Heavenly Homemakers

Encouraging women in homemaking, healthy eating and parenting

  • Home
    • About
    • FAQs
  • Recipes
    • Bread and Breakfast
    • Condiments
    • Dairy
    • Main Dishes
    • Side Dishes and Snacks
    • Desserts
    • Gluten Free
    • Instant Pot
    • Crock Pot
    • Heavenly Homemaker’s Weekly Menus
  • Homemaking
    • Real Food Sources
  • Store
  • Contact
    • Advertise
    • Disclosure
    • Privacy Policy
  • Simple Meals
  • Club Members!

What to do with All the Zucchini

August 27, 2021 by Tasha Hackett Leave a Comment

This post may contain affiliate links which won’t change your price but will share some commission.

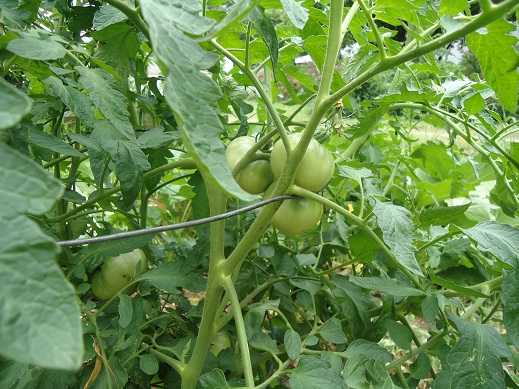
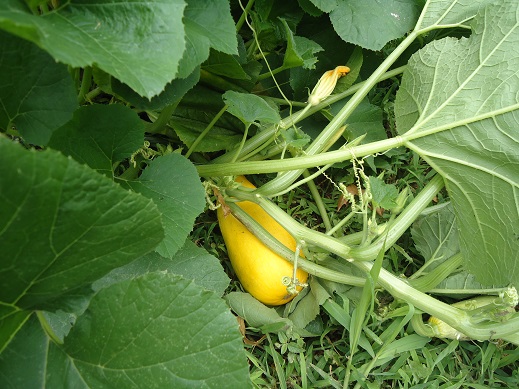
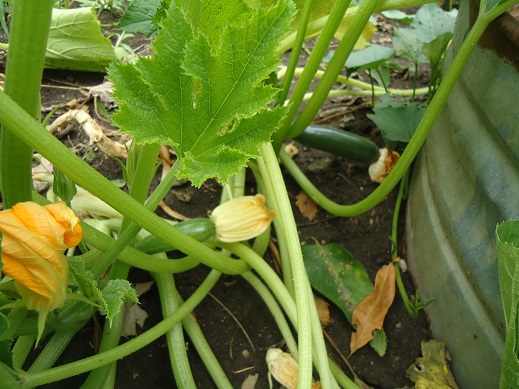
Trying to figure out what to do with all the zucchini?

what to do with all the zucchini

Yum

It’s zucchini season! I didn’t grow any this year. Sad. But other people did and around this time each year people are giving them away because when a zucchini plant does well, it does well. And when it doesn’t, we all curse the vine-borer grubs in unison and praise God for grocery stores and our friends who somehow fought off the nefarious and disgusting grubs. Ah-hem. Back to the yummy part.

What to do with all the zucchini?

Zucchini might be one of our favorite versatile vegetables. Here’s what I do with it:

  1. Chop it up and pan fry with salt and pepper and other stuff to make a quick skillet dinner: a.) garlic, onions, mushrooms, shrimp. b) garlic, onions, beef, cabbage. c.) garlic, onions, tomatoes, parmesan cheese. You get the idea: cook it and eat it for dinner with some meat and garlic and onions.
  2. Shred (or use the food processor to chop) and bake it into muffins, brownies, pancakes, waffles, breads, etc. Some people freeze the shredded zucchini to use for later. I have done this and I NEVER have good luck with it later. It gets all weepy and soggy and then I get weepy and never use it. Best of luck to you if you decide to freeze it. I’d rather bake the bread and freeze that instead.
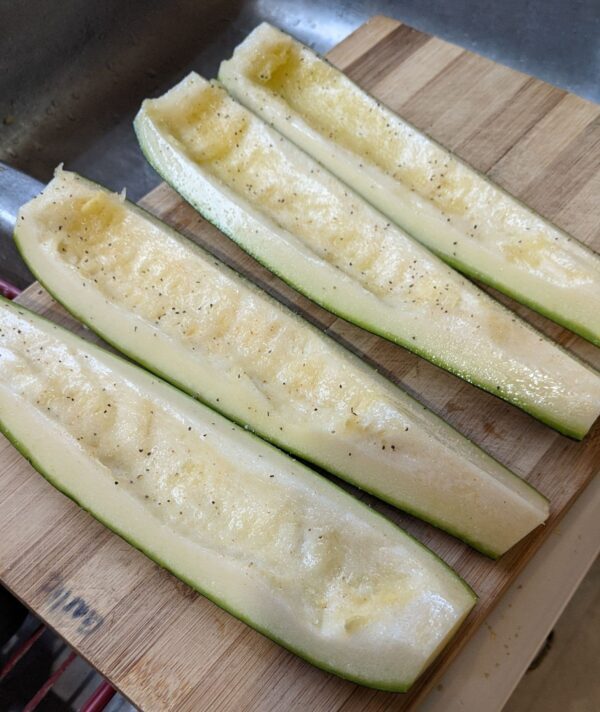
  3. Cut in half, scrape out the middle and make pizza boats. (Broil, then melt on your pizza toppings. Dip in pizza sauce.)
  4. Slice in half, or chop, and roast, broil, or grill with oil, salt, and pepper and just eat it!
  5. Use a zoodle thingy and make noodles. Easy Alfredo and shrimp used to be my favorite with this.
  6. Have I ever been tired of zucchini? No, I have not.
  7. This is my announcement: I will take your extra zucchini.

Don’t let all the zucchini go to waste, let’s start baking!

Of course, Laura already put together many of her favorite zucchini recipes, but that was ages ago and you may have forgotten about it. Click through some of those recipes or search “zucchini” on this site for more great ideas.

Are you a zucchini lover like me? I used to only be a zucchini bread (which is usually cake, let’s not kid ourselves) kind of girl. But then I grew up and realized that as a vegetable it can take on the flavor of butter and garlic and I do so love butter and garlic. Here are some great recipes for you to try as the zucchini crop comes in.

Simple Oven-Baked Pizza Nachos

Finely chopped and baked over the nachos is a great way to sneak more veggies into this meal.

Last Minute Stir-Fry

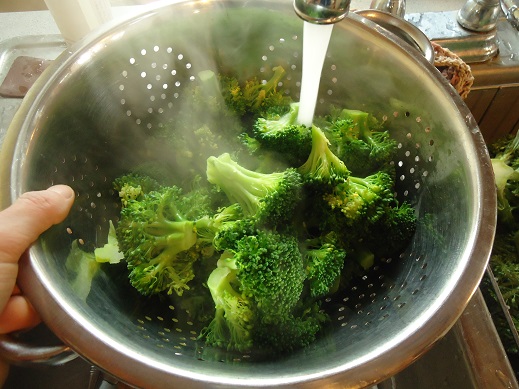
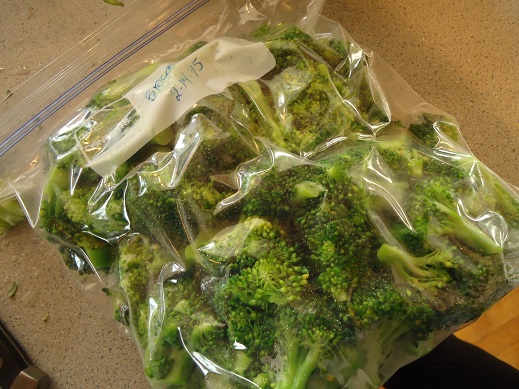
Frozen chopped zucchini will be a little soggier than fresh, but it holds up better than shredded, OR just add a few fresh ones to your frozen veggie bags.
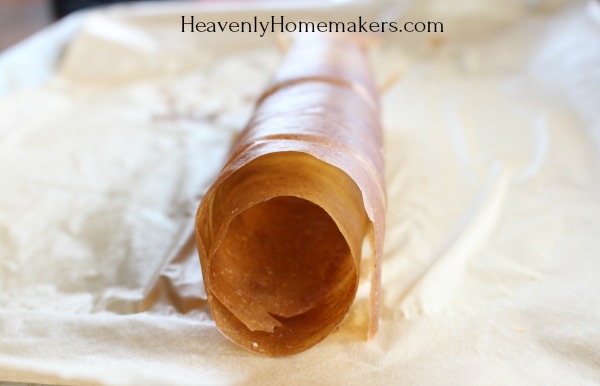
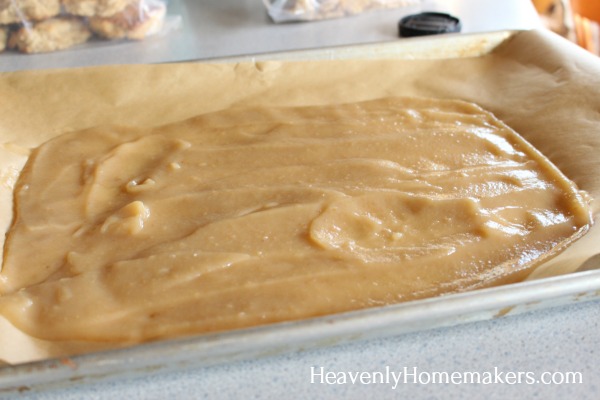
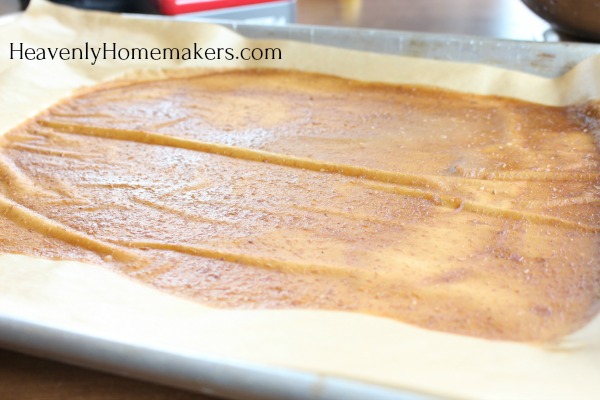
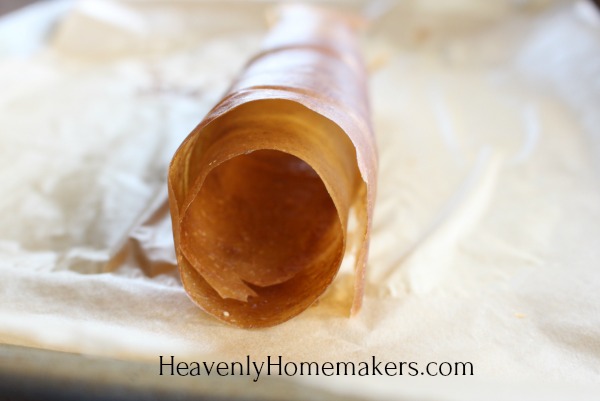
Zucchini Waffles

This is a pumpkin recipe. I know. You can sub one squash for the other. It will be fine. Really. Many popular baked zucchini recipes have so much sugar in them they may as well be cake… try a less-sugar option and top with just a few drops of maple syrup, honey, or nut butter.

Have zucchini for breakfast!

Why have we decided that most vegetables are for lunch and dinner? Here’s a quick breakfast that I’ve made many times already this summer: In a hot skillet I melt butter, fry up a chopped summer squash (yellow or green), add in a can of chicken (because it’s breakfast and people are hungry for the food), salt and pepper and (here’s the secret ingredient), a tablespoon or so of lemon juice. You must not forget the lemon juice. Once the chicken is warmed and the lemon juice has sizzled for a few seconds, we eat and dance and go about our day warm and well-fed.

In hindsight, I will need to make that one into an actual recipe post for you. You will need to be reminded of it again because it is so delicious.

Do tell, what is your favorite way to eat this amazing and versatile vegetable?


book cover of bluebird on the prairie Tasha Hackett is a friend of Laura and author of Bluebird on the Prairie, a historical romance set in an 1879 Nebraska town. Zeke has his sights set for California, but Eloise prefers the quiet safety of her home. Is it possible they’re both searching for the same things? Find this heart-warming romance wherever books are sold.

To find out more about Tasha and her world of historical fiction, connect with her at www.TashaHackett.com.

Heavenly Homemaker's Club Members: Access your homepage and all your fantastic resources here! Not a member yet? Please join us!

Summer Activities With the Kids: Go Berry, Apple, or Peach Picking!

May 30, 2019 by Laura 1 Comment

This post may contain affiliate links which won’t change your price but will share some commission.

Looking for some fun activities to do with your kids this summer? I’ve enjoyed 22 summers with kids (and counting!), so I certainly have a few ideas to share! Stay tuned during the next few weeks as we provide all kinds of suggestions for making your summer with your kids meaningful. (Subscribe here so you won’t miss out!) Today’s idea: Go Berry, Apple, or Peach Picking!

I have the BEST memories of heading to orchards, farms, and friend’s houses in the summertime with my kids so that we could pick berries, apples, or peaches.

We live in small-town Nebraska, so we are blessed to have many neighbors and friends who have berry patches, gardens, and orchards. (Yes, we have a garden in our yard too. But we don’t have the space for planting in huge bulk like many of our country neighbors.)

For years and years when our kids were little, we’d take advantage of every invitation to “come pick!” that we were able to enjoy.

Allow me to take a walk down memory lane…

We had a friend with a huge strawberry patch, where we would all load our buckets! We got to do this for FREE. What a blessing! (They’ve since sold their farm and moved out of state. Happy for them, sad for us!)

We also have friends with a gorgeous apple orchard! In the late summer, we’d head out and get as many apples as we could, all for a tiny price per grocery bag. It seemed too good to be true!

One year, my friend Anne and I borrowed the orchard owner’s cider press. After picking apples at the orchard, we spent the afternoon with all of our kids experiencing the work and joy of making homemade apple cider!

Oh my babies!

One year, we headed to Michigan for a wedding, at the perfect time for fruit picking! As we drove, we noticed sign after sign advertising “You Pick!” farms. Matt and I decided to stop at several locations on the way and enjoy time as a family picking fruit and enjoying the experience. We all still talk about that trip as one of our favorite traveling memories!

Blueberries don’t grow well in Nebraska, so picking them during that trip to Michigan was a very special treat! (Also, as we ate berry after berry while we continued to travel, somehow I ended up sitting on some and staining/ruining my pants. Hahaha! The boys still remember that too! “Mom, remember how you sat in blueberries and ruined your pants?!” Good times.)

Mmmmm, peaches! While peaches do grow well in Nebraska, we still stopped at a Peach Farm during our Michigan trip to enjoy a wagon ride to pick peaches. Of course, we took advantage of their offer to “eat whatever you like!”

Why Go Berry, Apple, or Peach Picking

Truly, the fun and joy that come with picking fruit on a farm with your family is priceless.

Yes, there are bugs. Yes, it is hard work. Yes, it may be hot. So prepare yourselves, give the kids a pep talk, take water bottles, go before the hottest part of the day, and know that while you’d love the experience to be perfect, someone may still have a melt-down.

Through the years and beyond all the less-than-fun parts, our family found these fruit picking experiences to be wonderful because:

  • The kids got to learn more about where our food comes from.
  • The kids got to learn about the hard work it takes to put food on the table.
  • We got to take home loads of delicious, nutritious fruit to eat in a variety of fun ways. (Details below!)
  • It saved all kinds of money as we either had to pay very small prices per pound of fruit, or we were encouraged to take all we wanted for free!

Beyond Berry, Apple, or Peach Picking

Once the fruit is picked, then what? Well, the fun just keeps on keeping on!

Yes, the fun comes in the form or hard work. :)

After working hard to pick the fruit, of course, we eat as much fresh fruit as we can hold. NOTHING is more delicious than sweet fruit that comes directly off the tree or bush!

But next comes the fun and work of preserving what we can’t eat fresh. The hard work pays off for months as we enjoy homemade applesauce, frozen berries in smoothies, and peach cobblers in the middle of winter. We all work together to wash, cut, and process the fruit.

Here are some ways we preserve our fruit to enjoy all winter long:

  • Make Applesauce with a Victorio or with a Blendtec. We use the water-bath method to can it – easy peasy!
  • Make Apple Pie Filling to pull out for quick pies at holiday time. We freeze the apple pie filling or we can the apple pie filling – depending on pantry and freezer space.
  • Make Apple Cider in the Crock Pot
  • Make Apple or Peach Fruit Leather
  • Freeze Whole Peaches – if we’re short on time. This turns them brown, but if we’re using them for smoothies or cobblers, it doesn’t matter!
  • Freeze Peach Slices or Whole Strawberries
  • Can Peaches for the pantry

What to make with Berries, Apples, and Peaches

You’re sure to come up with wonderful ways to use your freshly picked or beautifully preserved berries, apples, and peaches! Here are some of our favorite ways to enjoy the “fruit” of our labor. (Laura is punny.)

  • Applesauce
  • Apple Crisp (We follow this recipe but use ANY fruit depending on what we have and what sounds good!)
  • Fruit Cobbler (Recipe coming soon!)
  • Smoothies, smoothies, smoothies!
  • Strawberry Peach Slushies
  • 16 Recipes to make with Strawberries
  • Apple Butter
  • Peach Syrup
  • Easy Raspberry Pancake and Waffle Syrup
  • Blueberry Pancake and Waffle Syrup

Ready to go pick fruit?

Now that our “first batch of kids” is older, if they are able to join us, we can really pick a lot of fruit since they are able to work like adults. And here we are again, starting the process with new babes God has put in our lives. We are excited to take our Bonus Boy on fruit-picking adventures as we know he’ll love it!!

Here’s to a great summer of fun with our kids! Here are other ideas we’ve shared so far:

  • Make Donuts!
  • Have a Reading Party!
  • Make Smoothies, Milkshakes, and Popsicles

Stay tuned for more fun Summer Kid Activity ideas!


Heavenly Homemaker's Club Members: Access your homepage and all your fantastic resources here! Not a member yet? Please join us!

Two Simple Tricks to Get Your Kids to Eat Green Beans

April 25, 2019 by Laura 6 Comments

This post may contain affiliate links which won’t change your price but will share some commission.

Well now, isn’t this interesting? I’ve been feeding kids green beans since 1997. All my bio-boys love them because of the “bacon grease trick” my mom taught me years ago (more details below). But I just learned a new trick to add to my back pocket, which has finally helped our 5-year old Bonus Boy learn to love green beans too! Without further ado, how to get your kids to eat green beans…

How to Get Your Kids to Eat Green Beans

1. First, let’s talk about green beans and bacon.

Bacon makes everything better, of course. And you know me. I’m not afraid of fat if it is from a natural, real food source. Our family enjoys plenty of real butter and coconut oil, whole milk and red meat, real cream and yep – bacon.

All of these fats are recognized by our bodies, and are therefore easily digested and utilized for nourishment and energy. (Low on energy? Eat butter and bacon. You heard it here, folks. Now who’s your best friend??)

You can throw a slice or two of bacon into your green beans as they cook – or you can do what I believe is easier and faster! Drum roll please:

Save grease from cooked bacon to add to green beans anytime you need it!

Each time I cook bacon for my family, I let the bacon grease cool, then put it into a jar. I store this in the fridge, then add a scoop of bacon grease to a pot of green beans along with a little water (or chicken broth!) and Redmond Real Salt. Then I steam them to perfection. The bacon grease adds wonderful flavor to the beans, and of course, the fat makes the vegetable so much more appealing!

How do I cook my bacon?

oven-bacon-1

I’m so glad you asked. Here are my two favorite, most efficient methods of cooking bacon:

  1. Bake bacon in the oven. Then I freeze it to use as needed. This is so easy and helpful to have on hand for all your bacon needs! ;)
  2. Cut it into Bacon Bits. Once cooked, I put the bacon bits into a bag to freeze and pull out for salads, scrambled eggs, or BLT Wraps.

bacon bits 1

2. Now let’s talk about what kind of green beans seem to be the most appealing!

My family LOVES fresh green beans from our garden in the summertime. But alas, we live in Nebraska and can only enjoy these for a few months out of the year. If we grow enough, I blanch and freeze them to pull out and use during the cold months. But the past few years, we’ve been eating them as fast as they grow, leaving no reserves for the freezer!

Therefore, I typically buy frozen green beans in bulk from Azure Standard. Frozen green beans are much more flavorful and nutritious compared to canned beans. Still, even when cooked in bacon grease as described above, our Bonus Boy wasn’t very interested in this veggie side dish.

But, I’ve recently discovered a simple new trick! Instead of buying frozen “cut green beans” as I had been doing, I picked up a back of frozen “whole green beans” one day. I steamed them along with bacon grease and salt, and wouldn’t you know it? Bonus Boy ate them, and ate them, and ate them! We all did!

Who knew that simply switching from short and stubby beans to long and skinny beans would somehow make green beans taste so much better!

Now I stock up on frozen whole green beans and we all devour them!

So there you have it. Long green beans apparently taste better than short ones; and bacon grease makes beans taste amazing!

How do you and your family enjoy green beans?

Heavenly Homemaker's Club Members: Access your homepage and all your fantastic resources here! Not a member yet? Please join us!

The Easiest Way to Make Fruit Leather

March 6, 2018 by Laura 3 Comments

This post may contain affiliate links which won’t change your price but will share some commission.

Ever wondered the easiest way to make Fruit Leather? Or did you even know that making Fruit Leather is actually ridiculously easy?!

fruit leather66

Indeed, Fruit Leather is one of the easiest snacks you can make. Many recipes call for added sugar, but in our experience, none is necessary!

Also, making Fruit Leather at home costs only pennies. And it is a great way to use up fruit that is almost ready for the compost pile! Store-bought fruit leather is super convenient, so I definitely take advantage of this option from time to time and buy them for ease when we’re on the road for ball games. But if I can make it at home instead, I do.

Tips for Making Fruit Leather

  • The easiest way to make fruit leather is to spread leftover applesauce on your pan and dehydrate per the instructions below.
  • Peaches, nectarines, strawberries, blueberries, blackberries, raspberries, and watermelon are also great choices for Homemade Fruit Leather.
  • I avoid pineapple for fruit leather as it tends to be too stringy.
  • We’ve found that bananas by themselves don’t make a great fruit leather. But blending pureed bananas with other pureed fruit is a winner!
  • Speaking of mixing fruit together, we like mixing a variety of fruit to make more exciting fruit leather options.
  • Use a high power blender to turn your fruit into a super smooth and spreadable puree. Otherwise you might end up with chunky fruit leather. :)

fruit leather55

The Easiest Way to Make Fruit Leather

We’ve got more detailed info below. But here are the basic instructions so you can see how simple this is!

  1. Puree fruit.
  2. Spread mixture onto a parchment paper-lined cookie sheet.
  3. Bake for 4-10 hours at 170 degrees.

fruit leather11fruit leather22fruit leather33fruit leather44

The Easiest Way to Make Fruit Leather

The Easiest Way to Make Fruit Leather
 
Save Print
Author: Laura
Ingredients
  • Approximately 1 cup fruit
Instructions
  1. In a high power blender, puree fruit until smooth.
  2. Spread pureed fruit onto a parchment paper-lined cookie sheet, making sure the fruit is no more than ⅛ inch thick.
  3. Dehydrate in a 170 oven for 4-10 hours or until the entire sheet is no longer wet.
  4. (Mine tends to dehydrate from the outside in. Once the middle is dry, the fruit leather is done!
3.4.3177

The Easiest Way to Make 100 Fruit Leather

Have you ever tried to make fruit leather? What are your favorite flavors and fruit combinations?

Heavenly Homemaker's Club Members: Access your homepage and all your fantastic resources here! Not a member yet? Please join us!

How to Freeze Apple Pie Filling – Easy!

September 14, 2015 by Laura 12 Comments

This post may contain affiliate links which won’t change your price but will share some commission.

When it comes to making and preserving Apple Pie Filling, you have a few choices. You can can it (can can, can you do the can can, can you…). You can freeze it, which I will describe here today. Or (and this is by far the most novel idea of them all) you can put the filling directly into a pie crust and bake it immediately.

apples

It all comes down to how much freezer space you have, how much pantry space you have, if you love canning produce, if you have plenty of jars, or if you really just want to eat an apple pie after dinner on this very day.

But really most of it comes down to apples. You can’t do any of this if you don’t have apples.

So…do you have apples? I have apples. This year I decided that the easiest way for me to preserve Apple Pie Filling is to freeze it.

If you want to can apple pie filling so that you can store it in your pantry, you can learn how to do that here. You should know that I break out in a sweat every single time I type the word p-a-n-t-r-y. I re-read it four hundred and eighty times to make sure I didn’t leave out the “r” because that would bring a whole new unintended meaning to my sentence.

apple_pie_filling_5

Here’s how to freeze apple pie filling:

1. Wash, core, and slice apples into a large bowl. I leave the peeling on. (Once again I sweat and make sure I added the “l” to p-e-e-l-i-n-g.)
2. Stir in 1/4 cup sucanat or brown sugar plus 1 teaspoon cinnamon per every 5-6 apples.
3. Transfer mixture to quart-sized freezer bags, 3-4 cups of apple pie filling per bag.
4. Label the bag and freeze it for up to a year.

How to Freeze Apple Pie Filling

When you’re ready to make an apple pie, simply thaw and dump the contents into an unbaked pie crust, then proceed as you normally would to make an apple pie. Here’s my Whole Wheat Pie Crust recipe. Even easier, use the filling to make an Apple Crisp or a Salted Caramel Apple Crisp.

It’s wonderful having prepared apple pie filling in your freezer, and yes, even in your pantrrrrrrry.

How’s your apple supply? Have you been able to get your hands on plenty of good apples this year? 

Heavenly Homemaker's Club Members: Access your homepage and all your fantastic resources here! Not a member yet? Please join us!

About Our Garden and Our Cat. Wait. We Have a Cat?

July 26, 2015 by Laura 27 Comments

This post may contain affiliate links which won’t change your price but will share some commission.

Did I just say our cat?

I don’t even know where to start.

Mostly I want to tell you about our garden, but what I have to share isn’t terribly exciting because most of our garden produce isn’t ready yet. (Yes I know it’s almost August. It’s a Nebraska thing. It’s also a Coppinger thing as we got our garden planted a little bit late this year. We blame this on the Nebraska thing.) So just pretend to be interested when I say, oh look – it’s a picture of green tomatoes that aren’t ready to eat yet.

garden2

We do have a single yellow squash that appears to be an over-achiever. It got nice and big while we were away at camp, and while we wish it wasn’t so big and stringy, it will taste nice sliced and grilled along with some barbecue chicken. Otherwise though, there are no more squash ready.

garden1

As you can hopefully see below, we have two tiny zucchini which will be ready soon. All the squash plants are full of flowers, so in a couple weeks I’ll be begging you to come take some off my hands. At the very least, you should share your favorite squash recipes with me.

garden4

While we are lacking in abundant produce from our garden so far this year, there is one thing we are not lacking:

Bunnies.

I am here to tell you that bunnies are not cute. Bunnies are naughty. Like wag your finger and tsk like your great aunt naughty. Would you look at this?

garden5

What is that in the picture, pray tell? That is a nothing. It was a green bean plant. But now it is a nothing. We have two whole rows of nothings. That is because all the bunnies (every single one of them in the whole wide neighborhood) held a meeting to announce that the Coppinger fam was doing this thing called church camp which means that they were not around to say “scat bunny!” for 14 whole days. They decided to get their party on. In our garden. Within our rows of green beans. Naughty, naughty, naughty.

We have about 1.5 green bean plants that just might survive, which of course will feed our family of six for two bites each. This leads me to tell about our cat.

I can’t believe any of what I am about to write, mostly because we don’t have a cat, nor do we want a cat, nor do we want any pet at all because do I or do I not have enough mouths to feed said the mother of many, many teenage boys.

So this cat. It showed up in our yard over the weekend all hungry and meowy and stuff. Before I knew it, my husband – my husband – was outside giving it some milk. Wha??? We know better than to feed stray cats, do we not? I think we do. “Why are you doing that?” asked the mother of many, many teenage boys.

He was doing it because he was mad at the bunnies.

Oh, well in that case.

Wait. Wha???

No, but really. Matt explained to me (and I’m assuming he’s done hours of research on this) that bunnies do not like cats. Having a cat around might make the bunnies run the other way.

Being quite mad at the bunnies myself, I suddenly joined my husband in liking and wanting the cat.

Seriously, who is writing this? Like, want, cat, same sentence – I don’t even know who I am anymore. But I weighed the benefits. Bunnies eating all my bean plants or a cat rubbing its back against my porch rail? It’s a no brainer.

By the next morning, our ten year old had named the cat Wiggams (or Wigs for short) (or Wiggie if it’s being especially cute). He asked for string to play with it, and made it a home out of a cardboard box (because cats love this).

Then somebody else – who shall remain nameless – found herself scooping some pieces of chicken and tuna from the fridge onto a little plastic lid to put into the cat’s house, calling “here Wiggams” while doing so, because poor little Wiggie looked hungry and oh my goodness what in the world and who even am I??

So are you missing this cat? If so, call 555-BUNNIESARENAUGHTY. Trust that your cat is well fed but now answers to the name Wiggams. If you take the cat, you have to also take all of the bunnies.

cat1

I learned that if you say “look at the camera” to a cat, the cat will not respond accordingly. It’s like he doesn’t even appreciate the tuna. Dude. Wiggams. Just look up for a second.

cat2

Okay, then.

I suppose this story is “to be continued.” Stay tuned to hear more about garden produce and a camera shy cat named Wiggams. But not about fresh green beans -because bunnies are naughty.

Heavenly Homemaker's Club Members: Access your homepage and all your fantastic resources here! Not a member yet? Please join us!

How to Blanch and Freeze Broccoli

February 15, 2015 by Laura 16 Comments

This post may contain affiliate links which won’t change your price but will share some commission.

There was this one day when I saw that I could order 20 pounds of broccoli for just $12.50 and we all know how much I love good deals on good produce. Then there was that other day I picked up my order and found that 20 pounds of broccoli filled a box big enough for my 10-year old to play in. This was also the day we had four basketball games and the day I wanted to make heart-shaped pancakes for my family because they might not have known how much I loved them unless I shaped their pancakes into hearts and also because it was Valentine’s Day. I  never bite off more than I can chew.

I also never can make nicely shaped heart pancakes, which is clearly another issue to tackle another day.

So there I was, flipping a triple batch of ugly heart pancakes on the griddle, packing lunches to take to our basketball games, and staring down 36 crowns of broccoli. I love relaxing Saturday mornings.

I started a pot of water boiling on the stove, flipped the pancakes, and started to chop broccoli. I almost (happy valentine’s day) slid the prepared broccoli into the pancake batter, but stopped myself just in time, took a deep breath, and got my camera because that’s how quickly my brain moves on to the next thing. I am a blogger, after all, which means that just at that moment I realized that I should probably document the project so as to share the broccoli blanching details with you.

Matt suggested I also take a picture of the heart pancakes and I was all, seriously? No one wants to see these. So instead you get to look at my pot of boiling water which mostly looks like I’m about to set my kitchen on fire. It’s just steam though, I think.

blanch broccoli 2

How to Blanch Broccoli

Step One:  Boil water. One might wonder at the fact that it takes an entire tutorial to explain this process. Don’t worry. The exciting part is yet to come.

blanch broccoli 1

Step Two:  Wash and cut your broccoli. (Told you it would get more exciting.)

blanch broccoli 3

Step Three:  Place cut broccoli into your pot of boiling water for 2-3 minutes. (This stops the aging process so your vegetables will maintain better nutritional value.)

blanch broccoli 4

Step Four:  Immediately remove broccoli from boiling water and run it under very cold water. (This stops the cooking process.)

Step Five:  Spread the cooled broccoli on a clean towel to dry. I didn’t get a picture of this. I was probably flipping ugly pancakes.

blanch broccoli 6

Label a freezer bag and fill the bag with blanched, cooled, and dried broccoli. Freeze for up to 6 months.

You can use your prepared broccoli for soups and stir fry. The work is done!

How to Blanch and Freeze Broccoli

If you have a trick for making nicely shaped heart pancakes – do tell. If you have any tasty broccoli recipes, I believe I’ve made it clear that I would benefit. And in case you’re wondering, I slept very well the night of the basketball/broccoli/ugly pancakes.

Heavenly Homemaker's Club Members: Access your homepage and all your fantastic resources here! Not a member yet? Please join us!

Putting up Green Beans for Winter

July 27, 2014 by Laura 34 Comments

This post may contain affiliate links which won’t change your price but will share some commission.

This was originally posted in 2008. This is evident in the fact that Justus and Elias are only 8 and 6 in the picture below. They are now 14 and 12. Time flies – and little boys become teenagers. The green bean freezer method is still the same, however. Since we have been harvesting many the past few weeks, I thought it would be fun to re-post this tutorial. :)

How to Freeze Fresh Green Beans

After posting about how I put up corn for winter, many of you asked about green beans. I just happen to be in the middle of crazy green bean season. So…here you go!!

beans5sm.JPG

After picking our beans, I usually get my boys on “bean snapping duty” right away. (They never complain about this job. I think it’s because they are given permission to “break things”….what do you think?)  They snap off the ends and put the green beans into a colander. As soon as the colander is full I wash the beans to try to get as much “garden” (my nice way of saying bugs and dirt) off.

It is my understanding that in order to maintain as much green bean nutrition as possible, it is best to only snap the ends off the bean…not to snap the bean into pieces. It makes sense that if you snap the green bean into three pieces, when you cook the bean, more of the nutrients will be washed away in the water. But if it’s a whole bean…more of the nutrients stay inside the bean. (And you can have “My green bean is longer than your green bean” competitions while you eat dinner.)

beans1sm1.JPG

After washing the green beans, I then put them into a pot of boiling water. This blanching process stops their aging process. (No, you can not blanche people in order to stop their aging process.)

beans2sm1.JPG

After about two minutes in the boiling water, the green beans are a brighter green…and they go back into the colander where they are given a cold, cold shower. This process stops the cooking process that the blanching part started.

beans3sm1.JPG

After the green beans are cooled from the cold water shower, I then spread them out onto a dry towel. I use another towel to pat over the top of them to help dry them off more. If your beans are too wet when you put them into a freezer bag, you’ll have ice form around your beans. (You don’t want ice to form around your beans.)

beans4sm1.JPG

And then, I put my beans into a gallon freezer bag and label it. And into the freezer it goes. I know some people prefer to can their green beans. I don’t can them for two reasons:

1. Freezing them maintains more of the green bean’s nutrition.
2. I’m incredibly afraid of my pressure cooker. (When I got my mom’s pressure cooker, it didn’t have a manual with it. I have no idea how to use it properly.)  I do not need to cause an explosion in my kitchen.

So there you go! As I begin to can and freeze my tomatoes and fruit for the winter, I’ll be sure to show you those processes too! (Yeah, because those don’t require a pressure cooker, just a hot water bath…and I’m not so afraid of those.)

Heavenly Homemaker's Club Members: Access your homepage and all your fantastic resources here! Not a member yet? Please join us!

Hot Pepper in the Eye Remedy

July 16, 2014 by Laura 122 Comments

This post may contain affiliate links which won’t change your price but will share some commission.

Have hot pepper in your eye? Grab milk (preferably whole milk) and splash it into your eye. Aaahhh blessed relief. Then come back and read my story.

———————————————————————

Hot Pepper in the Eye Remedy

First I would just like to say that the number one remedy for bringing relief to the pain of hot pepper in your eye is simply to wear gloves while cutting peppers and NEVER EVER TOUCH YOUR EYE after cutting them.

However, since I was not quite so smart last Friday, I had to come up with another remedy.

It all started so innocently. We needed to leave for our homeschool PE class that morning, but I was trying to get some of the peppers from our garden cut up and frozen before we left. Matt has been the pepper guy at our house most of this summer so I was not aware that some of them were of the very freakishly hot variety. (They were shaped like tiny sweet bell peppers.)

I got all the peppers cut up and put away, cleaned up my mess and washed my hands. I then proceeded to help get the boys ready to head out the door for PE. My eye was itchy…and so I scratched it.

Bad idea.

As if someone had lit a match on my eyeball I shrieked and turned in a circle (because I didn’t know where to go or what to do). I believe that little move is called the Eyeball Fire Ballet Step. I then ran out of the kitchen and upstairs to Matt, who was thankfully home that morning. Neither of us really knew what to do, but I quickly put a cold, wet washrag on my eye. This brought a small amount of relief, which is good because all four boys (who aren’t used to seeing their mom run screaming out of the kitchen) had made their way upstairs to see if I was still alive. At least I was able to look up at them with one eye and a half smile to give them a little assurance that I was okay.

Matt went ahead and loaded up the boys to take them to PE. I decided to stay home and be miserable. The pain was not going away, and was in fact creeping all the way up to my forehead and all the way down to my chin (not kidding), making me feel as though I might pass out. I have a pretty high pain threshold, but wow.

With the cold wash rag over my burning eye, I somehow did a swag search on “hot pepper in the eye” to see what I needed to do. Did I need to go to the ER? Could they maybe take off my face so that the intense pain would stop?

I finally found a suggestion to use a shot glass full of whole milk to wash the eye, which would neutralize the capsaicin in the peppers that was causing the burning. Whole milk I had, a shot glass…not so much. In the meantime, one of the homeschool moms (who had heard of my woes at PE class) called to say the exact same thing (although she didn’t mention the shot glass).

Using one of our little drinking glasses, I was somehow able to get milk into my eye. (Don’t ask me to demonstrate.)  I also did a fairly good job of making the milk run all the way down my face and neck, but whatever.

Instant relief.  I stood there, blinking milkily in unbelief. Could I really have just gone from that much pain to practically no pain with just a few swishes of milk? Indeed I had.

I then decided that I should make cookies, both because I deserved and needed a cookie after my trauma…and because I thought that when the boys got home, they might like to see that their mama was normal (relatively speaking) and okay.

Kinda brings a new dimension to the idea of milk and cookies bringing comfort, doesn’t it?

So let’s review:

  1. Wear gloves when you cut hot peppers and don’t touch your eye.
  2. But if you don’t and then you do…swish your eye with milk.
  3. And then make cookies.

(P.S. It wasn’t until after the flame in my eye was extinquished that I realized that my hands were also burning like mad. Funny how the eye pain overshadowed the pain in my hands. I’m still a little afraid to put my contacts in normally. Good grief did I learn my lesson.)

This post was originally published September 19, 2010.

Heavenly Homemaker's Club Members: Access your homepage and all your fantastic resources here! Not a member yet? Please join us!

Here Today, Gone Tomorrow.

June 6, 2014 by Laura 20 Comments

This post may contain affiliate links which won’t change your price but will share some commission.

Remember all the lovely pictures of our garden that I took on Monday and shared for Gratituesday? Those pictures are all we have left of our garden.

garden145

Here’s what our spinach and lettuce looked like on Monday.

hail garden 1

Here’s what our spinach and lettuce looked like the very next day.

Tuesday night (yes, the very Gratituesday I had shared those happy garden pictures), a huge hail storm hit our town. It smashed our garden all to bits.  Seeing how this hail storm effected all of our garden areas, we sure hate to think what the farmers around here may have lost.

Can we replant? Probably. Will we? Yes, it’s not too late to replant some of it. Is this the end of the world for us? No, but it is a huge disappointment. It was a lot of work, many hours, and quite a few dollars worth of plants and seeds – down the drain. I know this loss could have been a million times worse. Our home is fine. Our children are fine. Nobody was hurt. Still, waking up to a sad garden mess was disheartening.

hail garden 2
Most of the leaves on our pepper, okra, and tomato plants were broken off.

The moral of the story:  We can make plans, work toward a goal, and look forward to something – but the end result is never really up to us. We just get to sit back and trust God.

We’re thankful that God knows what we need and that He will provide – even if it might look a little different this year. We’ll be grateful for the handful of plants that seem to maybe be surviving. We’ll get back out there and put more seeds and plants into the ground. Who knows but that “Garden…round 2” may be better than ever?!

Heavenly Homemaker's Club Members: Access your homepage and all your fantastic resources here! Not a member yet? Please join us!
Next Page »

Join Our Community!

 Facebook Twitter RSS E-mail Instagram Pinterest

Popular Posts

~ Will All of the Real Moms Please Stand Up?
~ Easy! Stir-and-Pour Whole Wheat Bread
~ How to Make Gatorade
~ 31 Real Food Breakfast Ideas
~ Dear Teenage Girls...
~ When Mom Takes a Step Back
~ The Inexpensive Health Insurance We Love!
~ Let's Talk Real Food Grocery Budgets

Check out our latest posts!

  • What to Make When It’s Too Hot to Make Dinner
  • How God Used My Cheesecake
  • Big Family Food and Fun: Meals and Photos from Last Week (May 17-27, 2023)
  • The Coppinger Castle
  • How Our Youngest Became Oldest of 9
Home  ~  Simple Meals  ~  Club Membership  ~  Shop  ~  Privacy Policy  ~  Disclosure  ~ Contact

Copyright © 2023 · Beautiful Pro Theme on Genesis Framework · WordPress · Log in