Heavenly Homemakers

Encouraging women in homemaking, healthy eating and parenting

  • Home
    • About
    • FAQs
  • Recipes
    • Bread and Breakfast
    • Condiments
    • Dairy
    • Main Dishes
    • Side Dishes and Snacks
    • Desserts
    • Gluten Free
    • Instant Pot
    • Crock Pot
    • Heavenly Homemaker’s Weekly Menus
  • Homemaking
    • Real Food Sources
  • Store
  • Contact
    • Advertise
    • Disclosure
    • Privacy Policy
  • Simple Meals
  • Club Members!

Easy Chicken Pot Pie {Real Food Dollar Menu}

January 16, 2013 by Laura 87 Comments

This post may contain affiliate links. For more information, please see our disclosure policy.

FAQs of Easy Chicken Pot Pie…

Question:  What do you get when you mix one cup of milk, one cup of mayonnaise, and one cup of whole wheat flour?

Answer:  The most amazingly delicious crust you can imagine.

Question:  What is the easiest way to make a crust for a Chicken Pot Pie?

Answer:  You know the “one cup of milk, one cup of mayonnaise, and one cup of flour” I referred to? Mix it up and pour it over the top of your pot pie filling, then bake. It doesn’t get any easier. No mess. No rolling. No problem.

Question:  How much does it cost to make this healthy, hearty Chicken Pot Pie?

Answer:  Would you believe me if I told you that it only costs $6.00*? It’s true. This recipe feeds 8-10 people. (Eight if you’re my family. Ten if you aren’t feeding teenage boys.)  That makes the cost of this recipe between $0.60 and $0.75 per person. And it’s a complete, filling, healthy meal.

Question:  Is the rest of this post going to be as cheesy as what I’ve read so far?

Answer:  Ummm…no. But I do want you to know that I’m currently working on more ideas for this milk/mayo/flour crust mixture. I got the idea from Matt’s cousin Monica, and I’m thinking that the possibilities are definitely not limited to Chicken Pot Pie. Can’t wait to figure out more ideas!
chicken_pot_pie_1

Easy Chicken Pot Pie

Yum

6 cups chicken broth
2 cups cooked chicken, cut into bites
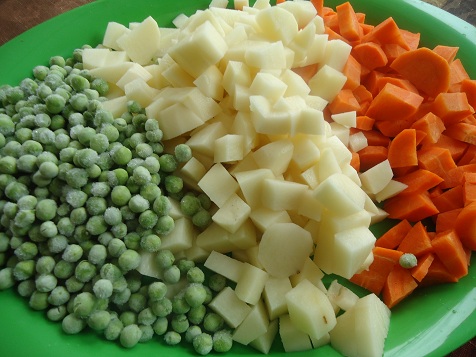
4 large carrots, peeled and cut into bite sized pieces
6 medium potatoes, peeled and cut into bite sized pieces
2 cups frozen peas
Sea salt and pepper to taste
1/3 cup cold water
2 Tablespoons organic corn starch or arrowroot powder
1 cup milk
1 cup mayonnaise (I use Hain Safflower Mayonnaise)
1 cup whole wheat flour (I use freshly ground flour from hard white wheat)

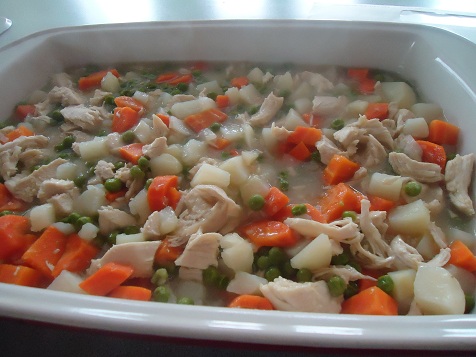
In a large cooking pot, boil broth, chicken, carrots, potatoes, and peas until veggies are tender. Mix cornstarch with water until smooth. Stir mixture into the broth/veggies, cooking for about one minute on the stove to help the mixture thicken. Pour contents into a 9×13 inch baking dish.
chicken_pot_pie_2

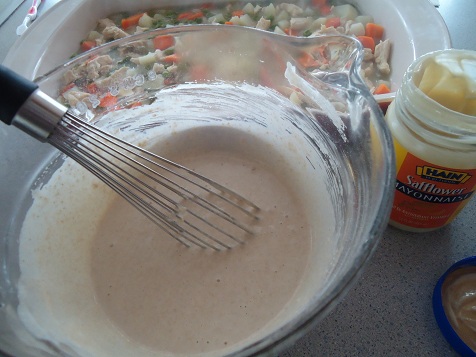
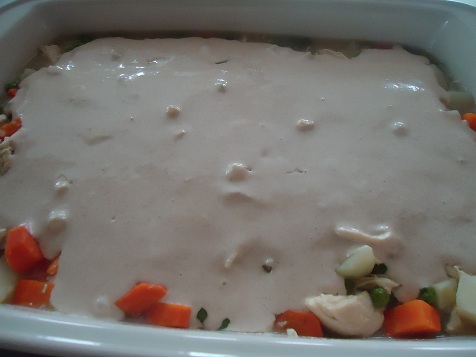
In a separate bowl, stir together milk, mayo, and flour. Spread mixture over the veggies in the baking dish.
chicken_pot_pie_3

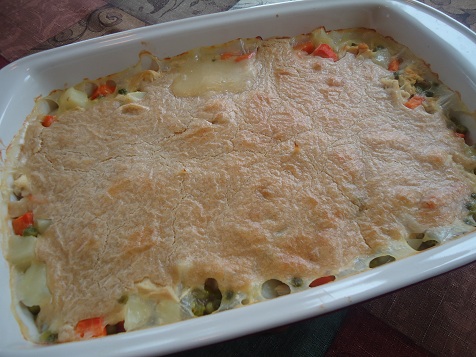
Bake in a 350° oven for about 45 minutes or until the crust is golden brown.
chicken_pot_pie_4

chicken_pot_pie_5

Easy Chicken Pot Pie {Real Food Dollar Menu}
 
Save Print
Author: Laura
Serves: 10 servings
Ingredients
  • 6 cups chicken broth
  • 2 cups cooked chicken, cut into bites
  • 4 large carrots, peeled and cut into bite sized pieces
  • 6 medium potatoes, peeled and cut into bite sized pieces
  • 2 cups frozen peas
  • Sea salt and pepper to taste
  • ⅓ cup cold water
  • 2 Tablespoons organic corn starch, arrowroot powder, or wheat flour
  • 1 cup milk
  • 1 cup mayonnaise (I use Hain Safflower Mayonnaise)
  • 1 cup whole wheat flour (I use freshly ground flour from hard white wheat)
Instructions
  1. In a large cooking pot, boil broth, chicken, carrots, potatoes, and peas until veggies are tender.
  2. Mix cornstarch with water until smooth.
  3. Stir mixture into the broth/veggies, cooking for about one minute on the stove to help the mixture thicken.
  4. Pour contents into a 9x13 inch baking dish.
  5. In a separate bowl, stir together milk, mayo, and flour.
  6. Spread mixture over the veggies in the baking dish.
  7. Bake in a 350° oven for about 45 minutes or until the crust is golden brown.
3.4.3177


Chicken Pot Pie

This is a great way to use up leftover chicken and broth. And I love one-dish meals!

This is just one more recipe that proves that healthy eating doesn’t have to be expensive!

Looking for more meals on our Real Food Dollar Menu? Here are the recipes I’ve shared so far:

  • Hearty Chili
  • Spanish Rice
  • Pasta Alfredo
  • Crock Pot Barbecue Chicken
  • Crock Pot Beef Stew

Stay tuned for many more recipes and ideas for our Real Food Dollar Menu!

*I calculated my cost based on the food sources and prices I have available to me. Most of the ingredients I use are organic. Your cost may be slightly more or less depending on where you find your ingredients.

P.S. I think this recipe would work great for creating personal sized frozen Chicken Pot Pies. :)


Heavenly Homemaker's Club Members: Access your homepage and all your fantastic resources here! Not a member yet? Please join us!

Homemade Nutella ~ Real Food Recipe Makeover

January 15, 2013 by Laura 44 Comments

This post may contain affiliate links. For more information, please see our disclosure policy.

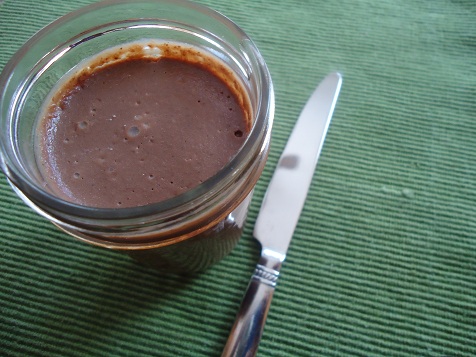
“Homemade Nutella” is a recipe request I’ve had over and over. I never got around to making it (and I have excuses). But do you remember how I told you that my friend Anne and I exchange Christmas stockings each year? Well this year, one of the items she put in my stocking was Homemade Nutella! I begged her for the recipe – and here it is.

You really don’t want to know all of this, but just in case you do, even though you really don’t, here is the background information on how I managed to get this recipe from Anne:

  1. I emailed Anne after I got back from California to thank her for the lovely stocking and to tell her that later that day when Matt came to pick up our milk, I would send over some of the fresh oranges we’d brought back from our trip. And I asked her for her Nutella recipe.
  2. She emailed back to say that she had also loved what I’d put in her stocking and that her mouth was watering while she waited for an orange. But she said nothing about the Nutella.
  3. Matt went and picked up the milk, but I was upstairs doing laundry when he left, so I forgot to send oranges.
  4. I found mouse poop in some red wheat I had in storage and emailed Anne asking if it would be okay to feed that to her chickens. And I apologized for not sending oranges and told her I’d eat one on her behalf, and that at that very moment, I had the juice from a delicious orange running down my chin.
  5. Then she emailed me back and told me that I was evil to eat her oranges. And she said, “rats” about the mouse poop. See her rodent inspired play-on-words there?
  6. I giggled and emailed her back and said that yes I was evil, and full of citrus, and that really and truly, I’d get her some oranges.
  7. Then I kept forgetting to take over the oranges.
  8. But I really wanted the Nutella recipe. So I emailed her again a few days later and said, “You know how I asked for the nutella recipe and you forgot to give it to me? (Kind of like I told you I would bring oranges and then didn’t?) Any chance you could throw that my way? A few thousand HHM readers would love to hear about it… :) I have a small sack of oranges ready for you by the way. And some poopy wheat.”
  9. She emailed back to say, “Very clever” and then she gave me the recipe.
  10. Then today I finally remembered to give her the oranges.
  11. The end.

You’ve got to admit. That story was a lot more fun than me simply stating, “I got this recipe from my friend Anne.”

Homemade NutellaYum

1 1/2 cup whole hazelnuts
1 1/2 cups whole milk
3/4 cup powdered milk (not an ingredient I typically use, but an okay compromise for this recipe)
1 Tablespoon mild-flavored honey
pinch salt
1 heaping cup chopped bittersweet or semi-sweet chocolate, or chips
1 scant cup chopped milk chocolate, or chips

On a rimmed baking sheet, toast the nuts in a 400º oven for 10 minutes, or until fragrant and their skins begin to pop. Transfer to a tea towel, gather into a bundle and rub together to remove as much of their skins as possible. While warm, transfer to the bowl of a food processor and blend until they go from finely ground to pasty and thick, like natural peanut butter.

Meanwhile, warm the milk, powdered milk, honey and salt in a small saucepan just until it starts to boil. Remove from heat. In a glass or stainless steel bowl set over a pan of simmering water, melt the chocolates, stirring occasionally until smooth.

Add the melted chocolate to the ground nuts and continue to process the mixture, stopping to scrape down the sides of the bowl as necessary. Add the warm milk mixture and process until everything is well blended and as smooth as you can get it. Makes about 2 cups.

nutella_2

 What’s your favorite way to use Nutella?

Heavenly Homemaker's Club Members: Access your homepage and all your fantastic resources here! Not a member yet? Please join us!

Gratituesday: Ping Pong

January 14, 2013 by Laura 16 Comments

This post may contain affiliate links. For more information, please see our disclosure policy.

Even though, for months, the boys had been talking about wanting one – they were not expecting to get a Ping-Pong Table for Christmas. That’s why it was so much fun to surprise them with it this year!

(Santa gets great deals on used items at Craig’s List sometimes…)  :)

This has been so much fun for all of us. I hadn’t played ping-pong since I was a teenager at camp…or maybe since hanging out in the college “student center” as a freshman. Still though, I’m happy to report that I can still hold my own with some of my boys. I haven’t taken on Matt yet however…

Oh, and it’s probably not a good idea to ask me a question (such as, “Mom, what’s for breakfast tomorrow?”) when I’m in the middle of a match. I’m not good enough yet to simultaneously get my paddle on the ball while saying the word “muffins”. Maybe I’ll be that good eventually. :)

ping_pong

We put our new table up in our “game room” – the room that was built above what used to be a garage sometime during the 100+ year lifetime of this house. That room is perfect for our boys and their friends to play and make a mess. Now that we have the ping-pong table, that room is seeing even more traffic!

In just a short time, we are already seeing the blessings of having a ping-pong table. Yay God for giving us great deals and even better ways to spend time together! 

Share how God is working in your life on your blog, then come link up with us here. If you don’t have a blog, be sure to leave a comment letting us know what you’re grateful for! Please read through the Gratituesday Guidelines so that you understand what kinds of posts you can link up to share here. Posts that are linked but do not fit our Gratituesday theme will be deleted. 

If you are linking up a blog post for Gratituesday, please copy and paste the following sentence into your post! Thanks!

Join us for Gratituesday at Heavenly Homemakers!

Heavenly Homemaker's Club Members: Access your homepage and all your fantastic resources here! Not a member yet? Please join us!

Peanut Butter and Ranch Dressing – But Not At the Same Time {You Can Do This! eCourse Bonus Tip}

January 13, 2013 by Laura 13 Comments

This post may contain affiliate links. For more information, please see our disclosure policy.

ECourse1BonusTips

I am very excited that so many of you are taking part in our You Can Do This! The First Five Steps To a Real Food Kitchen eCourse!

As an added bonus – for those of you who are participating in the course and for those who aren’t – each Monday for the next few weeks, I plan to share a Bonus Tip to encourage you along in your Real Food Journey. Remember though, these are just bonus tips. If you take the eCourse, you’ll get loads more information, guidance, downloads, recipes, and worksheets – all for just $5! (Click here to purchase if you are interested.)

Today, I wanted to share a little bit about how my Real Food Kitchen works and how I manage to make healthy, whole foods in a timely way.

Last week, I found that I was out of two items that we eat often:  Ranch Dressing and Peanut Butter. Now, of course, we don’t eat the two together, nor would I recommend it to you. But I did make them at the same time, just as a way of being efficient. (I’ve talked about this a little bit already, and this new post is an example of how I put this method into practice.)

Side Note:  I had to be careful not to pour minced onions or parsley flakes for the dressing mix into the food processor with the peanuts. Wouldn’t that have been…icky. ;)

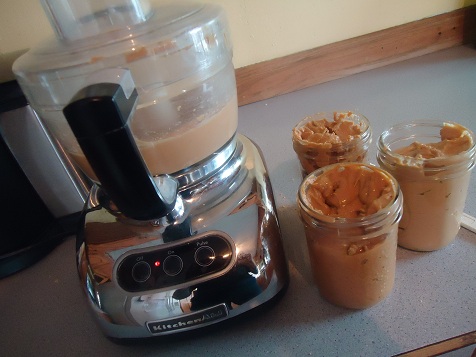
I first poured peanuts into my food processor, told everyone around me to plug their ears, and turned on the machine so that it could start to make peanut butter.

homemade_peanut_butter

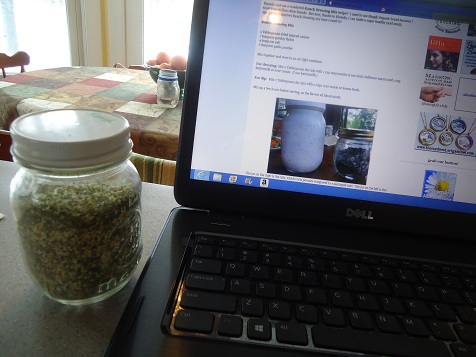
While it was turning peanuts into peanut butter, I looked up my Ranch Dressing Mix recipe and began getting out the ingredients I needed. I then proceeded to go back and forth between the food processor and the ranch dressing mix until I had four jars of peanut butter and a triple batch of ranch dressing mix all ready to go.

ranch_dressing_mix

Beyond encouraging you to be efficient with your time in the kitchen, here is actually the main tip I wanted to share:

When working to develop your Real Food Kitchen, try to plan ahead and work ahead just a little bit as you have time. This will save you time in the long run.

I wasn’t actually planning to serve ranch dressing or peanut butter the day I made them. But I often do need them both, and since I had neither of them on hand, taking a few minutes to make them one afternoon will be very convenient for me later, when all I’ll have to do is reach for them at a moment’s notice!

What is one thing you can make this week that will help you to get ahead in your Real Food Kitchen?

Interested in learning more about our
You Can Do This! The First Five Steps To a Real Food Kitchen eCourse?
We’d love to have you join us!

Heavenly Homemaker's Club Members: Access your homepage and all your fantastic resources here! Not a member yet? Please join us!

Menu Plan for the Week

January 13, 2013 by Laura 7 Comments

This post may contain affiliate links. For more information, please see our disclosure policy.

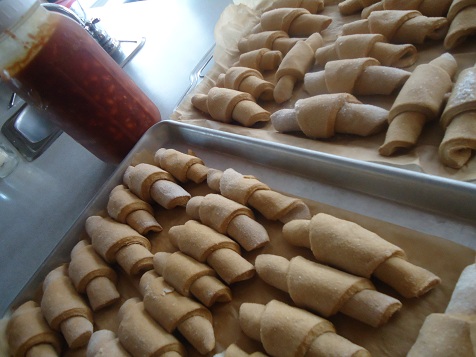
Last night before bed, I pulled some Whole Wheat Butterhorns out of the freezer to thaw and rise so that we could have them with our lunch today.

Correction.

I was in bed already and beginning to relax when I remembered that I had intended to get the butterhorns out of the freezer. I then had to wrestle around in my head while I tried to decide whether or not it was worth it to get up and get them out as planned. 

We were planning to invite college students over to share our lunch, and I knew they would love them and that they would help our lunch “stretch” a little farther. So I went ahead and got up. Oh, it was so worth it. These butterhorns are yummy! And the college students, as well as our family, were very happy to eat them today. :)

whole_wheat_butterhorns

Don’t worry. I made more than just these few.
This was the second round I pulled out of the oven.

Here’s our menu for this week:

Sunday, January 13
Baked oatmeal, fruit
Lasagna, whole wheat butterhorns, tossed salad, green beans
High School Huddle:  Chili cheese dogs, fritos, olives, baby carrots, chocolate chip cookies

Monday, January 14
Whole wheat pancakes, blueberries
Beefy vegetable soup, corn bread muffins
Creamy crock pot chicken and rice, carrots, tossed salad

Tuesday, January 15
Pumpkin chocolate chip muffins, applesauce
Chicken patty sandwiches, fruit plate, baby carrots
Beef stroganoff, green beans

Wednesday, January 16
Scrambled eggs, creamy orange coolers
Grilled cheese sandwiches, tomato soup, carrot sticks
Pizza boats, fruit salad

Thursday, January 17
Whole wheat bagels, cottage cheese and pineapple
Chicken tortilla soup, oranges
Tacos

Friday, January 18 (Elias’ 11th birthday choices!)
Donuts
Pizzadillas, fruit
Hamburgers, chips, veggies, fruit

Saturday, January 19
Breakfast pizza, oranges
Leftovers
Pasta alfredo, tossed salad, steamed broccoli and carrots

Did you make a menu plan this week?  Share if you’d like!

Heavenly Homemaker's Club Members: Access your homepage and all your fantastic resources here! Not a member yet? Please join us!

A Fresh Batch of Homemade Buttermilk

January 10, 2013 by Laura 55 Comments

This post may contain affiliate links. For more information, please see our disclosure policy.

I’ve been making homemade buttermilk for about seven years now. It’s such an easy-to-make food item! 

The beauty of homemade cultured dairy products, besides the fact that it saves you a lot of money to make them yourself, is that once you’ve made a batch, you can then use that batch to make more batches. In other words, once you have a jar of homemade buttermilk, you use the last cup of that batch of buttermilk to make another batch of buttermilk. Then you use the last cup of that buttermilk to make another batch of buttermilk. Then you use the last cup of that buttermilk to make another….

Well, you get the picture.

This system works very well. Until you go on a long trip across the country and come home to find that the buttermilk that has been untouched for several weeks in your fridge smells gross and you need to begin a fresh, new batch. 

That would be the predicament that I found myself in this week. I found that the last little bit of buttermilk in my fridge had seen better days and needed to go. That’s okay though. Every once in a while, it’s a good idea to begin with fresh cultures and start a new batch of buttermilk.

Why do I like having buttermilk on hand? I use it often for pancakes and baked goods. And I really love using it in Creamy Orange Coolers. It tastes delicious and refreshing in that recipe, and gives our tummies some great, live cultures. It’s awesome for digestion!

I’ve shared it before, but I’ll share it again – just to reinforce to you how easy it is to make buttermilk. 

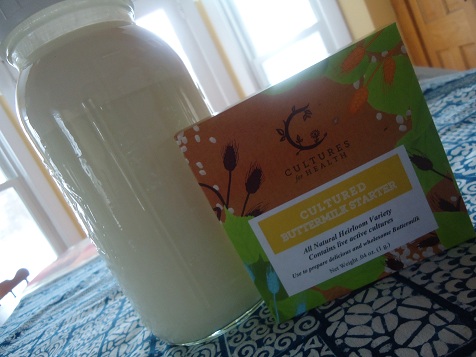
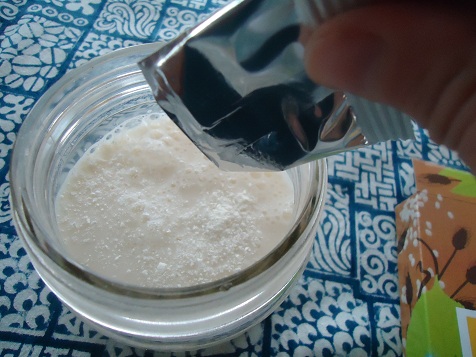
First, you get a starter culture. My favorite comes from Cultures for Health. Also, you need milk. I prefer raw milk, but this does work with store-bought milk as well.

buttermilk_1

Next, you pour the starter culture into a cup of milk. I use a pint sized jar for this.

buttermilk_2

Put the lid on and shake it up. 

buttermilk_3

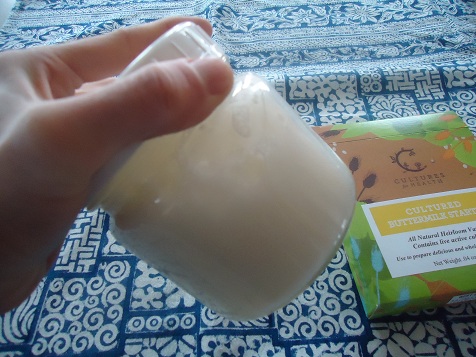
Once you’ve done this, place your jar in a “warmish” spot in your house for about 24 hours. (In the winter, I find that it often takes longer than 24 hours.)  I usually put mine in the cabinet above my refrigerator because it tends to be a little warmer there. Don’t put it on your fireplace – that’s too hot and it will kill the live culture. Not that you were thinking about doing that. But just in case, I thought it was worth mentioning. We’re going for warm here, not hot. (About 70°)

In about 24 hours, the milk will have turned into buttermilk. You’ll know that the process is complete when you turn the jar over and instead of being liquid, the buttermilk will kind of “plop” away from the side of the jar in a single mass. It’s pretty cool.

No need to fear leaving this dairy product out in the open for 24 hours. Live cultures are healthy and will not spoil your milk. Leaving it out in a warm place is all a part of the culturing process. I promise.

Once my buttermilk is finished culturing, I can then use the last cup of that buttermilk to make another batch of buttermilk. 

Pour your one cup of cultured buttermilk into a quart or even half gallon of fresh milk to make larger batches once you’ve activated your starter. Allow the buttermilk/milk combination to culture in a warm place for 24 hours or until it has become buttermilk. Then refrigerate it and use as needed, saving the last 1 cup for a future batch.  

Then you can use the last cup of that buttermilk to make another batch of buttermilk. Then you can use the last cup of that buttermilk to make another….

Oh wait. I think I told you that part already. But yay for saving money and eating healthy at the same time!

Ever tried making buttermilk? If not, what is holding you back?

Heavenly Homemaker's Club Members: Access your homepage and all your fantastic resources here! Not a member yet? Please join us!

What Recharges Your Batteries?

January 9, 2013 by Laura 32 Comments

This post may contain affiliate links. For more information, please see our disclosure policy.

freezer_cooking_3

Hearty Chili and Whole Wheat Butterhorns for the freezer

We had been traveling for two weeks. We drove from Nebraska to California and back again. We saw friends and loved ones along the way. We waited in traffic, slowed down while car accidents were cleared away, crawled along to be careful of icy roads, and took detours. Our body clocks got messed up because of the time changes. Our digestive systems got messed up because of the fast food.

We got behind on our work. We came home to deadlines, expectations, loads and loads of laundry, and a Christmas tree that needed to be taken down and put away.

After spending an enjoyable holiday with family – I found myself being so tired upon arriving home that all I could think of was how miserable I was. I had so much catching up to do, I didn’t know where to start. I just wanted to sleep. But no matter how much I slept, I somehow couldn’t get caught up on rest. My body was exhausted. And ultimately, I didn’t have time for extra sleep. There was too much to do!

The point of this post is not to invite you to my pity party. I’ve prayed through it. I’ve caught up on sleep. I’m over it. :)

But we all have times like this don’t we? Times when we are so overwhelmed and exhausted we can hardly see straight? It’s not fun.

While I was in the “thick of the sludge” last week, at one point I groaned and wearily told Matt, “You know what I really want to do? I really just want to skip all the rest of the work I need to do and go into the kitchen and cook all day!”

Matt told me to go for it. But I whined that I “didn’t have time to take a break like that.”

Finally, once I realized that I wasn’t able to be productive anymore at the computer, I threw my hands in the air and went into the kitchen to start grinding flour. :) I then proceeded to spend the entire afternoon baking, cooking, and baking some more.

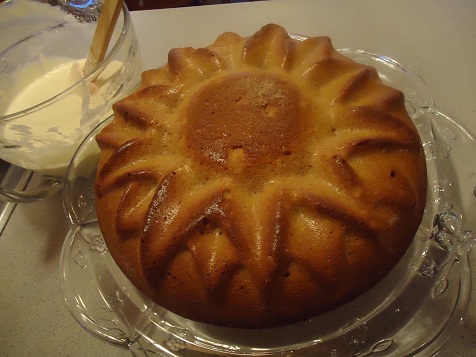
orange_cake_1

Orange Pound Cake, following this Lemon Pound Cake recipe, subbing orange juice from our California fresh oranges!

By the time I was finished, my back was aching, my feet were tired, and my kitchen was a mess. But I felt completely refreshed, recharged, and ready to tackle my other projects once again.

freezer_cooking_1

 Whole Wheat Calzones

 It’s amazing really. Sometimes when we have too much to do, we need to just step back and do something else. By doing so, we will be refreshed and ready to tackle our to-do list again.

Cooking refreshes me. I love it. And then I end up with great food to feed my family too. It’s a win-win!

What recharges your batteries? What activity do you love to do when you need a breath of fresh air? Making crafts, cleaning, cooking, something else? I can’t wait to hear!

Heavenly Homemaker's Club Members: Access your homepage and all your fantastic resources here! Not a member yet? Please join us!

If You Give an Eight Year Old Boy a Math Lesson…

January 8, 2013 by Laura 60 Comments

This post may contain affiliate links. For more information, please see our disclosure policy.

malachis_bday_cake

If you give an eight year old boy a math lesson, he will sit right down without hesitation, work diligently without interruptions, and accurately complete the lesson in record time.

Yeah right.

Maybe that’s how it goes for your kids, but here’s how it occasionally goes at my house:

If you give an eight year old boy a math lesson, he will give you a confused look, then ask you where his math book is. You will tell him that it is (as always) in the basket with all of his other school books and that he needs to run get it quickly.

He will begin to run up the stairs to get the math book, but will see a Nerf bullet on one of the steps on his way up. He will stop, pick up the Nerf bullet, examine it, then fling it toward the glass doors at the top of the stairs. The bullet will miss the door, but will instead hit one of his brothers as he comes around the corner. The bullet will thus be flung back and forth between the brothers until you realize what is happening and remind the eight year old (and his brother) of the jobs they are supposed to be doing.

As the eight year old arrives back in the kitchen with his math book (yay!), you will ask him if he also got a pencil. He will reply by telling you that while he does have his new green pencil sharpener, he has no pencil and that he can not find a pencil anywhere and that we must not have any pencils anymore because they were all, obviously, eaten by aliens.

You will show him where there are (as always) forty two (give or take) pencils ready and waiting to be used. He will proceed to take way too long choosing a pencil and will finally, with much urging from you, find his spot in the kitchen and open his math book (by using “the force”).

He will complete two math problems right away because suddenly he is racing against the clock in true boy “everything is a competition” fashion. But then he will accidentally drop his pencil on the ground, where – look out! – the volcanic lava is about to bubble over. He will warn you to “step back” so that your legs are not engulfed by hot lava, and will then try to dangle from the kitchen stool without touching the floor to retrieve the pencil before anyone or anything is harmed.

Just as he almost rescues the pencil from danger, he will see that there is a bug crawling on the floor. Volcanic lava forgotten, he will grab his green pencil sharpener and work to capture the bug. After three to five attempts at this, he will manage to coax the bug into its new home where it will stay while the eight year old settles down, finds his groove, and finishes his math lesson (while giving his new pet an in-depth explanation of how to “carry the one” while adding double digits).

The end.

malachi_bug_3

malachi_bug_2


Heavenly Homemaker's Club Members: Access your homepage and all your fantastic resources here! Not a member yet? Please join us!

Dairy Free Options to Replace Cream Soups

January 8, 2013 by Laura 33 Comments

This post may contain affiliate links. For more information, please see our disclosure policy.

If you’re looking to replace canned cream soups on a recipe, there are several options I’ve recommended. (Read this post to learn more.) 

However, all of the ideas I’ve thought of include dairy. What about those of you who need to avoid dairy? 

Shucks…I have no ideas. We’re very creamy and buttery at our house.

Our One Dish Meat and Potato Meal, which uses Homemade Cream of Mushroom Soup

Never fear though – I have a whole lot of readers and they are all smart and full of ideas. I’ll just bet many of you have some experience with this and can chime in with some great suggestions.

So let’s hear it! What can you use in a recipe to replace Cream Soups that will be a healthy alternative but does not include dairy?

Heavenly Homemaker's Club Members: Access your homepage and all your fantastic resources here! Not a member yet? Please join us!

Gratituesday: Oranges!

January 7, 2013 by Laura 15 Comments

This post may contain affiliate links. For more information, please see our disclosure policy.

We just got back from a long, long drive to and from California to visit Matt’s family. One of the best parts of the trip (besides seeing loved ones, obviously!) is that we got to bring home two big sacks full of fresh oranges from Matt’s uncle’s tree.

oranges

Wow, they taste good. I see a lot of Creamy Orange Coolers in our future, as well as simply lots and lots of sliced up oranges with our meals and snacks.

It is amazing how much better these oranges taste compared to store bought oranges. And, because they were given to us by beloved family members, we remember to pray for them each time we eat one. Such a tasty reminder! :)

Share how God is working in your life on your blog, then come link up with us here. If you don’t have a blog, be sure to leave a comment letting us know what you’re grateful for! Please read through the Gratituesday Guidelines so that you understand what kinds of posts you can link up to share here. Posts that are linked but do not fit our Gratituesday theme will be deleted.

If you are linking up a blog post for Gratituesday, please copy and paste the following sentence into your post! Thanks!

Join us for Gratituesday at Heavenly Homemakers!


Heavenly Homemaker's Club Members: Access your homepage and all your fantastic resources here! Not a member yet? Please join us!
« Previous Page
Next Page »

Join Our Community!

 Facebook Twitter E-mail Instagram Pinterest

Popular Posts

~ Will All of the Real Moms Please Stand Up?
~ Easy! Stir-and-Pour Whole Wheat Bread
~ How to Make Gatorade
~ 31 Real Food Breakfast Ideas
~ Dear Teenage Girls...
~ When Mom Takes a Step Back
~ The Inexpensive Health Insurance We Love!
~ Let's Talk Real Food Grocery Budgets

Check out our latest posts!

  • Big Family Food and Fun: September 20-26, 2026
  • Big Family Food and Fun: September 13-19, 2026
  • Big Family Food and Fun: September 6-12, 2026
  • Big Family Food and Fun: August 30-September 5, 2026
  • Big Family Food and Fun: August 23-29, 2026
Home  ~  Simple Meals  ~  Club Membership  ~  Shop  ~  Privacy Policy  ~  Disclosure  ~ Contact

Copyright © 2026 · Beautiful Pro Theme on Genesis Framework · WordPress · Log in