Heavenly Homemakers

Encouraging women in homemaking, healthy eating and parenting

  • Home
    • About
    • FAQs
  • Recipes
    • Bread and Breakfast
    • Condiments
    • Dairy
    • Main Dishes
    • Side Dishes and Snacks
    • Desserts
    • Gluten Free
    • Instant Pot
    • Crock Pot
    • Heavenly Homemaker’s Weekly Menus
  • Homemaking
    • Real Food Sources
  • Store
  • Contact
    • Advertise
    • Disclosure
    • Privacy Policy
  • Simple Meals
  • Club Members!

Homemade Pudding Pops

July 19, 2011 by Laura 122 Comments

This post may contain affiliate links. For more information, please see our disclosure policy.

You know how all your friends growing up always had the cool snacks at their house? (Although I’m sure my friends thought I was the one with the cool snacks.)  One of my friends always had Jello Pudding Pops at her house. Visiting her in the summer was always a treat. Don’t worry – I liked her for more than just her pudding pops. I mean, she also had really cool Cabbage Patch Dolls. No really – I liked my friend for who she was – not just for her pudding pops and dolls (and cool play room and cute puppy).

I can not recreate a Cabbage Patch Doll, nor do I think my boys would want me to. But Beth at Turn 2 the Simple reminded me a few days ago with her comment on my Creamy Pudding recipe that I can recreate a Pudding Pop! I love how tasty these are, how refreshing they are on a hot day – and how they actually offer some nourishment and keep my kids full for a little while.

I simply followed my Creamy Pudding recipes and froze the mixture into pudding pops. EASY!!! I made both chocolate and vanilla. I didn’t try butterscotch, but I think I might next time just for fun!

How to Make Pudding Pops:

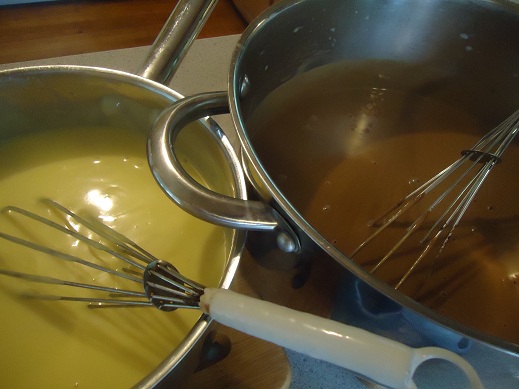
Make a batch (or two or three) of pudding. You can use my healthy varieties of Creamy Pudding if you want!

Yum

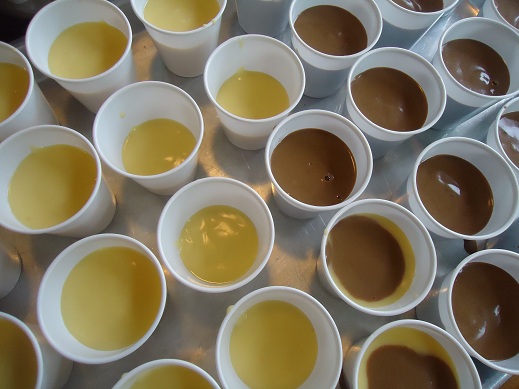
Pour the pudding into popsicle containers or 3 ounce sized bathroom cups.
Each batch of pudding made about 15 Pudding Pop cups.
I found it easiest to put all the cups on a large cookie sheet for easier transport the freezer.


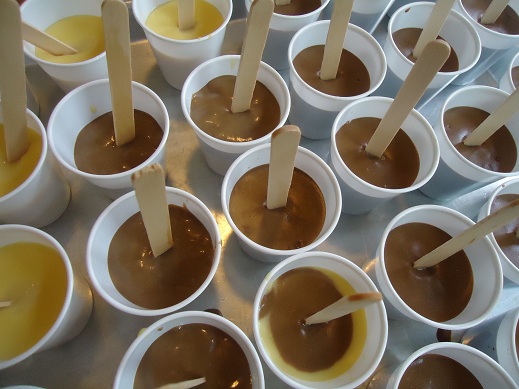
Allow the pudding to cool and set up (about 45 minutes). Place a popsicle stick in each cup:


Put the Pudding Pops into the freezer for at least 4 hours. I was surprised that it took quite a while for these to be frozen through and through. Oh, but when they were frozen – it took me back to my days as a little girl playing with Cabbage Patch Dolls with my friend, and eating pudding pops on her porch.


Do you have any Pudding Pop or Cabbage Patch Doll memories to share? Oh dear, or are some of you too young to remember Cabbage Patch Dolls?

Heavenly Homemaker's Club Members: Access your homepage and all your fantastic resources here! Not a member yet? Please join us!

Gratituesday: Just One Thing

July 18, 2011 by Laura 39 Comments

This post may contain affiliate links. For more information, please see our disclosure policy.


Of everything on my Two Week Tackle list, today I only got around to one thing – and even then I didn’t completely finish. All morning I was going to start tackling – yet everytime I tried, the phone would ring and someone would need us to help with something. Or the laundry needed to be switched out. Or we had to run an errand downtown.


And then it was time to make lunch.


That’s life and that’s why I allowed two weeks to tackle the list. Today I will choose to be grateful that I got just one thing done.


I decided to begin with one of the chores I was dreading most – cleaning out cabinets and putting down new shelf liner. Some of my cabinets have become pretty nasty, making for a job that wasn’t very fun. On the other hand, I’m really looking forward to sitting down and organizing our school books and working on our schedule. Therefore, I made myself get this dreaded cabinet cleaning chore done first – then I can reward myself by sitting down in a mountain of books!


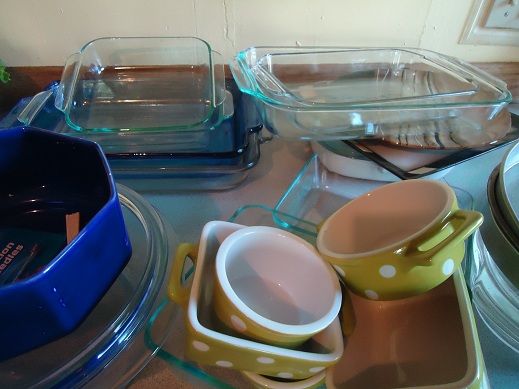
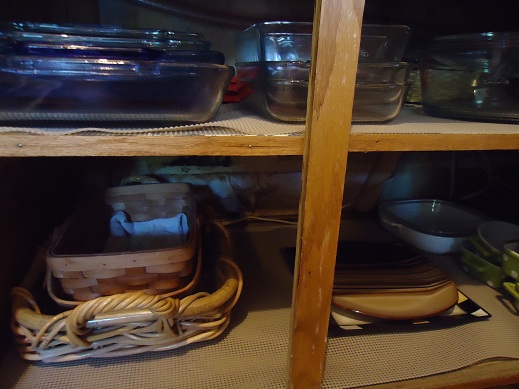
I piled the contents of several cabinets onto the counter-top and proceeded to peel out the old shelf liner, vacuum off the shelves, wipe them down, then put down fresh shelf liner. I also got myself completely filthy in the process. Is it just a little bit obvious that I like and use a lot of Pyrex dishes?


Lookie at my clean, organized cabinets!!


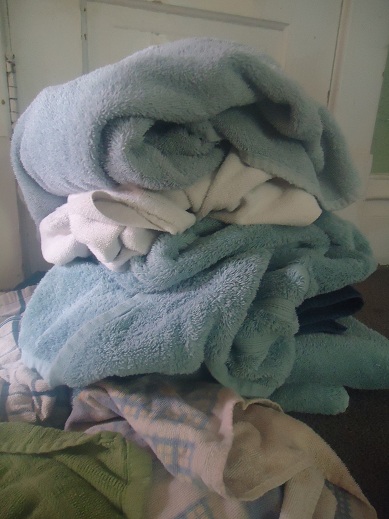
I also thought I’d show you what happens when you assign your kids to go fold five big loads of laundry. Our six year old was in charge of all of the towels. He does a great job with smaller kitchen towels and washrags. But the large bath towels are still a little bit difficult for him. Still – I found this pile so endearing, I had to take a picture. I couldn’t bear to refold them. He worked hard on that folding job! (No, really they are folded, can you tell?!)


Even though I’d hoped to get more accomplished today – I’m still very thankful that I got one major (and dreaded) task out of the way. And I’m thankful that my kids were willing to help with some of our other, normal jobs.


Also, I wanted to offer some encouragement to all of you who find yourself trying to get something accomplished – working hard all day – and feeling like you never really get much done. It’s easy to get discouraged when we work hard and don’t feel like we have much to show for it.


If your family has been loved on by you – if you’ve fed them, clothed them, trained them, kissed them, held them – then you have accomplished much. Even if the dirty laundry is still all over the floor and the project you started at 10:00 had to be put on pause, never to be resumed, at 10:02.


“Whatever you do, work at it with all your heart, as working for the Lord… ”  Colossians 3:23


What are you thankful for this Gratituesday? Write about it on your blog, then come link up with us here. If you don’t have a blog, be sure to leave a comment letting us know what you’re grateful for!


If you are linking up a blog post for Gratituesday,
please copy and paste the following sentence into your post! Thanks!


Join us for Gratituesday at Heavenly Homemakers!


Heavenly Homemaker's Club Members: Access your homepage and all your fantastic resources here! Not a member yet? Please join us!

The Two Week Tackle

July 17, 2011 by Laura 46 Comments

This post may contain affiliate links. For more information, please see our disclosure policy.

We like to begin our home school year at the beginning of August. This just works well for our family. That means I have about two weeks left before we hit the books. I’m really excited about this, and they aren’t admitting it, but deep down, my boys are excited too. ;)

August also brings quite a bit of other “excitement” as our garden will be kicking out lots of produce, which will need to be preserved. Our soccer season also starts in August. Our boys are on teams, but more importantly, the college team my husband helps coach gets underway the second week of August. Three-a-day practices keep him hopping plus, if you’ve been reading here long, you know that I usually feed the soccer team for an entire week before the college classes start. I LOVE doing this – the ladies on the soccer team are a joy to serve. I hear there will be 43 players on the team this year. That’s a lot of food! Stay tuned to hear how all of this goes.

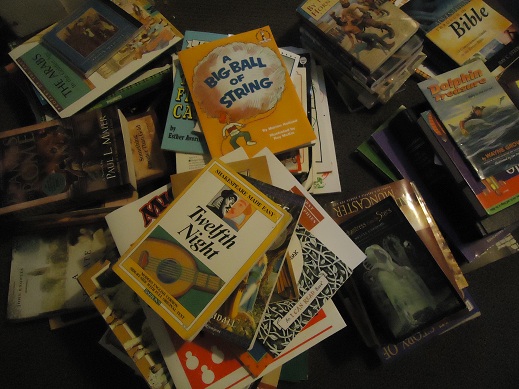
Here’s a big pile of our books – in desperate need of some sorting and organization!

I tell you all of this to say that I have a whoppin’ two weeks to get myself organized before the month of August slaps me in my eager – but full scheduled – face. I’ve spent a good part of the summer working on two new books. Now that they are in the editing stage, to say that my house needs a little bit of love would be an understatement. And there are other areas of life I really need to get organized and prepared for, simply so that the beginning of our school year goes more smoothly.

And so…I have made myself a list. I’m calling it the Two Week Tackle because well – I have two weeks to tackle this list. Can I do it? Who knows?

Want to watch me try? Yes, I figured you might.

Here’s the Two Week Tackle List, which I reserve the right to add to or take away from at any given time as the crazy urges hit:

  • Organize school books and create a schedule for our school year
  • Clean out kitchen cabinets – replace shelf liner
  • Deep clean the entire house
  • Plan and begin to prep soccer meals
  • Make and freeze healthy convenience foods for the month of August
  • Make homemade hand soap and laundry detergent (just because I really want to try)
  • Experiment with homemade white chocolate and butterscotch chips for the Heavenly Homemakers Recipe Challenge
  • Finish creating the Whole Foods Pantry resource list that so many of you have been requesting

Regarding this last bullet point – I will, for at least one week, be taking a break from writing my bulk food posts. Creating the Whole Foods Pantry resource page is a big job to undertake, and the more I write about bulk food, the more it has been brought to my attention that you would really benefit from this list. I’ll pick up with the bulk food series once the Whole Foods Pantry resource page is finished.

And so, during the next two weeks, I’ll be cleaning, organizing, sorting, writing, finishing the books, cooking, and in general, preparing my household for the month of August.

I’ll try to blog my way through the list with some pictures and explanations if I can. There may be times I just hop onto Facebook and give a quick update. If you aren’t already following me on Facebook, you may want to click over to do that now. I’d hate for you to miss any pictures of my insanity. ;)

And now a question for you:

What are you most excited for me to tackle and share with you? Which item should I do first?

If you’d like to join the Two Week Tackle – get your list ready and share it in the comments!

Heavenly Homemaker's Club Members: Access your homepage and all your fantastic resources here! Not a member yet? Please join us!

Menu Plan for the Week

July 17, 2011 by Laura 9 Comments

This post may contain affiliate links. For more information, please see our disclosure policy.

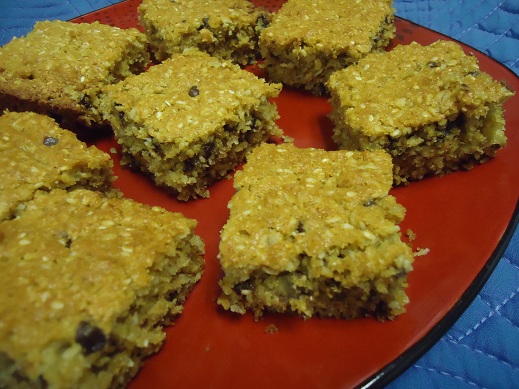
I’m not sure why I don’t make these Apricot Breakfast Bars more often.
This time, I added a few mini chocolate chips just for fun!

Matt joined Asa at camp last week, leaving just three boys and me at home. After two weeks of having our family scattered here and there – we’re all six back together again this week. YAY!

Here’s our menu plan for the week:

Sunday, July 17
Apricot breakfast bars, bananas
Beef roast, carrots, potatoes, gravy
Salmon patties, corn on the cob, watermelon

Monday, July 18
Homemade poptarts, cantaloupe
Alfredo sauce with pasta, steamed broccoli and carrots
Italian roast wraps, raw veggies with ranch dip, watermelon

Tuesday, July 19
Creamy orange cooler, toast
Bean and cheese burritos, applesauce
Beef stroganoff, tossed salad, green beans

Wednesday, July 20
Scrambled eggs, hashbrowns, oranges
Tuna salad on crackers, honeydew melon, sliced tomatoes
Cheeseburger macaroni, green beans, sliced tomatoes

Thursday, July 21
Crepes with jelly, applesauce
Black bean salsa with organic corn chips, grapes
Cheeseburger zucchini boats, carrots

Friday, July 22
Pancake and sausage muffins, blueberries
Sloppy joes, peas
Grilled chicken, corn on the cob, green beans

Saturday, July 23
Pineapple-orange slushies, toast
Crustless quiches, fruit salad
Leftovers

Sponsor Shout-Out

Lilla Rose has a new product! They’re called You -Pins – you can see how they work by watching this video. Gorgeous!

Heavenly Homemaker's Club Members: Access your homepage and all your fantastic resources here! Not a member yet? Please join us!

When to Leave Kids Home Alone?

July 15, 2011 by Laura 62 Comments

This post may contain affiliate links. For more information, please see our disclosure policy.

Now that I’m able to run to the store for a few items without buckling all my babies into car seats and lugging them in and out of the car – I feel like I’ve been handed a lovely little gift. It’s really quite nice to be able to holler at my boys, “I’m running to the post office – Asa’s in charge!”

It’s really, really, really nice to have this lovely perk. After so many years of “kid lugging” – I still haven’t gotten over the joy of how nice and easy it is to simply grab my purse and run out the door for a few minutes. If you are still in the “take your kids everywhere you go” phase – take heart! Some day, you too will be able to run to the library to return books without buckling in anyone but yourself.

toysfromlisa2sm.JPG

They look like they can hold their own – don’t you think?

It’s not that I don’t like being with my kids. I love taking them places. It’s just that when they were babies – hooking in car seats, bundling up babies, making sure everyone is pottied and fed – took longer than the actual trip to the store in the first place. Sometimes it’s nice just to be able to run in, run out and call it done.

It was with quite a bit of hesitation that we first began to leave our kids home alone for a few minutes. I did quite a bit of research to find out how old the “legal” age was to leave kids home alone. And how old should they be before they should be left in charge of other kids?

Turns out, there is no legal age – at least none that I could find. It’s really up to you.

I think the answer to this question is dependent on many factors:

  • How responsible is your child?
  • How old are the other kids that will be in his/her care?
  • Will the other kids respect and listen to the authority of the child in charge?
  • How large and safe is your town/city?
  • How comfortable does your child feel being left alone?
  • Have you prepared your kids to know how to handle phone calls and knocks on the door while you’re gone?
  • How long will you be gone?
  • How far are you going?
  • Does your child have a way to get in touch with you while you’re gone?

We seem to be a little bit later than many people around here – waiting until our boys are around 11 to be left alone, and even then, it’s only for a very short time. I think they could probably handle it before age 11 – they just haven’t seemed comfortable with the idea, so we haven’t pushed it.

Please share! At what age do you feel like it’s okay for your kids to stay home by themselves? When do you think it’s okay for a child to babysit or be in charge of other kids?


Heavenly Homemaker's Club Members: Access your homepage and all your fantastic resources here! Not a member yet? Please join us!

Empower Your Spouse

July 14, 2011 by Laura 14 Comments

This post may contain affiliate links. For more information, please see our disclosure policy.

~Appreciate Your Spouse~
~Buoyancy in Marriage~
~Consult Your Partner~
~Dream Together Part One ~Dream Together Part Two~

Empower Your Spouse

My Darling, Jet Fuel – Matt’s Thoughts

Think back to one of your best teachers, coaches or mentors.

They helped you become better. Without them would you have become better in that area of your life? I doubt it. They empowered you.

I really like the word empower. I used it in the Appreciate Your Spouse and Dream Together (part two) posts. I’ve been empowered by the Holy Spirit and the Spirit working through other people. Because of that empowerment, I am able to help others. I have the heart of a coach/teacher. Training, equipping and inspiring others brings me joy. It thrills me to invest in others and watch them succeed.

I have to “Amen!” an article Laura wrote in her Being Your Husband’s Help Meet series titled, Make Him or Break Him. We can help our spouses become better and in turn they pass on that energy to others. We can suck the life out of our spouse and become upset when our relationship withers. Another choice we can make is to let our spouse fend for him/herself and see what happens. If I was being torn down by Laura, I don’t know that I’d be able to train, equip and inspire others or that I’d be thrilled to see others succeed. I’d be in survival mode relationally.

Instead, she is propelling me toward greater works. She’s not merely a support, but my jet fuel. Usually I call her “Sweetie.” Other times it’s, “Babe.” But she’s really my “Jet Fuel”.

My Biggest Fan – Laura’s Thoughts

Whether I’m standing in the church foyer, watching games at the soccer field or making my rounds at a family reunion – these are the statements I hear from others:  “Matt told us about the great dinner you made tonight.” “Your hubby was bragging on you earlier when we were talking about how our week’s been going.” “Matt shared with us some of the writing you’ve been doing – way to go!” “It was great to catch up with Matt earlier. Sounds like you’re Miss America!”

Well, I guarantee you I’m barely Miss Matched Socks most days, much less Miss America – but in Matt’s eyes…I’m all that and more. It’s humbling, it’s gratifying…it’s empowering.

If Matt thinks I’m “all that” – I consider it a challenge to live up to, as well as an honor to be so highly esteemed in his eyes. He’s not blind to my weaknesses. He knows my struggles better than anyone. But he values me and has confidence in me. His support of my efforts truly empowers me to become a better, more godly woman.

I can not think of a more precious gift I’d rather receive from my beloved.

Are you tearing your spouse down, or are you working to empower them toward a more godly, productive life for the Kingdom?

Ladies, we know you’re reading here more often than the guys. ;)  We’d love husbands to read this article as well. If you feel so inclined please send the link to your husbands, or if it’s easier, we’ve created a downloadable article for you to quickly print off and share. Healthy Marriage Tips A to Z – Empower


Heavenly Homemaker's Club Members: Access your homepage and all your fantastic resources here! Not a member yet? Please join us!

Coconut Flour Cheddar Drop Biscuits

July 13, 2011 by Laura 119 Comments

This post may contain affiliate links. For more information, please see our disclosure policy.


coconut_flour_cheddar_biscuits_2

At a recent youth event, my friend Lisa mentioned something about her Coconut Flour Cheese Biscuits. I immediately dropped my plate and fork, leaped over the couch to the other side of the room and tackled her onto the floor, begging her to please share her recipe.

Of course you know I’m kidding.

Her name is really Louanne.

Okay no, I’m kidding again.

Her name really is Lisa and when she mentioned her Coconut Flour Cheese Biscuits I didn’t actually drop anything or leap over anything or tackle her. I’m not that crazy.

Yes, kidding again. You all know I’m crazy.

But still, she was nice enough to give me her recipe without all the drama. The drama is what I felt inside when I heard that she had a new great coconut flour recipe to offer.

So here, without any shoulder shaking, leg grabbing or tearful pleading is my friend Lisa’s awesome recipe:

Coconut Flour Cheddar Drop BiscuitsYum

¼ cup coconut oil or butter, melted
1/3 cup sifted coconut flour
4 eggs
¼ teaspoon salt
¼ teaspoon onion powder
¼ teaspoon baking powder
½ cup sharp cheddar cheese, shredded

Blend together eggs, coconut oil or butter, salt, and onion powder. Combine coconut flour with baking powder and whisk into batter until there are no lumps. Fold in cheese. Drop batter by the spoonful onto a greased cookie sheet. Bake at 400 degrees for 15 minutes. For a cheesier biscuit increase cheese to ¾ cup.

This recipe makes about 10 biscuits.

coconut_flour_cheddar_biscuits_1

If you’re curious, here’s a post I wrote explaining more about why I love coconut flour. And also, one of my readers just let me know that this great deal for coconut flour is back up and running. How very thoughtful of them to re-stock five minutes before I posted this recipe. :)

Disclaimer:  No friends were harmed during the acquiring of this recipe.

Have you tried coconut flour yet? Do you love it?

Heavenly Homemaker's Club Members: Access your homepage and all your fantastic resources here! Not a member yet? Please join us!

Homemade Vanilla for Christmas

July 13, 2011 by Laura 41 Comments

This post may contain affiliate links. For more information, please see our disclosure policy.

vanilla

In case you were wondering (and I’m just absolutely sure that you were), there are only 164 days left until Christmas.

In the midst of gardening and other summertime activities, Christmas isn’t on my mind very much right now. However, Homemade Vanilla Extract is a wonderful Christmas gift. It takes 4-6 months for your vanilla to be ready to bottle and give away. So, if you’re wanting to get on this project in time to be able to wrap bottles of homemade vanilla and put them under the tree this December – now is the time to get it going!

I love that making homemade vanilla saves money, and is so pure and good to use. It helps that it is completely delicious!

Here are complete instructions for how to make homemade vanilla extract. Trust me, it’s easy and super fun to do! Also, be sure to take advantage of the 10% discount on vanilla beans, offered by my very favorite vanilla bean source, Olive Nation. They are super high quality beans for an excellent price! (Use the code hhm2012 to receive 10% off.) And take a look at these pretty labels that my friend designed! They are customizable, and come in a variety of designs. So fun!

Merry Christmas everyone! (Ugh, it’s too hot and humid to pull that statement off with a straight face.)

Stay cool! (There, that’s better.)


Heavenly Homemaker's Club Members: Access your homepage and all your fantastic resources here! Not a member yet? Please join us!

What to Do About Crystallized Honey

July 12, 2011 by Laura 67 Comments

This post may contain affiliate links. For more information, please see our disclosure policy.

When I shared that I buy a year’s supply of honey at one time, many of you wondered if it crystallized and if so, what I did to solve that. Yes, my honey does crystallize, but it’s very easy to fix that issue.

By the way, have you ever read the words “do not microwave” on the side of your Honey Bear? That really means, “DO NOT MICROWAVE”. Many a Honey Bear has quickly become a sticky, melted mess within just a few seconds of being in the microwave. In fact, I believe you’d even be able to hear your Honey Bear moan, “I’m mellllttttiiiiiinnnggg….” as he turns into a plastic honey pool. Bless his little heart.

So, don’t microwave your honey to solve your crystallized honey issues. (I don’t recommend using a microwave for anything actually, but that’s another post for another day.)

Instead, I put my container of crystallized honey into with a few inches of water and heat it on the stove. If your honey is raw and you’d like to keep it that way, you want to heat the water very slowly and at low heat. It will eventually dissolve the honey.

The following picture is a little bit blurry – that would be because my Honey Bear is in a steamy sauna, and the steam fogged up my camera lens.

If you have a larger jug of honey, simply use a larger pot of water. Then, I find it helpful to pour the runny honey into smaller containers, preferably jars – go figure! :)

A little post update – myhnymybb makes a great point in her comment about not heating anything in plastic. I totally know that – and yet I did it anyway, then took a picture of it. Perhaps this is one of those “Duh Moments” I was talking about. I don’t want plastic leaching chemicals into my honey, which is why I usually store and heat my honey in glass jars. I just so happened to have a honey bear with crystallized honey, so I grabbed it and took a picture for this post. But yeah, plastic isn’t great, especially when it’s heated. So don’t follow my example. Put your honey into glass if possible.

But I still say don’t use a microwave to melt down the honey, no matter if it’s in glass or in a honey bear.

“I’m mellllttttiiiiiinnnggg….”


How do you store your honey? Do you buy bulk amounts of honey? Have you ever melted a Honey Bear in the microwave?

Heavenly Homemaker's Club Members: Access your homepage and all your fantastic resources here! Not a member yet? Please join us!

Free Preschool Activity Ebook

July 12, 2011 by Laura 4 Comments

This post may contain affiliate links. For more information, please see our disclosure policy.

Two years ago, we put together 101 Pre-School Projects ebook. All of the ideas in the book were contributed by Heavenly Homemakers readers – smart and creative people that you are. The book is loaded with over 100 fun and inexpensive ideas to use with your young children.

There are loads of summertime activities in the book. It occurred to me today that many of you might not be aware that we have this FREE resource in our Heavenly Homemakers Shop. I decided I’d better remedy that and tell you about it! 101 Pre-School Projects is free, on the house, complimentary…and it also doesn’t cost anything. Go download your free ebook and learn all kinds of fun activities to do with your kids!

101 Preschool Projects Free Download

Grab this FREE 101 Pre-School Projects book here!

I’m excited to share that signing up for these freebies will connect you to our new Heavenly Homemaker’s Learning Zone. It’s free, of course. You can unsubscribe at any time, your info will never be shared or sold, and being on this list means that you’ll be the first to know of the other fun (yes, FUN!) educational tools we’re putting together!

Heavenly Homemaker's Club Members: Access your homepage and all your fantastic resources here! Not a member yet? Please join us!
« Previous Page
Next Page »

Join Our Community!

 Facebook Twitter E-mail Instagram Pinterest

Popular Posts

~ Will All of the Real Moms Please Stand Up?
~ Easy! Stir-and-Pour Whole Wheat Bread
~ How to Make Gatorade
~ 31 Real Food Breakfast Ideas
~ Dear Teenage Girls...
~ When Mom Takes a Step Back
~ The Inexpensive Health Insurance We Love!
~ Let's Talk Real Food Grocery Budgets

Check out our latest posts!

  • Big Family Food and Fun: September 20-26, 2026
  • Big Family Food and Fun: September 13-19, 2026
  • Big Family Food and Fun: September 6-12, 2026
  • Big Family Food and Fun: August 30-September 5, 2026
  • Big Family Food and Fun: August 23-29, 2026
Home  ~  Simple Meals  ~  Club Membership  ~  Shop  ~  Privacy Policy  ~  Disclosure  ~ Contact

Copyright © 2026 · Beautiful Pro Theme on Genesis Framework · WordPress · Log in