Heavenly Homemakers

Encouraging women in homemaking, healthy eating and parenting

  • Home
    • About
    • FAQs
  • Recipes
    • Bread and Breakfast
    • Condiments
    • Dairy
    • Main Dishes
    • Side Dishes and Snacks
    • Desserts
    • Gluten Free
    • Instant Pot
    • Crock Pot
    • Heavenly Homemaker’s Weekly Menus
  • Homemaking
    • Real Food Sources
  • Store
  • Contact
    • Advertise
    • Disclosure
    • Privacy Policy
  • Simple Meals
  • Club Members!

How to Make Whipped Cream

November 11, 2015 by Laura 35 Comments

This post may contain affiliate links. For more information, please see our disclosure policy.

Of all the food I make from scratch, whipped cream is the one that tends to really surprise people who are unfamiliar with the simplicity (and deliciousness) of real food cooking.

“You can make whipped cream!?!?” they ask, incredulously. That’s when I tell them that they, too, can make this treat. Then I hand them the beaters and watch as they follow my ever so simple instructions to make whipped cream. (Stand, hold beaters in bowl of cream, move beaters around a little bit, watch fun patterns forming, stop when it’s thick.) After they’ve whipped the cream, thus creating whipped cream, they can’t believe that this is all it takes. I explain that this is how whipped cream got its name. It’s all very fascinating.
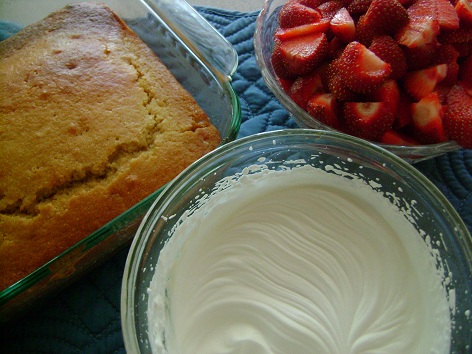
strawberry_shortcake_2

Cool Whip has us all a bit confused. I remember thinking that Cool Whip was whipped cream. As a matter of fact, Cool Whip used to be my favorite part of a holiday meal when I was a little girl. I did not even want the pie that went with it. Why would I want pie when there were tubs of Cool Whip in abundance? My cousin Rebecca and I would each get a bowl and fill it with Cool Whip. We’d sit back, giggling, licking spoonful after spoonful of Cool Whip. Our mothers and our aunts and our Nana would chuckle at us and we’d be like, “What?! This is the reason the pilgrims came over on the Mayflower.” We left the pie (and the coffee they drank with it) to the adults. Weirdos.

I’m all grown up now (she says, as she takes a sip of coffee). I’m over Cool Whip. I like the real stuff now. Real whipped cream is one of the easiest treats to make. Because it is real, it tastes absolutely amazing. Our bodies recognize it, so we don’t even have to be like “oh no, I’m eating so much fat, this is so bad for me.” On the contrary, our bodies don’t recognize and don’t know what to do with hydrogenated vegetable oil, high fructose corn syrup, sodium casienate, artificial flavor, xanthan and guar gums, polysorbate 60, sorbitan, monostearate, sodium polyphosphate.

Those are just some of the key ingredients in Cool Whip. Please don’t think it’s healthier. Or actual food. For the love of all things real, please whip cream.

How to Make Whipped Cream

Yum

5.0 from 2 reviews
How to Make Whipped Cream
 
Save Print
Author: Laura
Ingredients
  • 2 cups heavy whipping cream
  • 2 Tablespoons sugar or 10 drops liquid stevia
  • ½ teaspoon vanilla extract (optional)
Instructions
  1. Place ingredients in a high power blender. Whip on high speed for about 30 seconds or until cream has thickened. OR
  2. Put all ingredients into a large bowl. Whip with a hand mixer on high speed for 3-4 minutes or until cream thickens and forms stiff peaks.
3.4.3177

Make it Ahead

I recommend making Whipped Cream one day in advance or the morning of a big holiday meal. Prepare as directed, cover, and place in a bowl with a lid in the refrigerator until serving time. DO NOT STIR this after it has been whipped or it may deflate and become liquidy.
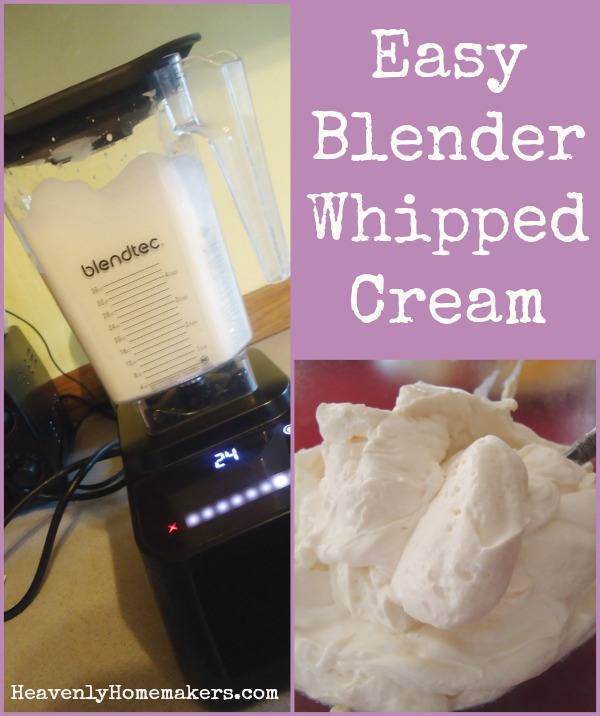
Easy Blender Whipped Cream

My new favorite way to make whipped cream is to pour cream, stevia, and vanilla into my Blendtec. I turn it on and have whipped cream 15-30 seconds later. It is so easy. The Blendtec is amazing in many ways (because hello, whipped cream in seconds). But beware: leaving the cream to whip much longer will produce butter. This is not a problem (because hello, butter in minutes) unless you wanted whipped cream for your pie. Butter is not the same.

How do you make Whipped Cream?

Here are the quick links to all the recipes we covered in this series:

  • Make-Ahead Turkey
  • Stuffing Muffins
  • Cheesy Mashed Potatoes
  • Oh Good Gravy
  • Green Bean Casserole
  • How to Make Frozen Pies
  • Simple Whipped Sweet Potatoes
  • How to make Whipped Cream
  • Whole Wheat Stir-and-Pour Dinner Rolls

Getting Ahead for the Holidays

Have you been a Cool Whip lover like I was in the past? Funny how now I can’t even stomach thinking about it. Now that I know the real deal is so easy and delicious, I don’t even see a comparison. Mmmm, real food how I love you.

~~~~~~~~~~~~~~~~~~~~~~~~~~~~~~~~~~~~~~~~~~~~~

Simple Meals is here! It’s saving my brain (and many of yours too!). If you haven’t joined yet, now’s the time. Get all the details here!

728x90

Heavenly Homemaker's Club Members: Access your homepage and all your fantastic resources here! Not a member yet? Please join us!

Simple Whipped Sweet Potatoes

November 10, 2015 by Laura 40 Comments

This post may contain affiliate links. For more information, please see our disclosure policy.

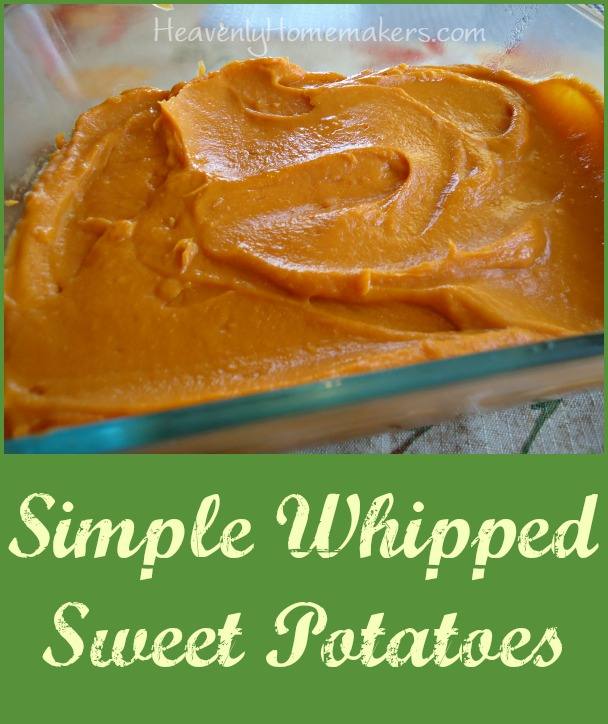
sweet potatoes2

Matt grew these beauties in our garden this summer!

Will your feelings be hurt if the sweet potatoes for your holiday meal don’t have marshmallows?

I don’t want marshmallows. My husband doesn’t want marshmallows. I’ve never even liked marshmallows (even in a s’more). But some people want marshmallows.

For example:

According to my 13-year old, the sweet potato recipe below isn’t sweet enough. Therefore I asked him, “Do you think I should add more maple syrup? Maybe even some brown sugar? Extra butter? Do you think I should salt it to bring out the natural sweetness? What do you think this recipe needs?”

With a grin, he quietly said, “Probably just marshmallows.”

Stinker. 

I do love to accommodate, especially for a holiday. Therefore, even though I vowed I never would, I looked again at homemade marshmallow recipes. Maybe for a special occasion, I thought, I could go to the trouble to make some. I searched for the marshmallow recipes that said “easy” and “quick.” But once again, I realized why I’ve never wanted to make homemade marshmallows. They might be easy, but they aren’t quick. They instruct, “Stand and whip the mixture until your legs cramp and you can no longer remember your name.”

Have I mentioned I don’t even like marshmallows?

I tell you what. If you want to add marshmallows to this recipe, I won’t even care. You can make them homemade. You can buy a package of them at the store. I will probably just skip the sweet potatoes and eat extra Green Bean Casserole. We can all still be friends. The good news is that this recipe (without the marshmallows) is incredibly simple to make, and you can make it ahead if you like!

Simple Whipped Sweet Potatoes

Simple Whipped Sweet Potatoes

Simple Whipped Sweet Potatoes
 
Save Print
Author: Laura
Serves: 6-8 servings
Ingredients
  • 4-6 medium sized sweet potatoes
  • 3 Tablespoons butter
  • 3 Tablespoons real maple syrup, sucanat, or brown sugar
  • Sea salt to taste
Instructions
  1. Scrub sweet potatoes and place them in a covered baking pan.
  2. Bake them in a 350° oven for about one hour or until they are tender.
  3. The skins should peel right off!
  4. Place peeled potatoes and remaining ingredients into a high power blender or into a mixing bowl. Blend until smooth either with a blender or a hand mixer.
  5. Serve right away or follow directions below to prepare ahead of time.
3.4.3177

Make Ahead Whipped Sweet Potatoes

Yum
Make sweet potatoes according to directions above. Allow them to cool completely. Cover and refrigerate for up to two days before rewarming to serve. Or, cover and freeze the dish for up to 3 months. To reheat and serve, thaw potato dish, cover, and place in a 350° oven for about 30 minutes or until they are warm through and through.

Truly, you will want to embellish these sweet potatoes to fit your tastes. Add more sugar if you like. Toss on some marshmallows (I’ll look away). It’s a holiday! Do whatever you enjoy!

Are you a fan of marshmallows? 

Here are the quick links to all the recipes we covered in this series:

  • Make-Ahead Turkey
  • Stuffing Muffins
  • Cheesy Mashed Potatoes
  • Oh Good Gravy
  • Green Bean Casserole
  • How to Make Frozen Pies
  • Simple Whipped Sweet Potatoes
  • How to make Whipped Cream
  • Whole Wheat Stir-and-Pour Dinner Rolls

Getting Ahead for the Holidays

~~~~~~~~~~~~~~~~~~~~~~~~~~~~~~~~~~~~~~~~~~~~~

Simple Meals is here! It’s saving my brain (and many of yours too!). If you haven’t joined yet, now’s the time. Get all the details here!

728x90

Heavenly Homemaker's Club Members: Access your homepage and all your fantastic resources here! Not a member yet? Please join us!

How To Make Your Own Frozen Pies

November 9, 2015 by Laura 40 Comments

This post may contain affiliate links. For more information, please see our disclosure policy.

Last I checked, Sara Lee charges over $3 for her frozen pies. I don’t blame her. I’d charge $5. But when I make my own pies, it can cost as little as $1 and I know what ingredients I’m including. Plus I’m making mine with love and all that. (Priceless, no doubt.)

Making a frozen pie is as easy as making a not frozen pie. Not that making a pie is easy. Nor is it really hard. You just have to commit, you know? You have to be like, “Today I am going to mix together and roll out pie crusts. I’m just going to do it and get this job out of the way. Everyone will love the pie. It’s not as hard as it sounds. Let’s do this.”

Then, after you mix and roll your crusts, you add whatever filling you want (pumpkin, apple, etc). You wrap them well, and you freeze them.

This is exactly how Sara Lee does it. Only she puts hers in a box. We’ll skip that part.

This post is chuck full of pie-making tips, recipes, and instructions. Shall we begin?

How to Make a Whole Wheat Pie Crust

Yum

1.0 from 1 reviews
How To Make Your Own Frozen Pies
 
Save Print
Author: Laura
Serves: 1 crust
Ingredients
  • 1¼ cup whole wheat flour
  • ¼ teaspoon sea salt
  • ⅓ cup Palm Shortening (or butter)
  • 4-5 Tablespoons cold water
Instructions
  1. Place flour, salt and shortening in food processor.
  2. Blend until shortening is cut throughout the flour and the mixture resembles crumbs.
  3. Drizzle in the water while the food processor is still whirling.
  4. Continue until a ball of dough forms.
  5. Roll out your dough into a circle on a well floured surface.
  6. Fold the circle in half. Then fold it in half again.
  7. Place your dough in your pie dish with the folded corner in the center.
  8. Unfold the dough, shape it into the dish and make the edges pretty. (see tutorial video below)
  9. Poke your dough a few times with a fork to keep it from poofing up in the oven.
  10. Bake at 450° for 10-12 minutes or until the crust is golden brown. Or, fill it with pie filling and bake as directed in specific pie recipe.
3.4.3177

How to Shape a Pie Crust

You can look through a picture tutorial on this post to see the specifics of how to roll a pie crust and place it in a pie pan.

Want to watch me shaping a pie crust a few years ago? Watch the video below. (Click here if the video doesn’t show up for you.)

How to Make a Frozen Pie

How to Make Your Own Frozen Pies

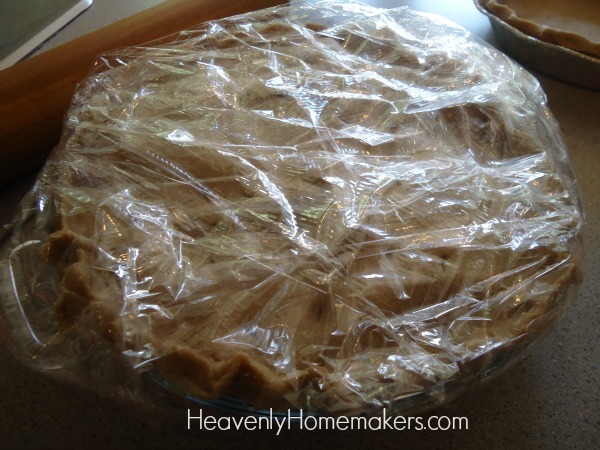
To make a frozen pumpkin or fruit pie, make it according to the directions but do not bake. Wrap the unbaked pie very well in plastic wrap. You might even consider putting the wrapped pie into a freezer bag for extra freezer protection. Label the pie. Freeze for up to three months.

To bake your frozen pie, take it out of the freezer and put it directly into a cold oven. Turn on the oven and bake as directed allowing a little extra baking time if necessary. See how easy this is?!

apple pie freezer 2

If you plan to make a cream pie, bake your crust as directed, allow it to cool, then wrap and freeze. Thaw crust and add your cream filling before serving.

Holiday Pie Recipes

Pumpkin Pie Recipe

2 cups canned or frozen pumpkin
2/3 cup brown sugar or sucanat
1 teaspoon cinnamon
½ teaspoon ginger
½ teaspoon nutmeg
3 eggs
1 ¼ cup heavy cream

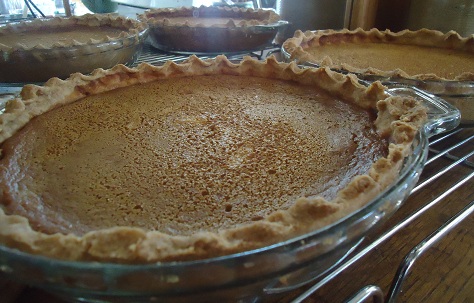
Whisk together all ingredients. Pour into unbaked pie crust. Freeze if desired. Bake at 350° for 50-60 minutes, or until a toothpick inserted in the middle of the pie comes out clean.

pumpkin_pies

Apple Pie Recipe

5-6 apples (any variety)
1/4 cup sucanat or brown sugar
1 teaspoon ground cinnamon

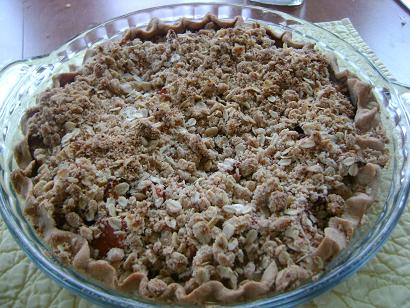
Wash and slice apples. Stir in sucanat and cinnamon. Make a double pie crust recipe. Place one crust on the bottom of a pie pan. Spread apple pie filling into the unbaked crust. Place the second pie crust on top. Seal and shape as shown in the video above. Freeze if desired. Bake at 350° for 50-60 minutes.

I usually have prepared Apple Pie Filling in my freezer, making this super simple.

Dutch Apple Pie Recipe

Make as directed above, only make a single pie crust. Top apples with crumb topping recipe found here.

apple_pie_palm_shortening_sm

If you’re hoping to Get Ahead for the Holidays, I highly recommend making your pies soon and putting them into the freezer to pull out for easy baking the day before your meal!

Here are the quick links to all the recipes we covered in this series:

  • Make-Ahead Turkey
  • Stuffing Muffins
  • Cheesy Mashed Potatoes
  • Oh Good Gravy
  • Green Bean Casserole
  • How to Make Frozen Pies
  • Simple Whipped Sweet Potatoes
  • How to make Whipped Cream
  • Whole Wheat Stir-and-Pour Dinner Rolls

~~~~~~~~~~~~~~~~~~~~~~~~~~~~~~~~~~~~~~~~~~~~~

Simple Meals is here! It’s saving my brain (and many of yours too!). If you haven’t joined yet, now’s the time. Get all the details here!
728x90

Heavenly Homemaker's Club Members: Access your homepage and all your fantastic resources here! Not a member yet? Please join us!

Real Food Green Bean Casserole (a Make-Ahead Dish)

November 8, 2015 by Laura 43 Comments

This post may contain affiliate links. For more information, please see our disclosure policy.

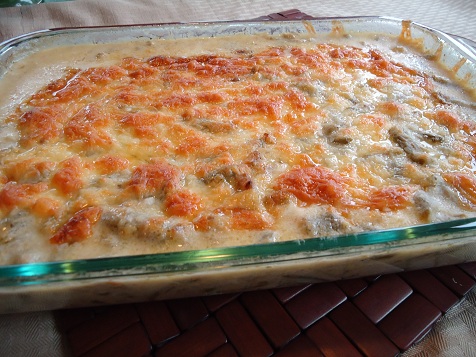
gb_casserole_2

If I had to choose a favorite holiday dish, it would have to be Green Bean Casserole. It’s not something I remember eating when I was growing up. I discovered it sometime after Matt and I got married. So yum.

The recipe I learned to make? It was the one with canned cream of mushroom and french fried onions. Man, I loved that stuff.

Once I learned more about cooking with real food ingredients, I knew that the canned cream of mushroom soup and French fried onions didn’t make the cut. But this casserollllllle! How to make a real food version?

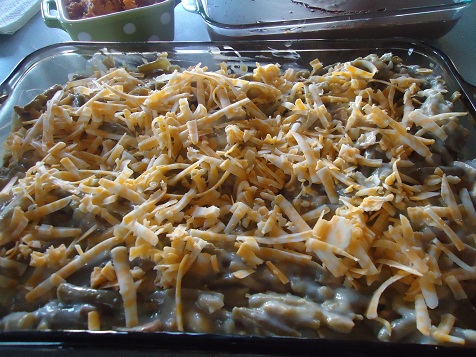
gb_casserole

I learned long ago how to make cream soups. French fried onions had me stumped though – mostly because of the time I felt it would take to create them. Then all my plans to keep my real food kitchen simple would be out the window.

Finally I figured out how I could make this casserole without mushroom soup or French fried onions. It goes without saying, then, that this casserole is very easy to make. Just wait until you see how easy!

Green Bean Casserole

Yum

5.0 from 1 reviews
Real Food Green Bean Casserole (a Make-Ahead Dish)
 
Save Print
Author: Laura
Serves: 6-8 servings
Ingredients
  • 3 cups fresh or frozen green beans
  • 2 Tablespoons minced onion
  • 3 Tablespoons butter (if needed)
  • 1 Tablespoon cornstarch or whole wheat flour
  • 2 cups milk
  • Sea salt
  • 2 cups grated cheddar cheese
Instructions
  1. Steam green beans until tender. Set aside.
  2. In a large saucepan, saute onion and butter together until the minced onion is lightly toasted.
  3. Turn heat down to low.
  4. Stir in cornstarch, then add milk.
  5. Turn heat up to thicken cream sauce, stirring constantly until sauce is thick and bubbly.
  6. Stir in cooked green beans, salting liberally.
  7. Pour the mixture into a 9x13 inch casserole dish.
  8. Top with grated cheese.
  9. Cover and bake in a 350° oven for 30 minutes.
  10. Uncover and bake for 10 minutes more.
  11. Serve.
3.4.3177

To Freeze Green Bean Casserole:

Make the casserole as directed in the recipe above. All it to cool completely. Cover and freeze for up to three months.

To bake and serve, thaw casserole in the refrigerator and bake as directed. OR, cover the frozen dish with foil. Place it in a cold oven*. Turn the oven on to 250° and bake for 2 hours. Turn the oven up to 350° to continue baking to heat through.

*Be sure your oven is cold when you put in the frozen dish! Otherwise, the pan will crack because of the extreme temperature change.

Real Food Green Bean Casserole ~ a Make-Ahead Dish!

There is a One-Dish Meal version of this casserole in my Oh, For Real Cookbook called Hearty Green Bean Casserole. It includes hamburger and it is awesome.

Note that if you use corn starch instead of wheat flour to make the sauce for this recipe, it will be completely gluten free.

I think this will soon become one of your favorite holiday dishes! Then, of course, you will find yourself making it many times all year round. No need to wait for Thanksgiving and Christmas for this one!

Here are the quick links to all the recipes we covered in this series:

  • Make-Ahead Turkey
  • Stuffing Muffins
  • Cheesy Mashed Potatoes
  • Oh Good Gravy
  • Green Bean Casserole
  • How to Make Frozen Pies
  • Simple Whipped Sweet Potatoes
  • How to make Whipped Cream
  • Whole Wheat Stir-and-Pour Dinner Rolls

Getting Ahead for the Holidays

~~~~~~~~~~~~~~~~~~~~~~~~~~~~~~~~~~~~~~~~~~~~~

Simple Meals is here! It’s saving my brain (and many of yours too!). If you haven’t joined yet, now’s the time. Get all the details here!

728x90

Heavenly Homemaker's Club Members: Access your homepage and all your fantastic resources here! Not a member yet? Please join us!

Can You Make Mashed Potatoes Ahead of Time?

November 4, 2015 by Laura 53 Comments

This post may contain affiliate links. For more information, please see our disclosure policy.

Oh yes. You can. You can make mashed potatoes ahead of time.

potatoes_2

Now, there are some things you’ll need to avoid. Here are two mashed potato tricks that do not work:

1. Do not boil potatoes with the plan to mash and serve them later.

While this seems like such a good idea, this will turn them into a sticky, gooey mess.

2. Do not make mashed potatoes and freeze them as-is.

I’ve never had success with this. Plain mashed potatoes freeze fine but thaw weird. They are always watery and unappetizing. These are not the kind of potatoes I want to include on my holiday table. If you do freeze them as-is, you must cook the frozen/thawed potatoes in a pot to steam off excess water that has formed in the freezing process. More info to come.

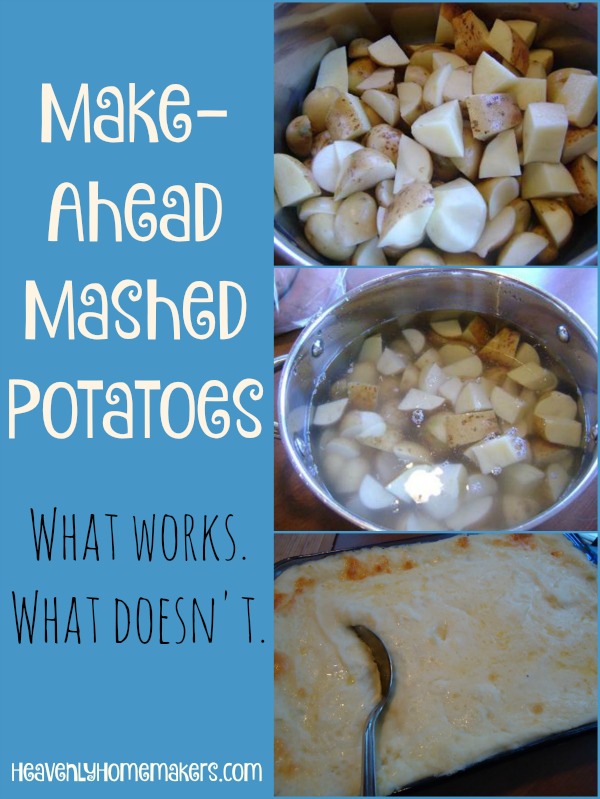
Make-Ahead Mashed Potatoes ~ What Works, What Doesn't.

Ways to prepare this side dish favorite ahead of time:

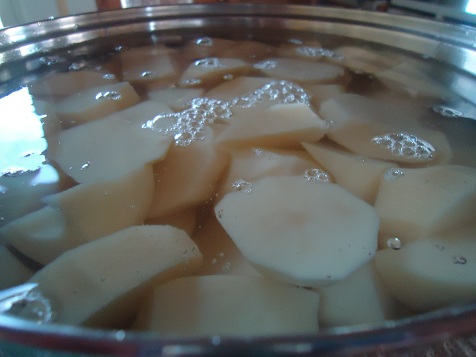
1. Scrub or peel the potatoes and put them into a pot of cold water.

Want to get the prep work out of the way on a busy day filled with meal preparations? Typically I pull my family into the kitchen the night before the holiday meal. Together, we scrub and chop potatoes. We put them into a large pot, cover them with cold water, put on a lid, and leave them until boiling and mashing time the next day.

potatoes

2. Make mashed potatoes, then use your crock pot to keep them warm.

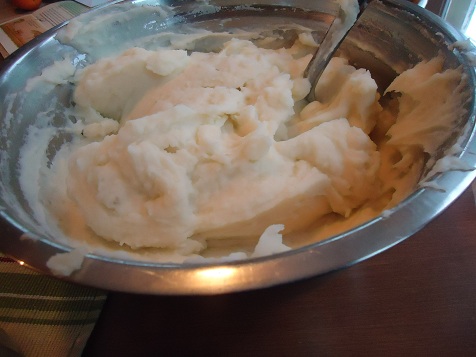
What I find very helpful is to follow all the instructions detailed in #1 to prep the potatoes the night before. The next morning – hours before our meal – I cook, drain, and mash. I then put them into a crock pot (with butter, always) on the “keep warm” setting until serving time. In the meantime, I can wash and put away the potato pot, then focus on other meal prep that needs to be done.

3. Embellish the mashed potatoes before freezing them.

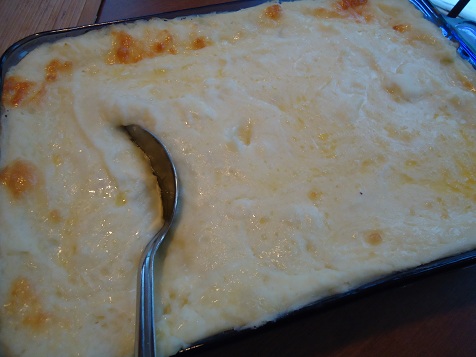
While mashed potatoes don’t freeze well as-is, they do freeze well if you add some goodies to them. Take a look at the recipe below for all the specifics! When made like that, they do freeze well. Or, at the very least, you can make them a few days before your holiday meal, refrigerate them, then bake them on serving day. This is the method I plan on using this holiday season.

cheesy_mashed_potatoes

Cheesy Mashed Potatoes are always a huge hit. You can’t go wrong with sour cream and cheese right?

Make-Ahead Cheesy Mashed Potatoes

Yum

5.0 from 1 reviews
Make-Ahead Cheesy Mashed Potatoes
 
Save Print
Author: Laura
Serves: 8-10 servings
Ingredients
  • 8 medium-sized potatoes
  • 1 cup milk (more or less as needed)
  • sea salt to taste
  • 3 Tablespoons butter
  • 1 cup sour cream
  • 1 cup shredded cheese
Instructions
  1. Scrub and cube potatoes.
  2. Boil them in water until tender.
  3. Drain water and mash potatoes with milk and salt until smooth.
  4. Stir together the mashed potatoes, butter, and sour cream.
  5. Spread into a 3 quart casserole dish.
  6. Sprinkle cheese on top.
  7. Refrigerate until you are ready to bake this dish.
  8. Bake in a 350° oven for 45 minutes.
3.4.3177

Freezing Instructions:

Make the potatoes as directed in the recipe above. All it to cool completely. Cover and freeze for up to three months.

To bake and serve, thaw potatoes in the refrigerator and bake as directed. OR, cover the frozen dish with foil. Place the frozen dish of potatoes into a cold oven*. Turn the oven on to 250° and bake for 2 hours. Turn the oven up to 350° to continue baking to heat through.

*Be sure your oven is cold when you put in the frozen dish! Otherwise, the pan will crack because of the extreme temperature change.

What has been your experience with making potatoes ahead of time?

Here are the quick links to all the recipes we covered in this series:

  • Make-Ahead Turkey
  • Stuffing Muffins
  • Cheesy Mashed Potatoes
  • Oh Good Gravy
  • Green Bean Casserole
  • How to Make Frozen Pies
  • Simple Whipped Sweet Potatoes
  • How to make Whipped Cream
  • Whole Wheat Stir-and-Pour Dinner Rolls

~~~~~~~~~~~~~~~~~~~~~~~~~~~~~~~~~~~~~~~~~~~~~

Simple Meals is here! It’s saving my brain (and many of yours too!). If you haven’t joined yet, now’s the time. Get all the details here!

728x90

Heavenly Homemaker's Club Members: Access your homepage and all your fantastic resources here! Not a member yet? Please join us!

Make-Ahead Turkey ~ Yes You Can!

November 3, 2015 by Laura 73 Comments

This post may contain affiliate links. For more information, please see our disclosure policy.

Make-Ahead Turkey? Oh yes, indeed!

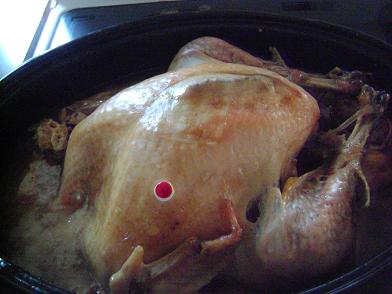
turkey22sm

There are people who wake up in the middle of the night to begin cooking their turkey for a holiday meal. There are people who baste and stuff and rub down their bird. These people are so very nice and dedicated to poultry perfection.

And then there’s me.

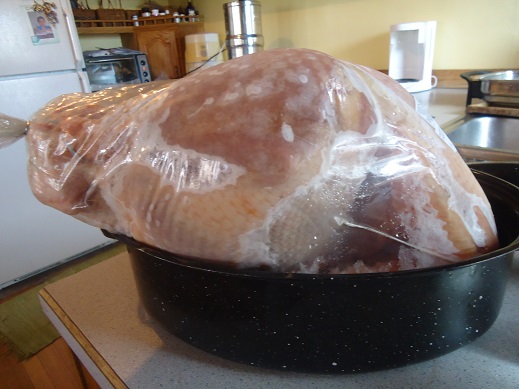
huge turkey 1

That is one huge bird.
Read the whole tale here.

I cannot find it within myself to do any of this to my turkey. I’m just not as devoted of a holiday baker as some. I’m a plop the bird in a pan, add nothing to it, cover it, put it in the oven, and take it out a few hours later kind of girl.

And…my favorite turkey baking tip of all: I cook my bird before the holiday. Like, two days before, usually.

I bake it, de-bone it, prepare all the broth, dispose of the carcass – basically I do all the messy, tedious, laborious turkey work ahead of time. Then on the day of the holiday feast, I take out my big dish of cooked meat, pour on a little broth, cover it, rewarm it, and we eat it. This is stress-free turkey baking.

My turkey always still tastes delicious.

That’s why I keep doing it this way.

No, our table doesn’t hold a big un-carved turkey. There is no turkey carving tradition at our house. For those who love traditions like this, I say go for it! Baste and carve and enjoy that special tradition.

But for those who find the turkey to be tedious, you might instead consider making it ahead of time.

But won’t the meat be dry?

Not if you don’t over-bake it in the first place.

The trick is to drizzle broth over your cooked, de-boned meat (I’d say one-two cups of broth per 9×13 inch dish full of meat), then cover the dish well. I warm it on Thanksgiving day for 30-45 minutes in a 300-350° oven along with other dishes that are baking. I pull it out and have a steaming, moist, delicious pan of turkey.

Make-Ahead Turkey

Yum

4.8 from 5 reviews
Make-Ahead Turkey
 
Save Print
Author: Laura
Ingredients
  • 1 Turkey
  • Seasonings of your choosing
  • 1 Large Roasting Pan
  • Foil if necessary
Instructions
  1. Place the turkey in the refrigerator for 3-4 days until thawed.
  2. Remove the bag of giblets from the inside of the turkey.
  3. Empty the giblets into your roasting pan as they help make a good, rich broth.
  4. Place the bird, breast side up, into a large baking pan or roaster.
  5. Season however you like.
  6. Cover with foil or with your roaster lid.
  7. Cook at 325° for 15-20 minutes per pound.
  8. You know your turkey is done cooking when the red thing pops up, or when the legs start to pull away from the body. It should be golden brown and slightly crisp looking.
  9. Be sure to save the broth that formed naturally!
  10. Allow the turkey to cool, then de-bone completely. Store meat in baggies or in covered pyrex dishes in the refrigerator.
  11. Save turkey carcass to make another round of broth for gravy, soup, and other nourishing meals.
  12. On serving day, drizzle a liberal amount of broth (one-two cups per 9x13 inch pan of meat) over turkey, cover and warm in 300°-350° oven for 30-45 minutes or until meat is hot and steamy.
  13. Serve right away.
3.5.3251

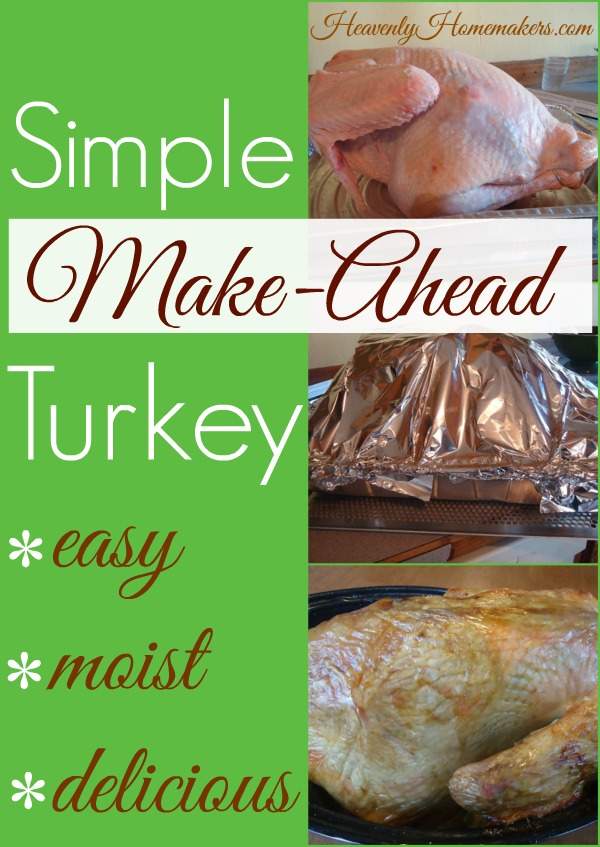
Simple Make-Ahead Turkey ~ Easy, Moist, Delicious

Additional Turkey Tips:

  • Adding a few onions to the turkey while baking is an effortless way to add more flavor.
  • Be sure to save the broth that forms naturally while your bird bakes.
  • Do not wait until your turkey is cold to take the meat off the bones. This makes the job much harder!
  • After you’ve taken all the meat off the bones, save the bones and put them into a stock pot. Fill the pot with water, carrots, onions, and any other veggies you like. Salt liberally. Cook on low for 4-6 hours to create a wonderful broth. Strain out bones. Blend the veggies until smooth and stir them back into the broth for added richness.
  • Use turkey broth for gravy. Use it to make Turkey and Noodles a few days after Thanksgiving. Use it for any soup or recipe that calls for chicken broth.
  • While making your turkey ahead of time is wonderfully helpful in cutting down work on your holiday meal serving day, you don’t want to make it too far in advance! I recommend making it on Tuesday or Wednesday, then serving it on Thanksgiving Thursday.

What’s your turkey tradition? To carve, or not to carve? To baste, or not to baste? Ever made a turkey ahead of time?

Here are the quick links to all the recipes we covered in this series:

  • Make-Ahead Turkey
  • Stuffing Muffins
  • Cheesy Mashed Potatoes
  • Oh Good Gravy
  • Green Bean Casserole
  • How to Make Frozen Pies
  • Simple Whipped Sweet Potatoes
  • How to make Whipped Cream
  • Whole Wheat Stir-and-Pour Dinner Rolls

~~~~~~~~~~~~~~~~~~~~~~~~~~~~~~~~~~~~~~~~~~~~~

Simple Meals is here! It’s saving my brain (and many of yours too!). If you haven’t joined yet, now’s the time. Get all the details here!
728x90


~~~~~~~~~~~~~~~~~~~~~~~~~~~~~~~~~~~~~~~~~~~~~~~~~~

Subscribe for FREE to Heavenly Homemakers so you won’t miss all the new Simple Recipes and ideas we share to save you money!

Heavenly Homemaker's Club Members: Access your homepage and all your fantastic resources here! Not a member yet? Please join us!
{Low Sugar} Lemon Melt-Away Cookies

October 29, 2015 by Laura 10 Comments

This post may contain affiliate links. For more information, please see our disclosure policy.

I’m almost embarrassed to admit to you how many batches of Easy {Low Sugar} Cookies our family has eaten since I posted the recipe in September. We all declare these to be the best “why would we ever need more sugar in these cookies” cookies. They are incredibly delicious just as they are. I make them often. You should too.

Easy {Low Sugar} Cookies

Low Sugar Lemon Melt-away Cookies

Yum

I’ve long since stopped rolling and cutting when I make those cookies. After all – if life is too short to knead bread dough, it’s certainly too short to get out a rolling pin and cookie cutters. (Although I will be rolling and cutting for the holidays because there are laws enforcing the making of cookies into the shape of trees and stars and candy canes at Christmastime.) Instead of rolling and cutting in the non-holiday season though, I’ve been either freezing and slicing or simply dropping and squooshing (as detailed below).

Every time during the past few weeks I’ve made the drop and squoosh sugar cookies, Malachi walks by and says, “Man, I always think these are some kind of lemon cookies. Mom, you should make these into lemon cookies.”

Either my kids are related to me, or they just naturally get inspired with, “great recipe. now let’s tweak it.” Some of my best recipe ideas come from the brains of my boys. Need I remind you of the Pineapple Fluff Salad? Or the 5-Minute Stove-Top Granola? Now, allow me to introduce you to {Low Sugar} Lemon Melt-Away Cookies.

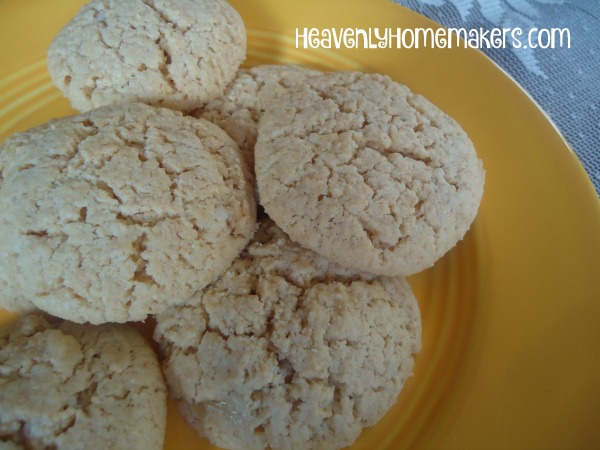
Lemon Melt-Away Cookies

I simply added 2 Tablespoons of lemon juice to my Easy {Low Sugar} Cookies recipe and voila: {Low Sugar} Lemon Melt-Away Cookies. If we loved the regular version, we love the lemon version even more. I used the drop and squoosh technique, which is the method all the professionals use. To squoosh is a real thing. I definitely did not make up the term five minutes ago. All the famous chefs squoosh. Squooshing is a well-known culinary term just like saute, dredge, and braise. (Though it might be used more often by cooks who say “slap it down into a pan,” “toss in a little of that,” and “throw it down on the table.” Still. Professional.)

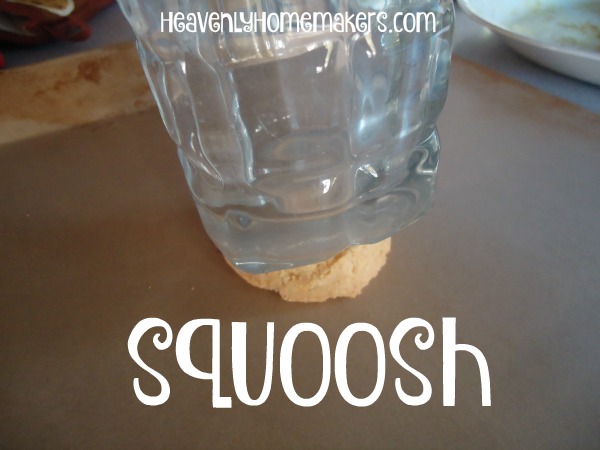
Simply put, to squoosh is to press down lightly on a ball of cookie dough with the bottom of a drinking glass. Dip the glass into a small amount of sugar if necessary to keep it from sticking. Drop a scoopful of dough, squoosh it down with the bottom of a glass. Drop, squoosh, drop, squoosh. Or, to be more efficient: drop, drop, drop, drop, drop (x24) – squoosh, squoosh, squoosh, squoosh (and so on).

It looks something like this:

squoosh

It must please you so much to be taught these professional terms so that you can impress everyone around you as you cook and bake. “What are you doing?” a friend will ask. “Oh, I’m just squooshing my cookies,” you’ll reply. Then your friend will nod in quiet appreciation at both your skill and your knowledge. They will also enjoy eating your cookies.

Now I shall give you the Low Sugar Lemon Melt-Away Cookie recipe that will have you squooshing in no time.

{Low Sugar} Lemon Melt-Away Cookies
 
Save Print
Author: Laura
Serves: 24-30
Ingredients
  • 1 cup melted butter
  • ½ cup sucanat or raw sugar
  • 2 Tablespoons lemon juice
  • 2 eggs
  • 1 teaspoon vanilla extract
  • 1 teaspoon baking powder
  • 3 cups of whole wheat pastry flour (give or take)
Instructions
  1. Stir together melted butter and sugar.
  2. Add lemon juice, eggs, vanilla, and baking powder.
  3. Stir in flour until a solid ball of dough forms.
  4. Drop teaspoon-sized balls of dough onto a cookie sheet, about an inch apart.
  5. Squoosh the dough down gently with the bottom of a glass.
  6. Bake in a 350° oven for 10-12 minutes or until cookies are lightly browned.
3.4.3177

Low Sugar Lemon Melt-Away Cookies ~ Easy!

It’s time to start squooshing, friends. Is this a skill you’ve already mastered, or is this one a new one for you? Let the squooshing begin.

Heavenly Homemaker's Club Members: Access your homepage and all your fantastic resources here! Not a member yet? Please join us!

Whole Wheat Stir-and-Pour Sandwich Bread. YES, it works!

October 28, 2015 by Laura 165 Comments

This post may contain affiliate links. For more information, please see our disclosure policy.

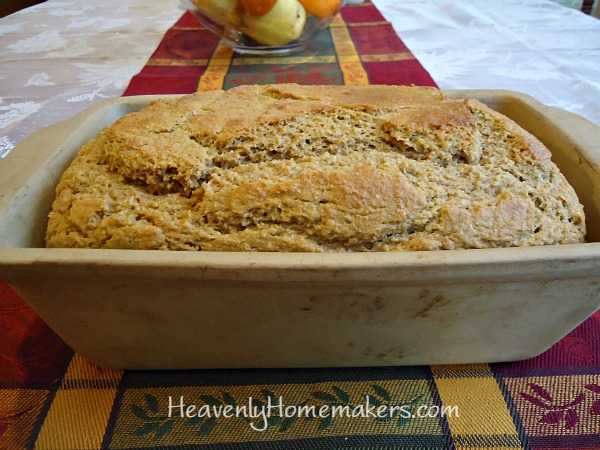
stir and pour bread loaf 4

Yum

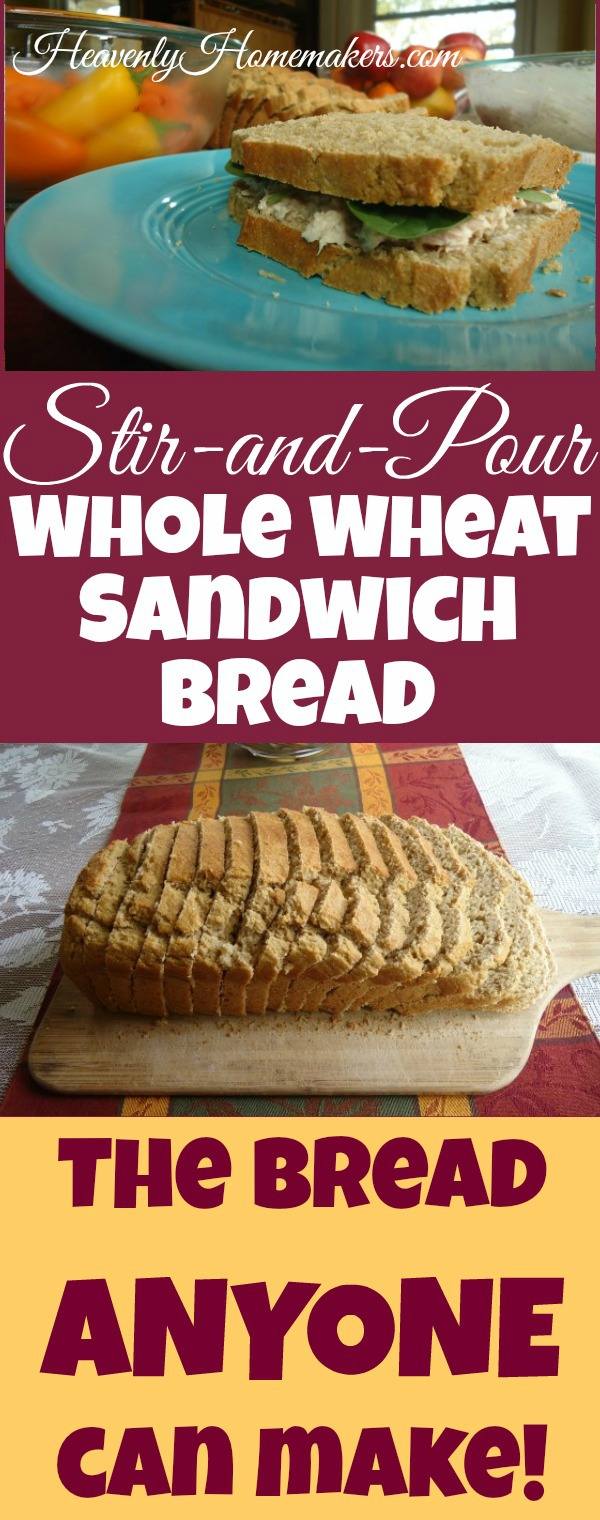
If you haven’t tried this Whole Wheat Stir-and-Pour Bread yet, I’m here to give you more reasons to make it.

First, you make it exactly like the title implies: You stir the ingredients together, then your pour them into a pan to bake. It is easier than making brownies from a box and it is HOMEMADE BREAD. It makes amazing bread without a mess, without kneading, and without blocking out a four-hour period of time. I am so amazed at this!

Second, it only costs about $1.00 – for 100% whole grain bread with totally pure ingredients. Third, it’s homemade bread, which is obviously delicious so you should need no other reasons to make this, but I’ll give you some anyway. Fourth, anyone can make it. Anyone. Even me, while I’m having a conversation with someone. I know!

Last weekend we had company. We all know I can’t talk and cook at the same time. I always have to either pick very easy meals to make for guests, or make most of the food ahead of time. Otherwise my talker and my thinker blow up all over the kitchen which results in burnt muffins, which doesn’t even matter because I have forgotten to put baking powder in them anyway.

But last weekend, I made this Whole Wheat Stir-and-Pour Bread while having a conversation with my guests that actually made sense. This is monumental.

I’m not sure which is more impressive about this bread recipe:

  • A three year old can make it.
  • Laura can make it while talking to guests in her kitchen.

Here, because you need to see this again (click here if this video doesn’t show up for you):

Not to take away from the three year old Cooking Guy, but you really must be impressed with this: Laura can make this bread at the very same time that she is telling a story to her out-of-town guests. You know this is a big deal.

Now, reason number 5 why you should make Whole Wheat Stir-and-Pour Bread and the actual reason I am writing this post:

This recipe makes a great Whole Wheat Sandwich Bread.

After I posted the recipe a couple weeks ago, many of you asked if it could be made into a bigger loaf for sandwiches. I decided to be nice and try it out. After all, I knew that if it didn’t work, I’d only be out about ten minutes of work time and I could use the results to make bread crumbs.

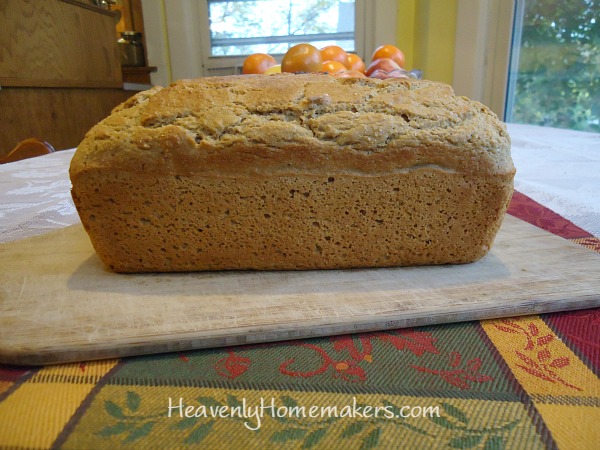
stir and pour bread loaf 5

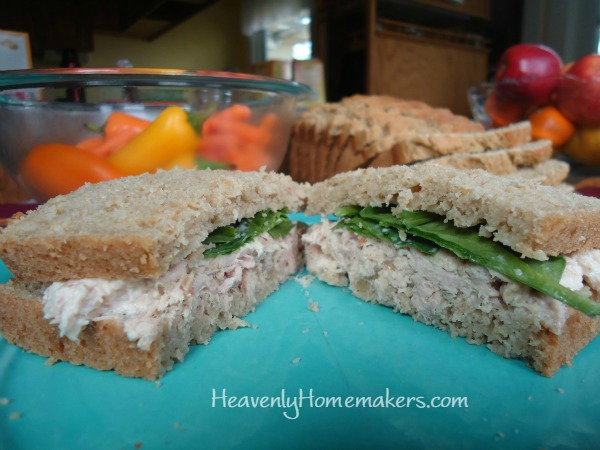
It works, it works, it works! This recipe makes an amazing loaf of sandwich bread! You are going to love this!

stir and pour sandwich 3

Pssst!

Your interest in this recipe leads me to believe you like to keep things simple. Oh my stars, you and me both. The simpler the better! Though I don’t like to compromise on nutrition. (Another great thing about this bread recipe!)

728x90

To go with this bread, I invite you to join us in enjoying Simple Meals week after week. It saves us all time, money, and energy so we can enjoy nourishing, delicious meals without sacrificing time with family!

Now, back to the bread…

Some tips I’ve learned about varieties of Whole Wheat Stir-and-Pour Bread

  • You can pour it onto a cookie sheet to bake, which takes a very short time since it is all spread out. (Details here.)
  • You can pour it into two loaf pans to make small loaves. (Details here.)
  • Or, you can pour it all into one buttered loaf pan to make one large sandwich loaf. (Love this, love this, love this!! Details below.)

How to make the best Stir-and-Pour Sandwich Bread

  • Butter your loaf pan well before pouring in the bread mixture.
  • Bake it at 350° for 50-60 minutes.
  • Let it sit in the loaf pan for about 15 minutes after it comes out of the oven.
  • Remove it from the pan after 15 minutes.
  • Allow it to cool completely before slicing.

All of us love bread right out of the oven, right? I kept trying to slice this bread right away, which resulted in a very messy loaf. Delicious, but messy.

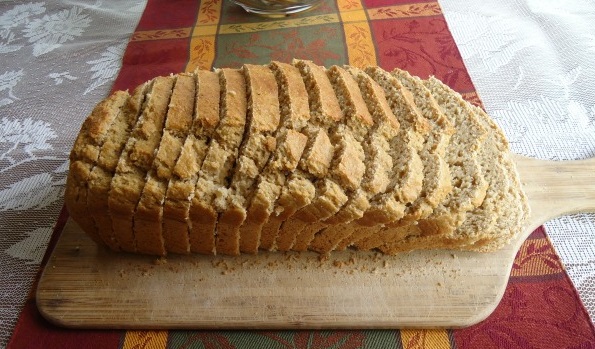
When I let it cool before slicing, this bread becomes magic. It slices like magic. It tastes even better (I’m not sure how). And then it works wonderfully for sandwiches.

stir and pour sandwich 12

As much as I love my old recipe for Honey Whole Wheat Bread, I will probably never make it again. Why would I, when the Stir-and-Pour Bread is just as delicious and forty times easier and faster? And it works better for sandwiches! Please try making this bread. I’ve said it before and I will say it again: this bread will change your life.

Easy Stir and Pour Whole Wheat Sandwich Bread

I originally posted this recipe here, and I encourage you to read through it for more specifics. But I will post the recipe again with the details of making it into one sandwich loaf. This is my way of saying: GO MAKE THIS BREAD! ALL OF YOU! ANYONE CAN DO THIS!

4.7 from 20 reviews
Whole Wheat Stir-and-Pour Sandwich Bread
 
Save Print
Prep time
10 mins
Cook time
1 hour
Total time
1 hour 10 mins
 
Author: Laura
Serves: 1 loaf
Ingredients
  • 4 cups whole wheat flour (I use freshly ground hard white wheat)
  • 2 teaspoons active rise yeast
  • 2 Tablespoons sucanat or sugar or honey
  • 1 teaspoon sea salt
  • 1 egg (optional)
  • ¼ cup heavy cream (optional)
  • 2 cups warm water
Instructions
  1. Stir all ingredients together.
  2. Cover and allow it to sit for 30 minutes.
  3. Pour contents into a well-buttered loaf pan.
  4. Bake in a 350° for 50-60 minutes or until evenly browned.
  5. Allow it to sit in the pan for 15 minutes.
  6. Remove the loaf to let it cool completely before slicing.
3.4.3177

Tell me if you’ve made this recipe already! Love it?? Go get out your mixing bowls. Your life is about to change.

Don’t forget to check out Simple Meals. You are going to love this!

page_header

Heavenly Homemaker's Club Members: Access your homepage and all your fantastic resources here! Not a member yet? Please join us!

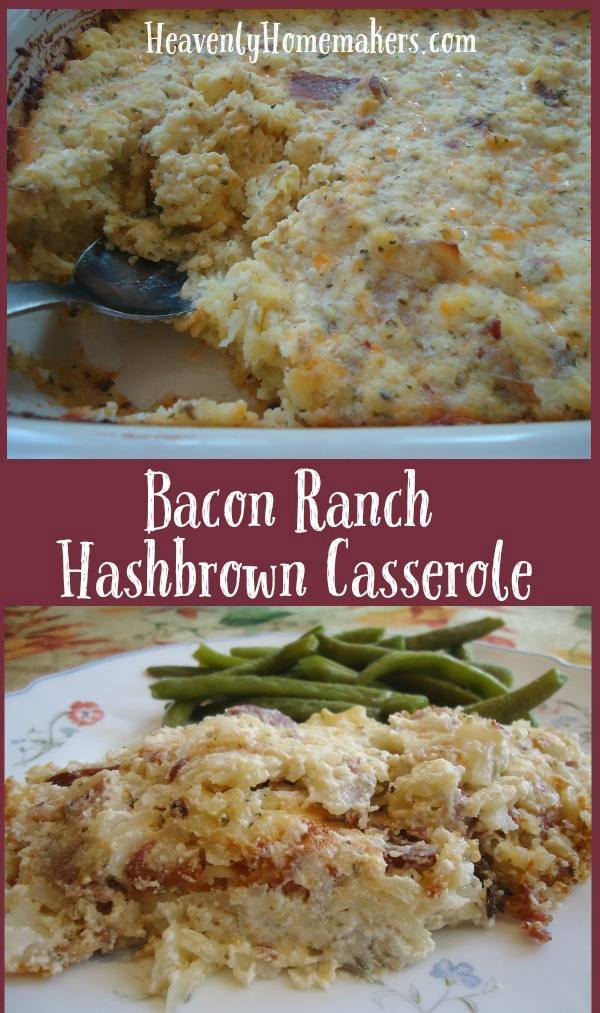
Bacon Ranch Hashbrown Casserole

October 21, 2015 by Laura 4 Comments

This post may contain affiliate links. For more information, please see our disclosure policy.

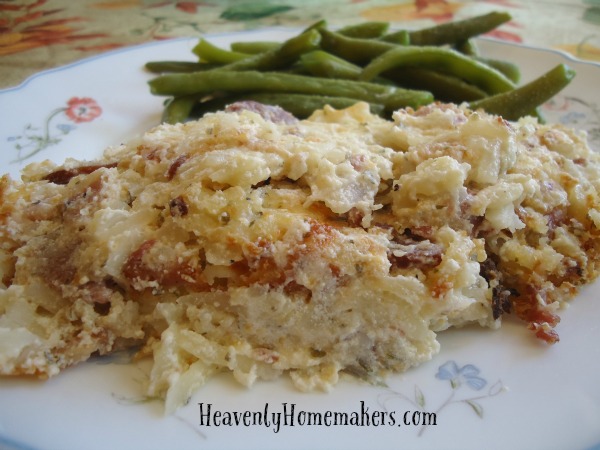
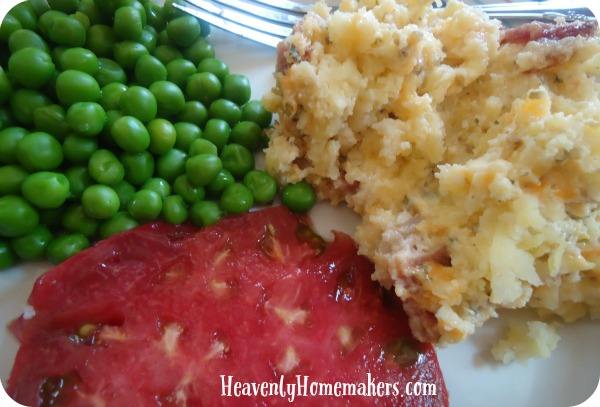
Bacon Hashbrown Casserole

Yum

A friend had just stopped by when I was pulling this dish out of the oven for lunch earlier this week. It smelled quite amazing. She asked what it was, so I went down the list of ingredients our lunch included, “bacon, ranch dressing, sour cream, cheese…” Then this is when she said,

“Bacon? Ranch? Cheese? With all that in it, you know it’s going to be good!”

Yep, pretty much. What’s not to love?

You might also love knowing how easy this is to make. Cook the bacon, stir in the other ingredients, spread it all in a cooking dish, put it into the oven. Easy. It does help if you have premade frozen hashbrowns and a jar of homemade ranch dressing mix ready to go. Just please put the lid on your ranch dressing before you shake it up. Please. I’m only here to help.

A big thanks to Plain Chicken for the idea for this recipe! I’m excited to think about possibilities of ways to continue tweaking this. Maybe add some cooked chicken to the mix? What else can you think of to add to this dish?

Bacon Ranch Hashbrown Casserole
 
Save Print
Author: Laura
Serves: 10 servings
Ingredients
  • 1 pound bacon
  • 2 cups shredded cheddar or Colby jack cheese
  • 3 cups sour cream
  • 3 Tablespoons Ranch Dressing Mix
  • 1 bag of frozen shredded hashbrowns (about 8 potatoes worth of homemade)
Instructions
  1. Cut bacon into bite-sized pieces and cook.
  2. Drain grease.
  3. In a large bowl, stir together cooked bacon, shredded cheese, sour cream, and ranch dressing mix.
  4. Fold in frozen hashbrowns until all ingredients are well combined.
  5. Bake uncovered in a 350° oven for 45-60 minutes or until casserole is lightly browned and bubbly.
3.4.3177

Some recipes you’ll need to go along with this one:

Homemade Ranch Dressing Mix

Homemade Hashbrowns

Lately I’ve been finding really great deals on packaged hashbrowns at the store, so I’ve picked up a few to save me some time. I much prefer homemade, but busyness doesn’t always allow me the luxury. It’s good to be relaxed and flexible about healthy eating, right? Right.

So far I’ve only served this casserole for lunch or dinner. But I also think it would be great for breakfast or brunch!

Want to make Bacon Ranch Hashbrown Casserole ahead and freeze it for later? Here’s how:

Make the casserole as directed. Before baking, cover well and freeze for up to three months. To cook and serve – thaw and bake as directed. Or, cover frozen casserole and place it into a cold oven. Turn the oven on to 225° and bake for 2-3 hours or until casserole has thawed, baked, and is heated through.

Bacon Ranch Hashbrown Casserole - Easy!

Note: This recipe is naturally gluten free. Hold onto this one if you have to avoid gluten – or so that you can bless friends who eat gluten free!

I’ll definitely be making this casserole often! Since it’s freezer-friendly, I’ll likely be making two or three at once so I can have no-brainer meals on hand for busy nights. After all, why dirty up more dishes tomorrow when tomorrow will have enough dirty dishes of its own? Right??

Heavenly Homemaker's Club Members: Access your homepage and all your fantastic resources here! Not a member yet? Please join us!

Hamburger Pot Pie Recipe – Nourishing Comfort Food

October 14, 2015 by Laura 4 Comments

This post may contain affiliate links. For more information, please see our disclosure policy.

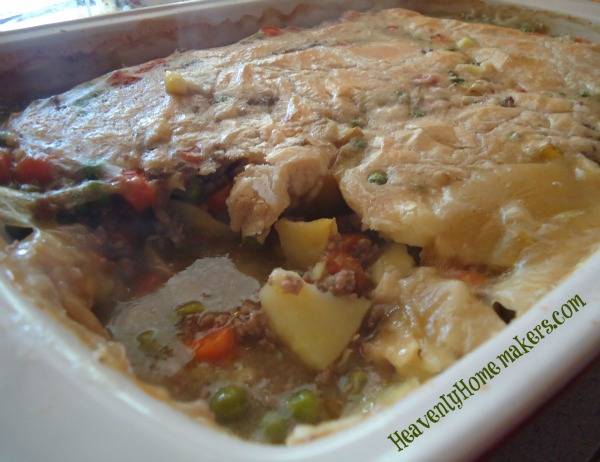
Hamburger Pot Pie22

Oh comfort food. You are so…comforting.

If you love Chicken Pot Pie, you will love this Hamburger Pot Pie. I actually think I like this one even better. (No surprise there. I’m a beef-loving girl.) Pin this recipe so you can use it to keep yourself warm all winter long.

For the record, if you need to eat gluten free – or if you’re like me and you’re more into meat and veggies than bread – you can skip the topping on this and just eat it in a bowl like Hamburger Soup.

Hamburger Pot PieYum

4.5 from 2 reviews
Hamburger Pot Pie
 
Save Print
Prep time
30 mins
Cook time
45 mins
Total time
1 hour 15 mins
 
Author: Laura
Serves: 8-10
Ingredients
  • 1 pound hamburger meat
  • 1 small chopped onion
  • 6 cups beef broth
  • 4 large carrots, peeled and cut into bite sized pieces
  • 6 medium potatoes, peeled and cut into bite sized pieces
  • 2 cups frozen peas
  • Sea salt and pepper to taste
  • ⅓ cup cold water
  • 2 Tablespoons organic corn starch, arrowroot powder, or wheat flour
  • 1 cup milk
  • 1 cup mayonnaise (I use Hain Safflower Mayonnaise)
  • 1 cup whole wheat flour (I use freshly ground flour from hard white wheat)
Instructions
  1. In a large cooking pot, brown hamburger and onion together.
  2. Stir in broth and prepared veggies.
  3. Cook until veggies are tender.
  4. Mix cornstarch with water until smooth. Stir mixture into the broth/veggies, cooking for about one minute on the stove to help the mixture thicken.
  5. Pour contents into a 9×13 inch baking dish.
  6. In a separate bowl, stir together milk, mayo, and flour.
  7. Spread mixture over the veggies in the baking dish.
  8. Bake in a 350° oven for about 45 minutes or until the crust is golden brown.
3.4.3177

To save money and add nourishment, I recommend making your own broth for recipes like this one. Here’s How to Make Beef Broth. While we’re at it, here’s How to Make Chicken Broth. :)

Hamburger Pot Pie

What are your favorite winter comfort foods? Which do you typically enjoy more – hamburger or chicken?

Heavenly Homemaker's Club Members: Access your homepage and all your fantastic resources here! Not a member yet? Please join us!
« Previous Page
Next Page »

Join Our Community!

 Facebook Twitter E-mail Instagram Pinterest

Popular Posts

~ Will All of the Real Moms Please Stand Up?
~ Easy! Stir-and-Pour Whole Wheat Bread
~ How to Make Gatorade
~ 31 Real Food Breakfast Ideas
~ Dear Teenage Girls...
~ When Mom Takes a Step Back
~ The Inexpensive Health Insurance We Love!
~ Let's Talk Real Food Grocery Budgets

Check out our latest posts!

  • Big Family Food and Fun: September 6-12, 2026
  • Big Family Food and Fun: August 30-September 5, 2026
  • Big Family Food and Fun: August 23-29, 2026
  • Big Family Food and Fun: August 16-22, 2026
  • Big Family Food and Fun: August 9-15, 2026
Home  ~  Simple Meals  ~  Club Membership  ~  Shop  ~  Privacy Policy  ~  Disclosure  ~ Contact

Copyright © 2026 · Beautiful Pro Theme on Genesis Framework · WordPress · Log in