Heavenly Homemakers

Encouraging women in homemaking, healthy eating and parenting

  • Home
    • About
    • FAQs
  • Recipes
    • Bread and Breakfast
    • Condiments
    • Dairy
    • Main Dishes
    • Side Dishes and Snacks
    • Desserts
    • Gluten Free
    • Instant Pot
    • Crock Pot
    • Heavenly Homemaker’s Weekly Menus
  • Homemaking
    • Real Food Sources
  • Store
  • Contact
    • Advertise
    • Disclosure
    • Privacy Policy
  • Simple Meals
  • Club Members!

Homemade {Easy} Tapioca Pudding

December 31, 2014 by Laura 41 Comments

This post may contain affiliate links. For more information, please see our disclosure policy.

You know what’s bad about feeding my family beans? (Well, besides that.)  It’s that I almost always forget to soak the beans ahead of time. This does not work, even a little bit, unfortunately. Crunchy beans do not make good chili.

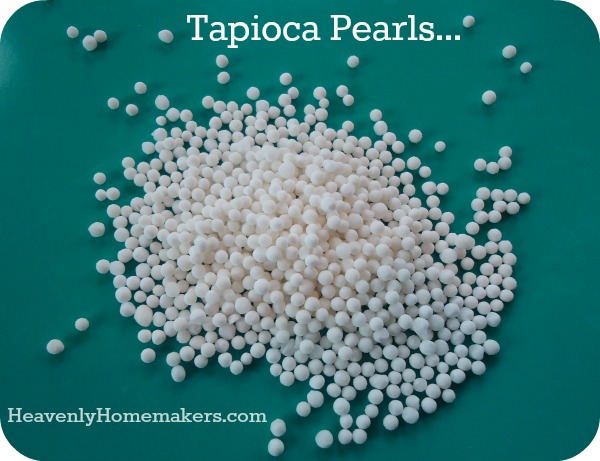
As you can imagine, then, when it comes to making Tapioca Pudding, I am never prepared. Every recipe I’ve found calls for soaking the tapioca pearls overnight or longer. Then, most of them tell me to cook the tapioca pudding for a bazillion minutes in a double boiler.

tapioca pearls

See, I’m just not into recipes that require all kinds of thought and effort. Plus, I don’t even own a double boiler. My rebellious “yeah, I don’t want to go to the trouble to do it that way” recipe reading self sometimes gets into trouble. Usually though, I find that I can take short-cuts and still turn out a good product.

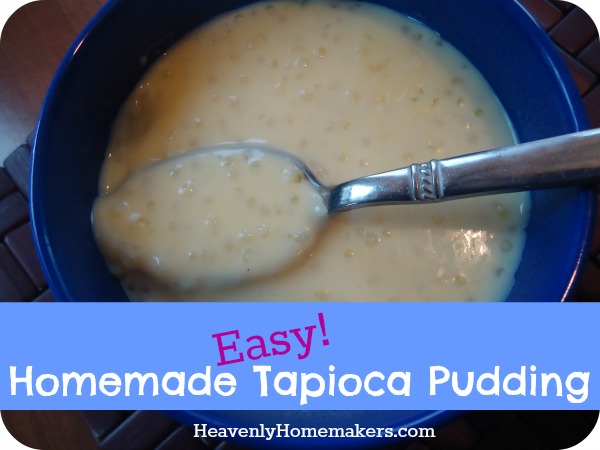
Real food recipes become easy, time consuming tasks become effortless, and recipes with twenty-seven steps become no-brainers. This is how this Tapioca Pudding recipe came to be. I suddenly got hungry for the comfort food Tapioca Pudding…and I wanted some right now. “Soak the tapioca pearls in milk then cook it in a double-boiler until Christmas morning 2019” just wasn’t going to cut it. What if? I thought. What if I just pour the tapioca into the milk along with my other delicious ingredients, and start cooking it in a plain ol’ saucepan?

But then the Follow All Instructions Exactly Police showed up at my door, so I’m actually writing this post from prison.

At least we can now all benefit from knowing this is super easy and delicious way to make Tapioca Pudding. Here’s how I did it:

Homemade {Easy} Tapioca PuddingYum

5.0 from 2 reviews
Homemade {Easy} Tapioca Pudding
 
Save Print
Author: Laura
Serves: 4-6
Ingredients
  • 1 cup tapioca pearls (unsoaked, booyah!)
  • 4 cups whole milk
  • 4 egg yolks (save the whites for something else)
  • ¼ teaspoon sea salt
  • ¼ cup real maple syrup (more if you like)
  • 1 teaspoon real vanilla extract
Instructions
  1. Measure tapioca pearls, milk, egg yolks, sea salt, and maple syrup into a medium sauce pan.
  2. Use a whisk to cook and stir constantly over medium-low heat for about 15 minutes or until tapioca pearls have "popped" and pudding is thick.
  3. Remove from heat and stir in vanilla.
  4. Serve right away, or refrigerate.
  5. This tastes great hot or cold.
3.4.3177

Homemade Tapioca Pudding - Easy!

I have yet to convince my boys that Tapioca Pudding is the bomb-diggity of comfort foods. You’d think me calling cooked tapioca pearls “eye-balls” would have at least intrigued them a little bit, but nope. They think those tapioca things are weird. My youngest actually suggested that perhaps Tapioca Pudding might taste good “without those tapioca things.” Oh well, more for me.

Do take heed of the “stir constantly” instructions in this recipe. While I’m obviously always eager to break rules and go about cooking my own way without following recipes word-for-word, walking away from your cooking tapioca pudding would be a very, very bad idea. Scorched milk, crunchy uncooked tapioca pearls, and black floaties in your pudding really will cause the I Told You So Police to show up at your door. Ask me how I know.

Are you a fan of tapioca pudding, or would you rather it didn’t have those tapioca things in there?

Heavenly Homemaker's Club Members: Access your homepage and all your fantastic resources here! Not a member yet? Please join us!

Cheesy Vegetable Casserole

December 20, 2014 by Laura 45 Comments

This post may contain affiliate links. For more information, please see our disclosure policy.

This Cheesy Vegetable Casserole makes it possible to help your entire family enjoy veggies!

XmasBrunch2011

This recipe is versatile so you can add your family’s favorite veggies – or be creative so you can learn to eat new ones. The mixture of all these ingredients makes any vegetable taste great!

Cheesy Vegetable CasseroleYum

Cheesy Vegetable Casserole
 
Save Print
Author: Laura
Ingredients
  • 2 pounds fresh variety of vegetables of your choice (broccoli, cauliflower, carrots, green beans, zucchini, or asparagus all work well)
  • ¼ cup chopped onion
  • ¼ cup melted butter
  • ½ cup mayonnaise (I use Hain Safflower)
  • 1 cup sour cream
  • 1  ½ cups shredded cheese (cheddar or Colby jack work well)
  • ½ teaspoon sea salt
  • ¼ teaspoon ground pepper
  • ¼ teaspoon garlic powder
Instructions
  1. Chop vegetables into bite-sized pieces.
  2. Stir all ingredients together in a large bowl.
  3. Pour into a 2-quart baking dish.
  4. Bake, uncovered, for 45-60 minutes in a 350° oven.
3.4.3177

Cheesy Veggie Casserole

This recipe is perfect to add to your holiday brunch table. Here are some dishes I recommend serving with your Cheesy Vegetable Casserole for brunch:

  • Angeled Eggs
  • Bacon Tomato Dip with Baked Tortilla Chips
  • Fruit Salad
  • Honey Peanut Bars
  • Hot Spinach and Artichoke Dip
  • Nectarine Cream Cups
  • No-Bake Chocolate Fudge Bites
  • No-Bake Peanut Butter Cookie Bites
  • No-Bake Snickerdoodle Bites
  • Pineapple Fluff Salad
  • Ranch Cheese Ball
  • Beef Summer Sausage
  • Barbecue Brisket
  • Crock Pot Barbecue Chicken Breasts
  • Turkey Ranch Pinwheels

The thing about brunches is that you’re wide open to serving just about anything – from main dish to side dish to breakfast dish to dessert. That’s what makes them fun. Putting this Cheesy Vegetable Casserole on the table – even with other breakfast type foods like muffins and sausage – really adds something special. And let’s not forget that it means your putting veggies on the table. With cheese. Veggies with cheese are always a hit!

What are your favorite dishes to add to a brunch table?

Check out DHGate for their fun kitchen gadgets!

Heavenly Homemaker's Club Members: Access your homepage and all your fantastic resources here! Not a member yet? Please join us!

Simple Pumpkin Pancakes

November 21, 2014 by Laura 7 Comments

This post may contain affiliate links. For more information, please see our disclosure policy.

It might be apparent to you at this point that I am on a big pumpkin kick right now. First Pumpkin Breakfast Cake, then Pumpkin Cheesecake, now Simple Pumpkin Pancakes. It’s just one more way to add vegetables to our table, plus it’s delicious – so why not? That, and I have oodles of pumpkin puree at my house right now, so I’m making everything I can think of. My family rejoices.

It is important to note that I often use butternut squash in many of the pumpkin recipes I am making. Pumpkin and butternut squash are interchangeable in recipes. Many a pumpkin pie at my house is actually butternut squash pie, but don’t tell.

Want to know how to easily cook a pumpkin (or butternut squash)? Cooking them whole is the easiest way I’ve found to cook them to make puree. Once pureed, I use it right away or freeze it until I need it. Awesome, nutritious goodness!

These Pumpkin Pancakes stir together in just a few minutes and taste fantastic. Veggies for breakfast…woot!

Simple Pumpkin PancakesYum

1 1/2 cups whole wheat flour (I use freshly ground hard white wheat)
1 teaspoon baking powder
1/4 teaspoon sea salt
1 teaspoon ground cinnamon
2 eggs
1 cup pumpkin puree
1 1/4 cups milk
1/4 cup melted butter

Whisk ingredients together until smooth. Cook on a hot, buttered griddle, flipping once the pancake becomes bubbly on the first side. Serve with applesauce or real maple syrup. Makes about ten 3-inch pancakes.

Simple Pumpkin Pancakes

Other pumpkin (or butternut squash) recipes you’ll find here:

  • Pumpkin Chocolate Chip Bread
  • Pumpkin Chocolate Chip Muffins
  • Pumpkin Donuts
  • Warm Pumpkin Custard
  • Multi-Grain Pumpkin Waffles and Pancakes
  • Pumpkin Chocolate Chip Cake
  • Pumpkin Pecan Pie Squares
  • Pumpkin Pie
  • Pumpkin Breakfast Cake
  • Pumpkin Cheesecake

What’s your favorite way to use pumpkin (or butternut squash)?

Heavenly Homemaker's Club Members: Access your homepage and all your fantastic resources here! Not a member yet? Please join us!

BLT Wraps – The Perfect Summertime Meal

May 14, 2014 by Laura 17 Comments

This post may contain affiliate links. For more information, please see our disclosure policy.

Nothing says “I’m a humble cook” like shouting really loudly that this is the best recipe you’ll ever eat!  My bad. What can I say? There’s bacon in it. And cream cheese. The goodness of this recipes has nothing to do with me, and everything to do with the amazing mixture of ingredients all rolled up in a tortilla.

This recipe is so easy that my kids made it on their own for our family to eat on Mother’s Day. These can be made ahead of time – or at the very least, you can cook the bacon and prepare the tomatoes and lettuce so that you can put them together right before serving time.

The best part? Well…the bacon, duh. Yeah, but the other best part? These wraps really hit the spot on a hot day. There’s minimal cooking involved, so the house won’t heat up. Serve these with a variety of fresh fruit like pineapple, watermelon, or strawberries. Set out some sweet peppers, sliced cucumbers, and carrot sticks. What a wonderful, nourishing meal.

BLT Wraps

Yum

5.0 from 1 reviews
BLT Wraps - The Perfect Summertime Meal
 
Save Print
Author: Laura
Ingredients
  • 4 ounces softened cream cheese
  • ½ cup mayonnaise
  • 8 slices cooked and crumbled bacon
  • ½ cup chopped tomatoes
  • ½ cup shredded spinach, romaine, or green leaf lettuce
  • 3 eight-inch whole wheat tortillas
Instructions
  1. Mix cream cheese and mayonnaise until smooth.
  2. Stir in bacon crumbles and chopped tomatoes.
  3. Spread mixture onto tortillas.
  4. Sprinkle shredded lettuce on top evenly.
  5. Roll tortillas up tightly.
  6. Cut each into 5 diagonal slices.
  7. Chill until ready to serve.
3.4.3177


BLT Wraps

Tip: Make the cream cheese filling ahead of time and store it in the fridge. Then simply fill your tortillas at meal time, wrap, and serve! These work great for brunch, lunch, party, snack…pretty much any time.

Which do you like better: bacon or cream cheese?  How sweet it is that you can have both in this recipe, at the same time. :)

Heavenly Homemaker's Club Members: Access your homepage and all your fantastic resources here! Not a member yet? Please join us!

Easy Peanut Butter Snack Bars

November 3, 2013 by Laura 22 Comments

This post may contain affiliate links. For more information, please see our disclosure policy.

Here’s another super easy snack recipe to help us along in the Getting Ahead {Snacks} Challenge. These were a huge hit at our house – and so easy that I can definitely make these frequently!

peanut butter snack bars

Easy Peanut Butter Snack BarsYum

Easy Peanut Butter Snack Bars
 
Save Print
Author: Laura
Serves: 20
Ingredients
  • 1 cup natural peanut butter (I use homemade creamy peanut butter)
  • ½ cup butter
  • ⅔ cup sucanat or brown sugar
  • 3 eggs
  • 1 teaspoon vanilla extract
  • ½ teaspoon sea salt
  • 1 cup whole grain flour
  • ¼ cup chocolate chips (optional)
Instructions
  1. In a small saucepan, melt together peanut butter and butter.
  2. Pour mixture into a medium-sized bowl and stir in sucanat until creamy.
  3. Add eggs, vanilla, and salt, stirring well.
  4. Mix in flour until well combined.
  5. Spread mixture into a 9x13 inch baking dish.
  6. Bake in a 350° oven for about 25 minutes.
  7. Remove from oven and sprinkle chocolate chips on top if desired.
  8. Cut into about 20 bars.
3.5.3251


To freeze:  Allow bars to cool completely. Wrap them individually to keep the bars moist. Place wrapped bars in a freezer bag and freeze for up to 3 months. Thaw for at least one hour before serving.

These make for great grab-and-go snacks!

Heavenly Homemaker's Club Members: Access your homepage and all your fantastic resources here! Not a member yet? Please join us!

Homemade Chocolate Peanut Butter Cups {Real Food Recipe Makeover}

July 9, 2013 by Laura 21 Comments

This post may contain affiliate links. For more information, please see our disclosure policy.

This recipe was inspired by Laura S., someone I met at the Colorado Springs Meet and Greet. Not only was her idea brilliant, I think her name is absolutely beautiful. ;)

I wasn’t able to make these Chocolate Peanut Butter Cups look perfect and beautiful like one you’d pull out of a Reese’s wrapper. But I did make them taste better, so we’ll go with “taste before beauty” on this one. And of course, with these, you avoid the hydrogenated oils and turn out an even more delicious treat than one that comes from a factory.

Chocolate Peanut Butter Cups
Warning:  These are super rich and slightly messy. Children and adults alike may end up with chocolaty fingers and faces, not to mention a sugar high. You’re welcome and I’m sorry.

Chocolate Peanut Butter CupsYum

1/4 cup natural peanut butter
2 teaspoons honey
1 cup chocolate chips
2 Tablespoons Butter

Stir together peanut butter and honey in a small bowl. Set aside. Prepare six regular sized or 15 mini-sized muffin cups with paper liners.

In a small saucepan, melt chocolate chips and butter, stirring until melted. Spoon half of the melted chocolate mixture into the prepared paper-lined muffin cups.

pb_cups_4

Place a spoonful of peanut butter mixture into each cup, dividing the mixture evenly among the cups. Top each with the remaining chocolate, smoothing it the best you can to cover the peanut butter.

pb_cups_5

Refrigerate for two hours until solid. (Or place in the freezer for about thirty minutes to speed the process.)  Store in the refrigerator until ready to serve.

pb_cups_2
pb_cups_3
You’ll be happy to know that while playing with this idea, I also came up with a Chocolate Caramel Cup. Recipe coming soon…

Heavenly Homemaker's Club Members: Access your homepage and all your fantastic resources here! Not a member yet? Please join us!

Sweet Pepper Fritata

December 20, 2011 by Laura 143 Comments

This post may contain affiliate links. For more information, please see our disclosure policy.

I can’t decide which I like best about this dish:  looking at it…or eating it. I love that the red and green peppers make this fritata look festive for Christmas. This is very easy to make and can be put together ahead of time and baked just before serving. If you want to add a little extra protein, throw in some leftover cooked chicken or sausage.

Sweet Pepper FritataYum

1 small onion, chopped
3/4 cup chopped green pepper
3/4 cup chopped red pepper
2 Tablespoons butter
5 eggs, lightly beaten
1/2 cup chopped sun dried tomatoes
1 1/2 cups shredded cheddar cheese
1 teaspoon Worcestershire sauce
1/2 teaspoon sea salt
1/4 teaspoon black pepper

Saute onion and peppers in the butter for 5-7 minutes or until veggies are tender and your family comes running into the kitchen to see what smells so good. Meanwhile, combine remaining ingredients in a bowl. Stir sauteed vegetables into egg mixture. Pour into an ungreased pie dish. Bake in a 350° oven for 25-30 minutes or until a knife inserted in the middle of the fritata comes out clean. Serves 6-8.

Sweet Pepper Fritata

Which would you rather do – look at this, or eat it? Or maybe you could just really enjoy looking at it while you eat it. ;)

Heavenly Homemaker's Club Members: Access your homepage and all your fantastic resources here! Not a member yet? Please join us!

Yummy and EASY Sloppy Joes

September 17, 2009 by Laura 71 Comments

This post may contain affiliate links. For more information, please see our disclosure policy.

Call me weird, but I’ve about decided that Sloppy Joes are one of my favorite things to eat. I know – it’s just this spoonful of messy meat on a bun. But I love it.

sloppy_joe_1

They are just so simple to make and easy to eat, and they have such good flavor. I love making them for lunch. The meat mixture freezes well. It reheats easily. Ah, Sloppy Joes…what’s not to love?

TIP: Make 2-6 pounds of this Sloppy Joes recipe ahead of time and freeze in meal-sized portions. Thaw and reheat as needed.

TIP #2: Take this Sloppy Joe meat on the road with you! Re-heat in a crock pot in your hotel room for an easy, wholesome meal. This saves money on eating out when you travel!

Sloppy JoesYum

Yummy and EASY Sloppy Joes
 
Save Print
Author: Laura
Serves: 6 servings
Ingredients
  • 2 lbs ground meat (beef, turkey, venison or lamb)
  • 2 T. minced onion
  • 1 cup ketchup
  • 1 teaspoon mustard
  • ¼ teaspoon garlic powder
  • 1 Tablespoon worchestershire sauce
  • sea salt to taste
Instructions
  1. Brown meat and onion together.
  2. Add remaining ingredients, stirring well.
  3. Allow mixture to simmer in the skillet for a few minutes.
3.4.3177

(I’m experimenting with making my own ketchup, but in the meantime I love this brand.)

Easy Sloppy Joe Meat

We love Sloppy Joes served on these homemade buns. Shucks, I like them without a bun. A Sloppy Joe in a bowl with tortilla chips is delicious!

sloppy_joe_1

Ways to use Sloppy Joe Meat

Don’t just limit Sloppy Joes to a bun! Try using this Sloppy Joe recipe in these ways too:

  • Serve the meat in bowls, add your favorite nacho toppings, and scoop it into your mouth like nachos.
  • Make Sloppy Cornbread.
  • Make Sloppy Cornbread Muffins.

The Easiest Sloppy Joes

Join Simple Meals!

If you love simple recipes like these Sloppy Joes, you will love Simple Meals even more!

728x90

Want all the work of menu planning to be done for you? We invite you to subscribe to Simple Meals! We equip you – every single week – to put great money and time saving meals on the table – every single night!

Heavenly Homemaker's Club Members: Access your homepage and all your fantastic resources here! Not a member yet? Please join us!

Special Breakfast: Whole Wheat Waffles with Blueberry Syrup

April 7, 2008 by Laura 60 Comments

This post may contain affiliate links. For more information, please see our disclosure policy.

Pretty sure this picture right here is going to make us all want to make waffles very, very soon. Does a treat get any more delectable?

Whole Wheat Waffles

Waffles are one of our favorite breakfast foods – especially when we top them with strawberries, blueberries, and/or whipped cream. This is a great meal to feed company who is at your house for breakfast. They are so easy to make, but taste like a great treat!

My kids now call these “Super Mama Waffles.” If I was going to have a food named after me, I can’t think of one better than waffles. I’m pretty sure it’s the fruit and whipped cream that make these waffles super.

Keep these waffles in mind for dinner as well. And…we’ve even made big batches to feed college kids after church on Sundays for a fun lunch!

blueberrywaffle2sm.JPG

Whole Wheat Waffles

Special Breakfast: Whole Wheat Waffles with Blueberry Syrup
 
Save Print
Author: Laura
Serves: 5 servings
Ingredients
  • 1¾ cup whole wheat flour
  • 1 teaspoon baking powder
  • ½ teaspoon sea salt
  • 2 eggs
  • ¼ cup coconut oil
  • 1½ cup milk
Instructions
  1. Whisk all ingredients together.
  2. Cook batter in a waffle iron until golden brown,
3.5.3251

I usually double this recipe and freeze the leftovers to be popped into the toaster another day!

Blueberry SyrupYum

2 cups fresh or frozen blueberries
1/4 cup rapadura or sucanat (dehydrated cane sugar juice)

Stir ingredients together in a saucepan over medium heat for about 10 minutes until blueberries become a little mushy and syrupy. Serve over pancakes or waffles.

Whipped Cream

1/2 cup heavy whipping cream
drop of vanilla
2 drops of stevia

Whip cream in a bowl until soft peaks form. Add vanilla and stevia and whip just a bit more.

Serve Blueberry syrup and whipped cream over waffles. Delicious!

Add protein to this meal by serving with scrambled eggs, ham, sausage, and/or bacon.

Confession: We now have two waffle irons. Our friends offered us theirs when they moved away, and we decided that would help make the process of feeding the masses so much faster. Indeed, we can now make twice the waffles at one time that we once could when we only had one waffle maker. See how good I am at math?

What are your favorite ways to serve waffles? You’ll want to be sure to check out our delicious recipes for Raspberry Syrup and Peach Syrup also. It is so easy to use whatever extra fruit you have on hand to make deliciously healthy syrups that end up being a fantastic treat!

Heavenly Homemaker's Club Members: Access your homepage and all your fantastic resources here! Not a member yet? Please join us!
« Previous Page

Join Our Community!

 Facebook Twitter E-mail Instagram Pinterest

Popular Posts

~ Will All of the Real Moms Please Stand Up?
~ Easy! Stir-and-Pour Whole Wheat Bread
~ How to Make Gatorade
~ 31 Real Food Breakfast Ideas
~ Dear Teenage Girls...
~ When Mom Takes a Step Back
~ The Inexpensive Health Insurance We Love!
~ Let's Talk Real Food Grocery Budgets

Check out our latest posts!

  • Big Family Food and Fun: May 10-16, 2026
  • Big Family Food and Fun: May 3-9, 2026
  • Help Your Kids Become Independent in the Kitchen!
  • Big Family Food and Fun: April 26-May 2, 2026
  • Big Family Food and Fun: April 19-25, 2026
Home  ~  Simple Meals  ~  Club Membership  ~  Shop  ~  Privacy Policy  ~  Disclosure  ~ Contact

Copyright © 2026 · Beautiful Pro Theme on Genesis Framework · WordPress · Log in