Heavenly Homemakers

Encouraging women in homemaking, healthy eating and parenting

  • Home
    • About
    • FAQs
  • Recipes
    • Bread and Breakfast
    • Condiments
    • Dairy
    • Main Dishes
    • Side Dishes and Snacks
    • Desserts
    • Gluten Free
    • Instant Pot
    • Crock Pot
    • Heavenly Homemaker’s Weekly Menus
  • Homemaking
    • Real Food Sources
  • Store
  • Contact
    • Advertise
    • Disclosure
    • Privacy Policy
  • Simple Meals
  • Club Members!

Easy Low Sugar Peanut Butter Cheesecake Balls

February 21, 2019 by Laura Leave a Comment

This post may contain affiliate links. For more information, please see our disclosure policy.

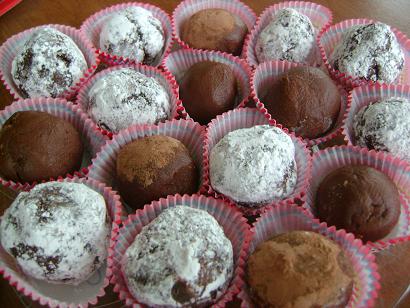
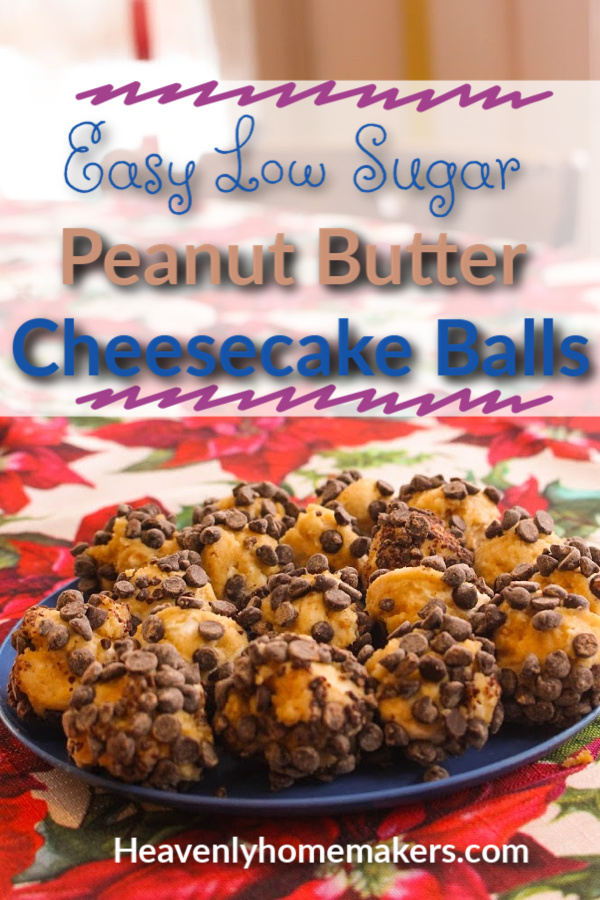
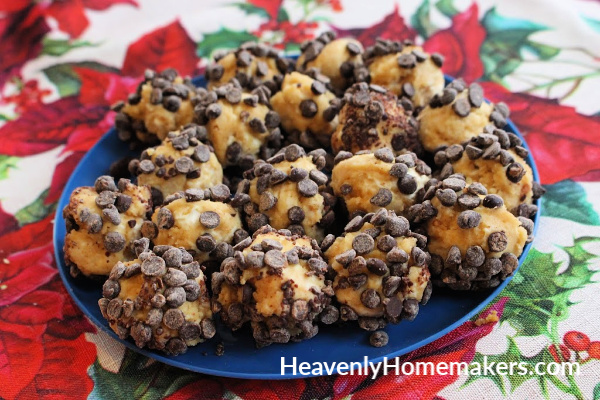
I served these Low Sugar Peanut Butter Cheesecake Balls to a group of college kids, wondering what they would think since they were made with stevia. Five out of five college students were none the wiser, and declared this treat to be delicious. After all, how can we go wrong when cream cheese, peanut butter, and chocolate chips are the main ingredients?

I love having several jars of Homemade Peanut Butter on hand to use in quick recipes like this one. And of course, I like having several packages of cream cheese in the fridge, seeing as cream cheese makes everything better.

By the way, have you tried this Simple Cream Cheese Corn yet? Just when you think sweet corn can’t taste any better than it already does, you add cream cheese and it turns into a plate full of amazingness!

But back to the Peanut Butter Cheesecake Balls. Our 5-year old Bonus Boy and I were looking through Pinterest (a dangerous idea when you’re hungry) and found a recipe similar to this one. Since I had all the ingredients on hand to tweak it into a healthy treat for us, he and I got started mixing these up right away. Success! And according to college kids who didn’t know these were on the healthier side, no one can tell these are low in sugar. Double success!

Easy Low Sugar Peanut Butter Cheesecake BallsYum

Easy Low Sugar Peanut Butter Cheesecake Balls
 
Save Print
Author: Laura
Serves: 15-18
Ingredients
  • 8-ounces softened cream cheese
  • 3 Tablespoons creamy natural peanut butter
  • 20 drops liquid stevia OR 2 Tablespoons honey
  • ½ cup mini chocolate chips
Instructions
  1. Stir cream cheese, peanut butter, and stevia together until well combined.
  2. Scoop out small balls of the mixture and roll the balls into a bowl of chocolate chips to coat them.
  3. Chill balls for at least one hour before serving.
3.5.3251

Here are some quick links to some of the finer ingredients in this recipe:

  • Homemade Peanut Butter
  • NuNaturals Liquid Stevia (my favorite brand)
  • Enjoy Life Mini Chocolate Chips (soy free!)

Want more Low Sugar Treat recipes?

[wp_eStore_fancy1 id=18]

Some of these links are my affiliate links.

Heavenly Homemaker's Club Members: Access your homepage and all your fantastic resources here! Not a member yet? Please join us!

Real Food, Real Easy Banana Pudding Recipe

February 12, 2019 by Laura 3 Comments

This post may contain affiliate links. For more information, please see our disclosure policy.

Want a special treat? Try this Real Food, Real Easy Banana Pudding!

Need a fun Banana Pudding Story before reading the recipe? Of course you do.

Our 5-year old Bonus Boy has some speech challenges, which have been coming along quite nicely during the past few months. He works hard to make improvements and we make speech practice into a fun game. We found that he was capable of making bigger strides, but he continued to say some of his words and sentences in a lazy way, like when he asked for a banana. If he wanted a banana, he would say, “I nana.” Communication was established, but we knew he could do better.

So we’d stop and make him ask in a full sentence. And we practiced and practiced on the word ba-na-na. Over and over, we tapped it out and had him say all the syllables. He got it rather quickly, but now he still breaks up all the syllables as if that is the correct way to say ba-na-na. It’s extremely adorable, and he’s 5, so we’re letting it go for now.

All this to say: When making and eating this Banana Pudding, you must say it like we now say it at our house. Ba-na-na Pudding. Then you have to grin very proudly because you said ba-na-na correctly. Yay you!

Would you like some Ba-na-na Pudding? Don’t mind if I do.

Easy Banana Pudding

Real Food, Real Easy, Banana Pudding Recipe
 
Save Print
Author: Laura
Serves: 4-6
Ingredients
  • 2½ cups milk
  • 3 egg yolks
  • ¼-1/2 cup real maple syrup
  • 4 Tablespoons arrowroot powder or cornstarch
  • ¼ teaspoon sea salt
  • 1 teaspoon vanilla
  • 2 bananas, sliced into "coins"
Instructions
  1. In a medium saucepan, whisk together milk, egg yolks, maple syrup, arrowroot powder, and salt. Cook over medium heat, whisking/stirring CONSTANTLY until pudding begins to thicken.
  2. Stir over the heat for about 15 more seconds.
  3. Remove immediately from the heat, and continue to stir until pudding is creamy.
  4. Add vanilla and continue to stir until mixed.
  5. Pour into serving dishes, layering the pudding with sliced bananas.
  6. Chill for two hours before serving.
  7. Serve with vanilla wafers if you like.
3.5.3229

Heavenly Homemaker's Club Members: Access your homepage and all your fantastic resources here! Not a member yet? Please join us!

Delicious Low Sugar Chocolate Bundt Cake with Chocolate Glaze

February 5, 2019 by Laura 3 Comments

This post may contain affiliate links. For more information, please see our disclosure policy.

Because I am your friend, I am sharing this Delicious Low Sugar Chocolate Bundt Cake with Chocolate Glaze just in time for Valentine’s Day. See, you can make this cake any time, any day. But Valentine’s Day is sort of an excuse to eat chocolate. So this cake recipe comes to you just in time!

Does the recipe look familiar? It should. I originally created and shared this recipe a few years ago, baking it in a regular cake pan. It remains my all-time favorite cake recipe, and I usually spread Low Sugar Cream Cheese Frosting over the top.

But sometimes it’s fun to mix things up a little by, you know, pouring your cake batter into a pan of a different shape. Do I know how to party or what?

Delicious Low Sugar Chocolate Bundt Cake with Chocolate Glaze

3.5 from 2 reviews
Delicious Low Sugar Chocolate Bundt Cake with Chocolate Glaze
 
Save Print
Author: Laura
Serves: 15
Ingredients
  • 1 cup melted coconut oil
  • 1 cup water
  • 4 Tablespoons unsweetened cocoa powder
  • 2 cups whole wheat pastry flour
  • ½ cup sucanat or brown sugar
  • dash of sea salt
  • 1 teaspoon baking soda
  • ½ cup sour cream
  • 2 eggs
  • CHOCOLATE GLAZE:
  • ½ cup butter
  • 4 Tablespoons cocoa powder
  • 2 Tablespoons milk
  • 2-4 Tablespoons honey (sweeten this to your taste)
  • 1 teaspoon vanilla extract
Instructions
  1. In a large mixing bowl, stir together flour, sucanat, salt, and baking soda.
  2. Set aside. In a saucepan, bring oil, water, and cocoa to a boil.
  3. Pour liquid mixture into the bowl with the dry ingredient mixture.
  4. Stir well.
  5. Add sour cream and eggs, mixing well.
  6. Pour batter into a buttered bundt pan.
  7. Bake in a 350° oven for 30-35 minutes or until a toothpick inserted in the middle comes out clean.
  8. Allow cake to cool completely before drizzling chocolate glaze over the top.
  9. For CHOCOLATE GLAZE:
  10. In a small saucepan combine butter, cocoa, milk, and honey.
  11. Cook and stir over low heat until ingredients are well combined and mixture begins to thicken slightly.
  12. Remove from heat.
  13. Stir in vanilla.
  14. Drizzle over cooled cake.
3.5.3229

Want many more delicious, low sugar treats? Check this out!

Heavenly Homemaker's Club Members: Access your homepage and all your fantastic resources here! Not a member yet? Please join us!

Easy 4-Ingredient Peanut Butter Truffles for Valentine’s Day

January 29, 2019 by Laura 3 Comments

This post may contain affiliate links. For more information, please see our disclosure policy.

Not that we can’t make a treat like this any day of the year. It’s just that these Peanut Butter Truffles seem best served as a special Valentine’s Day treat. Perhaps we should make a trial batch here in January though? And maybe remind ourselves how to make them sometime next April? Then again in August. All that to say, who am I to tell you when to make these truffles? I totally and completely support your truffle-making choices.

I love how easy these are to make. I love that the only sugar in them is what is already in the chocolate chips. I love the peanut butter-chocolate combo. I love…well, love. So see? These are perfect to make for Valentine’s Day!

Easy 4-Ingredient Peanut Butter Truffles

5.0 from 1 reviews
Easy 4-Ingredient Peanut Butter Truffles for Valentine's Day
 
Save Print
Author: Laura
Serves: 18-24
Ingredients
  • 2 cups milk chocolate chips
  • ½ cup heavy cream
  • 2 Tablespoons butter
  • ½ cup natural peanut butter (I used homemade peanut butter*)
  • ⅛ cup unsweetened cocoa powder (optional)
Instructions
  1. In a saucepan stir together chocolate chips, cream, and butter over medium heat.
  2. Just as the chocolate chips have almost melted, add peanut butter and stir until smooth.
  3. Spread mixture into a pie pan and chill for about two hours.
  4. Cut and roll mixture into 1 inch balls.
  5. Dip balls into cocoa powder if you like.
  6. Place on parchment paper and chill until set.
3.5.3229

*I use homemade peanut butter from one of the following recipes:

  • Peanut Butter (just peanuts!)
  • Peanut Butter (super creamy – like Skippy or Jif)

Roll these truffles in powdered sugar for a fun variety. And place them into holiday colored mini-muffin liners to make them festive!

Here are many more Low Sugar Treats for you to enjoy!

[wp_eStore_fancy1 id=18]

Want more great recipes that call for 5 or fewer ingredients? Grab our most popular eBook!

[wp_eStore_fancy1 id=32]

Heavenly Homemaker's Club Members: Access your homepage and all your fantastic resources here! Not a member yet? Please join us!

Easy Low Sugar Peanut Butter Brownies

January 24, 2019 by Laura 1 Comment

This post may contain affiliate links. For more information, please see our disclosure policy.

My first attempt at creating Low Sugar Peanut Butter Brownies actually turned out too sweet! This was shocking seeing as I had cut the sugar down tremendously from the original recipe I had found to give me the inspiration. I cut it down even more and voila. Peanut Butter Brownie perfection!

I love that cutting down sugar in recipes still turns out awesome treats. These are as simple as can be, perfectly moist (as long as you don’t overbake them), and made even more fabulous because of the peanut butter whipped frosting we spread over the top.

Make yourself a batch, pour yourself a glass of milk, sit back, and enjoy!

Easy Low Sugar Peanut Butter Brownies

Easy Low Sugar Peanut Butter Brownies
 
Save Print
Author: Laura
Serves: 12-15
Ingredients
  • ½ cup butter
  • 1 cup natural peanut butter*
  • ⅓ cup brown sugar or sucanat
  • ¼ teaspoon sea salt (leave this out if your peanut butter is already salted)
  • 2 eggs
  • 1 cup whole grain flour (I use freshly ground soft white wheat)
  • Frosting:
  • ¾ cup natural peanut butter
  • 1 cup heavy whipping cream
  • 10 drops liquid stevia
  • 2 teaspoons sugar or maple syrup
  • ½ teaspoon vanilla extract
Instructions
  1. In a small saucepan, heat butter and peanut butter until melted.
  2. Stir together melted butters and sugar in a mixing bowl.
  3. Add salt and eggs, mixing well.
  4. Fold in flour and stir until well combined.
  5. Spread batter into a 9x9 or 8x8 inch baking dish.
  6. Bake in a 350 degree oven for 20-25 minutes or until brownies are lightly browned.
  7. Allow brownies to cool completely before frosting.
  8. FROSTING:
  9. In a high power blender, or in a bowl with a hand mixer, whip frosting ingredients together until thick and smooth.
  10. Spread over Peanut Butter Brownies.
  11. Store in the refrigerator.
3.5.3229

*I use homemade peanut butter from one of the following recipes:

  • Peanut Butter (just peanuts!)
  • Peanut Butter (super creamy – like Skippy or Jif)

Here are many more Low Sugar Treats for you to enjoy!

[wp_eStore_fancy1 id=18]

Heavenly Homemaker's Club Members: Access your homepage and all your fantastic resources here! Not a member yet? Please join us!

Easy Low Sugar Cream Cheese Cut Out Cookies

January 22, 2019 by Laura 3 Comments

This post may contain affiliate links. For more information, please see our disclosure policy.

Is it just me, or can we all agree that when we add cream cheese to a recipe, it will become extra – top notch – amazing? May I interest you, then, in these Cream Cheese Cut Out Cookies? Don’t worry – they are low in sugar. Oh, but also don’t worry – they still taste incredible!

You’re going to want to add this recipe to your list of keepers! We make these Cream Cheese Cut Out Cookies for just about every holiday. Pumpkin shapes in the fall, trees and stockings at Christmas time, and hearts for Valentine’s day. If we’re really feeling crazy, sometimes we’ll make them randomly in June. It just so happens that we have a cookie cutter in the shape of Mickey Mouse. June’s as good a month as any to make a Mickey cookie.

Since I’m not much into sugar anymore, I like eating these as-is, without frosting. My kids, of course, prefer to frost theirs. In case you need some low sugar (or high sugar) frosting recipes, I will share them below. But for now…

Easy Low Sugar Cream Cheese Cut Out Cookies

Easy Low Sugar Cream Cheese Cut Out Cookies
 
Save Print
Author: Laura
Serves: 24-30
Ingredients
  • 1 cup melted butter (two sticks)
  • 8-ounces softened cream cheese
  • ½ cup raw sugar or sucanat
  • 2 eggs
  • ½ teaspoon baking powder
  • ½ teaspoon vanilla extract
  • 3½-4 cups flour (I use freshly ground hard white wheat flour)
Instructions
  1. Stir together melted butter, softened cream cheese, and sugar.
  2. Add eggs, baking powder, and vanilla.
  3. Stir in flour until well combined. (Use a little less or a little more flour as needed.)
  4. Place dough in the refrigerator for at least two hours.
  5. Once dough is chilled, roll on a well-floured surface and cut out into desired shapes.
  6. Bake in a 350° oven for 10-15 minutes or until cookies are lightly browned. (I prefer mine just barely done so that they stay soft!)
  7. Allow cookies to cool completely before frosting.
3.5.3229

Want more Low Sugar Treat recipes? This awesome eBook is full of them!

[wp_eStore_fancy1 id=18]

Cream Cheese Frosting

1/2 cup butter, softened
8 ounces cream cheese, softened
4 1/2 cups unbleached organic powdered sugar
1/2 teaspoon vanilla extract

Whip butter and cream cheese with beaters until fluffy. Add vanilla and powdered sugar and beat until mixed thoroughly.

Stevia Sweetened Cream Cheese Frosting

8 ounces softened cream cheese
1 cup heavy whipping cream
1/2 teaspoon vanilla extract
Liquid stevia to taste (I use 2 droppers full)

Whip ingredients together until smooth. Frost cookies just before serving.

Low Sugar Chocolate Frosting

1/2 cup butter
4 Tablespoons cocoa powder
2 Tablespoons milk
2-4 Tablespoons honey (sweeten this to your taste)
1 teaspoon vanilla extract

In a small saucepan combine butter, cocoa, milk, and honey. Cook and stir over low heat until ingredients are well combined and mixture begins to thicken slightly. Removed from heat. Stir in vanilla. Spread onto cookies.

Heavenly Homemaker's Club Members: Access your homepage and all your fantastic resources here! Not a member yet? Please join us!

3-Ingredient Peanut Butter Honey Rice Krispie Treats

January 15, 2019 by Laura 11 Comments

This post may contain affiliate links. For more information, please see our disclosure policy.

I will admit to you that I find it silly to write “3-Ingredient Peanut Butter Honey Rice Krispie Treats” as a title. Why? Because all three ingredients are listed in the title, so the title is basically the post.

There’s nothing else you will possibly need to know since obviously, to make 3-Ingredient Peanut Butter Honey Rice Krispie Treats you need peanut butter, honey, and Rice Krispies. My job here is done.

Ah, but wait. You still don’t know how much of each ingredient to use to make these fine treats. I guess you still need me after all. Phew. 

I had a lot of fun playing with this idea to try Rice Krispie Treats without the marshmallows. It all made sense and tasted delicious in my head, but recipes in my head and recipes in real life don’t always turn out the same.

Would they be gooey chewy like I was hoping, or would they turn out hard like bricks and crumble everywhere? Would they be sweet enough? Or maybe too sweet? Would they even stay together, or would they just fall apart and turn into peanut butter honey flavored Rice Krispie cereal?

One never knows until one tries the recipe inside one’s head while hoping for the best. How delighted was I when this recipe came out chewy gooey good on the first try! (It helped that I stirred in cereal just a little at a time until I reached my desired gooeyness level.) The peanut butter – honey – crunch combo reminds me of a childhood treat that included ingredients I no longer use. So I am perfectly thrilled with these awesome 3-Ingredient Peanut Butter Honey Rice Krispie Treats and can’t wait for you to try them too! (Bet you can’t guess what the 3 ingredients are…)

3-Ingredient Peanut Butter Honey Rice Krispie Treats

5.0 from 1 reviews
3-Ingredient Peanut Butter Honey Rice Krispie Treats
 
Save Print
Author: Laura
Serves: 12
Ingredients
  • 1 cup natural peanut butter*
  • ⅓ cup honey
  • 2½ cups Rice Krispies (the off brand works great!)
Instructions
  1. In a large saucepan, stir peanut butter and honey over low heat until runny and smooth.
  2. Remove from heat and stir in Rice Krispies.
  3. Press mixture into a 9x9 inch baking dish.
  4. Refrigerate for 2 hours before serving.
3.5.3229

*I use homemade peanut butter from one of the following recipes:

  • Peanut Butter (just peanuts!)
  • Peanut Butter (super creamy – like Skippy or Jif)

Want more great recipes that call for 5 or fewer ingredients? Grab our most popular eBook!

[wp_eStore_fancy1 id=32]

Heavenly Homemaker's Club Members: Access your homepage and all your fantastic resources here! Not a member yet? Please join us!

Chocolate Chip Cookie Bars (Low Sugar, Whole Grain)

January 6, 2019 by Laura 3 Comments

This post may contain affiliate links. For more information, please see our disclosure policy.

Who needs sugar when you can eat butter? What I mean to say is, these Chocolate Chip Cookie Bars taste lightly sweet and deliciously buttery. What else can we possibly need? (Chocolate chips.) Ah yes. Chocolate chips. Well, I guess we’ve thought of everything.

As many of you know, I’m not much into sugar anymore. But I do like a barely sweet treat to enjoy with my coffee. I’m not terribly picky. I think something is plenty sweet when it is only barely sweet. Much more sweetness than that seems like much too much these days.

My kids think I’m weird about this (and at least a couple of other things) and have become a bit leery of my homemade “super low sugar treats.” If Mom is eating it, it must be one of those weirdo stevia sweetened things and it probably won’t taste as good as a candy bar. I beg to differ, but I also remember being a teen and liking my Twix and Pepsi.

Now then, I guess it’s my job to confess that because of the aforementioned, I have learned to wait to eat my low sugar treats until AFTER I have served some to my sons. The two sons still living at home are the pickiest of our four. (And now we have an almost-adopted son, so I’ll be learning to say five sons instead of four, oh my goodness!)

My picky kids aren’t always willing to try new foods, so I must be wise in how I present them. I am MOM, therefore I know more than they do (about everything except Fortnite). I know very well that they will like the treat if only they try it with an open mind. After all, did I mention the butter? And the chocolate chips? And there’s actual sugar in it, not stevia. It’s just that I cut the sugar from 1 1/2 cups all the way down to just a 1/2 cup.

Just eat the cookie bars, kids.

So they did. And they like them. Shocker.

I snuck one later with my coffee, which made them second guess for a moment if they still liked them. Silly boys.

Chocolate Chip Cookie Bars

4.0 from 1 reviews
Chocolate Chip Cookie Bars (Low Sugar, Whole Grain)
 
Save Print
Author: Laura
Serves: 9
Ingredients
  • 1 cup melted butter (2 sticks)
  • ½ cup brown sugar or sucanat
  • 2 eggs
  • ¼ teaspoon baking soda
  • ¼ teaspoon sea salt
  • 1 teaspoon vanilla extract
  • 1 cup whole grain flour (I use freshly ground soft white wheat)
  • ¼ cup mini chocolate chips
Instructions
  1. Stir together melted butter and brown sugar.
  2. Add eggs, baking soda, salt, and vanilla, stirring well.
  3. Stir in flour until well combined.
  4. Fold in chocolate chips.
  5. Spread dough into an 8x8 inch baking dish.
  6. Bake in a 350 degree oven for 20-25 minutes or until golden brown.
  7. Allow bars to cool for 10 minutes before cutting and serving.
3.5.3229

Are your kids leery to try any of your “healthier foods” for fear you might be serving them something weird? Silly kids.

Here are many more Low Sugar Treats that I promise my kids like, so yours will too!

[wp_eStore_fancy1 id=18]

Heavenly Homemaker's Club Members: Access your homepage and all your fantastic resources here! Not a member yet? Please join us!

Festive Raspberry (or Cranberry or Apricot) Oatmeal Bars

December 20, 2018 by Laura Leave a Comment

This post may contain affiliate links. For more information, please see our disclosure policy.

Remember these awesome Raspberry Oatmeal Bars? Seeing as they have red raspberries in them, that automatically turns them into a festive holiday recipe option, don’t you think?

Now, keep in mind, any of your favorite fruits and jellies will work in these Oatmeal Bars! Perhaps you’d enjoy making a Cranberry variety for Christmas? We like Raspberry and Apricot best at our house. And if you top them with slivered almonds, you’ve got an extra special treat!

When you look at the recipe, you’ll notice that there’s a lot of butter in these. YES. That’s why they are so delicious!

Festive Raspberry (or Cranberry or Apricot) Oatmeal Bars

Festive Raspberry (or Cranberry or Apricot) Oatmeal Bars
 
Save Print
Author: Laura
Serves: 12
Ingredients
  • 1½ cups whole wheat flour
  • 1½ cups rolled oats
  • ½ cup sucanat or brown sugar
  • ½ teaspoon baking powder
  • ¼ teaspoon sea salt
  • 1 cup melted butter
  • ½ cup 100% fruit jam (raspberry, apricot, grape, cranberry, etc)
Instructions
  1. Mix together flour, oats, sucanat, baking powder, and salt.
  2. Stir in melted butter until the mixture resembles crumbs.
  3. Press half of the mixture into an 8x8 inch baking pan.
  4. Spread jam over the top.
  5. Sprinkle remaining oat mixture on top of the jam layer, pressing down to cover.
  6. Sprinkle slivered almonds on top if you like!
  7. Bake in a 350° oven for 30 minutes or until lightly browned.
3.5.3229


Want to mix and match your flavors by using a variety of jellies? I’ve described how to do that here!

Heavenly Homemaker's Club Members: Access your homepage and all your fantastic resources here! Not a member yet? Please join us!

Simple Crock Pot Chocolate Peanut Butter Lava Cake

December 18, 2018 by Laura Leave a Comment

This post may contain affiliate links. For more information, please see our disclosure policy.

I shared this Simple Crock Pot Chocolate Peanut Butter Lava Cake with you many years ago! Christmas is the perfect time to bring it back, don’t you think?

This recipe looks rather involved, but would I be sharing it if it was difficult? Of course not. :) Putting this together is very simple, and worth every bit of your (small amount of) effort!

Simple Crock Pot Chocolate Peanut Butter Lava Cake

Simple Crock Pot Chocolate Peanut Butter Lava Cake
 
Save Print
Author: Laura
Serves: 6-8
Ingredients
  • 1 cup whole wheat flour
  • 2 Tablespoons unsweetened cocoa powder
  • ½ cup sucanat or brown sugar
  • 1½ teaspoon baking powder
  • ¼ teaspoon salt
  • ½ cup milk
  • 2 Tablespoons melted butter (or coconut oil)
  • 1 teaspoon vanilla
  • ½ cup natural peanut butter
  • ½ cup semi-sweet chocolate chips
  • TOPPING:
  • 3 Tablespoons cocoa powder
  • ½ cup sucanat or brown sugar
  • 1½ cups boiling water
Instructions
  1. Combine flour, cocoa, sucanat, baking powder, and salt. Mix well.
  2. Make a well in the center and add milk, butter, and vanilla.
  3. Stir well, until batter is smooth.
  4. Stir in peanut butter (heat if needed, to thin).
  5. Stir in chocolate chips.
  6. Spread the batter evenly into a well greased slow cooker.
  7. Make the topping:
  8. Mix cocoa and sucanat, whisk in boiling water until smooth.
  9. Gently pour over batter in crock pot, but don’t stir.
  10. Cover and cook on HIGH until puffed and the top layer is set, about 2- 2¼ hours.
  11. Turn off crock pot and let stand, covered for at least 30 minutes.
  12. Serve the cake (which is now on top) with ice cream or whipped cream and drizzle the fudgy pudding from the bottom over both.
3.5.3229
Top this awesome cake with freshly whipped cream!

How to Make Fresh Whipped Cream

Want to go a little chocolate and peanut butter CrAzY? Try this on top of your cake:

How to Make Chocolate Peanut Butter Cup Whipped Cream

Heavenly Homemaker's Club Members: Access your homepage and all your fantastic resources here! Not a member yet? Please join us!
« Previous Page
Next Page »

Join Our Community!

 Facebook Twitter E-mail Instagram Pinterest

Popular Posts

~ Will All of the Real Moms Please Stand Up?
~ Easy! Stir-and-Pour Whole Wheat Bread
~ How to Make Gatorade
~ 31 Real Food Breakfast Ideas
~ Dear Teenage Girls...
~ When Mom Takes a Step Back
~ The Inexpensive Health Insurance We Love!
~ Let's Talk Real Food Grocery Budgets

Check out our latest posts!

  • Big Family Food and Fun: May 3-9, 2026
  • Help Your Kids Become Independent in the Kitchen!
  • Big Family Food and Fun: April 26-May 2, 2026
  • Big Family Food and Fun: April 19-25, 2026
  • Big Family Food and Fun: April 12-18, 2026
Home  ~  Simple Meals  ~  Club Membership  ~  Shop  ~  Privacy Policy  ~  Disclosure  ~ Contact

Copyright © 2026 · Beautiful Pro Theme on Genesis Framework · WordPress · Log in