Heavenly Homemakers

Encouraging women in homemaking, healthy eating and parenting

  • Home
    • About
    • FAQs
  • Recipes
    • Bread and Breakfast
    • Condiments
    • Dairy
    • Main Dishes
    • Side Dishes and Snacks
    • Desserts
    • Gluten Free
    • Instant Pot
    • Crock Pot
    • Heavenly Homemaker’s Weekly Menus
  • Homemaking
    • Real Food Sources
  • Store
  • Contact
    • Advertise
    • Disclosure
    • Privacy Policy
  • Simple Meals
  • Club Members!

The Best Way to Add Flavor to Plain Yogurt

March 6, 2018 by Laura 3 Comments

This post may contain affiliate links. For more information, please see our disclosure policy.

If you’ve struggled to know how to doctor up plain yogurt and keep it healthy, you will love this tip from Bethany as much as I do!

The Best Way to Add Flavor to Plain Yogurt

From Bethany:

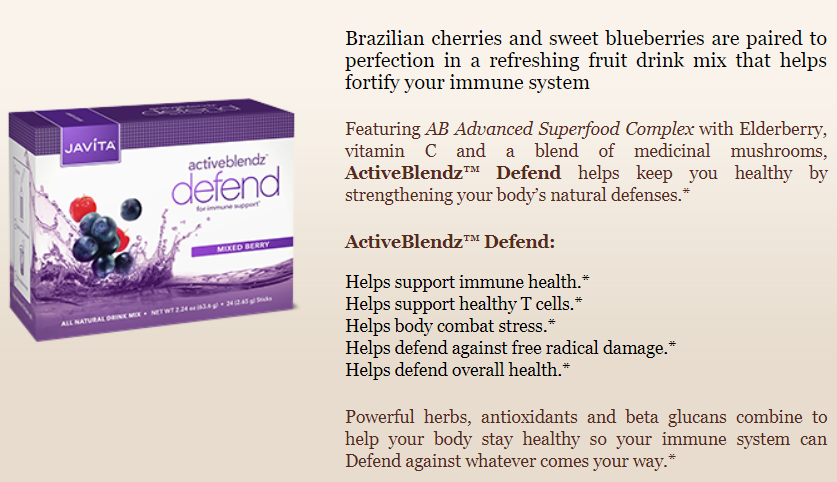
We’ve really been enjoying our Javita here, and it really helped a lot over our recent vacation! I wanted to share with you a little fun thing. We have struggled with yogurt since cutting sugar. The flavored ones are loaded with so much sugar (and often other junk), but the pain is so…. plain, and my kids have disliked every flavoring I’ve tried to add. Until today! I had the idea to mix a packet of Defend into a tiny bit of milk and then mix that into a container of plain yogurt. Everyone loved it, even my pickiest kids! Hooray! Now we can eat yogurt again!

I LOVE this! We’ve always added fresh or frozen fruit to flavor our plain yogurt. Then we add some kind of sweetener, usually real maple syrup. This is great, but what I love about Bethany’s idea to stir in a Defend is that not only does it flavor and sweeten the yogurt (with stevia), it provides our bodies with all the immune system benefits of drinking a Defend.

Why I Trust Defend:

My family has been drinking Defend all winter to help us fight sicknesses that have been going around. I personally find that Defend mixed with Flex is a perfect combo as the Flex adds anti-inflammatory help with keeps my asthma in check along with Defend’s immunity boost.

So consider all the benefits of yogurt to keep our guts healthy, then add Defend and we’ve got a winning, delicious combination!

Thank you, Bethany, for sharing this fun information you discovered!

How to Add Defend to Plain Yogurt

The Best Way to Add Flavor to Plain Yogurt
 
Save Print
Author: Laura
Serves: 2 cups
Ingredients
  • 1 Packet of Defend
  • 3 Tablespoons milk
  • 16-ounces plain yogurt (more or less to taste)
Instructions
  1. Empty one packet of Defend into the milk and whisk until dissolved.
  2. Stir mixture into plain yogurt and serve.
3.5.3229


Read more about Javita products here and why I love them so much.

May our yogurt be delicious, our digestive systems working like they should, and our immune systems kicked in full gear!

Heavenly Homemaker's Club Members: Access your homepage and all your fantastic resources here! Not a member yet? Please join us!

The Best Coconut Flour Chocolate Cupcakes (Only 6 Ingredients!)

March 1, 2018 by Laura 9 Comments

This post may contain affiliate links. For more information, please see our disclosure policy.

Whether or not you need to eat a gluten free diet, you will want to make and enjoy these fabulous and highly nutritious 6-Ingredient Coconut Flour Chocolate Cupcakes! Wait until you hear how and why we came up with this recipe.

coconut flour cupcake22

My 18-year old son came home after a weekend away and shocked me by saying this, “Ok, Mom. For the next 30 days, Jacob and I are cutting out all junk food and empty carbs. We’re going to do 100 push-ups and 100 sit-ups every day. At the end of the 30 days, we’re going to see how we feel, and then we’ll eat birthday cake.”

Birthday cake? Well yes. This was part of the plan because Justus happened to be turning 18 the day his eating challenge ended. Perfect timing, eh?

I was amazed during the 30 days that followed Justus’ proclamation. He was extremely disciplined, ate loads of fruits and veggies for snacks, and even packed big salads to eat in the bleachers between his basketball games. (By the way, his friend who joined him in this challenge is also on the basketball team. They cracked me up more than once as they sat side by side eating salad in the bleachers. Here are your team captains, ladies and gentlemen, showing leadership on and off the court.)

While I loved this challenge the boys had set their minds to, I was also very cautious. Justus has zero body fat and is extremely active, so I watched carefully to be sure he was getting plenty of good carbs, good fats, and good proteins along with his fruits and veggies. He realized only two days into the challenge that he needed to keep a big supply of easy and filling snacks around the house so he would stay full and energized throughout the day.

simple-chicken-cheeseballs1

He made himself Chicken Cheeseballs, Simple Crunchy Ranch Chicken Strips, Honey Sweetened Fat Bombs, and Low Sugar Crustless Cheesecakes.

easy-mini-crustless-baked-cheesecake

Throughout the day, Justus would randomly drop down to the floor and do a round of push-ups or sit-ups. I even caught the kid searching for high protein snacks on Pinterest, then heading to the kitchen to experiment. Is he my son or is he my son? It was too much fun. (I’m still debating whether I’m going to let him graduate high school and move out in a few months.)

Together we came up with this wonderful recipe for The Best Coconut Flour Chocolate Cupcakes. Call them muffins if you want as these are full of nourishment and very adaptable. Coconut Flour Chocolate Cupcakes are very filling since they are so full of fiber and protein. Commonly I watched Justus eat three of them along with an entire pound of strawberries. Ha! No need to worry that this kid was still getting enough good carbs and calories while on his “diet.”

coconut flour cupcake11

I truly think eating treats like these Coconut Flour Chocolate Cupcakes can be good for all of us! Coconut flour is a wonderful source of fiber, protein, and fat. It’s grain free so it gives our bodies a break from all the wheat or rice we often consume. I plan on serving these to my entire family for breakfast and snacks long after Justus’ special diet ends.

Where to Get Coconut Flour

I tend to shop around to find the best price for Coconut Flour and have even discovered that our local Wal-mart now carries it. A little Coconut Flour goes a long way, so keep that in mind as you shop for this gem.

  • Amazon has a variety of Coconut Flour options. Here’s a good one for a good price!
  • Healthy Traditions carries a top-knotch brand of Coconut Flour. I only purchase from them if they are offering a sale paired with free shipping.
  • iHerb is a great option. They offer a variety of quality brand names to choose from.

coconut_flour

You’ll notice that most Coconut Flour recipes call for a significant amount of eggs. This is because Coconut Flour is very dry. Eggs provide liquid needed, plus “stickability” in recipes. I love that combining Coconut Flour with so many eggs makes treats like this so high in protein and good fat!

Ready to enjoy these amazing Coconut Flour Chocolate Cupcakes?

The Best Coconut Flour Chocolate Cupcakes

The Best Coconut Flour Chocolate Cupcakes
 
Save Print
Author: Laura
Serves: 12
Ingredients
  • ½ cup coconut flour
  • ½ cup unsweetened cocoa powder
  • ½ teaspoon baking powder
  • ⅓ cup honey
  • 6 eggs
  • ⅓ cup melted coconut oil
Instructions
  1. Whisk all ingredients together until smooth.
  2. Scoop batter into 12 paper-lined muffin tins.
  3. Bake in a 350 degree oven for 20 minutes.
3.4.3177

The Best Coconut Flour Chocolate Cupcakes

I personally love these cupcakes with a big scoop of Stevia-Sweetened Cream Cheese Frosting spread over the top or plopped onto the plate.

Stevia Sweetened Cream Cheese Frosting

8 ounces softened cream cheese
1 cup heavy whipping cream
1/2 teaspoon vanilla extract
Liquid stevia to taste (I use about 30 drops)

Whip ingredients together in a blender or with a hand mixer until smooth.

If you don’t mind the added sugar, sprinkle some chocolate chips on top of each cupcake before baking. Add nuts if you like.

Coconut_Flour_Muffin

Here a few other coconut flour recipes you’ll find here at Heavenly Homemakers:

  • Coconut Flour Muffins
  • Coconut Flour Banana Muffins
  • Coconut Flour Drop Cheddar Biscuits

What are your favorite ways to get plenty of good carbs, fats, and proteins?

Heavenly Homemaker's Club Members: Access your homepage and all your fantastic resources here! Not a member yet? Please join us!

Simple Snack Recipe: Creamy Chocolate Fruit Dip

February 27, 2018 by Laura 2 Comments

This post may contain affiliate links. For more information, please see our disclosure policy.

When you eat Creamy Chocolate Fruit Dip you might find yourself pausing to say out loud, “Is there anything better than this dip with strawberries? Anything at all on this entire earth?”

chocolate fruit dip23

Some of the children standing in the room might answer your rhetorical question and suggest that winning a soccer game, getting an A on a difficult test, or finally finishing Geometry for the rest of your life is better than the Creamy Chocolate Fruit Dip. But then he will pop a chocolate dip-covered strawberry into his mouth and remember quite clearly that indeed, this snack is better than almost anything in the entire world. And perhaps it goes without saying that eating this Creamy Chocolate Fruit Dip with strawberries immediately after winning a soccer game, getting an A on a test, or finally finishing Geometry for the rest of your life is the perfect way to celebrate all good things.

Far be it from me to ruin the strawberry-dipped moment by reminding said child that one day when he has a child of his own, he may encounter Geometry all over again as a dad who helps his kid try to understand linear equations and obtuse angles. This is not the time to speak of the Geometry of the future. Let the child enjoy this Geometry-Free Creamy Chocolate Fruit Dip pleasure, am I right?

I guess now you know how we all feel about Geometry at our house. Sorry, Mathematicians. We try. And we appreciate your care and concern about figures that are congruent. We realize that life as we know it is so much better because of your vast knowledge. But we would prefer to create fun videos and music to entertain you in your down time. And we like making delicious food to feed you. Dear Mathematicians. May we interest you in a Creamy Chocolate Fruit Dipped strawberry? We think it will give your protractor a run for its money.

Truly, isn’t it a joy that we all have interest in different things? This is what makes the world go ’round. But also, this Creamy Chocolate Fruit Dip!!!! As sure as the world is spinning, dipping your fruit in this will make each day better no matter your opinion of working with Isosceles Triangles.

Creamy Chocolate Fruit Dip

5.0 from 1 reviews
Simple Snack Recipe: Creamy Chocolate Fruit Dip
 
Save Print
Author: Laura
Serves: 3 cups
Ingredients
  • 8- ounces softened cream cheese
  • 2 cups heavy whipping cream
  • 2 heaping Tablespoons unsweetened cocoa powder
  • Sweetener of your choice (30 drops liquid stevia, 3 Tablespoons real maple syrup, or ¼ cup sugar)
Instructions
  1. Blend ingredients together until smooth.
  2. Cover and store in refrigerator until ready to serve.
  3. Serve with fresh strawberries, bananas, raspberries, apples, or blueberries.
3.4.3177

Simple Chocolate Fruit Dip
Looking for more Simple Snack Recipes?

We’re sharing new recipes all month! So far here’s what we’ve come up with:

  • No Bake Cookie Cups (5 minute prep!)
  • Cream Cheese Salsa Dip (2 ingredients!)
  • Pineapple Coconut Quick Bread (blends together fast!)
  • Parmesan Crisps (so easy you won’t believe it!)
  • Sweet and Salty Almonds or Pecans
  • Chocolate Cheesecake Fudge
  • Creamy Italian Veggie Dip
  • No Bake Chocolate Chip Cookie Bars
  • Honey Sweetened Flourless Peanut Butter Bars (3 ingredients!)
  • Easy Cheesy Popcorn

Do you like math with your strawberries?

Heavenly Homemaker's Club Members: Access your homepage and all your fantastic resources here! Not a member yet? Please join us!

Simple Snack Recipe: Honey Sweetened Flourless Peanut Butter Bars

February 22, 2018 by Laura 5 Comments

This post may contain affiliate links. For more information, please see our disclosure policy.

This Honey Sweetened Flourless Peanut Butter Bars recipe has been a family favorite for many years!

pb bars11

Though actually, I used to always make this recipe into cookies. And I used to use regular sugar. And I used to use 2 cups of that sugar! (Whoa.)

Now I use just 1/3 cup of honey and I simply mix up the three needed ingredients to make Honey Sweetened Peanut Butter Bars instead of cookies.

I love that even though I’ve drastically cut the sweetener, these cookie bars are sweet enough that my kids still enjoy them, but they aren’t so sweet that I can’t enjoy them too. But the best part, of course, is that they stir together super quickly and provide a wholesome snack for the family in just a few minutes!

The cookie version of this low sugar recipe is great too. You’ll find it here. I just like the ease of spreading the batter into a pan and baking. Shortcuts are our friend!

pb bars22

Honey Sweetened Flourless Peanut Butter Bars

5.0 from 1 reviews
Honey Sweetened Flourless Peanut Butter Bars
 
Save Print
Author: Laura
Serves: 18
Ingredients
  • 2 cups natural peanut butter
  • ⅓ cup honey
  • 1 egg
Instructions
  1. Mix the ingredients together until smooth.
  2. Spread mixture into an 9x13 inch baking dish
  3. Bake in a 350° oven for 15-20 minutes or until bars are lightly browned.
  4. Allow the pan to cool for 10 minutes before cutting into bars.
3.4.3177

I prefer making Homemade Peanut Butter, simply because it tastes amazing and I can be confident about the ingredients! Here are my two favorite Peanut Butter recipes/methods:

  • Peanut Butter (just peanuts!)
  • Peanut Butter (super creamy and spreadable – like Skippy or Jif – only healthy!)

Honey Sweetened Flourless Peanut Butter Bars

Looking for more Simple Snack Recipes?

We’re sharing new recipes all month! So far here’s what we’ve come up with:

  • No Bake Cookie Cups (5 minute prep!)
  • Cream Cheese Salsa Dip (2 ingredients!)
  • Pineapple Coconut Quick Bread (blends together fast!)
  • Parmesan Crisps (so easy you won’t believe it!)
  • Sweet and Salty Almonds or Pecans
  • Chocolate Cheesecake Fudge
  • Creamy Italian Veggie Dip
  • No Bake Chocolate Chip Cookie Bars
Heavenly Homemaker's Club Members: Access your homepage and all your fantastic resources here! Not a member yet? Please join us!

Simple Snack Recipe: Chocolate Cheesecake Fudge (Stevia or Honey Sweetened)

February 15, 2018 by Laura 5 Comments

This post may contain affiliate links. For more information, please see our disclosure policy.

Who says we can only eat fudge during a holiday season? This Chocolate Cheesecake Fudge is so low in sugar we can eat it in the middle of February, every other Thursday, and if you’re really feeling sassy, on a Monday afternoon after you’ve washed the breakfast dishes.

fudge1

Or not. I mean, you don’t have to actually wash the dishes before rewarding yourself with this fudge. I think it is enough work to have dirtied the dishes in the first place, am I right? Indeed. Fudge all around!

This Chocolate Cheesecake Fudge needs no special occasion. Though it will feel like a special occasion while you’re eating it because of the fact that it is fudge and it tastes amazing. I suppose the fact that it has the word “cheesecake” in the title also proves its greatness. You will be tempted to feel guilt over splurging on this treat since Christmas was two months ago and you’ve been doing such a good job of eating right since the first of the year. But no guilt is allowed or even warranted because this fudge isn’t full of sugar! Yep. It’s sweetened with a little honey and a little stevia. That’s it.

Of course this qualifies as a Simple Snack Recipe because you can blend all the ingredients together in just a couple of minutes. What a treat!

Chocolate Cheesecake Fudge

Simple Snack Recipe: Chocolate Cheesecake Fudge (Stevia or Honey Sweetened)
 
Save Print
Author: Laura
Serves: 18 pieces
Ingredients
  • ½ cup softened butter
  • 8-ounces softened cream cheese
  • 2 Tablespoons unsweetened cocoa powder
  • 2 Tablespoons honey
  • 30 drops liquid stevia (I like NuNaturals brand best)
Instructions
  1. Blend ingredients together in a high power blender.
  2. Spread mixture in an 8x8 inch dish.
  3. Chill in the fridge for at least one hour.
  4. Cut into pieces and serve.
  5. Store fudge in the refrigerator.
3.4.3177

Simple Low Sugar Chocolate Cheesecake Fudge

This recipe is easy to adapt. Add more or less honey, stevia, and cocoa powder per your preference. You can find NuNaturals Liquid Stevia here (my affiliate link).

Looking for more Simple Snack Recipes?

We’re sharing new recipes all month! So far here’s what we’ve come up with:

  • No Bake Cookie Cups (5 minute prep!)
  • Cream Cheese Salsa Dip (2 ingredients!)
  • Pineapple Coconut Quick Bread (blends together fast!)
  • Parmesan Crisps (so easy you won’t believe it!)
  • Sweet and Salty Almonds or Pecans

Can’t wait to share more!

Heavenly Homemaker's Club Members: Access your homepage and all your fantastic resources here! Not a member yet? Please join us!

Simple Snack Recipe: No Bake Cookie Cups

February 4, 2018 by Laura 12 Comments

This post may contain affiliate links. For more information, please see our disclosure policy.

This is a recipe in which my beloved Fat Bomb treat teams up with my dearest Honey Sweetened No-Bake Cookies to create No Bake Cookie Cups in perfect harmony.

no bake cups11

Indeed, I’m talking about actual harmony as these No Bake Cookie Cups sing to me when I walk into the kitchen each morning. It’s like I have my very own Barber Shop Quartet sitting in my refrigerator. Just think of it! I open the fridge door at 6:30 am and these cookie cups take off their red and white striped hats to salute me. Then the singing begins.

I’ll spare you the song lyrics, but they are obviously all about how well I pull off the “just rolled out of bed” look with my mis-matched pajamas and fly-away hair.

Simple Snack Recipes Series

Why all the hoopla about this simple snack recipe? Because it truly is my very favorite. These No Bake Cookie Cups are a perfect mix of nourishment and deliciousness. They are super filling because they are loaded with good fat and protein. The oats make them seem more like a no-bake cookie, and well, oats are good. The fact that these are made in muffin cups makes them even easier to make and definitely easier to eat.

no bake cups12

So basically, these No Bake Cookie Cups are perfection, which is why we can all break out in to four part harmony together as we rejoice over this snack.

Here’s why they qualify as a Simple Snack Recipe: These come together in about five minutes. Scoop all ingredients into a saucepan and stir together until melted (five minutes, tops). Add the oats. Pour into muffin cups. Refrigerate. Eat. Sing. Be happy.

Such a Simple Snack Recipe!

No Bake Cookie Cups

Simple Snack Recipe: No Bake Cookie Cups
 
Save Print
Author: Laura
Serves: 12
Ingredients
  • ½ cup coconut oil (I use expeller pressed so the coconut flavor doesn't overpower.)
  • 1 heaping Tablespoon cocoa powder
  • 4 Tablespoons butter
  • ½ cup natural peanut butter
  • Liquid stevia to taste (I use 1½ droppers full of NuNaturals Brand.) or 2-3 Tablespoons honey
  • 1 cup whole rolled oats
Instructions
  1. In a small saucepan, heat and stir together coconut oil, cocoa powder, butter, honey, and peanut butter. (If using stevia as sweetener, wait to add it until after ingredients are melted and you've removed the pan from the heat.)
  2. Stir until melted.
  3. Remove from heat.
  4. Stir in oats.
  5. Pour into 12 lined muffin tins. (I prefer to use silicone liners for these.)
  6. Freeze for 20 minutes or refrigerate for 2 hours.
  7. Store in fridge and enjoy.
3.5.3229

Simple No Bake Cookie Cups

It’s worth noting that these taste best right out of the fridge and start to melt quickly if left out for longer than two minutes. Don’t ask me about the time I packed one to eat at a basketball game. Ok fine. I’ll tell you anyway. I once packed a No Bake Cookie Cup to eat at a basketball game, but by the time we arrived and I got it out to enjoy, it had turned to a baggie full of mush that required a spoon and five napkins. Good story, huh?

Stay tuned for more great (stories and also) Simple Snack Recipes you’ll love!

Heavenly Homemaker's Club Members: Access your homepage and all your fantastic resources here! Not a member yet? Please join us!

Simple Crock Pot Cranberry Apple Cider

December 17, 2017 by Laura 3 Comments

This post may contain affiliate links. For more information, please see our disclosure policy.

It is a fact that the first time I made this Cranberry Apple Cider, a young boy visiting our home looked into the crock pot, saw the floating cranberries, and asked, “Are those berries poisonous?”

cranberry cider33

Hey. It was a fair question. He’s been taught well. Never eat berries without first asking what they are and checking to be sure that they are safe to eat. Smart kid, that one.

I assured him that the berries floating in my cider were merely cranberries, but my proclamation meant nothing at all to him. So he stood waiting for me to answer his actual question, “Are those berries poisonous?”

cranberry cider22

I’ll admit that for at least two seconds, my mind started heading down the path of possible answers I could but should not give. “We’re not really sure, but we decided to try them and see what happened.” Or maybe, “Yes, but they were so pretty we decided it didn’t matter.”

But only a terrible hostess would scare visiting children, so even though this kid is a regular guest in our home and knows we specialize in sarcasm, I ignored the untrue answers threatening to come out of my mouth and told him, “Yes. But only if you chew them up and swallow them. If they’re just floating in your cup, they won’t hurt you.”

I kid, I kid.

I actually didn’t have to say anything at all because while I was quietly saying, “Nope, they’re just cranberries. Not even a little bit poisonous.” My almost 13-year old was sharing his own scary remarks about how his mom sometimes, but not always, puts poisonous berries in the cider so the family never knows which batch is safe, then ended with, “So. You want to try some?”

cranberry cider11

It’s so much fun to be a guest at our house. You should definitely come drink cider with us sometime. If you dare. Mooh-ha-ha.

Well now that we got all the sarcasm out of the way (a Christmas miracle), let’s get on with the niceties about this recipe.

This Simple Crock Pot Cranberry Apple Cider actually smells like Christmas. Yes, if you’ve ever wondered what Christmas smells like, this is your answer. It also looks like Christmas because what is more festive looking than (potentially poisonous) red berries, oranges, and cinnamon sticks in a crock pot? So pretty!

The best news is that this may be the simplest recipe you can make during the holiday season. Put ingredients into crock pot. Turn on crock pot. Let the smell of Christmas fill your home.

Simple Crock Pot Cranberry Apple Cider

Simple Crock Pot Cranberry Apple Cider
 
Save Print
Author: Laura
Serves: 8-10
Ingredients
  • 64 ounces unsweetened apple juice
  • 1-2 whole oranges, sliced
  • 16-ounces fresh cranberries
  • 3-5 cinnamon sticks
Instructions
  1. Place all ingredients into a slow cooker.
  2. Heat on low for 3-4 hours.
  3. Serve and enjoy!
3.4.3177

TIP: After you make the first round of cider, save the cinnamon sticks, oranges, and cranberries to reuse in another batch of hot cider.

Simple Crock Pot Cranberry Apple Cider

This cider is fun to leave in a crock pot for several hours during the day so that at all times the house smells wonderful and at any time a cup can be refilled!

Heavenly Homemaker's Club Members: Access your homepage and all your fantastic resources here! Not a member yet? Please join us!

Easy Chocolate Chip Cheesecake Muffins

November 19, 2017 by Laura Leave a Comment

This post may contain affiliate links. For more information, please see our disclosure policy.

It’s like we just can’t get enough of these cheesecake-topped muffins. We’re loving them at our house! Allow me to remind you of the others in this little series before I share the latest Easy Chocolate Chip Cheesecake Muffins:

  • Easy Chocolate Cheesecake Muffins
  • Easy Banana Cheesecake Muffins
  • Easy Pumpkin Cheesecake Muffins

The fourth and final (at least for now) cheesecake muffin is this:

chocolate chip cheesecake muffin22

Care to peek inside?

chocolate chip cheesecake muffin11

There’s so much yum in there!

I’m not sure why I saved these for last. Perhaps because most have declared them to be the best of them all? You be the judge. They are all amazing.

Easy Chocolate Chip Cheesecake Muffins

Easy Chocolate Chip Cheesecake Muffins
 
Save Print
Author: Laura
Serves: 12-15
Ingredients
  • 2 cups Muffin Mix** or...
  • 1½ cups whole grain flour
  • ⅓ cup brown sugar or sucanat
  • ½ teaspoon baking power
  • ½ teaspoon sea salt
  • 1 egg
  • ½ cup milk
  • ½ cup sour cream
  • ¼ cup melted butter
  • ¼ cup mini chocolate chips
  • Cheesecake topping:
  • 8 ounces softened cream cheese
  • 1 egg
  • 2 Tablespoons real maple syrup
  • ½ teaspoon vanilla extract
  • ¼ cup mini chocolate chips
Instructions
  1. Scoop Muffin Mix or measure dry ingredients together in a bowl.
  2. Add egg, sour cream, milk, and melted butter, stirring until ingredients are combined.
  3. Fold in ¼ cup chocolate chips.
  4. Scoop batter into 12-15 prepared muffin tins.
  5. Prepare cheesecake topping by blending (in a blender or with a hand mixer) cream cheese, egg, maple syrup, and vanilla until smooth.
  6. Spoon 2-3 Tablespoons of cheesecake topping over each unbaked muffin.
  7. Sprinkle chocolate chips over the top of each.
  8. Bake in a 400 degree oven for 18-22 minutes or until muffins are golden brown.
3.4.3177

**You really must get our Simple Mixes to Save the Day eBook so you can save time and energy by using the Muffin Mix for this recipe instead!! I LOVE having these mixes on hand!!!

Easy Chocolate Chip Cheesecake Muffins


How are your holiday plans coming? Have you been Getting Ahead for the Holidays? I can’t recommend it highly enough!

Heavenly Homemaker's Club Members: Access your homepage and all your fantastic resources here! Not a member yet? Please join us!

Easy Pumpkin Cheesecake Muffins (With or Without Chocolate Chips)

November 14, 2017 by Laura 5 Comments

This post may contain affiliate links. For more information, please see our disclosure policy.

Are you tired of Pumpkin Spice yet? Oh no. You can’t be. It’s way too early for that. And you haven’t even tried these Pumpkin Cheesecake Muffins yet!

pumpkin cheeesecake muffin11

I did cringe to see a box of Pumpkin Spice Cheerios at the store the other day. Really now. I think we’ve taken this Pumpkin Spice craze just a little bit too far. I love pumpkin and the delicious spices of the season. But I think we should leave our Cheerios alone. And who needs oddly flavored Cheerios anyway when there are these real Pumpkin Muffins with actual cheesecake topping for our dining pleasure?

pumpkin cheesecake muffin22

Better yet, if I give you permission to sprinkle mini chocolate chips on top of the muffins if you wish? Well, I think the holiday season just got significantly more merry and bright. Pour a cup of coffee to go with, and a delicate tear will slip out the side of your eye as you recognize that Jesus really is the reason for the season.

Easy Pumpkin Cheesecake Muffins

Easy Pumpkin Cheesecake Muffins (With or Without Chocolate Chips)
 
Save Print
Author: Laura
Serves: 12-15
Ingredients
  • 2 cups Muffin Mix** or...
  • 1½ cups whole grain flour
  • ⅓ cup brown sugar or sucanat
  • ½ teaspoon baking power
  • ½ teaspoon sea salt
  • 2 teaspoons pumpkin pie spice*
  • 1 egg
  • 15-ounces pumpkin puree
  • ¼ cup melted butter or coconut oil
  • Cheesecake topping:
  • 8 ounces softened cream cheese
  • 1 egg
  • 2 Tablespoons real maple syrup
  • ½ teaspoon vanilla extract
Instructions
  1. Mix dry ingredients together in a bowl.
  2. Add egg, pumpkin puree, and melted butter, stirring until ingredients are combined.
  3. Scoop batter into 12-15 prepared muffin tins.
  4. Prepare cheesecake topping by blending (in a blender or with a hand mixer) cream cheese, egg, maple syrup, and vanilla until smooth.
  5. Spoon 2-3 Tablespoons of cheesecake topping over each unbaked muffin.
  6. Sprinkle a few mini chocolate chips on each muffin if you like.
  7. Bake in a 400 degree oven for 18-22 minutes or until muffins are golden brown.
3.4.3177

*Find the recipe for our Pumpkin Spice mix here. Or substitute: 1 teaspoon ground cloves, 1 teaspoon cinnamon, and 1/2 teaspoon nutmeg in this recipe.

**If you have our Simple Mixes to Save the Day eBook, save time and energy by using the Muffin Mix for this recipe instead!!

Easy Pumpkin Cheesecake Muffins

In case you’d rather eat a Pumpkin Spice Cheerio instead of an actual Pumpkin Cheesecake Muffin, or if you’re someone who doesn’t like pumpkin or the spices that typically accompany this delightful gourd, I will now refer you to this recipes sister recipes:

  • Easy Chocolate Cheesecake Muffins
  • Easy Banana Cheesecake Muffins

banana cheesecake muffins22

chocolate cheesecake muffin11

Coming soon: Chocolate Chip Cheesecake Muffins!

chocolate chip cheesecake muffin22

These recipes prove that there is so much to be thankful for this season, am I right?

Heavenly Homemaker's Club Members: Access your homepage and all your fantastic resources here! Not a member yet? Please join us!

Easy Banana Cheesecake Muffins

November 9, 2017 by Laura 3 Comments

This post may contain affiliate links. For more information, please see our disclosure policy.

Perhaps you’re thinking, why would I make Banana Cheesecake Muffins when I can make Chocolate Cheesecake Muffins?

banana cheesecake muffins11

I’m here to tell you that I actually like these even better than the chocolate muffins. This, from a girl who loves her chocolate. There’s just something about the subtle sweetness, the perfect moistness, and the obvious cheesecake topping that makes these banana muffins rise to the top for me.

banana cheesecake muffins22

Then there’s the fact that I can think of no better way to use up overripe bananas. Now I watch our uneaten bananas start to turn dark and I’m like, “YES! I’m going to have to make some Banana Cheesecake Muffins with these!”

Notice I said “have to.” Because there is no other option. None at all. The only thing I can possibly do with my blackened bananas is make these Banana Cheesecake Muffins. It is the only way.

Easy Banana Cheesecake Muffins

5.0 from 1 reviews
Easy Banana Cheesecake Muffins
 
Save Print
Author: Laura
Serves: 12-15
Ingredients
  • 2 cups Muffin Mix** or...
  • 1½ cups whole grain flour
  • ⅓ cup brown sugar or sucanat
  • ½ teaspoon baking power
  • ½ teaspoon sea salt
  • 1 egg
  • 2 mashed ripe bananas
  • ¼ cup melted butter
  • Cheesecake topping:
  • 8 ounces softened cream cheese
  • 1 egg
  • 2 Tablespoons real maple syrup
  • ½ teaspoon vanilla extract
Instructions
  1. Scoop Muffin Mix or measure dry ingredients together in a bowl.
  2. Add egg, mashed banana, and melted butter, stirring until ingredients are combined.
  3. Scoop batter into 12-15 prepared muffin tins.
  4. Prepare cheesecake topping by blending (in a blender or with a hand mixer) cream cheese, egg, maple syrup, and vanilla until smooth.
  5. Spoon 2-3 Tablespoons of cheesecake topping over each unbaked muffin.
  6. Bake in a 400 degree oven for 18-22 minutes or until muffins are golden brown.
3.4.3177

**If you have our Simple Mixes to Save the Day eBook, save time and energy by using the Muffin Mix for this recipe instead!!

Easy Banana Cheesecake Muffins

Check out the sister recipe to this one: Easy Chocolate Cheesecake Muffins. And be watching for more! Easy Pumpkin Cheesecake Muffins and Easy Chocolate Chip Muffins recipes coming soon!

chocolate cheesecake muffin11

Heavenly Homemaker's Club Members: Access your homepage and all your fantastic resources here! Not a member yet? Please join us!
« Previous Page
Next Page »

Join Our Community!

 Facebook Twitter E-mail Instagram Pinterest

Popular Posts

~ Will All of the Real Moms Please Stand Up?
~ Easy! Stir-and-Pour Whole Wheat Bread
~ How to Make Gatorade
~ 31 Real Food Breakfast Ideas
~ Dear Teenage Girls...
~ When Mom Takes a Step Back
~ The Inexpensive Health Insurance We Love!
~ Let's Talk Real Food Grocery Budgets

Check out our latest posts!

  • Big Family Food and Fun: May 10-16, 2026
  • Big Family Food and Fun: May 3-9, 2026
  • Help Your Kids Become Independent in the Kitchen!
  • Big Family Food and Fun: April 26-May 2, 2026
  • Big Family Food and Fun: April 19-25, 2026
Home  ~  Simple Meals  ~  Club Membership  ~  Shop  ~  Privacy Policy  ~  Disclosure  ~ Contact

Copyright © 2026 · Beautiful Pro Theme on Genesis Framework · WordPress · Log in