Heavenly Homemakers

Encouraging women in homemaking, healthy eating and parenting

  • Home
    • About
    • FAQs
  • Recipes
    • Bread and Breakfast
    • Condiments
    • Dairy
    • Main Dishes
    • Side Dishes and Snacks
    • Desserts
    • Gluten Free
    • Instant Pot
    • Crock Pot
    • Heavenly Homemaker’s Weekly Menus
  • Homemaking
    • Real Food Sources
  • Store
  • Contact
    • Advertise
    • Disclosure
    • Privacy Policy
  • Simple Meals
  • Club Members!

Mix and Match Oatmeal Bars

November 10, 2013 by Laura 27 Comments

This post may contain affiliate links. For more information, please see our disclosure policy.

Whenever I say something to someone about one of my kids not liking something I make for a meal or snack, I get reactions like, “What?! Your kids are picky eaters?” No, no. I say. All four of them shout, “YES!” and do a fist pump each time they look over and see what has been prepared for them to eat. They give me a loving squeeze and pick me up off the floor (because three out of four of them can do that now), swing me around, and offer to do the dishes after we eat. They eagerly dig into each prepared dish, helping themselves to seconds and thirds – no  matter what I have fixed. I’m four-for-four on every single breakfast, lunch, dinner, and snack item I prepare.

Bahahahaha….haha…ha

The truth is that if I ever happen to prepare a meal that all four boys like without making any adaptions, it’s an amazing feat. They aren’t brats about it (usually), but shucks if two of my boys don’t even like corn. One won’t eat peanut butter. One hates bananas. One likes just about anything…but he’s not a big fan of anything with pumpkin unless it’s pie. One will only eat green beans if he has ketchup to dip them in. Only one boy will eat a fresh tomato and it’s beyond me why one of my cute blondies won’t eat a sweet potato fry because it’s orange and you know, tastes a little funny.

Do I baby my kids when it comes to food? Only in my spare time. When one of my boys hesitates about the food I’ve made, I remind him that I have not made anything weird or gross to eat, that I’m not going to make anything else for this meal, that most of what I make they do like, and they are to be grateful for the wonderful variety of food we always have at our house. They always have to eat some of what I make. If it truly makes them gag, they are on their own to find something nutritious that is less disgusting to them.

Hey, I get it. I don’t really love bananas either. We all have different tastes and preferences. But we don’t get to whine or complain, and we do need to be tough and thankful. Why yes, I have given that lecture a few (hundred) times.

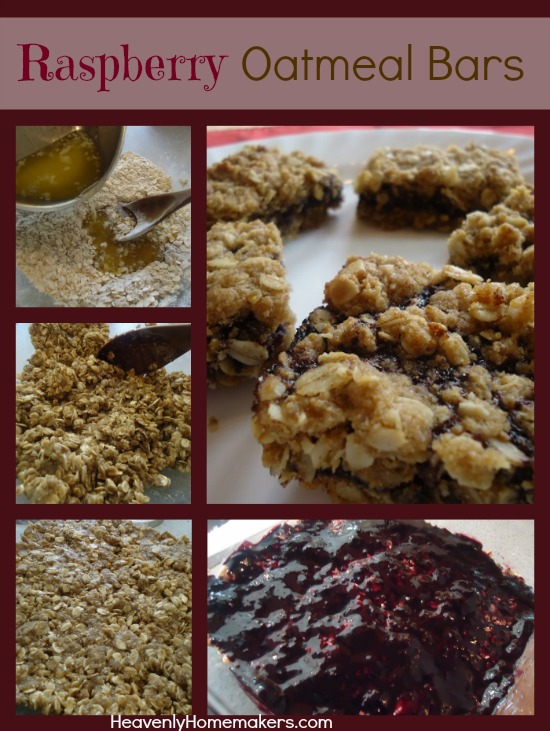
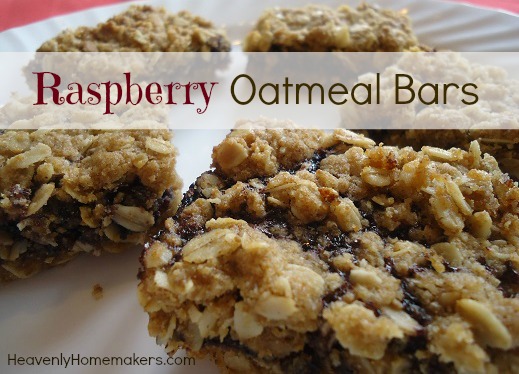
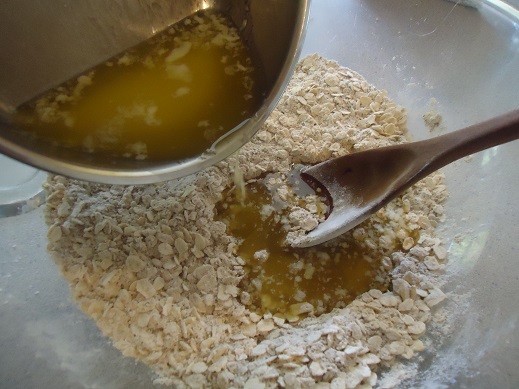
All that to say, last week I decided to make Raspberry Oatmeal Bars for breakfast. When I mentioned my plan, one of my boys said, “Okay, but I like apricot jelly better than raspberry.” To which I replied, “And I like summer better than winter, what’s your point?” Not really. Although I do…like summer better. But it occurred to me how easy (and tasty) it would be to make the oatmeal bars half and half. Not always can I run with the taste preferences in my household, but for this? Sure, why not?

Mix and Match Oatmeal Bars

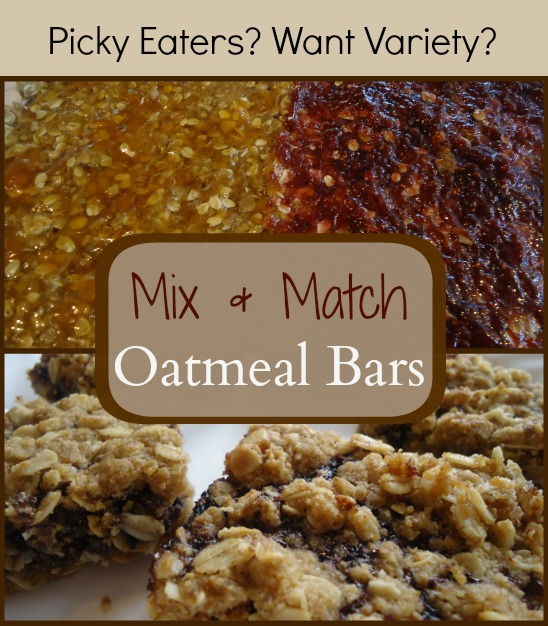
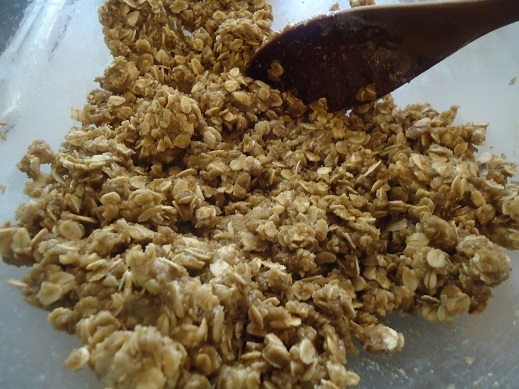
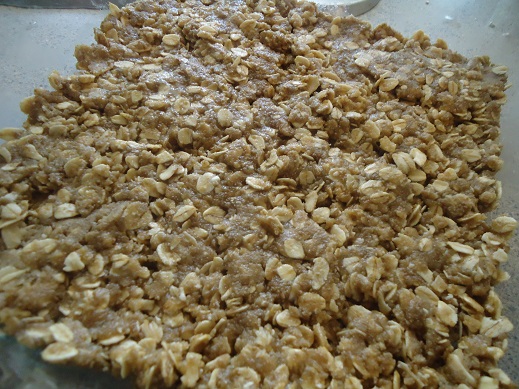
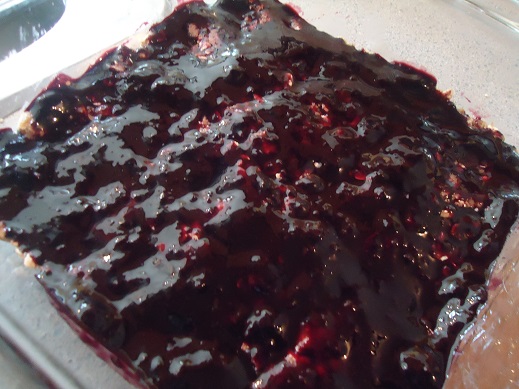
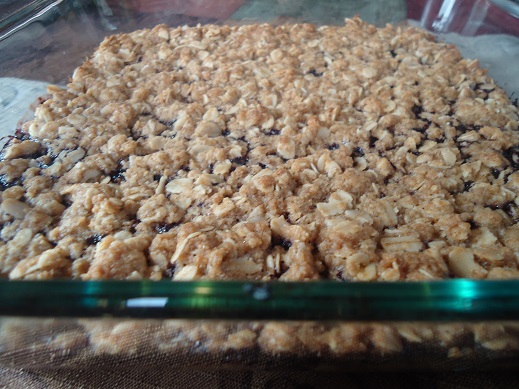
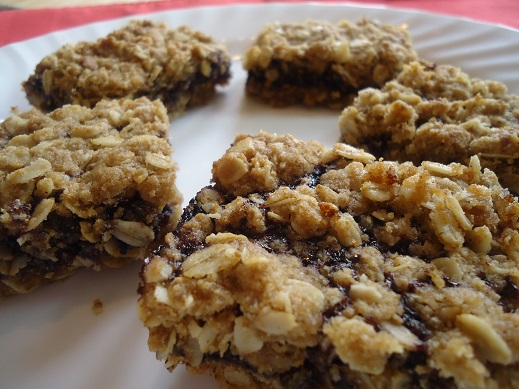
I doubled this Raspberry Oatmeal Bar recipe. I pressed the mixture into a 9×13 pan. I spread apricot jelly on one half and raspberry jelly on the other half. I sprinkled the oatmeal deliciousness on top, I baked the bars, and we all had a breakfast we loved. All six of us. Even the one who didn’t really think oatmeal bars sounded good that morning. To which I answered, “This is what we’re having for breakfast. And don’t forget to drink your milk.”

Next time, instead of making them half and half, I think I’ll make them like a checkerboard – each piece a different flavor.

Bahahahaha….haha…ha

In my spare time.

Does everyone in your house eat everything you make every time?


Heavenly Homemaker's Club Members: Access your homepage and all your fantastic resources here! Not a member yet? Please join us!

Menu Plan for the Week

November 10, 2013 by Laura 2 Comments

This post may contain affiliate links. For more information, please see our disclosure policy.

Chocolate_Chocolate_Chip_Muffins

My two favorite healthy muffin secrets, which are not secrets since I’ve blasted them all over this website multiple times are:  Freeze Muffin Batter to Make Life Simpler and Use Sour Cream Instead of Milk for a Moist Muffin. Those two non-secrets are what will give us a fast, delicious breakfast tomorrow morning before we start our school/work day. I love keeping life simple while putting great food on the table!

Here’s our menu for this week:

Sunday, November 10
Homemade instant oatmeal, dried fruit
Cheeseburger macaroni, peas
Small group fellowship – tacos

Monday, November 11
Chocolate chocolate chip muffins, apples
Crustless pizza, green beans
Turkey sausage and red bean stew, tossed salad

Tuesday, November 12
Pumpkin pancakes, applesauce
Meat and cheese burritos, carrots, pears
Beefy vegetable soup, cornbread

Wednesday, November 13
Sweet potato streusel muffins, bananas
Tomato soup, grilled cheese sandwiches, pineapple
Layered cheesy salsa enchiladas, tossed salad

Thursday, November 14
Whole wheat waffles, blueberries
Spanish rice, pineapple mango smoothies, carrots
Chicken fried steak strips, mashed potatoes, gravy, peas

Friday, November 15
Peanut butter pancakes, bananas
Chili, corn chips, veggies
Italian cream cheese chicken, tossed salad

Saturday, November 16
Homemade grape nuts cereal, fruit
Leftovers
Tuna casserole, green beans

Heavenly Homemaker's Club Members: Access your homepage and all your fantastic resources here! Not a member yet? Please join us!

Cranberry Nut Trail Mix

November 7, 2013 by Laura 4 Comments

This post may contain affiliate links. For more information, please see our disclosure policy.

This healthy, make-ahead snack is kind of a no-brainer, and not really a recipe at all. But it’s still worth mentioning as we focus on getting ahead with healthy snacks. Why? Because there’s chocolate in it. Obviously.  And also because it’s easy and good for you and all that other stuff.

Last week, I mixed up a big bowl of Cranberry Nut Trail Mix with items we had on hand. Then, I scooped it into individual grab-and-go baggies. Don’t like the dried fruit and nut options I mention below? No biggie – just use what you have and what you like. No matter what, you’ll be putting together a healthy snack. (Unless you add candy corns or m&ms, c’mon.)

And have you purchased bagged trail mix? Talk about pricey! They can’t help but be. Ingredients like nuts and dried fruit can be expensive. Therefore, I’ve decided that I don’t need to pay someone to stir my ingredients and put them into a bag for me. I can do that myself thankyouverymuch and save some bucks while I’m at it. (I buy my nuts in bulk at Braga Farms.)

Cranberry Nut Trail Mix

So here you go – Cranberry Nut Trail Mix, the recipe. Which isn’t a recipe. Far be it for me to tell you how nutty you should be on any given day.

Cranberry Nut Trail MixYum

Almonds
Cashews
Dried Cranberries
Golden Raisins
Dark Chocolate Chips

Stir any combination of the ingredients together in a bowl. Store in an airtight container (like a jar!), or scoop mixture into individual baggies for grab-and-go snacks.

What other trail mix combinations do you like?

Heavenly Homemaker's Club Members: Access your homepage and all your fantastic resources here! Not a member yet? Please join us!

How Do You Clean Your Home Naturally? (What Would Grandma Do?)

November 6, 2013 by Laura 32 Comments

This post may contain affiliate links. For more information, please see our disclosure policy.

cleaners

I thought I was going to gag. I almost got a headache. My lungs got tight. I’m not exaggerating.  Elias (my 11 year old) was with me, and he started to feel queasy. We were there only about seven seconds.

Where had I taken my child, you ask? To aisle nine.  We were simply walking down the cleaning products aisle at the store.

I avoid that aisle at all costs. But that particular day last week, I needed one item – an ingredient to make a homemade cleaning product. Go figure, after those seven seconds of torture, I still couldn’t find what I was looking for.

Elias asked, “Mom, why is that aisle so disgusting?” Obviously, I’ve avoided taking my kids there since my eleven year old didn’t know that it even existed. If found it hard/ironic/frustrating to explain that all of those products that seemed so nasty to him are offered for sale to help us get our house, dishes, hands, air, clothes, furniture, bathroom, floors, and windows clean.

I’m all for getting rid of the dark cloud of dirty sock scent that hovers over my boys’ room. But when did “clean” begin to smell so toxic? And why are there so many hundreds of varieties of cleaning products to choose from? Do I really need twenty-seven separate products to clean approximately five major areas of my home? Must we all keep a large cabinet full of sprays, bottles, drops, powders, and scrubby bubbles in order to be fully equipped with everything it takes to keep a house clean?

Absolutely not. Be relieved and take a deep breath (but by all means, get out of the cleaning aisle first so that you don’t pass out).

I’m inclined to ask, “What would Grandma do?” I spent hours at my grandma’s house, helping her cook and clean. Try as I might, I can not remember where in the world her cleaning cabinet was. This leads me to believe that she didn’t have one. She wouldn’t have seen the value of spending money on a variety of different cleaning products when her home naturally had everything she needed. In fact, as long as I can remember, she made her own bars of soap. If I close my eyes, I can still smell it. Mmmm, there’s nothing toxic about it. In fact, it didn’t have much of a scent at all. It only smelled…clean.

I’ll admit – I don’t make my own soap. Instead, I have found some great online resources for a few products I trust for our skin, hair, laundry and dishes.

As for cleaning my home? Well, I don’t find that it’s very complicated really. There’s nothing like good old water. Norwex products are awesome. And the best? Baking soda and vinegar.

I found a great online resource, sharing 27 Ways to Clean with Baking Soda. Not to be outdone, here’s a post I found called 1001 Uses for Vinegar. I’m guessing Grandma knew many of these tricks, because she knew that getting her home clean didn’t require that she spend much money or use toxic chemicals. I’m guessing, actually, that she never gave thought much to toxic chemicals – she simply used what she had, and she knew how to keep her home clean.

Ahhh, fresh, clean, and chemical free. That’s what I call cleaning your home naturally.

I know many of you have knowledge on this topic! Share your tips and ideas. How do you clean your home naturally?

Heavenly Homemaker's Club Members: Access your homepage and all your fantastic resources here! Not a member yet? Please join us!

Homemade Soft Pretzel Bites Recipe

November 5, 2013 by Laura 31 Comments

This post may contain affiliate links. For more information, please see our disclosure policy.

How’s the Getting Ahead {Snacks} Challenge going for you? I’m having a blast in the kitchen, but I can’t say I’m really getting ahead. We’re eating the food as fast as I make it. And by we, I mean my four boys. Okay fine, except for the Raspberry Oatmeal Bars. I took care of those very well without much help. {grins sheepishly}

You are going to love today’s idea! This one really did help me get ahead. I turned out so many pretzel bites, we ate on them all day, then I was able to stash some in the freezer too. This recipe is more time consuming than the other easy snack recipes I’ve shared. But trust me, these are worth the extra work! I didn’t stop and count how many pretzel bites this recipe makes (for obvious sanity reasons), but I would say this recipe would fill a two gallon ziplock bag and then some. Yep! You’ll get ahead with this recipe for sure!

pretzel_bites

Yum

Homemade Soft Pretzel Bites (Adapted from my Soft Pretzel Recipe)

1 cup water
2 Tablespoons yeast
2 teaspoons honey
2 1/2 cups milk
1 stick butter
1/2 cup honey
4 teaspoons sea salt
8 cups whole wheat flour (more or less as necessary)
butter
salt

In a large bowl, mix 1 cup warm water, yeast, and 2 teaspoons of honey. Stir this together and allow it to sit. Meanwhile, heat butter, milk, 1/2 cup honey, and salt in a medium saucepan on the stove until mixture has reached 120°. Stir contents in saucepan into the yeast mixture. Begin adding flour, two cups at a time until a nice dough has formed. Knead for 3-4 minutes. Place dough in bowl, cover, and allow it to rise for 1-2 hours.

On a well floured surface, roll fistful sized balls of dough into “snakes.” Cut into one inch bites.

pretzel_bites_1

Place on a baking sheet or stone. No need to allow for rising time, but if they sit there a while, that’s okay too. Bake in a 350° oven for 15-20 minutes or until golden brown.

pretzel_bites_3
Place baked pretzel bites in a bowl, drizzle on some melted butter, toss until coated, then sprinkle sea salt and toss again. Serve warm, serve cold, or cool and freeze the bites in a freezer bag for up to three months. Thaw and reheat in the oven.
pretzel_bites_2
I experimented with a Nacho Cheese Dip for these pretzel bites. Check it out here!

pretzel_bites_4

 Give me more dipping ideas for these soft pretzel bites!!

Heavenly Homemaker's Club Members: Access your homepage and all your fantastic resources here! Not a member yet? Please join us!

Cooking Whole Pumpkins

November 5, 2013 by Laura 4 Comments

This post may contain affiliate links. For more information, please see our disclosure policy.

Pumpkin_Puree_Collage_2

My children have informed me that we should have pumpkin pie more often (why wait till Thanksgiving?!). And pumpkin pancakes. And pumpkin muffins (chocolate chip or cream cheese, take your pick).

And so, since I acquired another couple of pumpkins last week, I have them in the oven today so that I can be on top of my pumpkin game. It’s not just the kids who want these treats. There’s just something about rain, soggy leaves, and wind that make me want to bake pumpkin recipes.

I wanted to remind you about the post on my site detailing how to easily cook a whole pumpkin. It’s the easiest way to make pumpkin puree – you won’t even chop off any of your fingers!! Plus this method turns out a puree super delicious and perfect for all your pumpkin recipes.

So kids, pumpkin pie…coming up!

What’s your experience with making pumpkin puree? Ever cooked a whole pumpkin before? Do it!!

Heavenly Homemaker's Club Members: Access your homepage and all your fantastic resources here! Not a member yet? Please join us!

Gratituesday: Quick Trip

November 4, 2013 by Laura 10 Comments

This post may contain affiliate links. For more information, please see our disclosure policy.

When my dad called last week and told me that he had some shocking news, my heart skipped a beat. No one likes to receive a phone call like that. :(

As it turns out, my 30 year old cousin, had passed away the day before. He was a delightful Christian young man who had fought physical ailments, including severe seizures, for years. As sad as I was to hear that he was gone, I couldn’t help but be thankful that he is now free. The memories flooded back as I thought back to the days I had spent with him growing up. I babysat many, many days for him and his siblings. Back when I was a teenager, I had loved caring for those kids!

And now Garrett was gone. His funeral was to be Friday. I felt a huge tug to be there – to see his siblings that I love so much. To see his mom and his dad. His grandpa. Yes, I wanted to be there.

By some miracle, we had a free weekend. Matt was out of town with the college soccer team, but the four boys and I headed south to spend time with family and to celebrate Garrett’s life. Asa, our 16 year old, drove most of the way. That is another Gratituesday post in and of itself. I have a kid old enough to drive me to Kansas and back.  Wowza.

I am so thankful we were able to go. It was worth the trip just for the hugs. I loved hearing from Garrett’s sister as she told her new husband, “Laura babysat us all the time. She’s the one that made us awesome monkey bread.” Aw, how sweet that she remembered. :)

It’s amazing, isn’t it, that funerals become wonderful reunions with loved ones? In addition, while we were in Kansas, my younger boys got to have a great time with their cousins, my older boys got to work at my Dad’s Saturday auction (he’s a realtor/auctioneer), we got to go to my nephew’s birthday party, and I got to have a talk a mile a minute because we only have one hour together visit with my great friend Amy from The Finer Things in Life. We arrived home just in time to set our clocks back, hit the bed, and welcome Matt home from his trip.

God is so good to give us the energy and ability to make this trip happen. While we will all miss Garrett, I am so thankful that as we celebrated his life together with family and friends, then have some bonus time with others we love!

Share how God is working in your life on your blog, then come link up with us here. If you don’t have a blog, be sure to leave a comment letting us know what you’re grateful for! Please read through the Gratituesday Guidelines so that you understand what kinds of posts you can link up to share here. Posts that are linked but do not fit our Gratituesday theme will be deleted.

If you are linking up a blog post for Gratituesday, please copy and paste the following sentence into your post! Thanks!

Join us for Gratituesday at Heavenly Homemakers!

Heavenly Homemaker's Club Members: Access your homepage and all your fantastic resources here! Not a member yet? Please join us!

Easy Peanut Butter Snack Bars

November 3, 2013 by Laura 22 Comments

This post may contain affiliate links. For more information, please see our disclosure policy.

Here’s another super easy snack recipe to help us along in the Getting Ahead {Snacks} Challenge. These were a huge hit at our house – and so easy that I can definitely make these frequently!

peanut butter snack bars

Easy Peanut Butter Snack BarsYum

Easy Peanut Butter Snack Bars
 
Save Print
Author: Laura
Serves: 20
Ingredients
  • 1 cup natural peanut butter (I use homemade creamy peanut butter)
  • ½ cup butter
  • ⅔ cup sucanat or brown sugar
  • 3 eggs
  • 1 teaspoon vanilla extract
  • ½ teaspoon sea salt
  • 1 cup whole grain flour
  • ¼ cup chocolate chips (optional)
Instructions
  1. In a small saucepan, melt together peanut butter and butter.
  2. Pour mixture into a medium-sized bowl and stir in sucanat until creamy.
  3. Add eggs, vanilla, and salt, stirring well.
  4. Mix in flour until well combined.
  5. Spread mixture into a 9x13 inch baking dish.
  6. Bake in a 350° oven for about 25 minutes.
  7. Remove from oven and sprinkle chocolate chips on top if desired.
  8. Cut into about 20 bars.
3.5.3251


To freeze:  Allow bars to cool completely. Wrap them individually to keep the bars moist. Place wrapped bars in a freezer bag and freeze for up to 3 months. Thaw for at least one hour before serving.

These make for great grab-and-go snacks!

Heavenly Homemaker's Club Members: Access your homepage and all your fantastic resources here! Not a member yet? Please join us!

Menu Plan for the Week

November 3, 2013 by Laura 1 Comment

This post may contain affiliate links. For more information, please see our disclosure policy.


baked_mac_and_cheese_2

Sunday, November 3
Dark chocolate almond granola, apples
Hearty green bean casserole (in Oh, For Real cookbook)
Fall Festival at church – taking Peanut Butter Apple Cookie Bars

Monday, November 4
Cinnamon bun muffins, peaches
Bacon, egg, and avocado salad, whole wheat toast
Alfredo sauce with pasta, steamed carrots and broccoli

Tuesday, November 5
Homemade instant oatmeal, dried fruit
Calico beans, applesauce, carrot sticks
Spicy cheesy chicken dip, grapes

Wednesday, November 6 (the day Matt finally joins me in being 40!)
Peach cobbler (the perfect birthday breakfast for him)
Salmon patties, sweet potato fries, peas
Cheesy turkey sausage stromboli, tossed salad

Thursday, November 7
Protein pancakes, blueberries
Rice and veggie stir-fry with broccoli and carrots
Italian roast wraps with lettuce, sweet peppers

Friday, November 8
Pumpkin scones
Shepherd’s pie, fruit salad
Smothered chicken pasta, tossed salad

Saturday, November 9
Pumpkin oatmeal bake, applesauce
Twice baked potatoes, green beans
Sloppy joes, ranch potato wedges, peas

Heavenly Homemaker's Club Members: Access your homepage and all your fantastic resources here! Not a member yet? Please join us!

Raspberry Oatmeal Bars

October 31, 2013 by Laura 76 Comments

This post may contain affiliate links. For more information, please see our disclosure policy.

Raspberry Oatmeal Bars are pretty much amazing.

Raspberry Oatmeal Bars 11

Yum

I’m on a mission to create new healthy snack recipes so that my boys will have some great options on hand. But here’s what happened after I made these Raspberry Oatmeal Bars:  I dug into them while I was in the kitchen by myself and loved them so much that I forgot to call in the kids. Then when I realized I was like, “Eh, the kids can have a piece of cheese.” And then I kept eating the bars. Great mom moment, huh? :)

This may be one of the best snack recipes ever, hands down. The kids thought so too, once I remembered to share.

Raspberry Oatmeal Bars

Raspberry Oatmeal Bars
 
Save Print
Author: Laura
Ingredients
  • 1½ cups whole wheat flour
  • 1½ cups rolled oats
  • ½ cup sucanat
  • ½ teaspoon baking powder
  • ¼ teaspoon sea salt
  • 1 cup melted butter
  • ½ cup raspberry jam (100% fruit)
Instructions
  1. Mix together flour, oats, sucanat, baking powder, and salt.
  2. Stir in melted butter until the mixture resembles crumbs.
  3. Press half of the mixture into an 8x8 inch baking pan.
  4. Spread jam over the top.
  5. Sprinkle remaining oat mixture on top of the jam layer, pressing down to cover.
  6. Bake in a 350° oven for 30 minutes or until lightly browned.
3.4.3177

Raspberry Oatmeal Bars 12

You can definitely change these up by using a different variety of jelly or jam. I think apricot would be awesome in these, or strawberry, or peach…

If they last long enough, you can freeze them: Allow them to cool completely, then wrap individually for a quick grab and go snack. Place individually wrapped bars in a large freezer bag and store in the freezer for up to two months.

Here are some pictures to show more specifically how to put these bars together. They are really so easy!

First,  mix together the dry ingredients. Then pour in the melted butter.

raspberry-bars_1

 Stir until the mixture resembles buttery crumbs.
raspberry_bars_2

Press half of the crumbs into an 8×8 inch baking dish.

raspberry_bars_3
Spread the jam over the first layer of oat mixture. Spoon the remaining oat mixture over the jam and press down to cover.
raspberry_bars_4

Bake in a 350° oven for about 30 minutes. Cut them while they are warm, or allow them to cool first.

raspberry_bars_7

Try to remember to share them with others.

raspberry_bars_8

Not only will I be making these frequently for snacks in the future, I think they will be wonderful for breakfast. And I’ll even try to remember to serve them to my children. ;)

Heavenly Homemaker's Club Members: Access your homepage and all your fantastic resources here! Not a member yet? Please join us!
« Previous Page
Next Page »

Join Our Community!

 Facebook Twitter E-mail Instagram Pinterest

Popular Posts

~ Will All of the Real Moms Please Stand Up?
~ Easy! Stir-and-Pour Whole Wheat Bread
~ How to Make Gatorade
~ 31 Real Food Breakfast Ideas
~ Dear Teenage Girls...
~ When Mom Takes a Step Back
~ The Inexpensive Health Insurance We Love!
~ Let's Talk Real Food Grocery Budgets

Check out our latest posts!

  • Big Family Food and Fun: May 31-June 6, 2026
  • Big Family Food and Fun: May 24-30, 2026
  • Free 7-Day Summer Menu Plan
  • Big Family Food and Fun: May 17-23, 2026
  • Easy Side Dishes for Summer
Home  ~  Simple Meals  ~  Club Membership  ~  Shop  ~  Privacy Policy  ~  Disclosure  ~ Contact

Copyright © 2026 · Beautiful Pro Theme on Genesis Framework · WordPress · Log in