Heavenly Homemakers

Encouraging women in homemaking, healthy eating and parenting

  • Home
    • About
    • FAQs
  • Recipes
    • Bread and Breakfast
    • Condiments
    • Dairy
    • Main Dishes
    • Side Dishes and Snacks
    • Desserts
    • Gluten Free
    • Instant Pot
    • Crock Pot
    • Heavenly Homemaker’s Weekly Menus
  • Homemaking
    • Real Food Sources
  • Store
  • Contact
    • Advertise
    • Disclosure
    • Privacy Policy
  • Simple Meals
  • Club Members!

Too Tired to Cook

September 10, 2010 by Laura 51 Comments

This post may contain affiliate links. For more information, please see our disclosure policy.

When I wrote this post suggesting that you eat out less as a simple step toward becoming more healthy, several of you asked, “So what do you do when you’re just too tired to cook?”

Well, thankfully I never get tired so this isn’t an issue at our house.

Just kidding.

I adore cooking and consider it to be one of my favorite hobbies, but there are several times a week (whether it’s breakfast, lunch or dinner) that I really don’t feel like cooking. Or I don’t feel like messing up the kitchen. Or the kitchen is already messy and I don’t feel like cleaning it and then making it messy again. Or I’ve been in the kitchen all day making tomato sauce or salsa or applesauce, which makes me feel like I’ve been cooking but there’s still nothing for dinner…and I’m tired.

Then my pitiful, starving children crawl into the kitchen clutching their empty bellies because it’s been like 28 minutes since they last put food in their mouths and they must…have…dinner…

This is when I am so thankful that I have taken the time to prepare food ahead of time and put it in the freezer.

So in answer to your questions about what I do when I don’t feel like cooking:  I make good use of the food I’ve prepared ahead of time and put in the freezer. Healthy freezer foods are a life saver for me. I HEART freezer foods!!!

Now, some foods take longer to re-heat from a frozen state (like a lasagna casserole)…so hopefully I am aware ahead of time that I need to grab something pre-made out of the freezer for a meal. (A frozen lasagna casserole takes a good two hours (+) to thaw and cook.)  Otherwise, many items just go directly to the oven in their frozen state, taking just a few minutes to reheat (like these burritos).

I encourage you to look through all the posts in my Make Ahead Meals series for ideas, recipes and suggestions for freezer cooking. It isn’t hard to spend a few hours each month making extra food and putting it into the freezer. Just do a little bit every few days until you have a nice freezer stash. You will be so thankful you did! The few hours you spend cooking ahead will save you many hours later. Plus it will save you a load of money and help you eat healthier too!

Here are the foods I’ve been making recently to have on hand:

freezer_cooking_sept

Banana Bread and Banana Muffins (Yes, that is tomato sauce in the background. 
It’s always good to bake something while you’re in the kitchen waiting for tomato sauce to cook down.)

freezer_cooking_sept_2

Sloppy Cornbread Muffins – these can be warmed in the oven
from their frozen state and ready in just a few minutes!

freezer_cooking_3

Two loaves of honey whole wheat bread and two loaves of
cinnamon swirl bread. We discovered the other day that the
cinnamon swirl bread makes wonderful french toast for breakfast!

freezer_cooking_4

Hamburger buns…and YES, I figured out how to make hotdog buns. 
SO EASY! I’ll share the “how-to” soon!

yogurt

Yogurt – okay it’s not a freezer food –
but I’m so happy to have a big half gallon jar of yogurt on hand for snacks or for soaking grains.

chewy_granola_bars

Chewy Granola Bars – also not a freezer food.
I made a triple batch of these so now we have a huge supply in the
fridge ready for Matt or the boys to grab on the run!

granola_bars_2

 I individually wrapped the granola bars and put them in a cute basket in the fridge.
  The men in my life don’t so much appreciate my cute basket, but you appreciate it don’t you? 
They do appreciate the contents of the basket, of course.

chicken_broth_14

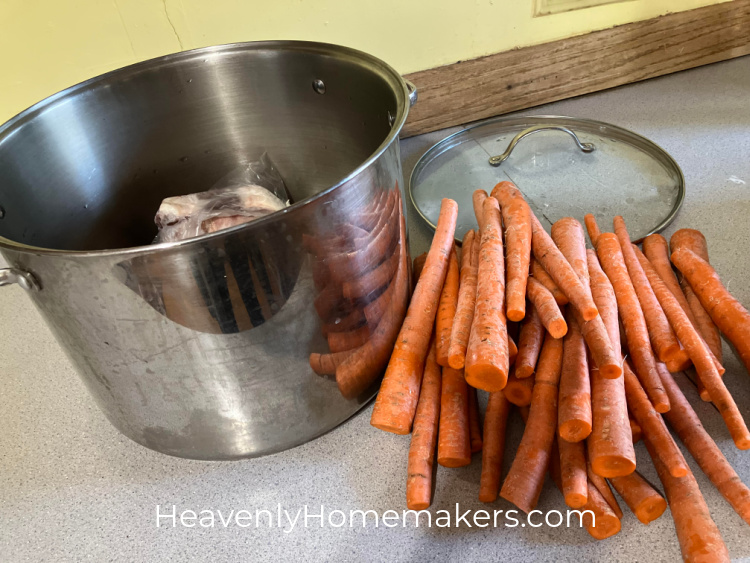
You already know that I had a big chicken party and made four huge containers of chicken broth…

chicken_broth_10

And ten containers of cooked chicken.

homemade_noodles_14

I made and dehydrated a double batch of homemade noodles
to go with that chicken and broth – perfect for these chilly fall evenings!

homemade_poptarts

Last but not least, I tried an idea I’ve been thinking about for a while – homemade poptarts!! They turned out so-so (read:  tasty but really sticky and messy), so I’ll be tweaking the recipe before I share it with you. But you can look forward to it coming sometime!

A few other fall back meals I rely on when I don’t feel like cooking:

  • Salmon Patties with vegetables
  • Quesadillas (if I have tortillas on hand)
  • Pancakes and scrambled eggs (using this pancake recipe – skipping the soaking part)
  • Hamburger patties with vegetables
  • Fried eggs on toast with smoothies

What meals do you make when you don’t feel like cooking, but you want to avoid eating out? Have you found that having frozen, premade meals in the freezer has been helpful to you?

Heavenly Homemaker's Club Members: Access your homepage and all your fantastic resources here! Not a member yet? Please join us!

Homemade Chicken Broth

September 9, 2010 by Laura 148 Comments

This post may contain affiliate links. For more information, please see our disclosure policy.

Making homemade chicken broth is one of my favorite ways to save money and pack in the nourishment too.

How to Make Chicken Broth

Yum

Last weekend I had a big party with some chickens in my kitchen. Three extra large chickens to be exact, purchased from a farm nearby that allows their chickens to do the chicken dance all over their yard while feasting on bugs all day long.

I decided that since I was going to cook one chicken, I might as well cook three. One mess, one day…all done. You can, of course, make this broth using only one chicken…but the pictures below are going to be of the big chicken party.

First, thaw your chicken. Or not. I got my chickens out of the freezer and put them in the fridge overnight, but they were still pretty frozen the next morning when I was ready to start my broth. No matter. Frozen chickens thaw quickly in boiling water (imagine that).

chicken_broth_1

Check it out, it’s a tower of chickens.

How to Make Chicken Broth

Put your chicken into a large pot. I used my huge stock pot since I was going to be boiling three large birds. Fill the pot three-quarters full of water.

chicken_broth_2

Add veggies to the pot…as many as you want and any variety you want. My favorites are:  carrots, onions, leaks and celery. I pretty much throw in whichever veggies I have at the time. There is no rhyme or reason to my chicken broth making madness…you really can’t hurt your broth by putting in too many veggies. You can overflow your pot, but I’ll just assume you’ll use common sense on that one.

Shake a nice amount of sea salt into the pot.

chicken_broth_3

Bring your pot of chicken, veggies, water and salt to a boil. Turn the burner down and simmer (with the lid on) for several hours. By several, I mean check it every so often in between clipping your child’s fingernails, matching up a basket of socks, and chasing your naked toddler down the street to bring him back into the house for his bath. When the chicken starts to spread apart and the meat is falling off the bone…ding! He’s done.

chicken_broth_4

Carefully lift the chicken(s) out of the pot and onto another dish. Allow it to cool for a little while (but not too long because de-boning a cold chicken is a lot harder than de-boning a warm one). Take all the meat off the bone once the chicken is cool enough for you to touch it without screaming.

chicken_broth_5

This is the part I usually like to hand over to Matt. I’m not a big fan of de-boning a chicken, even though it isn’t hard. Matt doesn’t mind doing it because he usually sneaks bites of cooked chicken while he works. And I let him because he’s de-boning the chicken so I don’t have to.

chicken_broth_7

Use your chicken bones to make broth

Throw all the bones and skin back into the pot of broth, and fill the pot with water, onions, and carrots. Now you can make a second round of broth – getting the most out of your chicken and bones!

chicken_broth_6

chicken_broth_8

Cover the pot and simmer for 4-10 hours to really “suck the good stuff out of the bones and into the broth.”

chicken_broth_9

In the meantime, you can put all your cooked chicken into containers for future meals. I happened to get TEN meals worth of meat from my three extra large chickens because I like to make my chickens stretch as much as I can. These jars went into the freezer (after they cooled completely). Yes, I put lids on them first.

chicken_broth_10

After the bones and skin have cooked for a couple of hours, strain the carcass out of the broth with a colander. Lookie, a big colander of chicken carcass. I don’t really like the word carcass. And yet, I keep saying carcass. Someone stop me. (What is the plural form of carcass? Carcasses? Carci? Seriously, someone stop me.)

chicken_broth_12

Mmm, look at that good, rich broth. I always run it through my blender (if I feel like it that day) to smooth out all the veggies. They’re usually pretty mushy by then anyway, and blending them into the broth adds even more nourishment and good flavor.

chicken_broth_13

Now, I actually have a hard time letting go of my chicken bones and skin (otherwise known as the carcass), so if I have an ounce of energy left at the end of my full day of chicken cooking and de-boning and broth making, I will then put the contents of my colander into my crock pot, fill it with water and leave it on low all night to make yet another round of broth. It isn’t as rich, but it still makes a good broth.

Chicken broth freezes very well, you’ll just want to make sure it has completely cooled before you put it into the freezer. I freeze mine in jars and in freezer bags. If you freeze it in jars, be sure to leave several inches open at the top to allow for the broth to expand. Otherwise your jar will bust and it will be sad.

chicken_broth_14

And there you have it. If this isn’t a great way to stretch chickens, I don’t know what is. From three big chickens I got four or more meals of chicken broth and ten meals of cooked chicken. LOVE. IT.

Heavenly Homemaker's Club Members: Access your homepage and all your fantastic resources here! Not a member yet? Please join us!

Favorite Chapter Books for Beginning Readers

September 8, 2010 by Laura 6 Comments

This post may contain affiliate links. For more information, please see our disclosure policy.

ramona

Once my kids have mastered learning to read simple books on their own, jumping into beginning chapter books feels like such an accomplishment for them. They think it is so cool to say, “Mom, I just read two chapters!” or “Wow, this book has twelve chapters in it!” Never mind that the chapters might be three pages long with large print. Reading “chapter books” is a really big deal for kids and a wonderful way to transition them toward bigger chapter books.

Read the rest of this article over at Deal Moon….

Heavenly Homemaker's Club Members: Access your homepage and all your fantastic resources here! Not a member yet? Please join us!

Gratituesday: My Messy House

September 6, 2010 by Laura 15 Comments

This post may contain affiliate links. For more information, please see our disclosure policy.

gratituesday

I know this is going to sound weird…but I’m really thankful tonight for my messy house.

Do I love having junk all over the floor? No. Do I enjoy stepping over cords and shoes and swords and sticks (who brought those sticks into the house, by the way?)? Not really.

But we’ve had a busy weekend, full of soccer games and family time and tomato sauce canning and chicken cooking and all kinds of work that needed to be done.

I’m thankful because we are all healthy enough to work hard and play hard and make messes. I don’t want to ever take our good health or the good health of our kids for granted.

The messes will still be there tomorrow…and we can tackle them all eventually (probably starting with those sticks!). But looking at our busy-ness, which there is evidence of in every room of our house, makes me smile tonight. I’m thankful for my crazy household. I’ll take this over a spotless house any day! I truly am living my dream…

What are you thankful for this Gratituesday? Write about it on your blog, then come link up with us here. If you don’t have a blog, be sure to leave a comment letting us know what you’re grateful for!

If you are linking up a blog post for Gratituesday,
please copy and paste the following sentence into your post! Thanks!


Join us for Gratituesday at Heavenly Homemakers!

Heavenly Homemaker's Club Members: Access your homepage and all your fantastic resources here! Not a member yet? Please join us!

Menu Plan for the Week

September 5, 2010 by Laura 2 Comments

This post may contain affiliate links. For more information, please see our disclosure policy.

orangejulius2sm

It’s been a soccer tournament filled weekend (I have a nice sunburned face to prove it)! I LOVE watching our kids play soccer and it’s kept me away from my computer much of the weekend. So…I haven’t had time to work on a menu plan (except in my head, which you can’t see).

This week, instead of writing a thorough menu plan, I am once again “jotting” down a quick list of ideas to grab from. I have been working to fill my freezer over the past week and can also grab from those meals if I need to. I’ll share about all my “cooking ahead” later this week!

Breakfast/Snack Ideas:

  • Creamy Orange Cooler
  • Mini Breakfast Pizzas
  • Applesauce Bread
  • Apples and Grapes with Strawberry Yogurt Fruit Dip
  • Simple Soaked Pancakes
  • Scrambled or Fried Eggs
  • Oatmeal

Lunch/Dinner Ideas:

  • Taco Potatoes
  • Grilled Cheese and Tomato Soup
  • Salmon Patties
  • Sloppy Joes on homemade buns
  • Pizza Casserole
  • Black Bean Salsa
  • Chicken Veggie Quesadillas
  • Cheesy Beef and Rice
  • Italian Roast Wraps
  • Rice and Veggie Stir Fry with Chicken

In between games this weekend, I did find time to have a party with three big chickens in my kitchen. Wanna hear about it? It was very exciting. There was a lot of broth involved.

Heavenly Homemaker's Club Members: Access your homepage and all your fantastic resources here! Not a member yet? Please join us!

Don’t Buy Stuff

September 2, 2010 by Laura 73 Comments

This post may contain affiliate links. For more information, please see our disclosure policy.

That’s it. My title is my post. Don’t buy stuff…that’s all I have to say.

 When asked what my favorite frugal tip is…Don’t Buy Stuff is the best thing I can come up with.

When you buy stuff, you have to pay for it with money. And then you have to find a place to put it once you bring it home. And it won’t stay where you put it because someone will get it out and not put it away. And then it will get lost. Or broken. Or forgotten.

Buy food. You need to eat.

Splurge on toilet paper. It’s very useful.

Invest in soap…using soap is good.

But don’t buy stuff.

You’ll save a lot of money.

And…if you didn’t really need it in the first place, you won’t even miss it. ;)

Heavenly Homemaker's Club Members: Access your homepage and all your fantastic resources here! Not a member yet? Please join us!

Homemade Whole Wheat Pasta

September 1, 2010 by Laura 92 Comments

This post may contain affiliate links. For more information, please see our disclosure policy.

I’ve been making homemade pasta for several years. It is SO easy and everyone loves it. I mostly use the noodles for Chicken and Noodle Soup or Beef and Noodles. Or, sometimes I roll the recipe into Lasagna Noodles (I’ll share how I do that soon).

By the way…I can’t decide whether to call this pasta or noodles. Is there a difference? If it’s okay with you, I’ll just keep using the words interchangeably since I apparently can’t make a decision about which one to use. Hopefully I won’t accidentally combine the two and call it poodles because that’s a different thing entirely and poodles can neither be mixed in a bowl nor rolled out on a well floured surface.

I think most people assume it’s hard to make your own noodles. If you are one of those people, please try mixing these up really quickly and find out how EASY they are to make!! Here…I’ll show you…

Whole Wheat PastaYum

2 1/3 cups whole wheat flour (I use freshly ground flour)
1/2 teaspoon sea salt
2 beaten eggs
1/3 cup water
1 teaspoon olive oil

Grain Soaking Instructions (so that the grain will be more easily digested):

Use the same ingredients, substituting the water with a cultured dairy product like buttermilk or plain yogurt. Mix then cover with a towel and let it sit for 12-24 hours.

First mix the flour and salt together in a bowl and make a little”pit”  in the middle.

homemade_noodles_1

Beat your eggs in a separate bowl, then pour them into the flour mixture.
Add the water (or buttermilk) and olive oil.

homemade_noodles_2

Stir well until the ingredients are mostly combined.

homemade_noodles_4

Dump it out onto a floured surface and knead it a little bit to get the ingredients combined well.
(If you are planning to soak the grain, you would begin at this point.
Put the “blob of dough” back into your bowl, cover and let it sit for 12-24 hours.)

homemade_noodles_7

Make sure your surface has a LOT of flour all over it so that your noodles won’t stick when you roll out the dough. Sticky noodles are not fun. (I would imagine that sticky poodles are not fun either, but I don’t have any experience in this area.)

homemade_noodles_6

Use a well floured rolling pin and roll and roll and roll until your noodle dough is almost hanging off the side of your counter top. Or at least until it is very thin, about 1/8 inch in thickness. You may need to keep tossing some flour under the dough as you roll to keep it from sticking.

homemade_noodles_8

I use a pizza cutter to cut long strips in my noodle dough.
That’s what Grandma used to do after all.

homemade_noodles_10

Ooh, isn’t it purty?

homemade_noodles_11

Cut your noodles any length you want.

homemade_noodles_13

In case you’re wondering…I made a double batch. Yeah…that’s a lot of noodles.

homemade_noodles_14

 Once you’ve cut your noodles you can either use them right away, or you can let them dry so that you can store them and have them ready for when you need them.

I used my new dehydrator to dry the noodles, but you can just leave them on the countertop to dry if you want. It will take a while…like several hours or even an entire day. You may also need to turn the noodles over after a few hours so that the under side can dry.

Once the noodles are completely dry, store them in an air tight container in your pantry. They will stay good for up to a month. They can also be frozen….just let them thaw a little before you cook them.

homemade_noodles_17

To cook your noodles:

Bring six cups of chicken, beef or vegetable broth to a boil. (I like to include cooked meat and veggies in my broth too when I add noodles.)  Stir in the noodles, making sure they don’t stick to each other. Salt well. Cover and simmer for 20-25 minutes or until the noodles are fat and tender.

Heavenly Homemaker's Club Members: Access your homepage and all your fantastic resources here! Not a member yet? Please join us!

Why You Shouldn’t Use Imitation Vanilla!

September 1, 2010 by Laura 42 Comments

This post may contain affiliate links. For more information, please see our disclosure policy.

Maybe you knew this already, but just in case…check out this email from Lindsy:

Hi Laura! I was just telling some friends today about my adventures in making vanilla extract. I live near Appleton, WI and this area is sometimes referred to as the Paper Valley because there are so many paper mills in the area. Anyway, one of my friends was saying that her husband works at a paper mill and part of his job is to collect the “run-off” from paper pulp. They then sell this by-product to companies that make it into imitation vanilla extract. How disgusting is that!?! I did a little Googling to see if this is for real, and found this on Wiki Answers:

“Imitation vanilla is manufactured either from clove oil (eugenol) or as a breakdown product of lignin from a conifer (e.g., spruce, Picea).”

I really don’t want to flavor my food with the run off from paper pulp, so I’ll stick to making homemade vanilla… :)

vanilla

Pssst! Grab your vanilla beans from Olive Nation. They offer us a 15% off coupon code: home. And we get free shipping on orders over $50!

Heavenly Homemaker's Club Members: Access your homepage and all your fantastic resources here! Not a member yet? Please join us!

Excalibur Food Dehydrator

August 31, 2010 by Laura 28 Comments

This post may contain affiliate links. For more information, please see our disclosure policy.

My friend Anne told me last summer that if I was going to invest in a good food dehydrator, to get an Excalibur Food Dehydrator because they were the best!

Much to my loudly squealing delight, a few weeks ago Cultures for Health sent me a Excalibur Food Dehydrator free of charge, in exchange for telling you all about it here on my blog! Wow, wow, wow.  I love every package delivered to my door, but this big ol’ box may have made me jump a just little higher (poor UPS man).

My husband and I are having such a fun time giving our Excalibur Food Dehydrator a work-out! This is the perfect time of year for us to give the dehydrator a whirl as we have all kinds of fresh produce needing to be preserved.

See the pretty peach fruit leather?

peach_fruit_leather

Matt cut up a bunch of our red jalapeno peppers and dehydrated them. Here they are before they went into the dehydrator…

dehydrating_peppers

And then just a few hours later… 

dehydrating_peppers_2

We then ground them up to put on pizza and in chili. SO easy!!

Beyond fruits and vegetables, I’ve used the dehydrator to quickly dry homemade pasta! Note to self:  Don’t cut the pasta too short when planning to put it in your dehydrator. Or, for Pete’s sake, make good use of your Paraflex Sheets!

homemade_noodles_16

The noodles still turned out great even if they were “bent out of shape”. I’ll be sharing the recipe soon!

Our dehydrator has five drying trays, which makes it possible to preserve a lot of food all at one time. LOVE that! The best part about anExcalibur Food Dehydrator is that all of the food drys evenly so that we don’t have to rotate the trays or be frustrated because one is done and the others aren’t yet. Oh, and if we only need two trays at once, we only put two trays in. There are several different “heat settings” so that you can keep some of your food raw if you want or even make yogurt!

We are LOVING our Excalibur Food Dehydrator and appreciate that Cultures for Health was kind enough to send it to us. We can’t wait to see what we can dehydrate next!!!

I’m sure you’d enjoy looking over the Cultures for Health site. They have wonderful products to make cultured dairy products and cheese and sprouted grain and more…not to mention the awesome Excalibur Food Dehydrator!!

Heavenly Homemaker's Club Members: Access your homepage and all your fantastic resources here! Not a member yet? Please join us!

Gratituesday: The Painless Dentist Visit (and Why I Can Eat Lettuce Again)

August 30, 2010 by Laura 26 Comments

This post may contain affiliate links. For more information, please see our disclosure policy.

gratituesday

I had put it off long enough.

Admittedly, I don’t go to the dentist as often as I’m supposed to. I actually had no idea when I had last been in for a cleaning/check-up and I was afraid to make an appointment and have my dentist shake his head at me as he told me how long it had been. Yes, I am 37 and I was afraid of being scolded. Go figure.

But, I had been experiencing an area of pain in one of my back teeth for several months. I realize I was only delaying the inevitable, but I just wasn’t very eager to go into the dentist office.

And so I put it off. In the meantime, I began to avoid a very important food: Lettuce.

There was something about the crunch of lettuce that shot a searing pain from my jaw all the way to…I don’t know…South Dakota? And so, not only did I avoid going to the dentist, I avoided eating lettuce because it is not fun for pain to shoot from your jaw all the way to your northern state border.

I finally decided that I was being unwise, and also a whiny baby…so I made the appointment.

The dentist only gently suggested that I come in more often, then looked and found my painful spot and said, yes…it looks like I have a tiny bit of decay on a back tooth. They had a cancellation the next day. Did I want to come then? Well sure I did. Gulp.

The next day I was ushered back and as I sat down in the special chair, I had this tremendous urge to buckle my seat belt. Am I a weirdo, or what? Apparently sitting in the dental chair made me feel like I had just taken a seat in my mini-van. What, was I afraid I might fall out or something?

They put the cute little bib on me, then the dentist gave me the option:  the cavity was so tiny that I may not want to mess with having a shot to deaden the area. Did I want to try receiving the filling without having the area numbed?

As it was a Wednesday and I hadn’t really been looking forward to drooling down the left side of my face during Bible class that evening, I decided to give it a go. But I think I said something like, “If at any point during the drilling I feel like punching you, can I then have a shot?”

Yes, I actually said that…to my dentist. I have got to learn when and where it is appropriate to use my sarcasm.

Thankfully, he understood that I was joking (I think) and said that yes, I could have a shot if the pain was too much to handle.

Then they started to drill. I braced myself for the pain. But it never came. Then they put the composite filling in my mouth and drilled that down and then took off my bib. I was done.

Not only did I never have the urge to punch my dentist, I instead had a very big urge to hug him. Painless dental work, really? And I could still feel both of my lips too? What a deal!

Of course, that night I went home and celebrated with (you guessed it) some lettuce. We’re obviously big partiers at our house.

So yes, today I am SO grateful that I got my dentist appointment over with and that it truly was painless. And I’m thankful that I can eat lettuce without pain. I know that’s silly but I truly am thankful for it. (I suppose I should also be grateful that I didn’t punch the man drilling my tooth. Or maybe he should be grateful for that?)

What are you thankful for this Gratituesday? Write about it on your blog, then come link up with us here. If you don’t have a blog, be sure to leave a comment letting us know what you’re grateful for!

If you are linking up a blog post for Gratituesday,
please copy and paste the following sentence into your post! Thanks!


Join us for Gratituesday at Heavenly Homemakers!

Heavenly Homemaker's Club Members: Access your homepage and all your fantastic resources here! Not a member yet? Please join us!
« Previous Page
Next Page »

Join Our Community!

 Facebook Twitter E-mail Instagram Pinterest

Popular Posts

~ Will All of the Real Moms Please Stand Up?
~ Easy! Stir-and-Pour Whole Wheat Bread
~ How to Make Gatorade
~ 31 Real Food Breakfast Ideas
~ Dear Teenage Girls...
~ When Mom Takes a Step Back
~ The Inexpensive Health Insurance We Love!
~ Let's Talk Real Food Grocery Budgets

Check out our latest posts!

  • Big Family Food and Fun: June 14-20, 2026
  • Big Family Food and Fun: June 7-13, 2026
  • Big Family Food and Fun: May 31-June 6, 2026
  • Big Family Food and Fun: May 24-30, 2026
  • Free 7-Day Summer Menu Plan
Home  ~  Simple Meals  ~  Club Membership  ~  Shop  ~  Privacy Policy  ~  Disclosure  ~ Contact

Copyright © 2026 · Beautiful Pro Theme on Genesis Framework · WordPress · Log in