Heavenly Homemakers

Encouraging women in homemaking, healthy eating and parenting

  • Home
    • About
    • FAQs
  • Recipes
    • Bread and Breakfast
    • Condiments
    • Dairy
    • Main Dishes
    • Side Dishes and Snacks
    • Desserts
    • Gluten Free
    • Instant Pot
    • Crock Pot
    • Heavenly Homemaker’s Weekly Menus
  • Homemaking
    • Real Food Sources
  • Store
  • Contact
    • Advertise
    • Disclosure
    • Privacy Policy
  • Simple Meals
  • Club Members!

Menu Plan for the Week

March 7, 2010 by Laura 20 Comments

This post may contain affiliate links. For more information, please see our disclosure policy.

You all know that food makes me excited. Can I tell you about my latest little fun food thing? I found these cute mini chocolate chips at Amazon. They don’t have any soy lecithin in them (my reason for looking). They’re so stinkin’ cute and fun to bake with. Yep, doesn’t take much to entertain us all around here. (And yes, I often do make my own chocolate chips, but sometimes a girl just needs a little chocolate chip convenience.)

I’ve also got to tell you about how we tried Valerie’s Bacon Cheddar Meatloaves  last week! We’d been excited all week long because, hello? Bacon, cheddar cheese and beef all together in one dish? How would that not be good?

So Saturday night came and I had the meatloaves in the oven baking…went to the fridge to get out the bacon to wrap around the loaves for the last phase of baking…and DIDN’T HAVE ANY BACON. I knew I had some bacon in there. Except that I didn’t.   And I was WAY too scary looking to run to the store (which thankfully I remembered before I went). 

So we had Cheddar Meatloaves , which were still amazingly wonderful, by the way.

cheddar_meatloaves

Here’s our menu for the week, and here’s hoping I have all the ingredients this time:

Sunday, March 7
Oatmeal, pears
Fund raising meal for youth mission trip
Creamy mac and cheese, steamed broccoli and carrots

Monday, March 8
Chocolate chip pancakes, bananas
Homemade corn dogs , apple slices
Roasted chicken, potatoes, carrots, gravy

Tuesday, March 9
Mini breakfast pizza, oranges
Grilled turkey and cheese sandwiches, strawberry peach slushie
Sloppy cornbread, tossed salad

Wednesday, March 10
Orange muffins, fruit and kefir smoothies
Cheddar ranch burgers, green beans
Chicken and noodles, carrot sticks, fruit salad

Thursday, March 11
Fried eggs, cinnamon swirl bread, clementines
Turkey sausage, mashed potato pancakes, peas
Italian stew with green beans

Friday, March 12
Peanut butter honey toast, canned peaches
Taco potatoes
Lamb-burgers on whole wheat hamburger buns, onion rings

Saturday, March 13
Mom is Great breakfast Cake
Leftover buffet
BBQ meatballs, baked potatoes, asparagus
———————————————-

Find more menu planning inspiration at Organizing Junkie.

Heavenly Homemaker's Club Members: Access your homepage and all your fantastic resources here! Not a member yet? Please join us!

Favorite Pizza Toppings – Question #60

March 5, 2010 by Laura 49 Comments

This post may contain affiliate links. For more information, please see our disclosure policy.

panpizza2sm

Tonight was pizza night at our house. 

I usually make pizza using this recipe, but tonight I was more in the mood for a thicker crust, so I made a yeast dough.

And of course, pictured above is just one of the pizzas but really I had to make three pizzas to fill us all. (I just picked the prettiest one for the picture.) 

Three pizzas did fill us all but most everyone needed more food two hours later. That’s how it works around here. Wow, these kids can eat.

We like making our pizzas with a variety of toppings. Some with “just cheese”. Some with cheese and turkey pepperoni. Some with cheese, turkey pepperoni and black olives. Some with cheese, turkey pepperoni, black olives, mushrooms and green peppers.

panpizzasm

Pretty tasty. 

Ooh, and my favorite ingredient? I like using white cheddar cheese instead of mozzarella. It gives the pizza SUCH good flavor!

So what’s your favorite kind of pizza? Do you like making pizza yourself? If not, where do you like to get your pizza?

Is anyone now hungry for pizza? Sorry about that. If you come on by, I think I might have a couple leftover slices.

Heavenly Homemaker's Club Members: Access your homepage and all your fantastic resources here! Not a member yet? Please join us!

High Five Recipes: Cream Scalloped Potatoes

March 4, 2010 by Laura 36 Comments

This post may contain affiliate links. For more information, please see our disclosure policy.

High Five Recipes 2

Had I not tasted these potatoes myself (when my friend’s mom made them) and realized that I had just bitten into a bite of comfort food heaven, I would not have believed that these three little ingredients all by themselves could actually create such a wonderful side dish.

All of the other scalloped potatoes I’ve ever made have required quite a bit of work:  prepare potatoes…make a white sauce…layer the potatoes with the sauce…cook covered for a specific amount of time…then uncovered for another specific amount of time.

But this potato recipe?  Scrub and slice potatoes. Sprinkle with salt. Pour cream over potatoes. Bake. Stir every once in a while. Eat. Try to be nice and share. No really Laura…please pass the potatoes.

creamscallopedpotatoessm

Cream Scalloped Potatoes

4-5 medium potatoes
1 1/2 cups cream
sea salt to taste

Scrub potatoes and cut into very thin slices. Spread into a casserole dish. Sprinkle with salt. Pour cream over potatoes.

Bake uncovered at 300° for 1 1/2 to 2 hours, pulling dish out and stirring occasionally. Serve when potatoes are tender and cream has thickened.

The starch from the potatoes naturally thickens the cream into it’s own white sauce! SO simple!

Now, you’re welcome to throw in some onion or even sliced carrots into this dish if you want more flavor. I personally love it with just a generous amount of salt.

This potato dish is inexpensive, healthy and takes very little time to prepare. And it tastes like comfort food heaven. What more could we ask for?

Heavenly Homemaker's Club Members: Access your homepage and all your fantastic resources here! Not a member yet? Please join us!

Our Healthy Eating Journey, Part 5

March 3, 2010 by Laura 45 Comments

This post may contain affiliate links. For more information, please see our disclosure policy.

 healthyeatingjourney
If you missed them, please catch up on
Part 1, Part 2, Part 3 and Part 4

Back in Nebraska now, I had to adjust to the fact that NONE of the stores doubled coupons. I sort of went through withdrawals. Crazy, I know…but double couponing and getting most of our food for free had been a big part my grocery shopping/menu planning/cooking for the past four years. I had to learn how to shop in a new way now.

I continued to shop the sales and clip as many coupons as I could. I found I was still able to save quite a bit of money using coupons, spending only about $200/month for our family of five.

Our first summer here, I had my first real garden…asking as many questions as I could to people who knew more than I did (because at that point, EVERYONE knew more than I did about gardening!). It was fun…yet hard because I had a five year old, a two year old and a five month old at the time. 

I remember learning that I had dug up a nice strawberry patch because I didn’t know what that area of green stuff was growing in the middle of the place I wanted to put my green beans. I remember asking about what I should put on my tomato plants, then buying and using some sort of bug killer that would also hurt my children if not put up in a high place (yeah, I had barely even heard the word organic then).

My second year of gardening, I brought home my mom’s canning jars and her book about how to preserve food. That was the first year I attempted to “home can” anything…and I loved it! (I believe the rest is history in regard to canning and preserving!)

It wasn’t until I was pregnant with our fourth son that we even started thinking remotely about eating healthy. Even though I was pregnant, I still drank my Pepsi regularly…enjoyed lots of lunches out with friends…had a pantry full of boxes.

Then Matt went on a short trip to Scotland (LONG story) to visit some friends who were living there. While he was there, he kept a journal. In his journal, he even kept a record of the food he ate (because he thought I’d probably enjoy knowing…is he the sweetest or what?!).

The friends he stayed with there were pretty health conscious and ate lots of fresh fruits and vegetables. During meals, they would discuss some of the foods they focused on eating, and some of the foods they worked to avoid.

Matt came home from his trip and told me, “Did you know margarine is made from this stuff called ‘partially hydrogenated oil’ and that’s really bad for us?” To which I replied, “How bad is it?  Because margarine is really cheap and real butter is expensive.” Matt finally convinced me that it was worth it to buy butter, not margarine…but oh how I cringed when I put it into my cart.

Our switch from margarine to butter was the very first step we took on our healthy eating journey. Although, at this point, I wouldn’t yet call it a “journey”. 

It wasn’t until our littlest guy Malachi was born with chronic eczema that we really began looking into what it actually meant to eat a healthy diet.

To be continued…

Heavenly Homemaker's Club Members: Access your homepage and all your fantastic resources here! Not a member yet? Please join us!

Homeschool Hubbub: Am I Qualified to Teach?

March 2, 2010 by Laura 66 Comments

This post may contain affiliate links. For more information, please see our disclosure policy.

For those of you who are considering homeschooling, wondering if you’re qualified to teach your kids:

I wish I had a dime ( more would be fine too) for every time someone has said to me, “It’s so great that you have a teaching degree so that you can teach your kids. I’m just not qualified to teach. I’d never be able to do it. I wouldn’t know how to teach them. I know I’d miss tons of information and they’d never be ready for college.”

Am I Qualified to Teach My Kids

Here and now, I would like to debunk the myth that in order to home school your children, you must have a teaching degree or somehow “qualify.”

Here. Use this check list:

  1. Can you read?
  2. Do you know your numbers?
  3. Can you write?
  4. Do you know where your pencils are?

If you answered “yes” to at least three out of four of the above questions – you’re in. You’re good to go.  You’re totally qualified. And if you actually know where your pencils are, you may be overqualified and put the rest of us homeschooling mothers to shame. (To my credit, I do happen to know where some of my pencils are, but none of them – I repeat – none of them are sharpened.)

So, you may ask, what about all the things I don’t know? How will I ever teach my kids history or science or math? I don’t remember half of the stuff I was taught in school.

What? You think that since I have a teaching degree I actually know stuff? Or that I magically remember everything I was taught?

That’s what BOOKS are for.

I don’t remember 7/8 of the information I was taught in school. It doesn’t matter.

I have books. Lots and lots of books. I have software. I have search engines. I have friends who know things. I have a husband who knows things. I have a library.

And sometimes, on a good day, I have a sharpened pencil.

I promise…promise you that if you have the desire to teach your kids at home, that is truly all you need. The desire – and resources.  Resources are out there all over the place for you.

You don’t need a degree or 459,392 facts stored up in your head.

If there’s something you don’t know – there is a book that will tell you or someone else you can ask.

You don’t even have to try very hard to find these resources. Home schooling materials of ALL kinds are available out there now. For every type of child. For every type of parent. For every type of home. For every type of learning style. For every type of schedule.

You don’t have to reinvent the wheel. You don’t have to think hard. You don’t have to know much.

You want to know how I teach my kids? We read together. We look information up on the computer (cheering each time we get a Swagbuck!). We talk to each other. We look at what is going on around us. We ask questions.

Never ever feel like you aren’t qualified to be your child’s teacher. You are the person who loves them the most and knows them best of all.

Guess what? You are already your child’s teacher.

And see? You’re doing just fine.

More About Homeschooling

  • Here is an entire category of posts I’ve written about homeschooling at our house.  Scroll down to the beginning if you would like.
  • I talk about my favorite curriculum choices here.  Be sure to read the comments to read what others recommend!
  • This post lists some great resources I highly use and love.

Moms (and dads)…please leave comments here letting us know your favorite homeschool resources, aids, curriculums, books – anything you’ve found helpful in your homeschool journey!

Heavenly Homemaker's Club Members: Access your homepage and all your fantastic resources here! Not a member yet? Please join us!

Gratituesday: Manly Men

March 1, 2010 by Laura 20 Comments

This post may contain affiliate links. For more information, please see our disclosure policy.

gratituesdaynov09

Last Friday I just didn’t feel well. I was achy all over and I felt like if I wasn’t really careful…I’d develop a very bad cold. So I decided to take the “day off” and focus on resting, taking vitamins and eating nutrition-packed -foods and drinking lots of water and herbal tea. I know my body well enough to know that if I push it on a day like that, I can just count on getting REALLY sick.

Thankfully Matt had the morning off and was able to hang out with the boys until 2ish. And I rested. It was wonderful.

Can I just tell you some of the sweetest parts of Mama having to “clock out” for a day?

First, at lunch…Matt and the boys decided to put together a big fruit salad to go with the pizza pockets (that were thankfully in the freezer ready for an easy meal). They had all kinds of fun mixing together just about every kind of fruit we had in the house. They added some cream…then Justus (the chef) sprinkled on some raisins and coconut flakes. It was SERIOUSLY delicious (and just what I needed)!

Later that afternoon Justus came in to my room and said, “Don’t worry mom. Before I ate my plate of fruit salad I took a couple of pictures for you in case you want to share our recipe on your website.”

justusfruitsaladsmIs that the SWEETEST!? Does my family know me or what?
And isn’t their salad beautiful?!
I think Justus needs to write a guest post and share his recipe.

Second – and I do think this is my favorite of all the ways my family pitched in this weekend – Malachi needed a birthday gift as he was going to a party Saturday for his friend Emma.

He was determined that he was going to get Emma a baby doll. He just HAD to get her a baby doll. There was no other option. I loved the idea and couldn’t wait to take him to the store to pick one out (because I haven’t picked out a baby doll at the store since…???).

However, since I was feeling so crummy Friday and knew Saturday would be pretty full…I resorted to calling Matt at work and asking him to see what he could find at Walmart on his way home that night.

You understand what I had to ask my husband to do, right? My husband, the father of four strapping sons needed to go to the store and pick out a baby doll. I wasn’t even really able to give him any direction or advice since it had been since ??? that I’d even been down the pink aisles at Walmart. We tend to stick to the brown and black and sword type aisles when we go.

But, Matt agreed and I have to say that if it’s even possible…I now love him even more. The guy spent 30 – yes thirty – minutes in the dolly aisle trying to figure out which baby doll would be the best one for Emma.

malachiwithdollsm

Malachi (and ALL the boys – even the 12 year old) were SO excited to see Emma’s baby doll the next morning. Emma’s pretty special to all of us, can you tell?

And third…well…let’s just say I’ve seen all kinds of other little surprises throughout the past couple of days that have shown me what all my boys did while I took the day off. I found a pair of Matt’s socks in my sock drawer, showing me that the boys folded clothes and attempted to put them away for me. I found my salt shaker in the TV room, showing me that the boys made themselves popcorn for a movie night Friday so I could rest. I’m pretty sure I’ll find more “surprises” in the next few days.

Ah, I love my guys.

What are you thankful for this Gratituesday? Write about it on your blog, then come link up with us here. If you don’t have a blog, be sure to leave a comment letting us know what you’re grateful for!

If you are linking up a blog post for Gratituesday,
please place the following link into your post! Thanks!


Join us for Gratituesday at Heavenly Homemakers!

Heavenly Homemaker's Club Members: Access your homepage and all your fantastic resources here! Not a member yet? Please join us!

March Freezer Cooking Report (aka My Baggies of Food Photo Album)

March 1, 2010 by Laura 35 Comments

This post may contain affiliate links. For more information, please see our disclosure policy.

Well now, there’s just something so satisfying about seeing a bunch of prepared food in baggies, isn’t there?  Or is it just me?  

I knocked out everything on my list over the weekend. Would you care to take a look at my baggies of prepared food with me? (What, like I’m actually giving you a choice?)

Here are 20 Breakfast Burritos frozen, ready and waiting in the freezer for a busy morning…

breakfastburritos7smI practiced FishMama’s baggie-air-sucking-out technique…very cool!

And here we have about 80 little Turkey Sausage Patties prepped and waiting to be cooked up for a breakfast or lunch…

turkeysausagebaggedsm

And here is a baggie of Whole Wheat Tortillas, waiting in the fridge to be made into Melting Snowflakes  or Tuna Wraps… 

tortillabaggiesm

And here are a bunch of Mini Apple Pies in baggies ready to be baked for a special breakfast sometime…

miniapplepies8sm

And even though it wasn’t on the list, I had a chance to make a big batch of Whole Wheat Waffles to freeze (and pop in the toaster another day!). Oh look, I put them in a baggie and took a picture for you…

wafflebaggiesm

Thank you for nodding and smiling and saying “oh very nice, Laura” and trying to stay awake while looking at my all of my baggies of food.

I also made a batch of Homemade Peanut Butter and filled up a pint sized jar. Mmmmm! Um, here’s a picture in case you’d like to see it (and because I didn’t want the peanut butter to feel left out)…

peanutbutterjar

I think my most favorite part of my food preparation weekend was mixing together six pounds of Turkey Sausage!! When I make this sausage, I have to get twelve herbs and spices out of my cupboard. That’s kind of a lot of effort.  It was WONDERFUL to get out all of those ingredients one time, then make SIX batches of the sausage.

I saved out one batch of sausage to make the Breakfast Burritos, but made the rest (five pounds worth!) into little frozen sausage patties. I am SO excited to have these convenient little sausage patties in my freezer!

turkeysausagepattiessmI just froze them on parchment paper lined cookie sheets,
then put them into two gallon sized freezer bags
(shown above, because you know you want to go look at the baggies again).

To cook them, I’ll thaw the desired number of patties on a plate overnight in the fridge, then cook them up at breakfast the next day!

Wow, who knew 80 little sausage patties and all the other above pictured baggies of food could make me feel such a sense of accomplishment.

If I feel this great after making food and putting it into baggies…just think how I will feel when I watch my children receive a high school diploma.
—————————

You’ll find more great monthly cooking tips at Moms in Need of Mercy.

Heavenly Homemaker's Club Members: Access your homepage and all your fantastic resources here! Not a member yet? Please join us!

Oh Look. My Closet Has a Floor.

February 28, 2010 by Laura 18 Comments

This post may contain affiliate links. For more information, please see our disclosure policy.

Our closet has some major issues. It has a big sloped ceiling (because it is under a set of stairs). It has lots of stuff in it and it is used mainly by little boys who don’t like to put their stuff where it goes. 

A few weeks ago, I actually heard my closet having a panic attack. After weeks of wintertime apparel being thrown haphazardly all over its floor and after being chosen time after time as “the best hiding spot” in Hide-And-Go-Seek and after the unfortunate “where are the tennis balls I KNOW I put them somewhere in the back with the golf clubs last summer” incident…

Well, if I had to suffer this kind of treatment all winter long, by February I’d look terrible and suffer a panic attack too.

closetbeforesmAlmost looks worse than my hair when I walk the five yards from my front door
to the mailbox on a 45 mile per hour windy day in March, doesn’t it?
 

At least there are some possible solutions for organizing the closet. My hair on a windy day? Well…let’s just stick with attainable goals shall we?

I started by cleaning out all of the unused contents of the closet. There are six people who share this closet and four of them are boy children who like to play in snow…but do we really need nine pairs of snow boots? And can anyone actually fit into these little baby sized boots anymore? And why do we have so many coats? I am SO thankful for hand-me-downs, but how about we only keep the coats that currently fit someone and put the other sizes into tubs in the attic? (Although those coats will have to be taken to the attic by my brave and fearless husband because I’m still suffering bird-in-the-face trauma).

So, paring down to one coat and pair of boots (and one pair of gloves and one hat and one scarf) per person…plus some snow suits and roller blades and heelies…

The tubs in our closet now look like this:

closet11smI realize it doesn’t look like much of an improvement…but trust me…it is. 
Big fat coats and snow suits take up an incredible amount of space. Multiply coats, snowsuits and boots by my four children and two entire tubs are full.

Why, you might ask, are you putting all of these items in tubs? Did we or did we not recommend hooks??? 

Yes, you did indeed recommend hooks, but I actually have very little wall space in my closet because of the sloped ceiling. I do have a few hooks, but they are quite high. And any other wall space that might sport a hook is directly behind where the big coats hang. Hooks, unfortunately aren’t working for me as a solution this time. 

My two big rubbermaid tubs fit nicely into the sloped space. The kids (after being gently reminded and then lovingly threatened with losing prized lego possessions) now remember to NEVER AGAIN put their coats on the floor, but to ALWAYS put their coats and boots in the correct tubs under the slope.

closet2smSee, coats in one tub and boots, roller blades in the other tub…gloves and hats in the crate. 
Daddy’s boots get to go on the floor,
because he’s the daddy and Mommy said it was okay.

Since the hooks are a little bit too high for the little guys, I assigned one hook to our oldest/tallest son (who would never dream of putting his coat on the floor in the first place). I’m using the other hooks for my shopping bags so that they don’t get mixed in with the kid’s boots.

closet4sm

closet1sm

And there you go.

Are you impressed? Probably not. Tubs and crates are really not that exciting. Someone who utilized some really adorable and trendy looking storage containers should totally win this challenge. 

But after several weeks of not seeing the floor of my closet and being incredibly frustrated with my children every time I need a shopping bag and have to dig for five minutes under muddy snow boots…I’m pretty stinkin’ excited.

Oh and also, I haven’t heard any panicky sounds coming from my closet for days. In fact, if I listen very closely I actually hear the occasional, “aaahhhh.”

This post is linked to Organizing Your Way.

Heavenly Homemaker's Club Members: Access your homepage and all your fantastic resources here! Not a member yet? Please join us!

Menu Plan for the Week

February 28, 2010 by Laura 11 Comments

This post may contain affiliate links. For more information, please see our disclosure policy.

Not to bore you with talk of the weather, but did you KNOW that it might actually get up to the 40s at my house this week?! For several days in a row?  You should’ve heard my husband when he was checking the weather last night. I thought maybe he’d just found out we’d won a million dollars or something. Nope, just reading about great weather this upcoming week. Skip the million dollars…bring on the sun!

Here’s our menu this week during our heat wave:

Sunday, February 28
Oatmeal, pears
Simple soaked pancakes, scrambled eggs
Bean dip with chips, cheese and salsa, clementines

Monday, March 1
Whole wheat waffles with strawberries and cream
Rice and veggie stir fry, strawberry peach slushies
Chicken fried steak strips, mashed potatoes and gravy, peas

Tuesday, March 2
Breakfast burritos, oranges
Fish and chips, carrot sticks
Spaghetti, steamed broccoli and cauliflower

Wednesday, March 3
Mini apple pies, turkey sausage
Tuna salad on toast, fresh pineapple, chocolate milkshakes
Taco potatoes, fruit salad

Thursday, March 4
Banana muffins, apples with strawberry yogurt fruit dip
Potato soup, carrot sticks
Cheesy beef and rice, asparagus

Friday, March 5
Giant breakfast cookies, bananas
Salmon patties, ranch potato wedges, peas
Homemade pizza, tossed salad

Saturday, March 6
Whole wheat donuts with chocolate frosting
Leftover buffet
Valerie’s Turkey bacon cheddar meatloaves (I can’t wait to try these!), baked potatoes, green beans

Snacks for the week:

  • Popcorn
  • Warm Vanilla Soother
  • Smoothies
  • Whole Wheat Graham Crackers

Thank you all for your input last week about which mixer you recommend. I wanted to point out that Paula’s Bread is a great resource for mixers, grain mills and other awesome kitchen gadgets!

Also, check it out! I FINALLY got around to making a Heavenly Homemakers button and putting it on my side bar for you to grab and put on your own site if you want! Finally!  A big thanks to those who emailed me about it so that I would be motivated to finally get a round tuit!
———————————-

Find more menu planning inspiration at Organizing Junkie.

Heavenly Homemaker's Club Members: Access your homepage and all your fantastic resources here! Not a member yet? Please join us!

Healthy Homemade Breakfast Burritos

February 27, 2010 by Laura 41 Comments

This post may contain affiliate links. For more information, please see our disclosure policy.

Well, I made the kids mad at lunch today. I stood there making 20 breakfast burritos and wouldn’t even let them eat one.

Instead, they had to eat tuna.   I was heartless enough to actually make them wait until next week to eat the Breakfast Burritos. Hey, I’m just trying to get ahead here. Someday when they become the parent, they too might have a Breakfast Burrito agenda and make their children settle for tuna. And then they’ll come back to me and tell me how sorry they are for being mad about the 2010 Withholding of the Breakfast Burritos.

Someday.

breakfast_burritos_2

Homemade Breakfast BurritosYum

1 pound turkey sausage, browned
12 eggs, scrambled
1 1/2 cups shredded cheddar cheese (I use Landmark Raw White Cheddar)
2 cup salsa (more or less to taste)
20 whole wheat tortillas*

*Tortilla Hint:  If you’re making your own tortillas (and if you aren’t, you really should be, because YUM)…try this tip to make burrito forming so much easier! As you roll your tortillas, cook them on just one side, leaving the other side softer and more flexible.  Also, I find it works best to form the burritos within two or three hours of making the tortillas…before the tortillas have been refrigerated.

To put together the burritos:

Stir together scrambled eggs, cooked sausage, cheese and salsa. (I leave out the salsa at first and make up some salsa-less burritos for a couple of boys in my life who don’t like salsa. Then I add salsa to the remainder of the mix and make a few with salsa for the rest of us!)

breakfastburritos2sm
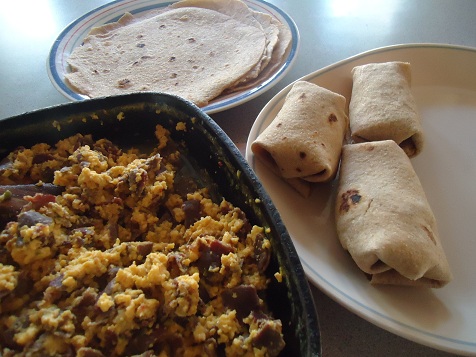
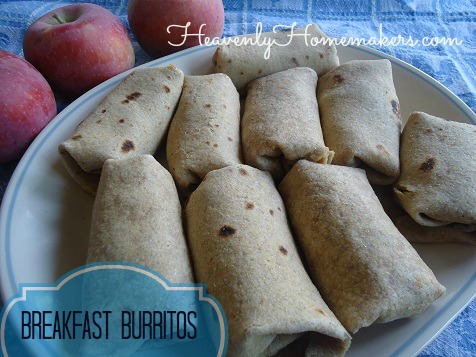
Place a nice spoonful of burrito mixture onto a tortilla.

breakfastburritos3smFold in the ends.

breakfastburritos4smFold up one side, and then the other.

breakfast_burritos

Place burritos in a freezer bag and store in the freezer for up to three months.

To reheat:  Place desired number of thawed or frozen burritos on a baking sheet. Heat in a 350° oven for 10-20 mintues until heated through.

P.S. The children weren’t mad for long. They really like tuna…but just temporarily forgot that fact when they smelled the sausage cooking. They happily ate their tuna and will ever so much more happily eat their Breakfast Burritos some morning next week when I have yet another agenda:  the-hurry-up-and-eat-breakfast-so-that-you-can-start-your-handwriting-and-math…agenda.

Heavenly Homemaker's Club Members: Access your homepage and all your fantastic resources here! Not a member yet? Please join us!
« Previous Page
Next Page »

Join Our Community!

 Facebook Twitter E-mail Instagram Pinterest

Popular Posts

~ Will All of the Real Moms Please Stand Up?
~ Easy! Stir-and-Pour Whole Wheat Bread
~ How to Make Gatorade
~ 31 Real Food Breakfast Ideas
~ Dear Teenage Girls...
~ When Mom Takes a Step Back
~ The Inexpensive Health Insurance We Love!
~ Let's Talk Real Food Grocery Budgets

Check out our latest posts!

  • Big Family Food and Fun: June 21-27, 2026
  • Big Family Food and Fun: June 14-20, 2026
  • Big Family Food and Fun: June 7-13, 2026
  • Big Family Food and Fun: May 31-June 6, 2026
  • Big Family Food and Fun: May 24-30, 2026
Home  ~  Simple Meals  ~  Club Membership  ~  Shop  ~  Privacy Policy  ~  Disclosure  ~ Contact

Copyright © 2026 · Beautiful Pro Theme on Genesis Framework · WordPress · Log in