Heavenly Homemakers

Encouraging women in homemaking, healthy eating and parenting

  • Home
    • About
    • FAQs
  • Recipes
    • Bread and Breakfast
    • Condiments
    • Dairy
    • Main Dishes
    • Side Dishes and Snacks
    • Desserts
    • Gluten Free
    • Instant Pot
    • Crock Pot
    • Heavenly Homemaker’s Weekly Menus
  • Homemaking
    • Real Food Sources
  • Store
  • Contact
    • Advertise
    • Disclosure
    • Privacy Policy
  • Simple Meals
  • Club Members!

Honey Whole Wheat Bagels

April 9, 2009 by Laura 243 Comments

This post may contain affiliate links. For more information, please see our disclosure policy.

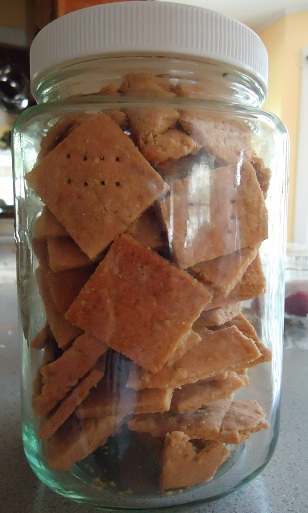
honey_whole_wheat_bagels

I used to make these bagels all the time…then I guess I forgot about them. Recently the boys asked, “WHEN are you going to make those yummy bagels again?!” (I think they ended the sentence with “oh our Beautiful Mother Dearest” or something like that.)

Funny how you can completely forget about a particular recipe for a while. I made the requested bagels again last weekend and I think I made quite a few little men (and one tall one) very happy. Wow, is that all it takes?

Making bagels takes a few different steps…but they aren’t hard steps. You mix, rest, shape, broil, boil, and bake. I kinda think it’s fun to say “broil your bagels”, but then again, I don’t get out much.

Honey Whole Wheat BagelsYum

4  to 4 1/2  cups whole wheat flour (I use freshly ground flour from hard white wheat)
1 pkg yeast (2 1/4 teaspoons)
1 1/2 cups warm water (if you put your finger in and it hurts, it’s too hot and will kill your yeast)
3 Tablespoons honey + 1 Tablespoon honey
1 teaspoon sea salt

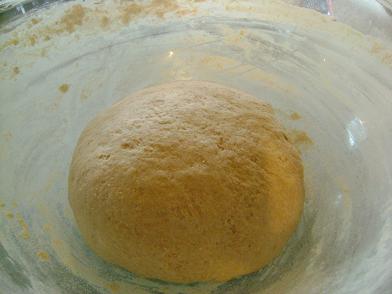
Stir together 2 cups of the flour, the salt and the yeast. Add in the warm water and 3 Tablespoons honey. Gradually add in the remaining flour.

bagels1sm.JPG
Dump it out and knead the flour in until the dough is smooth and elastic.
Cover the dough and let it take a nap for about 10 minutes. (zzzz)

bagels2sm.JPG
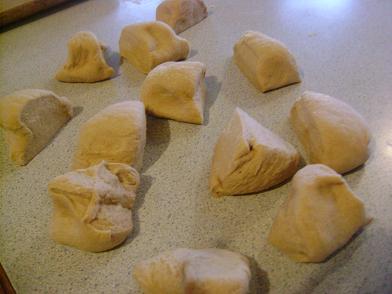
Divide the dough into twelve equal parts.

bagels3sm.JPG
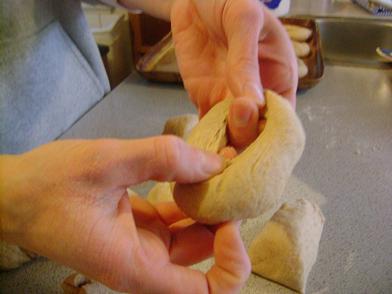
Set a timer for 20 minutes. Begin shaping each piece of dough into a nice ball. Stick your finger in the middle of the ball and pull it apart to create about a 2 inch hole.

bagels6sm.JPG
Lay it onto a buttered cookie sheet or baking stone.
Continue until all the bagels are formed. Let them sit until your timer goes off.

bagels7sm.JPG
After your 20 minute timer goes off, turn the broiler on in your oven.
Broil your bagels for 2 minutes on each side.

Meanwhile…bring a big pot of water to a boil. Stir in the remaining 1 T. honey.

bagels8sm.JPG
Put 4-6 bagels into the water, turn down the heat and
simmer for seven minutes, turning the bagels over once during that time.

bagels9sm.JPG
Continue to boil your bagels until they are all done.
Let them drain on a towel for 1-2 minutes.

bagels11sm.JPG
Bake at 375 ° for 25-30 minutes or until the tops are golden brown.

Slice these, toast them, then slather them with butter or cream cheese for breakfast….oh my goodness.

Now I want to experiment with cinnamon raisin or blueberry bagels…and what other flavors can you think of?

Okay, answer me this….is it fun to say “broil your bagels” or is it just me? Yeah, you know you love it.
———————————————-

This post is linked to Frugal Fridays.

Heavenly Homemaker's Club Members: Access your homepage and all your fantastic resources here! Not a member yet? Please join us!

Homeschool Hubbub: Why We Chose to Homeschool

April 8, 2009 by Laura 36 Comments

This post may contain affiliate links. For more information, please see our disclosure policy.

I recently heard from Karen, who asked some great questions that I haven’t addressed yet on my blog.

  • Why did you choose to homeschool?
  • What do you love about homeschooling…and what is really challenging?
  • How do you budget for it?
  • Do you worry about your kids being ready academically for high school/college?
  • Do you participate in any social or sports groups that extend the opportunity for the boys to meet others?
  • How do you design your curriculum? Do you do the pre-packaged stuff or customize your own?

What a great list of questions… Can’t believe I haven’t written about them yet. :)

Today, I’ll answer the question of WHY we homeschool. 

Homeschooling was not something Matt and I gave much thought to when our first two boys were little. Asa was four, Justus was one and a half and we had another baby on the way. It seems our days were full of diapers and toys and tantrums and just making it until bedtime in one piece. 

At that time, we only had a few months before Asa was to start kindergarten. People began asking us where he would go to school or if we were going to homeschool him. Our answer was to shrug and simply say, “Hmm, we don’t know yet.” We really did not have any strong convictions one way or the other.

Just before Elias was born, I began to read Creative Correction, by Lisa Whelchel. Call me dense, but before reading that book I was just kind of floating along and trying to keep my kids clean and fed and happy and well behaved (and keep myself sane). All good things. I had just not given a lot of thought yet to their character training and the fact that raising children wasn’t just about taking them to church and working to teach them to be “good”. Lisa’s book opened my eyes to the magnitude of the wonderful task Matt and I had before us.

God began to work on my heart to teach me what that might look like.

Right after Elias was born, I kept thinking over and over:  God gave us three boys. Boys.  Three of them. Why? What was God’s plan? (Of course I had no idea that there would be a fourth boy!)

I suddenly felt very strongly convicted (whacked over the head). God gave us three boys so that we could raise three godly leaders for his church.

And eighteen years didn’t quite seem like a long enough time to instill in them all the truths that we needed to instill in them.

We made the decision at that point to homeschool them. The biggest reason? Time.

Time to be together. Time to train. Time to learn. Time to talk. Time to listen. Time to hold. Time to work. Time to just be.

Since making that decision, we have never one time questioned that we were doing the right thing for our family. God has shown us in countless ways through the years that our choice to homeschool our kids was the right one. 

So, that’s our story. 

Let me say that again…that’s OUR story. This is what God convicted US to do. I never, ever want to sound like we think we’re better parents because we homeschool. It’s what we’ve chosen because when God whacks you over the head, it’s always a good idea to listen. And so we did.

The end. :)

I’ll plan to answer more of the above questions during the next several weeks. Feel free to write more of your questions in the comment section!

I’d love for you to share how God has convicted you in this area. What has God led your family to do in regard to your children’s education? If your kids aren’t school age yet, what are some of your thoughts for the future? Please everyone, keep your comments kind and non-condemning, okee-dokee?

Heavenly Homemaker's Club Members: Access your homepage and all your fantastic resources here! Not a member yet? Please join us!

Gardening 101: Planting Potatoes

April 7, 2009 by Laura 42 Comments

This post may contain affiliate links. For more information, please see our disclosure policy.

One of my very favorite foods to plant is potatoes. You put a hunk of potato into the ground….then, it grows into a plant…which produces several brand new potatoes. When it’s time to dig up potatoes in the fall…it’s like Christmas time! I LOVE it!!

Here are some Potato Planting Basics:

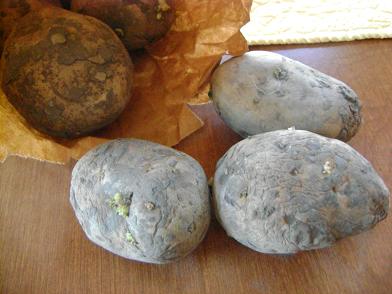
seedpotatoes1sm.JPG

  • Purchase seed potatoes (I got mine at a grocery store). Find seed potatoes with lots of “eyes” if you can. 
  • Keep in mind that the “russet” or “kennebec” potato will store the best…so if you’re planting enough potatoes to store for a few months, you’ll want this kind. Red and Yukon Gold don’t store quite as well (oh but they sure are yummy!). 
  • Cut your seed potatoes into hunks. Each hunk needs to have at least one good “eye” (see the one in the picture below?). That’s what your new potato plant will grow from. 

seedpotato2sm.JPG

  • Be sure not to cut your potato hunks too small. They need to have enough potato on them to provide nourishment for the plant as it starts to grow.

  • It’s a good idea to cut your potatoes a few days before they are planted so that they can “cure”. This helps to prevent rotting under the ground once they are planted. However, most years I don’t know that I’ll be planting until the day I plant! Cutting the potatoes right before you plant them won’t hurt anything!

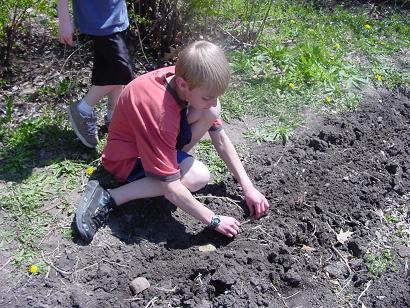
garden3sm.JPG

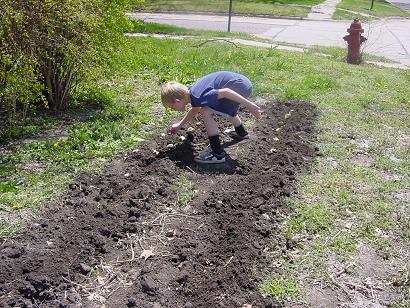
  • Place your potato hunks in the ground with the “eye” facing upward. They need to be about one foot apart. To make this easier for my kids, I usually break a stick into a piece one foot long. They lay down a potato…then lay down the stick…then lay down another potato at the end of the stick. It’s a great way for them to measure the distance and avoid putting the potatoes too close together.

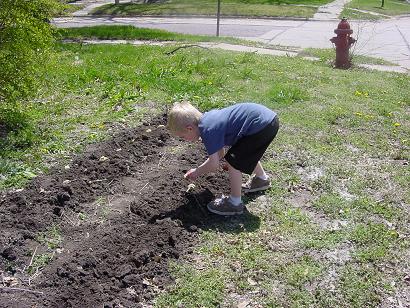
garden1sm.JPG

  • Your rows should be about two feet apart. Cover your seed potatoes with about 3-4 inches of soil.

  • Once you’ve got your potatoes planted, give them a nice drink of water. Then, leave them alone for a few days. It isn’t neccessary to give them much water for the first several weeks. After a week or so, you’ll see some nice sturdy plants coming up out of the ground (at which point, you’ll do a happy little potato dance!).

  •  Once the plants are about eight inches tall, pull the soil up around each of them and kind of pack it in around the base of the plant.
  • When your potato plant begins to flower, you’ll know that there are now some new potatoes growing under the ground (and you’ll do another happy little potato dance!). At this point, your potato plants need plenty of water. Big fat potatoes can grow bigger and fatter with lots of water.
  • All summer long, be sure that the soil is pulled up high around the base of your plant. You don’t want any growing potatoes to start popping up out of the soil. They’ll turn green….and you don’t want green potatoes.
  • You can begin to “steal” little new potatoes from your plants anytime after they flower. But, if you leave them there and continue to water them well, they’ll grow into baked potatoes and french fries and bowls of mashed potatoes. Really, it’s true.

And may I just say….you haven’t eaten a potato until you’ve eaten a fresh potato right out of the ground!!! 

I will also be planting some “containers” of potatoes this year since I don’t have enough garden space to plant enough potatoes to last us the entire winter. Soon, I’ll share that technique with you….and maybe all of you who don’t have big garden spaces will want to play along with me. Start looking out for big garbage containers!!

A couple more things…I live in the midwest and I haven’t actually planted my potatoes yet. (I took the above pictures last year when we were planting.)  You’re safe to plant potatoes a few weeks before the last freeze…so for me that means I can plant them pretty soon. We just haven’t had a chance to get our garden ready for planting yet, what with all the SNOW THAT HAS FORGOTTEN TO REMEMBER THAT SPRING IS HERE. Really, I do love living in Nebraska.

Are you planting potatoes this year? Interested in learning more about planting potatoes in a container? Have any more potato planting tips for us?
————————————

This post is linked to Works for me Wednesday.

Heavenly Homemaker's Club Members: Access your homepage and all your fantastic resources here! Not a member yet? Please join us!

Gratituesday: Hope

April 6, 2009 by Laura 17 Comments

This post may contain affiliate links. For more information, please see our disclosure policy.

gratituesdayspring.jpg

Attending funerals is never something I look forward to. In fact, I usually dread them…until I get there and remember that I’m there to celebrate the life of the person who died. 

Last week, I mentioned the death of my friend’s dad. I struggled so much preparing to go to that funeral. But I tell ya, this man lived his life for the Lord. And he loved his family. And he wasn’t afraid to tell people about Jesus. He was constantly sharing about how God was blessing him.

This man had given his life to Christ and lived for him…every day.

His memorial service was a huge celebration because HE IS NOW FINALLY WITH JESUS!!!! And he’s walking again and talking and singing and dancing…all for the Lord!! Pain free…struggle free.

Oh the joy of knowing that we as believers have hope! The peace that comes from understanding that living on this earth is not all there is to LIFE. 

“In this world, you will have troubles. But take heart. I have overcome the world!”  John 16:33

I ask you…is there anything else that makes you more excited than that? Jesus has overcome the world for us!!

We. Have. Hope. 

Thank you, God. We have hope.

That makes me so excited, I can hardly breathe.
———————————————–

What are you grateful for this Gratituesday? Read the details here, then come link up with us so that we can come read about what you’re thankful for! If you don’t have a blog, leave a comment letting us know how God is working in your life.

[blenza_autolink code]

Heavenly Homemaker's Club Members: Access your homepage and all your fantastic resources here! Not a member yet? Please join us!

Filling Those Easter Baskets

April 6, 2009 by Laura 31 Comments

This post may contain affiliate links. For more information, please see our disclosure policy.

Looking to fill your kids’ Easter Baskets this weekend? Do it simply with these Six Easy Steps:

  1. Purchase the biggest basket you can find.
  2. Dump in a good portion of the money you earned this week.
  3. Pour in five pounds of sugar.
  4. Drizzle on three cups of High Fructose Corn Syrup.
  5. Add a wide variety of artificial colors. (Go ahead, don’t hold back.)
  6. Toss in several cheap plastic toys (the kind that like to re-locate themselves under your van seats and couch cushions after one short use).

What? You don’t like my Six Easy Steps? Neither do I.

But that’s often what many of us do when we put together Easter baskets for our kids. We spend more money than we mean to. We can’t decide between the jelly beans, the chocolate bunnies or the malted milk balls…so we get all three (plus several of those foil covered cream filled eggs). The little yo-yos with little yellow chicks printed on them are too cute to pass up, so we throw those into the cart too.

Before we know it, we have completed the Six Easy Steps in twelve expensive minutes.

How about taking a look at some new ideas this year? There are so many fun ways to create gifts for your kids that cost just a few cents and a small amount of your time. Here are a few that our kids have enjoyed.

Fill the Easter Baskets

Homemade Flubber

flubbersm.JPG


Homemade Tootsie Rolls

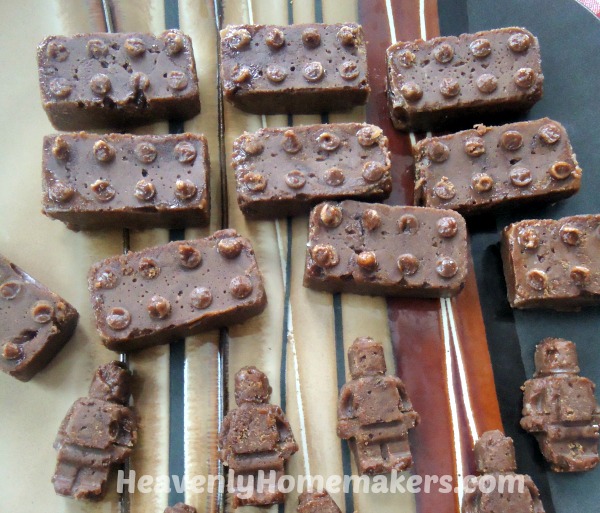
Malachi's Lego Fudge


Homemade Vanilla Wafers

tinycookiebitessm.JPG

Homemade Bubble Bath

eliasbubblebathsm.JPG

Homemade Fruit Leather

fruitleather6sm.JPG

Honestly, my kids enjoy the Easter Egg hunt so much, they really don’t think too hard about what’s in the eggs!

AND…what’s really important about Easter anyway?! :)

What kinds of things do you like to put into your kids’ Easter Baskets? Have any fun ideas or neat family traditions to share?

Heavenly Homemaker's Club Members: Access your homepage and all your fantastic resources here! Not a member yet? Please join us!

Menu Plan for the Week

April 5, 2009 by Laura 8 Comments

This post may contain affiliate links. For more information, please see our disclosure policy.

Soccer season for our boys starts up this week. Malachi is finally “big” enough to play. He’s been waiting his whole life for this moment. :) 

So, here we go. Four boys on four different teams…Matt coaching two of the teams…Evenings and Saturdays full of practices and games…Freezing our tushies off while we jump and cheer and say things like, “No! Go the other way!!”.

I’m mostly looking forward to the season…because it truly is delightful to watch each of the boys play at their different levels. I can’t wait to see Malachi in his uniform, which is surely going to look like a dress on him. 

Oh my word, I hope we have cleats to fit everyone this year. Usually this isn’t a problem because we have had soccer shoes of every brand and size handed down to us. It’s just a matter of finding them all and making sure there is a left shoe to go with the right shoe. Details, details.

This weekend I tried to work ahead in the kitchen so that we’d have some easy meals to pull from before we head off to play soccer. Everyone seems to need to eat before we leave and after we get home from practices and games. 

To make things a little simpler (or whatever), I planned our bigger meals during lunchtime this week, saving our grab and go food for the evenings. At least this way I can try to make sure we get enough veggies in, right?

Sunday, April 5
Honey whole wheat bagels, applesauce
Friends took us out to lunch!
Chicken and noodles, mashed potatoes, carrot sticks

Monday, April 6
Simple sourdough pancakes
Oven fried chicken, mashed potato pancakes, peas
Beef and cheese burritoes, apples

Tuesday, April 7
Biscuits and gravy, scrambled eggs, oranges
Beefy enchilada bake, tossed salad
Homemade pizza pockets, peaches

Wednesday, April 8
Chocolate chip muffins, pears
Lamb chops, baked potatoes, green beans
Baked spaghetti, tossed salad, corn

Thursday, April 9
Fruit-kefir smoothies, granola
BBQ chicken, potato salad, creamy cole slaw
Cheesy quesadillas, carrot sticks, apples

Friday, April 10 – Sunday, April 12
LTC and Easter weekend with friends!!

On the blogging menu for the week:

  • I’ll share some simple Easter basket fun (less sugar, less money!)
  • Gratituesday (I LOVE reading about what you’re grateful for!)
  • Gardening 101:  How to plant potatoes
  • Homeschool Hubbub:  Why we chose to homeschool
  • I’m taking a break from sharing High Five Recipes so that I can share my Honey Whole Wheat Bagel recipe. High Five Recipes will return next week!

Have any Easter weekend plans?!
——————————————

Visit Organizing Junkie for more menu planning ideas!

Heavenly Homemaker's Club Members: Access your homepage and all your fantastic resources here! Not a member yet? Please join us!

How to Make Peanut Butter

April 2, 2009 by Laura 147 Comments

This post may contain affiliate links. For more information, please see our disclosure policy.

I just learned last week how to make peanut butter.

peanut_butter

Here is what I must now ask myself…

WHY HAVE I NEVER MADE PEANUT BUTTER BEFORE?

I make almost everything else from scratch. But somehow making peanut butter sounded hard to me. I guess I thought I’d have to crush each individual peanut for three hours with my fingernails until it turned soft and creamy. I’d just never looked into it before. Finally I watched a tutorial here.

Um, hello Laura! It takes about a minute and a half! And you don’t even break a sweat (or a fingernail). Now, I’m totally addicted to making peanut butter. It’s one of the coolest things I’ve ever made.

After I made it, we ate it on pancakes and it was one of the best meals I’ve ever eaten. I loved it!!! All of us loved it! (Except Malachi who doesn’t love peanut butter at all.)

Here’s how to make Peanut Butter:

peanutbutter1sm.JPG

Yum
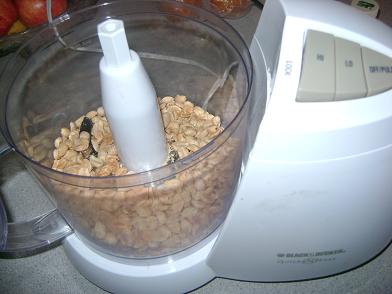
Pour about 2 cups of dry roasted peanuts into your food processor and begin to chop.

peanutbutter2sm.JPG
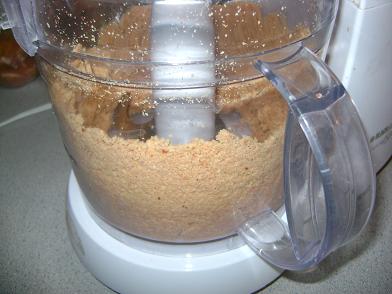
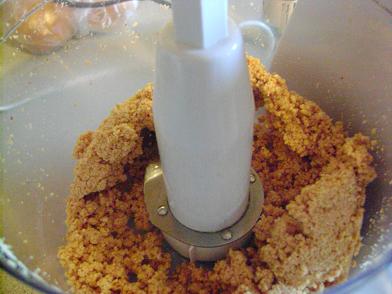
After about thirty seconds the nuts will all be crumbled up like this.

peanutbutter3sm.JPG
Keep going with the food processor…

peanutbutter4sm.JPG
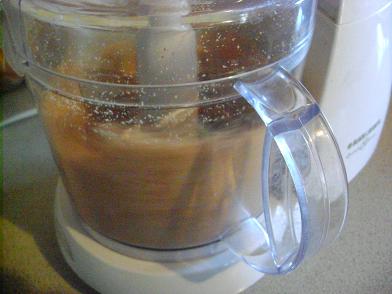
Here’s what it looks like after about one minute.

peanutbutter5sm.JPG
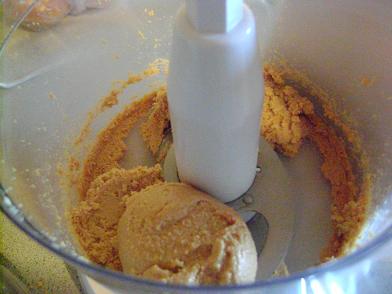
And after about a minute and a half, it starts to become butter-like and rolls itself into a ball. Continue processing until your peanut butter reaches desired consistency.

peanutbutter6sm.jpg
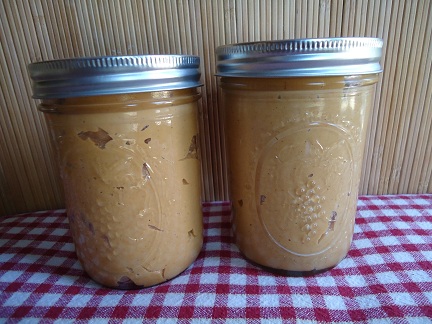
Tada…peanut butter!

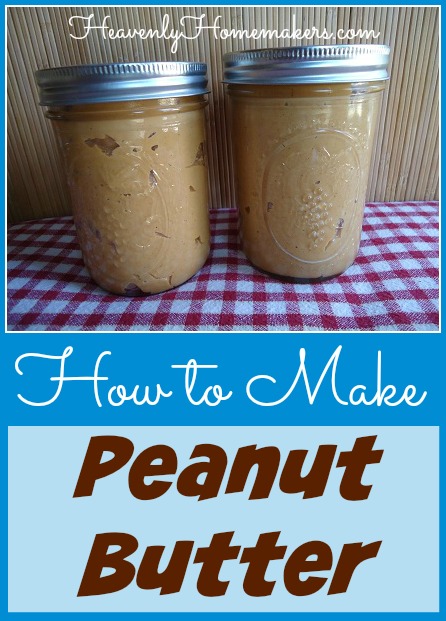
How to Make Peanut Butter

Stir some honey into your peanut butter if you think your family would like it better that way. Even better, if you prefer a more spreadable peanut butter (like Jif or Skippy but without all the icky ingredients) – check out this recipe for Super Creamy Peanut Butter.

NOW, I’m going to experiment making other nut butters and sunbutter (which is butter made from sunflower seeds if you aren’t familiar with that one). *Update* You’ll find my Almond Butter tutorial here.

The math: The way I figured it, making my own peanut butter did save me money, but not oodles of it like I was hoping for. However, because of the fresh taste of this peanut butter…and the fact that making it was as easy as using my thumb to push a button – I’m hooked!

Grab the family and try this! Then pour yourself a glass of milk and enjoy your hard work. (I love hard work that isn’t hard…)

Heavenly Homemaker's Club Members: Access your homepage and all your fantastic resources here! Not a member yet? Please join us!

Women with a Mission: The Great Clothing Exchange

April 1, 2009 by Laura 33 Comments

This post may contain affiliate links. For more information, please see our disclosure policy.


womenwithamission3sm3.JPG
Be sure to catch up on
the rest of this series here!


My friend Kim organizes a clothing exchange twice a year at our church for anyone in the community to come and get free clothing for their families.  It has been a HUGELY successful ministry and SUCH a practical and obvious opportunity to bless people around us.

I love this “Mommy Ministry” and asked her to write some details about it for you.

Here’s Kim:

HOW IT BEGAN:

As a first time Mom, I was overwhelmed with the task and expense of keeping my daughter clothed in the correct season and size. Several other moms in our congregation mentioned that they had things I could use. So it came to mind to organize an exchange. It began as a group of Moms getting together with the things they would be willing to part with (or loan) to someone else in the congregation.

An exchange of children’s clothes grew into what is now a community event. Twice a year, in April and October, we take donations of any size or season of clothing, shoes, coats, boots, and bedding to freely distribute to the people of the church first, and the community second.

ORGANIZATION:

The fun begins on the Wednesday evening preceding the Saturday event when tables and clothing racks are set up and all the donations are brought in from their storage area.

Thursday morning, the sorting begins. With all the rows labeled, each person can take a bag or box and put the appropriate items on the appropriate tables. This generally continues all day Thursday and Friday with breaks for meals. Clothing from size newborn up to adult are sorted, organized, hung and folded.

clothingexchangesm.JPG

Friday evening, the congregation is invited to come and take what they can use. Then Saturday morning from 8-12, the doors are open to the public. People can come and take what they can use without restrictions or strings attached. As people walk in the door, they are given an empty bag and asked if there is anything specific they are looking for. If there is, they are guided to that area. If not, we point out the labels for each row and let them begin the hunt. At the end of the event, leftovers are boxed and given to a local thrift store or charity, as they are available and willing to take them.

THE REASON BEHIND IT: I cannot tell you how rewarding this project has become. It allows us to make contact with people in the community that we might not otherwise meet. It allows us to meet needs without people having to ask, thus allowing them to maintain some dignity. Plus, it allows us to clothe our families for little to no expense. Most importantly, though, it allows me to do what Jesus commanded and clothe those who are “naked”. Who knows, maybe he or one of his angels have been through those doors a time or two and picked up a couple of things!
—————————————————

If you’re interested in organizing a clothing exchange ministry similar to this one, click here to download more information. No need for you to re-invent the wheel when she’s already got a wonderful detailed explanation of how to run an event like this one!
—————————————————-

Thanks Kim for taking the time to share this with us!

Heavenly Homemaker's Club Members: Access your homepage and all your fantastic resources here! Not a member yet? Please join us!

A Little Too Much Hands-On Time…

March 31, 2009 by Laura 20 Comments

This post may contain affiliate links. For more information, please see our disclosure policy.

Remember that Science Museum I told you about? Last month’s topic was all about reptiles. We were all welcome to hold anything we wanted. 

Of the five from our family who were there, four of us said thanks for the offer.

One out of five couldn’t leave until he held EVERY one of those snakes. 

justussnake2sm1.jpg

justussnake1sm.jpg

I was just proud of myself for getting close enough to snap pictures to show Daddy. 

Could YOU have held one of those creatures?!

Heavenly Homemaker's Club Members: Access your homepage and all your fantastic resources here! Not a member yet? Please join us!

Which Mop?

March 31, 2009 by Laura 74 Comments

This post may contain affiliate links. For more information, please see our disclosure policy.

I need a little help in the mopping arena.

kitchentablesm.JPG

I won’t show pictures of all the mops that haven’t worked for me…but if I were to do that, there would be a parade of them.

They either work one time and then stop working…or the little top spongy things gets crusty and gross after I’ve mopped with it twice. Or the head falls off after a few uses.

Maybe it’s because I’m buying cheap mops?

Spending lots of money on a mop doesn’t really make me feel joy or excitement.

Wonder what kind of mop June Cleaver used?  Maybe I should wear my high heels when I mop? (I don’t own any high heels.) 

We’ve now chucked all of our mops and begun using a bucket of warm water (sometimes with Basic H) and an old wash rag on our hands and knees. It beats anything else we’ve ever tried.

Except for the “maybe we just won’t clean our floors” idea. That doesn’t seem to work either.

What kind of mop do YOU use? Have you found one that really works for you?! WILL YOU COME OVER AND DEMONSTRATE IT FOR ME on all the levels of my house (every Tuesday)? 

P.S. Most of my house is has hard wood floor if that makes any kind of difference in your advice. Thanks!
————————————————-

More backwards Works for me Wednesday here.

Heavenly Homemaker's Club Members: Access your homepage and all your fantastic resources here! Not a member yet? Please join us!
« Previous Page
Next Page »

Join Our Community!

 Facebook Twitter E-mail Instagram Pinterest

Popular Posts

~ Will All of the Real Moms Please Stand Up?
~ Easy! Stir-and-Pour Whole Wheat Bread
~ How to Make Gatorade
~ 31 Real Food Breakfast Ideas
~ Dear Teenage Girls...
~ When Mom Takes a Step Back
~ The Inexpensive Health Insurance We Love!
~ Let's Talk Real Food Grocery Budgets

Check out our latest posts!

  • Big Family Food and Fun: September 20-26, 2026
  • Big Family Food and Fun: September 13-19, 2026
  • Big Family Food and Fun: September 6-12, 2026
  • Big Family Food and Fun: August 30-September 5, 2026
  • Big Family Food and Fun: August 23-29, 2026
Home  ~  Simple Meals  ~  Club Membership  ~  Shop  ~  Privacy Policy  ~  Disclosure  ~ Contact

Copyright © 2026 · Beautiful Pro Theme on Genesis Framework · WordPress · Log in