Heavenly Homemakers

Encouraging women in homemaking, healthy eating and parenting

  • Home
    • About
    • FAQs
  • Recipes
    • Bread and Breakfast
    • Condiments
    • Dairy
    • Main Dishes
    • Side Dishes and Snacks
    • Desserts
    • Gluten Free
    • Instant Pot
    • Crock Pot
    • Heavenly Homemaker’s Weekly Menus
  • Homemaking
    • Real Food Sources
  • Store
  • Contact
    • Advertise
    • Disclosure
    • Privacy Policy
  • Simple Meals
  • Club Members!

Homemade Cream of Mushroom Soup

November 15, 2011 by Laura 118 Comments

This post may contain affiliate links. For more information, please see our disclosure policy.

Learning to make Cream of Mushroom Soup will be a fantastic tool to have in your real food kitchen tool belt!

Just in case you lose count while reading the following sentence, I used the word “cream” or “creamy” six times, because apparently I like these words and like to overuse them. And also because once I realized I was doing it, I exaggerated on purpose:

When I shared my Creamy Chicken and Rice Casserole recipe, I told you that I don’t usually make cream soups to replace the canned cream soups called for in many creamy recipes, but instead substitute straight cream to make the dish creamy.

(Someone give me a synonym for “creamy” to enhance my future sentence writing creativity.)

However, I have a great recipe for an easy one dish meat and potato meal that I hadn’t made for years because I wasn’t sure how to make it without the cream of mushroom soup. For this, straight cream just wouldn’t cut it. I need to make the soup.
Homemade Cream of Mushroom Soup

Therefore, for all one of my recipes that need cream of mushroom soup, here is how I make it:

Homemade Cream of Mushroom SoupYum

Homemade Cream of Mushroom Soup
 
Save Print
Author: Laura
Ingredients
  • ½ cup sliced mushrooms
  • 3 Tablespoons butter
  • ¼ cup organic corn starch or arrowroot powder
  • 4 cups milk, divided
  • 1 teaspoon sea salt
  • pepper to taste
Instructions
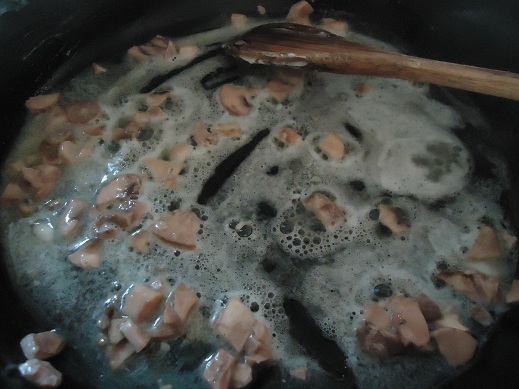
  1. Begin by sauteing mushrooms and butter until mushrooms are tender.
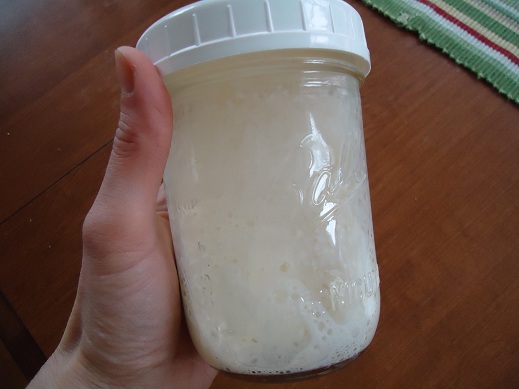
  2. In the meantime, shake the cornstarch or arrowroot powder in a jar with 1½ cups of milk.
  3. Use a whisk to mix the milk mixture into the sauteed mushrooms, stirring constantly at medium heat.
  4. Slowly add remaining milk, salt and pepper.
  5. Stir with a whisk until smooth and thick.
3.4.3177

You probably could have figured out how to do this step without a picture, but when have I ever missed a chance to take a great photo of a jar?
Ooh, Ahh
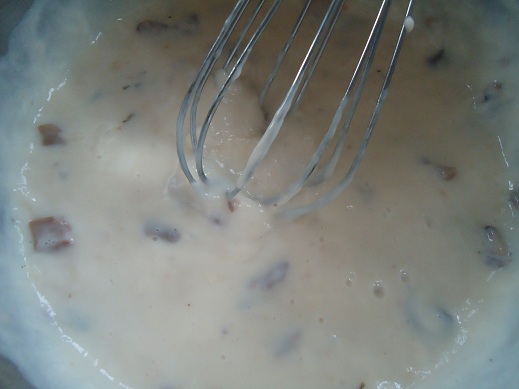
This recipe will make around three cans worth of cream soup. I haven’t done it before, but I would imagine you could substitute celery for the mushrooms to make cream of celery soup instead. If you have extra soup that you don’t need, this can be frozen.

This recipe tastes great in my One Dish Meat and Potato Casserole!

What recipes do you make that require cream of mushroom soup?

Heavenly Homemaker's Club Members: Access your homepage and all your fantastic resources here! Not a member yet? Please join us!

Healthy Crock Pot Recipe: Italian Cream Cheese Chicken

November 9, 2011 by Laura 80 Comments

This post may contain affiliate links. For more information, please see our disclosure policy.

You’re about to learn about my amazing Italian Cream Cheese Chicken recipe – one of my family’s favorite meals!

If you didn’t know it already, after reading this recipe it will be very clear to you that I am not afraid to cook with, serve my family, or eat high fat foods. Welcome to a recipe that includes butter, cream and cream cheese. Oh yes, that’s why it tastes so good.

If you are afraid of fats, I’d love to assure you of how healthy it is to eat these whole, natural foods. There’s a big difference in the fat you consume at McGreasies and fat which is whole and natural. Our bodies, skin and hair need healthy fats in order to thrive. Here is a post I wrote a while ago regarding butter and cream – and if you’d like to read through my entire series of Getting Real with Food posts, you can do that here.

Ah, and I have to laugh at myself because while this recipe calls for butter, cream and cream cheese – it also calls for boneless, skinless chicken breasts, which always makes me think of low-fat cooking. I’m not afraid of the fat in the skin of a chicken, nor am I afraid of cooking a chicken with bones – but I don’t really prefer pieces of bone or skin in my pasta dishes. Therefore, I find that boneless, skinless chicken works best in this recipe. ;)

Italian Cream Cheese ChickenYum

Healthy Crock Pot Recipe: Italian Cream Cheese Chicken
 
Save Print
Author: Laura
Serves: 6-8
Ingredients
  • 4 boneless, skinless chicken breasts
  • 2 Tablespoons dry Italian Dressing Mix
  • ½ cup butter
  • 1½ cups cream
  • 8 ounces cream cheese, softened
Instructions
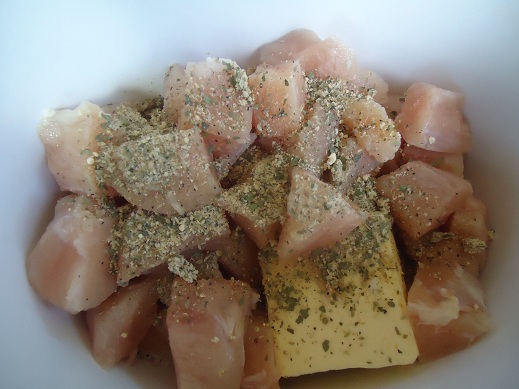
  1. Place chicken, dressing mix and butter in a crock pot. (I used my homemade Italian Dressing Mix to make this dish.)
  2. Cook for 6 hours on low or 4 hours on high.
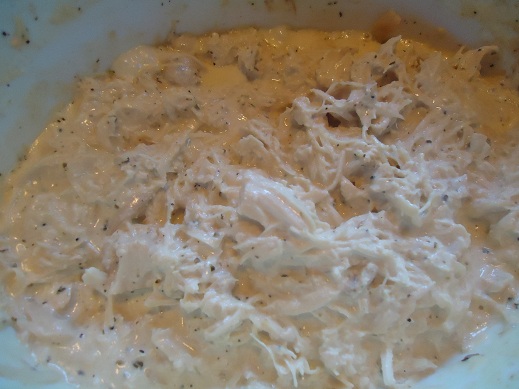
  3. Shred chicken with a knife and fork. Add cream and cream cheese to the chicken and stir.
  4. Cook for ½ hour longer on low.
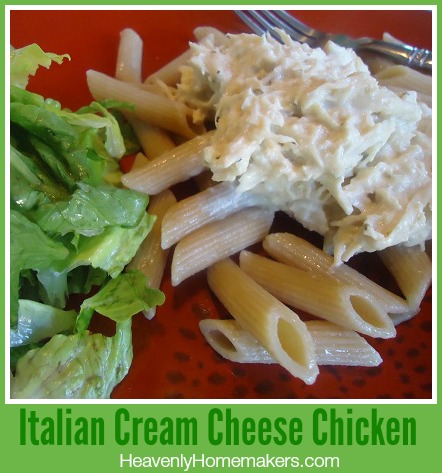
  5. Serve with whole grain noodles or brown rice.
3.4.3177

Italian Cream Cheese Chicken

What are the fats you include in your healthy diet?

Heavenly Homemaker's Club Members: Access your homepage and all your fantastic resources here! Not a member yet? Please join us!

Multi-Grain Pumpkin Waffles and Pancakes (wheat free)

November 2, 2011 by Laura 21 Comments

This post may contain affiliate links. For more information, please see our disclosure policy.

I am such a whole wheat girl. I love my freshly ground hard white wheat. I order 500 pounds of wheat at a time for goodness sake. But, in an effort to add variety to our diets, I’ve been on a mission to try different grains.

As you know, I’ve done a fair amount of experimenting lately with Coconut Flour (which isn’t a grain, but it does add variety to our healthy baked goods). Recently, my dear friend Angie sent me this Pumpkin Waffle recipe, and then another dear friend Jenny (who is Angie’s sister) affirmed how good these are – so I went for it. This recipe calls for several different grains and none of them are wheat. Look at me, growing in my grain varieties! Hey, it’s not difficult when you have good recipes like this one. In fact, my kids loved them and my pickiest eater even said, “Wow, these taste like your homemade donuts!” I think we have a winner.

Multi-Grain Pumpkin Waffles and PancakesYum

1 cup sorghum or barley flour
1 cup buckwheat flour
1/3 cup millet flour
1/3 cup brown rice flour
1 teaspoon baking soda
2 teaspoons baking powder
1/2 teaspoon salt
1/4 teaspoon ginger
1 teaspoon cinnamon
1/4 teaspoon nutmeg
3/4 cup pumpkin puree
4 tablespoons melted coconut oil
4 tablespoons maple syrup or sucanat
1 teaspoon vanilla extract
2 eggs
2 cups milk (or coconut milk if you’re going for dairy free also)

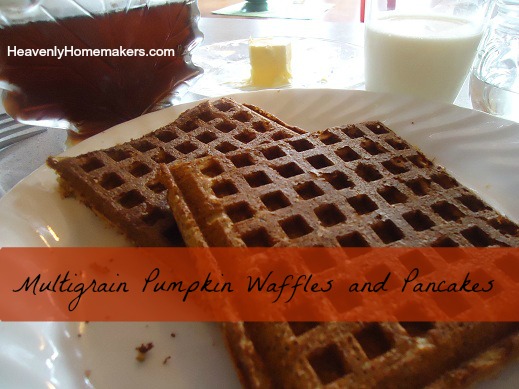
Whisk together dry ingredients. Beat the wet into the dry ingredients to combine. Cook the batter in a waffle iron – greasing well between each batch. Or, add a few extra tablespoons of milk and cook the batter into pancakes.

pumpkin_waffles
I can attest to the fact that it’s best to keep your waffle iron greased well to keep these from sticking. Otherwise, these were easy to make and incredibly delicious. And we just added some multi-grain variety to our diets. It wasn’t even painful. ;)  Remember, my nine year old thinks these taste like donuts. That’s a multi-grain transition anyone can make!

What grains do you eat at your house? Have you ventured beyond whole wheat yet?

Heavenly Homemaker's Club Members: Access your homepage and all your fantastic resources here! Not a member yet? Please join us!

Peanut Butter Apple Cookie Bars

November 1, 2011 by Laura 26 Comments

This post may contain affiliate links. For more information, please see our disclosure policy.

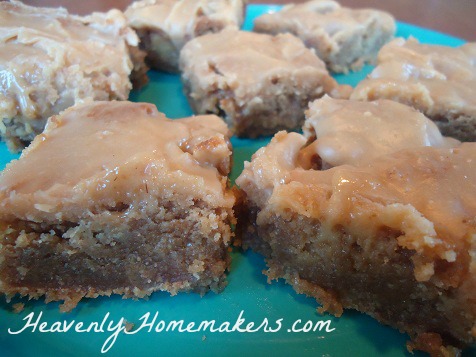
Peanut_Butter_Apple_Bars

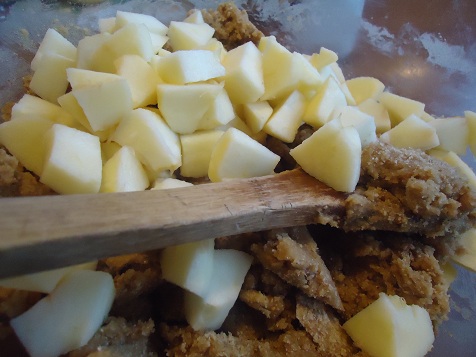
I’ve managed to whittle my apple supply down to about only 50 pounds of apples after making two rounds of Apple Sauce, Apple Butter, Caramel Apple Dip, Apple Crisp and Mini Apple Pies. Since I’m still surrounded by apples, I knew I had to try these Peanut Butter Apple Cookie Bars when I saw them at the Diva Entertains Blog. If you are unable to eat nuts, I would imagine you could substitute Sunbutter in this recipe, but I haven’t tried it to know for sure how it would work.

Peanut Butter Apple Cookie Bars (adapted from Diva Entertains Blog)

1/2 cup butter, melted
1 1/2 cups sucanat (or brown sugar)
1/2 cup peanut butter (homemade or natural)
2 eggs
1 teaspoon vanilla extract
1 teaspoon baking powder
1/4 teaspoon baking soda
1/2 teaspoon sea salt
2 cups whole wheat flour (I use freshly ground hard white wheat)
1 1/2 cups peeled and diced apples

In a large mixing bowl, stir together melted butter, peanut butter and sucanat until creamy. Add eggs, vanilla, baking powder, baking soda and salt, stirring until well combined. Mix in flour thoroughly. Fold in diced apples.

Spread dough into a 9×13 inch baking dish. Bake at 350° for 25-30 minutes or until golden. Allow bars to cool before adding the glaze.

Peanut Butter GlazeYum

2 cups powdered sugar (I recommend making your own with sucanat or using organic, unbleached)
1/4 cup milk
1/4 cup creamy peanut butter (homemade or natural)
1/2 teaspoon vanilla extract

Combine all ingredients and beat until smooth. Drizzle or spread over the cooled bars.

peanut_butter_apple_bars_5

As you can see, drizzling the glaze kinda led to spreading the glaze like a frosting in my case, so feel free to drizzle or spread or slop the glaze on there however you’d like. They’ll pretty  much taste great no matter how you do it. :)

Heavenly Homemaker's Club Members: Access your homepage and all your fantastic resources here! Not a member yet? Please join us!

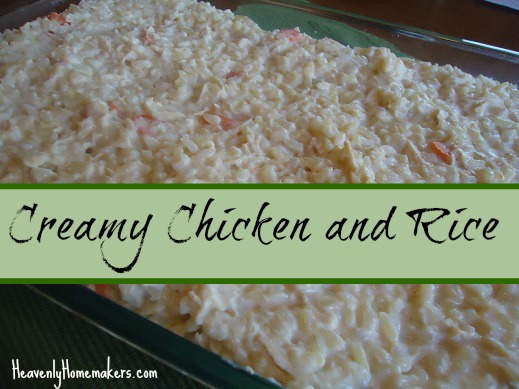
Creamy Chicken and Rice Casserole (with no cream soups!)

October 30, 2011 by Laura 108 Comments

This post may contain affiliate links. For more information, please see our disclosure policy.

I am a canned Cream of Fill in the Blank Soup rebel. I have avoided canned cream soups since we began Our Healthy Eating Journey. Why? Because their ingredient lists scare me. (As in, I literally scream out loud, from deep in the back of my throat, when I pick up a can and read it at the store. Not really. But I wonder what my boys would do if I did? Maybe I’ll do that sometime. Not really.)

The ingredients in a can of Campbell’s Cream of Celery Soup, according to the Campbell’s Food Service Website are (and do try not to scream when you read this):

Water, Celery, Vegetable Oil (Corn, Cottonseed, Canola, and/or Soybean), Wheat Flour, Modified Food Starch, Contains less than 2% of: Salt, Soy Protein Concentrate, Monosodium Glutamate, Cream Powder (Cream [Milk], Soy Lecithin), Yeast Extract, Flavoring, Beta Carotene for Color.

Well, at least the first two ingredients are water and celery. ;)

There are all kinds of recipes which share how to make homemade cream soups. I’ve tried some of them, and I’m thankful that the recipes are available. For some reason though, I just haven’t had a loving enough relationship with cream soup to try to keep the homemade varieties on hand.

The question is then, how do you make a casserole without a cream soup? Ah, very simple:  I use cream.

Cream of what? No, just cream. Cream. The stuff that rises to the top of your raw milk. Or the thick, white liquid you can buy in the dairy department of the store, usually labeled Heavy Whipping Cream. If you use cream, along with a few spices that enhance your casserole, your dish will be tasty, easy and surprise, surprise:  creamy.

Here is how I now make my Creamy Chicken and Rice Casserole with real, whole food ingredients:

Creamy Chicken and Rice CasseroleYum

4 cups chicken broth (I avoid canned broth or bouillon because they are also loaded with MSG.)
4 carrots, peeled and sliced
1 medium onion, diced
2 cups brown rice
2-3 cups cooked chicken, cut into bite sized pieces
1/2 teaspoon (or more) garlic powder
Sea salt, to taste
1 1/2 cups cream (heavy whipping cream, or fresh cream which has risen to the top of whole, raw milk)

In a large pot, bring chicken broth, carrots and onion to a boil at high heat. Add rice, stir, and place the lid on the pot. Reduce heat to low and cook the rice and vegetables in the broth for 45 minutes. (To avoid sticky rice, don’t stir the rice while it’s trying to cook – just walk away and ignore it for the entire 45 minutes. You can do it.)

When the rice is done, stir in cooked chicken, garlic powder and cream. Shake in liberal amounts of sea salt for best flavor. (I use Redmonds Real Sea Salt, which is unbleached and full of natural minerals.)  Cook ingredients for about five more minutes to heat the chicken and cream. Serve directly from pot, or pour into a 9×13 inch baking dish. This meal can be prepared ahead of time, refrigerated and reheated in the oven at serving time. Cover and heat in a 350° oven for 20-30 minutes or until hot through and through. Serves eight.

(You can also freeze this meal. To reheat, simply put the frozen, covered casserole into the oven, turn the oven onto 350° and cook for about 1 1/2 hours or until it is heated thoroughly.)

Creamy Chicken and Rice

Creamy Chicken and Rice Casserole (with no cream soups!)
 
Save Print
Author: Laura
Serves: 8-10 servings
Ingredients
  • 4 cups chicken broth (I avoid canned broth or bouillon because they are also loaded with MSG. Here's my easy homemade chicken broth recipe, which includes frighteningly ugly pictures of a chicken carcass. Again, try not to scream.)
  • 4 carrots, peeled and sliced
  • 1 medium onion, diced
  • 2 cups brown rice
  • 2-3 cups cooked chicken, cut into bite sized pieces
  • ½ teaspoon (or more) garlic powder
  • Sea salt, to taste
  • 1½ cups cream (heavy whipping cream, or fresh cream which has risen to the top of whole, raw milk)
Instructions
  1. In a large pot, bring chicken broth, carrots and onion to a boil at high heat.
  2. Add rice, stir, and place the lid on the pot.
  3. Reduce heat to low and cook the rice and vegetables in the broth for 45 minutes.
  4. When the rice is done, stir in cooked chicken, garlic powder and cream.
  5. Shake in liberal amounts of sea salt for best flavor.
  6. Cook ingredients for about five more minutes to heat the chicken and cream.
  7. Serve directly from pot, or pour into a 9x13 inch baking dish.
  8. Cover and heat in a 350° oven for 20-30 minutes or until hot through and through.
3.4.3177

Cooking your rice in the chicken broth gives this dish a wonderful, naturally delicious flavor. And in case I didn’t mention it before, the cream makes this dish…creamy.

Where have you landed on the Cream of Fill in the Blank issue? Have you given them up yet? Have you ever screamed out loud when reading the ingredient list on a can of soup at the store? Do you make your own cream soups? Or do you use another substitution? (Sour cream works well too, in some recipes!)

Heavenly Homemaker's Club Members: Access your homepage and all your fantastic resources here! Not a member yet? Please join us!

Healthy Crock Pot Recipes: Turkey Sausage and Red Bean Stew

October 18, 2011 by Laura 30 Comments

This post may contain affiliate links. For more information, please see our disclosure policy.

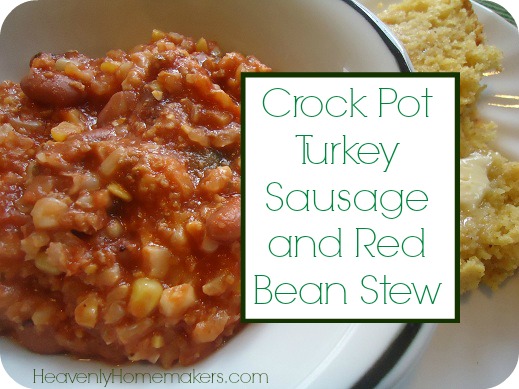
This Turkey Sausage and Red Bean Stew is a pretty awesome comfort food!

How nice is it that I put this stew into my crock pot before a soccer game, then came home to dinner all ready and waiting for us to eat? In fact, my crock pot was so nice that as we walked in the door, it scooped the prepared stew into six serving bowls, poured milk for us to drink, set the table and sang us a song while we gathered around. Okay, not really. But still, having a hot meal ready and waiting made me feel like someone else had done all the work.

This stew is especially easy to make if you already have turkey sausage and red beans cooked up ahead of time. I typically make six pounds of the sausage at a time, then freeze it in one pound packages, making it easy to throw into a meal like this one.

Turkey Sausage and Red Bean StewYum

Healthy Crock Pot Recipes: Turkey Sausage and Red Bean Stew
 
Save Print
Author: Laura
Serves: 6-8
Ingredients
  • 1 pound turkey sausage (browned)
  • 2 cups cooked red beans or 1 can (15 ounces) small red beans
  • ½ cup brown rice (uncooked)
  • 1 cup water
  • 1½ cups corn (frozen or canned)
  • 2 cups tomato juice
  • ½ cup chopped sweet green pepper (more if you like)
  • salt and pepper, to taste
Instructions
  1. Combine all ingredients in a slow cooker.
  2. Cook on low setting for 6 hours.
  3. This stew is great served with hot cornbread and a glass of milk.
  4. It is also gluten free - a bonus for those of you with GF needs!
3.4.3177

You need this recipe: Turkey Sausage

Crock Pot Turkey Sausage and Red Bean Stew

With my crock pot cooking our dinner for us, now all I need is an appliance that will clean my kitchen for me. Oh wait – that’s what the kids are for. We make kitchen clean-up a family project – here’s a post explaining more, along with a free downloadable kitchen chore chart.

Is it stew weather where you live? (If it’s still warm and sunny at your house, break it to me gently.) ;)

Heavenly Homemaker's Club Members: Access your homepage and all your fantastic resources here! Not a member yet? Please join us!

My Favorite, Versatile Whole Wheat Dough

October 5, 2011 by Laura 67 Comments

This post may contain affiliate links. For more information, please see our disclosure policy.

You’ve been seeing this same dough recipe pop up over and over as I post new recipes. It has definitely become my go-to dough recipe for quick, kid-friendly meals that are also healthy. I decided today to highlight and feature my friend, The Versatile Dough. He (she?) is a winner in my book and can multitask in my kitchen to create all kinds of wonderful food.

I guess that must mean that this dough is definitely a “she”. He’s can’t multitask as well as she’s can. This is not an insult to the he’s – no not at all. I’m thankful that God made males able to focus on one thing well. We females can multitask so well, it’s sometimes hard for us to focus on just one thing. Trust me, I’m a she. I know these things. (See, like right now I’m typing this, thinking about the meat thawing in my kitchen for lunch tomorrow, making a plan for what to do with the apples on my porch and creating a chore list for my kids – all at the same time. It’s amazing that my post makes any sense at all. Case in point. So far, this post hasn’t made a whole lot of sense. After all, I’ve just assigned a gender to my whole wheat dough.)

So back to my point, because surprisingly, I really do have one. I love this Whole Wheat Dough. I use it a lot. I think you will love it too.

Versatile Whole Wheat DoughYum

3 to 3 1/2 cups whole wheat flour (I use freshly ground hard white wheat flour)
1 teaspoon sea salt
1 cup butter, melted and cooled
1 cup plain yogurt

Mix all ingredients and knead together until a nice dough has formed. (If you’re using store-bought flour, you will probably not need all 3 1/2 cups of flour.)  You can roll out and use this dough right away, or you can allow it to sit on the counter-top overnight (covered) in order to break down the phytates in the wheat and make it more digestible.

If you do allow the dough to sit overnight, it is best to knead this dough for several minutes before you try to roll it out. :)

What to Make With This Versatile Whole Wheat Dough

(Click on the links above the pictures to find the specific recipes.)

Pizza Crust

pizzasm.JPG

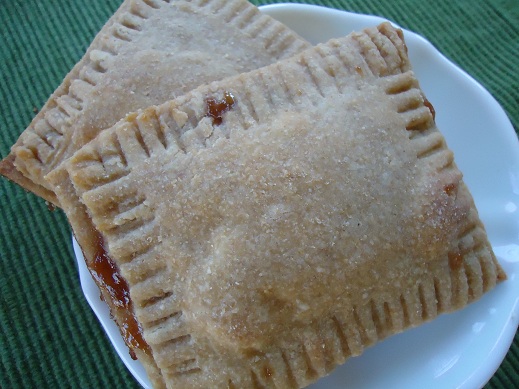
Poptarts

Pigs in a Blanket

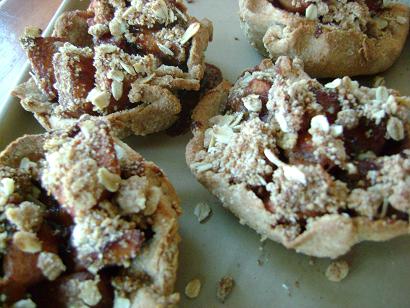
Mini Apple Pies and Pockets

miniapplepies9sm

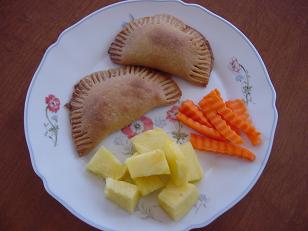
Pizza Pockets

pizzapockets2sm.JPG

I bet if I think real hard, I can come up with several more ways to use this dough. Have you tried making this dough before or any of the above recipe ideas? You MUST try it – it’s buttery, flaky, healthy, tasty and EASY!

And if you think I’m weird calling my dough a “she” you should hear me talking to my frozen/thawing chickens as I prepare them for soup. Wouldn’t you just like to be a fly on the wall in my kitchen sometime? Oh the things you would learn about me then. ;)

Heavenly Homemaker's Club Members: Access your homepage and all your fantastic resources here! Not a member yet? Please join us!

Homemade Peach Syrup (made with unprocessed sugar)

October 2, 2011 by Laura 13 Comments

This post may contain affiliate links. For more information, please see our disclosure policy.

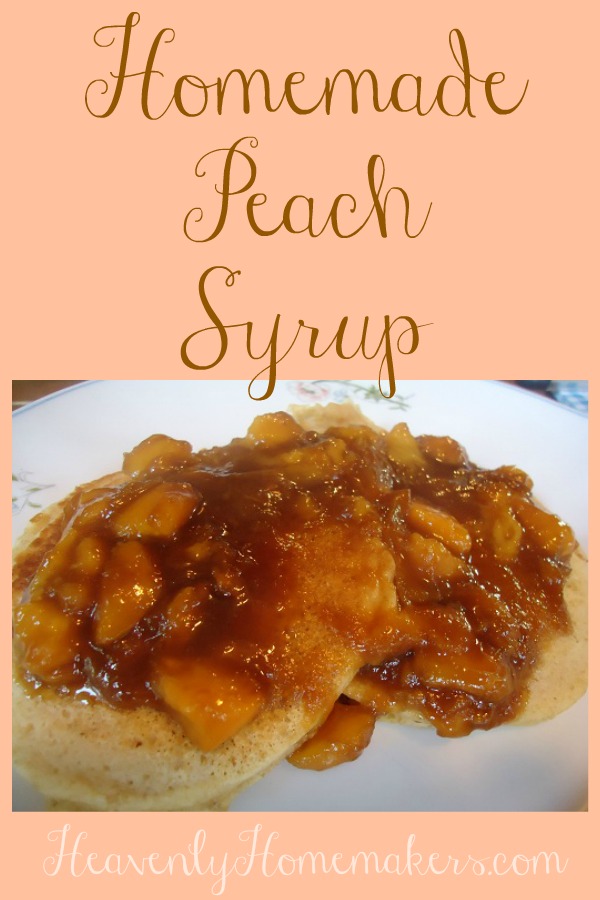
We usually top our pancakes with real maple syrup or homemade applesauce. Sometimes peanut butter and jelly. Or peanut butter with maple syrup. Or honey. Or if we sprinkle a few mini chocolate chips into the pancakes, we don’t really need syrup at all. But last week when we had some fresh, local peaches in our kitchen, I made a quick and healthy homemade peach syrup that is oh-my-goodness good.

You need exactly two ingredients to make this: peaches and sucanat. The two together cook to form a syrup. No water necessary. Can you believe how easy this is?

Homemade Peach SyrupYum

Homemade Peach Syrup (made with unprocessed sugar)
 
Save Print
Author: Laura
Ingredients
  • 3 fresh peaches (or 2 cups frozen)
  • 2 Tablespoons sucanat or brown sugar
Instructions
  1. Slice peaches into a saucepan.
  2. Stir in sucanat and cook on medium heat, stirring occasionally until the peaches are tender and the ingredients have formed a syrup.
3.4.3177

You can add a few shakes of cinnamon if you like. Of course I love doing that in the fall when everything seems to need to smell and taste like cinnamon.

I love how the fruit and sugar cooked together form a syrup naturally. This works with both fresh or frozen fruit. No need to thaw the frozen fruit before cooking!

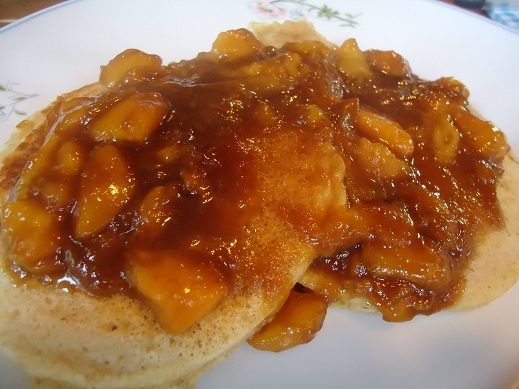
Homemade Peach Syrup


Another variation of this Peach Syrup recipe is…

Easy Raspberry Pancake and Waffle Syrup

Easy Raspberry Pancake and Waffle Syrup - Only Two Ingredients!

It’s the same idea – just sub out peaches for raspberries. Or use blueberries instead. Or strawberries. Or any combination of peaches or berries to make a multi-fruit syrup. See how easy this is?

In case you need them (and of course you do want them), here are our family’s favorite pancake and waffle recipes:

  • Whole Wheat Waffles
  • Quick Mix Pancakes
  • Peanut Butter Pancakes
  • Pumpkin Pancakes

What’s your favorite way to top pancakes and waffles?

Heavenly Homemaker's Club Members: Access your homepage and all your fantastic resources here! Not a member yet? Please join us!

Coconut Flour Brownies (Gluten Free!)

September 28, 2011 by Laura 57 Comments

This post may contain affiliate links. For more information, please see our disclosure policy.

I decided to follow my “What Kind of Wheat Flour is Best?” post with a gluten free recipe. Talk about swinging from one side of the pendulum to the other, huh? I’m either trying to be accommodating – or keeping you forever on your toes with what to expect when you check in here. ;)

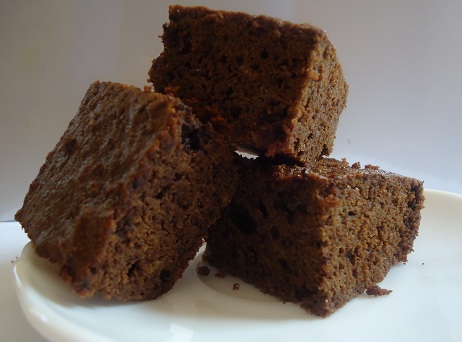
Beth emailed this recipe to me, saying she found it on the Azukar Coconut Flour package that I’d posted a deal for recently. (The deal is still good, by the way!)  I tweaked the recipe slightly by replacing the regular sugar with sucanat. Also, you could add chocolate chips if you’re feeling the need for a major chocolate fix, or chopped nuts if you’re feeling nutty. Personally, I can always use a chocolate fix, and nutty as I am, I don’t care for chopped nuts in my brownies.

Coconut Flour BrowniesYum

1/3 cup melted butter or coconut oil
1/2 cup cocoa powder
1 cup sucanat
6 eggs
1/2 teaspoon vanilla extract
1/2 cup coconut flour
1/2 cup chocolate chips (optional)
1/2 cup chopped nuts (optional)

Stir together melted butter (or oil), cocoa and sucanat. Add eggs and vanilla, mixing well. Stir in coconut flour, stirring until all ingredients are well combined. (Coconut flour likes to clump together a little bit – I find a whisk usually helps smooth out the mixture as I stir.)  Fold in chocolate chips and/or nuts if you choose.

Pour into an 8×8 inch baking dish. Bake in a 350° oven for about 30 minutes.

Whether or not you need to eat a gluten free diet, I really recommend that you check into using coconut flour every once in a while. It’s a very healthy flour. Read more about why I love coconut flour.

What have your coconut flour experiences been like so far? Are you a nutty brownie sort of person, or simply just…nutty?

Heavenly Homemaker's Club Members: Access your homepage and all your fantastic resources here! Not a member yet? Please join us!

Whole Wheat Pumpkin Chocolate Chip Muffins

September 26, 2011 by Laura 69 Comments

This post may contain affiliate links. For more information, please see our disclosure policy.

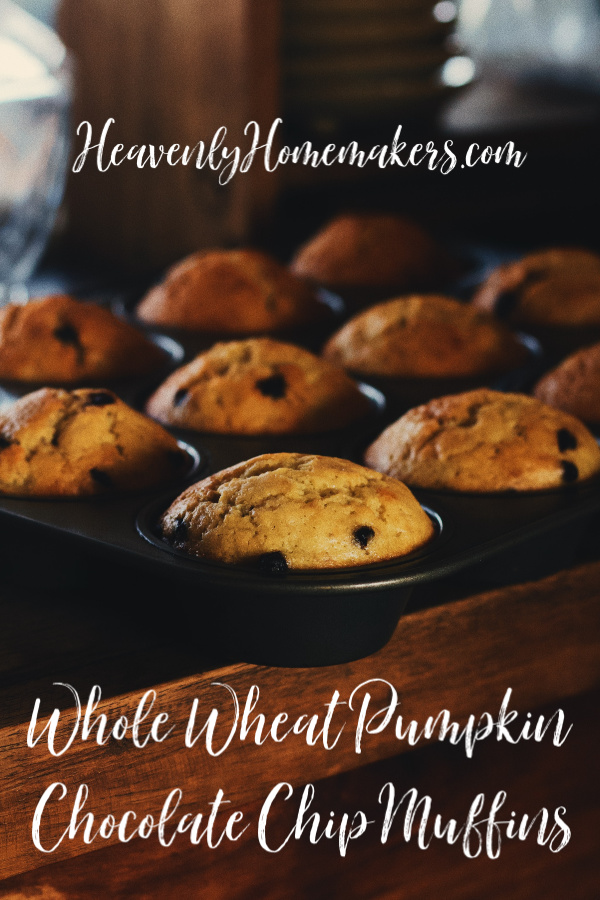
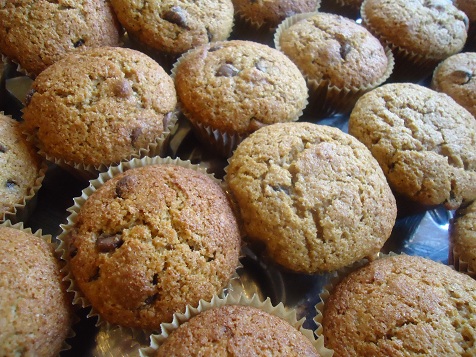
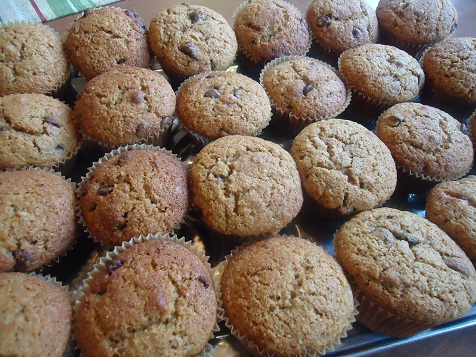
Whole Wheat Pumpkin Chocolate Chip Muffins anyone? Grab a cup of coffee or hot chocolate! What a delicious combination, and perfect for fall!

Yum

As several of you requested, I’m sharing my healthy variations to Crystal’s Pumpkin Chocolate Chip Muffins. These were a big hit yesterday morning when I served them in our marriage class.

If you’d like to read more about how I adapt a recipe to make it healthier, check out this post. You’ll find a free, downloadable recipe conversion sheet which you can tack onto your refrigerator to reference when you need to convert a recipe.

Whole Wheat Pumpkin Chocolate Chip Muffins

(adapted from MoneySavingMom)

5.0 from 1 reviews
Whole Wheat Pumpkin Chocolate Chip Muffins
 
Save Print
Author: Laura
Serves: =24
Ingredients
  • 3 cups whole wheat flour (I used freshly ground hard white wheat)
  • ½ cup sucanat
  • 1 teaspoon baking soda
  • 2 teaspoons baking powder
  • 1 teaspoon sea salt
  • 1 teaspoon cinnamon
  • 4 eggs
  • 2 cups pureed pumpkin (or one 16 ounce can)
  • 1 cup melted coconut oil (or butter)
  • 1 cup chocolate chips
Instructions
  1. In a large mixing bowl, stir together all dry ingredients.
  2. Add eggs, pumpkin and oil.
  3. Mix well.
  4. Fold in chocolate chips.
  5. Spoon batter into 24 paper lined muffin cups.
  6. Bake in a 400° oven for 16-22 minutes or until the muffins are golden brown.
3.5.3229


(I prefer either homemade chocolate chips or soy free chocolate chips)


These are easy to put together and make your house smell just like the fall season is supposed to smell. Pumpkin and cinnamon smell awesome. Plus, adding chocolate to a muffin never, ever hurts my feelings. :)

Want more pumpkin recipes?

  1. Overnight Pumpkin Spice French Toast Casserole (Such a wonderful recipe to put together at night, then bake and serve to guests in the morning!)
  2. Super Moist Sour Cream Pumpkin Bread
  3. Pumpkin Spice Roll-Out Cookies (Simple and sweet, one of my favorites!)
  4. Pumpkin Chocolate Chip Bread
  5. Pumpkin Donuts (I make these all year round as an excuse to feed my kids a vegetable for breakfast.)
  6. Warm Pumpkin Custard (Oh yes, you should drink your pumpkin.)
  7. Simple Pumpkin Pancakes
  8. Pumpkin Chocolate Chip Cake
  9. Pumpkin Pecan Pie Squares (Such a fun combination of two holiday favorites.)
  10. Pumpkin Pie
  11. Pumpkin Breakfast Cake
  12. Pumpkin Cheesecake (Making life better, one delicious bite at a time.)
  13. Pumpkin Pie Bars (These are a Thanksgiving tradition at our house.)
  14. Pumpkin Cream Cheese Muffins
  15. Easy Pumpkin Cheesecake Muffins (With chocolate chips on top. Amen.)
  16. Flourless Pumpkin Muffins (Flourless and fabulous!)
Heavenly Homemaker's Club Members: Access your homepage and all your fantastic resources here! Not a member yet? Please join us!
« Previous Page
Next Page »

Join Our Community!

 Facebook Twitter E-mail Instagram Pinterest

Popular Posts

~ Will All of the Real Moms Please Stand Up?
~ Easy! Stir-and-Pour Whole Wheat Bread
~ How to Make Gatorade
~ 31 Real Food Breakfast Ideas
~ Dear Teenage Girls...
~ When Mom Takes a Step Back
~ The Inexpensive Health Insurance We Love!
~ Let's Talk Real Food Grocery Budgets

Check out our latest posts!

  • Big Family Food and Fun: September 6-12, 2026
  • Big Family Food and Fun: August 30-September 5, 2026
  • Big Family Food and Fun: August 23-29, 2026
  • Big Family Food and Fun: August 16-22, 2026
  • Big Family Food and Fun: August 9-15, 2026
Home  ~  Simple Meals  ~  Club Membership  ~  Shop  ~  Privacy Policy  ~  Disclosure  ~ Contact

Copyright © 2026 · Beautiful Pro Theme on Genesis Framework · WordPress · Log in