Heavenly Homemakers

Encouraging women in homemaking, healthy eating and parenting

  • Home
    • About
    • FAQs
  • Recipes
    • Bread and Breakfast
    • Condiments
    • Dairy
    • Main Dishes
    • Side Dishes and Snacks
    • Desserts
    • Gluten Free
    • Instant Pot
    • Crock Pot
    • Heavenly Homemaker’s Weekly Menus
  • Homemaking
    • Real Food Sources
  • Store
  • Contact
    • Advertise
    • Disclosure
    • Privacy Policy
  • Simple Meals
  • Club Members!

Frozen Oatmeal Cups – for a Quick, Hearty Breakfast

August 2, 2015 by Laura 17 Comments

This post may contain affiliate links. For more information, please see our disclosure policy.

Seriously, Frozen Oatmeal Cups. Check this out.
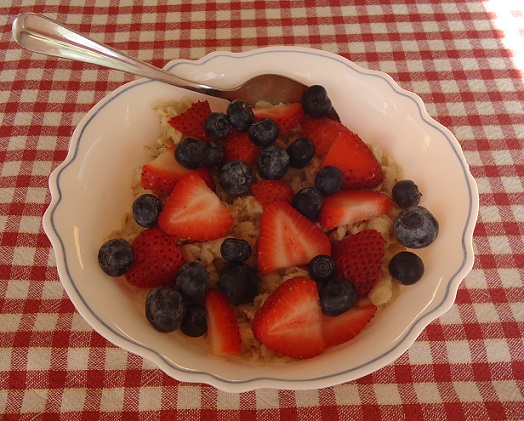
frozen oatmeal8

Yum

Making oatmeal has got to be the most difficult thing to do ever. It’s definitely the most tedious breakfast food there is – requiring time, energy, thought, and absolute sweat-dripping labor over a stove for five entire minutes (because oatmeal won’t cook properly unless someone is staring at it in expectation). Life is hard. We should probably settle for pop-tarts. It’s the only way.

Don’t worry, friends. I’ve found a way to avoid performing this grueling task (and eating pop-tarts) in the mornings – and I’m here to share. I think we can all agree that the more we can avoid the challenge of putting water in a pot to boil, the better. Gather ’round, everyone. This tip will shave at least 1.4 minutes off your morning meal prep, so listen closely. Every 1.4 minutes counts.

Here’s what you need to do: You need to cook up a double or triple batch of oatmeal (you can do it, we’re all in this together, persevere, I believe in you). Once the oatmeal is done, go ahead and feed some to your family. Here’s where it gets good: After your meal, freeze the leftovers in muffin cups, topped with whatever delicious toppings your family likes. Like this:
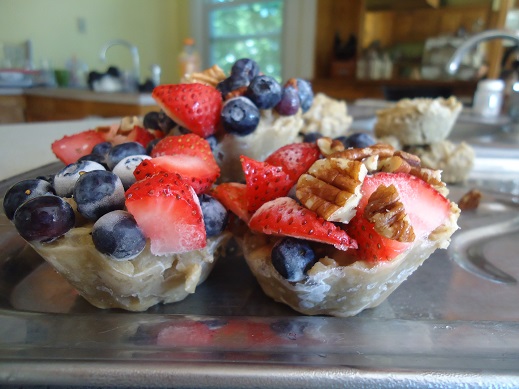
frozen oatmeal3

The result is easy-to-store cups of frozen oatmeal which are ready to pull out and re-heat at any given time – preferably on those mornings. You know the ones I’m talking about.

But seriously, in all seriousness, because I am always serious – this really is a lovely way to help your children help themselves on a busy morning, and it really does save a tiny bit of time because the cooking of the oatmeal has already been done.

Now, if you get a little bit burned out on oatmeal and you’re still struggling with the urge to buy a pre-made breakfast in a box that promises to save you time – I suggest you consider the possibility of frying an egg. If I can do it, you can do it. There are also apples – a brand new innovative idea for breakfast that I’ve heard are great to grab-and-go. Who knew?
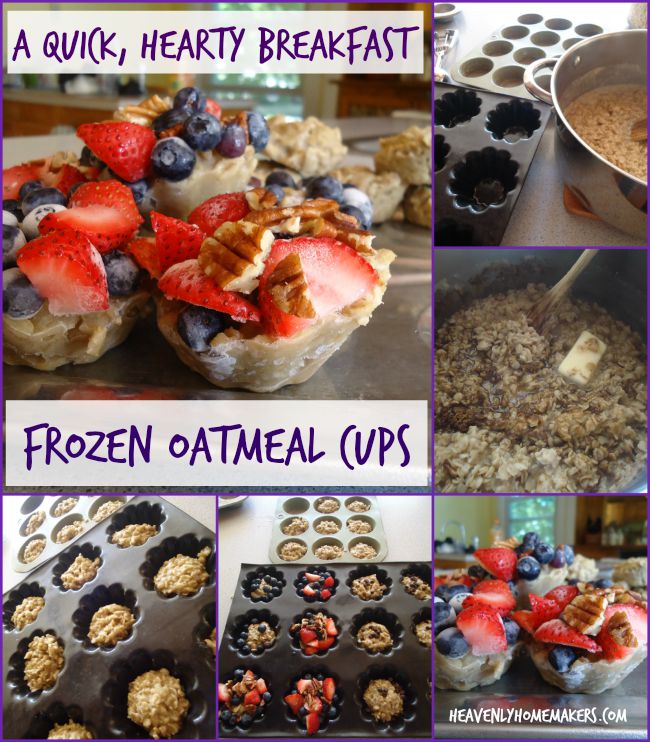
Frozen Oatmeal Cups - a quick, hearty breakfast

The Specifics of Making Approximately 24 Frozen Oatmeal Cups

  1. Boil 6 cups of water.
  2. Stir in 3 cups of whole oats.
  3. Turn the heat down to simmer the oats/water for about 5 minutes, stirring occasionally.
  4. Remove from heat once the water has been absorbed and the oats are soft.
  5. Stir in 1-3 Tablespoons of butter and 1-4 Tablespoons of sweetener like honey or sucanat as desired.
  6. Scoop prepared oatmeal into muffin tins (no need to grease the tins).
  7. Top oatmeal cups with any variety of fruit, nuts, chocolate chips, etc.
  8. Place filled muffin pans in the freezer for 2-3 hours or until oatmeal is frozen solid.
  9. Pull frozen oatmeal out of the freezer and allow it to sit on the counter-top for about 10 minutes.
  10. Use a fork or spoon to gently pop the frozen oatmeal cups out of the tins.
  11. Place the frozen cups into a labeled freezer bag. Store in the freezer for up to three months.
  12. Re-heat by placing frozen oatmeal cup(s) in a small saucepan on medium heat until thawed and warm.

I love this idea (for so many reasons, as explained earlier) – but also because this allows for a variety of sizes of appetites. Little ones may just need one cup to fill them, whereas my sons would likely each pull out 2-4 to rewarm.

So now, go therefore and make yourself some frozen oatmeal cups. Your breakfast – and really, your entire life – is obviously going to be changed for the better because of this tip. Enjoy your extra 1.4 minutes of morning time. You are very, very welcome.

What do you think of this idea? I like the brainlessness of it. I like that the cooking is done so all that needs to be done is rewarm and serve. I love that my kids can do this themselves. Not every freezer meal is about saving time – sometimes it’s just about the comfort of having prepped food on hand for ease!

P.S. We also really love making Homemade Instant Oatmeal to have on hand.

Kudos to Cupcakes and Kale Chips where I first saw this fun idea!

Heavenly Homemaker's Club Members: Access your homepage and all your fantastic resources here! Not a member yet? Please join us!

From Frosty Freezers to Defrosted Freezers to Full Freezers

July 30, 2015 by Laura 25 Comments

This post may contain affiliate links. For more information, please see our disclosure policy.

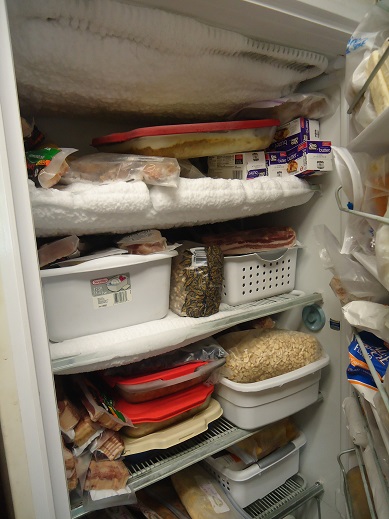
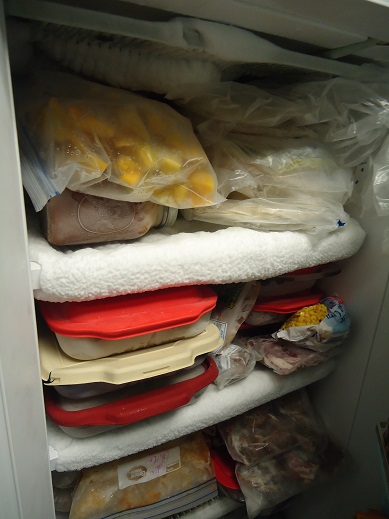
It may not look like much of a difference to you when you see my pictures, but trust me on this one. My freezers were completely disorganized and full of frost. I didn’t know what I had in there, much less where anything was.

Before I show you my before and after pictures, let’s establish this right away: No one ever accused me of not having enough food on hand. No one ever said, “Laura I think you should really consider buying more than one pound of meat at a time.” No one ever said, “Have you ever considered buying in bulk?”

“I sure hope the Coppingers can find something to eat today,” said no one ever. I’m thankful for the abundance, and you’ll read more about how we afford full freezers below.

Instead, this is what people say:

“If ever there is a food crisis, we will go to Laura’s house.” and “What are you guys, carnivores?!” and also “I would never have time to do all that freezer cooking.”

That final statement always makes me bang my head on my freezer since time is something I often feel that I am severely lacking and freezer cooking is what saves my meals (and ironically, my time).

So how do we afford to buy so much at once? True statement: We can’t afford not to.

Buying meat, cheese, nuts, grains, and butter in bulk and when we find good deals is the only way to feed a family full of teenage boys (and guests) without breaking our bank. If it’s a good price, I buy a cartful – which is a lot of cost upfront but saves $1,000’s in the long run.

How do I find time to do freezer cooking? I make time, spending an additional two hours or so here and there to save a dozen or more hours of cooking later. Or my favorite tip of all, when I’m making one casserole to eat at dinner, I typically make an additional one or two while I’m at it. Same effort, same amount of dishes, twice or three times the eats. It only makes sense.

So let’s take a look now at my freezers, and then let’s encourage Laura not to buy any more meat for a while. Seriously.

First I will show you (because I love splashing my disorganizational skills all over the internet) my two frost-filled, haphazard freezers in which one can only hope to reach in to grab a chicken and actually come away with a chicken.

Freezer #1

freezer1

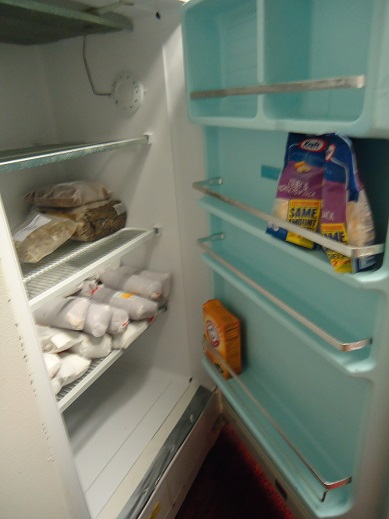
Freezer #2

freezer2

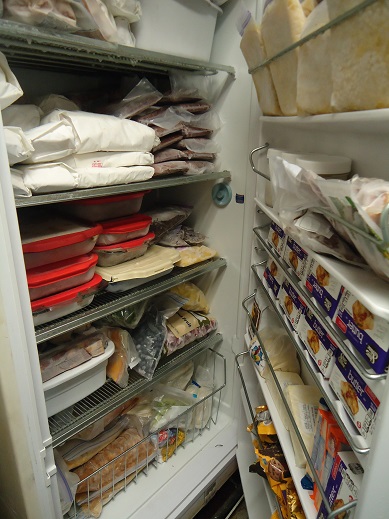
Operation defrost and reorganize the freezers began Saturday afternoon.

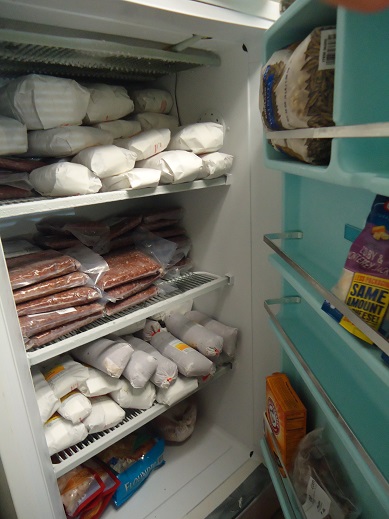
Half the fun of this project was actually discovering that I had over 12 prepared freezer meals scattered all over the place. Thinking a better idea would be to put them all one one shelf so I’d know just where to look, I…you know, put them all on one shelf so I’d know just where to look. Brilliance. I’ll be saving these meals for the first few weeks of school/soccer season. This is what sanity is made of.

I put all the chicken on the top shelf, all the beef on the second shelf, all the butter in the door, and all the frozen fruits and veggies on aisle 4.

freezer4

Freezer #2 then only contained only our lamb meat, nuts, and a couple packs of cheese. But wait. There’s more.

freezer5

On Tuesday, Matt picked up the grass-fed beef we had ordered from local farmer friends. Did we need to order beef right now? No, we still had some. But our friend’s cows were ready right now…and later would be too late. Saying no now would have made us run out of beef before next spring/summer, so we ordered before we needed it. I think we’re set on beef for a while. Although we will go through this faster than many would think. You’ve seen teenagers eat, right?

freezer6

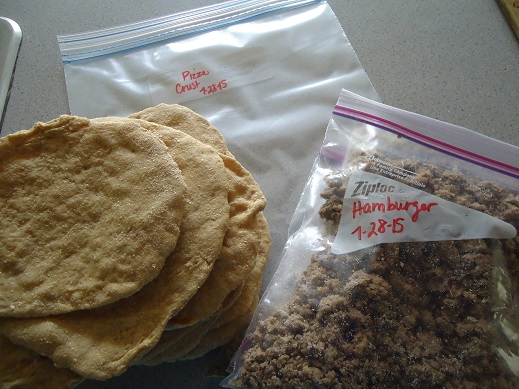
In other freezer cooking news, I made a batch of Whole Wheat Pizza Crusts for an easy lunch once school starts. I also cooked 3 pounds of hamburger meat (seeing as I had some to cook). We’ll use it on the pizzas and for other easy meals.

pizza crust for freezer

I have more to share about how I used my Eat Right Away Beef and Chicken Slow Cooker Editions (my fav so far!) to make many meals in a tiny amount of time – but that’s another post for another day.

I also planned to make a bunch of muffin batter for the freezer, but I am completely out of eggs (and beef is a poor substitute). We will be getting several dozen eggs today from our friend with chickens, then the muffin-batter-for-the-freezer plans will commence.

So now you tell me about your freezer(s). And about your beef. And about your eggs. And about your experiences in watching teenagers eat.

Heavenly Homemaker's Club Members: Access your homepage and all your fantastic resources here! Not a member yet? Please join us!

The First Thing I Did When I Got Home From Camp – Plus What I’ll Be Up to This Week

July 25, 2015 by Laura 2 Comments

This post may contain affiliate links. For more information, please see our disclosure policy.

I bet you can guess. What’s the first thing I did the moment I got out of the van after being at camp for two weeks?

Okay fine. I went potty. But after that? Well, yes I started a load of laundry. But then??? Well I filled a glass of water to make sure I was hydrated.

But none of those count. What’s the really first thing I did after being away from my kitchen for two weeks?

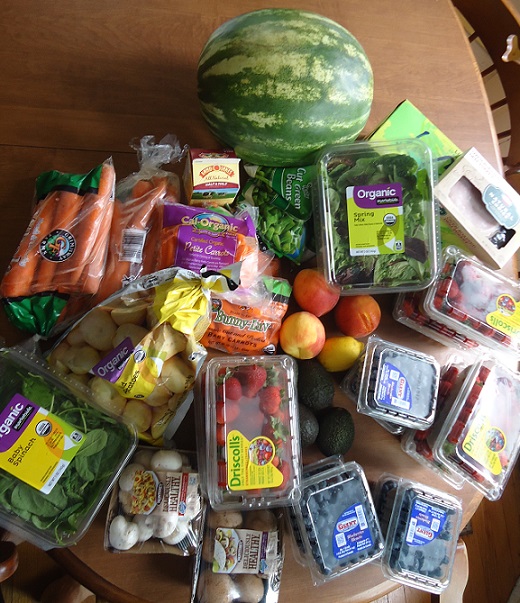
groceries725Home from camp!
Ahhhhh, yes. I made a big price-matching list and headed to the store. The fridge was all but empty, we’re craving more fresh produce, and I’ve missed cooking. I loved the break (especially from the dishes!) – but I am so excited about being back in my kitchen!

I must admit that our three teenage boys are still at camp for another week and a half which means that I might have over-purchased just a wee bit. All you see in the picture up there? That’s just for Matt, Malachi (age 10), and me. We’re that hungry for freggies. I couldn’t hold back.

Case in point: Matt washed one of the containers of blueberries as soon as I gave him permission (aka, as soon as I got a picture taken – it’s a food blogger thing). I snagged a few of the berries as I scrubbed refrigerator shelves and put away groceries. A few minutes later, Matt appeared with the blueberry container and a grin. The blueberries were almost completely gone. The guy ate an entire pint (minus the 17 little berries I ate) in about 5 minutes. We’re craving this stuff, I tell ya.

Cravings aside, I would not have gotten 6 pounds of strawberries and 6 pints of blueberries for just the three of us – but I was able to price match them for just $1.00 each. Who can pass up filling the cart when they’re only a buck?? If we can’t finish them before they go bad, we’ll just freeze them for muffins and smoothies. It’s too easy.

So here’s what I’m thinking. I’m thinking that while I still just have one boy at home and therefore don’t need to prep large meals – I’m going to do some freezer cooking this week. My list is too long, which means I won’t likely get around to all of this since I have so much other work to catch up on after being away for two weeks. But here’s my crazy-lady list nonetheless:

1. Defrost the freezer.

We’re getting a quarter of grass-fed beef this week, so that along with putting prepped food in the freezer means I need to get rid of the terrible ice build up I’ve been ignoring for way too long.

2. Make a few batches of Strawberry and Blueberry Cream Muffins – freezing the batter to bake fresh later. (Read more about this wonderful freezer tip here.)

3. Work through my Eat Right Away Beef and Chicken Slow Cooker Editions to get easy meals in the freezer ready for upcoming school/soccer/busy days.

4. Make Whole Wheat Pizza Crusts for the freezer so the boys can quickly make their own pizzas on busy days.

5. Make and freeze Chicken Fried Steak Strips with the beef we’re picking up from the butcher.

6. Stop making this list before I become overwhelmed.

There are too many great freezer cooking ideas. I made myself stop adding to the list so I don’t overwhelm myself. I’ll take pictures of my progress throughout the week and share an update with you soon!

What are you going to be doing this week?

Heavenly Homemaker's Club Members: Access your homepage and all your fantastic resources here! Not a member yet? Please join us!

You Know My Family Hasn’t Always Eaten Healthy, Real Food – Right?

July 20, 2015 by Laura 2 Comments

This post may contain affiliate links. For more information, please see our disclosure policy.

When people read about the way I feed my family now, many assume I’ve known about healthy eating forever and that nothing about this is difficult for me.

Not true. We have not always eaten healthy.

Several years ago (when my blog was a baby) I wrote a series sharing my family’s healthy eating journey. Ugh, was it ever a journey. It still is.

All the fears and unknowns that many of you feel when you start reading about what is healthy and what isn’t – I totally get it. I’ve been there. Sometimes I’m still there. I haven’t arrived at perfect eating and never will. I’m pretty sure it’s not even possible.

So to encourage you to take some baby steps and to reassure you that you are not alone – I’d love for you to go back and read through this series of posts: Our Healthy Eating Journey. If nothing else, you’ll enjoy reading about how I  became completely convinced that I should be eating organic food and free range everything, but like a crazy lady, I still guzzled down a Pepsi to go with my meals. (I told you. I get it.)

healthyeatingjourney

Our Healthy Eating Journey

  • Part 1 
  • Part 2 
  • Part 3 
  • Part 4
  • Part 5
  • Part 6
  • Part 7 
  • Part 8 
  • Part 9
  • Wrapping it Up

If you’re interested, we have put together a simple eCourse to walk you through some steps to begin your Real Food Journey. You can tailor make this to fit your family’s needs. It’s called You Can Do This! Because truly, you can, do this. :)

What are some steps you’ve taken on your healthy eating journey?

Heavenly Homemaker's Club Members: Access your homepage and all your fantastic resources here! Not a member yet? Please join us!

9 Favorite Summer Strawberry Recipes ~ With Free Printable Recipe Cards For All!

July 13, 2015 by Laura Leave a Comment

This post may contain affiliate links. For more information, please see our disclosure policy.

For your strawberry enjoyment, I put together all of my favorite summer strawberry recipes here for you for easy clicking. At the bottom of this post, you’ll find a fun strawberry freebie. Sweet! (literally) Use the printables to bless others. Maybe make them a strawberry treat to deliver along with the cards!

You’ve probably figured out by now that strawberries are my favorite fruit. Then if we put Chocolate Whipped Cream on them or make them into Strawberry Cheesecake Parfaits I am seriously in love.

9 Favorite Summer Strawberry Recipes

All of these recipes are made with real food. Real food tastes amazing (trust me). Skip the “strawberry flavored” non-food out there. Grab the real deal and indulge! Most of these recipes are also low in sugar, but don’t shy away. They are full of great flavor!

Low Sugar Strawberry Cheesecake Parfait

Low Sugar Strawberry Cheesecake Parfait 1

7-Minute Strawberry Ice Cream (with a dairy free option)

7-Minute Dairy Free Strawberry Ice Cream

Strawberry Creamsicles

Strawberry Creamsicles

 Strawberry Cream Muffins

strawberry_muffins_1

Strawberry Shortcake

Strawberry Shortcake with Whole Wheat and Honey

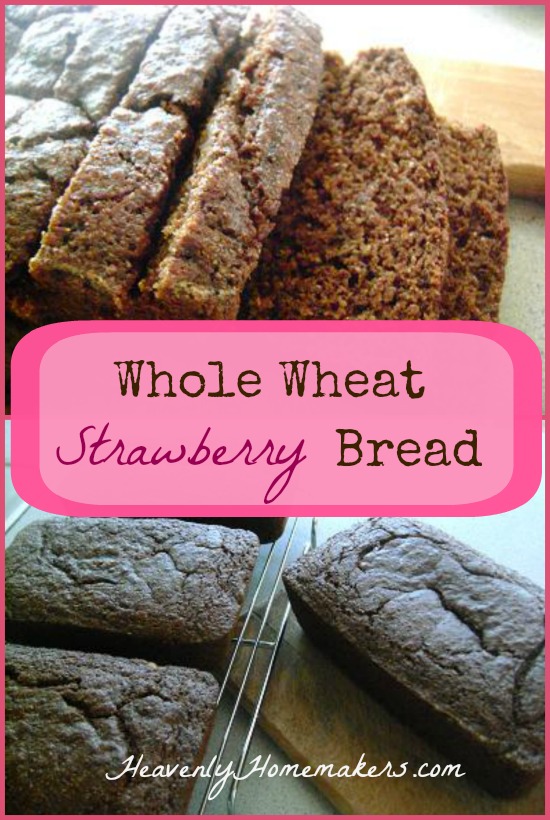
Strawberry Bread

Strawberry Bread

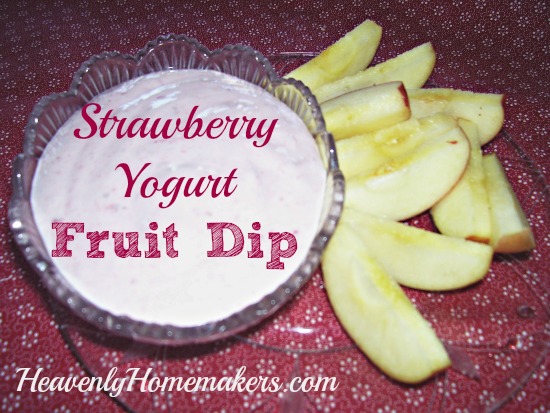
Strawberry Yogurt Fruit Dip

Strawberry Yogurt Fruit Dip

Strawberry Milkshakes

Strawberry Milkshake

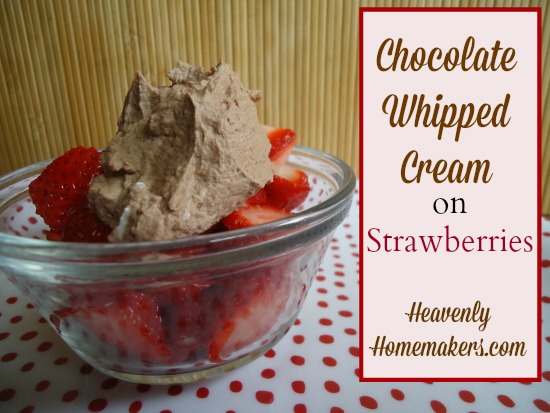
Chocolate Whipped Cream on Strawberries

Chocolate Whipped Cream on Strawberries 2

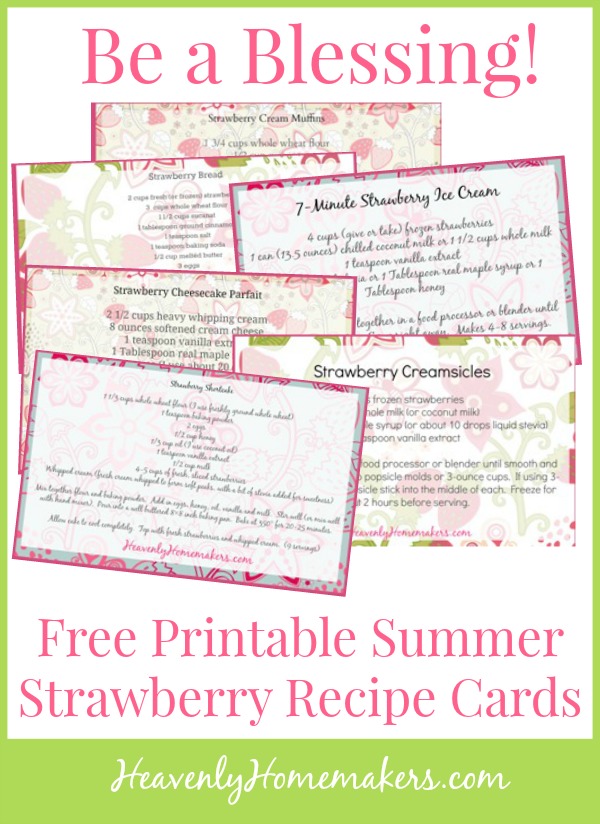
And now, to help you have fun with strawberries and be a blessing to others – here are some free printable Strawberry Recipe Cards! Print them and use them for yourself or use them as gifts.

Enjoy your freebie and your strawberries!

Be a Blessing! Free Printable Summer Strawberry Recipe Cards

Print Your Free Strawberry Recipe Cards Here!

What’s your favorite way to eat strawberries?

Heavenly Homemaker's Club Members: Access your homepage and all your fantastic resources here! Not a member yet? Please join us!

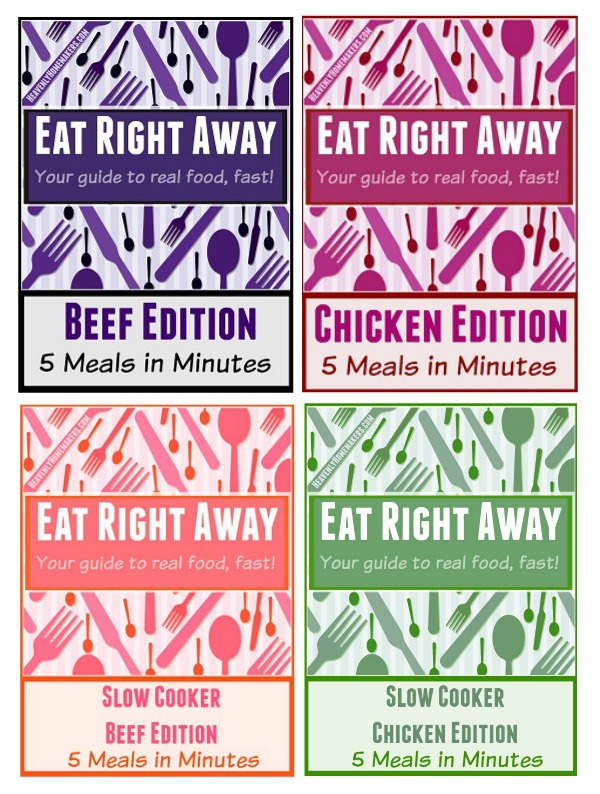
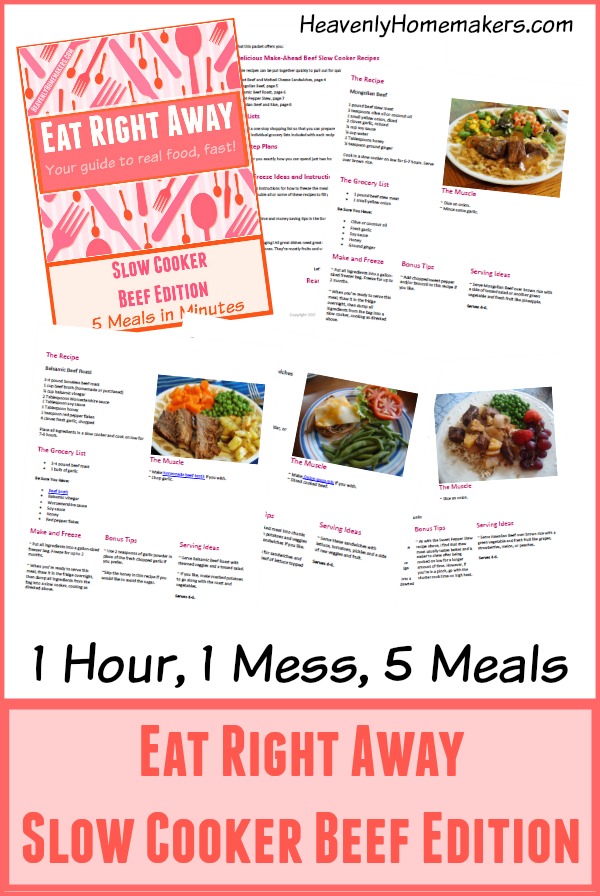
Eat Right Away ~ Slow Cooker Chicken and Slow Cooker Beef Editions are Here!

July 7, 2015 by Laura 5 Comments

This post may contain affiliate links. For more information, please see our disclosure policy.

Eat Right Away Collection2

You asked. I hurried. :) Just in time to beat the summer heat, Eat Right Away: Slow Cooker Chicken Edition and Eat Right Away: Slow Cooker Beef Edition are here!

Eat Right Away Slow Cooker Chicken Edition 2sm

Actually, I wanted the Eat Right Away Slow Cooker Editions as much as you did – so I worked double time. Now that they are finished, I’m gonna tell you this: As much as I love the other editions, I love these slow cooker editions even more. These meals take even less time to prepare than the others (I didn’t know it was possible). And then to just place all prepared ingredients into a crock pot and walk away until meal time? It does not get any easier! Love, love, love!

Eat Right Away Slow Cooker Beef Edition 2sm

Beyond saving time and serving your family real food meals, these packets will help you save money. These meals are very low in cost!

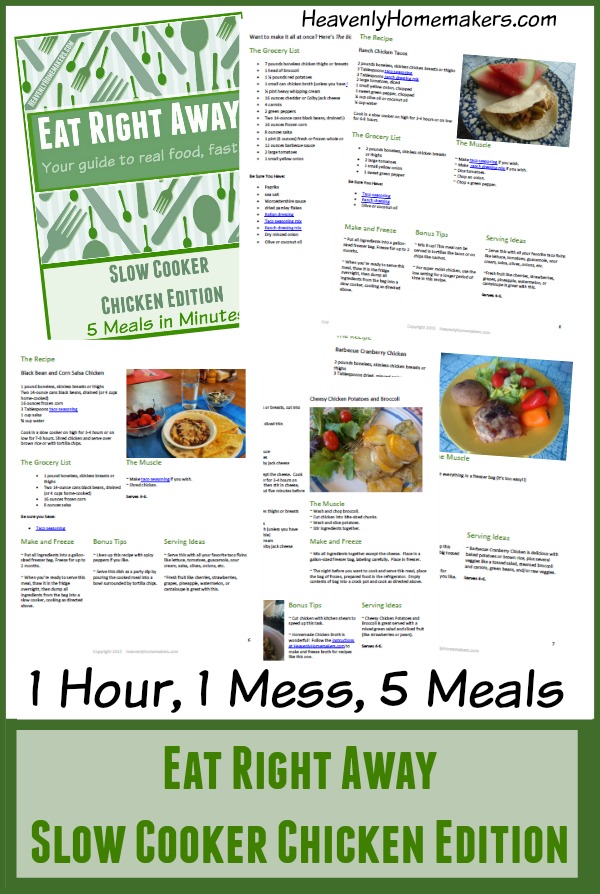
Each of these downloadable Eat Right Away packets  include:

  • 5 brand new recipes
  • 5 individual meal grocery lists, plus 1 big grocery list to aid you in making all five meals in one sitting (though you’ll actually be standing, not sitting, my apologies).
  • 5 individual recipe instructions, plus 1 “Be Efficient” set of instructions to guide you through making all five meals in about a 1-hour time frame
  • Freezer safe instructions for each recipe, plus guidance on thawing, putting the food into a slow cooker, then serving each meal with little effort
  • Serving suggestions so you don’t have to think about the side dishes
  • Bonus tips

Each packet is only $2.00. Yep! That’s it. We want to get them into all of your hands to help you save time and money in your real food kitchen. Just like the other packets, the ten recipes in these two packets are either naturally gluten free or can be easily adapted to be gluten free. Bonus!

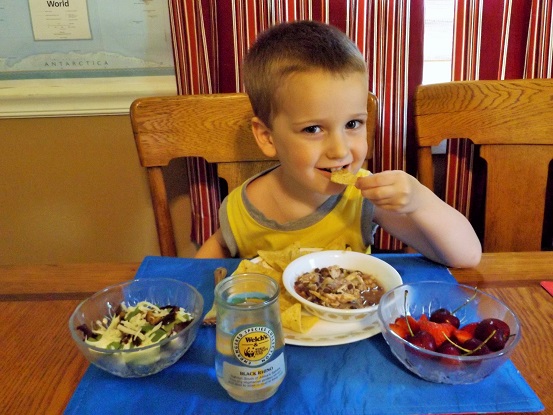
Check it out. I borrowed another family to be my taste-testers for some of these recipes. I wanted to be sure these really were as easy as I thought they were (and as yummy). I received some great feedback and food pictures, but of course, the picture with the three year-old taste-tester is my very fav.

taste tester

Here’s a closer look at each new packet:

Eat Right Away: Slow Cooker Chicken Edition ~ Recipes Included Are:

  • Cheesy Chicken Potatoes and Broccoli
  • Italian Chicken and Veggies
  • Black Bean and Corn Salsa Chicken
  • Barbecue Cranberry Chicken
  • Ranch Chicken Tacos

Eat Right Away Slow Cooker Chicken Edition Banner

Make all five recipes in about one hour. Put them in the freezer or fridge. Pull them out and throw them into the crock pot. Easy, real food goodness!

Eat Right Away: Slow Cooker Beef Edition ~ Recipes Included Are:

  • Roast Beef and Melted Cheese Sandwiches
  • Mongolian Beef
  • Balsamic Beef Roast
  • Sweet Pepper Beef Stew
  • Hawaiian Beef and Rice

Eat Right Away Slow Cooker Beef Edition Banner

Just like the chicken recipes, you can make all five beef recipes in about one hour. Put them in the freezer or fridge. Pull them out and throw them into the crock pot.

Get all four of our Eat Right Away Packets here!

[wp_eStore_fancy1 id=5]

I hope you’re enjoying these packets as much as I am. Three cheers for easy make-ahead meals and even easier dinner times with our families!

Heavenly Homemaker's Club Members: Access your homepage and all your fantastic resources here! Not a member yet? Please join us!

Using Our Real Food “Velveeta” and Rotel to make Spicy Mac and Cheese

July 5, 2015 by Laura 8 Comments

This post may contain affiliate links. For more information, please see our disclosure policy.

Allow me to introduce you to one of the easiest meals and most delicious comfort foods around: Spicy Mac and Cheese.

Spicy Mac and Cheese

Yum

Remember the Real Food “Velveeta” and Rotel Dip recipe I posted a few days ago? You need to make that today. I’m only bossing you around because when it comes to that dip – I know best, I’m right, and that dip will change your life. It’s a proven fact.

Then here’s what you do: You either eat that dip with chips because that’s what we do with dip. Or – you boil 16 ounces of pasta, drain off the water, then stir this dip into your noodles for the most delicious Mac and Cheese with a kick. The most delicious.

My kids, my kids’ friends, all the adults -we all love this dish. I love that it’s super easy, flavorful – and all real food.

A little hint: Double the dip recipe. Eat it one day as a dip. Put the leftovers in the fridge. A day or two later, boil noodles and stir in the leftover sauce for an oh-so-easy meal to throw on the table. (With fruits and vegetables. This is a given.)

I used whole wheat noodles (my favorite kind) and I’m sure brown rice noodles would work great too.

Spicy Mac and Cheese Recipe

This Dip
16 ounces of your favorite pasta

Make the dip as directed. Boil and drain pasta according to package. Stir sauce into cooked and drained pasta. 

Spicy Mac and Cheese 3

Now go make the dip! Then watch as life as you know it improves for the better – one bite at a time.

Heavenly Homemaker's Club Members: Access your homepage and all your fantastic resources here! Not a member yet? Please join us!

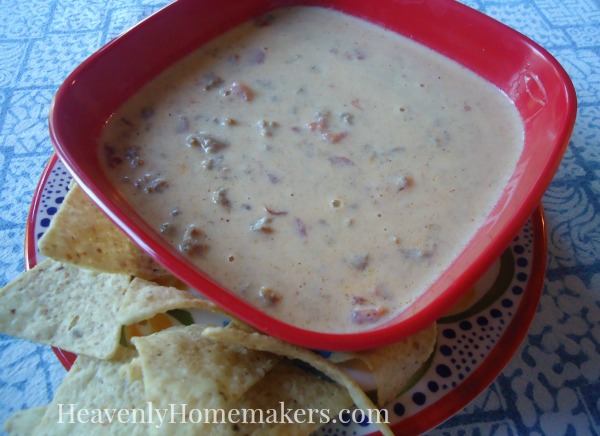
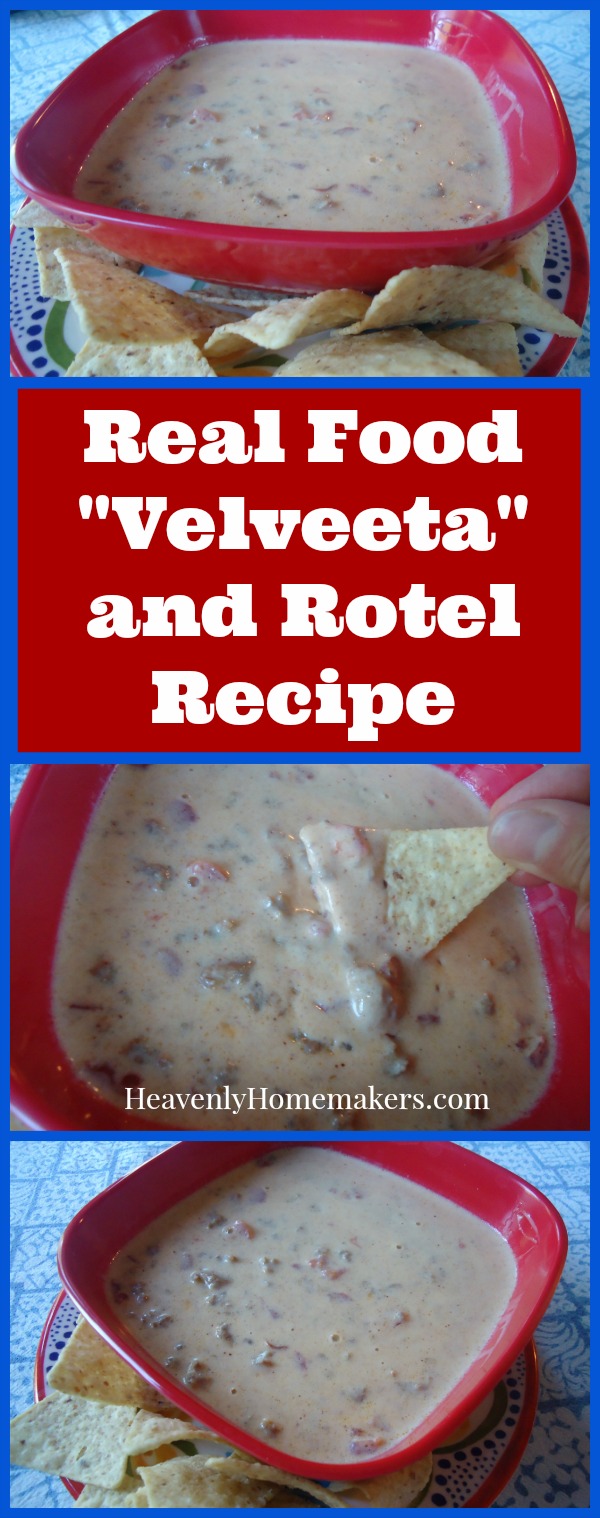
Real Food “Velveeta” and Rotel Recipe

June 28, 2015 by Laura 46 Comments

This post may contain affiliate links. For more information, please see our disclosure policy.

To be clear, this recipe does not include Velveeta as one can not use the words “real food” and “velveeta” in the same recipe and be telling the truth. In addition, this is not a recipe for Velveeta. I refuse to experiment to come up with a way to make a cheese product that has a shelf life.

Real Food Velveeta and Rotel Dip

But. As many of you know, I have a ridiculous love for the completely nasty and absolutely delicious Velveeta Rotel Dip that I grew up on as a kid. You may remember that I wrote a love letter to Velveeta a few years ago and bid her farewell as I created a tasty dip to replace her. Sure enough, we make that dip frequently at our house as it is super easy, all real food, and absolutely yummy.

But. That recipe, as good as it is, is still not the same as the Velveeta Rotel Dip I crave. That is why (and I’m not proud of this) sometimes I put a $6 log of boxed cheese product (otherwise known as Velveeta) into my cart along with 2 cans of Rotel and I bring it home and I melt it together and I eat it even though it is terribly terrible and truthfully it doesn’t even taste as good to me as it used to because of that whole real food thing I’m into now which has made all bad foods taste like chemicals on a tortilla chip.

So what is my problem?

Problem? I don’t have a problem.

Okay fine. Whatever. I have a problem.

And also? When did fake cheese become so expensive? You’d think that would deter me from buying it. But as I said, I have a problem.

It was either time to begin a Velveeta support group or get back in the kitchen to try my hand at another dip recipe since I’ve only tried like seventeen other times and posted like five other cheese dip recipes through the years and may have to rename this website to cheesediprecipesforaddicts.com with the tag line “All Cheese Dip Recipes, All the Time.”

A support group was out of the question because it is my understanding that they don’t serve chip dip at those meetings. So here we are again, back in the kitchen for another attempt at a real food version of my beloved dip.

You guys. I think I nailed it this time. And I mean that with all the humility and sweetness possible, but hey guess what? I just made the best chip dip ever!!! 

So here’s how this dip becomes amazing. Two things:

  1. We must make a cheese sauce for this to work. This requires butter and corn starch and actual cheese. Relax. It’s not as hard as it sounds.
  2. We must use actual Rotel or an off brand of “diced tomatoes and green chilies. Salsa isn’t the same. Thankfully, Rotel is still a real food – read the ingredient label and rejoice.

Note: My wonderful grass-fed beef produces the perfect amount of fat so I never have to drain off grease. In order to make a sauce, one must have fat or grease to work with. That’s why my recipe includes butter. Depending on what meat you have, I recommend either skipping the butter (if your meat has some grease to work with) or draining the grease and adding the butter or using your grease with some butter. Just so you have about 4 Tablespoons of fat to work with, you’re golden.

Real Food “Velveeta” and Rotel Dip RecipeYum

5.0 from 2 reviews
Real Food "Velveeta" and Rotel Recipe
 
Save Print
Author: Laura
Serves: 6-8
Ingredients
  • 1 pound hamburger meat
  • 2-4 Tablespoons butter
  • 2 heaping Tablespoons corn starch
  • 1 cup water
  • 1 teaspoon chili powder
  • sea salt to taste
  • 2 cups heavy cream
  • 10-ounce can diced tomatoes with green chilies (Rotel)
  • 1-2 cups shredded cheddar or colby jack cheese
Instructions
  1. Brown the hamburger meat in a large pot.
  2. Add butter to the meat, melting it throughout the pot.
  3. Sprinkle in corn starch, coating the meat.
  4. Pour in water, chili powder, and salt.
  5. Turn heat up and stir until the mixture thickens.
  6. Add cream, continuing to stir as the mixture thickens. (This all happens quickly in my experience.) Stir in Rotel, heating for about 2 more minutes.
  7. Remove from heat.
  8. Add shredded cheese, stirring until the cheese has melted and the dip is smooth.
3.4.3177

If you don’t remove your sauce before adding cheese, your cheese will end up funky and not smooth and creamy. You’ve been warned, so don’t add your cheese while your pot is still on the stove, then email me and ask why your cheese got funky. Not that anyone would ever do that.

Real Food Velveeta and Rotel Recipe

If you need me, I’ll be in the kitchen eating another bowl of my homemade not velveeta but way better than velveeta because it’s real food Chip Dip.

Who wants to come join me? I need to know who loves this dip as much as me. Admit it. Join my support group – the one where there IS CHIP DIP AT THE MEETINGS because my support group meetings rock and we support one another by eating dip.

~~~~~~~~~~~~~~~~~~~~~~~~~~~~~~~~~~~~~~~~~~~~~~~~~~~~

It’s recipes like this Real Food Velveeta and Rotel that makes Simple Meals what it is. It offers you huge money and time savings. Not to mention you don’t have to think as hard every week about what to cook and what to buy.

Join the fun! Check out our amazing Simple Meals program!

You will love this!

728x90

Heavenly Homemaker's Club Members: Access your homepage and all your fantastic resources here! Not a member yet? Please join us!

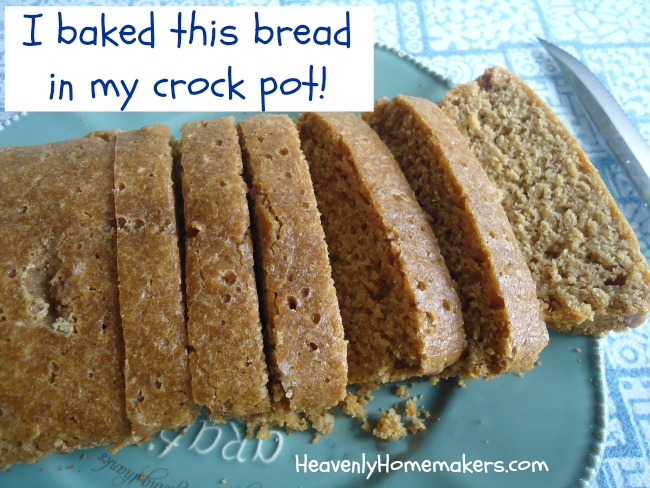
We Can Bake Quick Breads in a Slow Cooker!

June 25, 2015 by Laura 13 Comments

This post may contain affiliate links. For more information, please see our disclosure policy.

It’s a new way to bake quick breads!

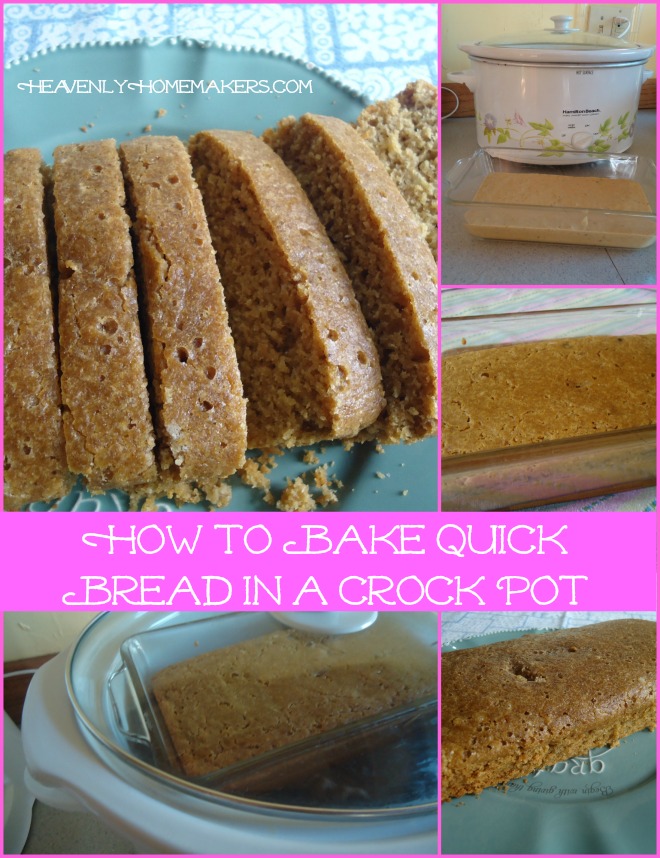
You Can Bake Bread in a Crock Pot!

Yum

I had no idea that this was an actual thing. Did you?? I came across this idea here and am ever so grateful.

I’ve been baking potatoes in a crock pot for several years, but I did not know a person could bake quick bread this way too. (And also yeast bread, but I’m trying to perfect that idea before posting about it. You can look forward to that…as will I if I can ever figure out how to do it right.)

This is going to change how we eat this summer. No more avoiding bread on hot days since I never want to turn on the oven. However, since I only have one crock pot, I can obviously only do one loaf of bread at a time. This is a little bit limiting for my family of huge eaters. But all I’ll have to do to remedy this is scramble up a bunch of eggs and make a blender (or two) full of smoothies to go with our loaf, and we’ve got a meal.

I’ve tried this idea with two different types of quick breads – Chocolate Chip Bread and Snickerdoodle (it was a recipe experiment). Both worked great! This leads me to believe that any quick bread recipe will work. (Actually, I’m not sure about gluten free breads. Anyone have experience with this?)

How to Bake Quick Bread in a Crock Pot

How to Bake Quick Breads in a Crock Pot

1. Turn your crock pot onto “hi” to preheat.

2. Mix your quick bread as usual and put it into a buttered loaf pan. (I used glass as I’m not sure about using a stone in my crock pot. Any have experience with this?)

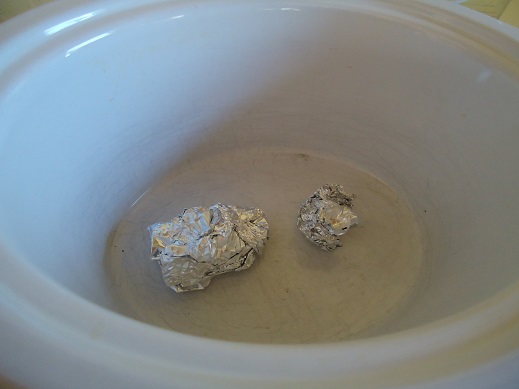
3. Wad up two pieces of tin foil and place them at the bottom of your crock pot. This will offer some space under your bread pan which will help your bread bake better.

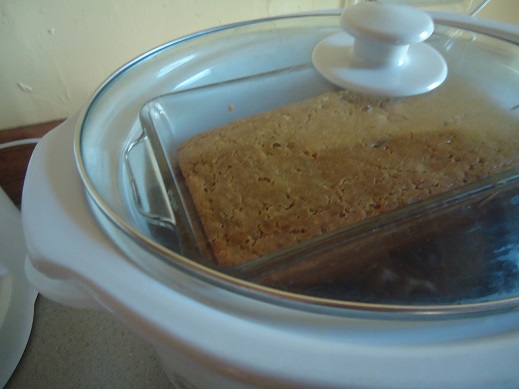
bread in crock pot 2
4. Set your loaf pan into your crock pot. (Mine is actually barely the right size, so it didn’t fit all the way in thus negating the need for wads of foil. As you can see in the pictures above, my pan sat on the edge of the top of the crock. It worked perfectly.)

5. Place the lid on your crock pot slightly off centered so as to allow a little bit of steam to escape during baking.

6. Leave the bread to bake in the crock pot for about 2 hours. You’ll be able to watch it baking from the outside into the middle, making it quite easy to see when it has finished baking.

bread in crock pot 3

How excited are you to learn this fun trick?! What quick bread are you going to try baking in your crock pot first? I’m asking because I know you are going to try this right away, this minute, today, as soon as you stand up.

P.S. Look through our quick bread/muffin recipes here.

Heavenly Homemaker's Club Members: Access your homepage and all your fantastic resources here! Not a member yet? Please join us!

Build a Breakfast Burrito Bar

June 16, 2015 by Laura 12 Comments

This post may contain affiliate links. For more information, please see our disclosure policy.

My family ranks the Breakfast Burrito Bar as one of the best ways to feed a crowd in the morning!

It seems that I’ve been on a bit of a Build a _________ Bar kick during the past few months. I believe it just makes sense now that my kids are older. They definitely have specific tastes and preferences. Laying out ingredients and letting individuals put together what they like just makes sense.

That, and it’s much less work for me. I like this part best of all.

Beyond the family, the Build a __________ Bar idea is wonderful for company. Guests can fill their bowl or plate just the way they like. This is a great way to accommodate people with food allergies or differing tastes.

So let’s see. Shall we review the Build a ______ Bar ideas I’ve shared up to this point?

  • Build a Brownie Sundae Bar
  • Build a Fruit Salad Bar
  • Build a Pasta Salad Bar

I thought surely I had posted about Build a Chef Salad Bar, but I guess I never have. That’s one of the easiest meal ideas, so I highly recommend it.

And now, consider a Breakfast Burrito Bar. This worked wonderfully for company a few weeks ago.

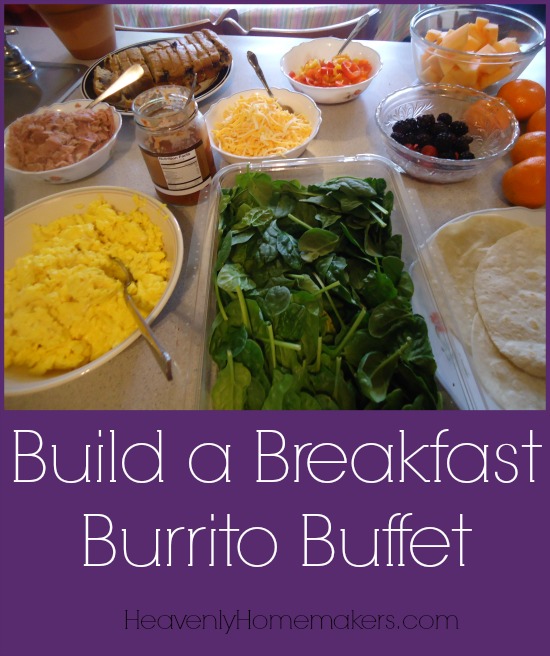
Build a Breakfast Burrito Buffet

Simply lay out breakfast burrito items and let everyone fill their plate according to their tastes. Here are some suggestions for the buffet:

Build a Breakfast Burrito BuffetYum

  • Warm tortillas
  • Scrambled eggs
  • Cooked meat like ham, sausage, or bacon
  • Shredded cheese
  • Salsa
  • Chopped veggies like peppers, onions, and mushrooms
  • Spinach

Of course, it’s great to offer a variety of fresh fruit for a side dish.

Do you have any other Build a __________ Bar ideas to share? I love how simple this is!

Heavenly Homemaker's Club Members: Access your homepage and all your fantastic resources here! Not a member yet? Please join us!
« Previous Page
Next Page »

Join Our Community!

 Facebook Twitter E-mail Instagram Pinterest

Popular Posts

~ Will All of the Real Moms Please Stand Up?
~ Easy! Stir-and-Pour Whole Wheat Bread
~ How to Make Gatorade
~ 31 Real Food Breakfast Ideas
~ Dear Teenage Girls...
~ When Mom Takes a Step Back
~ The Inexpensive Health Insurance We Love!
~ Let's Talk Real Food Grocery Budgets

Check out our latest posts!

  • Big Family Food and Fun: September 27-October 3, 2026
  • Big Family Food and Fun: September 20-26, 2026
  • Big Family Food and Fun: September 13-19, 2026
  • Big Family Food and Fun: September 6-12, 2026
  • Big Family Food and Fun: August 30-September 5, 2026
Home  ~  Simple Meals  ~  Club Membership  ~  Shop  ~  Privacy Policy  ~  Disclosure  ~ Contact

Copyright © 2026 · Beautiful Pro Theme on Genesis Framework · WordPress · Log in