Heavenly Homemakers

Encouraging women in homemaking, healthy eating and parenting

  • Home
    • About
    • FAQs
  • Recipes
    • Bread and Breakfast
    • Condiments
    • Dairy
    • Main Dishes
    • Side Dishes and Snacks
    • Desserts
    • Gluten Free
    • Instant Pot
    • Crock Pot
    • Heavenly Homemaker’s Weekly Menus
  • Homemaking
    • Real Food Sources
  • Store
  • Contact
    • Advertise
    • Disclosure
    • Privacy Policy
  • Simple Meals
  • Club Members!

The Surprising Reason I Spent Money on a Bosch Mixer

September 16, 2020 by Laura Leave a Comment

This post may contain affiliate links. For more information, please see our disclosure policy.

I’m not even sure if I’ve even told you that I bought a Bosch Mixer! So hey guess what?! I bought a Bosch Mixer. Here’s why…

Yum

First of all, I could spend a few words telling you why it took me so long to finally break down and spend the money on a Bosch Mixer. But it’s mostly because of this:

  • These beauties are pricey!
  • I’ve stirred my bread dough and cookie dough and brownie batter by arms for well over 40 years. Why did I need an expensive mixer seeing as I still have working arms and hands?

But all of you friends who have a Bosch or a Kitchen Aid have said to me, “With all the cooking and baking you do, how in the world do you actually survive without a mixer?” And I always went back to…

  • Expensive.
  • My arm works fine.

Yes, investing in a nice mixer has been in my mind for quite some time, and my desire for one went up a notch every time one of you told me how great they are.

So what finally pushed me over the edge to fork out the money for a Bosch Mixer?

It was a conversation with my friend Rhonda (and then it still took me several months to ruminate over it, but whatever).

Here’s what Rhonda said – and I will tell you that when Rhonda speaks, I listen. She knows things. She’s an awesome friend and has raised awesome kids and she says smart things.

Rhonda was sharing with me how she had recently become the recipient of a used but still wonderful Kitchen Aid Mixer. She was loving it and decided it was fantastic and then she said:

I wish I would have had this in my kitchen when my kids were still at home growing up.

She went on to talk about how much time it saved and about how nicely it mixed up batters and while I really liked hearing this part of her review, I just couldn’t let go of this thought:

Moms. We sacrifice. We skimp. We save. We make do. And God bless us for it!! I mean, after all, regarding the cooking and the baking and the batters and the doughs – I do have arms that work. My grandma used her arms. Why do I need to spend money on a mixer? I can make do.

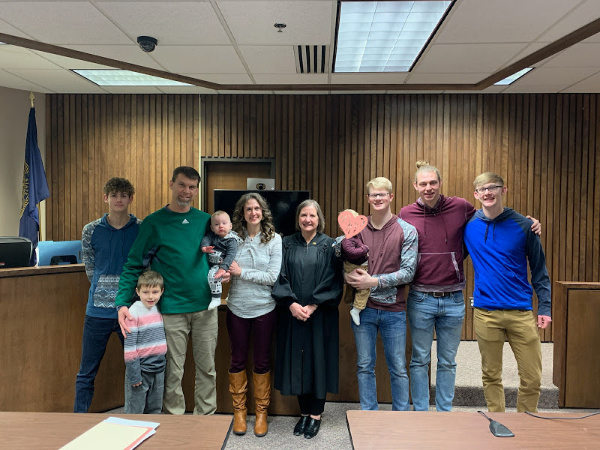
But there I stood with Rhonda in the church foyer, with my adult and teen kids hanging out with their friends in the background and my new set of littles playing at my feet. And I realized yet again: I AM STARTING OVER!!! Just when I thought I was almost done raising kids, God started us fresh with new fellas, and friends? That means I’m going to be working at this “feeding a family” thing for a very long time.

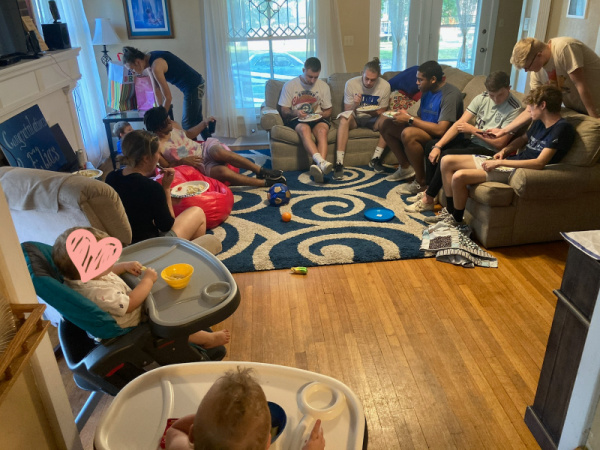
Add to that all the friends we feed regularly, plus the daughters-in-law and grandbabes I’d like to think are a part of our future and I’m pretty sure I will be cranking food and food and more food out of my kitchen for many more years!

Shucks, here I’m tearing up again at the beauty of this life we didn’t know God had planned for us.

Well anyway. I chewed on Rhonda’s statement for several months, watched in awe as my teens and littles shared meals, and I decided to run it by Matt. This wouldn’t be just a small purchase, and would it be worth it?

We decided yes. I should get a mixer because I was embracing Rhonda’s advice about “oh how nice it would have been to have when my kids were at home growing up.”
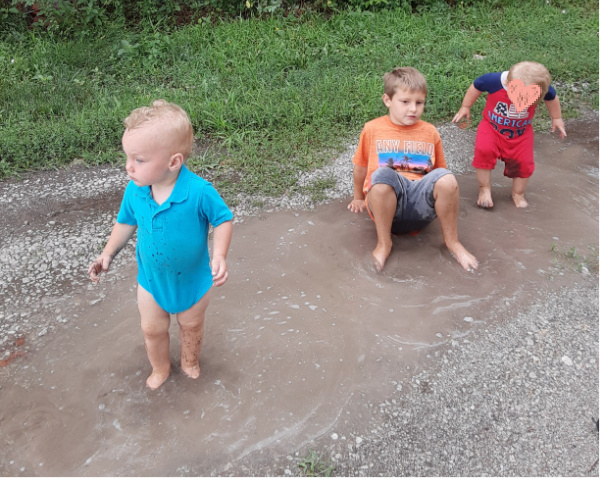
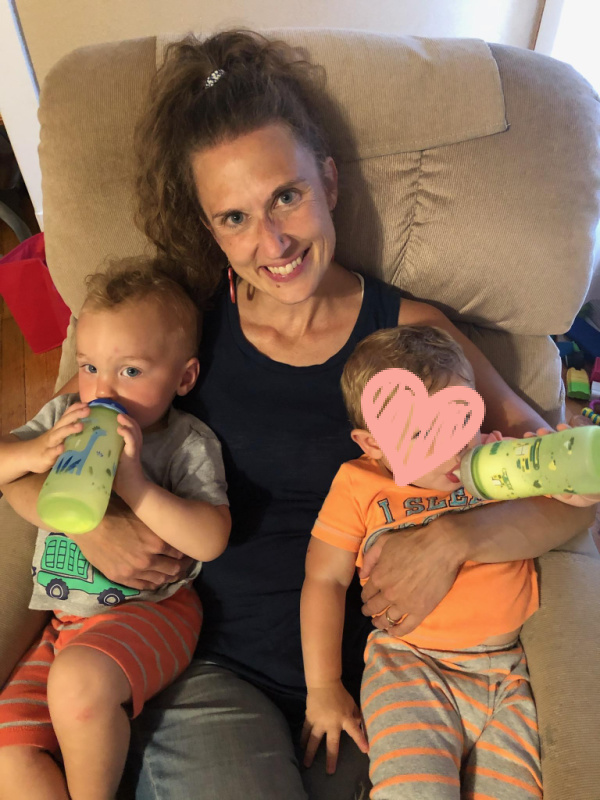
Little Boys #round2

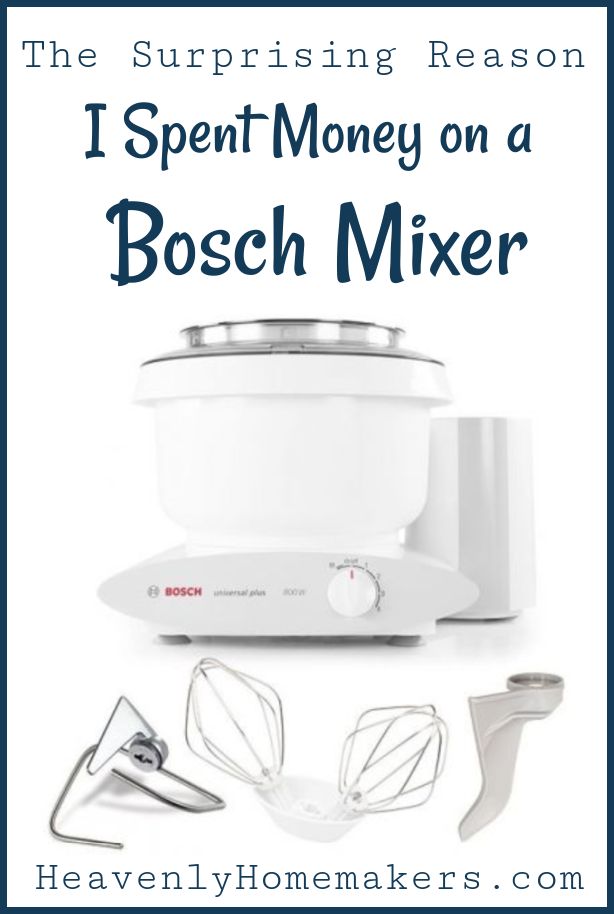
Before purchasing, I spend some time researching. One does not drop several hundred dollars on a kitchen tool without doing her homework. I landed on purchasing a Bosch Universal Plus. If I was going to spend big, I was going to get the best of the best. (Also, I purchased from Paula’s Bread because she’s a small business I trust and I wanted to support her with my big purchase!)

You guys. How did I ever get along with this? Well shucks, I used my arms I guess. :)

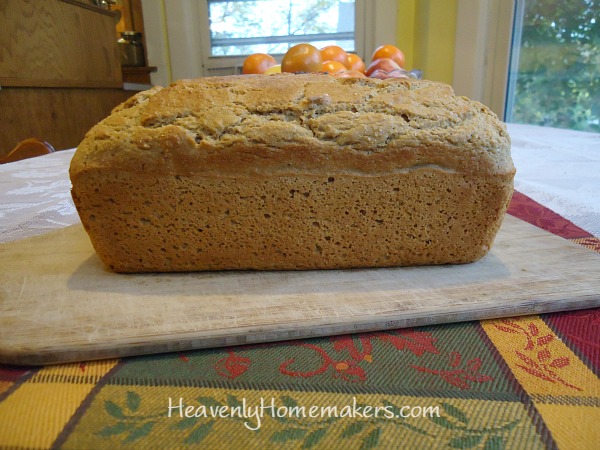
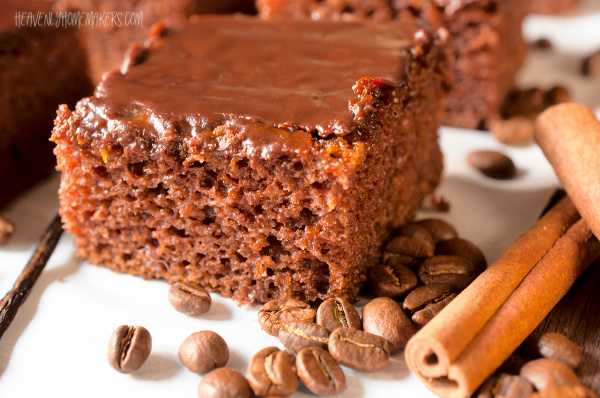
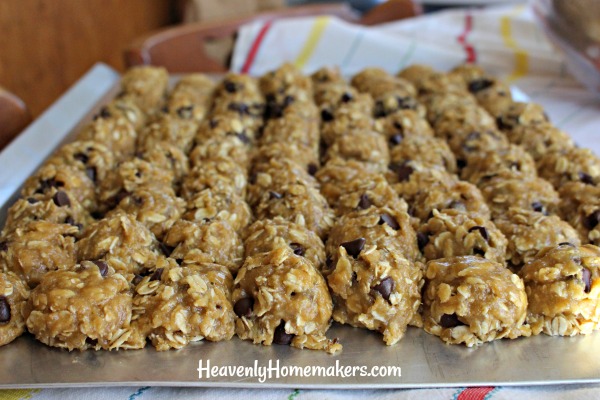
But Rhonda was right. This is a wonderful tool to have when you do a lot of cooking and baking,  for a family. My Bosch Mixer has already paid for itself in its efficiency and ease and time-saving gifts that it has given me as I work to take care of so many kids of different ages and while I feed many college kids and other guests too. I’m totally in love with it and am 100% grateful that we made this investment!

As for using my arms to stir and mix? Well, I’m going to focus on using my arms for more important endeavors. :)

Heavenly Homemaker's Club Members: Access your homepage and all your fantastic resources here! Not a member yet? Please join us!

Cream Cheese Pastries – the Healthier Way

September 13, 2020 by Laura Leave a Comment

This post may contain affiliate links. For more information, please see our disclosure policy.

Cream Cheese Pastries were one of my favorite treats when I was a kid. I finally got the idea to try and make them at home with freshly ground flour!

Have I ever told you how I like to keep recipes as simple as possible? Oh yes. I think I’ve mentioned that here a time or two. ;)

So that is why I decided to make these with my Stir-and-Pour Bread recipe. SO EASY! Mix the bread ingredients together. Walk away. Then you spoon the bread dough onto a pan, scoop on some cream cheese filling, and bake. Drizzle on the glaze. Enjoy your delicious treat!

I was thrilled with how these turned out, and I love that they are made with whole grain flour and less sugar than a typical pastry recipe. My pickiest eater ate three right in a row. :) Ready to give them a try?

Cream Cheese PastriesYum

Cream Cheese Pastries - the Healthier Way
 
Save Print
Author: Laura
Serves: 15
Ingredients
  • 4 cups whole grain flour (I use freshly ground hard white wheat)
  • 2 teaspoons active rise yeast
  • 2 Tablespoons sucanat or sugar or honey
  • 1 teaspoon sea salt
  • 1 egg (optional)
  • ¼ cup heavy cream (optional)
  • 2 cups warm water
  • CREAM CHEESE FILLING:
  • 8-ounces softened cream cheese
  • 3 Tablespoons lemon juice
  • ¼ cup sugar or maple syrup
  • 1 egg
  • GLAZE:
  • ¾ cup powdered sugar
  • 3 Tablespoons milk
Instructions
  1. Mix together the bread ingredients.
  2. Cover and allow the bread dough to rise for at least 30 minutes.
  3. Meanwhile, blend Cream Cheese Filling ingredients until smooth.
  4. Scoop small mounds of bread dough onto a buttered cookie sheet.
  5. Spoon the cream cheese filling onto each bread dough mound evenly.
  6. Bake in a 350 degree oven for about 20 minutes or until the bread is golden brown.
  7. Meanwhile mix up the glaze.
  8. Drizzle glaze over the baked pastries and serve.
3.5.3251

One more quick piece of info:

I finally invested in a Bosch Stand Mixer. I can’t even tell you how much I love it! I used it to mix the dough for these Cream Cheese Pastries so of course, that made this recipe even easier to make, if that’s even possible. More about my Bosch coming up soon!

Heavenly Homemaker's Club Members: Access your homepage and all your fantastic resources here! Not a member yet? Please join us!

5 Easy Breakfast Ideas to Have Every Week

August 19, 2020 by Laura 8 Comments

This post may contain affiliate links. For more information, please see our disclosure policy.

Need breakfast ideas to have every week to make life easier?

How many decisions do we make in a day, I wonder? I’m guessing it would blow our minds to know the answer to that.

Tip: I’ve heard that it’s wise to always take the same “route” as you walk through the grocery store, simply to cut down on the decisions you have to make.

Hmmm, interesting. Hearing that tidbit of advice made me think about what other decisions I could cut out of my very full brain (that is so busy making decisions that it can’t help me remember where I set my pen).

So let’s talk about breakfast!

I’ve just figured out how wonderful it is to save my brain energy by planning the same basic breakfast meals every weekday!

Here’s the basic breakdown of what I now make or serve each weekday:

Monday – Muffins
Tuesday  – Toast
Wednesday – Oatmeal
Thursday – Eggs
Friday – Granola or Cereal

With this skeleton plan, I can now make fun adaptations each weekday to keep our menu fresh and fun! (I save pancakes or waffles or other special breakfast ideas for Saturdays.) :) And now I will give you more specifics about how this works for us…

5 Easy Breakfast Ideas to Have Every WeekYum

Monday – Muffins

I can choose from these 40 recipes so that Mondays are never boring. I shall call this “Muffin Monday” because cuteness in the kitchen is underrated.

Tuesday – Toast

Let’s hear it for “Toast Tuesday.” Though now I have to admit, my cute names for days of the week have now run out. Anyway though, we can make this Stir and Pour Bread and then top it however we like. Peanut butter and honey is a favorite for most of us. And homemade bread is tough to beat!

Wednesday – Oatmeal

I try to keep this Homemade Instant Oatmeal on hand, but sometimes I splurge and buy these too. Either way, this makes for a fast breakfast!

Thursday – Eggs

We mostly prefer scrambled cheesy eggs, but occasionally we’ll fry them. I love how easy eggs are to make!

Friday – Granola or Cereal

We like different kinds of homemade granola like:

  • Dark Chocolate Almond Granola
  • Easy Basic Homemade Granola
  • Granola ~ 5-Minute Stop-Top Version
  • Peanut Butter Honey Granola

Or, I can make these Homemade Chewy Granola Bars for a fun change of pace.

Always serve fruit

Fruit at breakfast is a given at our house. So with all of the above day-of-the-week breakfast ideas, everyone can choose what fruit they like best. I try to keep a variety on hand, depending on what is in season. Our favorites for breakfast are:

  • Blueberries
  • Cantaloupe
  • Apples
  • Oranges/Clementines
  • Bananas
  • Applesauce
  • Peaches
  • Pears
  • Strawberries

How might this idea work for your family?

Heavenly Homemaker's Club Members: Access your homepage and all your fantastic resources here! Not a member yet? Please join us!

How to Serve a Special Breakfast without Breaking the Bank

June 14, 2020 by Laura 2 Comments

This post may contain affiliate links. For more information, please see our disclosure policy.

Want to serve a special breakfast without breaking the bank? Here’s how!

Yum

How to serve a special breakfast without breaking the bank

In short, the answer is pancakes.

And crepes.

With pretty fruit.

And whipped cream.

See, here’s how I came to learn about this special breakfast. I mean, I already knew about it. But I guess I didn’t realize how amazing it really was. I thought I was just feeding college kids while simultaneously cleaning out my fridge (shh, don’t tell!).

As it turns out, I was giving them a feast that made them think I had gone to a lot of trouble and expense. They were amazed and grateful and overjoyed when they saw our buffet. Which was?

A tower of pancakes and whatever fruit I could find in my house.

We already know that pancakes are cheap to make in bulk. And we already know that most people love pancakes. So this is a great meal to feed a larger group of people.

So as I flipped the cakes, I kept pulling out whatever I could find to go with them. Matt sliced some bananas. I whipped some cream. Then I got out frozen fruit stuffed and forgotten in the back of my freezer and turned it into syrup.

We got out half empty full jars of applesauce. We pulled out a few fresh berries. We set out homemade peanut butter.

The buffet ended up looking so pretty and fun! The college students (who this time happened to be a bunch of soccer athletes who can EAT and who also have a soft spot for our Boy Babes – oh my heart) were simply thrilled with the food options.

We fed about 10 extras that night for just a few dollars. But seeing their faces beam and their plates fill and their hearts soften as they loved on our littles – it was entirely priceless.

For the record, I did decide to save money and make “syrup” by heating and stirring together brown sugar and water in a saucepan. Again, they all thought it was fancy since I’d made it myself. I was kinda feeling stingy about such a large group dousing their pancakes in our hard-to-come by and pretty pricy real maple syrup. So that was my money-saving solution to that. :)

So that’s that.

If you need to feed a crowd and you want to do it on the cheap, make a pile of pancakes and clean the frozen fruit out of the back of your freezer. Make your own “syrup” (I’ll post the details soon!) and put a big smile on your face. Offer this meal for breakfast, lunch, or dinner – it is a winner any time of day!

Heavenly Homemaker's Club Members: Access your homepage and all your fantastic resources here! Not a member yet? Please join us!

Oatmeal Cinnamon Yogurt Muffins

April 12, 2020 by Laura 4 Comments

This post may contain affiliate links. For more information, please see our disclosure policy.

Hmmm, Oatmeal Cinnamon Yogurt Muffins. I’m sure you’re wondering…what’s in these muffins? ;)

Perhaps a little oatmeal? Some cinnamon? Possibly a tad of yogurt? Wow, you guys are good. How’d you figure that out?

These simple muffins are the result of an experiment on a day I needed to use up some yogurt in my fridge. Yogurt makes muffins extra moist – though the oats make them a little more hearty. So the yogurt plus the oats work well together so that these muffins don’t turn out dry and crumbly!

And the cinnamon? Well, of course, that makes these muffins taste incredible!

We prefer these straight out of the oven, slathered in butter. You can use flavored yogurt if you’d like, though if you do, I’d recommend cutting down the sugar since flavored yogurts have sugar added. I use whole milk plain yogurt when I make these.

Oatmeal Cinnamon Yogurt MuffinsYum

5.0 from 1 reviews
Oatmeal Cinnamon Yogurt Muffins
 
Save Print
Author: Laura
Serves: 12
Ingredients
  • 1½ cups whole wheat flour (I use freshly ground soft white wheat)
  • 1 cup rolled oats
  • ¼ cup sucanat or brown sugar
  • 1 teaspoon baking powder
  • ½ teaspoon sea salt
  • 1 teaspoon cinnamon
  • ¾ cup whole milk plain yogurt
  • 2 eggs
  • ¼ cup melted coconut oil
Instructions
  1. Stir together dry intgredients in a large mixing bowl.
  2. Add yogurt, eggs, and oil, mixing well.
  3. Scoop batter into 12 paper-lined muffin tins.
  4. Bake in a 400 degree oven for 20-22 minutes or until muffins are golden brown.
3.5.3229

I especially like these because they remind me of a muffin I used to enjoy in our college cafeteria wayyyyy back in the day. I have no idea what was in those, but they were hearty with a hint of sweetness and cinnamon. Mmmm.

Is it crazy that I now have sons in college? And that I have babies again? And that I can still taste those college muffins from 29ish years ago? Life is crazy. Expect God to do great things!

Heavenly Homemaker's Club Members: Access your homepage and all your fantastic resources here! Not a member yet? Please join us!

Simple Omelet Muffins

April 5, 2020 by Laura 5 Comments

This post may contain affiliate links. For more information, please see our disclosure policy.

These Simple Omelet Muffins are super fun to make and eat for breakfast, brunch, lunch, or supper!

Not only do these Omelet Muffins work for any meal of the day, they are low in cost. You can make them ahead of time and rewarm them as needed. They freeze well. Annnnd…you can make them per everyone’s liking.

Add lots of meat. Add no meat at all. Throw in lots of veggies. Try a variety of cheeses. Have fun experimenting!

Some tasty add-in options are:

  • Chopped Ham
  • Bacon Bits (here’s how to make them yourself!)
  • Sausage Crumbles
  • Leftover Taco Meat
  • Shredded Chicken
  • Colby Jack Cheese
  • Mozzarella Cheese
  • Pepper Jack Cheese
  • Smoked Gouda Cheese
  • Blue Cheese
  • Diced Tomatoes
  • Diced Sweet Peppers
  • Diced Onion or Dried Minced Onion
  • Mushrooms
  • Sun Dried Tomatoes
  • Fresh Spinach
  • Broccoli
  • Black Beans
  • Sea Salt and Pepper to Taste

You really can enjoy a variety of mixtures using any of these add-in ideas or any others you can think of!

Simple Omelet MuffinsYum

Simple Omelet Muffins
 
Save Print
Author: Laura
Serves: 12
Ingredients
  • 10 eggs
  • 3 Tablespoons milk
  • ¼ teaspoon sea salt (more or less to taste)
  • Any variety of chopped meat, diced veggies, and shredded cheeses you like.
Instructions
  1. Whisk together eggs, milk, and salt.
  2. Add in any fillings you like.
  3. Spray 12 muffin cups with oil.
  4. Scoop omelet mixture into prepared muffin cups.
  5. Bake in a 400 degree oven for 20-25 minutes or until the muffins are set and golden brown.
3.5.3229


If you make these ahead of time, rewarm them in the oven or toaster oven at 350 degrees for just a few minutes.

To freeze these Omelet Muffins: Bake them as directed and allow them to cool completely. Put them into a freezer bag and freeze them for up to a month. Thaw and reheat as needed.

I think these would be great to pack and take to work for lunch – a great change of pace from packing a sandwich!

Do you have any other great add-in ideas for these Omelet Muffins?

Heavenly Homemaker's Club Members: Access your homepage and all your fantastic resources here! Not a member yet? Please join us!

How to Make Perfect French Toast

March 15, 2020 by Laura 3 Comments

This post may contain affiliate links. For more information, please see our disclosure policy.

Want to know the secret ingredient that makes Perfect French Toast? How about two secret ingredients? Mhmm, these ingredients are about to become not-so-secret…

I realize that these tricks may be what you’ve been doing all along to make Perfect French Toast. Still, it’s fun to share, just in case. Nothing like taking a delicious and easy breakfast, brunch, or dinner and making it just that much better!

How to Make Perfect French ToastYum

Here are the two tricks I use to take our French toast up a notch:

1. Add Vanilla Extract to the egg mixture.

2. Use Cinnamon Swirl Bread.

The vanilla adds a wonderful flavor to your French Toast. And using Cinnamon Swirl Bread instead of “regular ol’ bread” is a huge game-changer for the better. THIS MAKES FRENCH TOAST SO GOOD!!

I used to always make Cinnamon Swirl Bread at home. I started using:

  1. This Cinnamon Swirl Bread Recipe, then switched to an easier method which turned into:
  2. This Stir-and-Pour Cinnamon Swirl Bread Recipe

But now that we’ve added little ones to our home again and I find myself juggling my bigs, my littles, my marriage, my home, my work, court dates, case worker visits/meetings, appointments, my own health – well…

I happily and un-guiltily buy the cinnamon swirl bread.

Does it need to be said? Ok. Let’s review:

God is bigger than store-bought bread.

Amen.

Hallelujah.

However you would like to make your Perfect French Toast, with whatever bread works best for you, go for it and enjoy! But oh making it with Cinnamon Swirl Bread does make it so much better!

Perfect French Toast

5.0 from 1 reviews
How to Make Perfect French Toast
 
Save Print
Author: Laura
Serves: 4-6
Ingredients
  • 10 slices of Cinnamon Swirl Bread
  • 3 eggs
  • 3 Tablespoons cream
  • 1 teaspoon vanilla extract
  • Butter for cooking French Toast
  • Fruit and Real Maple Syrup
Instructions
  1. In a bowl, whisk together eggs, cream, and vanilla extract.
  2. Heat butter in a skillet until melted.
  3. Dip bread into the egg mixture, coating each slice entirely.
  4. Fry each coated slice of bread in the buttered skillet until both sides are golden brown.
  5. Serve with real maple syrup and fruit
3.5.3229

What about making homemade vanilla? Goodness I would but is the price of vanilla beans ever going to go back down?? C’mon beans. We need you. And we need you to cost less than our sons’ college tuition.

Have you tried using Cinnamon Swirl Bread when you make French Toast? And do you add a little shot of vanilla? Mmm, so good.

Heavenly Homemaker's Club Members: Access your homepage and all your fantastic resources here! Not a member yet? Please join us!

Cream Cheese Chocolate Chip Bread

November 10, 2019 by Laura 1 Comment

This post may contain affiliate links. For more information, please see our disclosure policy.

Cream Cheese Chocolate Chip Bread is a huge hit!

One of my favorite things to do is to text my college-age son and tell him to invite friends to eat lunch with us on Sunday after church. So here’s how this works:

  1. Justus texts friends to invite them for lunch, then he tells his friends to invite friends too.
  2. His friends invite friends, and they are welcome to invite others too.
  3. We never know who is going to show up for lunch, and it is always a blast!

Often I’ll be in the kitchen putting the final touches on the meal while college kids pour into the living room. I walk out to greet them and get to be surprised every time by who was able to come!

I am often asked, “But how do you know how much food to make?”

Well, I don’t. ;) But God does. There’s always plenty, and I can always pull more from the pantry or freezer to stretch out each meal. In addition, if I’ve made lots and lots of food and not many are able to come for the day, that means we have extra food to share with sick or struggling friends throughout the week.

What does all this have to do with Cream Cheese Chocolate Chip Bread?

I recently served this fun bread on a Sunday afternoon to our college guests along with Taco Soup and a buffet full of sides. This bread was gone within minutes! The chocolate chips are the main attraction, but if you ask me, the cream cheese is the most valuable player in this recipe. You’ve got to try it!

Cream Cheese Chocolate Chip BreadYum

Cream Cheese Chocolate Chip Bread
 
Save Print
Author: Laura
Serves: 1 large loaf
Ingredients
  • ½ cup melted butter
  • 8-ounces softened cream cheese
  • ½ cup sucanat or raw sugar
  • 2 eggs
  • 1 teaspoon vanilla extract
  • ¼ cup milk
  • 2 cups whole grain flour (I use freshly ground soft white wheat)
  • 1 teaspoon baking powder
  • ¼ teaspoon sea salt
  • ½ cup chocolate chips
Instructions
  1. In a large mixing bowl or in a powerful blender (like a Blendtec), whip together butter, cream cheese, sugar, eggs, vanilla, and milk.
  2. Add flour, baking powder, and salt.
  3. Fold in chocolate chips.
  4. Pour batter into a well-buttered 9" loaf pan.
  5. Bake in a 350 degree oven for 45-55 minutes or until a toothpick inserted in the middle comes out clean.
3.5.3229

Tip: How about making batches of this bread to give as gifts this holiday season?

Heavenly Homemaker's Club Members: Access your homepage and all your fantastic resources here! Not a member yet? Please join us!

Simple Pumpkin Waffles

November 3, 2019 by Laura 1 Comment

This post may contain affiliate links. For more information, please see our disclosure policy.

I highly recommend enjoying a fall brunch with these Simple Pumpkin Waffles. These are light, fluffy, flavorful, and perfect!

When I told our 17-year old that I was going to make Pumpkin Waffles he saw right through my “add a veggie to breakfast” scheme. Still, he went back for seconds and even ate homemade applesauce on the side. It was a perfect fall breakfast – or brunch as was the case that day as we tried to squeeze in a hearty meal between high school/college classes, kindergarten homeschool, babies’ naps, a college soccer game, and tennis meet.

It’s rare that I have time to stand at the waffle iron these days. So it only made sense that I double the recipe and make a huge pile of waffles so we can easily toast and enjoy them another day soon. If you’re going to make a mess, you might as well make a big one, right? :) So now I have a freezer full of Simple Pumpkin Waffles to pull out and serve as needed!

I highly recommend whipping some cream to serve on top of these waffles. A huge dollop of whipped cream along with real maple syrup drizzled over the top of these waffles makes an incredible meal. Sausage, applesauce, and coffee too? It’s breakfast heaven.

Simple Pumpkin WafflesYum

Simple Pumpkin Waffles
 
Save Print
Author: Laura
Serves: 6-8
Ingredients
  • 2 cups of whole grain flour (I use freshly ground soft white wheat)
  • 1 teaspoon of baking powder
  • 1 teaspoon of cinnamon or pumpkin pie spice
  • ½ teaspoon of sea salt
  • 1½ cups of milk
  • 15 ounce can 100% pure pumpkin
  • 3 eggs
  • 4 tablespoons of melted butter or coconut oil
Instructions
  1. Whisk all ingredients together until smooth.
  2. Scoop about ½ cup of batter into a hot waffle iron.
  3. Cook until waffles are golden brown.
3.5.3251

What is it about pumpkin and cinnamon in the fall that just doesn’t taste the same any other time of year?

Heavenly Homemaker's Club Members: Access your homepage and all your fantastic resources here! Not a member yet? Please join us!

Easy Whole Wheat Cinnamon Rolls

October 23, 2019 by Laura Leave a Comment

This post may contain affiliate links. For more information, please see our disclosure policy.

Tis the season to bake, bake, bake! (And also eat vegetables. Never forget to enjoy the broccoli. Man shall not live on baked goods alone.) Since it’s baking season, it’s time for me to re-share my recipe for Whole Wheat Cinnamon Rolls!

Are cinnamon rolls difficult to make? Well, they do require more steps than say…all of the Simple Recipes I share. I prefer quick and easy – just like most of us do!

But are cinnamon rolls WORTH THE EFFORT? Can I answer a question with a question? Do I need to even answer that question? Do we all know the answer?

(Making homemade Cinnamon Rolls is worth the effort.)

And also, I find that making homemade cinnamon rolls isn’t terribly difficult. I don’t make them often, but when I do, we are all so happy that I did! It’s also worth noting that these can be prepared, then frozen to thaw and bake later. Now THAT makes baking cinnamon rolls easy!

Whole Wheat Cinnamon RollsYum

Easy Whole Wheat Cinnamon Rolls
 
Save Print
Author: Laura
Serves: 30
Ingredients
  • 1 cup warm water
  • 2 Tablespoons yeast
  • 2 teaspoons honey
  • 2½ cups milk
  • ½ cup butter
  • ½ cup honey
  • 4 teaspoons sea salt
  • 8 cups whole wheat flour
  • CINNAMON FILLING:
  • ½ cup melted butter
  • ¾ cup sucanat (you can use white sugar if you want)
  • ½ Tablespoon ground cinnamon
Instructions
  1. In a large bowl mix water, yeast, and honey. Set aside.
  2. Melt butter in a large saucepan, then add honey, salt, and milk. Heat this to 120 degrees, then remove from heat..
  3. Pour milk mixture into yeast mixture and stir. Stir in 8 cups of flour, 2 cups at a time (more or less as needed).
  4. Knead the dough for 5-10 minutes.
  5. Place it in a bowl, cover it, and let it rise for 1-1½ hours.
  6. After dough is nice and fat, punch it down and knead out all it’s bubbles.
  7. Cut the dough in half, setting one half aside.
  8. On a well floured surface, roll dough into a nice big rectangle, about ¼ inch thick.
  9. Use a pastry brush to spread ½ of the melted butter all over the rectangle.
  10. Sprinkle ½ of the sucanat/cinnamon mixture all over the butter.
  11. Roll the prepared dough, then cut into thin slices, about ½ inch thick.
  12. Place slices in a buttered baking dish.
  13. Repeat process with other ½ of dough.
  14. Allow rolls to rise about 30 minutes.
  15. Bake for 25 minutes or until golden brown at 350 degrees.
3.5.3229

Ooey-Gooey Frosting

1/4 cup butter
3 Tablespoons milk
1/2 teaspoon vanilla
1-2 cups powdered sugar to make the consistency you like

Melt butter. Remove from heat and stir in vanilla, milk and powdered sugar. Whisk together until smooth.

NOTE ABOUT WHOLE WHEAT:

I use freshly ground hard white wheat to make these Cinnamon Rolls. That makes these seem not as whole-wheaty as when using flour made from red wheat. Here are more posts that share about different varieties of wheat.

Heavenly Homemaker's Club Members: Access your homepage and all your fantastic resources here! Not a member yet? Please join us!
« Previous Page
Next Page »

Join Our Community!

 Facebook Twitter E-mail Instagram Pinterest

Popular Posts

~ Will All of the Real Moms Please Stand Up?
~ Easy! Stir-and-Pour Whole Wheat Bread
~ How to Make Gatorade
~ 31 Real Food Breakfast Ideas
~ Dear Teenage Girls...
~ When Mom Takes a Step Back
~ The Inexpensive Health Insurance We Love!
~ Let's Talk Real Food Grocery Budgets

Check out our latest posts!

  • Big Family Food and Fun: May 24-30, 2026
  • Free 7-Day Summer Menu Plan
  • Big Family Food and Fun: May 17-23, 2026
  • Easy Side Dishes for Summer
  • Big Family Food and Fun: May 10-16, 2026
Home  ~  Simple Meals  ~  Club Membership  ~  Shop  ~  Privacy Policy  ~  Disclosure  ~ Contact

Copyright © 2026 · Beautiful Pro Theme on Genesis Framework · WordPress · Log in