Heavenly Homemakers

Encouraging women in homemaking, healthy eating and parenting

  • Home
    • About
    • FAQs
  • Recipes
    • Bread and Breakfast
    • Condiments
    • Dairy
    • Main Dishes
    • Side Dishes and Snacks
    • Desserts
    • Gluten Free
    • Instant Pot
    • Crock Pot
    • Heavenly Homemaker’s Weekly Menus
  • Homemaking
    • Real Food Sources
  • Store
  • Contact
    • Advertise
    • Disclosure
    • Privacy Policy
  • Simple Meals
  • Club Members!

Menu Plan for the Week

May 16, 2010 by Laura 8 Comments

This post may contain affiliate links. For more information, please see our disclosure policy.

We have survived soccer season again this spring. We’re on the home stretch…our last games are Tuesday night. You can’t see me, but I’m doing back flips in celebration. I’ve loved watching my boys play…but it will be nice to have more time at home again. I think they are a tiny bit relieved too. (You should see the back flips they can do.)

Here’s our menu for the week:

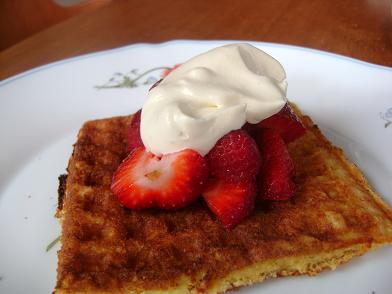
strawberrywafflessm.JPG

Sunday, May 16
Oatmeal, peaches
Sandwiches on the way to a soccer game
Leftovers

Monday, May 17
Whole wheat waffles, strawberries
Bean and cheese burritos, watermelon
Chicken Fried Steak Strips, mashed potatoes, gravy, peas

Tuesday, May 18
Orange carrot muffins, bananas
Pizza pockets, carrot sticks, applesauce
Italian Stew with green beans

Wednesday, May 19
Mini breakfast pizza, oranges
Homemade corn dogs, strawberry yogurt fruit dip with apple slices
Taco potatoes

Thursday, May 20
French toast
Spanish Rice, corn, pears
Cookout at the park with Justus’ soccer team

Friday, May 21
Mini apple pies, cheese
Chicken tortilla soup, strawberry peach slushies, carrots
Cheesy salsa enchiladas, creamy orange cooler

Saturday, May 22
Whole wheat donuts
Nachos, apples
Cheddar ranch burgers on whole wheat hamburger buns, hashbrowns

Simple Steps Toward Healthy Eating Series begins tonight…stay tuned!
———————————————————

Find more menu planning inspiration at Organizing Junkie!

Heavenly Homemaker's Club Members: Access your homepage and all your fantastic resources here! Not a member yet? Please join us!

Lookie! We’re on TV!

May 14, 2010 by Laura 72 Comments

This post may contain affiliate links. For more information, please see our disclosure policy.

I received a phone call Wednesday from our local NBC news station here in Nebraska. They wanted to interview me about HeavenlyHomemakers.com…could they come in two hours?

Two hours!? Well sure they could come in two hours!

And so, of course, I spent the next two hours sitting quietly and reflecting in wonder about how a dandelion changes in form from a lovely yellow flower to a soft fluffy puff of seeds that children love to blow softly into the air…

Yeah right.

I immediately called Matt, who thankfully was on his way home from work. He suggested that I start to bake something. His reasons for this were threefold:

  1. He was hungry.
  2. He recognized that I had a lot of nervous energy and that I should knead some dough to calm myself.
  3. He thought maybe KHAS-TV might like to see some freshly baked goods in our kitchen.

My husband is so smart. Kneading bread dough when you have a TV crew coming to your house is a perfect way to calm your nerves (chalk that tidbit of wisdom away for future reference, people). 

We had a delightful time with Josh Bonifas, their videographer and “interview guy”. He did a great job putting us at ease and asked great questions. Later that night during our nightly prayer time, our boys were talking about “Josh” like he’d been a part of our family forever. So cute.

Anyhoo…being interviewed for the KHAS nightly news was a blast and a wonderful honor. You can watch the clip of me taking bread out of the oven and talking all about Heavenly Homemakers here if you’d like. Disregard the nice stuff the anchor woman says at first about me “having it all figured out”. You all know better than that, right?

newsclip
Click here to watch the clip!

Heavenly Homemaker's Club Members: Access your homepage and all your fantastic resources here! Not a member yet? Please join us!

How to Store Bulk Grain

May 13, 2010 by Laura 77 Comments

This post may contain affiliate links. For more information, please see our disclosure policy.

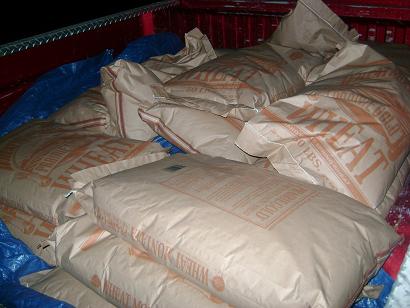
Remember that 500 pound order of hard white wheat I ordered and brought home a few weeks ago? (Yeah, like you could forget.)

bagsofwheatsm

You may be happy to know that I’m down to only 447 (give or take) pounds of wheat now. And you were worried that I wouldn’t use it all up quickly…

Anyway, many of you asked how I would store all my bags of grain…and several of you suggested that I “critter proof” it. Yes. Very, very good advice. If it’s one thing I can count on having at my house…it’s critters. {shudder}  Although I don’t think snakes or birds should care too much about my wheat…we do see our fair share of bugs and the occasional mouse. Eeeww.  I do NOT want mice getting into my big stash of wheat. That would just be maddening.

And so, ever since I brought home all the wheat in February…I’ve been on a quest for big huge buckets for my grain storage. I needed some with lids that seal very well (obviously). The fabulous buckets with gamma seal lids I found online are pricey! Great quality, no doubt…but I needed around 20 buckets. I could have spent at least $80 for what I needed, and that was JUST the lid…not the bucket! Ouch.

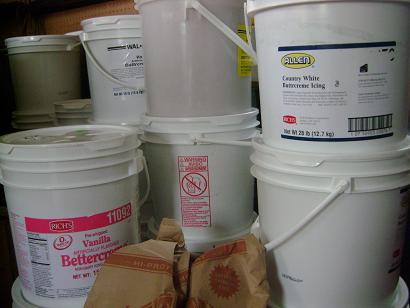
Instead, I began asking around at my local grocery stores. Did you know that the frosting used in a bakery often comes in big five gallon buckets?! Yes indeed. That’s a lot of frosting! Did you know that most bakeries go through several of these big five gallon buckets in a month? Yes indeed. That’s a lot of frosting! And did you know that bakeries generally don’t want to keep their empty buckets after they’ve used the frosting out of them? Yes indeed. That’s a lot of empty, unwanted buckets.

One store asked me to “fork over” an entire dollar per bucket with lid that I took from them. Big buckets with lids for a dollar each? Okeedokee!

The other store practically threw their buckets with lids into my cart and wouldn’t let me pay one penny for them. They were almost giddy about the fact that I was so happy to take the buckets off of their hands. For free. Yes indeed.

And so…long story longer…I came away from my grocery store bakery departments with 20 buckets with lids for a total of $6.00. Yes, that was SIX dollars. Total. 

wheat_bucket_sm

I washed and dried the buckets thoroughly, then got busy scooping all of the wheat into them. I found that it took two – five gallon buckets for each 50 pound bag of wheat. 

I now have a big stash of white frosting buckets full of hard white wheat just waiting to be turned into bread, tortillas, muffins, pancakes, cakes, pies, cookies, pretzels, donuts, buns, bagels…the possibilities are endless!

And the critters? They can go pick on someone their own size. 

Huh. I’m suddenly remembering another time I bravely and fearlessly used big buckets to defend myself from attack. Wow. Who knew buckets such as these would be such a helpful aid for a wimpy woman such as I. Between big buckets and cottage cheese containers…I’d say I am well protected. What do you think?

Heavenly Homemaker's Club Members: Access your homepage and all your fantastic resources here! Not a member yet? Please join us!

I Knew So Much Before I Had Kids

May 12, 2010 by Laura 35 Comments

This post may contain affiliate links. For more information, please see our disclosure policy.

Before I had kids…

I knew how to keep a constantly clean and orderly house.

I knew how to discipline children lovingly, yet firmly. I knew how to answer questions patiently and with kindness. I knew how to give my full attention and listen to everything a child said without being distracted.

I knew how to keep up with laundry and to put it into drawers neatly. I knew how to travel with children in a way that did not make a mess of the car or the child’s hair or the child’s clothes or the driver’s sanity. I knew how to keep children from throwing fits in the store. I knew how to keep crust from forming under a child’s nose.

I knew how to keep a child from being a picky eater. I knew how to make sure a child’s clothes always matched, were on right-side-out and with the tag in the back. I knew how to keep a child from having stinky feet.

I knew how to make a child love bath time. I knew how to have a quiet toddler. I knew how to control a child during church. I knew how to keep my kitchen clean. I knew how to teach a child to sit down and be still. I knew how to keep a child’s toys picked up. I knew how to make sure a child’s shoes were on the right feet and the laces were always tied.

I knew how to make sure a child never dropped his coat on the floor when he walked in the door. I knew how to tell a child to do something and they would just do it right away the first time without arguing. I knew how to keep a child from back-talk. I knew how to keep a child from ever being mean to another child, ever.

I knew how and when to potty train. I knew how to keep my child from having any learning problems. I knew how to keep caught up on the dishes. I knew how to get my kids to sleep through the night.

I knew how to keep the windows and mirror clean. I knew how to inspire children to cheerfully help and work hard. I knew how to teach children fun songs and meaningful songs and historical songs and spiritual songs and to sing themselves to sleep.

I knew how to teach children eloquent language and foreign language and sign language and to never use bad language. I knew how to make sure children always neatly wrote a loving thank you note for every gift they received. 

I knew how to make sure children always spoke nice and clear when talking to an adult and to never mumble. I knew how to make sure a child never loudly said embarrassing things about how that woman has a mustache and that man has a really big nose.

I knew how to win every battle.

I knew all the answers.

Before I had kids.

Heavenly Homemaker's Club Members: Access your homepage and all your fantastic resources here! Not a member yet? Please join us!

Healthy Celebrations: Double Lemon Cupcakes (a guest post!)

May 11, 2010 by Laura 13 Comments

This post may contain affiliate links. For more information, please see our disclosure policy.

healthy_celebrations_med

Yum

Please join me in welcoming Holly, who is guest posting today to share her awesome Double Lemon Cupcake recipe with us! I can’t wait to give these a try!
—————————————————–

Hello Heavenly Homemakers readers! My name is Holly. I am a Christian, a military wife and momma to an 18 month old son, and I am really excited to be sharing a recipe (or three) with you. The past year I have been learning about traditional foods; I have reinvented how I shop, cook, eat, and feel about food. The most recent milestone in this journey was birthday cake. Remember when Laura asked us to choose between chocolate and vanilla? Well, to celebrate my 24th birthday I chose option C.  

I wanted  a birthday dessert that satisfied my emotional desire for cake, but also fulfilled my sensible need to eat wholesomely. I knew that if I did not satisfy both halves I would be left either feeling like a whole wheat martyr or a big sugar-filled failure. Yuck. Blessedly, I found a happy medium with these  sweet and tangy cupcakes. 

lemon_cupcakes_6

Let me just say that I am normally very relaxed baker, I never sift. I fudge the temperatures and can be lazy with the mixing. But for this recipe, if I say sift I do mean sift. The same goes for temperatures and times. It may seem fussy for some of you, but the results are rewarding. 

Double Lemon Cupcakes


3 c whole wheat flour
1 tbsp baking powder
½  tsp sea salt
1 c butter, room temperature
1 c orange blossom honey
4 large eggs, room temperature
the zest of 3 lemons (I recommend organic because you are consuming the peel), plus 2 tbsp lemon juice
1 tsp vanilla extract
1 c buttermilk 

Preheat oven to 325° F. Butter and flour the inside of two round cake pans or two dozen muffin tins. Zest the lemons (just the yellow part, try to avoid the white pith because it is bitter), you want this to be very fine. Sift the dry ingredients together and set aside. Add the lemon juice to the buttermilk. 

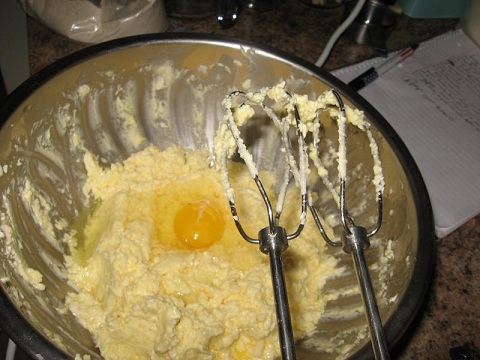
Cream the butter and the honey until they are nice and fluffy. Add the eggs one at a time, until well mixed in. Add the zest and vanilla. Add the flour and buttermilk in three parts. Beat until just combined. Pour the batter into the prepped pans and bake until golden brown and they pass the toothpick test, 30-35 minutes for a cake, 25 minutes for cupcakes. 

lemon_cupcakes_2

While the cakes are baking, mix up a nice batch of… 

Lemon Curd   

8 large egg yolks
Finely grated zest of 2 lemons
½  c plus 2 tbsp lemon juice (about 3-4 lemons)
½ c orange blossom honey
teeny pinch of salt, about 1/8 tsp
¾ c unsalted butter (10 tbsp or 1 ¼ sticks) cold, cut in pieces  

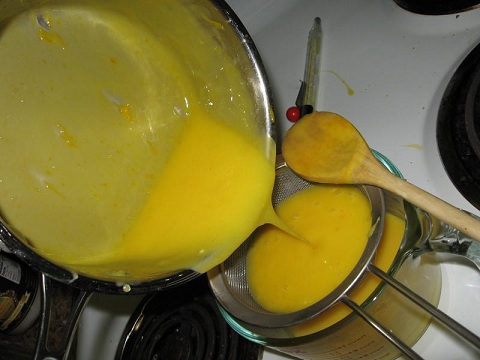
Wisk together all ingredients except butter and salt in a medium saucepan. Cook over medium-high heat, stirring constantly with a wooden spoon. When the mixture registers 160° F on an instant-read thermometer and is thick enough to coat the back of the spoon, remove from heat. This should take about 8-10 minutes. If you don’t have a thermometer, just do what I did and use good quality eggs. 

Remove pan from heat and add salt and butter, one piece at a time, stirring until smooth after each addition. Strain through a sieve. It is normal for small bits of cooked egg to strain out, don’t worry you did it right. :) Cover this with plastic wrap and let it cool in the fridge at least one hour.

lemon_cupcakes_3  

Fill your cupcakes with lemon curd. You can use a pastry bag and large tip, or poke a hole with the wrong end of a wooden spoon and use a plastic baggie with a corner snipped off. Spread extra curd on top of the cupcake. If you’re making a cake, spread the lemon curd between the two layers. Then whip up your frosting. 

Soft and Fluffy Frosting

8 egg whites
¾ c orange blossom honey
1 tsp vanilla extract. 

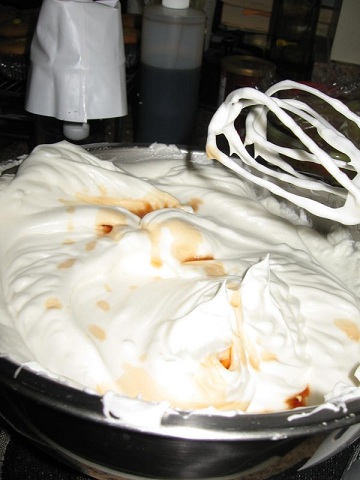
Combine egg whites and honey in a large heat-proof mixing bowl (or the bowl for your stand mixer if you have one and it’s heat-proof) set over a pan of simmering water. Wisk rapidly for two minutes  Make sure your water does not boil! You will end up with scrambled egg frosting and it will be gross. Cook this until it reaches 160° F on an instant-read thermometer (or if like me you don’t have one, use good eggs and cook for two minutes). Remove from the heat and beat on your mixer’s highest speed for  until soft and fluffy, about 7-9 minutes. Beat in the vanilla. Use this frosting immediately. 

lemon_cupcakes_4

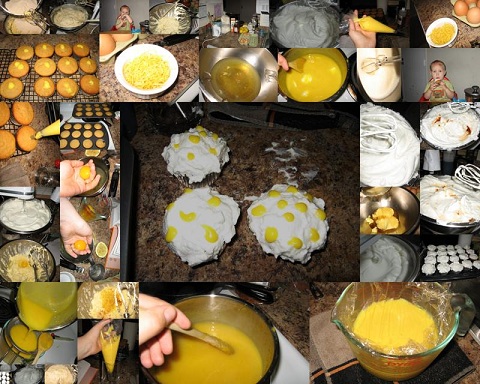
I used (some of the) leftover curd to decorate the tops of some of the cupcakes. Or you could eat it with a spoon and not tell anyone there were leftovers. I won’t look. 

lemon_cupcakes

Thanks Laura for letting me share my recipes with you and your readers!

Holly wanted me to be sure to let you know that the curd will keep in the fridge about 3 days, but it is best served in the first 24-36 hours, and the frosting should be used immediately after it’s made, because it will start to deflate after a few hours. It’s still edible for several days, but the quality goes down after 6-8 hours.
——————————————————-

This post is linked to Works for me Wednesday.

Heavenly Homemaker's Club Members: Access your homepage and all your fantastic resources here! Not a member yet? Please join us!

Gratituesday Meets the Spring Cleaning Carnival

May 10, 2010 by Laura 52 Comments

This post may contain affiliate links. For more information, please see our disclosure policy.

gratituesdaynov09[1]

This week, Gratituesday is teaming up with Katie’s Spring Cleaning Carnival to talk about “getting the pesticides out”. The carnivals came together on the same day…so we’re working with it. You may think that thankfulness and pesticides have absolutely nothing in common…ooh but you’re wrong! It just so happens that I’m very grateful that we DON’T have to use pesticides. See? The two do go together!

SPRING CLEANING BUTTONRead more of what I wrote about getting rid of pesticides over at Katie’s!

Learning about all the pesticides in many of our foods and the harmful ways they can wreak havoc on our bodies can be incredibly disheartening. 

I’m thankful that we don’t have to throw our hands up in dispair! Do you know what I’ve discovered while growing my own garden? It is really NOT hard to grow vegetables without pesticides. Just don’t use them – plain and simple. There WILL  be bugs. Squish them, flick them, step on them, scream at them…but you don’t have to use poison on them. Poison for the bugs means poison for the food. Watch carefully (especially under the leaves of your plants) and squish them before they get out of hand. Plant marigolds in and around your garden (because many bugs don’t like them!).

And what about the food in the store? How can you afford to buy organic foods all the time? Well, there’s no hard and fast answer to these questions. Our health food co-ops have made organic eating much easier for us, not to mention…affordable! Katie has a list here that may help you decide which fruits and vegetables should be a higher priorty when it comes to buying organic. Plus, read through this series I wrote on Feeding the Family to see how feeding our family of six a *mostly* organic diet on a limited budget works for us.

And what about household pests like ants and roaches? Sprinkling borax in the “buggy hotspots” of your home is very effective!

Trying to avoid DEET? Try cinnamon oil! Mosquitoes don’t like it!

I’m so thankful that there are healthy, safe alternatives to pesticides. I’m thankful that I’ve learned the harmful effects of pesticides to our bodies and to the earth. I’m so thankful that we have a choice about what we eat and what we do.

But I’m VERY thankful that no matter what the pesticide usage is in the world, and no matter what I choose for my family…God is still in control. We put our trust in Him!

Please join us for Gratituesday and/or the Spring Cleaning Carnival! Write on your blog about what you’re grateful for…and/or about how you’re working to get rid of pesticides! Come over and link up with us here!! 

AND…there’s a giveaway going on over at Katie’s place that includes Heavenly Homemaker’s Guide to Gardening and Preserving Ebook. Leave a comment over there AND over here for chances to win!

Heavenly Homemaker's Club Members: Access your homepage and all your fantastic resources here! Not a member yet? Please join us!

Menu Plan for the Week

May 10, 2010 by Laura 6 Comments

This post may contain affiliate links. For more information, please see our disclosure policy.

Thank you all so much for your “hugs” and support yesterday. I love all your suggestions about buying a shirt “for my mom” and giving it to someone in need. I’m going to consider starting a new tradition next year. What great ideas you shared! You are all awesome!

I DID have a wonderful Mother’s Day. Matt had to work a big part of the day (Mother’s Day at a restaurant means all employees on board, you know)…so we waited until the big crowd had thinned out and the boys “took me out to Daddy’s restaurant” for lunch. Matt was able to sit and eat with us at that point…AND my three older boys actually pitched in and paid for my meal. Are they so sweet or what? 

I’m finally getting my menu posted for ya!

Monday, May 10
Simple soaked pancakes, blueberries
Grilled cheese sandwiches, tomato soup, carrots
Tacos

Tuesday, May 11
Chocolate chocolate chip muffins, bananas
Turkey sausage, hashbrowns, creamy orange cooler
Popcorn chicken, ranch potato wedges, peas

Wednesday, May 12
Scrambled eggs, fruit-kefir smoothies
Salmon patties, creamy coleslaw, sweet baked beans
Sloppy cornbread, green beans

Thursday, May 13
Cinnamon swirl bread, strawberry peach slushies
Tuna salad on crispy cheese crackers, strawberry milkshakes
Lasagna, tossed salad

Friday, May 14
Peanut butter honey toast, applesauce
Picnic in the park – sandwiches, chips, carrots, fruit leather
Hamburgers on whole wheat hamburger buns, onion rings

Saturday, May 15
Homemade oat crunch cereal with dried fruit
Leftovers
Crunchy ranch chicken, rice and veggie stir fry

If you haven’t signed up for Paula’s Bread Pizza Kit Giveaway….hurry over! I’ll be drawing a random winner tonight!

———————————————-

You can take advantage of the 25% off sale in Heavenly Homemaker’s Shop until midnight tonight!

———————————————

Visit Organizing Junkie for more menu planning inspiration.

Heavenly Homemaker's Club Members: Access your homepage and all your fantastic resources here! Not a member yet? Please join us!

I Love Mother’s Day. Why Am I So Sad?

May 9, 2010 by Laura 71 Comments

This post may contain affiliate links. For more information, please see our disclosure policy.

Today is Mothers’ Day. I love being a mother. I am so thankful that God blessed me with four wonderful children. I take them for granted, when truly they are the best gift God has given my husband and me.

My husband and boys do a wonderful job making Mother’s Day special for me. They don’t let me cook. They don’t let me do dishes. They take special annual Mother’s Day pictures out by the peach tree we planted four years ago. I love celebrating Mother’s Day with my men.

And yet, for some reason…all I can do today is cry.

I miss my own mama.

And today would have been her 61st birthday.

Why in the world did her birthday have to fall on Mother’s Day this year? Mother’s Day is hard enough. Her birthday is hard enough. Both on the same day? Ugh.

For a couple of weeks now, so many things I’ve seen and heard are painful reminders that I no longer have my mom around. Our radio keeps asking people to call in and share about why their mom is so special. There are ads all over the place suggesting that we should get our mothers flowers and other wonderful gifts.

You know what I would have given my mom for Mother’s Day/her birthday this year?

A new shirt.

Because that’s what I gave her every year. Because that’s what she always wanted. Because she loved getting new shirts. Because even though it felt boring and unoriginal to give her the exact same thing every year…if I didn’t pick out a new shirt for her…deep down I think she would have been disappointed. Because she loved getting a new shirt. And she loved it when I was the one picking out the new shirt for her. I knew just what she liked.

This time of year, I am drawn to shirts that my mom would have liked. When I am out shopping, I see a cute button up blouse (usually in some shade of blue) and I almost buy it. Every year. Because I always got her a new shirt.

And now, every year, I hurt and feel joy at the same time when I see a shirt that she would have liked for her birthday or for Mother’s Day. And I feel ridiculous standing in the clothing department with tears running down my face because for Pete’s sake, it’s a shirt. Who cries over shirts?

I do. Every May.

Anyway, I love Mother’s Day. It’s a wonderful day to honor precious women in our lives. 

But today, I’m hurting. I’m weepy. And I miss my mom.

I figured you wouldn’t mind if I shared that with you.

Heavenly Homemaker's Club Members: Access your homepage and all your fantastic resources here! Not a member yet? Please join us!

12 Tips for Planning a Memorable Frugal Family Vacation

May 6, 2010 by Laura 9 Comments

This post may contain affiliate links. For more information, please see our disclosure policy.

The following is a guest post from Jeri who writes a frugal family travel blog where she shares family travel tips like airplane games for kids. Having flown over 75,000 miles either pregnant or with kids, she has some experience in the field of family travel. 
—————————————————–

‘Tis the season for gearing up and trying to figure out what the family will do to entertain the youngsters while on summer vacation. If you want to plan an  amazing family vacation, these tips will help get you on your way.

How to Plan a Memorable and Frugal Family Vacation

1. Consider your budget.  So, maybe you can’t fly your family of 12 to Europe this summer, but surely there are more options. Look at your family budget, decide on a number, then continue with the planning. Make it a challenge: where can we go and what can we do with this much money?

2. Ask for input. Even if you have young children, ask the family for their ideas. I know my 4 and 2-year-olds love to be involved in our travel conversations. Sometimes I’m amazed at the ideas they have in their minds.

3. Create anticipation. In our home, we read books and play a game we invented called “Airplane, Airplane” where my husband pretends to be a flight attendant and we all practice being passengers. Even very young children can learn words like “departure”, “arrival”, and “rest area.” Get the kids (and yourself) excited about the adventure ahead  -whether it’s a road trip or someone’s first flight. Count down the days or months together.

4. Tell stories from past travels. My two-year-old son still loves us to tell the story over and over and over again about how he ate buffalo food at a Bison Ranch in Wyoming last year. He doesn’t remember it, but he loves to hear all about it. And it breeds more anticipation for future travel. My children also love to hear about all of the countries they’ve been to and the modes of transportation they’ve taken.

5. To save money, be flexible with your dates and destinations. (And, just be flexible in general.)  Make sure you do all you can to book cheap travel and start planning in advance! (That’s why I’m telling you now.)  Also, depending on your lodging, consider cooking meals instead of eating out.

6. Be ready and willing to entertain the kids. After all, it is a FAMILY vacation. Yes, it takes more energy, but it is worth it. I notice that when I pay attention to my children and go out of my way to spend time with them (at home or on the road), I have a lot fewer behavior problems. It’s even possible to keep kids entertained on flights.

7. S-L-O-W down!  Is it really necessary to visit every museum in Washington DC in a single day, go out for breakfast, lunch, and dinner, and enjoy the latest viewing of the latest movie that was released, and stop for ice cream on the way home? (Phew!)  To enjoy a vacation with children, make it simple. Make time for naps – that is, if you’d like your 2-year-old to be good-natured at dinner. Fewer activities = fewer dollars, too. We try not to plan more than one “big” activity per day for our young family.

8. Take pictures.  You’ll want to remember what you did on your vacation, and this is an easy way to do it.

9. Check out free activities. I was amazed when we found a FREE museum in Brisbane, Australia on one of our vacations. Also, it’s often the simple things that matter most. Hanging out at the beach or a local park for a picnic can be just as memorable as paying big bucks for Universal Studios. 

10. Stay with friends on vacation. Sometimes I’m afraid to ask because we might be intruding, but we’ve always enjoyed staying with our friends on vacation. (And I think that deep down they like it, too!)  The best part is that after you put the kids to bed, you can hang out with your friends. The days can be spent doing something with your own family, and communicating this with your host family is important. It saves you money, and gives you some time to invest in a relationship that maybe you’ve neglected over a few years. Conversely, we would always welcome our friends to “vacation” in our home. Speaking of which, anyone up for a South Pacific vacation this summer?

11. Pack light. Even if you’re taking a road trip, there’s no reason to take the whole kitchen and bathroom sink with you. As you pack, ask yourself, “Can I survive a week without this?” If the answer is “yes”, leave it at home. This one is tough for me since we’re missionaries in Papua New Guinea and travel for months at a time. But, I can tell you firsthand that it is no fun having too much luggage! Besides, now it is costing more and more on flights for extra weight. More weight often means more wait in many circumstances.

12. Preserve your memories.  I keep a travel scrapbook for our family, in which I make one page for each trip we take. If you’re not into scrapbooking, consider making a short slideshow to view with your kids days, months, or years later. Trust me, it’ll be worth it.

For us, family vacations are important. They have knit us together in a way that every day life can’t. 

What are your vacation plans for the summer?

This post is linked to Frugal Fridays.

Heavenly Homemaker's Club Members: Access your homepage and all your fantastic resources here! Not a member yet? Please join us!

Our Healthy Eating Journey, Wrapping it Up

May 5, 2010 by Laura 60 Comments

This post may contain affiliate links. For more information, please see our disclosure policy.

healthyeatingjourney

If you missed them, please catch up on
Part 1, Part 2, Part 3, Part 4, Part 5, Part 6 , Part 7, Part 8 and Part 9.

I had finally accepted and realized that our bodies needed nourishment. Eating food wasn’t just about filling a hole. Eating food was about providing our bodies with all of the right nutrients, vitamins, minerals, enzymes and fats.

I re-read Nourishing Traditions. I asked millions of questions of my friends who knew more about healthy eating than I did.  I got completely overwhelmed.  I began throwing processed foods out of my pantry. I pretty much turned into a Nazi about healthy eating. If it wasn’t organic, raw, fermented, grass fed, soaked whole grain or cultured…I was scared to let it pass our lips. We would probably die! We would for sure get cancer! Malachi’s eczema would get worse! My asthma would get worse! We would all get terribly sick!

This way of thinking turned me into a nervous wreck anytime we went anywhere. If I was at home, I could control what we ate. But if we were at a friend’s house or out of town visiting family or if someone offered my children candy…I was scared to death to let us eat! Those foods were poison!! It sounds crazy (because it was) but that’s how I was when I first learned about eating nourishing foods. When you’re first learning about the harmful ways animals are raised for meat and milk and how many pesticides are sprayed on produce, it can make you want to run away screaming. 

It took me a few months to come around. Part of it was that I just needed to wrap my brain around this new lifestyle. I had to figure out how to eat and serve my family a healthy diet. I had to learn where good food sources were. I had to learn to spend money on food (and figure out where that money was going to come from). I had to learn how to grow my garden organically. I had to learn how to cook and bake differently.

But I had to learn to CHILL OUT.

I learned that while we could try our best to eat the best foods we could most of the time…we could never eat perfect foods all of the time. And guess what? That’s okay! The stress of trying to eat perfectly, and the fears I had developed when we couldn’t were probably more harmful than the occasional store bought pizza or non-organic apple we might eat.

And so I discovered a healthy balance. More importantly, so that our children would come along with us on this journey and not be afraid that Mommy would be serving them yet another weird dish that they’d never heard of and that they hated…I learned to re-create all of our favorite foods. Now, we could eat all of our favorites (Pizza, Mac and Cheese, Tacos, Nachos, Spaghetti, etc.), but they were made with healthy and wholesome ingredients! The kids were happy. The parents were happy. Our bodies were happy.

So that’s where we’ve landed. We don’t eat a perfect diet…we just do the best we can. Our journey continues, because that’s what journeys do, don’t they?

Now my goal is to continue to develop more healthy and tasty recipes that my family loves and share them with you!

I’m wrapping up this series about Our Healthy Eating Journey today, with plans to launch into another series of sorts in which I’ll share some simple steps you can take toward healthy eating if this journey is new to you. I’ll share specific information about healthy meats, dairy products, eggs, spices, grains, produce, fats, etc. More importantly, I’ll give you ideas and tools for where to start. You DON’T need to change everything all at once!

My goal is to help you know that eating healthy is a possibility for EVERYONE. No matter what your budget, your cooking ability and experience, your understanding of nutritious food. You can do this!

Healthy eating tastes so good! Learn along with me that changing over to a healthy lifestyle is simple, affordable and delicious!

Heavenly Homemaker's Club Members: Access your homepage and all your fantastic resources here! Not a member yet? Please join us!
« Previous Page
Next Page »

Join Our Community!

 Facebook Twitter E-mail Instagram Pinterest

Popular Posts

~ Will All of the Real Moms Please Stand Up?
~ Easy! Stir-and-Pour Whole Wheat Bread
~ How to Make Gatorade
~ 31 Real Food Breakfast Ideas
~ Dear Teenage Girls...
~ When Mom Takes a Step Back
~ The Inexpensive Health Insurance We Love!
~ Let's Talk Real Food Grocery Budgets

Check out our latest posts!

  • Big Family Food and Fun: September 20-26, 2026
  • Big Family Food and Fun: September 13-19, 2026
  • Big Family Food and Fun: September 6-12, 2026
  • Big Family Food and Fun: August 30-September 5, 2026
  • Big Family Food and Fun: August 23-29, 2026
Home  ~  Simple Meals  ~  Club Membership  ~  Shop  ~  Privacy Policy  ~  Disclosure  ~ Contact

Copyright © 2026 · Beautiful Pro Theme on Genesis Framework · WordPress · Log in