Heavenly Homemakers

Encouraging women in homemaking, healthy eating and parenting

  • Home
    • About
    • FAQs
  • Recipes
    • Bread and Breakfast
    • Condiments
    • Dairy
    • Main Dishes
    • Side Dishes and Snacks
    • Desserts
    • Gluten Free
    • Instant Pot
    • Crock Pot
    • Heavenly Homemaker’s Weekly Menus
  • Homemaking
    • Real Food Sources
  • Store
  • Contact
    • Advertise
    • Disclosure
    • Privacy Policy
  • Simple Meals
  • Club Members!

How Your Family Can Eat Healthy Food That Seems Like Junk Food

October 4, 2018 by Laura 3 Comments

This post may contain affiliate links. For more information, please see our disclosure policy.

Long ago I decided that eating healthy food tastes ridiculously better than eating junk food. I mean, have you ever slathered real butter over a whole grain chocolate muffin made with all real food ingredients? Ever enjoyed a Strawberry Cheesecake Parfait made with fresh, real food ingredients? So much yum! You can’t pay me to trade those in for a poptart from a box after enjoying such delicious real food.
Still, I think we all have our junk-food-guilty-pleasures, right? While I love so many nourishing dishes – a steaming pot roast, cheesy potatoes, fresh from the garden green beans, tossed green salad with homemade ranch – I do have my moments that I get an absurd hankering for Lays potato chips. The Stax kind. These are dangerous in my hands and I forget all things wise and nourishing when I have some {hangs head and shrugs sheepishly}.

What I’m here to share with you today (besides my Lays Stax confession – but I don’t want to talk about that anymore) is that there are many super fun, super nourishing foods I make regularly for my family and they really make us feel strangely like we’re eating junk food. Among them are our two favorites:

  1. Guacomole
  2. Sweet Potato Fries

I’m sorry, but is there any better way to eat vegetables? (Yes, I know avocados are fruit. But they are green so in my head they will always be a veggie, not that it really matters.)

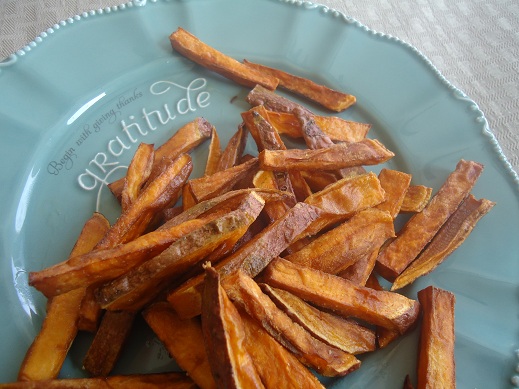
Our family can stand in the kitchen and eat an unbelievable amount of sweet potato fries. We feel zero guilt and 100% joy over this because I make them with healthy oils that can withstand high temps, so we don’t have to fear the fried food. We salt them with Redmond Season Salt and we eat and we eat and we eat. There is nothing bad about these and everything good. Sweet Potato Fries. Best “junk food” ever.
Unless we’re talking about Guacomole. This gives Sweet Potato Fries a run for their money. Yes, we eat Guac with chips, but c’mon now. We’re eating avocados and salsa. Happy, happy health food. (I get chips like these with are a step above, but also, tortilla chips in general aren’t too bad with their three or so ingredients.)
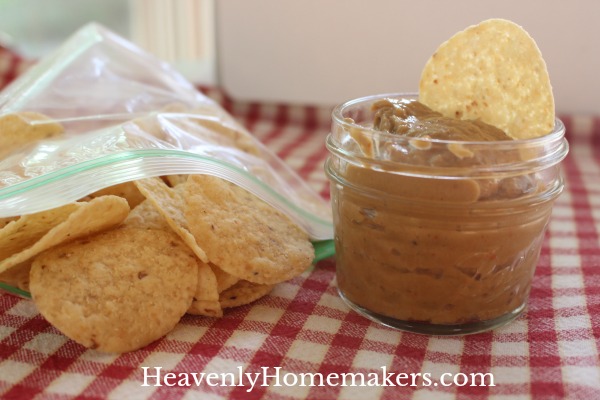
So there you have it. There are many real foods that taste awesome and feel like a treat to eat. Cream Cheese Corn? It’s like eating a bowl full of candy. Strawberry Cheesecake Parfaits? Wowza. Homemade Chicken Nuggets? It doesn’t get any better than this.

What are your favorite healthy foods that taste like you’re eating junk food?

Want to learn more about making your favorite foods the healthy way?

Grab our free Simple Real Food Substitutions printable!

This printable shares all our favorite real food substitutions that makes food tastes so delicious without compromising good health! Get yours here.

Heavenly Homemaker's Club Members: Access your homepage and all your fantastic resources here! Not a member yet? Please join us!

I Found a Solution to my 45-Year Old Eyelash Issues! (Win a $25 Jenuiniely Pure Gift Certificate!)

October 3, 2018 by Laura 23 Comments

This post may contain affiliate links. For more information, please see our disclosure policy.

I was the girl who had long, thick eyelashes. They needed no make-up. They made my blue eyes stand out without any help. And then I got older.

Suddenly I realized my eyes looked tired. It was then that I noticed my eyelashes had started to disappear. Aha! Hello, 45-year old self. You no longer have thick, lush eyelashes. You have exactly two lashes left (fine, I exaggerate). And while in the big scheme of things, this is very much a trivial matter, I still spent at least 5-minutes to consider what might be done about this.

Rest assured, my husband has always – and still does – proclaim that his favorite color is “the color of my wife’s eyes.” This makes the college soccer girls he coaches swoon and gush and run over to examine my eyes the next time they see me. Indeed, Matt cares very little about my current lack of lashes, so the issue is mine alone. And while most of the time I don’t think twice about such petty matters, I decided that a little mascara from time to time might be fun. You know, just to make my eyes not look so tired. (Tired? I’m not tired.)

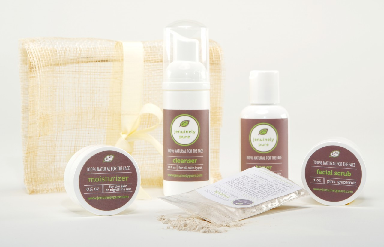
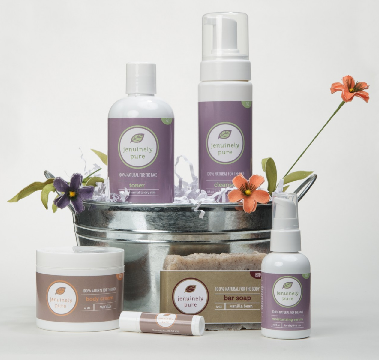
Therefore, the timing couldn’t have been more perfect for me to receive a non-toxic Eye Make-Up Remover from Jenuinely Pure. It works beautifully, and I am completely assured that I’m not wiping anything dangerous into my eyes.

Meanwhile, Jenuinely Pure sent me Body Wash, Baby Wash, Foaming Hand Soap, and a Moisturizing Body Scrub. They are fabulous, and here’s why:

  • Their products are high quality with only pure ingredients
  • They use organic ingredients when available
  • They include nourishing handmade botanical extracts
  • They contain NO harmful or questionable ingredients, no artificial fragrances or perfumes, no parabens, phthalates, or sulfates, and no genetically modified ingredients

So yes. I will gently and confidently wash the mascara off my few remaining lashes with such a safe product.

And what about that Baby Wash, you ask? Well, the timing is perfect to receive that too, seeing as we have a 4-year old living with us now. Plus we frequently have babies in our care as we have been trying to help a single mom get on her feet. I give a lot of little people baths now, so I am loving the use of this gentle and safe Baby Wash!

The teens and adults in the family are loving the Body Wash and Foaming Hand Soap. And as soon as I find a few extra minutes, I am going to enjoy the Moisturizing Body Scrub they sent!

And with that, it is time for you to get very excited!

Jenuinely Pure is giving us all a 20% discount on our purchases!! Yep! If your lashes need love like mine do, or if you need any of their great products, take advantage of this offer! Receive 20% any online order by entering “HEAVEN20” in the coupon code box.

And guess what else? This week they are giving two of you a $25 Gift Certificate to the Jenuinely Pure! Sign up in the Rafflecopter below for a chance to win!

a Rafflecopter giveaway

Giveaway ends Tuesday, October 9. I’ll send an email to reveal the winners!

Don’t forget to take advantage of the 20% discount!

Special thanks to Jenuinely Pure for sponsoring this review, and especially for the discount and giveaway!

Heavenly Homemaker's Club Members: Access your homepage and all your fantastic resources here! Not a member yet? Please join us!

Easy Peanut Butter Honey Granola

October 2, 2018 by Laura 3 Comments

This post may contain affiliate links. For more information, please see our disclosure policy.

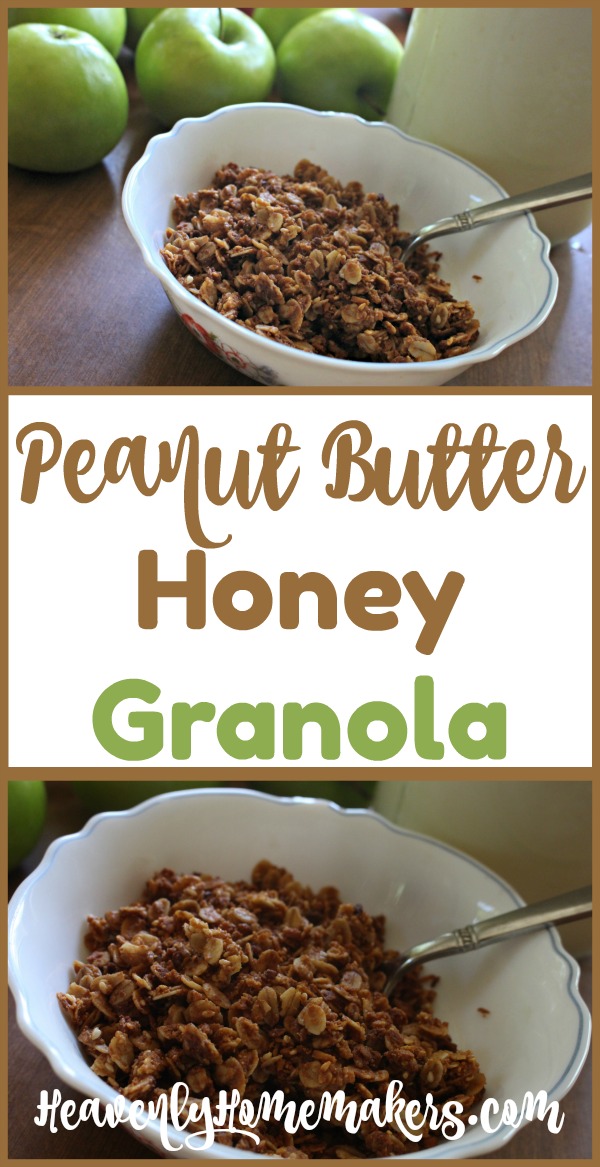
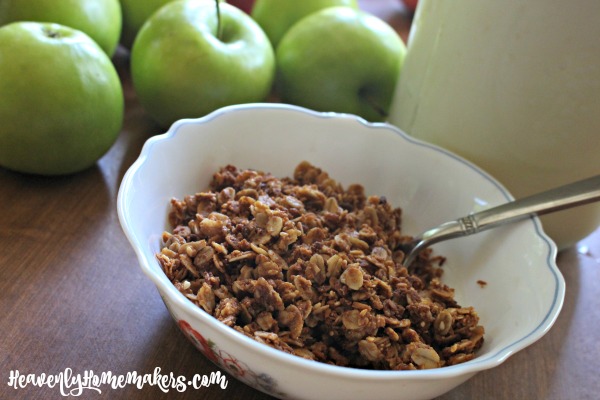
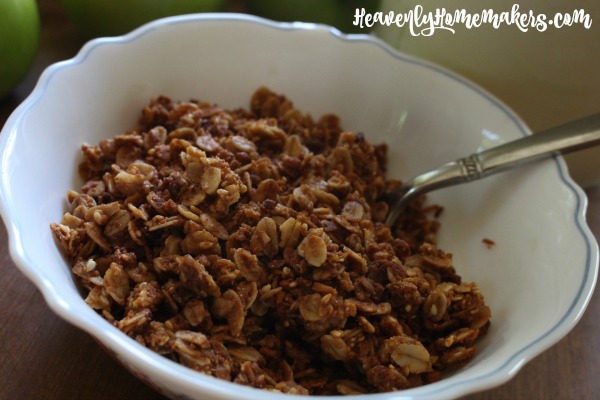
Save big bucks and use the finest ingredients when you make this Easy Peanut Butter Honey Granola!

Confession: Sometimes I buy granola at the store. The kind that comes in a box or a bag. The kind that costs more than a pound of grass-fed beef.

Why do I do this? Because it’s convenient. It’s tasty. It’s fun. And because life gets extra full, therefore sometimes store-bought conveniences feed the family and I don’t even feel bad about it.

Interesting fact: I used to think I was busy (because indeed, I was certainly never bored). Then God suddenly and beautifully made us a foster family. Overnight, I learned what “busy” was in a brand new way. Simultaneously, I began to learn that nothing in this world matters more than loving God and loving people.

Never again will I say, “I’m so busy!” with a negative or complaining heart (or at least it is my goal to keep life in perspective like this). How blessed we are to have such full lives, surrounded by so much love and goodness from the Father! He is the ultimate, perfect provider.

I am learning that if we are “busy” loving God and loving people, the rest will all fall into place, whether it’s schedules, appointments, work, laundry, meals, school, dishes, or any of the many tasks that fill our days. And for the record, sometimes I am “busy resting” because God provides for that too and I’ve learned to take full and glorious advantage of down time and moments of quiet.

Well now, what an interesting way to introduce our new Peanut Butter Honey Granola recipe. I can’t help it. I bought some Peanut Butter Granola in a bag on one of “those days” but wanted to try my hand at making some at home with all of our favorite whole food ingredients and for a fraction of the price.

Our 4-year old foster son jumped right in to help me because “I wike to help Mama Copp cook!” Seriously, this is the best “busy” I’ve ever been.

Easy Peanut Butter Honey Granola

Easy Peanut Butter Honey Granola
 
Save Print
Author: Laura
Serves: 10-15
Ingredients
  • ⅔ cup coconut oil
  • 1 cup natural peanut butter
  • Pinch of sea salt
  • ½ - ¾ cup honey
  • 4 cups rolled oats
  • 1 cup shredded unsweetened coconut
  • ½ cup sesame seeds
Instructions
  1. Measure coconut oil, peanut butter, salt, and honey in a large cooking pot.
  2. Heat and stir together until melted and well-combined.
  3. Remove from heat.
  4. Add oats, coconut, and seeds, stirring well.
  5. Spread mixture on a parchment paper-lined cookie sheet.
  6. Bake in a 350 degree oven for 20 minutes, then stir.
  7. Bake for 10 minutes more.
  8. Remove from oven and allow granola to dry on the countertop for about one hour.
  9. Transfer granola to an air tight container.
3.5.3229


Stir some mini chocolate chips for an extra special breakfast or snack.

What’s your favorite flavor of granola?

Heavenly Homemaker's Club Members: Access your homepage and all your fantastic resources here! Not a member yet? Please join us!

Lilla Rose Fall Sale!

October 1, 2018 by Laura Leave a Comment

This post may contain affiliate links. For more information, please see our disclosure policy.

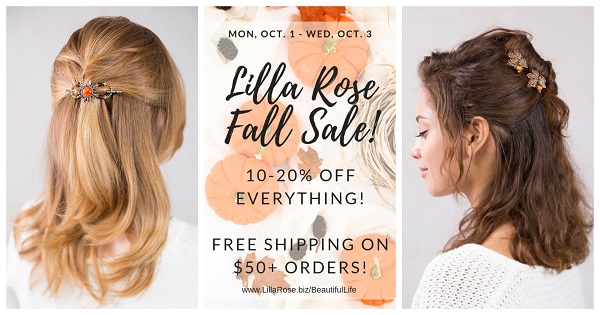
It’s a Lilla Rose Fall Sale!

Yay! I’m here right now to let you know about a wonderful fall sale that Lilla Rose is having today through Wednesday!

(And you KNOW how much I love my Flexi clips…so quick and easy to do my hair in the morning, and super-comfy! They also work in all types of hair…from baby fine to super long and thick! Be sure to watch this sizing video or this one to find your perfect size. And have no worries, as Lilla Rose has a 90-day sizing guarantee for free exchanges!)

Lilla Rose has just released some very cute styles that are very fun for fall! Charlotte’s Web, pumpkins, beautiful Maple Leaves, and more! And the Flexi-of-the-Month, “Solana,” is a warm fall sun!

The great part is that all of these new releases and other select styles are all on sale at 20% off!
Plus, you get 10% off Everything Else!

And on top of the discounts on absolutely every item on Paula’s website, you get FREE SHIPPING as well as a FREE U-PIN on all orders of $50 or more!!!…

Did I say that this was a wonderful sale, or what?! Yep, you won’t want to miss this one, for sure!

Fine Print: Sale starts at 7 am PT/10 am ET on Monday, Oct. 1 and ends at midnight Pacific on Wednesday, Oct. 3, 2018. All items are limited supply and available only while supplies last. Please contact my awesome independent stylist Paula Ramm if you have any questions at all…she will be happy to help you with anything you need!

Heavenly Homemaker's Club Members: Access your homepage and all your fantastic resources here! Not a member yet? Please join us!

Sweet and Simple Buttery Almond Cookies (4 Ingredients!)

September 30, 2018 by Laura 4 Comments

This post may contain affiliate links. For more information, please see our disclosure policy.

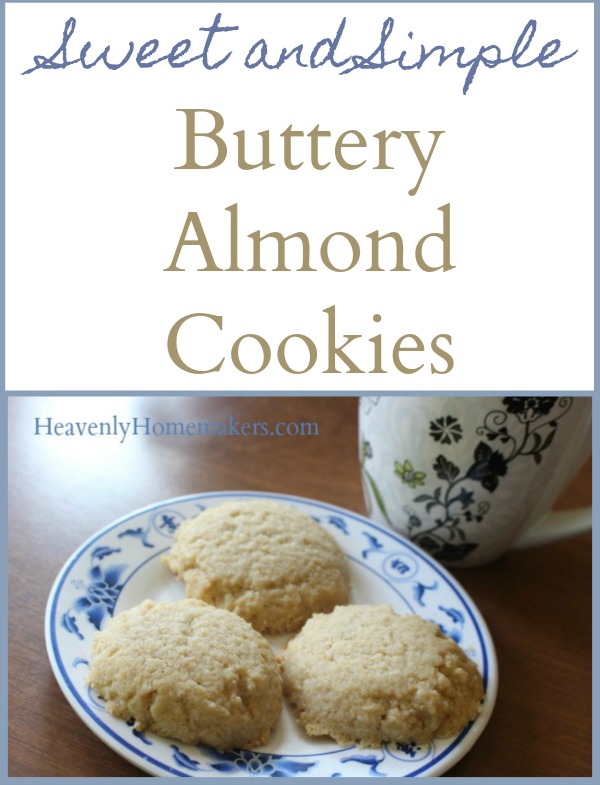
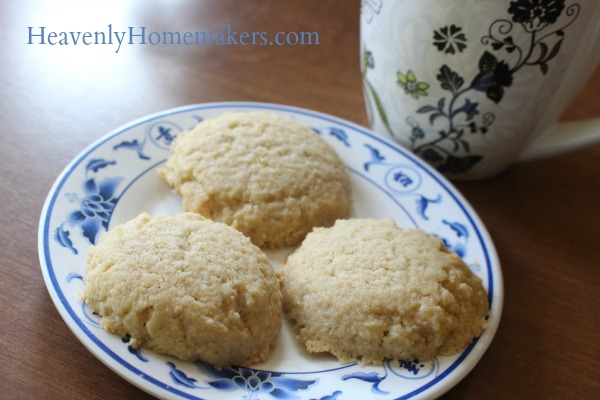
Once upon a time I decided I wanted the delicious flavor of Almond Extract in a light and buttery cookie. So I mixed up these Sweet and Simple Buttery Cookies and I subbed Almond Extract for Vanilla Extract. Just like that, we had a batch of Buttery Almond Cookies. Recipe tweaks? They can be ridiculously easy. (Just like the recipe I’m about to show you!)

Recently one of my favorite 6th grade girls was at our house visiting. She LOVES cooking (almost as much as I do), so as she tasted each item of food from our table that day, she asked about the ingredients and how I had made it. Super cute!

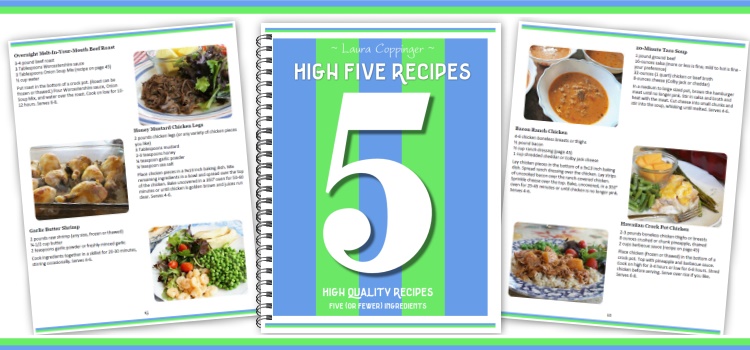
Later, she told her mom, “Ms. Laura’s recipes are all so simple. Most of them only have 5 or fewer ingredients!” Her mom laughed with the proclamation, because you see, her mom is the one that designed this book for me:

Indeed. All of Ms. Laura’s recipes are simple, and many of them do only use five or fewer ingredients. High fives all around!

You’ll find our High Five Recipes eBook here, and you’ll love it because there are 111 recipes that come together in no time. Meanwhile, we’ve got a new cookie recipe to share, and it uses only 4 little ingredients!

If you’ve tried our Sweet and Simple Butter Cookies recipe, you’ll see that this is the exact same recipe with a key flavor ingredient switched. Sub vanilla extract for almond extract and suddenly the taste of this cookie changes significantly. I can’t decide which I like better, but it doesn’t matter because they are both buttery and light, low in sugar, and delicious! How fun that one little tweak creates a brand new cookie!

Buttery Almond Cookies

Sweet and Simple Buttery Almond Cookies
 
Save Print
Author: Laura
Serves: 15-18
Ingredients
  • 1½ cups melted butter
  • ⅓-1/2 cup sugar (raw, white, brown, or sucanat)
  • 1 tablespoons almond extract
  • 3 cups whole wheat flour (I use freshly ground soft white wheat)
Instructions
  1. Cream butter and sugar together in a bowl.
  2. Stir in almond extract.
  3. Mix in flour until well combined.
  4. Scoop Tablespoon-sized balls of dough onto cookie sheets.
  5. Press the dough down with your fingers or a fork.
  6. Bake in a 350 degree oven for 8-12 minutes or until cookies are golden brown.
3.5.3229


Enjoy these cookies with a cup of tea or coffee. Enjoy them with a friend. Enjoy them during quiet time with God.

Get 111 more High Five Recipes to simplify your real food kitchen!

[wp_eStore_fancy1 id=32]

Heavenly Homemaker's Club Members: Access your homepage and all your fantastic resources here! Not a member yet? Please join us!

Simple One Dish Chicken Florentine (For Instant Pot or Crock Pot)

September 27, 2018 by Laura 11 Comments

This post may contain affiliate links. For more information, please see our disclosure policy.

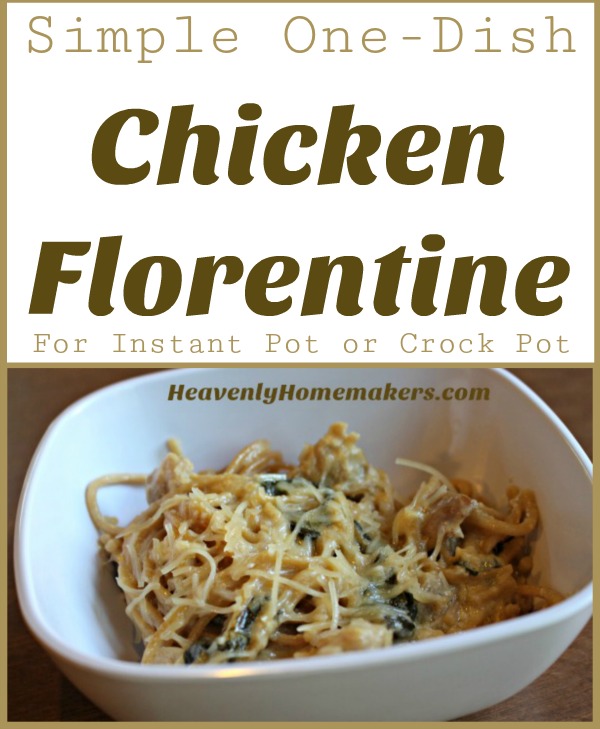
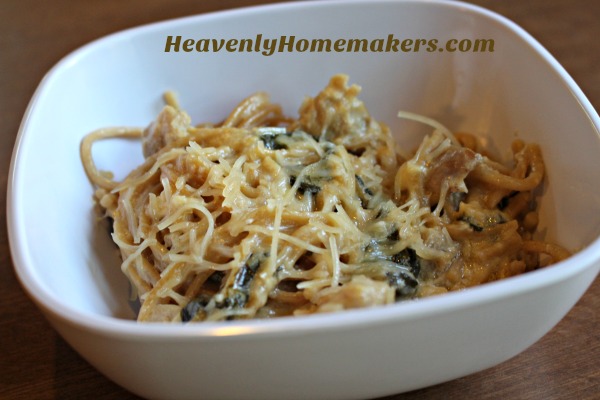
You guys. This entire, delicious meal takes me only 7 minutes of work to prepare. 7 minutes to make One-Dish Chicken Florentine. Meat, pasta, and veggie all in one dish. With 7 minutes of total prep time. Hoorah!

Now, I can’t say for sure because I don’t know the specific needs of the picky people in your life. But I dare say that even picky people might not mind the spinach in this dish. Why? Because you can’t taste it. It doesn’t really create a weird texture. It really just adds color variety (and hidden nutrients, shh!).

I personally like to serve a tossed salad on the side of this dish, because the more greens, the merrier. But in a pinch, just serve this quick-to-make dish all by itself and you’re golden!

Can we all stand and applaud the fact that we don’t have to precook our chicken or pasta when making this? That’s why it only takes 7 minutes of prep time! Raw chicken, uncooked noodles, dump it all into an Instant Pot or Crock Pot and dinner takes care of itself!

Simple One-Dish Chicken Florentine

Simple One Dish Chicken Florentine (For Instant Pot or Crock Pot)
 
Save Print
Author: Laura
Serves: 6-8
Ingredients
  • 1½ pounds boneless chicken thighs or breasts
  • 3 cloves fresh garlic, minced or 1 Tablespoon garlic powder
  • Sea salt to taste
  • 6 cups fresh spinach leaves
  • 16-ounces whole grain spaghetti (uncooked)
  • 2 cups heavy whipping cream
  • 4 cups chicken broth
  • 3 cups shredded mozzarella cheese
Instructions
  1. Cut chicken into bite-sized pieces. (I use kitchen shears for this which makes it super fast!)
  2. Place prepared chicken in the bottom of your Instant Pot or Crock Pot.
  3. Sprinkle with garlic, salt, and spinach leaves.
  4. Break spaghetti noodles in half and place on top.
  5. Pour on chicken broth and cream.
  6. Top with shredded cheese.
  7. Seal Instant Pot and cook on the "Poultry" setting for 15 minutes, doing a quick release after the time runs out.
  8. OR Cook in a Crock Pot on low for 6 hours.
  9. Stir and serve.
  10. Garnish with grated parmesan if you like!
3.5.3229

Don’t have an Instant Pot? I held back for years before jumping on the bandwagon. But now that I have one I LOVE how much time and energy it has saved me in the kitchen. This Chicken Florentine is just another recipe to prove how great my Instant Pot makes my real food kitchen life.

But a Crock Pot works too, and will still allow you to create this recipe with just 7 minutes of effort, so use whatever you have!

Want more Simple Recipes?

  • Simple Baked Salmon and Asparagus
  • Simple Crock Pot Chicken Soup with a Kick
  • Simple Skillet Taco Pasta
  • Last-Minute Lentil Chili
  • Simple Sweet and Sour Baked Chicken Legs
  • 20-Minute Taco Soup
  • Simple Cheesy Baked Chicken
  • Simple Creamy Chicken Stew in the Crock Pot
  • Simple Italian Beef and Broccoli Skillet
  • Simple Bacon Ranch Chicken
  • Simple Hawaiian Crock Pot Chicken
  • Simple Taco Rice Dinner
  • Simple Last Minute Nacho Plate
  • Simple Chicken Cheeseballs with a Kick
  • Simple Beanie Weanies
  • Simple Crock Pot BBQ Spareribs
  • Simple Pizza Chicken Bake
  • Simple Italian Chicken and Green Bean Bake
  • Last Minute Creamy Bacon Spaghetti
  • Simple Hamburger Soup
  • Simple Parmesan Broiled Fish
  • Simple Overnight Saucy Crock Pot Chicken
  • Simple 15-Minute Meal
  • Simple Overnight Melt-in-Your-Mouth Beef Roast
  • Simple 3-Cheese Crock Pot Pasta
  • Simple Oven Fried Chicken
  • Simple Honey Mustard Chicken Legs
  • The Easiest Mashed Potatoes in the World
  • Simple Garlic Butter Shrimp
  • Simple Crunchy Ranch Chicken Strips
  • Simple Crock Pot Shredded Ranch Chicken (for salad or tacos)
  • Simple Crock Pot Pizza Casserole
  • Simple Barbecue Beef Roast
  • Simple Spanish Rice Bowls
  • Simple Roasted Rotiserie Chicken
  • Simple Green Chile Chicken
  • Simple Tex-Mex Creamy Chicken
  • Simple Waffle Omelets
  • Simple Crock Pot Taco Pasta
  • Simple Grilled Chicken
  • Simple Hawaiian Beef Roast
  • Simple Crock Pot Creamy Stew Meat
  • Simple Cheese Stuffed Burgers
  • Simple Hashbrown Casserole (For Instant Pot, Crock Pot or Oven!)
  • Simple Lasagna Casserole (For Instant Pot or Crock Pot)
  • Simple Chili Mac
  • Simple Bacon Cheeseburger Casserole
  • From Burrito Bar to Casserole (a 5-Minute Meal!)
  • Simple Bacon Cheeseburger Roll
  • Simple Garlic Parmesan Chicken Legs
  • Super Simple Lasagna
  • The Simplest White Chicken Chili
  • Simple Lentil Nachos
  • Simple Tuna Patties
  • Simple Banana Pancakes
  • Simple Crock Pot Applesauce BBQ Chicken
  • Simple Hashbrown and Egg Nests
  • Simple Cornbread Waffles with Chili
  • Simple Veggie Fritters
  • Simple Lemon Garlic Chicken Legs
  • Simple Noodle Soup
  • Simple Three Cheese Spaghetti
  • Simple Crock Pot Salsa Shredded Beef
  • Cheeseburger Hashbrown Cups or Casserole
  • Easiest Beef Roast in the Instant Pot

Join Simple Meals!

728x90

We love how Simple Meals has been saving family time for so many, and helping people put great food on the table each night! Join us for just $1/week!

[wp_eStore_subscribe_fancy id=28]

Heavenly Homemaker's Club Members: Access your homepage and all your fantastic resources here! Not a member yet? Please join us!

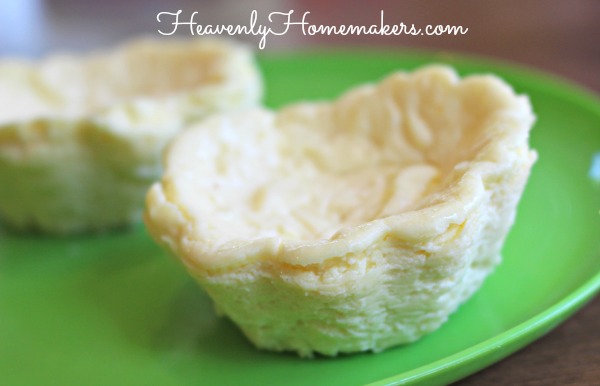
Mini Crustless Lemon Cheesecakes (Low Sugar!)

September 25, 2018 by Laura 8 Comments

This post may contain affiliate links. For more information, please see our disclosure policy.

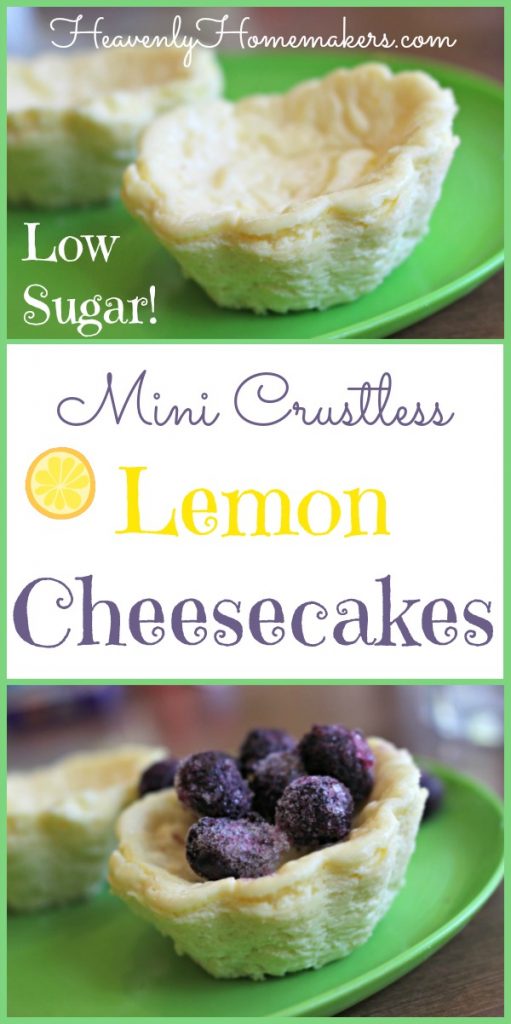
I’ve been wanting to try this Mini Crustless Lemon Cheesecakes recipe idea for months! (Apparently my to-do list is a little bit backed up?)

Why did it take so long to finally give these a try? Goodness, I don’t know. Life. People. Ministry. Unexpected foster care in our home. Graduation. Soccer season. Church camp. Moving not one but TWO sons into the college dorm in August.

We never quite know what God has for us each day, do we? It’s fun to look forward to learning what He has planned. So what if it takes six months to get around to trying a new recipe? Good things come to those who wait.

I met a new friend at my kids’ homeschool basketball tournament back in March. She said, “I make your Mini Crustless Cheesecakes all the time, but I always add lemon. You should try it! And top it with fruit!” Oh man, did that sound good.

Of course I couldn’t wait to try it and share the idea with you!! Except that I did wait. Six entire months.

So here we are, without further ado, and without any more delays (says the girl who actually started writing this post back in July…).

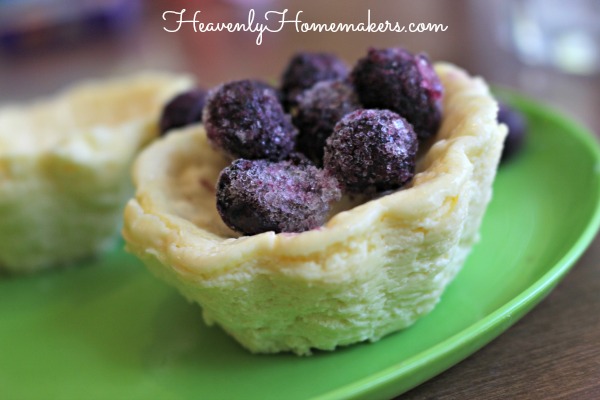
Mini Crustless Lemon Cheesecakes

Mini Crustless Lemon Cheesecakes (Low Sugar!)
 
Save Print
Author: Laura
Serves: 12
Ingredients
  • 16 ounces softened cream cheese
  • 3 Tablespoons lemon juice (or the juice of one lemon, plus zest if you like!)
  • 2 eggs
  • 2 Tablespoons maple syrup or sugar
  • 2 full droppers of liquid stevia
  • 1 teaspoon vanilla extract
Instructions
  1. Blend all ingredients together until smooth.
  2. Pour into 12 muffin cups.
  3. Bake in a 350 degree oven for 20 minutes.
  4. Turn off heat, open the oven door, and leave the cheesecakes in the oven for an additional 20 minutes. (Cheesecakes will puff up during baking but deflate while continuing to sit in the oven.)
  5. Transfer cheesecakes to the fridge and chill for at least two hours before serving.
3.5.3229

Add fresh or frozen fruit to your cheesecakes for an added burst of flavor.

P.S. I find it easiest to bake my Mini Cheesecakes in a silicone baking pan like this. Once they’ve cooled, they pop right out and the pan is super easy to wash out!

Heavenly Homemaker's Club Members: Access your homepage and all your fantastic resources here! Not a member yet? Please join us!

The BEST Chocolate Chip Cookie Cups

September 23, 2018 by Laura Leave a Comment

This post may contain affiliate links. For more information, please see our disclosure policy.

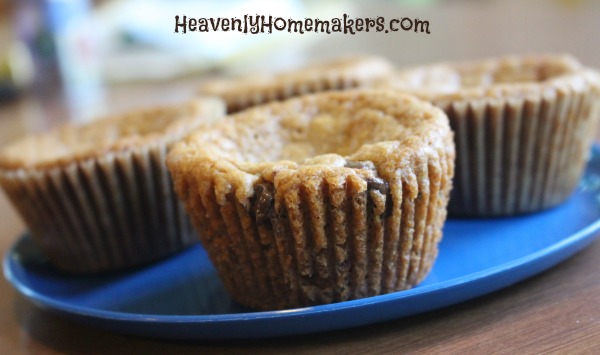
In case you are wondering, these Chocolate Chip Cookie Cups truly are the best. I didn’t just make that up. It’s a proven fact.

Who am I kidding? I rarely eat sugar so I only see and smell these gems when I make them for my family or for guests. But I remember the deliciousness and therefore, I taste them in my mind. (For the record, when I smell something wonderful I feel as though I’ve tasted it. Am I the only weird one? Who can relate?)

Ultimately, you can take any of your favorite cookie recipes and bake them in a muffin cup for a fun cookie twist. But my family has declared THIS Chocolate Chip Cookie recipe to be the best, and who am I to argue?

Scoop your cookie dough (with a large scoop like this one) into a prepared muffin cup. Bake and be happy. Eat and be happier. (Or just smell them and be happy. That works too.)

The BEST Chocolate Chip Cookie Cups

The BEST Chocolate Chip Cookie Cups
 
Save Print
Author: Laura
Serves: 24
Ingredients
  • 1 cup melted butter (2 sticks)
  • 1½ cups brown sugar
  • 2 eggs
  • ½ teaspoon baking soda
  • ½ teaspoon sea salt
  • ½ teaspoon vanilla extract
  • 2¼ cups whole grain flour, more or less as needed (I use freshly ground soft white wheat)
  • 1 cup chocolate chips
Instructions
  1. In a large mixing bowl, stir together butter and brown sugar.
  2. Add eggs, baking soda, salt, and vanilla.
  3. Stir in flour until well combined (tweaking the amount as needed depending on the flour you are using)
  4. Fold in chocolate chips.
  5. Use a large cookie scoop to add dough to 24 prepared muffin tins.
  6. Bake in a 350 degree oven for 15-20 minutes or until cookie cups are golden brown.
3.5.3229

There’s something about baking these cookies into a muffin cup that makes them extra chewy and good. These Chocolate Chip Cookie Cups are awesome for packing in a lunch box or taking on the road! Make these ahead and freeze them for easy access to a great dessert when you need one.

While this recipe is made with real butter (yay!) and whole grain (hooray!), it isn’t low in sugar, so don’t go too crazy. These Chocolate Chip Cookie Cups were meant to be shared!

Want to really have fun (while you’re sharing, that is)? Put a scoop of vanilla ice cream on top of these cookie cups when they first come out of the oven. Of course then the high sugar dessert becomes an even higher sugar dessert. But wow, so good.

Heavenly Homemaker's Club Members: Access your homepage and all your fantastic resources here! Not a member yet? Please join us!

The BEST Way to Make Mashed Potatoes in the Instant Pot

September 20, 2018 by Laura 10 Comments

This post may contain affiliate links. For more information, please see our disclosure policy.

Sometimes a girl thinks she is onto something when she learns to make Mashed Potatoes in the Instant Pot. Then her friend Leesa is like, “Girl, you have to try it my way instead.” And then you try making Mashed Potatoes Leesa’s way and you fall down dead.

How is it that the best foods we all love can actually taste even better when we tweak a few ingredients and methods? Can it be that these Mashed Potatoes take so little effort to make? And is it actually possible that making Mashed Potatoes in the way I am about to describe actually adds more nutrients to this delicious dish?

Yes. So these potatoes are better tasting AND better for us, all without any extra work. Hoorah!

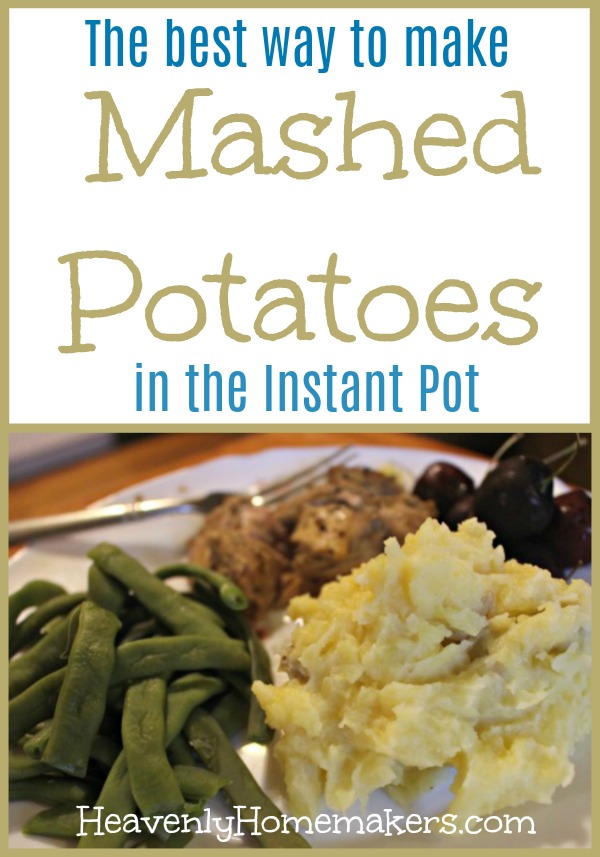
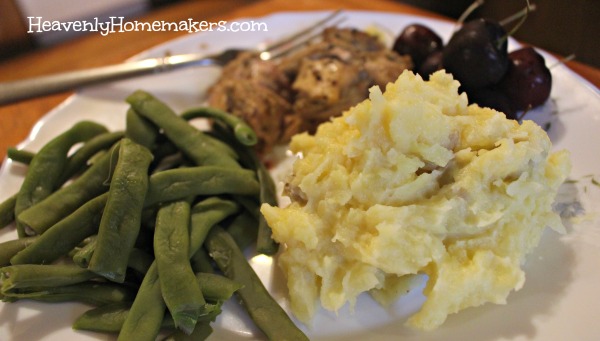
The BEST Mashed Potatoes in the Instant Pot

What takes these great Mashed Potatoes in the Instant Pot from good to BEST? Chicken broth. Indeed, instead of simply cooking our potatoes in water, then draining and adding milk and butter later – we are going to cook the potatoes in chicken broth and milk. No draining needed! The nutrients and flavor absorb into the potatoes, we mash them and add butter and salt, then voila. Amazing Mashed Potatoes in the Instant Pot!

NOTE: Never fear the fat! These are full of good fats, so let’s emphasize the GOOD in that sentence. Broth, real butter, and whole milk are all good, nourishing foods. Our brains need good fats for good health. So give a cheer for mashed potatoes that taste amazing and offer great nourishment too!

Don’t have an Instant Pot?

Make these in the Crock Pot instead! Cook on low for 8-10 hours or hi for 5 hours. Mash, add butter and salt, and serve!

Wait. You don’t have an Instant Pot?

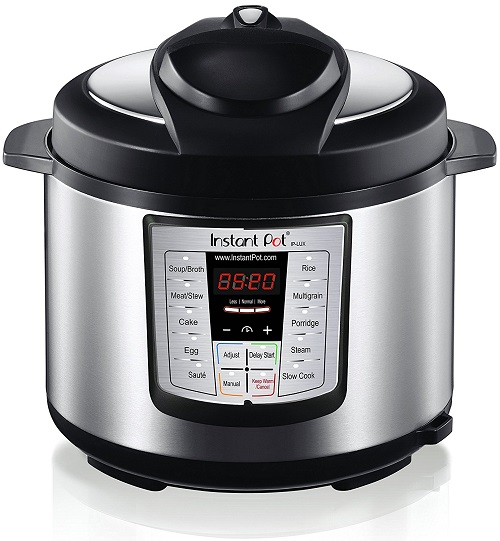
I was with you for years, putting it off forever, not wanting to jump on the Instant Pot bandwagon. Then so many worked to convince me that I finally jumped. I’ve found that investing in this lovely appliance truly has saved me time and energy in my real food kitchen.

I LOVE my 8-Quart Instant Pot (because I always make large amounts of food). Some prefer the 6-Quart Instant Pot because it comes to pressure faster.

Beyond the mashed potato, my favorite way to use my Instant Pot is to cook 5-7 pounds of frozen hamburger meat in 30 minutes. For real!

And now for my friend Leesa’s wonderful Mashed Potato recipe and instructions!

The BEST Mashed Potatoes in the Instant Pot

The BEST Way to Make Mashed Potatoes in the Instant Pot
 
Save Print
Author: Laura
Serves: 6-8
Ingredients
  • 5 pounds Yukon gold potatoes
  • 1 cup chicken or beef broth
  • 1 cup whole milk
  • Butter to taste (I use one stick)
  • Sea salt to taste
Instructions
  1. Wash and quarter potatoes.
  2. Put them onto the trivet inside your instant pot along with the chicken broth and milk.
  3. Seal and cook at high pressure for 10 minutes.
  4. Quick release the pressure.
  5. Don't drain the liquid!
  6. Add butter and salt to your liking (the more butter the better, I always say!)
  7. Mash with a potato masher and serve!
3.5.3229

These Mashed Potatoes are a must try! Let me know what you think!

Heavenly Homemaker's Club Members: Access your homepage and all your fantastic resources here! Not a member yet? Please join us!

Easy Whole Grain Orange Poppyseed Muffins

September 18, 2018 by Laura 7 Comments

This post may contain affiliate links. For more information, please see our disclosure policy.

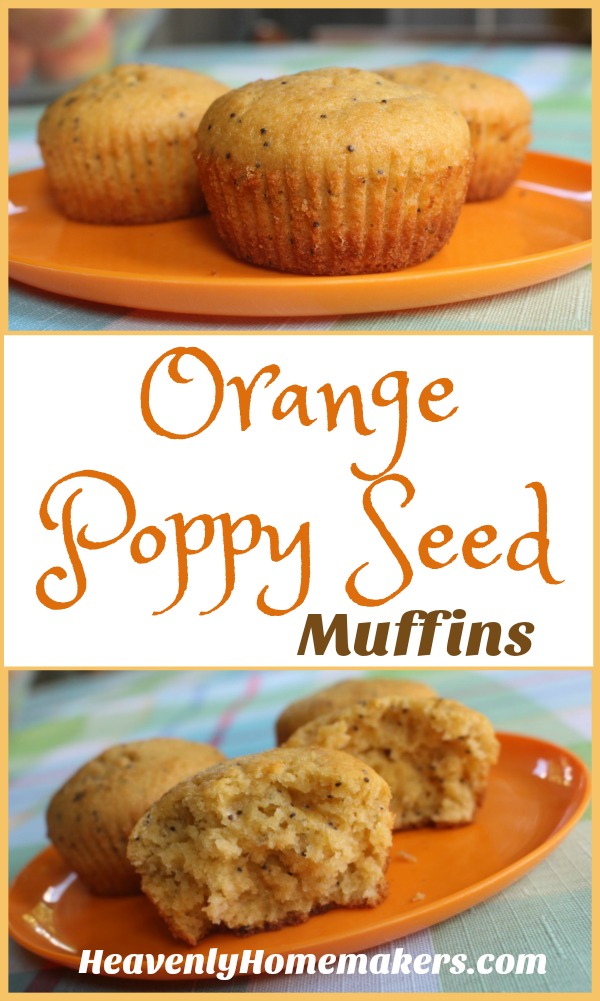
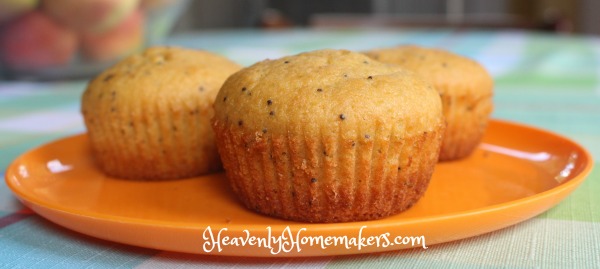
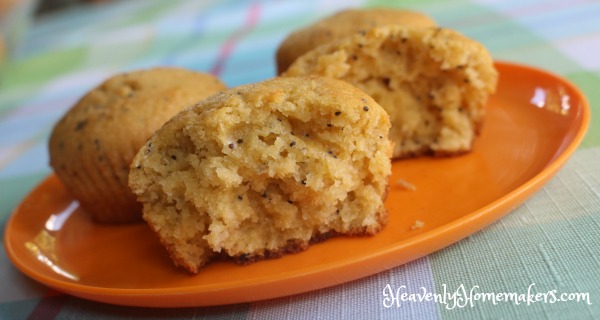
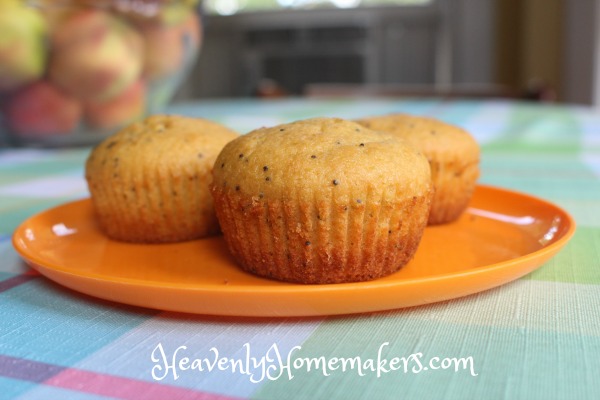
Oh my goodness, can you say “fluffy?” These Orange Poppyseed Muffins are so light and fluffy, the fact that they are made with whole grains and are low in sugar will be easily overlooked.

Allow me to share with you the ingredients that make these muffins so incredible. Drum roll please:

  1. Almond Extract: Do not skip this ingredient. It takes these muffins up a thousand notches.
  2. Orange Juice: The OJ gives a perfectly light citrus flavor that pairs perfectly with the almond extract.
  3. Whole Wheat Pastry Flour: I grind this myself from soft white wheat berries. Oh my goodness, is this stuff amazing! (But if you need to eat GF, I believe your favorite flour blend will work just as well in these muffins!)
  4. Poppyseeds: What even is a poppyseed? What exactly do these add to the recipe? I have yet to figure this out after all my years of baking.

Many times I’ve considered leaving the poppyseeds out of my Poppyseed Bread or Muffins, simply because I can’t figure out the role they play (aside from the fact that a Poppyseed Muffin wouldn’t be a Poppyseed Muffin without Poppyseeds, and that’s what gives the bread/muffins their name). They have no taste, they don’t make the muffin rise, therefore they seem to only be an aesthetic ingredient.

Who can help me solve the mystery of the Poppy Seed? What is its purpose? Who decided to add them to breads and muffins? We may never know…

But no matter. Go make these muffins and then eat one (or three) fresh out of the oven with a glass of milk or a cup of coffee or tea. They are ridiculously delicious!

Whole Grain Orange Poppyseed Muffins

Easy Whole Grain Orange Poppyseed Muffins
 
Save Print
Author: Laura
Serves: 18-24
Ingredients
  • 3 cups whole wheat pastry flour
  • ½ cup sugar or sucanat
  • 1½ teaspoons baking powder
  • 1 teaspoon sea salt
  • 1 Tablespoon poppyseeds
  • 3 eggs
  • 1¼ cups orange juice
  • 1 cup melted butter
  • ½ teaspoon vanilla extract
  • 1 teaspoon almond extract
Instructions
  1. Mix dry ingredients in a large bowl.
  2. Add eggs, orange juice, and melted butter.
  3. Stir until just mixed (but do not over-stir).
  4. Scoop batter into 18-24 prepared muffin tins.
  5. Bake in a 400 degree oven for 18-25 minutes or until muffins are golden brown.
3.5.3229

By the way, you’ll likely notice the similarity of this muffin recipe with my Orange Glazed Poppyseed Quick Bread. I tweaked that recipe just a bit to make these simple muffins. I love how they turned out!

Pssst! Want to keep Muffin Mix on hand to sub out for the dry ingredients in recipes like this? Simple Mixes to Save the Day truly do save my day over and over. Find our Muffin Mix Recipe and many more in this delightful treasure!

Heavenly Homemaker's Club Members: Access your homepage and all your fantastic resources here! Not a member yet? Please join us!
« Previous Page
Next Page »

Join Our Community!

 Facebook Twitter E-mail Instagram Pinterest

Popular Posts

~ Will All of the Real Moms Please Stand Up?
~ Easy! Stir-and-Pour Whole Wheat Bread
~ How to Make Gatorade
~ 31 Real Food Breakfast Ideas
~ Dear Teenage Girls...
~ When Mom Takes a Step Back
~ The Inexpensive Health Insurance We Love!
~ Let's Talk Real Food Grocery Budgets

Check out our latest posts!

  • Big Family Food and Fun: September 13-19, 2026
  • Big Family Food and Fun: September 6-12, 2026
  • Big Family Food and Fun: August 30-September 5, 2026
  • Big Family Food and Fun: August 23-29, 2026
  • Big Family Food and Fun: August 16-22, 2026
Home  ~  Simple Meals  ~  Club Membership  ~  Shop  ~  Privacy Policy  ~  Disclosure  ~ Contact

Copyright © 2026 · Beautiful Pro Theme on Genesis Framework · WordPress · Log in