Heavenly Homemakers

Encouraging women in homemaking, healthy eating and parenting

  • Home
    • About
    • FAQs
  • Recipes
    • Bread and Breakfast
    • Condiments
    • Dairy
    • Main Dishes
    • Side Dishes and Snacks
    • Desserts
    • Gluten Free
    • Instant Pot
    • Crock Pot
    • Heavenly Homemaker’s Weekly Menus
  • Homemaking
    • Real Food Sources
  • Store
  • Contact
    • Advertise
    • Disclosure
    • Privacy Policy
  • Simple Meals
  • Club Members!

Easy 5-Minute Frozen Yogurt Cups

September 8, 2016 by Laura 6 Comments

This post may contain affiliate links. For more information, please see our disclosure policy.

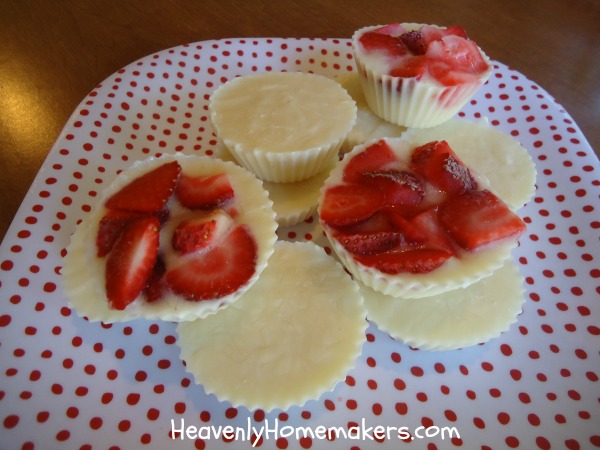
I think I just discovered my new favorite snack. Look at these adorable Frozen Yogurt Cups!
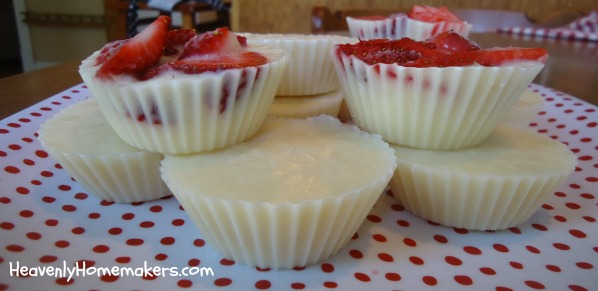
Frozen Yogurt Cups

How is it that just when I think there can’t possibly be any more great new food ideas, I come across another wonderful new way to make something delicious and fun? I love how many wonderful ways we can enjoy real food.

I am one of the biggest food geeks. Nobody loves food as much as I. Except for maybe you, which is why you and I have so much fun together here. Isn’t food so very much fun!?!?!!!!!!
frozen yogurt2

At the very least, we all love to eat. It’s just that some of us like to also gawk at our groceries, get a thrill out of creating fun menus, and dream daily of new recipe ideas. Occasionally we might tear up when we look at the full shelves in our beautiful pantry. Some of us.

All this excitement over little frozen yogurt cups. Hey. You have no idea. I saw this idea and loved it, but I didn’t know that I would love it, love it. But the easiness of this idea! The endless options of what can be done to create variations that every family member will like! The deliciousness.
frozen yogurt4

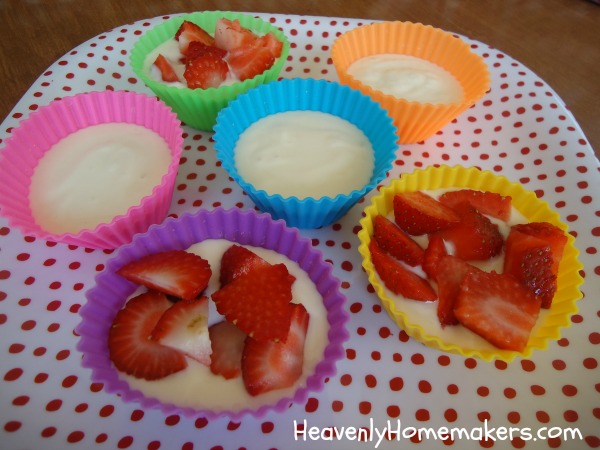
Because making Frozen Yogurt Cups is so very easy, this would be a great “recipe” to hand over to your kids to make. Everyone can create these with their favorite goodies (granola, berries, nuts, peanut butter, chocolate chips…).

You can buy pre-made, flavored yogurt if you like, but since many store-bought options are so loaded with sugar and other not-so-great ingredients, I much prefer to buy or make Whole Milk Plain Yogurt and add my own sweetener and vanilla. If you don’t make your own yogurt, plain store-bought yogurt works just fine for this “recipe.”

It’s easy to make yogurt: learn more here.

Easy 5-Minute Frozen Yogurt CupsYum

Easy 5-Minute Frozen Yogurt Cups
 
Save Print
Author: Laura
Serves: 10-12
Ingredients
  • 1 cup whole milk plain yogurt
  • Sweetener of choice (I used 1-2 Tablespoons real maple syrup)
  • 1 teaspoon vanilla extract
  • Toppings like fresh berries or peaches, granola, chocolate chips, etc.
Instructions
  1. Prepare muffin tins with liners (I used silicone liners which makes this very simple!)
  2. Stir together yogurt, sweetener, and vanilla until well combined.
  3. Scoop 2-3 Tablespoons of yogurt mixture into prepared muffin cups.
  4. Top with fruit if you like.
  5. Freeze for 1-2 hours until solid.
  6. Serve.
  7. Transfer leftovers to a freezer bag and pull out for snacking as needed.

3.4.3177

Easy Frozen Yogurt Cups

To Fantastic Frozen Yogurt Cup Tips:

1) These worked wonderfully in my Silicone Baking Cups. They popped right out once frozen and clean up was so simple!

2) You can use your Frozen Yogurt Cups to make smoothies! I mean, frozen yogurt and berries? This is what smoothies are made of. Throw some Frozen Yogurt Cups into a blender with a little milk and you’re set!

Raise your hand (and leave a comment) if you’re a food geek like me. Raise your hand (and leave a comment) if you aren’t a food geek, but appreciate that other are so that you can enjoy eating yummy food. See, everyone wins. :)

 

Heavenly Homemaker's Club Members: Access your homepage and all your fantastic resources here! Not a member yet? Please join us!

How to Make Homemade Chicken Patties for Sandwiches (Freezable!)

September 6, 2016 by Laura 14 Comments

This post may contain affiliate links. For more information, please see our disclosure policy.

You want to know one of my favorite convenience foods I miss the most since switching to real food? Processed chicken patties for chicken sandwiches. (Bet you never would have guessed that, since that’s what this post is about.)

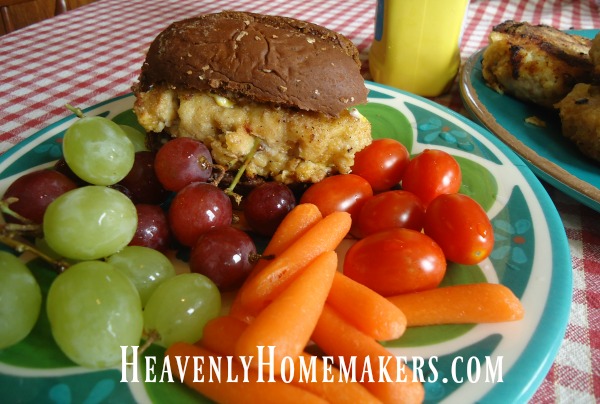
chicken patties9

I grew up microwaving Schwan’s chicken patties and slapping them on white buns for a quick meal or snack after a sports practice. They were yummy and easy and while I couldn’t care less about many other processed convenience items (I gave up boxed pizza rolls several years ago and never looked back) – I do miss the taste and handiness of chicken patties.

So why it’s taken me this long to figure out a recipe that resembles the beloved frozen chicken patties, I do not know. But here I am, finally learning a way to make breaded chicken patties for sandwiches. The best news is that you can make these in bulk and freeze them for a fast, convenient, ready-made meal on a busy day.

Homemade Chicken Patties for SandwichesYum

How to Make Homemade Chicken Patties for Sandwiches (Freezable!)
 
Save Print
Author: Laura
Serves: 15-20 patties
Ingredients
  • 3 pounds ground chicken
  • 4 teaspoons onion powder, divided
  • 3 teaspoons garlic powder, divided
  • 1 teaspoon sea salt, divided
  • 3 eggs
  • 1 cup milk
  • 3 cups whole grain flour (I used whole wheat, but if you need these to be gluten free, use your favorite flour choice)
  • Palm shortening or oil of choice
Instructions
  1. In a large bowl mix ground chicken, 2 teaspoons onion powder, 2 teaspoons garlic powder, and ½ teaspoon sea salt.
  2. Shape meat mixture into 15-20 patties (make them larger or smaller depending on your family's portion size needs)
  3. Beat eggs into a bowl.
  4. Pour milk into a separate bowl.
  5. In a third bowl, mix flour, 2 teaspoons onion powder, 1 teaspoon garlic powder, and ½ teaspoon sea salt.
  6. Heat palm shortening or oil on a griddle.
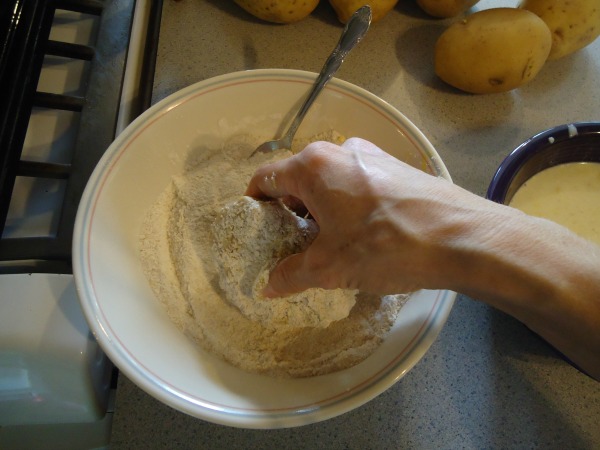
  7. Dip prepared meat patties in egg, then flour mixture, then milk, then flour mixture again.
  8. Place battered chicken patty into oil on the griddle.
  9. Repeat process with each chicken patty.
  10. Cook for 7-10 minutes on each side, mashing down lightly as needed.
  11. Serve right away, or cool and freeze for future use, then rewarm in a 350 degree oven until heated through.
3.4.3177

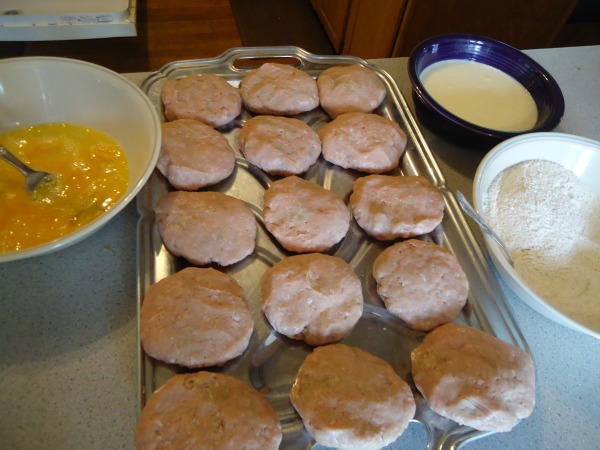
Are you ready to see some ugly chicken patty pictures? This isn’t pretty, friends. Raw meat pressed into patties – well there’s a reason we call stuff like this “processed food.” But take great comfort in the fact that this is all made from real food and wholesome ingredients and ignore the fact that naked ground chicken pressed into a patty really just ain’t purty.

chicken patties2

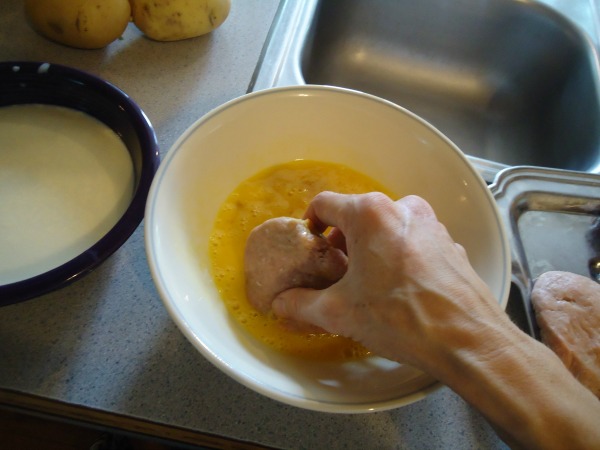
See the patty breading process? First the egg.

chicken patties3

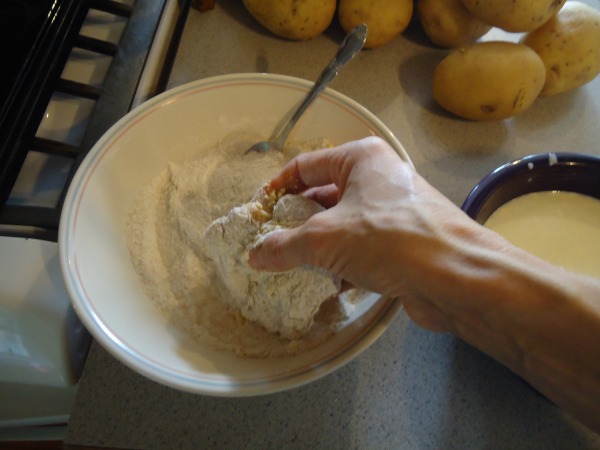
Then the flour.

chicken patties4

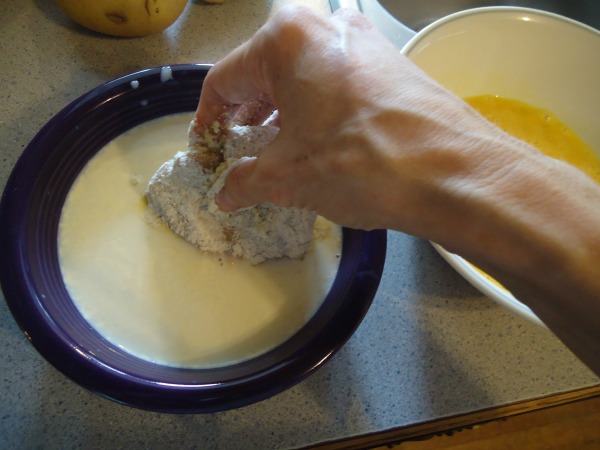
Then the milk.

chicken patties5

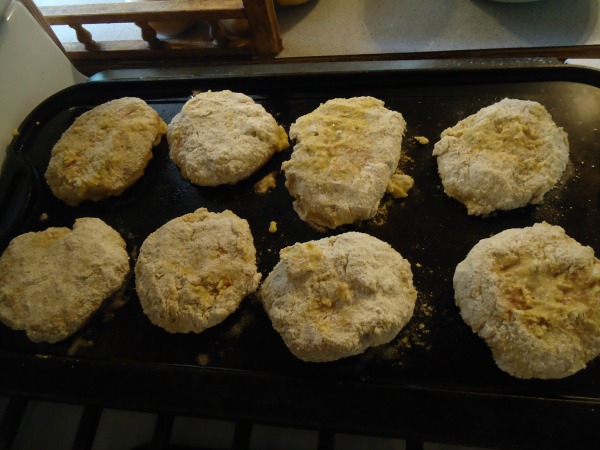
Then the flour again.

chicken patties6

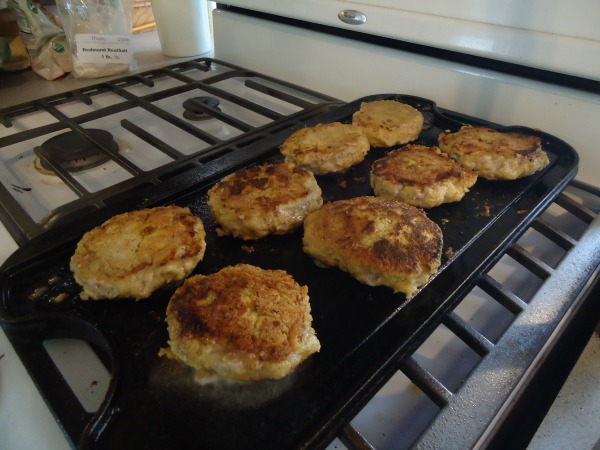
Then comes the part where we fry the patties in oil.

chicken patties7

We watch in amazement as they turn into beautiful chicken patties we can’t wait to put on a bun or between two big leaves of lettuce.

chicken patties8
Sure, it’s thicker than the patties we grew up eating. We like it that way. That means there’s double the meat.

Homemade Chicken Patties for Sandwiches - Freezable

One of the biggest perks is that you can form your chicken patties into any size you need for your family. Have small children? Make small patties. Have teenage boys? Make the patties nice and big. Have some big eaters and small eaters? Make a variety.

The biggest win is that if you make a bunch, you’ll have yummy chicken patties ready to warm up for sandwiches on a day you don’t have time to cook!

Did you grow up eating and loving processed chicken sandwiches? 

Heavenly Homemaker's Club Members: Access your homepage and all your fantastic resources here! Not a member yet? Please join us!

24 Favorite Freezer Foods (with new recipes and ideas coming this month!)

September 4, 2016 by Laura 4 Comments

This post may contain affiliate links. For more information, please see our disclosure policy.

I decided to devote much of the month of September to sharing freezer-friendly recipes and fun freezer food tips. The idea came to me as I was obsessively thinking of everything possible that would keep me from being overwhelmed with the beginning of school and fall soccer season. Freezer foods are a life saver this time of year. That, and calendars. And dry erase boards. And strong coffee.

So far, so good on the “freezer foods save my neck” thing. Except that we’ve already used most of the freezer foods I’d made for the start of our school year. But hey, that’s what they’re for. It’s not like I can’t make more, right?

24 Favorite Freezer Food Recipes

Get excited because I’ve got some fun posts in the works with new recipes and ideas! To kick things off, I thought I’d share 24 of our favorite Main Dish recipes that can be made and frozen for easy meals!

24 Main Dish Freezer Foods

  • Barbecue Beef and Cheese Hot Pockets
  • Bean and Cheese Burritos
  • Beefy Enchilada Bake
  • Calzones
  • Cheesy Beef and Rice
  • Cheesy Salsa Enchiladas
  • Chicken Burritos
  • Chicken Fried Steak Strips
  • Chili
  • Corn Dogs and Corn Dog Muffins
  • Italian Pasta Bake
  • Lasagna Casserole
  • Lazy Dogs
  • Meat and Cheese Burritos
  • Pigs in a Blanket
  • Pizza Pockets
  • Popcorn Chicken
  • Sloppy Cornbread Muffins
  • Sloppy Joes
  • Taco Corn Fritters
  • Three Cheese Garlic Chicken Pasta
  • Turkey Sausage
  • Whole Wheat Pizza Crust
  • Frozen Pizza

There’s no doubt having these made and in the freezer saves me so much time and money! I’ve got breakfast ideas and snack ideas too, so you’ll definitely want to stop by often and get all the good info. (Subscribe to our free weekly newsletter so you won’t miss anything!)

Make this and freeze it for convenience and health!

Make Your Own Frozen Pizza

Think of the money you’ll save and the healthy ingredients you’ll be able to use! Coming up next…Breaded Chicken Patty Sandwiches. (My kids think they taste like store-bought, which I find strangely satisfying.)

Heavenly Homemaker's Club Members: Access your homepage and all your fantastic resources here! Not a member yet? Please join us!

Make Your Own Cracklin’ Oat Bran Cereal

August 16, 2016 by Laura 16 Comments

This post may contain affiliate links. For more information, please see our disclosure policy.

When you think “homemade cereal” you might think tedious, time consuming, or labor intensive. Um, hi. Would I be sharing this recipe if it were any of those things? Ok then.

You mix up the ingredients, you dump it into a pan, you bake it, and you eat it. I’ve already taken it upon myself to double the recipe from what it originally was, because why make a little when we can make enough for two or three meals or snacks? You can make this with wheat flour or gluten free flour – whichever you need.

Huge thanks to my friends Katie and Kim for sharing this amazing recipe idea with me!!

Homemade Cracklin' Oat Bran
I have no idea what the actual boxed variety looks like or tastes like. Don’t know, don’t care. You know why? This homemade version of Cracklin’ Oat Bran is amazing. I’m quite sure making it homemade saves me a nice chunk of change and I know the homemade version is healthier.

Cracklin’ Oat Bran Cereal RecipeYum

Make Your Own Cracklin' Oat Bran Cereal
 
Save Print
Author: Laura
Serves: 10-12 cups
Ingredients
  • 4½ cups rolled oats (ground in the blender to become flour*)
  • 1 cup whole grain flour (I used freshly ground wheat, but you can use rice, sorgham, or another gf option if you like.)
  • ½ cup arrowroot powder
  • 2 cups unsweetened finely shredded coconut
  • 3-5 teaspoons cinnamon (the cinnamon is what makes this really yummy!)
  • ½ teaspoon salt
  • 1 teaspoon baking soda
  • 2 teaspoons vanilla
  • ½ cup sugar of choice (sucanat, coconut palm sugar, or brown sugar)
  • ¼ cup honey
  • ¼ cup maple syrup
  • ⅓ cup melted coconut oil
  • 4 egg whites, whisked to frothy**
Instructions
  1. Mix dry ingredients together in a large bowl.
  2. Add all wet ingredients to the dry ingredients at the same time, mixing until combined. Mixture will resemble large crumbs.
  3. Crumble the mixture onto two baking sheets or Pyrex casserole dishes.
  4. Bake in a 350 degree oven for 20-40 minutes, stirring and breaking up large chunks every 10 minutes. (Baking time varies as every oven is different.)
  5. Once cereal is golden brown, turn off oven but leave the cereal in the oven to crisp up.
3.4.3177

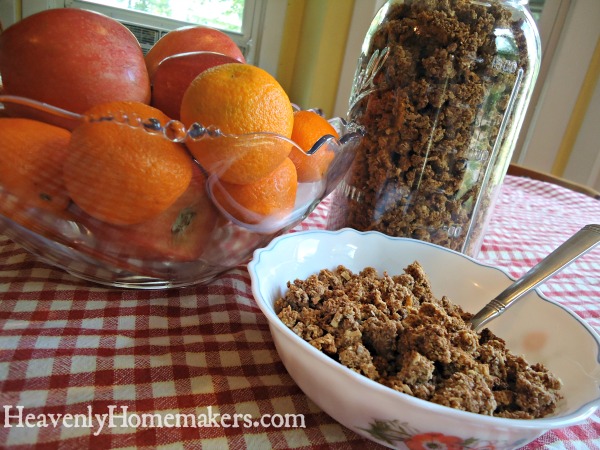
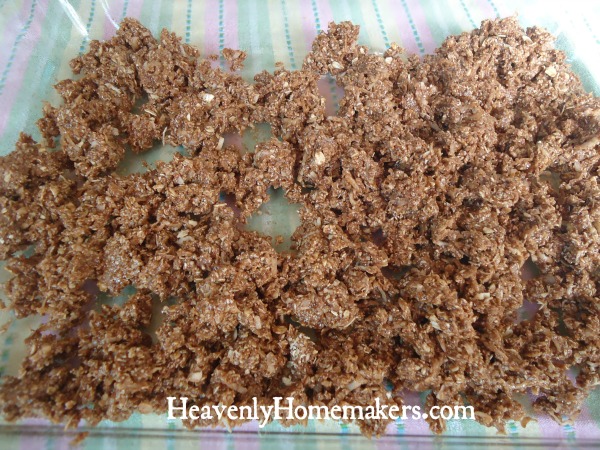
Here’s what the mixture looks like in “crumb form” before being baked. I found it easiest to break up the mixture with my fingers before putting it into the oven. Then, as it’s baking, I use a wooden spoon to break it up more so it becomes bite-sized cereal pieces. :)
cracklin oats1
* It’s very easy to make Oat Flour in your blender. Simply put the 4 1/2 cups of oats in your blender and whirl until the oats become fine. You can read more details about this here. Be sure to use gluten free oats if you need this cereal to be GF!

** I often have egg whites hanging out in my fridge after I make Tapioca Pudding, so this is a perfect way to use them! Otherwise, separate your eggs for this recipe and save the yolks for scrambled eggs. To “whisk to frothy” I simply put the egg whites in a bowl and whip them with a fork for a couple minutes. Easy as that!

Make Your Own Cracklin' Oat Bran

Want other Homemade Cereal ideas?

  • Instant Oatmeal Packets
  • Granola
  • Granola ~ 5-Minute Stop-Top Version
  • Grape Nuts Cereal
  • Dark Chocolate Almond Granola
  • Homemade Peanut Butter Captain Crunch

So far this recipe has been a huge hit with our family! I hope to keep at least one variety of homemade cereal on hand during the school year so I can fall back on it as a breakfast option on busy mornings.

Have you tried any other homemade cereal recipes I should look at?

Heavenly Homemaker's Club Members: Access your homepage and all your fantastic resources here! Not a member yet? Please join us!

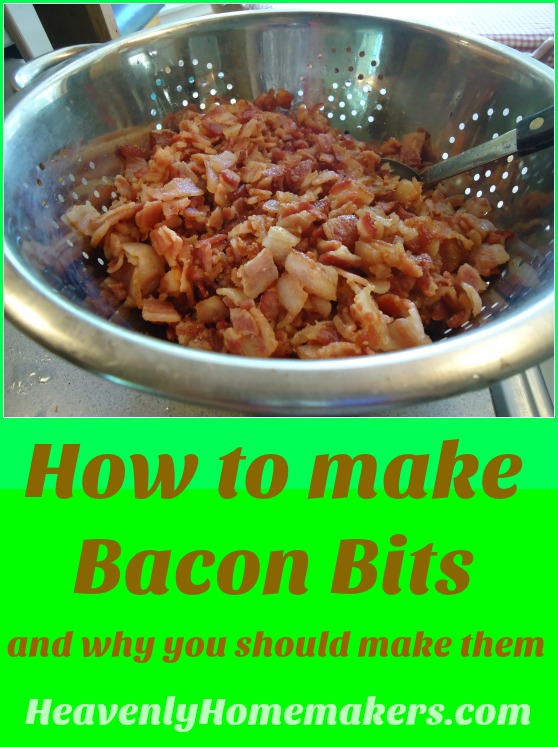
How to Make Bacon Bits and Why You Should Make Them

August 7, 2016 by Laura 17 Comments

This post may contain affiliate links. For more information, please see our disclosure policy.

Five pounds of bacon. That’s how much I cooked at one time a couple weeks ago. This might sound excessive to you, but have you met my family? 

The following are conversations I have every single time I am at the grocery store when people see my shopping cart:

Person: Wow, what are you going to do with all those berries?
Me: Eat them.

Person: Wow, what are you going to do with all that chicken?
Me: Eat it.

Person: Wow, what are you going to do with all those peaches?
Me: Eat them.

And on it goes. Every time. Without fail. At least one person at the store comments on the abundant contents of my shopping cart. Apparently my cart looks like one big party. This is what happens when you have a household of teenage boys. Also, when there is a good price, I buy in bulk. It only makes sense, but apparently people aren’t used to seeing a woman with 15 packages of cheese. I had no idea I was such an anomaly. As if 15 packages of cheese at one time is somehow weird. It’s a day in the life, man. A day in the life.

So back to the bacon. No, we did not eat all five pounds at once. Goodness.

I found it for a fantastic price, which of course means that I bought 10 packages. (Wow, what are you going to do with all that bacon? We’ve been through this already…)

I froze five packs and then proceeded to cook the other five pounds. Why?

  1. Because why cook one when you can cook five and only dirty one pot?
  2. Having bacon bits in the freezer saves oodles of time and means all I have to do is grab the cooked bacon and use it in a meal (see ideas below).
  3. When I cook bacon, my clothes and hair smell like bacon. I’d prefer this scent to be my perfume of choice only occasionally.

How to Make Bacon Bits and Why You Should Make Them

Yum

What’s the easiest way to make Bacon Bits?

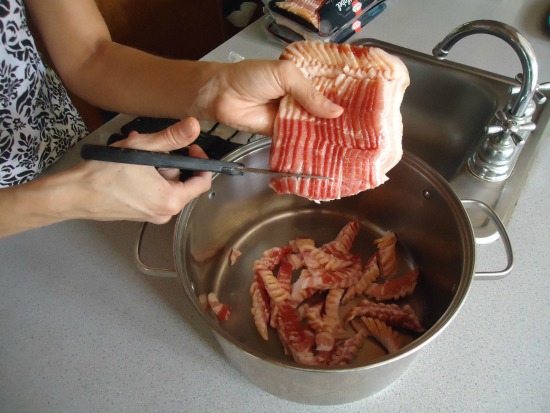
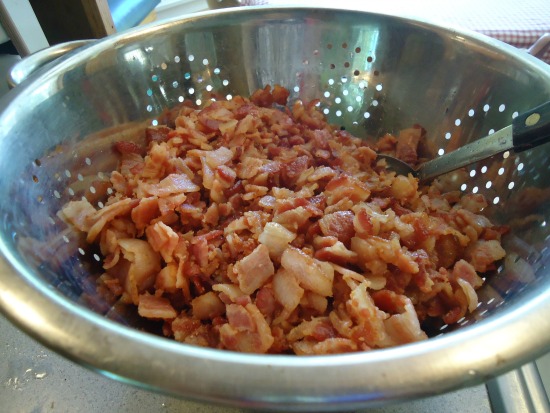
I pick up the entire package of bacon, with the strips all stuck together, and I cut it with kitchen shears like this:

bacon bits 1

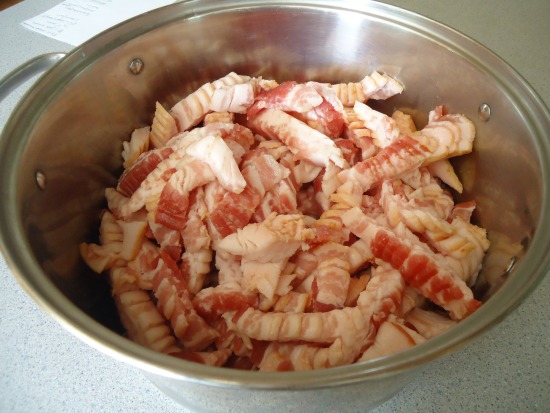
For five pounds, I use my largest pot. Once the pieces are cut, I cover it and cook it on medium heat for about an hour, stirring every once in a while so it cooks evenly. (A smaller amount of bacon would take much less time, but I know nothing about cooking in small amounts.)

bacon bits2

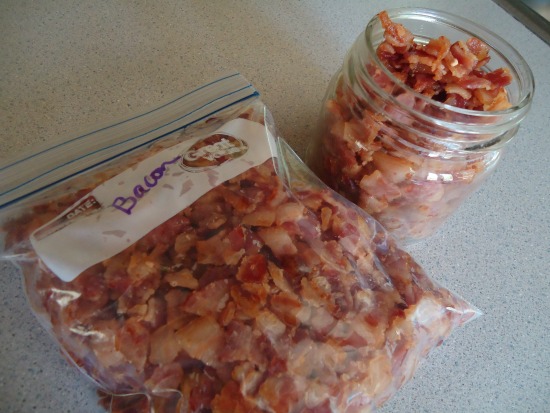
Once the bacon is fully cooked, I strain out the grease, allow it to cool, then package it up in meal-sized portions for the fridge and freezer.

bacon bits4

bacon bits3

What will I do with all the Bacon Bits? As needed, I’ll pull some out to quickly make:

  • Our favorite Bacon Cheesy Eggs
  • BLT Chopped Salad (best salad in the world!)
  • Bacon Cheese Muffins
  • Bacon, Egg, and Avocado Salad
  • Bacon Tomato Dip
  • Easy Make-Ahead Baked Potato and Bacon Casserole
  • Bacon Ranch Hashbrown Casserole
  • Bacon Ranch Chip Dip

In other “why you should make your own Bacon Bits” related news, I believe it is important to be aware that we’re aware that: “Bac’n Pieces™ Bacon Flavored Bits are artificially flavored textured soy flour to imitate bacon pieces.” Ingredients include Textured Soy Flour, Canola Oil, Salt, Caramel Color, Maltodextrin, Natural And Artificial Flavor, Lactic Acid, Yeast Extract, Disodium Inosinate And Disodium Guanylate (Flavor Enhancers), And&Nbsp;Fd&C Red 40.

I’d stick with real bacon if I’m you. It’s not difficult and the taste is no comparison.

Ever made your own bacon bits? Ever get amazed comments at the store because of the amount of food you buy? Ever cut bacon with scissors?

Heavenly Homemaker's Club Members: Access your homepage and all your fantastic resources here! Not a member yet? Please join us!

Freezer Cooking I’ve Been Doing to Prepare for Back-to-School

August 4, 2016 by Laura 18 Comments

This post may contain affiliate links. For more information, please see our disclosure policy.

With a houseful of teenage boys, it’s difficult to get ahead.

I’m talking about food in this case, although I guess the same statement is true in every area of life in a household full of kids. (I’m looking at you, Laundry Pile. Dirty Dishes. Mail. Shoe Closet.) Bah.

This is why I did some freezer cooking a few weeks ago when three outa four of our boys were still at church camp. With hardly anyone here to eat, I actually had leftovers to put in the freezer. Yay me!

I took a few pictures along the way to share with you. Take note that not all freezer cooking involves making casseroles. There are many other ways to get ahead. For instance…

I had a cheese shredding marathon:

school food1

It only takes a few minutes and NO EFFORT to shred 8 packages of cheese when I use my food processor. I ran it through the shred piece, so now I have two big bowls of shredded cheese ready to add to everything we need for the next couple of weeks! (Yes, this will be gone by the time we start school. Whatever.)

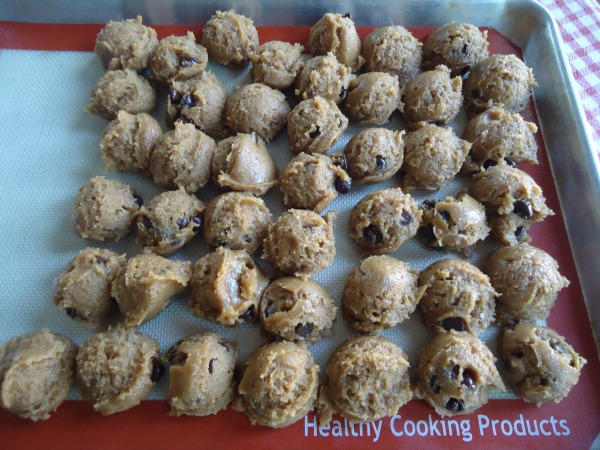
Almost as important as shredded cheese is the double batch of frozen cookie balls I made. These won’t last long once the boys discover them, but I love that they can take out a few and bake them for an afternoon snack. I used this Chocolate Chip Cookie recipe.

school food2

If you don’t have any of these Silicone Baking Mats,
I encourage you to read more about why I love them here!

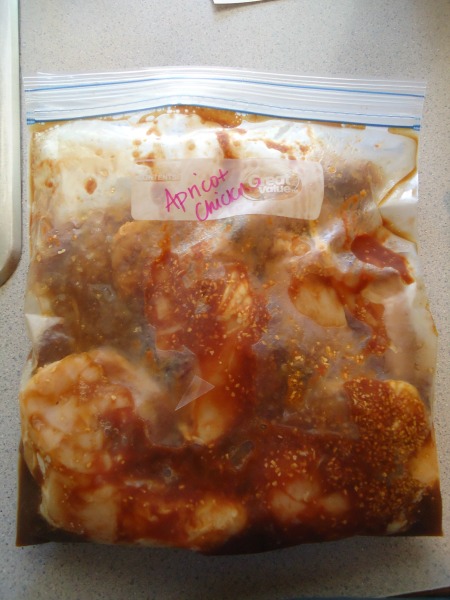
I made two bags of our favorite Apricot Chicken. I’ll dump this into the crock pot on a busy school day. (This is a recipe from our Eat Right Away Collection. These are a must have because they save so much time!)

school food3

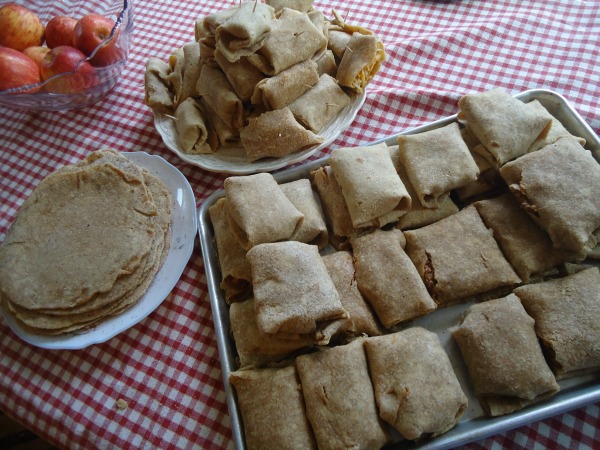
You know I didn’t do all of this, all on the same day, right? No way. But, there was a day I made not one but SIX batches of homemade whole wheat tortillas. That was a tortilla making record for me!

Malachi helped me use the tortillas to make 24 Lazy Dogs and 24 Meat and Cheese Burritos. We still had leftover tortillas for a few quesadillas, so I felt very accomplished that day.

school food4

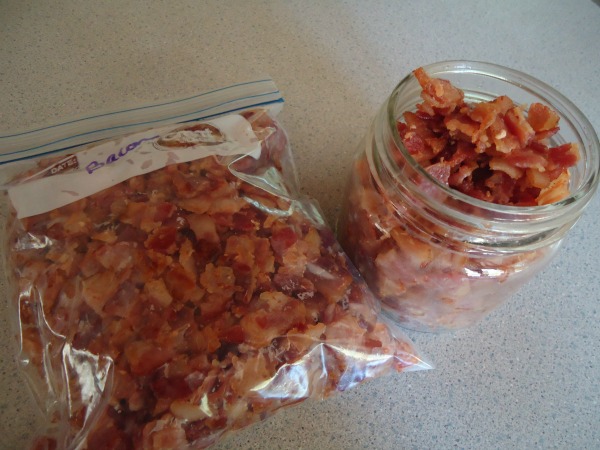
Another time, I cut and cooked 5 pounds of bacon to have on hand for salads and scrambled eggs. More on that later. :)

school food6

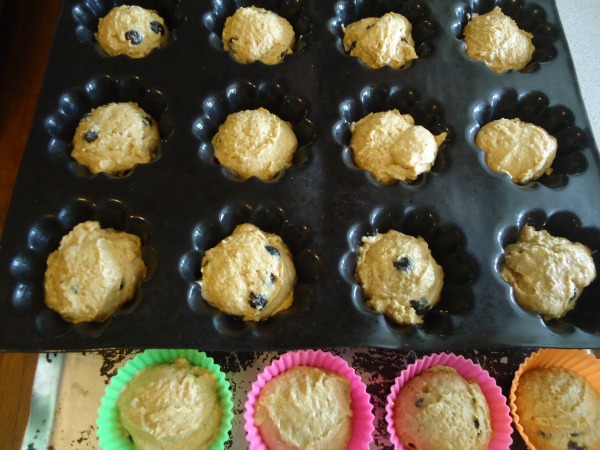
I mixed up a double batch of Blueberry Muffins and froze the batter so we can bake the muffins fresh on a school morning. I love this time saving technique!

frozen muffins

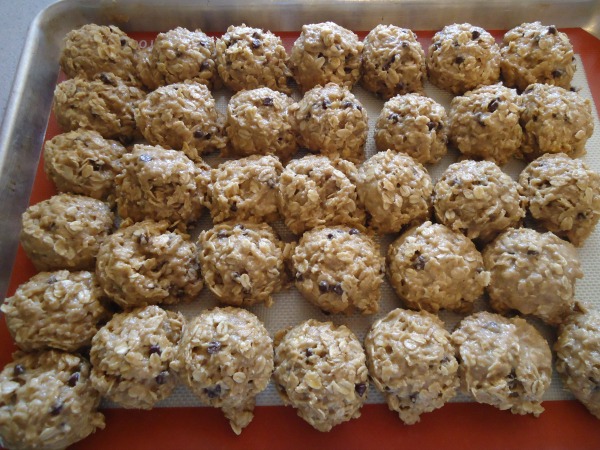
Last, I made a double batch of Giant Breakfast Cookies. Instead of baking them, I froze them into unbaked cookie balls. This means we can take out a few and bake them fresh any morning we want/need them. I’ll share specifics on how to do this another day soon!

breakfast cookies1

I’m hoping to make a triple or quadruple batch of this Real Food “Velveeta” and Rotel Dip for the freezer during the next few days. That will be great to have on hand for Nachos, Spicy Mac and Cheese, or Simple Taco Soup.

Now your turn! Have you done any freezer cooking lately? What have you been making in an effort to get ahead before school starts?

Heavenly Homemaker's Club Members: Access your homepage and all your fantastic resources here! Not a member yet? Please join us!

Easy Chicken With Cream Cheese Sauce

January 3, 2016 by Laura 4 Comments

This post may contain affiliate links. For more information, please see our disclosure policy.

I have a wonderful chicken recipe to share with you. But first, a story.

Cream Cheese Chicken

Once upon a time, I was dating my husband. I mean, my boyfriend. I mean, we weren’t married yet when we were dating but then we did get married and all of that barely has anything to do with this recipe.

But back in the days of our dating, engagement, and early marriage we drove an hour away from our college town each Sunday morning to a small church with a sweet youth group. Matt was their youth leader, teaching Bible classes and forming relationships with the teens. These dear ones became our church family, worshiping with us, throwing us a wedding shower, celebrating our marriage, being a part of our first pregnancy, and welcoming Baby #1 into the world with us.

Some of our fondest memories of those years are looking back to the Sunday afternoons in the homes of various church family members. They took turns signing up to feed us after church. Those meals!!! Talk about a church full of good cooks. The fellowship was precious and I can remember in detail many of the ladies’ specialties. We were very well taken care of, that is for sure.

Well, one of these ladies frequently made chicken that was slathered in the most delicious cream sauce. When we knew Carlene had signed up to feed us, I’d always say to Matt, “Ooooh, I hope she made that chicken this time!” Anytime she did make it and we sat there gushing over the meal, she’d always shake her head at us and say, “Oh. It’s just food.”

Right. Just food. Just the best chicken I’ve ever eaten!!!

Since that time, I’ve always regretted that I never got her recipe. I’m not even kidding you that 20 years later I still get hungry for that meal. Finally about a month ago I thought to myself, “Laura, are you or are you not the lady who invents recipes? For Pete’s sake, woman. Go to the kitchen and figure out how to make Carlene’s chicken.”

You’d think I would have considered this option before.

Well, my friends. I now present to you Not-Quite-Carlene’s Chicken with Cream Cheese Sauce. Make this.

Easy Chicken with Cream Cheese SauceYum

Easy Chicken With Cream Cheese Sauce
 
Save Print
Author: Laura
Serves: 6-8
Ingredients
  • 6 boneless, skinless chicken breasts or thighs
  • 1 beaten egg
  • ⅔ cup whole wheat flour
  • Sea salt and pepper to taste
  • ½ cup palm shortening or other oil for frying
  • 8 ounces softened cream cheese
  • 2 cups chicken broth
Instructions
  1. Mix flour, salt, and pepper.
  2. Dip chicken in egg, then coat in flour mixture.
  3. Fry in oil for just a few minutes on each side. (Do not over cook or the chicken will become dry.)
  4. Remove chicken from pan.
  5. Pour chicken broth into the pan, scraping up the chicken drippings.
  6. Add softened cream cheese, stirring until smooth.
  7. Place cooked chicken back into the pan, coating on both sides with sauce.
  8. Serve with rice or pasta.
3.4.3177

Make-Ahead Instructions

Prepare and fry meat as directed. Allow it to cool, then cover and store in the refrigerator for up to two days. Prepare sauce as directed and stir in the chicken, heating through.

Freezer Instructions

Prepare and fry meat as directed. Allow it to cool. Freeze in a well-sealed freezer bag for up to three months. To serve, thaw cooked meat. Prepare sauce as directed and stir in the chicken, heating through.

Easy Chicken with Cream Cheese Sauce Recipe

I can’t think of a brilliant way to end this post. Go make this chicken! There. That oughta do it.

Heavenly Homemaker's Club Members: Access your homepage and all your fantastic resources here! Not a member yet? Please join us!

Stir-and-Pour Dinner Rolls ~ Freezer Edition

November 22, 2015 by Laura 7 Comments

This post may contain affiliate links. For more information, please see our disclosure policy.

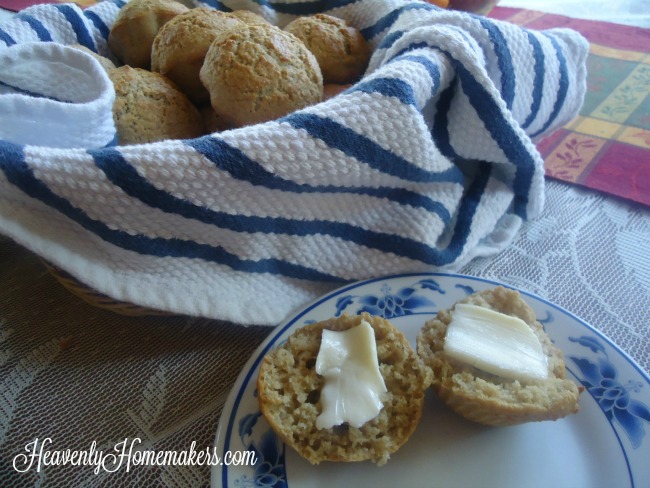
stir and pour rolls 1

Guess what? 

One of my darling readers, Vicki, experimented with the Stir-and-Pour Dinner Rolls to see if we could make them even more convenient by making them ahead and freezing the dough. I won’t keep you in suspense!!! —–>

Okay, maybe just for a little bit.

I’m wearing a new sweater today. I got it on sale, of course. I got it the same day I got all the butter on sale. That was a great day for sales, no doubt. I sure do love good sales. And butter.

So how about those dinner rolls? Does it work to make and freeze the dough, just like we make and freeze muffin batter? Vicki tried it. She reported back. Drum roll please…

It worked!! This is great news, and much more relevant than pointless talk about my new sweater. Although the sweater led me back to talking about butter; and butter and rolls go together. Therefore everything I’m writing today makes sense and is on topic.

You must be wondering, is there even a way to make this very easy recipe even more convenient? I mean, how can it get easier than the Stir-and-Pour Bread and Stir-and-Pour Dinner Rolls recipes? But actually, it does. It gets easier. Vicki proved it.

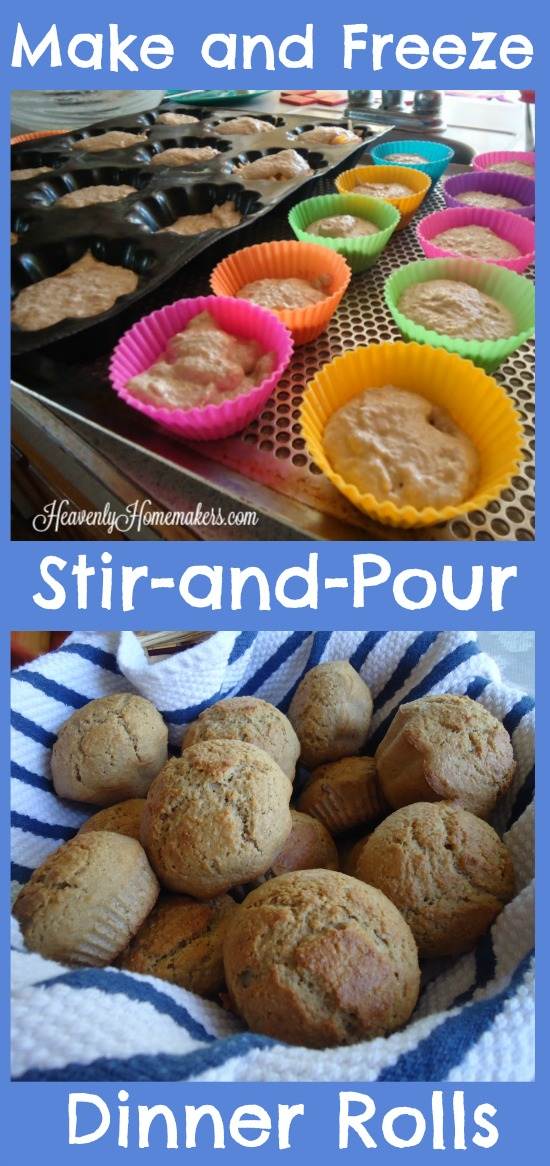
Make and Freeze Stir-and-Pour Dinner Rolls

1. Mix the ingredients as normal.
2. Scoop batter into muffin pans. I super love my new silicone baking cups. I use them alllll the time.
3. Freeze dough immediately.
4. Remove frozen dough from muffin cups and transfer them to a freezer bag. Store in the freezer for up to three months.
5. To bake: Place frozen dough into muffin cups. Cover with a cloth. Thaw on the countertop for 4-6 hours.
6. Bake as directed.

Vicki said that these taste just as good prepared this way as they do when prepared fresh. I mean, these are still fresh. They’re just frozen first before baking them. I love this time-saving tip!

This is especially helpful for days such as…I don’t know…Thanksgiving maybe? That day we’re putting forty-seven ~ give or take ~ other dishes on the table all at the same time? If there is a way to dirty up fewer dishes and execute fewer food preparation steps, by all means, let us do it!
Yum

5.0 from 1 reviews
Stir-and-Pour Dinner Rolls ~ Freezer Edition
 
Save Print
Author: Laura
Ingredients
  • 4 cups whole wheat flour (I use freshly ground hard white wheat)
  • 2 teaspoons active rise yeast
  • 2 Tablespoons sucanat or sugar or honey
  • 1 teaspoon sea salt
  • 1 egg (optional)
  • ¼ cup heavy cream (optional)
  • 2 cups warm water
Instructions
  1. Stir all ingredients together.
  2. Cover and allow it to sit for 30 minutes.
  3. Pour contents into buttered muffin tins or silicone muffin cups.
  4. Place filled muffin cups in freezer immediately.
  5. Once frozen, transfer frozen dough to freezer bags, storing for up to three months.
  6. To Bake:
  7. Place frozen dough back in prepared muffin cups.
  8. Cover and allow dough to thaw 4-6 hours on the counter-top.
  9. Bake in a 350° for 20-25 minutes or until lightly browned.
  10. Serve right away.
3.4.3177

Make and Freeze Stir-and-Pour Dinner Rolls

Vicki said she used the leftover rolls to make Stuffing Muffins. I did the exact same thing a few days ago!

Let’s hear it for another great make-ahead tip!

This post contains an affiliate link.

Heavenly Homemaker's Club Members: Access your homepage and all your fantastic resources here! Not a member yet? Please join us!

Make-Ahead Turkey ~ Yes You Can!

November 3, 2015 by Laura 73 Comments

This post may contain affiliate links. For more information, please see our disclosure policy.

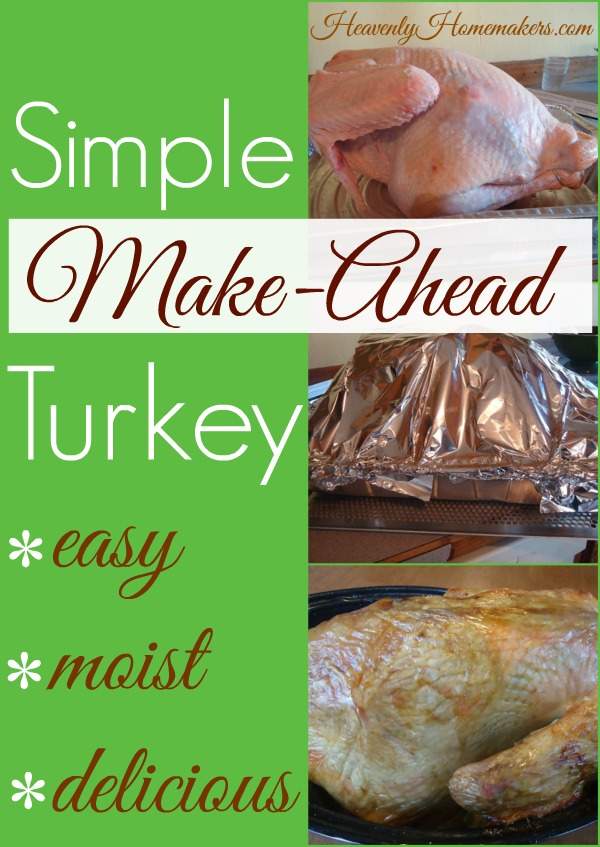
Make-Ahead Turkey? Oh yes, indeed!

turkey22sm

There are people who wake up in the middle of the night to begin cooking their turkey for a holiday meal. There are people who baste and stuff and rub down their bird. These people are so very nice and dedicated to poultry perfection.

And then there’s me.

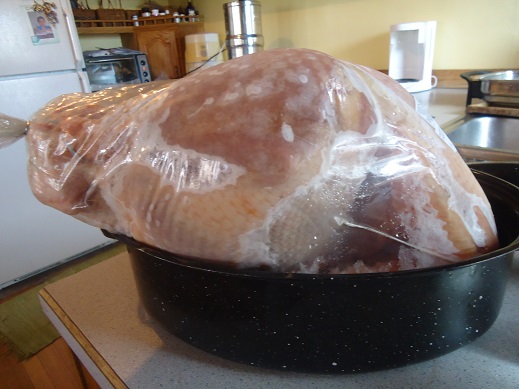
huge turkey 1

That is one huge bird.
Read the whole tale here.

I cannot find it within myself to do any of this to my turkey. I’m just not as devoted of a holiday baker as some. I’m a plop the bird in a pan, add nothing to it, cover it, put it in the oven, and take it out a few hours later kind of girl.

And…my favorite turkey baking tip of all: I cook my bird before the holiday. Like, two days before, usually.

I bake it, de-bone it, prepare all the broth, dispose of the carcass – basically I do all the messy, tedious, laborious turkey work ahead of time. Then on the day of the holiday feast, I take out my big dish of cooked meat, pour on a little broth, cover it, rewarm it, and we eat it. This is stress-free turkey baking.

My turkey always still tastes delicious.

That’s why I keep doing it this way.

No, our table doesn’t hold a big un-carved turkey. There is no turkey carving tradition at our house. For those who love traditions like this, I say go for it! Baste and carve and enjoy that special tradition.

But for those who find the turkey to be tedious, you might instead consider making it ahead of time.

But won’t the meat be dry?

Not if you don’t over-bake it in the first place.

The trick is to drizzle broth over your cooked, de-boned meat (I’d say one-two cups of broth per 9×13 inch dish full of meat), then cover the dish well. I warm it on Thanksgiving day for 30-45 minutes in a 300-350° oven along with other dishes that are baking. I pull it out and have a steaming, moist, delicious pan of turkey.

Make-Ahead Turkey

Yum

4.8 from 5 reviews
Make-Ahead Turkey
 
Save Print
Author: Laura
Ingredients
  • 1 Turkey
  • Seasonings of your choosing
  • 1 Large Roasting Pan
  • Foil if necessary
Instructions
  1. Place the turkey in the refrigerator for 3-4 days until thawed.
  2. Remove the bag of giblets from the inside of the turkey.
  3. Empty the giblets into your roasting pan as they help make a good, rich broth.
  4. Place the bird, breast side up, into a large baking pan or roaster.
  5. Season however you like.
  6. Cover with foil or with your roaster lid.
  7. Cook at 325° for 15-20 minutes per pound.
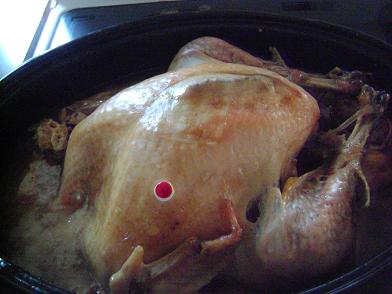
  8. You know your turkey is done cooking when the red thing pops up, or when the legs start to pull away from the body. It should be golden brown and slightly crisp looking.
  9. Be sure to save the broth that formed naturally!
  10. Allow the turkey to cool, then de-bone completely. Store meat in baggies or in covered pyrex dishes in the refrigerator.
  11. Save turkey carcass to make another round of broth for gravy, soup, and other nourishing meals.
  12. On serving day, drizzle a liberal amount of broth (one-two cups per 9x13 inch pan of meat) over turkey, cover and warm in 300°-350° oven for 30-45 minutes or until meat is hot and steamy.
  13. Serve right away.
3.5.3251

Simple Make-Ahead Turkey ~ Easy, Moist, Delicious

Additional Turkey Tips:

  • Adding a few onions to the turkey while baking is an effortless way to add more flavor.
  • Be sure to save the broth that forms naturally while your bird bakes.
  • Do not wait until your turkey is cold to take the meat off the bones. This makes the job much harder!
  • After you’ve taken all the meat off the bones, save the bones and put them into a stock pot. Fill the pot with water, carrots, onions, and any other veggies you like. Salt liberally. Cook on low for 4-6 hours to create a wonderful broth. Strain out bones. Blend the veggies until smooth and stir them back into the broth for added richness.
  • Use turkey broth for gravy. Use it to make Turkey and Noodles a few days after Thanksgiving. Use it for any soup or recipe that calls for chicken broth.
  • While making your turkey ahead of time is wonderfully helpful in cutting down work on your holiday meal serving day, you don’t want to make it too far in advance! I recommend making it on Tuesday or Wednesday, then serving it on Thanksgiving Thursday.

What’s your turkey tradition? To carve, or not to carve? To baste, or not to baste? Ever made a turkey ahead of time?

Here are the quick links to all the recipes we covered in this series:

  • Make-Ahead Turkey
  • Stuffing Muffins
  • Cheesy Mashed Potatoes
  • Oh Good Gravy
  • Green Bean Casserole
  • How to Make Frozen Pies
  • Simple Whipped Sweet Potatoes
  • How to make Whipped Cream
  • Whole Wheat Stir-and-Pour Dinner Rolls

~~~~~~~~~~~~~~~~~~~~~~~~~~~~~~~~~~~~~~~~~~~~~

Simple Meals is here! It’s saving my brain (and many of yours too!). If you haven’t joined yet, now’s the time. Get all the details here!

728x90


~~~~~~~~~~~~~~~~~~~~~~~~~~~~~~~~~~~~~~~~~~~~~~~~~~

Subscribe for FREE to Heavenly Homemakers so you won’t miss all the new Simple Recipes and ideas we share to save you money!

Heavenly Homemaker's Club Members: Access your homepage and all your fantastic resources here! Not a member yet? Please join us!

How to Cook Beans in the Crock Pot

October 7, 2015 by Laura 24 Comments

This post may contain affiliate links. For more information, please see our disclosure policy.

Cooking beans is crazy easy. It’s remembering to soak them the night before that is the hard part.

My morning brain and my night brain are two completely different beasts. My morning brain is like, “Wooooo yeah! We gonna cook all day and do school work with the kids (let’s do art today!) and organize ourselves completely and make all the phone calls and make 20 quarts of applesauce and finish the laundry and write two blog posts! Let’s do this!”

As the days wears on, I knock out about three of my twenty lofty goals (because my time and energy always run out before my to-do list ends –  and also because I hate making phone calls). After a full day of thinking hard and working hard and loving hard, my night brain is like, “I’m not speaking to you right now.”

This is why it is hard to soak beans.

The irony is that I never forget to grind coffee beans at night to put into my coffee pot for easy coffee making the next morning. Obviously, I have my priorities. Perhaps my two bean worlds could collide and I could let my coffee beans trigger a reminder about my pintos? It only makes sense.

On the rare occasion I do remember to soak beans, I feel so accomplished when I get into bed at night. Forget all the other stuff I did for 15 hours all day long. I totally put my beans in a pot with water! I am so very amazing!

Once the beans have been soaked, we can put them into a crock pot to cook all day for our dinner that night.

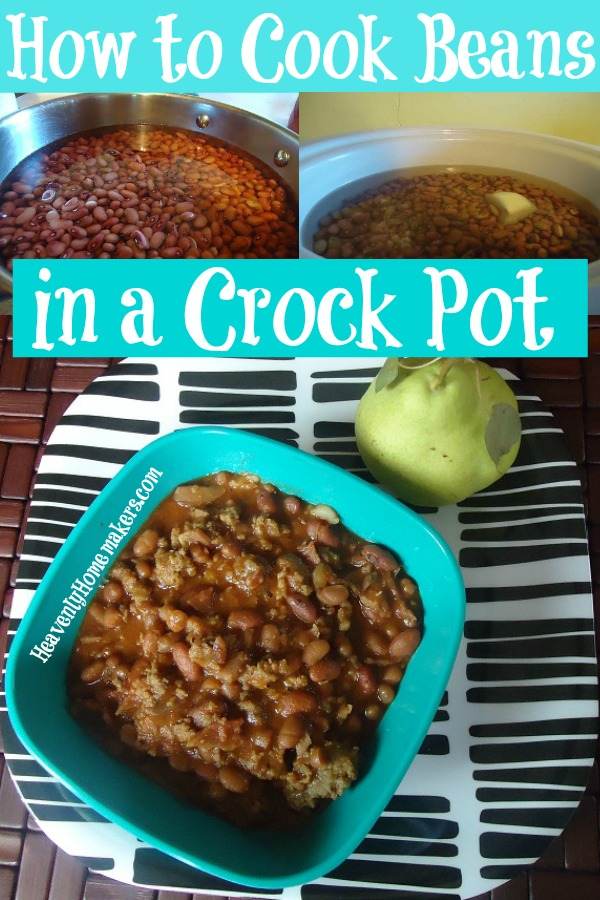
How to Cook Beans in a Crock Pot

How to Cook Beans in a Crock PotYum

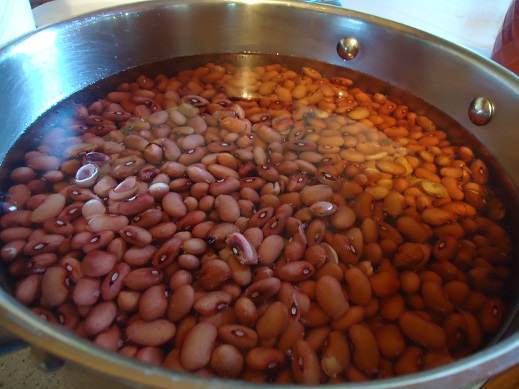
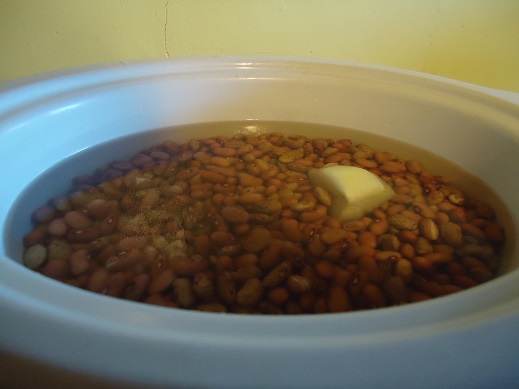
1. At night before bed, put about 4 cups of any variety of beans into a pot with 6-8 cups of water.

2. Splash in a little vinegar. It’s supposed to help with the toots. I offer no guarantees.

making beans1

3. Let the beans soak overnight.

4. Strain and rinse them in the morning. Put them into a crock pot and cover them with fresh water.

5. Add a couple of chopped onions to the post for flavor. This is optional but yummy and recommended.

6. Cover and cook the beans on low for 8-10 hours or until they are tender.

multitasking 5

At this point, you can enjoy your beans in any way you enjoy beans. Our favorites are:

  • Chili
  • Chili Mac
  • Easy Cheesy Bean Dip
  • Black Bean Chicken Nachos
  • Black Bean Salsa
  • Bean and Cheese Burritos
  • Calico Beans

What are your favorite ways to eat beans? Please tell me about your morning brain vs. your night brain. Which works better for you?

Heavenly Homemaker's Club Members: Access your homepage and all your fantastic resources here! Not a member yet? Please join us!
« Previous Page
Next Page »

Join Our Community!

 Facebook Twitter E-mail Instagram Pinterest

Popular Posts

~ Will All of the Real Moms Please Stand Up?
~ Easy! Stir-and-Pour Whole Wheat Bread
~ How to Make Gatorade
~ 31 Real Food Breakfast Ideas
~ Dear Teenage Girls...
~ When Mom Takes a Step Back
~ The Inexpensive Health Insurance We Love!
~ Let's Talk Real Food Grocery Budgets

Check out our latest posts!

  • Big Family Food and Fun: May 17-23, 2026
  • Easy Side Dishes for Summer
  • Big Family Food and Fun: May 10-16, 2026
  • Big Family Food and Fun: May 3-9, 2026
  • Help Your Kids Become Independent in the Kitchen!
Home  ~  Simple Meals  ~  Club Membership  ~  Shop  ~  Privacy Policy  ~  Disclosure  ~ Contact

Copyright © 2026 · Beautiful Pro Theme on Genesis Framework · WordPress · Log in