Heavenly Homemakers

Encouraging women in homemaking, healthy eating and parenting

  • Home
    • About
    • FAQs
  • Recipes
    • Bread and Breakfast
    • Condiments
    • Dairy
    • Main Dishes
    • Side Dishes and Snacks
    • Desserts
    • Gluten Free
    • Instant Pot
    • Crock Pot
    • Heavenly Homemaker’s Weekly Menus
  • Homemaking
    • Real Food Sources
  • Store
  • Contact
    • Advertise
    • Disclosure
    • Privacy Policy
  • Simple Meals
  • Club Members!

Homemade Chocolate Pudding Recipe

July 28, 2019 by Laura 4 Comments

This post may contain affiliate links. For more information, please see our disclosure policy.

Apparently, it is the week for pudding! We’ve shared our Homemade Vanilla Pudding recipe, a great idea for a Pudding Parfait in a Jar, and today our Homemade Chocolate Pudding Recipe!

Just like our Homemade Vanilla Pudding recipe, this one is tried and true and worth another share. We wanted to highlight it again as another school year is approaching (I know, I don’t want to talk about it either!). This is a great recipe for an after school snack or to pack in a lunch.

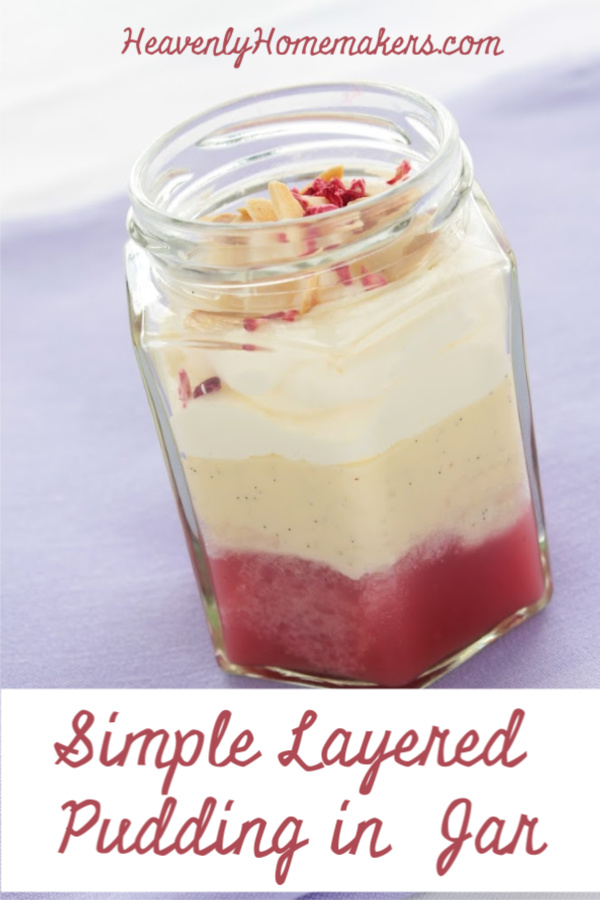
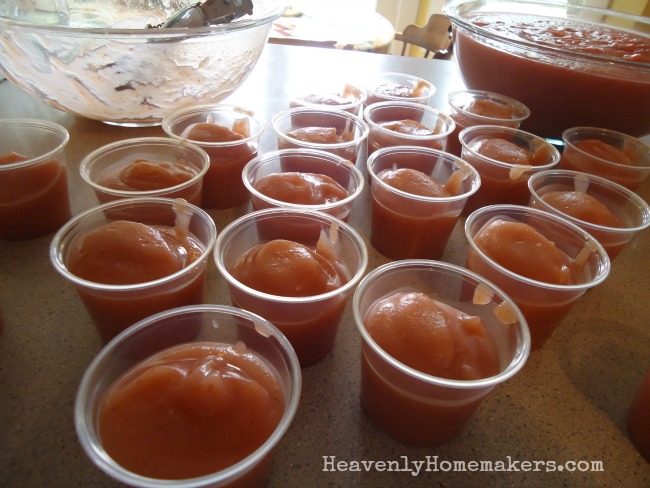
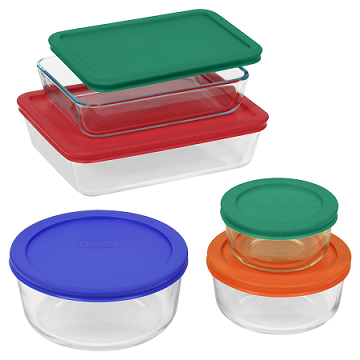
How should you pack it in a lunch, you ask? Well now, check out this fun idea for How to Make Your Own Pudding Cups!

And get our other homemade pudding recipes here so that you can mix and match!

  • Vanilla Pudding
  • Butterscotch Pudding
  • Tapioca Pudding
  • Peanut Butter Pudding

Homemade Chocolate Pudding RecipeYum

Homemade Chocolate Pudding Recipe
 
Save Print
Author: Laura
Serves: 4-6
Ingredients
  • 2½ cups milk
  • 3 egg yolks
  • ¼-1/2 cup real maple syrup
  • ¼ cup unsweetened cocoa powder
  • 4 Tablespoons arrowroot powder or cornstarch
  • ¼ teaspoon sea salt
  • 1 teaspoon vanilla
Instructions
  1. In a medium saucepan, whisk together milk, egg yolks, maple syrup, cocoa powder, arrowroot powder, and salt.
  2. Cook over medium heat, whisking/stirring CONSTANTLY until pudding begins to thicken.
  3. Stir over the heat for about 15 more seconds.
  4. Remove immediately from the heat, and continue to stir until pudding is creamy.
  5. Add vanilla and continue to stir until mixed.
  6. Pour into serving dishes and serve warm, or chill for two hours and serve cold.
3.5.3229

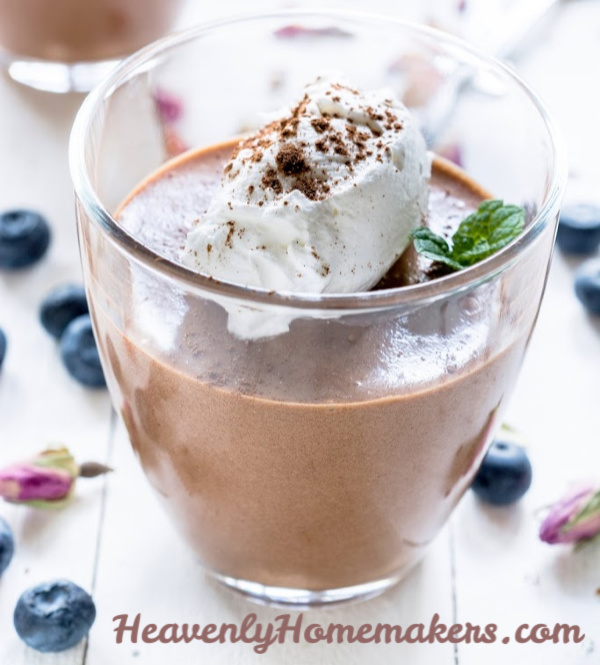
Need some Homemade Whipped Cream to eat on top of your Homemade Chocolate Pudding? YES, you really do! It’s super easy to make and well worth the small amount of effort so that you can enjoy the additional treat of whipped cream on top of your homemade pudding! Get our Homemade Whipped Cream recipe here.


Heavenly Homemaker's Club Members: Access your homepage and all your fantastic resources here! Not a member yet? Please join us!

Help Your Kids Learn to Obey and Be Kind (Awesome parenting freebie!!)

July 25, 2019 by Laura 1 Comment

This post may contain affiliate links. For more information, please see our disclosure policy.

While we wish it just came naturally, we realize that we have to help kids learn to obey and be kind. Then we have to remind them, and remind them some more.

It’s a battle we all face, right? The battle to overcome selfishness, bad attitudes, and complaining hearts. I find in my own life that I have to rely on the Holy Spirit constantly so that I don’t live in the flesh but by the Spirit. Gently leading our kids to do the same can be quite a challenge.

Long, long ago when our first set of kids looked something like this…

boys_costumes

…Matt and I found that we didn’t want to simply tell our kids to “be nice” or “do what I say.” We wanted our instruction to come from the heart of Jesus so that they learned that we didn’t just want them to “be good” and “do the right thing.” What was the reason? Where does our kindness come from? Why choose to talk nicely?

We found it amazing to discover how many scriptures spoke directly to all of us (parents and kids alike!) when it came to helping our kids learn how to obey and to be kind.

Our older four boys are either teens or adults and now God has blessed us with more boys to train and teach.

This guy is 5, so we’ve been pulling from our old bag of tricks. I’ve gotta say, having some experience under our belts sure has been nice this go ’round. We’re pulling out what we loved and what worked, and here’s our latest (which we are giving to you for free because sweet, obedient children make us happy!).

CCimage

These Character Charts WORK!

We used these for years when our kids were little, using scripture to help them remember to obey, to talk nicely, and to be selfless. It’s amazing how something as simple as “You sure are shining like a star right now. Go put a sticker on your chart!” means to a kid.

We started using this recently with our 5-year old and he actually beams like a star when we tell him to put a sticker on his chart to reward his good behavior. It is so great to not just affirm him but to use scripture while doing it.


There are five full sets of printable character charts and cut-out stickers in this collection, each with a Bible lesson you can use as you introduce it to and use with your kids.

  1. Shine Like Stars – from Philippians 2:14-16
  2. Fruit of the Spirit – from Galatians 5:22-25
  3. Walk in the Light – from 1 John 1:7
  4. Be Imitators of God – from Ephesians 5:1-2
  5. Treasures in Your Heart – from Matthew 6:19-21

You can download and use this collection in any way that works best for your family’s character and Biblical training!

My big and tall kids all look back at their beloved Character Chart days with fond memories (which is always fun for me to hear!). The charts use Biblical truth in a very simple and practical way so that God’s truth becomes your child’s truth.

Get your Character Chart package for free below, and check out the bonus offer we’re excited to announce!

Special Offer for You!

While the cut-out “stickers” have worked fine, we really, really wanted to be able to use actual stickers! Cutting these little shapes and gluing them onto a chart is kind of a hassle. Soooo, I asked Char, a dear friend and designer to turn the stickers cut-outs into actual stickers. So she DID!

Using these stickers with Bonus Boy is SO MUCH BETTER than the old way! The pages in this sticker package are loaded with stickers – 540 to be exact. So these will go a long way and make the Character Chart training so much more fun and definitely easier!

You’ll find the entire set of Character Chart Stickers here, and guess what else? She gave us all an $8.00 coupon to click on! That’s a huge discount because she loves us. :) Plus she’s offering free shipping, so hey, now who’s shining like a star and displaying the fruit of the Spirit? I think Char deserves a sticker. ;)

But seriously though, you will want these stickers to go with your charts, and your charts are FREE so all children everywhere are going to be Imi-tators of God before we know it. (Bet you were wondering what those potato stickers were all about. Catch your kid imitating Christ? He or she is an imi-tator, get it? You’re a tator, I’m a tator, wouldn’t you like to be a tator. It brings all sorts of fun to Ephesians 5.)

Get your Character Charts!

[wp_eStore_fancy1 id=26]

Get the stickers to go with them with an $8.00 off coupon (incredible) and free shipping.

Enjoy teaching your kids through scripture and fun!

This freebie offer is good through Friday, August 9. Hurry and get started!

Heavenly Homemaker's Club Members: Access your homepage and all your fantastic resources here! Not a member yet? Please join us!

Lilla Rose Christmas in July

July 25, 2019 by Laura Leave a Comment

This post may contain affiliate links. For more information, please see our disclosure policy.

I was so excited to hear about Lilla Rose’s Christmas in July Sale from my consultant Paula Ramm, that I had to hop on and let you all know!

Everything will be on sale at up to 65% off. That’s crazy! There will be FREE SHIPPING on orders over $50…

Brand new releases…

Free Surprise Gifts with every $60 and $100 order…

and Flash Sales with items as low as $1! Now, that IS crazy!

I am loving all my new Lilla Rose products I got this month, and I know that you will love them too!

If you’ve never tried a Lilla Rose item, now is a great time to give one a try, especially my favorite item, the Flexi clip!

Feel free to ask Paula if you need help with sizing or have any questions whatsoever…she is happy to help you get a Flexi you LOVE!

And if you are a raving Lilla Rose fan already, you know that this is a great time to stock up on your favorites! Be sure to check out the new items as well, like the acrylic hair forks…you may find a new favorite!

Visit  www.lillarose.biz/BeautifulLife to shop!

Sale ends Sunday, July 28 at midnight PT…You won’t want to miss this one!

Heavenly Homemaker's Club Members: Access your homepage and all your fantastic resources here! Not a member yet? Please join us!

Simple Layered Pudding in a Jar

July 23, 2019 by Laura Leave a Comment

This post may contain affiliate links. For more information, please see our disclosure policy.

Did you see our Homemade Vanilla Pudding Recipe? Now you’re going to need this Simple Layered Pudding in a Jar idea to go with it!

This idea is so fantastic because you can mix and match and make a treat exactly to your liking.

Take it to go!

This idea is beautiful enough to make for special gatherings, parties, and showers. But it’s also practical enough that you can make several jars ahead and take them on the go with you. Pack them for lunches. Carry them for snacks. Make everyone around you jealous that while you are eating a gorgeous and delicious Layered Pudding in a Jar treat, they are stuck with…well, anything but a Layered Pudding in a Jar treat.

Hmm, perhaps you should carry around extras to share with those around you. :)

Simple Layered Pudding in a JarYum

Simple Layered Pudding in a Jar
 
Save Print
Author: Laura
Serves: 6
Ingredients
  • 1 batch of homemade vanilla pudding*
  • 1 batch of homemade fruit syrup**
  • Whipped cream***
  • Slivered almonds or other nuts that you prefer (optional)
Instructions
  1. Make pudding, fruit syrup, and whipped cream as directed in each of the links below.
  2. Layer each in a jar according to your preference.
  3. Top with whipped cream and nuts if you like!
  4. Cover and store in the fridge to eat as needed.
3.5.3229

Ready for the recipe links?

*Homemade Vanilla Pudding

**Homemade Fruit Syrups:

  • Apple Butter
  • Peach Syrup
  • Easy Raspberry Syrup
  • Blueberry Syrup (sub strawberries if you want!)

***Homemade Whipped Cream

Don’t want to mess with making homemade fruit syrup?

Simply toss in sliced fresh fruit.

The sky is the limit to how you can create your Layered Pudding Parfaits. It should come as no surprise that strawberry is my favorite syrup to make and add to my pudding. But since I don’t want/need the added sugar needed to create a fruit syrup, I usually just add the strawberries as-is!

Enjoy and have fun!

Want more Food-in-a-Jar Ideas?

You’ll love these!

Need to know where to get great jars?

This post shares all!

Heavenly Homemaker's Club Members: Access your homepage and all your fantastic resources here! Not a member yet? Please join us!

Homemade Vanilla Pudding Recipe

July 21, 2019 by Laura 7 Comments

This post may contain affiliate links. For more information, please see our disclosure policy.

Want a Vanilla Pudding Recipe that you can make from scratch? But you’re afraid it will be too difficult? Check this out!

We shared this recipe years ago here at Heavenly Homemakers. But as delicious and simple as it is, I felt it was worth another share. A tried and true recipe like this one that we’ve made at our house for years and years is worth a repeat!

Homemade Vanilla Pudding is fantastic comfort food, and with its eggs and milk, it also offers nourishment. Eat it warm right off the stove, or let it chill so you can eat it cold.

Want to take it to go?

Check out our fun post that describes How to Make Your Own Pudding Cups!

Homemade Vanilla Pudding RecipeYum

4.0 from 2 reviews
Homemade Vanilla Pudding Recipe
 
Save Print
Author: Laura
Serves: 4-6
Ingredients
  • 2½ cups milk
  • 3 egg yolks
  • ¼-1/2 cup real maple syrup
  • 4 Tablespoons arrowroot powder or cornstarch
  • ¼ teaspoon sea salt
  • 1 teaspoon vanilla
Instructions
  1. In a medium saucepan, whisk together milk, egg yolks, maple syrup, arrowroot powder, and salt.
  2. Cook over medium heat, whisking/stirring CONSTANTLY until pudding begins to thicken.
  3. Stir over the heat for about 15 more seconds.
  4. Remove immediately from the heat, and continue to stir until pudding is creamy.
  5. Add vanilla and continue to stir until mixed.
  6. Pour into serving dishes and serve warm, or chill for two hours and serve cold.
3.5.3229

UPDATE:

I’ve started to add the entire egg to my pudding instead of separating the yolk from the white. The trick is to whisk the eggs and milk together VERY THOROUGHLY before adding the other ingredients and cooking it. Once the mixture is smooth, then cook and stir it on the stove.

Want your pudding more or less sweet? Adjust the amount of maple syrup in the recipe to your family’s preference!

It goes without saying that topping your Homemade Vanilla Pudding with fresh fruit it an additional wonderful and nourishing idea.

Want more homemade pudding recipes?

  • Butterscotch Pudding
  • Chocolate Pudding
  • Tapioca Pudding
  • Peanut Butter Pudding

I’ll be updating our Chocolate Pudding Recipe next. And stay tuned for an awesome Pudding Parfait in a Jar idea coming soon too!

Heavenly Homemaker's Club Members: Access your homepage and all your fantastic resources here! Not a member yet? Please join us!

Is it Worth the Money to Buy a Blendtec?

July 18, 2019 by Laura 7 Comments

This post may contain affiliate links. For more information, please see our disclosure policy.

Today’s the day I discuss with you whether or not I feel like it is really worth the money to buy a Blendtec. (You probably already know the answer.)

What is a Blendtec?

Well now. A Blendtec is a regular blender – but it is NOTHING like a regular blender. I used to regularly spend $25 to purchase cheap blenders at the store, only to have them burn out on me in less than a year. Not only would a regular blender die quickly, but its capabilities were also very limited. Not so with a Blendtec!

Regular blenders make sort-of-smooth smoothies. Regular blenders take a long time to sort-of mix ingredients. But a Blendtec??? This beauty of a blender is such a high powered machine that cream goes from liquid to whipped in less than 20 seconds. I can put big pieces of frozen fruit into my Blendtec and have a perfectly smooth smoothie in just a few seconds! And, the seeds from berries? They get blended in too! So picky kids (and adults, ha!) don’t have to worry about chunks or seeds in their food!

Ultimately, a Blendtec is a regular blender with many more capabilities and much more power. After so many years of using a Blendtec, I still am amazed at how much time it saves me and at how beautifully it blends or whips or purees our food!

How do I use my Blendtec?

I use my Blendtec multiple times each week, and sometimes multiple times each day.

I mix batter in it, whip cream in it, make smoothies in it, whip mini cheesecake filling in it, the list goes on and on. From cakes to muffins to pancakes – the Blendtec takes away my need to stir and mix. Cream goes from liquid to perfectly whipped in less than 30 seconds. Recently I dumped in all the ingredients for these Mini Crustless Cheesecakes and had them in the oven within a grand total of 5 minutes. Beautiful!

Here are some of the recipes I use my Blendtec for regularly:

  • Crustless Cheesecake Cups
  • Chocolate Whipped Cream
  • Regular Whipped Cream
  • All the Muffins :)
  • Simple Whole Wheat Pancakes
  • Easy Guacamole
  • Cream Cheese Salsa Dip
  • Pineapple Mango Smoothies
  • Pineapple-Orange Slushies
  • Creamy Orange Cooler
  • Strawberry Peach Slushies
  • Icy Cold Milkshake Treats
  • Green Machine Milkshakes
  • Homemade Chocolate Frappe
  • Low Sugar No-Churn Chocolate Ice Cream
  • Low Sugar No-Churn Vanilla Ice Cream
  • Low Sugar No-Churn Strawberry Ice Cream

In addition, I’ve started using my Blendtec to make our Homemade Applesauce. Once the apples are cooked down, it takes 30 seconds to blend them into super smooth sauce – peelings and all!

Why should I spend more money on a blender, bite the bullet, and buy a Blendtec?

In so many ways, my Blendtec makes my cooking and baking so much easier. It is extremely high powered, which is reflected in the price. A $25 blender gives only $25 of effort (and in my experience, lasts less than one year in my kitchen). The Blendtec, though much higher in price, comes with a warranty and is so high powered that it turns frozen fruit into liquid in just seconds. Unbelievable!

I highly recommend saving up and investing in a Blendtec. Oh the time and energy you’ll save! I acquired a Blendtec several years ago, and it is still going strong. So my larger money investment has already saved me $25 many times over and will continue to save me for years to come!

While money saving is nice – I consider the time and energy saved even better. The fact that I can dump ingredients into my Blendtec and whip or blend them so quickly and easily truly is a refreshing help in my kitchen. I LOVE not having to spend extra time whipping or stirring. Lazy? Absolutely not. Efficient? You bet!

So is it worth the money to buy a Blendtec?

Oh yes. So very worth it. The Blendtec has changed my kitchen life, and this is no exaggeration. Because I make so much food from scratch, while still striving to keep our recipes as simple as can be, I find the Blendtec to be invaluable! I don’t know how I ever lived without it, and that’s the truth!

What is your blender experience? Have you invested in a high power blender like a Blendtec yet?

Sidenote: My understanding is that a Vitamix is of the same quality as a Blendtec. So while I don’t have experience with those, I do recommend them also!

Heavenly Homemaker's Club Members: Access your homepage and all your fantastic resources here! Not a member yet? Please join us!

Why I Decided to Have an Amazon Prime Pantry Membership

July 16, 2019 by Laura 3 Comments

This post may contain affiliate links. For more information, please see our disclosure policy.

Until recently, I had never really looked into Amazon’s Prime Pantry. It came with a monthly fee, after all. But here’s what made me decide to take on an Amazon Prime Pantry membership.

There are several reasons really. But the first and most important reason is:

1. Groceries placed right on my porch.

I absolutely love groceries being delivered right to my doorstep. What a blessing!!

For years I’ve taken advantage of Amazon Prime and Subscribe and Save. I order many food and household items by the case, saving at least 15% and maybe more if there are coupons. Since I don’t have a Sams or Costco closeby, this has been a fantastic option for us!

But I kept ignoring all the Prime Pantry offers, mostly because I didn’t want to take the time to figure out how it worked (silly). Also, since I usually buy by the case, I wasn’t sure it would be beneficial. Then on Prime Day, there was a sweet Prime Pantry offer which made me decide to give it a try. Aha, I realized! Having a Prime Pantry membership would greatly help me with the fact that…

2. I don’t have any room in my grocery cart anymore!

With a squishy baby in the front and a stocky 5-year old in the big part of the cart, there’s not much room left in my grocery cart for actual groceries. We go through lots of food, so typically I need to fill an entire cart to the max.

This has become very challenging, phew!

When I realized that Prime Pantry would save me a trip to the store for all the odds and ends I typically get (applesauce squeezies, granola, chips, condiments, nuts, etc.), it made me very excited. If most of what I needed at an actual store was fresh fruits and veggies, chicken, and frozen food – well THAT I could probably fit into the cart along with cute little boys. :)

3. But what about the $4.99 monthly fee?

Worth it, worth it, worth it.

I like avoiding fees just as much or more as the next guy. But goodness, there’s a lot to be said for keeping life calm and simple when so much going on in life is far from calm and simple.

With Prime Pantry, I’ll now be able to order whenever I need to and have it delivered for free (on orders over $10, which is basically the amount of food we eat in five minutes). That $4.99 fee saves me all kinds of time, energy, and effort so I feel it is money well spent. Plus it will probably save me money in the long run.

Nope, no room for little boys in that cart!

4. Also, my sanity.

God bless little boys who talk non-stop and ask all the questions up and down every aisle. I absolutely love how inquisitive, fun, and aware our 5-year old is, and taking him to the store is so good for life skills training.

But I find it very difficult to compare prices and think about specific ingredients we need or make an actual good decision about my purchases while answering, “Mom, why is that box blue? Why isn’t that box blue? Are your eyes blue? Do you like blue? Blue is my favorite color. But green is my favorite. And every color of the rainbow is my favorite. Remember that rainbow we saw? I want to see another rainbow. Why can’t we see another rainbow today?”

Oh precious one. Be five forever. But sweet as it all is, that doesn’t help me think and shop at the same time.

So Prime Pantry will help me out with this and give us fewer aisles to travel during shopping trips. I guess I’ll have to come up with other excuses now for losing my sanity.

So Amazon Prime Pantry for the win.

If at any time I find that I’m not getting my $4.99/month worth out of this membership, I’ll let it go, no problem. But for now, I’m finding this to be quite wonderful and helpful!

Want to try it for free?

This is pretty exciting! If you click on the banner below, you can sign up for a free trial for one month to see if it benefits you and your family!

Are you a Prime Pantry member? What do you like about it?


Heavenly Homemaker's Club Members: Access your homepage and all your fantastic resources here! Not a member yet? Please join us!

Is Prime Day Worth All the Hype?

July 14, 2019 by Laura 3 Comments

This post may contain affiliate links. For more information, please see our disclosure policy.

Prime Day has arrived! It’s like Christmas in July. Or is it? Is Prime Day worth all the hype?

Well, that depends on your goals.

Are you planning to get some early Chrismas shopping done? Have you been saving up for a big kitchen appliance in hopes that it will be crazy discounted today? Are you simply interested in seeing what is being offered and scoring a few great deals?

Then I’d say that Prime Day is worth all the hype!

Remember how I finalllllly gave in and bought an Instant Pot a couple of Prime Days ago? Sure, I’d gotten sucked into the hype of the biggest deal day of the year. Sure, all the talk about taking advantage of Prime Day had me shopping more than normal paying more attention to sale offers. But you know what else?

It made me decide to follow the advice so many of you had given, and I got an awesome discount on an appliance I now absolutely love and use many times every week in my kitchen! If it wasn’t for Prime Day and the intrigue of possibly scoring a great deal, I may never have even looked into finally buying an Instant Pot.

WHAT WOULD MY LIFE BE WITHOUT MY INSTANT POT???? :) :) :)

For starters, my family would not be eating as many mashed potatoes. So clearly, all of the Coppingers are so grateful for Mom’s Prime Day Instant Pot score of 2017.

——-> Psssst! I don’t know how long this will last, but at the time I am writing this post, my very well-loved 8-Quart Instant Pot is marked down to just $99 AND there is a $15 off coupon to go with it!!!!!! I think that’s less than I paid back in 2017! The price is so low, I’m tempted to buy another one for absolutely no reason. <———

So is Prime Day worth all the hype?

If you ask me, it is. But just like anything, you have to know your goals and not spend money just because something is on sale. It doesn’t matter if you saved $20 if you didn’t need an item in the first place.

But if you have been saving and planning and are ready to make a purchase, and you are blessed to find it on sale on Prime Day. Beautiful!

And if you are like my cousin who does ALL of her Christmas shopping on Prime Day so that she can enjoy the actual holiday season without the stress of shopping, then Prime Day is more than just hype. It’s helpful and practical and a great blessing!

A few notes about Prime Day

  1. If you aren’t already a Prime Member, and you aren’t sure you want to become one and pay the yearly fee, you can still sign up for a 30-day FREE membership and enjoy Prime Day deals right now!
  2. If you want to hear from me about what items I’m most excited to see on sale for Prime Day, sign up here for our free newsletter. I’ll send an email or two as I find the best deals I think will benefit us all the most! (Plus, when you sign up for our newsletter, you’ll get a bunch of homemaking freebies!)
  3. As I’ve started looking for great deals, I’m finding a few not-so-great deals. So I advise that you do a little homework when you see something featured for Prime Day. It might be a fantastic deal!!! Or it might not. (Typically, deals offered for Prime Day really are great, though!)
  4. If you have been putting off buying an Instant Pot but really want to make it a part of your wonderful life, I’m not sure the price will ever be lower than this.

Also, here’s all my Instant Pot recipes so far.

What I’m hoping will be on sale for Prime Day

Here’s what I’ll be searching out first:

  • All things Pyrex
  • Instant Pot (I really hope this deal with coupon stays good through Monday and Tuesday!)
  • Nutrimill (Anything $219 or less is a deal worth taking advantage of.)
  • Blendtec or Vitamix (This Blendtec is only $228 right now, which is less than half regular price!)
  • Toys, because I get to shop for those again now!

As soon as I’ve compiled the best deals list I can come up with, I’ll send out an email. Join us here so you don’t miss it!

Are you excited about Prime Day? Do you feel it’s worth the hype?

Heavenly Homemaker's Club Members: Access your homepage and all your fantastic resources here! Not a member yet? Please join us!

Simple Recipes We’re Using to Help Our 5-Year Old Learn Kitchen Skills

July 11, 2019 by Laura 2 Comments

This post may contain affiliate links. For more information, please see our disclosure policy.

We’re starting over at our house! Just like we did with our “first set of kids” we are teaching our new 5-year old Bonus Boy how to cook. Here are the favorite simple recipes we are using to help him learn kitchen skills!

Hopefully, you won’t get too tired of hearing me encourage you to teach your kids to cook. :) Obviously, it’s more important that you teach them to love the Lord and love people. Focus on that first.

But also, eating is something we must all do every day of our lives. Your kids need to know how to prepare simple foods (or complicated foods, if you are my 19-year old). It’s a much-needed skill, and guess what?

After putting in hours of effort, making lots of messes, and having a blessed mixture of frustration and fun with my oldest four kids – they can all cook. It is fantastic. The work involved was entirely worth it. And when all is said and done, we made a lot of awesome memories (and Monkey Bread).

Sometimes now, they feed me. Often they feed themselves. They will someday feed their wives and children. This is beautiful!

Now, we’re starting all over again. This little one moved in with us when he was four. He has become the 5th Coppinger Boy! If I have the audacity to make food without him, he can’t possibly understand why. “But I wanted to help you!” Well, who am I to argue with that?

He cracks eggs, makes messes, helps measure ingredients, makes messes, stirs carefully, makes messes – well, he’s also learning how to use a broom and dustpan. ;)

Teaching Kids to Cook is MessyYum

So what? I like a clean kitchen, but now that I have teen and adult kids who can cook, I realize more than ever that the messes from when they were little are just part of the teaching process. If I expect a mess from the little one in training, then I’m less frustrated when a mess inevitably happens. If we happen to crack, pour, and stir correctly so as to avoid a mess, well, that’s a bonus.

Ready for some kid-friendly recipes?

Simple Recipes to Help Kids Learn Kitchen Skills

Here are some of our favorite simple recipes we are using right now to help teach our 5-year old basic kitchen skills. He helps measure, pour, and stir. As we work, I talk through everything we are doing so that he learns the vocabulary of cooking and the reasons we do what we do.

  • Simple Strawberry Fluff Salad
  • Simple Cookie Dough Treats
  • Grilled Pizza Tortillas
  • The EASIEST Frozen Yogurt Bites
  • No-Bake Chocolate Fudge Cookie Bites
  • No-Bake Snickerdoodle Bites
  • No-Bake Peanut Butter Cookie Bites
  • No-Bake Chocolate Chip Cookie Dough Bites
  • Any of these Mixes
  • Any of these Popsicles, Milkshakes, or Smoothies

In addition, he helps:

  • Crack eggs for Scrambled Cheese Eggs (he cracks it, then hands it to me to open it into a bowl).
  • Put frozen fruit and mixed greens into the blender for Smoothies.
  • Do whatever he can with whatever I’m making because he really wants to be a part of all of it! So if possible, I always try to find him a job while I’m cooking or baking.

Looking for more help and recipes as you pull your kids into the kitchen with you?

  • Grab our new and improved Teaching Your Kids to Cook eBook!
  • Here’s our Kids in the Kitchen discounted eBook collection.
  • This Kids Cook Real Food eCourse is fantastic! It is well worth the investment for all that it offers to your family!
  • Our Chocolate Covered Kids Cookbook and Resource Pack is filled with helpful tips, instructions, and of course, recipes!

If you really want to go all in and teach your kids to cook this summer, I encourage you to invest in Katie Kimball’s Kids Cook Real Food eCourse. I used this course with Malachi and plan to use it with Bonus Boy too. It is FANTASTIC!!! Get the details here. And pick up her awesome FREEBIE —>

What are your favorite foods to make with your kids?

Heavenly Homemaker's Club Members: Access your homepage and all your fantastic resources here! Not a member yet? Please join us!

Summer Activities for Kids: Make Ice Cream in 10 Minutes!

July 9, 2019 by Laura 2 Comments

This post may contain affiliate links. For more information, please see our disclosure policy.

Looking for some fun activities to do with your kids this summer? I’ve enjoyed 22 summers with kids (and counting!), so I certainly have a few ideas to share! Stay tuned during the next few weeks as we provide all kinds of suggestions for making your summer with your kids meaningful. (Subscribe here so you won’t miss out!) Today’s idea: Make Ice Cream in 10 Minutes!

Yum

As I was remembering this fun summer activity idea, I decided it would be much more fun to do if we invited friends over to join us! So we sent out the invitation, got our supplies ready, and had a little Ice Cream Making Party!

By the way, we are SO CLOSE to final adoption day for Bonus Boy that I almost waited to post this so that I could show you his precious face. Soon and very soon he will officially be a Coppinger and then all stickers come off!

This “make ice cream in a bag” idea is one of those we always WANT to do, but never seem to get around to ACTUALLY doing. Somehow inviting friends to do it with us made it much more doable, you know? Afterward, the kids played and the moms visited. Bliss! And also, there was ice cream to eat, so double win!

Make Ice Cream in 10 Minutes!

5.0 from 1 reviews
Summer Activities for Kids: Make Ice Cream in 10 Minutes!
 
Save Print
Author: Laura
Serves: 2 servings
Ingredients
  • 1 cup heavy whipping cream
  • 3 droppers full of liquid stevia, or 3-4 Tablespoons real maple syrup, or 3-4 Tablespoons sugar
  • ½ teaspoon vanilla extract
  • ½ cup rock salt or coarse sea salt
  • Ice
  • quart and gallon sized freezer bags
Instructions
  1. Measure cream, sweetener, and vanilla into a quart-sized freezer bag and seal.
  2. Fill a gallon-sized freezer bag half-full of ice.
  3. Add ½ cup rock salt to the ice.
  4. Place the sealed quart-sized bag filled with ice cream ingredients into the bag of ice and salt. Seal.
  5. Toss the bag back and forth, shaking and tossing for 5 minutes or until the mixture thickens to ice cream.
  6. Remove the quart-sized bag and rinse the salt off.
  7. Open the bag, scoop out the ice cream, and enjoy!
3.5.3229

We moms found that the ice cream shakers needed a little bit of help to get the mixture shaken vigorously enough to turn into ice cream! Also: be sure to do this activity outside!! The bags tend to get drippy. :)

Here are some of our other Simple Ice Cream Recipes.

Use any of these with the above Freezer Bag Toss idea!

  • Low Sugar No-Churn Chocolate Ice Cream
  • Low Sugar No-Churn Vanilla Ice Cream
  • Low Sugar No-Churn Strawberry Ice Cream
  • Low Sugar No-Churn Peanut Butter Ice Cream

Here’s to a great summer of fun with our kids! Here are other ideas we’ve shared so far:

  • Make Donuts!
  • Have a Reading Party!
  • Make Smoothies, Milkshakes, and Popsicles
  • Go Apple, Berry, or Peach Picking
  • Create Blessings for Father’s Day
  • Find Ways to Serve Together
  • Plan and Host a Party
  • 77 Screen-Free Activities for Kids
Heavenly Homemaker's Club Members: Access your homepage and all your fantastic resources here! Not a member yet? Please join us!
« Previous Page
Next Page »

Join Our Community!

 Facebook Twitter E-mail Instagram Pinterest

Popular Posts

~ Will All of the Real Moms Please Stand Up?
~ Easy! Stir-and-Pour Whole Wheat Bread
~ How to Make Gatorade
~ 31 Real Food Breakfast Ideas
~ Dear Teenage Girls...
~ When Mom Takes a Step Back
~ The Inexpensive Health Insurance We Love!
~ Let's Talk Real Food Grocery Budgets

Check out our latest posts!

  • Big Family Food and Fun: June 7-13, 2026
  • Big Family Food and Fun: May 31-June 6, 2026
  • Big Family Food and Fun: May 24-30, 2026
  • Free 7-Day Summer Menu Plan
  • Big Family Food and Fun: May 17-23, 2026
Home  ~  Simple Meals  ~  Club Membership  ~  Shop  ~  Privacy Policy  ~  Disclosure  ~ Contact

Copyright © 2026 · Beautiful Pro Theme on Genesis Framework · WordPress · Log in