Heavenly Homemakers

Encouraging women in homemaking, healthy eating and parenting

  • Home
    • About
    • FAQs
  • Recipes
    • Bread and Breakfast
    • Condiments
    • Dairy
    • Main Dishes
    • Side Dishes and Snacks
    • Desserts
    • Gluten Free
    • Instant Pot
    • Crock Pot
    • Heavenly Homemaker’s Weekly Menus
  • Homemaking
    • Real Food Sources
  • Store
  • Contact
    • Advertise
    • Disclosure
    • Privacy Policy
  • Simple Meals
  • Club Members!

Gratituesday: Creamy Orange Cooler

March 29, 2010 by Laura 63 Comments

This post may contain affiliate links. For more information, please see our disclosure policy.

Wow I love me a good Creamy Orange Cooler!

Over the weekend when I was nursing a sinus infection, I found myself without an appetite. But, I knew I needed to keep some good foods going in so that my body would have something to work with to fight the infection.

Something made me think of a recipe I had tried years ago (like before Asa was even born), and suddenly it sounded SO GOOD. I got out my old recipe book, made several tweaks to the concoction and guzzled it down!!! If I hadn’t been sick and out of energy, I would have done a dance around my kitchen! Maybe I had been hungrier than I thought – or maybe this was just exactly what I needed. Either way, I made another batch the next day!

Creamy Orange Cooler

Creamy Orange Cooler

Gratituesday: Creamy Orange Cooler
 
Save Print
Author: Laura
Ingredients
  • Juice of 3 medium oranges
  • 2 cups buttermilk
  • 2 teaspoons real maple syrup (or more to taste)
  • ½ teaspoon vanilla extract
  • a handful of ice cubes (optional)
Instructions
  1. Squeeze juice from the oranges and pour into a blender with remaining ingredients.
  2. Blend until smooth (or until ice is crushed if added).
3.4.3177

This drink is so easy to whip up. The buttermilk mixed with the sweet citrus creates an amazingly tangy taste that is SO refreshing!

I also love that this is a new way to get down some cultured buttermilk! (Learn how easy it is to make your own buttermilk here.)  I have a hard time drinking the raw, cultured buttermilk by itself, but in this mixture – I could just drink it straight from the blender!

And yes, I know dairy products aren’t great when you have a sinus infection…but I didn’t care. ;)  I needed something that would go down easily and satisfy my insides. It did exactly that. (Plus I used raw milk, which doesn’t have the same ill effects on the sinuses as store-bought milk does.)

Looking for more healthy, satisfying recipes? Here is a list of all my healthy Bread and Breakfast Recipes.

Heavenly Homemaker's Club Members: Access your homepage and all your fantastic resources here! Not a member yet? Please join us!

Homemade Chewy Granola Bars (without corn syrup!)

March 25, 2010 by Laura 420 Comments

This post may contain affiliate links. For more information, please see our disclosure policy.

Chewy Granola Bars. No corn syrup. Easy recipe. Grab-and-go snack option. Fantastic.

Chewy Granola Bars - No Corn Syrup

Every homemade chewy granola bar recipe I’ve ever seen includes corn syrup and/or marshmallow cream (not ingredients we feel okay about eating or feeding my family). Even most pre-made granola bars I have seen at the store (even the organic ones) have ingredients I don’t like feeding my family.

I finally figured out a chewy granola bar recipe that we like! It’s easy and includes all natural sweeteners and ingredients! These bars are way cheaper than store bought granola bars! Plus you can customize it according to your family’s taste and allergies! They can be easily wrapped individually to take in the car or packed in a lunch!

Homemade Chewy Granola BarsYum

5.0 from 2 reviews
Homemade Chewy Granola Bars (without corn syrup!)
 
Save Print
Author: Laura
Ingredients
  • ½ cup peanut butter or sunbutter
  • ⅓ cup honey
  • ¼ cup coconut oil (or another oil of your choice)
  • 1 cup oats
  • 1 cup total of any combination of: sesame seeds, coconut flakes, sunflower seeds, dried fruit, mini chocolate chips
Instructions
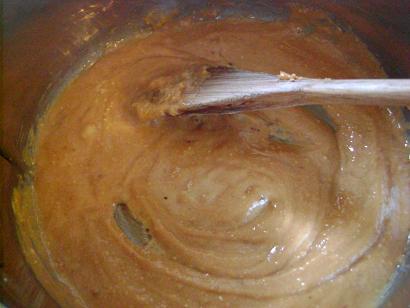
  1. In a medium sized saucepan, melt together peanut butter, honey and coconut oil.
  2. Remove from heat and add one cup of oats.
  3. Choose your favorite combination of coconut flakes, sesame seeds, sunflower seeds, dried fruit and mini chocolate chips, to equal a total of ONE CUP. (I just got out my one cup measuring cup and poured in the ingredients until the cup was full.)
  4. Pour in and stir well.
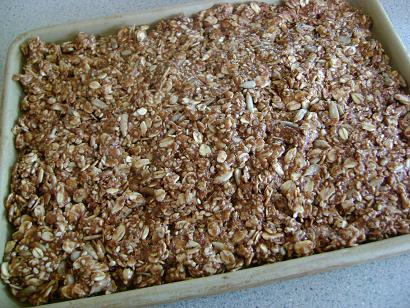
  5. Spread mixture into a 8x8 or 9x4 pan.
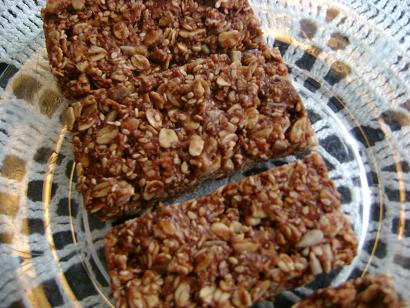
  6. Chill for two hours, then cut into bars.
3.4.3177

granola_bars_1

granola_bars_2

granola_bars_3

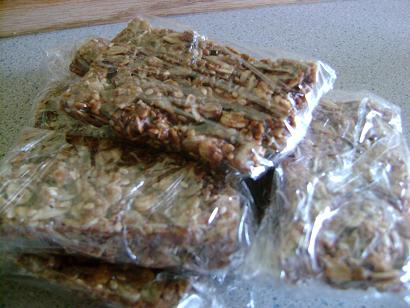
Wrap in plastic wrap for a quick grab and go snack!

granola_bars_4

Many have said that these taste similar to the oldie-but-goodie No Bake Cookie recipe we’re all familiar with. How fun that these are quite a bit healthier!

I’ve found that these keep best in the fridge as they get a little bit too soft if left out for too long. What a perfect grab-and-go snack!

Heavenly Homemaker's Club Members: Access your homepage and all your fantastic resources here! Not a member yet? Please join us!

High Five Recipes: Layered Cheesy Salsa Enchiladas

March 18, 2010 by Laura 24 Comments

This post may contain affiliate links. For more information, please see our disclosure policy.

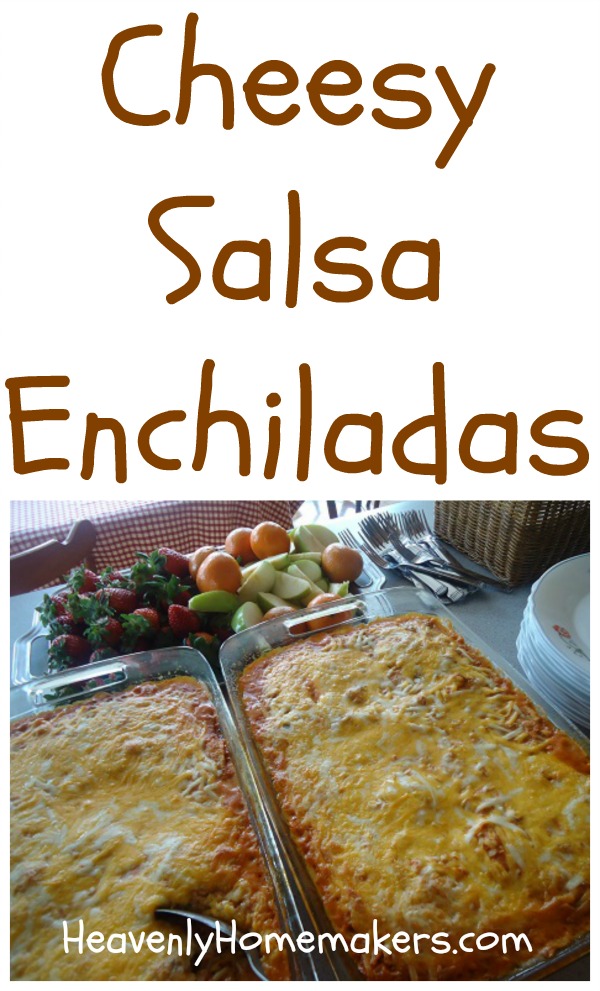
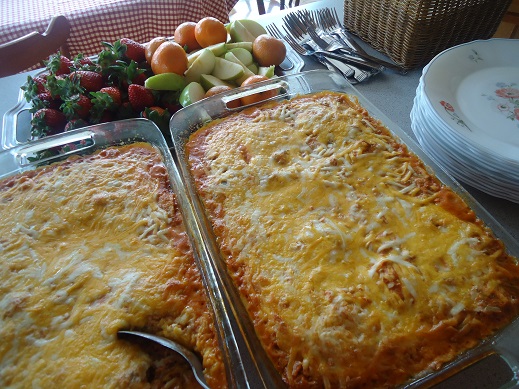
Layered Cheesy Salsa Enchiladas are about to become one of your family’s favorite recipes!

High Five Recipes 2

Yum

This recipe can not get any easier! Typically, I have all the ingredients on hand for these Layered Cheesy Salsa Enchiladas. So that means I can throw this together at the last minute whenever we need it. Everyone in my family loves this, which is a huge score!

We prefer flour tortillas, but these enchiladas can also be made with corn tortillas if you have a gluten intolerance or if you just like corn tortillas better.

Layered Cheesy Salsa Enchiladas

High Five Recipes: Layered Cheesy Salsa Enchiladas
 
Save Print
Author: Laura
Serves: 4-6
Ingredients
  • 1 pound ground beef
  • sea salt to taste
  • 2 cups salsa
  • 2 cups shredded cheddar cheese, divided (I use raw white cheddar)
  • 8 whole wheat flour tortillas (or corn tortillas)
Instructions
  1. Brown meat. Stir in salsa and ½ cup of cheese.
  2. Lay 4 tortillas in the bottom of a 9x13 inch baking dish.
  3. Spread half of meat mixture over tortillas.
  4. Layer again with the 4 remaining tortillas.
  5. Spread remaining meat mixture over tortillas.
  6. Top with 1½ cups cheese.
  7. Bake uncovered at 350° for 20-25 minutes.
3.4.3177


Save Print
3.4.3177

Cheesy Salsa Enchiladas
This dish freezes easily too, making it a great make ahead meal!

Freezing Instructions:  Cover dish well and freeze. Thaw and bake as directed above. Or, if the enchiladas are frozen, bake in a 250° oven for one hour, then at 350° for another 30 minutes or until cheese is bubbly.

Serve these Cheesy Salsa Enchiladas with a tossed salad and fresh fruit. This meal is as simple as can be!

creamy salsa enchiladas

I have several more High Five Recipes up my sleeve (not literally of course, but wouldn’t that be fun to see?). Oh, and actually if you haven’t already, you should go read the story of my sleeves because, well it’s always fun to read about sleeves.

It’s here! Check out our amazing Simple Meals program!

728x90

Heavenly Homemaker's Club Members: Access your homepage and all your fantastic resources here! Not a member yet? Please join us!

High Five Recipes: Cream Scalloped Potatoes

March 4, 2010 by Laura 36 Comments

This post may contain affiliate links. For more information, please see our disclosure policy.

High Five Recipes 2

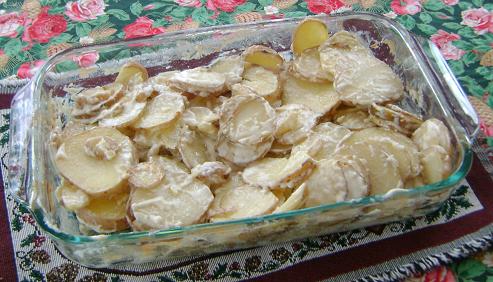
Had I not tasted these potatoes myself (when my friend’s mom made them) and realized that I had just bitten into a bite of comfort food heaven, I would not have believed that these three little ingredients all by themselves could actually create such a wonderful side dish.

All of the other scalloped potatoes I’ve ever made have required quite a bit of work:  prepare potatoes…make a white sauce…layer the potatoes with the sauce…cook covered for a specific amount of time…then uncovered for another specific amount of time.

But this potato recipe?  Scrub and slice potatoes. Sprinkle with salt. Pour cream over potatoes. Bake. Stir every once in a while. Eat. Try to be nice and share. No really Laura…please pass the potatoes.

creamscallopedpotatoessm

Cream Scalloped Potatoes

4-5 medium potatoes
1 1/2 cups cream
sea salt to taste

Scrub potatoes and cut into very thin slices. Spread into a casserole dish. Sprinkle with salt. Pour cream over potatoes.

Bake uncovered at 300° for 1 1/2 to 2 hours, pulling dish out and stirring occasionally. Serve when potatoes are tender and cream has thickened.

The starch from the potatoes naturally thickens the cream into it’s own white sauce! SO simple!

Now, you’re welcome to throw in some onion or even sliced carrots into this dish if you want more flavor. I personally love it with just a generous amount of salt.

This potato dish is inexpensive, healthy and takes very little time to prepare. And it tastes like comfort food heaven. What more could we ask for?

Heavenly Homemaker's Club Members: Access your homepage and all your fantastic resources here! Not a member yet? Please join us!

Healthy Homemade Breakfast Burritos

February 27, 2010 by Laura 41 Comments

This post may contain affiliate links. For more information, please see our disclosure policy.

Well, I made the kids mad at lunch today. I stood there making 20 breakfast burritos and wouldn’t even let them eat one.

Instead, they had to eat tuna.   I was heartless enough to actually make them wait until next week to eat the Breakfast Burritos. Hey, I’m just trying to get ahead here. Someday when they become the parent, they too might have a Breakfast Burrito agenda and make their children settle for tuna. And then they’ll come back to me and tell me how sorry they are for being mad about the 2010 Withholding of the Breakfast Burritos.

Someday.

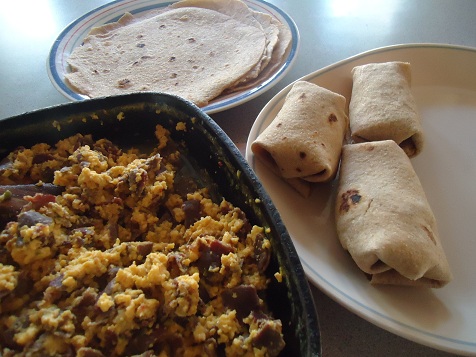
breakfast_burritos_2

Homemade Breakfast BurritosYum

1 pound turkey sausage, browned
12 eggs, scrambled
1 1/2 cups shredded cheddar cheese (I use Landmark Raw White Cheddar)
2 cup salsa (more or less to taste)
20 whole wheat tortillas*

*Tortilla Hint:  If you’re making your own tortillas (and if you aren’t, you really should be, because YUM)…try this tip to make burrito forming so much easier! As you roll your tortillas, cook them on just one side, leaving the other side softer and more flexible.  Also, I find it works best to form the burritos within two or three hours of making the tortillas…before the tortillas have been refrigerated.

To put together the burritos:

Stir together scrambled eggs, cooked sausage, cheese and salsa. (I leave out the salsa at first and make up some salsa-less burritos for a couple of boys in my life who don’t like salsa. Then I add salsa to the remainder of the mix and make a few with salsa for the rest of us!)

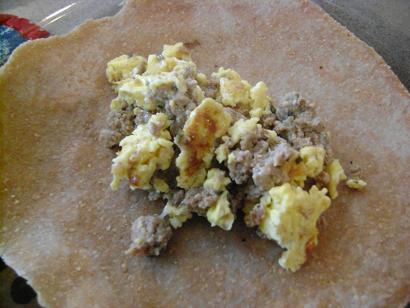
breakfastburritos2smPlace a nice spoonful of burrito mixture onto a tortilla.
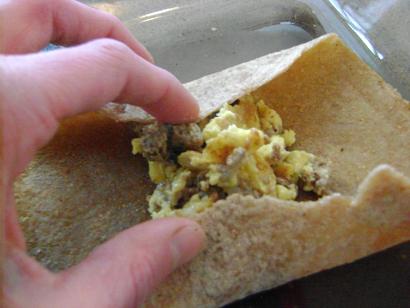
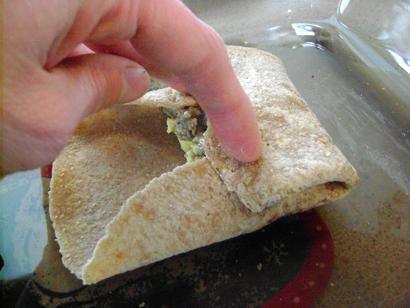
breakfastburritos3smFold in the ends.

breakfastburritos4smFold up one side, and then the other.

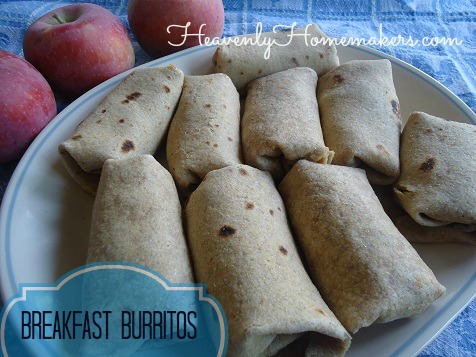
breakfast_burritos

Place burritos in a freezer bag and store in the freezer for up to three months.

To reheat:  Place desired number of thawed or frozen burritos on a baking sheet. Heat in a 350° oven for 10-20 mintues until heated through.

P.S. The children weren’t mad for long. They really like tuna…but just temporarily forgot that fact when they smelled the sausage cooking. They happily ate their tuna and will ever so much more happily eat their Breakfast Burritos some morning next week when I have yet another agenda:  the-hurry-up-and-eat-breakfast-so-that-you-can-start-your-handwriting-and-math…agenda.

Heavenly Homemaker's Club Members: Access your homepage and all your fantastic resources here! Not a member yet? Please join us!

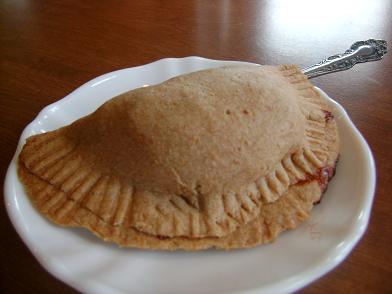
Mini Apple Pies (A Part of This Complete Breakfast)

February 25, 2010 by Laura 169 Comments

This post may contain affiliate links. For more information, please see our disclosure policy.

Who decided that sugar coated sugar dobbers and frosted sprinked poptarts were the best way to start the day? I also want to know why the aforementioned choices…or a pancake drenched in syrup is considered a great breakfast food…yet an apple pie is considered to be a dessert.

Remember, I like to think outside the box when it comes to breakfast. I’m all about Giant Breakfast Cookies, Breakfast Cake, Funnel Cake, Whole Wheat Donuts…and if you recall…even Homemade Ice Cream for breakfast. And what about our Valentine’s day Peach Cobbler? Yes, I think breakfast should be enticing, delicious, nutritious and sometimes even fun. And I think Apple Pie should be okay to eat for breakfast.

This Mini Apple Pie recipe is a new one I’ve come up with as I work on creating more Healthy Make-Ahead Meals. These freeze well (unbaked) – then you can just pull out a little pie (or 3) per person and bake.

Make them for breakfast…and your family will smell them baking, jump out of bed and come running into the kitchen and plow you over onto the kitchen floor (out of joy and love of course).

You can make these a couple of different ways:  Mini Apple Pies, or Apple Pie Pockets…depending on what works best for you. I use the same crust recipe I use for my Homemade Pizza Pockets. Follow the same instructions for the pizza pockets to create an Apple Pie Pocket…

applepiepockets2sm

Yum

The following directions are for Mini Apple Pies:

Crust:

3 1/2 cups whole wheat flour
1 t. sea salt
1 cup melted butter
1 cup plain yogurt

Stir ingredients together until thoroughly mixed. Use the dough right away to create pockets or pies…or let the dough sit overnight on the countertop to break down the phytates and make the grains more digestable. This dough is MUCH easier to work with if you work it like playdough in your hands a while before you try to roll it out.

Filling:

3 pounds of apples – about 11-12 smallish apples (any kind you like)
1/4 – 3/4 cup sucanat (your preference)
1 Tablespoon ground cinnamon

Topping:

1/2 cup whole wheat flour
1/2 cup rolled oats
2-4 Tablespoons sucanat
3 Tablespoons melted butter

To make Mini Apple Pies:

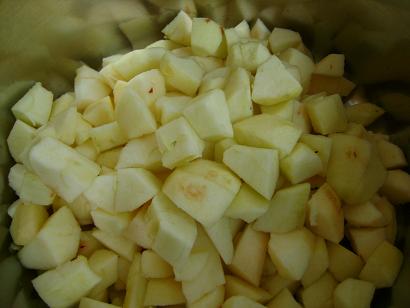
miniapplepies1smPeel apples and cut them into bite sized chunks.
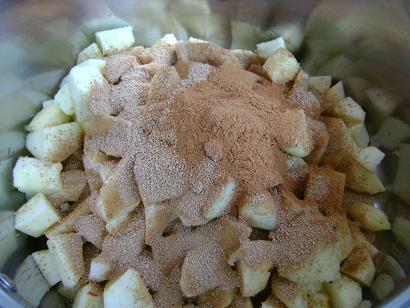
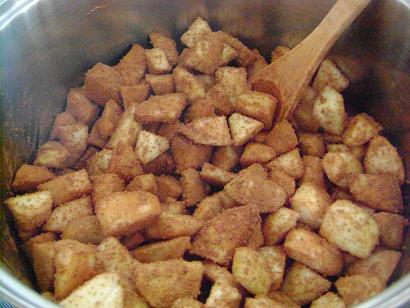
miniapplepies2smAdd sucanat and cinnamon.

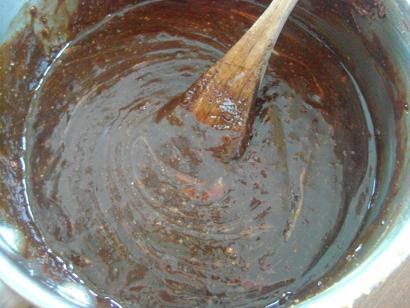
miniapplepies3smStir well and cook over medium heat until apples are
tender and a syrup has formed (about 10 minutes).

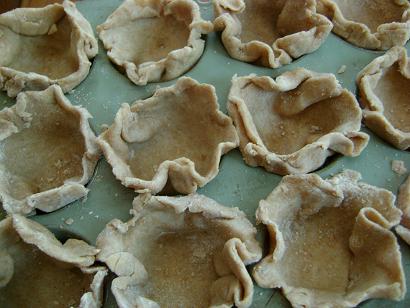
miniapplepies5smIn the meantime, separate dough into 21-24 pieces.
Roll each piece into a little circle with a rolling pen.
As you can see, I am NOT a perfectionist. If I was making these for a
ladies’ brunch or something…I might take the time to make them pretty.
But for my family of boys?
Do you think they really care if their pies are pretty?
They eat them in three minutes flat. Thus my sloppy dough squishing.

Squish (or place nicely) your dough circles into well buttered MUFFIN PANS. Using a muffin pan for these Mini Apple Pies eliminates the need to go buy 24 little mini pie pans.

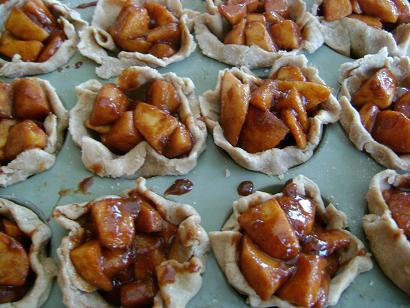
miniapplepies4smFill each (unbaked) crust with apple pie filling.
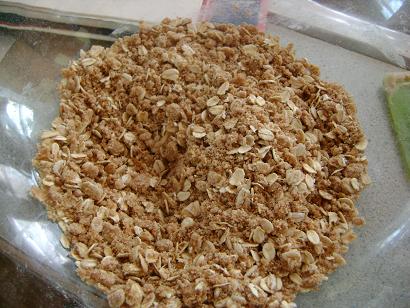
miniapplepies6smIn a bowl, stir together topping ingredients until the dry ingredients are moistened.
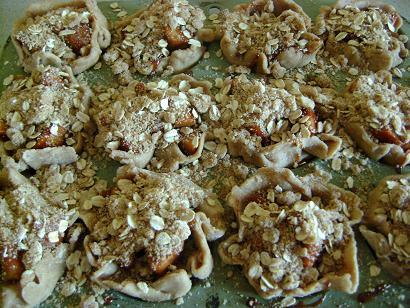
I find that melting the butter and stirring it into the flour, oats and sucanat makes a great crumb topping…much less effort than “cutting in the butter”.

miniapplepies7smSprinkle topping all over the top of your little pies.
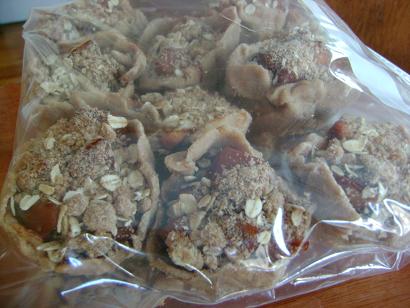
Try if you can to be as messy about this process as I am. Sheesh.

Freeze your pies in your buttered muffin pans for a couple of hours.

miniapplepies8smRemove your muffin pans from the freezer and allow them to sit on the counter for 10-15 minutes.  Use a fork to gently pry the pies out of the pan. Place them carefully into freezer bags and put them bag into the freezer.
To bake your Mini Apple Pies:

Take desired number of pies out of the freezer and place them on a baking pan. Bake in a 375° oven for 35-45 minutes. You can let them thaw first if you want…but I find that the frozen pies bake just fine!

Mini_Apple_Pies

And now I’d like to point out that (depending on how much you use) there is about 1/2 cup of sucanat divided by 24 little pies…making this a very healthy, very low in sugar breakfast. Much less even than my Applesauce Bread or something otherwise considered a breakfast food.

Bring on the Breakfast Pie! Shucks…maybe we should even serve it with Ice Cream!

What’s your opinion about serving cobbler or pie for breakfast? Do I sound like a weirdo?  (Wait, don’t answer that.)
——————————————-

Need more healthy and family friendly breakfast recipes? I’ve got a whole page of ’em here! And yes, would you believe…you can easily make Homemade Poptarts!!

Heavenly Homemaker's Club Members: Access your homepage and all your fantastic resources here! Not a member yet? Please join us!

Healthy Gluten Free Recipes

February 16, 2010 by Laura 22 Comments

This post may contain affiliate links. For more information, please see our disclosure policy.

glutenfreerecipespicsmFlour Free Peanut Butter Cookies

I often have the privilege of taking meals to friends who have just had a new baby. I love taking meals to people, but I really love holding the new babies when I get there. :)

My most recent new-baby-meal was delivered to a family that must avoid gluten. I enjoyed the challenge it posed to come up with an entire meal that was completely gluten free.

What I discovered through this challenge was that while I talk a lot about grains and grain mills and making bread…I also have quite a nice collection of recipes that are gluten free. I was excited to discover this and decided to make a Quick Click Gluten Free Resource Page on my site for those of you who either must eat a gluten free diet, or have opportunity to cook for those who do.

Here are the gluten free recipes I already have on my site:

Breakfast RecipesYum

  • Fruit and Yogurt Delight
  • Smoothies
  • Strawberry Yogurt Fruit Dip
  • Turkey Sausage
  • Veggie Egg Scramble
  • Warm Chocolate Soother
  • Warm Vanilla Soother

Dessert Recipes

  • Caramel Apple Dip
  • Chocolate Caramel Truffles
  • Coconut Macaroons
  • Creamy Pudding
  • Flourless Peanut Butter Cookies
  • Homemade Chocolate Chips
  • Homemade Ice Cream
  • Hot Cocoa
  • Peanut Butter Honey Bars
  • Peanut Butter Honey Fudge
  • Peanut Butter Raisin Balls
  • Peanut Butter Truffles
  • Snow Ice Cream

Main Dishes

  • Baked Potato with Broccoli Cheese Sauce
  • Beefy Enchilada Bake
  • Beefy Vegetable Soup
  • Black Bean Salsa
  • Black Bean Taco Salad
  • Cheddar Ranch Burgers
  • Cheeseburger Zucchini Boats
  • Cheesy Beef and Rice
  • Potato Soup
  • Shepherds Pie
  • Sloppy Joes
  • Taco Potatoes
  • Tomato Soup
  • Turkey

Side Dishes and Snacks

  • Angeled Eggs
  • Cheesy Mashed Potatoes
  • Cream Cheese Salsa Dip
  • Creamy Coleslaw
  • Fruit Salad
  • Homemade Potato Chips
  • Justus’ Shaved Ice
  • Ranch Cheese Ball
  • Ranch Potato Wedges
  • Rice and Veggie Stir Fry
  • Simple Mashed Potatoes
  • Spicy Avocado Dip
  • Strawberry Milkshake
  • Strawberry Peach Slushie
  • Super Simple  Chip Dip

Dairy

  • Butter
  • Buttermilk
  • Cream Cheese
  • Kefir
  • Mozzarella Cheese
  • Ricotta Cheese
  • Sour Cream
  • Yogurt

Condiments

  • Barbeque Sauce
  • Italian Salad Dressing
  • Peanut Butter
  • Ranch Salad Dressing
  • Sunbutter
  • Sweet Pickle Relish
  • Thousand Island Salad Dressing
  • Turkey Gravy (if you use cornstarch or arrowroot powder)

My hope now is to continue to add to this list as I find new, yummy, healthy gluten free recipes. I already have a few in the works that I plan to post, but I’d LOVE to add your recipe links to this page too!

If you have a healthy, whole foods recipe that does not include wheat, barley, oats or rye as an ingredient…leave the link in the comments section or email it to me so I can add it to the list. I would LOVE to have a huge collection of great gluten free recipes for all of us to resource as needed!
—————————————

This post is linked to Spring Cleaning Carnival where we’re talking about Getting the Gluten Out.

Heavenly Homemaker's Club Members: Access your homepage and all your fantastic resources here! Not a member yet? Please join us!

Special Valentines Day Treats: Peanut Butter Truffles and Chocolate Caramel Truffles

February 11, 2010 by Laura 52 Comments

This post may contain affiliate links. For more information, please see our disclosure policy.

I have always loved the idea of making truffles, yet it always seemed so daunting to me. Truffles sound so…gourmet or something. I finally decided that this year for Valentine’s Day I was going to give truffles a try.

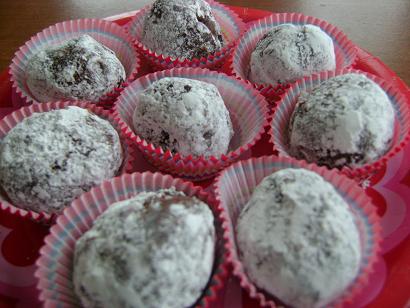
Delicious Homemade Truffles

I learned that not only are truffles easy to make…they are quite an inexpensive Valentine’s Day treat. Do you KNOW how much truffles cost at the store? Yeah, a lot more than homemade ones. Not only are the homemade truffles less expensive, these treats don’t have high fructose corn syrup or hydrogenated oils in them!

This first recipe is SO easy to make! Try this one first if you want to prove to yourself that you can make truffles.

Peanut Butter TrufflesYum

2 cups milk chocolate chips
1/2 cup heavy cream
2 T. butter
1/2 cup natural peanut butter (I used homemade peanut butter)
1/4 cup organic, unbleached powdered sugar (optional)

In a saucepan stir together chocolate chips, cream and butter over medium heat.

pbtruffles1smAbout the time the chocolate chips are almost melted,
add peanut butter and stir until smooth.

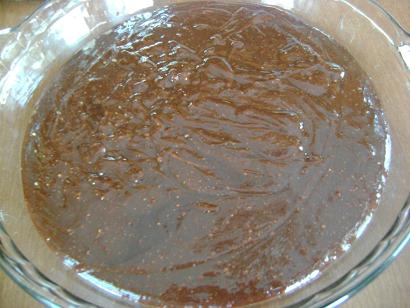
pbtruffles2smSpread mixture into a pie pan and chill for about two hours.
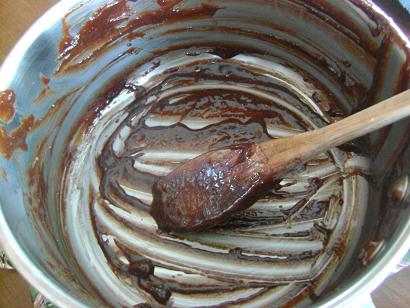
pbtruffles3smLick the pan while you wait for truffles to chill because…
well…do I actually need to give you a reason?

pbtruffles4smRoll mixture into 1 inch balls.
Dip in unbleached powdered sugar.
Place on parchment paper and chill until set.

This next truffle recipe takes a little more time to make, but it is SO WORTH IT.

Chocolate Caramel Truffles

1 cup sugar (I used sucanat)
2/3 cup heavy cream
1 cup chocolate chips (milk chocolate or semi-sweet)
1 t. vanilla extract
1/4 t. sea salt

carameltruffles1smIn a saucepan, cook and melt sugar, stirring with a fork.
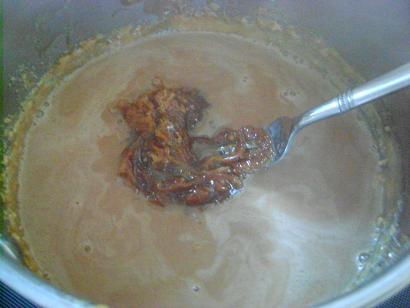
It will clump up at first while it melts, but it will melt if you keep stirring and heating.
(Trust me, use a fork. A spoon doesn’t work.)

carameltruffles2smRemove melted sugar from heat and stir in cream.
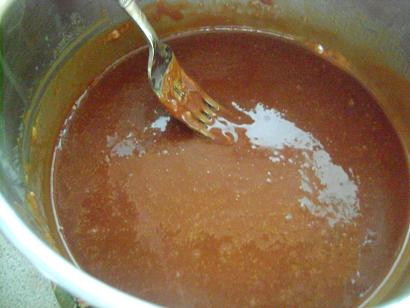
Pouring in the cream will immediately create a crazy big blob thing of caramel,
so take it back to the stove and heat and stir until it melts.
It will seem to take forever but don’t worry,
it really will melt eventually (about 15 minutes).

carameltruffles3smSee, it finally melted. Now you have caramel.

carameltruffles4smRemove from heat and stir in chocolate chips, vanilla and salt.
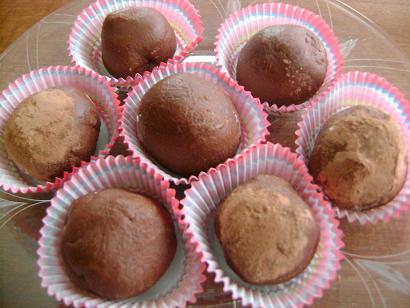
Pour mixture into a pie pan and chill for about two hours.

carameltruffles5smRoll mixture into 1 inch balls and chill on parchment paper until set.
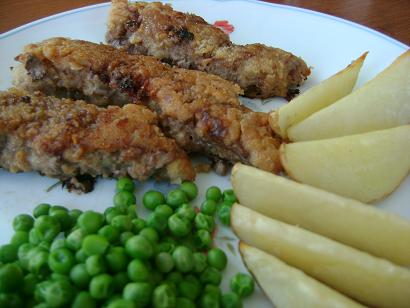
You can dip your truffles in a bit of cocoa powder if you want them to look pretty. They look pretty without the cocoa though, because hello? Chocolate and caramel all rolled into a ball? How could that not be pretty?

Place your truffles into little Valentine muffin papers and you’re all set!

I will present these truffles to Matt on Valentine’s Day, at which time we will have a conversation about whether caramel is pronounced Kare-uh-mel or Car-ml. He will say that he is pretty sure that it is Kare-uh-mel because there’s an “a” in the middle, and I will just sit there eating his truffles.

How do you say caramel, by the way?

It may seem like Matt and I argue over word pronunciation often, but really we don’t. Just KYOOPON vs. KOOPON and the occasional Kare-a-mel vs. Car-ml. And if those two marital issues are among our biggest, I’d say we’ll have a pretty great Valentine’s day.

Heavenly Homemaker's Club Members: Access your homepage and all your fantastic resources here! Not a member yet? Please join us!

High Five Recipes: Chicken Fried Steak Strips

February 9, 2010 by Laura 79 Comments

This post may contain affiliate links. For more information, please see our disclosure policy.

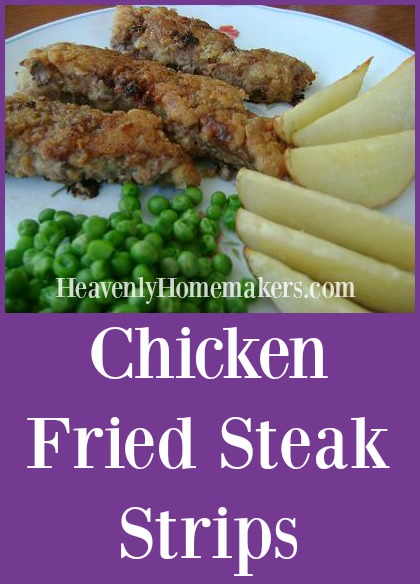
You can easily make Chicken Fried Steak into yummy strips which are easy to eat! Now a little tip…

High Five Recipes 2

I do almost all of the cooking around here…not because Matt can’t or won’t cook. I just really, really love to cook and have more time to be in our kitchen.

However, ever since Matt started working at a restaurant, he’s been quite a bit more interested in learning about food preparation – and guess what? My husband has a really great cooking tip for you today.

chickenfriedsteakstrips2sm

Yes indeed, this nugget of Chicken Fried Steak Strip wisdom is brought to you by the Heavenly Homemaker’s Husband! (Maybe you knew this tip already, but I didn’t.)

Here’s what he shared with me the last time I made these Chicken Fried Steak Strips:

If you keep dipping the meat in the flour and then in the milk and then back in the flour and then back in the milk and then back in the flour and then back in the…

It will make an extra yummy, extra crispy coating on the outside of the strip.

My strips were good, but I had just been single dipping. Following Matt’s advice, I am now double and even triple dipping. Now, they are Oh My Goodness Amazing. All thanks to my husband. I love that man. You will too after you try his double/triple dipping advice. But you can’t have him. He’s mine.

Chicken Fried Steak StripsYum

High Five Recipes: Chicken Fried Steak Strips
 
Save Print
Author: Laura
Ingredients
  • 1 pound beef cube steak
  • 1¼ cups whole wheat flour
  • ½ t. garlic powder
  • ¾ cup milk
  • oil for frying (I usually use Palm Shortening)
Instructions
  1. Cut cube steak into 1 inch strips.
  2. In a bowl, stir together flour and garlic powder.
  3. Pour milk into a separate bowl.
  4. Heat oil in a skillet (350° for electric skillet or medium heat on the stove top).
  5. Dip beef strip in milk, then in flour mixture.
  6. Dip, repeat. Dip, repeat. Dip, repeat. (More or less is fine.)
  7. Place strip in oil.
  8. Cook for about 7 minutes on each side. (Salt to taste.)
3.4.3177

Chicken Fried Steak Strips

So let’s review: The more you dip, the better the strip. You’ve gotta try it!

Read a great tip about Preparing Ahead and Flash Freezing your Chicken Fried Steak Strips here!

Heavenly Homemaker's Club Members: Access your homepage and all your fantastic resources here! Not a member yet? Please join us!

High Five Recipes: Super Simple Burritos

January 28, 2010 by Laura 47 Comments

This post may contain affiliate links. For more information, please see our disclosure policy.

All this time, I thought burritos was spelled “b-u-r-r-i-t-o-e-s”. Duh, I know. Spelling is not my gift. (You’ve probably figured that out by now.)  I had “burritoes” typed in this recipe, but it just didn’t look right.

High Five Recipes 2

So, I did a swag search for “burritoes” and you know what it asked me?

“Did you mean burritos?”

Well, that answered my question. But sheesh, it’s like the computer is mocking me when it does that, you know?

Super Simple Meat and Cheese BurritosYum

1 pound ground beef, venison or turkey
sea salt to taste
3/4 cup shredded cheese (I use raw white cheddar)
1 cup salsa
10-12 whole wheat tortillas

Brown meat in a large pan. Salt to taste. Remove from heat and stir in salsa and shredded cheese. Spoon 2-3 tablespoons onto a tortilla and wrap.

To Freeze:  Lay burritos barely touching in a 9×13 freezer safe dish. If you are freezing more than one layer of burritos, place wax paper or parchment paper between the layers to prevent them from sticking together.

To Re-Heat:  Place burritos on a baking sheet. If burritos are thawed, warm in the oven for about 15 minutes until heated through and through. If burritos are frozen, leave them in the oven for about 30 minutes. They might get a little crispy on the outside, but yum!

burritosm

Super Simple Bean and Cheese Burritos

3 cups cooked black or pinto beans
1 cup salsa
3/4 cups shredded cheese
sea salt to taste
8-10 whole wheat tortillas

Mix beans, salsa, cheese and salt. Wrap 2-3 tablespoons in each tortilla. Freeze and reheat as above.

Not flavorful enough for ya? Add any one or more of the following (which will mean that this recipe will no longer be a High Five Recipe…but who’s counting?):

  • 3 Tablespoons chopped onion
  • 1 teaspoon chili powder
  • 1/2 cup chopped olives
  • 1/2 cup cooked sweet corn

Or, make the ingredients go a little farther by stirring in 1 cup cooked brown rice.

Why This is One of My Very Favorite Recipes:

  • Everyone in my family loves them. The boys cheer when I make them.
  • They are SO easy to make!
  • They freeze VERY well. In fact, instead of making them just before serving time, I much prefer to make a triple batch of these, freeze them and have them ready to go for a quick meal.
  • When I have them made ahead of time, they are the EASIEST lunch to serve:   Heat…eat…done.
  • They are very low in cost, especially if you use beans.
  • They are good and healthy.
  • They are a PERFECT item to take to someone who has just had a baby or a surgery or a whatever. The recipient can warm them up as they need them. I take these to people ALL the time!
  • They keep my children full for longer than ten minutes.
  • Last but not least, I now know how to spell them correctly. ;)
Heavenly Homemaker's Club Members: Access your homepage and all your fantastic resources here! Not a member yet? Please join us!
« Previous Page
Next Page »

Join Our Community!

 Facebook Twitter E-mail Instagram Pinterest

Popular Posts

~ Will All of the Real Moms Please Stand Up?
~ Easy! Stir-and-Pour Whole Wheat Bread
~ How to Make Gatorade
~ 31 Real Food Breakfast Ideas
~ Dear Teenage Girls...
~ When Mom Takes a Step Back
~ The Inexpensive Health Insurance We Love!
~ Let's Talk Real Food Grocery Budgets

Check out our latest posts!

  • Big Family Food and Fun: September 6-12, 2026
  • Big Family Food and Fun: August 30-September 5, 2026
  • Big Family Food and Fun: August 23-29, 2026
  • Big Family Food and Fun: August 16-22, 2026
  • Big Family Food and Fun: August 9-15, 2026
Home  ~  Simple Meals  ~  Club Membership  ~  Shop  ~  Privacy Policy  ~  Disclosure  ~ Contact

Copyright © 2026 · Beautiful Pro Theme on Genesis Framework · WordPress · Log in