Heavenly Homemakers

Encouraging women in homemaking, healthy eating and parenting

  • Home
    • About
    • FAQs
  • Recipes
    • Bread and Breakfast
    • Condiments
    • Dairy
    • Main Dishes
    • Side Dishes and Snacks
    • Desserts
    • Gluten Free
    • Instant Pot
    • Crock Pot
    • Heavenly Homemaker’s Weekly Menus
  • Homemaking
    • Real Food Sources
  • Store
  • Contact
    • Advertise
    • Disclosure
    • Privacy Policy
  • Simple Meals
  • Club Members!

Easy Homemade Chocolate Milk

May 30, 2021 by Laura Leave a Comment

This post may contain affiliate links which won’t change your price but will share some commission.

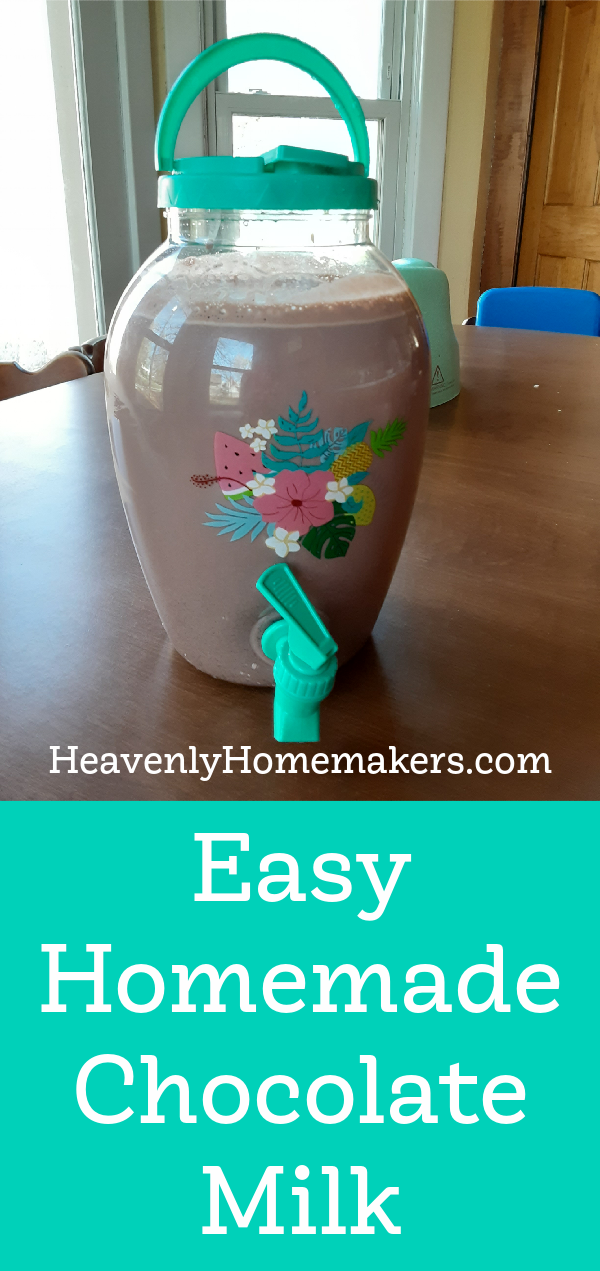
It really is easy to make Homemade Chocolate Milk! And it tastes better than any store-bought chocolate milk you can find. What a treat!

Recently, someone gave us 5 gallons of milk. FIVE! I mean, we have a big family, but it’s still hard to get through five gallons of milk before it goes bad.

I had fun figuring out ways to use up the milk. Pudding ranked high on the list:

  • Vanilla Pudding
  • Butterscotch Pudding
  • Tapioca Pudding
  • Peanut Butter Pudding
  • Chocolate Pudding

Mac and Cheese is also a great way to use up milk, especially this amazing recipe. And then, making Chocolate Milk as a special treat always makes my family happy!

I don’t love for us to drink much sugar. So I made this Easy Chocolate Milk to share with college students when they came over so that the gallon of fun could be spread throughout many of us, not just our family. :)

Ready for the recipe? Keep this one in your back pocket for a fun treat to serve guests on a hot day!

Easy Homemade Chocolate MilkYum

Easy Homemade Chocolate Milk
 
Save Print
Author: Laura
Serves: 1 gallon +
Ingredients
  • 1 cup brown sugar
  • ½ cup unsweetened cocoa powder
  • ½ cup water
  • 1 gallon milk
Instructions
  1. In a large pot, mix together sugar, cocoa, and water.
  2. Cook on low heat until the sugar is dissolved and the mixture is well combined.
  3. Turn off the heat.
  4. Stir in the milk with a whisk until the chocolate is evening mixed throughout.
  5. Pour chocolate milk into a gallon-sized serving jar.
  6. Chill for at least two hours before serving.
3.5.3251

Try this and let me know what you think? Best Chocolate Milk you’ve ever had? That’s what many of our guests tell me when they try this. :)

Heavenly Homemaker's Club Members: Access your homepage and all your fantastic resources here! Not a member yet? Please join us!

Best Leftover Mashed Potatoes You’ve Ever Had In Your Life

May 23, 2021 by Tasha Hackett Leave a Comment

This post may contain affiliate links which won’t change your price but will share some commission.

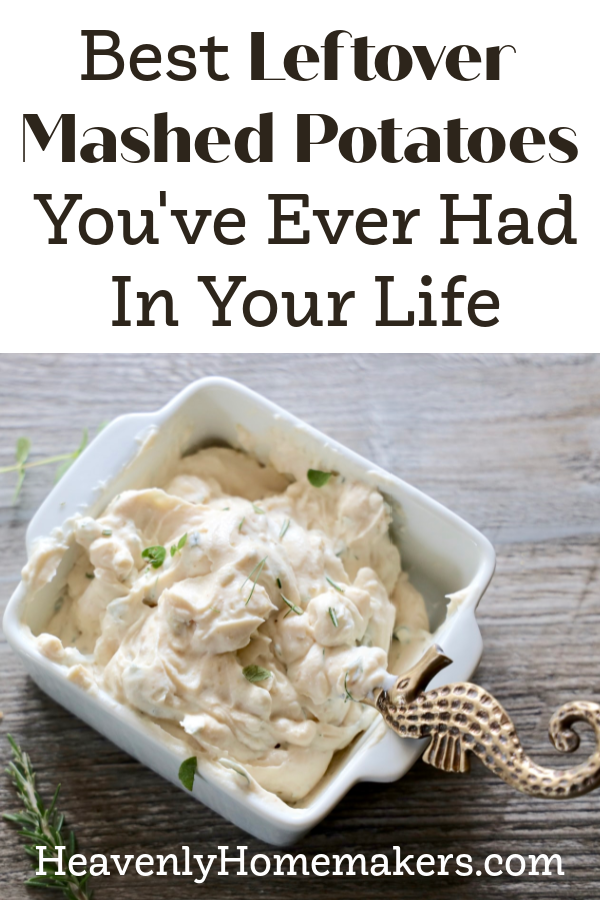
Is it true? Are these really the best leftover mashed potatoes? Tasha says so, and after reading this, I agree!

Best Leftover Mashed Potatoes You’ve Ever Had In Your Life

By Tasha Hackett

~~~~~~~~~~~~~~~~~~~~~~~~~~~~~~~~~~~~~~~~~~~~

The best leftover mashed potatoes. Okay! Sure. But the best? Lofty claims. I stand by my statement though. If you make the best mashed potatoes to begin with, which I do, reheating them is a breeze. Let me share my secrets with you. And yes. I know. Laura already told you six years ago. But dude, I’ve birthed three kids since then, it’s likely you could use a refresher as well.

Make leftovers on purpose.Yum

Yep! That’s my not so secret master plan to feed the people. I shared some stories on my Instagram about how food was really hard that day. I was sitting in the kitchen at 12:04 eating a homemade chocolate bar and the kids were running amok. There was no food. My kitchen was full of ingredients, but where was lunch?! This only happened because I lost my meal plan. True story. I wrote it all down on a scrap of paper. I went shopping for the ingredients. And then I lost the paper that was supposed to tell me what to do with those ingredients. (If only Laura had provided us really cute printout meal planning guides. Oh wait. She did!)

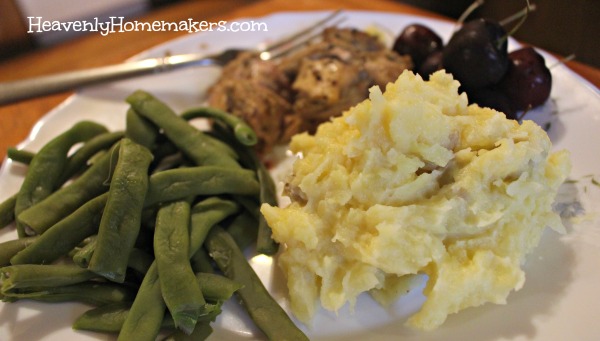
What’s the point? Yeah. The point is I had a pan of mashed potatoes in the fridge. I reheated it with a handful of cheese tossed on top. Opened a can of green beans and stirred in some bacon grease. Of course I gave them a handful of nuts for a smidge of protein and then I told them to eat and be thankful because Mom didn’t know what else to feed them.

mashed potatoes

You’re welcome, kids. Eat your leftover mashed potatoes.

Meh. It happens. Ain’t nobody going to starve today. Honestly, I shared because I felt the need to confess my homemaking woes. Like… Laura seriously makes food simple for us: Make a simple meal plan. Feed the people. I’m still the silly one who’s standing in the kitchen at 12:04 wondering what in the blazes I’m supposed to feed the people. Good, now that we have that confession out of the way. I will share with you the wisdom of leftover mashed potatoes.

First, make mashed potatoes. A lot of them. So many that your family can’t eat them all in one, two, three, four, or even five meals. Please tell me you’re following this train of thought, right? Make all the mashed potatoes. Do this when you have some spare time. On purpose. Your future self thanks you. Laura makes mashed potatoes like this. Easy peasy. If you want to do them the old fashioned way, peeling and chopping and boiling, just do yourself a favor and remember that you don’t need to chop them small! Big ol’ chunks of potatoes cook just as well when you are doing this well in advance of when you want to eat these.

mashed potatoes

You’ve a mountain of mashed potatoes. Now what?

Store them in baking pans. 9X13, 8X8, pie pans… anything that you can put in the oven for later. Sorry, back up–When you make your mashed potatoes, please, please, please add in all the butter, salt, and pepper. A touch of garlic is my standard and if you’re not on a dairy-free diet, be sure to add in cream cheese, and/or parmesan. Season them well, butter them well. Okay. Moving on. Your potatoes are cooked, seasoned, buttered, cheesed, and mashed. NOW separate them into meal sized portions in your extra baking dishes. You do have a plethora of extra dishes you’ve picked up at yard sales, right?

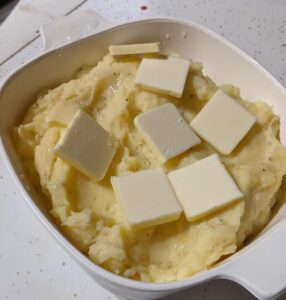
pan of mashed potatoes

Cover and freeze these leftover potatoes.

When you pull out the chicken to thaw for dinner, set out the pan of mashed potatoes. When you put the chicken in the oven, slide the potatoes in next to it. Boom. Done. Don’t ever serve cold mashed potatoes to your family again because you failed at getting everything on the table at the same time. Some people claim reheating these from the freezer makes them watery. I’ve never had this problem—perhaps because of the extra butter, cream cheese, and garlic powder… Either way. My preseasoned, prebuttered mashed potatoes from the freezer are a crowd favorite.

Is this clear to everyone? Yea? If you like to live on the edge like me, you will add more butter to the top of your pan of leftover mashed potatoes before you reheat it.

Please don’t ask me complicated questions like, “What temperature do you set the oven?” or “How long do they need to bake?” Girl… I put it in the oven and I cook it until it’s hot. (Sometimes I even put it in the microwave, don’t tell Laura, when it’s 12:04 and the people are hungry yesterday.) Count on at least half an hour if the pan is from the fridge, at least 45 min to an hour or more if it’s from the freezer. The size of your pan will make a difference. Stir it every 15 minutes if you want it to heat faster.

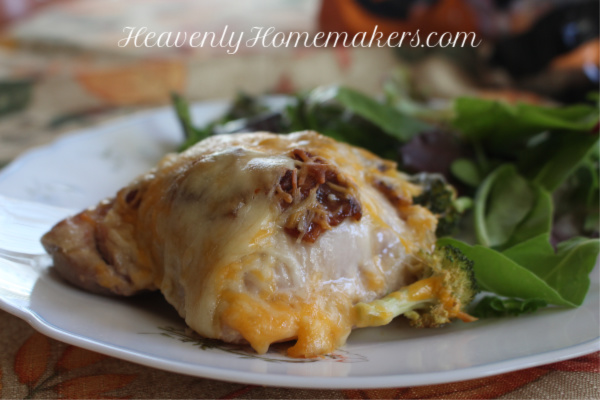
This works well if you’re serving it with something else that needs to go into the oven, like simple broccoli and bacon chicken. I would be sure to put it in the oven right away, don’t bother waiting for the preheat.

It’s not a 7 or 10 minute meal (unless you use the microwave) but it IS simple and doesn’t leave a mess and it’s GREAT for holidays or events and for Laura’s put-it-in-the-oven-leave-the-house-come-back-later trick.

Tell me. What’s in your potatoes?

What do we want? Mashed Potatoes!!!  When do we want it? Yesterday!!! Good job. Now you have a freezer well-stocked with yummy leftovers and you can have comfort food from scratch without the mess in your kitchen.


Tasha HackettTasha Hackett, friend of Laura and author of Bluebird on the Prairie, spends most of her time with four chatty children that she homeschools and her incredibly supportive husband. They give her the kind of love people write books about. Connect with her on Instagram @hackettacademy and learn more about her historical romance novel at www.TashaHackett.com. Sometimes, Tasha and Laura even catch a glimpse of each other across the soccer fields while they try to keep their toddlers from blowing away in the Nebraska wind.

Heavenly Homemaker's Club Members: Access your homepage and all your fantastic resources here! Not a member yet? Please join us!

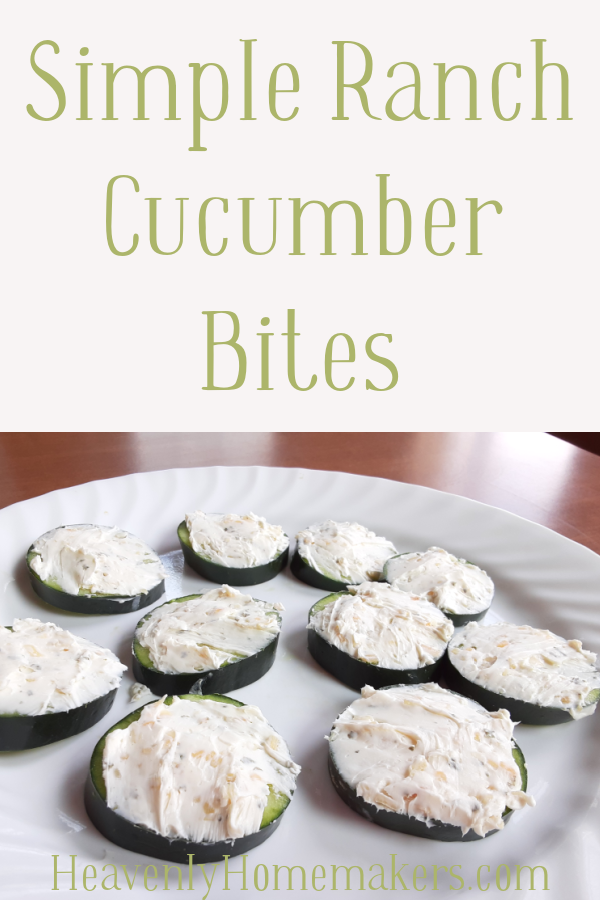
Simple Ranch Cucumber Bites

May 16, 2021 by Laura Leave a Comment

This post may contain affiliate links which won’t change your price but will share some commission.

In just a few weeks, this Simple Ranch Cucumber Bites recipes is going to come in very handy. Why? Because people will be anonymously leaving cucumbers from their garden on our doorsteps and running away. This is how it works every summer when cucumbers grow in abundance in people’s gardens!

I love how simple this recipe is! And if you peel the cucumbers before making these, your seven-year-old might forget that he’s eating cucumbers, eat the entire plate of Ranch Cucumber Bites, and ask for more.

Want more awesome Summer Snack ideas? I have brand new recipes here:

  • They don’t require a stove or an oven
  • They don’t take much time or energy to make
  • They’re healthy, but nobody will notice
  • Each of these recipes calls for 5 or fewer ingredients
  • The whole family will love them!

You will love these as much as my kids do (and my kids don’t usually eat cucumbers!).

See how to get this Perfect Summer Snacks recipe eBook here!

And now for our Ranch Cucumber Bites recipe. So easy. So good. Such a good way to eat all the cucumbers growing like crazy in everyone’s gardens!

Simple Ranch Cucumber BitesYum

Simple Ranch Cucumber Bites
 
Save Print
Author: Laura
Serves: 6-8 servings
Ingredients
  • 4-ounces softened cream cheese
  • 1 Tablespoon mayonnaise (I use Hain Safflower)
  • 3 Tablespoons Ranch Dressing mix
  • 2 medium-sized cucumbers
Instructions
  1. Mix the cream cheese, mayonnaise, and ranch dressing mix together until smooth.
  2. Cut cucumbers to create ⅙ inch slices.
  3. Spread ranch mixture onto cucumber slices.
  4. Refrigerate for an hour before serving.
3.5.3251

Want another great idea? Try subbing the Ranch Dressing Mix with our Italian Dressing Mix! This is also super delicious and fun.

Wondering what to do with the other half of your cream cheese block? Here’s an entire post that shares recipes that call for cream cheese. I heart cream cheese and feel that it makes everything taste better!


Heavenly Homemaker's Club Members: Access your homepage and all your fantastic resources here! Not a member yet? Please join us!

Simple Spaghetti Squash for Delightful Sapiens

March 29, 2021 by Tasha Hackett Leave a Comment

This post may contain affiliate links which won’t change your price but will share some commission.

This is a regular (albeit amazing) spaghetti squash recipe. It’s intended for all people, mankind, and sapiens. However, WordPress informs me that titles with uncommon words perform better. Sapiens fits the bill. Ha!

Simple Paleo Spaghetti

I’ve been eating a paleo diet for over three months! Simple meals are slowly making their way back into my life. I spent the first month floundering and relearning how to use my kitchen. The second month I discovered all the “junk” food I could make with honey and maple syrup and and ate an insane amount of homemade chocolate. But I’m rocking this new diet now. My crowd-pleasing, feed-the-people meal is either a ginormous salad with Almond-Orange Dressing or spaghetti squash. (Or both.)

The spaghetti squash topic has already been covered by Laura. 

spaghetti squash

Yum

If you search on this sight you will find multiple spaghetti squash posts. Like how to cook it in an instant pot. (Highlights: Gut it. 5 minutes. Or leave whole and 20 minutes.) But, I had more information to share. I’ll see your spaghetti squash and I’ll raise you sausage. At first I was afraid this idea was too simple to even bother sharing, but after our great dinner last night with friends, they encouraged me to please share. Mostly because she wanted the “recipe.” 

Make it now. Eat it later. It’s a no-fuss dinner. 

Here’s how it went down. One morning I remembered I had a meeting scheduled at my house the next day. This meeting would last until suppertime. Therefore, I wanted to make something I could pop in the oven at four o’clock and then feed the delightful sapiens at five o’clock. No prep. No mess. 

While I was overseeing third-grade math and language arts I baked two spaghetti squash in the oven (In short, slice in half, gut, bake “bowl-down” at 350* for 40-50 minutes. Or use the instant pot. Or bake whole and gut later). I chopped romaine leaves and other vegetables for a nice salad and put it all-together in a bowl in the fridge to be served with the amazing Almond Orange Paleo Dressing. Next, I cooked two pounds of pork sausage. 

When the squash was thoroughly cooked, I pulled it from its shells with a fork. This next part is where it gets exciting. THEN I mixed it with the sausage and a can of pasta sauce and spread it all into a 9X13 pan. Done. Mostly. 

A pre-made simple meal!

The next day, I simply popped the pan into the oven and re-heated it at 350° for an hour. At five o’clock the smell filled the dining room and I remembered I had completely forgotten to extend the invitation to dinner to our friends. “Oh, hey. You guys wanna stay and eat with us? Dinner’s already in the oven. We’re having squash and salad and stuff.” Haha. Who could turn down an invitation like that? They stayed. A good time was had by all indeed. Especially by my four-year-old, who cleaned his plate and spent the majority of the meal explaining, in detail to fresh ears, everything he knew about dinosaurs. 

looking at books

Simple meal prep is the best kept secret for the ease of serving other sapiens.

I want to be able to host and feed the people at a moment’s notice. When I first switched to paleo, I wasn’t able to do this. How could I bless others when I was following detailed recipes that included ingredients I wasn’t used to and only had enough on hand for four servings? After weeks of learning new skills, I’ve been able to put Laura’s good advice to work with my new diet requirements. I have pre-formed Salisbury steak (fancy burgers) in the freezer. I have riced cauliflower and shrimp on hand for quick and fun stir-fry. My fridge is usually full-to-bursting with fresh vegetables for snacks and salads because that’s fast food around here. Homemade chocolates, almond flour muffins, and green smoothies are a new staple. Whatever your diet needs, there are ways to make it simpler. I’m sure of it! 

Premade Spaghetti Squash Dinner
 
Save Print
Prep time
5 mins
Cook time
1 hour
Total time
1 hour 5 mins
 
Author: Tasha
Serves: 8 servings
Ingredients
  • Two Spaghetti Squash
  • Two Pounds Pork Sausage (or regular ground beef or pork)
  • 24 ounces of pasta sauce of your choosing
  • If using a plain pasta sauce, add salt, pepper, garlic, and Italian seasonings to taste.
Instructions
  1. Slice the squash down the middle to make two bowls and discard the seeds with a spoon.
  2. Oil the cut rings and place bowl-down on a pan with edges. Bake at 350 for 40-50 minutes.
  3. To check for doneness, a knife should easily slide into the squash.
  4. Brown the sausage in a skillet, pour off the extra grease if desired.
  5. Mix the squash, sausage, and sauce together. Add any extra seasonings to taste (salt, pepper, garlic, etc.)
  6. Serve immediately, or spread in a 9x13 and refrigerate up to three days.
  7. To reheat, put the cold pan in the the oven and then set to 350 for an hour.
3.5.3251

Have you ever given spaghetti squash a chance? 

I double-dog dare you to make it for dinner this week. Only mix in some great sausage and pasta sauce and voilá: Simple dinner for the masses. Just to be clear: viola is a musical instrument (played by skilled sapiens). Because I already knew that, I did not *ahem* need to search the web for the proper spelling of the French term “to suggest an appearance as if by magic.” Ya learn something new every day!


Tasha HackettTasha Hackett, friend of Laura and author of Bluebird on the Prairie, a Christian historical romance releasing Spring 2021, is fueled by sunshine, paleo pudding, or hot chocolate—whichever is more readily available. Though she often pretends to be a ballerina while unloading the dishwasher, her favorite thing is writing with hope and humor to entertain and encourage women. Her time is spent with four chatty children and an incredibly supportive husband. They give her the kind of love people write books about. You can connect with her at www.TashaHackett.com or Instagram @hackettacademy

Heavenly Homemaker's Club Members: Access your homepage and all your fantastic resources here! Not a member yet? Please join us!

Almond Orange Paleo Salad Dressing

March 8, 2021 by Tasha Hackett 2 Comments

This post may contain affiliate links which won’t change your price but will share some commission.

Tasha’s here again with an awesome new recipe just in time for spring!

Almond Orange Paleo Salad Dressing

by Tasha Hackett

What’s with the Paleo, Tasha? Okay! Sorry, just read this instead: Sugar-Free, Dairy-Free, Soy-Free Salad Dressing that will make you and your family cry tears of joy. Better? Hmm. But really, I can hardly describe the level of happiness this paleo salad dressing makes me. I never knew a salad dressing was capable of bringing forth such an emotion. Almond butter and orange juice? Who knew! Don’t be scared. This paleo salad dressing is delicious on, wait for it, SALAD, but also works great as a veggie dip. In fact, it is even edible straight from the table as pictured below. Not recommended. But acceptable.

toddler messes

Yum

My salad dressing is better than your salad dressing.

The original recipe that I adapted had a few more ingredients and it only made one tiny serving of dressing. I don’t know about you, but if I’m going to go through all the trouble of making a salad dressing from scratch to eat with my paleo food . . . I’m making more than one tiny serving. Clearly, the chances are high that I will be eating salad again in the near future. I’ve made some version of this dressing at least 5 times in the last month. If you’re drinking your salad, skip the dressing and add some fruit. **Insert puking face if you just envisioned drinking a garlic and olive oil flavored smoothie.

Almond Orange Paleo Salad Dressing

Make as directed for a typical dressing consistency. Though if you want it thicker, just add more almond butter. My salads are usually quite epic. I will rarely just eat lettuce, but this dressing has enough going on, that I have eaten it on plain old leaves before. My kitchen hack with this paleo dressing is to make it in my almond butter jar when there’s about half a cup left. Saves times scooping almond butter AND I don’t have to wash any jars just yet. Sometimes I’m pretty smart like that.

My new favorite salad includes the following:

  • Mixed greens (heavy on the spinach)
  • Chopped romaine hearts
  • Pumpkin seeds
  • Sunflower seeds
  • Chopped avocado
  • Slivered almonds
  • Dried cranberries or cherries
  • Chopped cold meat of some kind (ham, chicken, salmon, tuna, or even boiled/scrambled eggs, etc)
  • Chopped dill pickles (tricks me into feeling like I’m having a sandwich)

Yes. My toddler eats salad. What can I say? I think it’s the dressing.

Toss it all with Almond Orange Paleo Dressing and my kids fight for the last serving.

I’ve been serving my family made-from-scratch salad dressings for years and I absolutely love how freely we use them. No worries here about what we’re smothering our vegetables in. As a result, we don’t skimp on the dressings for health reasons. Everything in this dressing is Food. For. Fuel! Go make ya some and tell all your friends about how amazing it is and then invite them over for salad. I dare them to go home hungry.

Salad for dinner! Again! #paleohasmelike #sorrynotsorry #iheartsalad

Almond Orange Paleo Salad Dressing
 
Save Print
Prep time
5 mins
Total time
5 mins
 
Author: Tasha
Recipe type: Dressing
Serves: 2 Cups
Ingredients
  • ½ Cup Almond Butter
  • ½ Cup Red Wine Vinegar
  • 1 Cup Olive Oil (Can use part MCT oil or other oils)
  • 1 tsp Salt
  • ½ tsp Black Pepper
  • ½ tsp Granulated Garlic Powder (Or two fresh cloves, minced)
  • Juice of two Oranges
Instructions
  1. Mix all ingredients and stir or shake vigorously.
  2. Taste and adjust to preference.
  3. For a thicker dressing, add more almond butter.
  4. For a sweeter dressing, add a splash of apple juice.
  5. Store in the refrigerator.
3.5.3251


Quick! What’s your go-to salad dressing? Store-bought or make your own?

Lastly, be sure to check out some of the other dressings on our site.

  • Ranch Dressing
  • Italian Dressing
  • French Dressing
  • Thousand Island Dressing
  • Simple Vinaigrette

Tasha HackettTasha Hackett, friend of Laura and author of Bluebird on the Prairie, a Christian historical romance releasing Spring 2021, is fueled by sunshine, paleo pudding, or hot chocolate—whichever is more readily available. Though she often pretends to be a ballerina while unloading the dishwasher, her favorite thing is writing with hope and humor to entertain and encourage women. Her time is spent with four chatty children and an incredibly supportive husband. They give her the kind of love people write books about. You can connect with her at www.TashaHackett.com or Instagram @hackettacademy or for Laura @heavenlyhomemaker.

Heavenly Homemaker's Club Members: Access your homepage and all your fantastic resources here! Not a member yet? Please join us!

Decadent Simple Paleo Pudding

February 22, 2021 by Tasha Hackett Leave a Comment

This post may contain affiliate links which won’t change your price but will share some commission.

Decadent Simple Paleo Pudding

by Tasha Hackett

I was Surprised by my Love of Paleo Puddings 

I’ve been eating a paleo diet since December 20th. Do some math there—it’s been a few days! And for most of that time, there was no pudding. Truthfully, I was blindsided at first: No sugar of any kind, no grains of any kind, no legumes of any kind, and no dairy of any kind. Quickly I discovered a whole new world of food that has brought delight to my family as well. One of our favorites is Salisbury steak with a mushroom gravy and mashed potatoes and asparagus. I’m drooling just typing about it. 

coconut vanilla pudding

Yum

paleo vanilla pudding

And Then There was Coconut Vanilla and Pumpkin Pudding

Most winters I make Laura’s vanilla and other flavored soothers for my family. Instead of hot chocolate when they come in from the snow, they get a protein packed healthy version.

My paleo version, I believe is even healthier, doesn’t have any dairy, hardly any sweetener, and a solid amount of healthy fat for growing kids and all of us using up so much energy trying to stay warm this winter. 

Dairy-Free Paleo Pudding Special Ingredients

Coconut Cream  

I ordered a case of this from my local grocery store for a small discount. It’s not cheap. But I found I can get it for much cheaper from Azure Standard. (Currently $2.30/can.) Though I haven’t tried the Azure ordered cans yet, it will be coming on the truck in a couple weeks! Canned coconut milk has a higher percentage of liquid and less of the fat/oil. You can use that in this recipe instead of canned coconut cream, just factor in the extra liquid. You may need to add more thickener. 

Coconut Milk in a jug

I buy the jug in the cold aisle and go through about one a week. Be sure to buy unsweetened and check labels if there are options at your grocery and get one with the fewest amount of added ingredients. I use this in my coffee, smoothies, baking, and pudding! It is much yummier than almond milk. I’m just going to pretend I didn’t even mention almond milk, because I like to pretend it doesn’t exist. Almond Milk in my opinion is one of the most disgusting . . . blech. So, don’t even. Get yourself some unsweetened coconut milk from the jug. 

Egg Yolks

You can make this recipe with whole eggs, but I’ve had better luck just using the yolks. Egg whites will curdle and get chunky if you heat past 165* and nobody in my family wants to eat curdled pudding. Save the whites in another bowl because you can use them in baking or scramble with a few other eggs. Go ahead and store them in the fridge for a few days. 

Arrowroot Powder

I ordered a bag of this years ago and use it in place of cornstarch. If you’re not on a restrictive diet, cornstarch will work. Or you can skip this entirely if you want to drink your pudding. A healthy gelatin powder, or collagen works to thicken puddings, but they thicken upon cooling. To recap: if you use gelatin to thicken pudding, it will not thicken on the stovetop!

Sweetener

My preference is maple syrup. For the vanilla pudding recipe, I only used one tablespoon. I think the natural coconut cream is quite sweet. The vanilla extract needs the sweetener, I think. If you wanted to try this with NO syrup, I suggest going very easy on the vanilla extract. The pumpkin recipe calls for two tablespoons to counter the spices and vanilla. Start with less, you can always add more. Feel free to experiment with honey or stevia or other sweeteners of your choice. 

Simple Paleo Vanilla Pudding

  • Four egg yolks
  • One 13.6 oz can of coconut cream
  • 13.6 oz of coconut milk from the jug (use empty can to measure)
  • A couple dashes of salt

Mix those three together in a pot and then turn on the heat. Be careful not to boil.

Scoop out a ¼ cup of pudding and mix a slurry with ¼ cup of arrowroot powder and stir it back in the pot.

Once it begins to thicken, turn off the burner and add in:

  • One teaspoon of vanilla extract
  • One tablespoon of maple syrup. 

Taste and adjust sweetener if necessary. 

Either drink warm or chill for pudding. 

Frequently I serve this chilled for breakfast with toasted shredded coconut and pecans, blueberries, sliced bananas, apples, or any other toppings to create a full breakfast. We love this for a make-ahead breakfast. My kids can’t get enough. 

Simple Paleo Pumpkin Pudding

The same as the vanilla pudding, except add in:

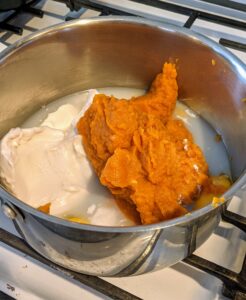
  • A can of pumpkin,
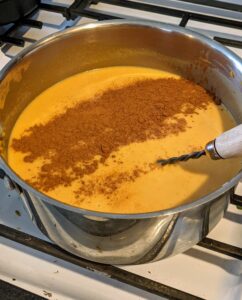
  • 2-3 teaspoons of pumpkin spice
  • An extra tablespoon of maple syrup to counter the spices 

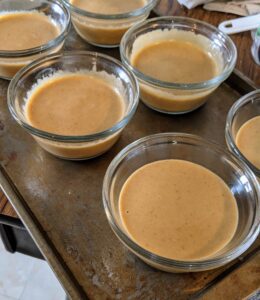
I poured this one in a paleo pie crust and pretended I was eating pumpkin pie for breakfast and had enough for six small servings for the next day. (No, it wasn’t as thick as a traditional pumpkin pie. But it was just as good!)

paleo puddingpumpkin puddingpumpkin paleo pudding

Psssst! All of these great ingredients can be purchased from Azure Standard!

Paleo isn’t a Prison

Clearly I’m not saying everyone must eat the way I do, but I have found it to be more freeing than I ever expected. My motivation for staying on this diet is different than most. If you’re curious about that, ask any questions you have! I’d love to chat about it. I’ll just briefly explain, though some people have found great success losing weight with this meal plan, that is not my goal. I’ve suffered headaches for over a decade, and recent lab results show evidence of chronic inflammation and infection among other things. In a nutshell, the paleo diet eliminates all foods that are prone to causing inflammation, as well as cutting out any processed foods that add toxins that prevent my body from healing itself. 

God is Greater than Paleo

While I 100% agree that love is better than food and who even cares about free-range chicken anymore? I know I’m on the right path. Laura spent years developing simple recipes and then they were there for her when she needed them! I believe the same has happened to me, for the first time in my life I have the budget to purchase more meat, vegetables, and nuts, to fill in the extra calories I’m no longer receiving from grains and beans and other “cheap” fillers.

Honestly, two years ago I fed my family on $200 a month. Six months ago it was about $450 a month. Paleo food for six (thankfully three of them are still tiny) is costing me $900 a month. If a doctor had told me to eat this way three years ago I would have cried. Point is: Food isn’t everything. Do what you can. Love your people. Love yourself.

Right now, for me, loving my people and myself means spending more time in the kitchen figuring out how to make paleo simple. For Laura, it means spending less time in the kitchen and more chicken nuggets. And we are not trying to confuse you. Ha! 

toddler messes

And just in case you think I have my act together, this salad-dumbing disaster, in some form, happens daily. Canned chicken on salad is a go-to lunch for us and that is not the face of a repentant toddler.

What’s your greatest struggle in the kitchen right now? Are you spending more or less time in the kitchen these days? Have you ever been put on an elimination diet of some form?

Paleo Coconut Vanilla Pudding
 
Save Print
Prep time
2 mins
Cook time
8 mins
Total time
10 mins
 
Author: Tasha
Recipe type: Breakfast
Serves: 6
Ingredients
  • 4 egg yolks
  • 1 13.6 OZ can of coconut cream
  • 1 13.6 OZ of coconut milk from the jug (use empty can to measure)
  • A couple dashes of salt
  • ¼ C arrowroot powder
  • 1 teaspoon vanilla extract
  • 1 Tablespoon real maple syrup
Instructions
  1. Mix egg yolks, coconut cream, and coconut milk, in a medium-sized pan.
  2. Add a few dashed of salt.
  3. Heat mixture on the stove being careful not to boil. Stir constantly.
  4. Remove ¼ cup of the mix and make a slurry with the arrowroot powder. Mix it all together in the pot.
  5. Keep stirring and just as the mixture begins to thicken, turn off the burner and add in the vanilla, and maple syrup. Taste and adjust sweetener if necessary.
  6. Drink warm or chill for pudding.
  7. Serve chilled pudding with a variety of toppings for breakfast or snack: sliced apples, bananas, cherries, blueberries, toasted coconut, pecans, etc.
3.5.3251

Try both and tell us your favorite!

Paleo Pumpkin Pudding
 
Save Print
Prep time
2 mins
Cook time
8 mins
Total time
10 mins
 
Author: Tasha
Recipe type: Breakfast / Snack
Serves: 6
Ingredients
  • 4 egg yolks
  • 1 13.6 OZ can of coconut cream
  • 1 13.6 OZ of coconut milk from the jug (use empty can to measure)
  • 1 can of pureed pumpkin
  • A couple dashes of salt
  • ¼ C arrowroot powder
  • 3 teaspoons of pumpkin spice
  • 1 teaspoon vanilla extract
  • 1 Tablespoon real maple syrup
Instructions
  1. Mix egg yolks, coconut cream, and coconut milk in a medium-sized pan.
  2. Add a few dashes of salt.
  3. Heat mixture on the stove being careful not to boil. Stir constantly.
  4. Remove ¼ cup of the mix and make a slurry with the arrowroot powder. Mix it all together in the pot.
  5. Keep stirring and just as the mixture begins to thicken, turn off the burner and add in the vanilla , spice, and maple syrup. Taste and adjust sweetener if necessary.
  6. Drink warm or chill for pudding.
  7. Serve chilled pudding with a variety of toppings for breakfast or snack: sliced apples, bananas, cherries, blueberries, toasted coconut, pecans, etc.
3.5.3251


Tasha HackettTasha Hackett, friend of Laura and author of Bluebird of the Prairie, a Christian romance releasing Spring 2021, is fueled by sunshine, paleo pudding, or hot chocolate—whichever is more readily available. Though she often pretends to be a ballerina while unloading the dishwasher, her favorite thing is writing with hope and humor to entertain and encourage women. Her time is spent with four chatty children and an incredibly supportive husband. They give her the kind of love people write books about. You can connect with her at www.tashahackett.com or Instagram @hackettacademy or for Laura @heavenlyhomemaker.

Heavenly Homemaker's Club Members: Access your homepage and all your fantastic resources here! Not a member yet? Please join us!

The Easiest Pulled Pork

October 28, 2020 by Laura Leave a Comment

This post may contain affiliate links which won’t change your price but will share some commission.

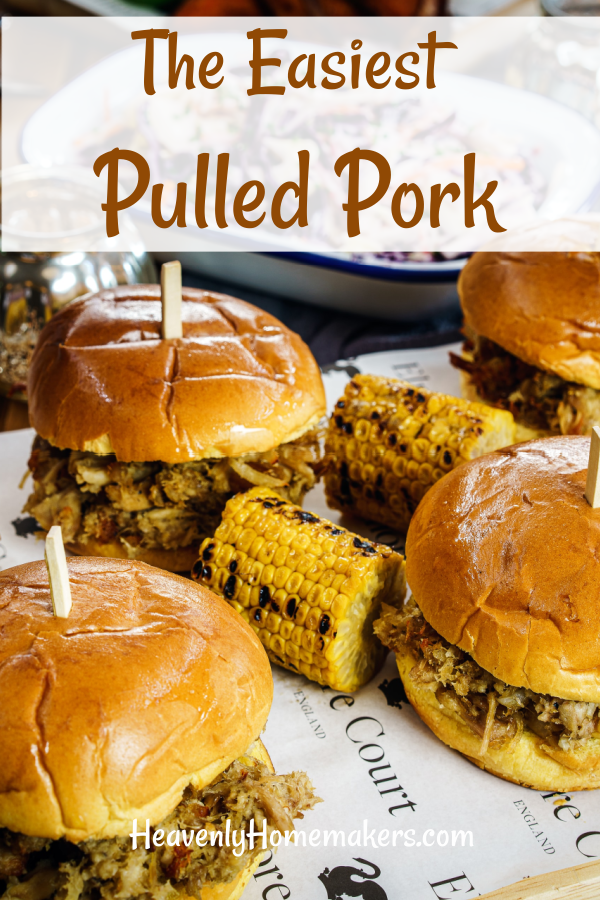
Need a meal to feed a crowd? Make the Easiest Pulled Pork!

You know I’m not a gourmet cook. I’m not even super eager to try new spices in my recipes, simply because I like to stick with basics that I always have on hand. It’s just easier for me this way and saves brain energy and effort.

The food is still delicious!

One of the first times I made this Easiest Pulled Pork and fed it to our YC soccer teams, one of the coaches told Matt, “I don’t know what your wife does to season that meat, but it is so good!”

Truth: Matt’s wife barely does anything to season the meat. But shh. Don’t tell!

I just find that food can really taste great without going to a lot of trouble and taking a lot of time. Since it was a hit last year, I made pulled pork again for the teams this year. I made 20 pounds of pork, and I’m pretty sure it only took 5 minutes of prep.

How I make pulled porkYum

  1. Put the pork butt in the slow cooker (when I make huge amounts, I use a large roaster instead of a crockpot).
  2. Sprinkle on salt and garlic powder.
  3. Peel a few onions if I have time. Cut them and throw them in with the meat.
  4. Cover and walk away.
  5. Well yeah, plug it in and turn it on low first. Then cover and walk away.

The meat slow cooks for hours then falls apart at the end of the day. It practically shreds itself. Then it can be served on buns with barbecue sauce and that’s that!

Now, those of you with smokers can surely turn out much better-tasting pulled pork than I! But this is a method that any of us can do if we have a slow cooker of some kind. And pulled pork is an inexpensive and easy way to feed a crowd!

The Easiest Pulled Pork

The Easiest Pulled Pork
 
Save Print
Author: Laura
Serves: 24 servings
Ingredients
  • 6-8 pound pork butt
  • sea salt
  • garlic powder
  • 2-3 onions (optional)
Instructions
  1. Place the pork in a slow cooker.
  2. Sprinkle on seasonings liberally.
  3. Peel onions and chop them on top of the meat.
  4. Cook on low for 10 hours.
  5. Use a knife and fork to shred the meat, which pulls apart quite easily after the meat has cooked slow and low!
3.5.3251

Don’t need to feed a crowd, just your family? You can still make this easy meal and then freeze the shredded meat in meal-sized portions to pull out and rewarm as needed. SO EASY!

Feeding a crowd and want to get ahead? Make this meat days or weeks ahead. Put the shredded, cooled meat into freezer bags to save in the freezer until you need it. Then thaw and reheat as needed.

Great Sides to Serve with Your Pulled Pork

  • Buns and Barbecue Sauces
  • Party Potatoes
  • Simple Cream Cheese Corn
  • Simple Baked Beans
  • Raw Veggies with Dip
  • Fruit like grapes, watermelon, or cantaloupe
Heavenly Homemaker's Club Members: Access your homepage and all your fantastic resources here! Not a member yet? Please join us!

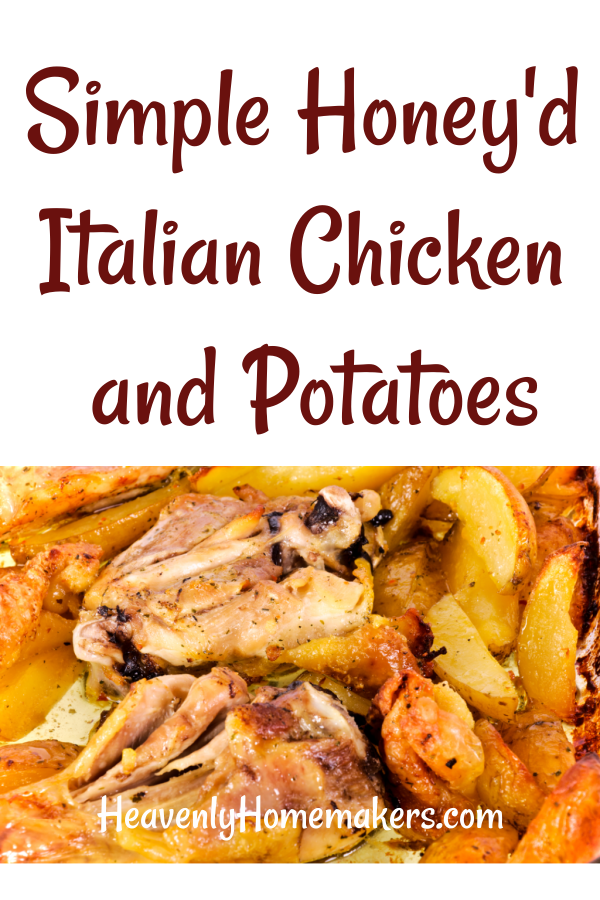
Simple Honey’d Italian Chicken and Potatoes

October 8, 2020 by Laura Leave a Comment

This post may contain affiliate links which won’t change your price but will share some commission.

This Simple Honey’d Italian Chicken and Potatoes will take you just a few minutes to prep!

Our amazing across-the-street neighbors decided in the midst of April quarantine to start raising and butchering chickens. They generously asked if we wanted in on it.

Wellllllll. Yes. We wanted some chickens, most definitely. But we knew nothing about raising them and butchering them, and we didn’t have time to commit to it. They assured us that they’d take care of the hard part (which sounded more fun than hard to them). So how could we say no?!

We helped pay for feed and other supplies, saved all of our food scraps for the growing chicks, and best of all? Our littlest guys learned to stop whatever they were doing outside to holler “doodle-do!” across the street whenever their roosters started crowing. Cutest. Think. Ever.

So now we have several locally grown chickens in our freezer (can it possibly get more local than ACROSS THE STREET?!). They even went so far as to cut legs and thighs off for us during the butchering process.

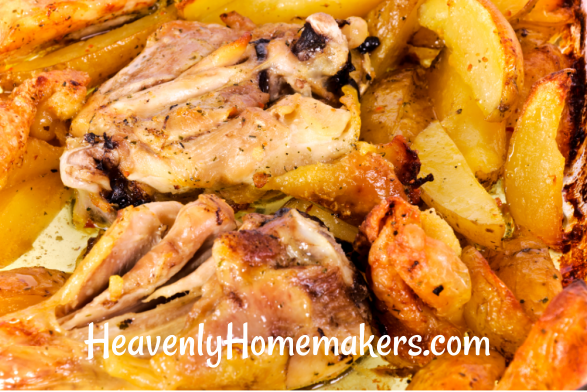
I’ve been using the thighs in this Honey’d Italian Chicken recipe and not only is it incredibly simple to put this all together, but it is also super delicious! I can quickly slide this into the oven to bake, then steam a veggie and get out mixed greens to go with it. So easy!

Simple 4-Ingredient Honey’d Italian ChickenYum

Simple 4-Ingredient Honey'd Italian Chicken
 
Save Print
Author: Laura
Serves: 4-6
Ingredients
  • 2 pounds boneless or bone-in chicken thighs or breasts
  • 2 pounds yellow or red potatoes
  • 3 Tablespoons honey
  • ¾ cup Italian Dressing
Instructions
  1. Place chicken in a baking dish.
  2. Scrub potatoes and cut them into wedges, placing them in the dish with the chicken.
  3. In a small saucepan, mix honey and Italian dressing over low heat until combined.
  4. Drizzle dressing mixture over the chicken.
  5. Bake, uncovered, in a 425 degree oven for 45 minutes or until chicken is no longer pink.
3.5.3251

If you prefer to use boneless chicken in this recipe, cut the baking time down to 25-35 minutes.

If you like simple recipes like this, you will love our Simple Real Food Recipes Cookbook. These are my go-to recipes now!

Heavenly Homemaker's Club Members: Access your homepage and all your fantastic resources here! Not a member yet? Please join us!

Simple Oven-Baked Pizza Nachos

August 23, 2020 by Tasha Hackett 4 Comments

This post may contain affiliate links which won’t change your price but will share some commission.

Ready for a great recipe from Tasha? This is a pretty fantastic idea!

Yum

What happened when Pizza met Nachos? Pizza Nachos. 

by Tasha Hackett

You can probably go on your merry way and figure this one out: Oven-Baked Pizza Nachos. Got it? But wait! Come back! I have a secret tip that takes this to the next level. Dip in warmed pizza sauce!

If you asked my family, “What’s better than nachos for dinner?” They will tell you it’s Pizza. Coincidentally, “What’s better than pizza for dinner?” Nachos. But I bet you can’t guess the newest thing I’m in love with…? Okay, fine, you got me. Pizza Nachos!!

But how simple is simple? Like, do I have to wash a bowl? 

This simple and easy dinner has become one of my favorite go-to meals where I feel like I’m meeting all the food groups (*cough* VEGETABLES) while still pleasing even the picky eaters. I started making this a few years ago, but I limited myself to traditional pizza toppings such as pepperoni, olives, mushrooms, peppers, etc., and mozzarella cheese. But this summer I realized, “I can hide all sorts of vegetables in mozzarella cheese!” (Namely zucchini.) One day, when I happened to be out of everything fresh I pulled canned chicken from my emergency pantry. Because even though I’m pretty talented at life, Laura still is mentoring me on the whole meal-plan-ahead-thing. Thus began the weekly Pizza Nacho extravaganza because even though Stir-and-Pour Pizza Crust is amazing and simple and easy, even that is too much for me right now. (Let’s be real, stirring and pouring I can handle, it’s the waiting and baking and that extra bowl to wash that does me in.) 

Okay, Karen, you can stop scrolling. Here’s how SIMPLE Pizza Nachos are made. 

  1. Spread a baking dish with tortilla chips. I use my large pampered chef jelly-roll pan. But you can use any pan you like that has an edge to keep the chips from falling into your oven and burning and setting off your smoke alarm and will leaving you wishing you had just ordered pizza like Susan does every weekend and then maybe you wouldn’t be pulling out the fire-extinguisher on a busy evening. So… I’ve used two 9″ X 13″ pans before and that works well. 
  2. Sprinkle a very sparse layer of shredded mozzarella on the chips. This is the glue to hold your toppings together.
  3. Add your toppings of choice. Feel free to be creative or not. I’ve been enjoying diced zucchini and green peppers with canned chicken on mine! Garden fresh basil and jalapenos are delightful. 
  4. Sprinkle with just a touch of Italian seasoning, salt, and garlic.
  5. Add the rest of the cheese to completely cover any sneaky vegetables you don’t want certain family members to know about. 
  6. Bake in the oven at 350° until the cheese is melted and just starting to brown. About 8 minutes. You CAN use broil for a couple minutes instead and you will have dinner, like, yesterday. But broil is not for the faint of heart, or the easily distracted, and you may want to go back to step #1 read it through carefully before you ever ever ever use the broil function… you’re welcome. #TashaCantBroil #BurnedFoodGuaranteed #TrueStory #GoAheadAndUseBroilifYoureVeryBrave
  7. While your Pizza Nachos are baking (or not burning under the broiler thing), warm up your pizza sauce of choice and do a little dance, but not too much dancing if you’re broiling. 
  8. Serve with metal salad tongs, because I don’t know any other way, and dip in pizza sauce.

pizza sauce

What are you waiting for? Go forth and make simple food.

And now I’m going to go eat one of those chocolate peanut butter cups that I have stored in my refrigerator because Laura made me do it and now I’m addicted and all this talk about pizza and nachos has me drooling.

Have you ever made pizza nachos before? I feel like I made this up, but I probably did not. Also, serious question: Is it even possible to broil without walking away and forgetting about what’s turning black in the oven? I know I’m a super unique and wonderful individual human person, but I can’t be only one with this skillset. 

P.S. You’re still allowed to plan ahead with this meal and write it on your meal plan that Laura has been teaching us about, and then you can relax that you have one less thing to worry about because you don’t even have to wash a dough bowl. 


tasha

Tasha Hackett is an unpublished Christian romance author who sometimes lives in a dream world of the Midwest 1800s with her characters. Graciously, Laura lets her play on the blog a few times a month! Tasha likes to encourage women, stay out of debt, read wonderful books, and homeschools with her four children. You can find her playing on Instagram @HackettAcademy and @heavenlyhomemaker.

Heavenly Homemaker's Club Members: Access your homepage and all your fantastic resources here! Not a member yet? Please join us!

Potato and Bacon Foil Packs on the Grill

July 15, 2020 by Laura 1 Comment

This post may contain affiliate links which won’t change your price but will share some commission.

Make yourself some Potato and Bacon Foil Packs for the grill! You will not be disappointed!

I may have to make this every week of the summer! The flavor is unbelievably good. And of course, these are really easy to make!

I like to prep them in the afternoon while the babies are napping. Then at dinnertime, we throw them on the grill. While they cook, we steam some veggies. And the meal is perfection!

First things first, make yourself a batch of this Ranch Dressing Mix. I like keeping a full jar of this mix in my pantry to use in recipes like this!

Second, consider making a batch of Bacon Bits like this. I love having these ready to grab and use in recipes!


If you’ve got those prepped ahead, you can make these Potato and Bacon Foil Packs super quickly!

Ready to put yours together?

Potato and Bacon Foil Packs on the GrillYum

Potato and Bacon Foil Packs on the Grill
 
Save Print
Author: Laura
Serves: 6-8
Ingredients
  • Heavy-duty foil
  • 5 pounds baby red potatoes
  • ½ pound cut and cooked bacon
  • 4 Tablespoons ranch dressing mix (or 1 pouch)
  • 1 stick of butter, cut into 12 slabs
  • Shredded cheese and sour cream for serving (optional)
Instructions
  1. Wash potatoes and slice them into very thin slices.
  2. Place them in a large bowl.
  3. Stir in cooked bacon and ranch dressing mix.
  4. Prepare foild packets using a double layer of foil filled with potato mixture. (I try to make my foil packets thin so they will cook faster on the grill. So I make this recipe into 3 large, flat foil pouches.)
  5. Top potato mixture with slabs of butter.
  6. Close pouches securely for the grill.
  7. Cook pouches on the grill for 15-30 minutes, turning occasionally for even cooking.
  8. When you can easily poke a fork into the pouches, you'll know the potatoes are thoroughly cooked.
  9. Pull potato pouches off the grill and serve with cheese and sour cream!
3.5.3229


Need more recipes for the grill? Here’s a great list!

Heavenly Homemaker's Club Members: Access your homepage and all your fantastic resources here! Not a member yet? Please join us!
« Previous Page
Next Page »

Join Our Community!

 Facebook Twitter RSS E-mail Instagram Pinterest

Popular Posts

~ Will All of the Real Moms Please Stand Up?
~ Easy! Stir-and-Pour Whole Wheat Bread
~ How to Make Gatorade
~ 31 Real Food Breakfast Ideas
~ Dear Teenage Girls...
~ When Mom Takes a Step Back
~ The Inexpensive Health Insurance We Love!
~ Let's Talk Real Food Grocery Budgets

Check out our latest posts!

  • Make an Amazing Costco Salmon Meal for just $2.20/person
  • Easy Way to Make Freezer Food (Without Trying)
  • Bake Strawberry Shortcake in the Crock Pot
  • How to Get Dinner on the Table Fast!
  • Our $0.99 Per Plate Costco Meal!
Home  ~  Simple Meals  ~  Club Membership  ~  Shop  ~  Privacy Policy  ~  Disclosure  ~ Contact

Copyright © 2022 · Beautiful Pro Theme on Genesis Framework · WordPress · Log in