Heavenly Homemakers

Encouraging women in homemaking, healthy eating and parenting

  • Home
    • About
    • FAQs
  • Recipes
    • Bread and Breakfast
    • Condiments
    • Dairy
    • Main Dishes
    • Side Dishes and Snacks
    • Desserts
    • Gluten Free
    • Instant Pot
    • Crock Pot
    • Heavenly Homemaker’s Weekly Menus
  • Homemaking
    • Real Food Sources
  • Store
  • Contact
    • Advertise
    • Disclosure
    • Privacy Policy
  • Simple Meals
  • Club Members!

The Most Comforting Comfort Food

December 3, 2011 by Laura 12 Comments

This post may contain affiliate links. For more information, please see our disclosure policy.

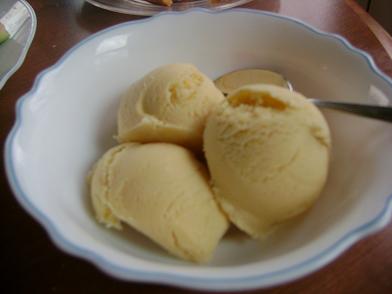
It’s what I want when I’m cold. It’s what I want when I’m tired. It’s what I want when I’m sad. It’s what I want when I’m happy. And this week, it is what I wanted when I was sick.

warmvanillasoother2sm

Warm Vanilla Soother

Warm Vanilla Soother is packed full of nourishing, stick-to-your-ribs comfort. And if you need comfort with a side of chocolate, well, there’s also Warm Chocolate Soother.

Heavenly Homemaker's Club Members: Access your homepage and all your fantastic resources here! Not a member yet? Please join us!

Thanksgiving Preparations

November 23, 2011 by Laura 14 Comments

This post may contain affiliate links. For more information, please see our disclosure policy.

Just in case you’re interested in my cooking plan for our holiday meal, here’s a little look inside my brain at how I have organized myself to get the meal on the table for Thanksgiving. I figured I needed to make the lists anyway – might as well bore you with them. ;)  Thankfully, everything from the Saturday through Wednesday lists are completed!

Saturday – Cook Thanksgiving turkey

Monday – Finish all Thanksgiving meal shopping

Wednesday –

  • Make Pumpkin Pies
  • Make Chocolate Pie
  • Make Cheesecake
  • Put together Green Bean Casserole (recipe found in Holiday Hospitality eBook)
  • Bake sweet potatoes, mash and have ready to rewarm tomorrow
  • Prep Stuffing (recipe found in Holiday Hospitality eBook)
  • Peel potatoes and put in water for tomorrow
  • Get cooked turkey out of freezer to thaw

Thursday Morning –

  • Make a double batch of rolls (recipe in Holiday Hospitality eBook)
  • Set out butter to soften
  • Cook and mash potatoes – put into crock-pot to keep warm
  • Cook corn for Cream Cheese Corn (recipe in Holiday Hospitality eBook)
  • Bake stuffing
  • Rewarm turkey
  • Bake Green Bean Casserole
  • Rewarm sweet potatoes
  • Make gravy
  • Whip cream for desserts
  • Have boys set up tables and prep plates, napkins, etc.
  • Do whatever else I’ve forgotten to do….

{I’m not really trying to be annoying by  putting (recipe in Holiday Hospitality eBook) several times in the above lists, but many have asked about those recipes and I thought I’d curb more of those questions by letting you know where to find those recipes. If you’re interested in that eBook, great, but – wink, wink – wait until at least Friday to purchase so that you’ll save a few bucks!!}

Here are my cooking and baking pictures from today. I had lots of fun and my feet are a little bit tired from standing so much. ;)

Below, it looks like I made six pumpkin pies – but really, there are just three. I have a big mirror in my kitchen, and I thought it would be fun to take the picture there to make it look like I got carried away with pumpkin pies.

Pictured with the cheesecake in the following picture is a batch of chocolate chip cookies. One college girl that is around town this week isn’t able to come for our Thanksgiving meal, but she really (really) likes my chocolate chip cookies. I made some to serve at lunch today (Wednesday) when she joined us.


It’s not likely that we’ll run out of desserts. I made this chocolate pudding recipe and poured it over a graham cracker crust for a “chocolate pie”. It ended up in a rectangle dish because I was out of pie pans. :)

I am so excited to eat this healthier version of Green Bean Casserole! Why don’t I make this more often?

Peeling and prepping our potatoes ahead of time is a tip I learned from my former hair dresser many eons ago. I love getting this chore out of the way a day early!

I baked three small sweet potatoes and only ended up with a small dish of them to serve tomorrow. I don’t think this will be the most popular part of the meal anyway, so a small amount will hopefully be fine.

Last but not least, I made dressing – for what I believe is my very first time! My sister-in-law has a wonderful recipe, which she shared for my Holiday Hospitality ebook. It is so easy, I’m not sure why I haven’t tried it before.

And now, I look forward to a good night’s sleep before I get up and tackle my Thursday list. How are your holiday preparations coming?

I’m thankful for all of you and pray that you have a wonderful, blessed Thanksgiving holiday!

Heavenly Homemaker's Club Members: Access your homepage and all your fantastic resources here! Not a member yet? Please join us!

How to Cook a Whole Pumpkin (to make pumpkin puree)

November 1, 2011 by Laura 219 Comments

This post may contain affiliate links. For more information, please see our disclosure policy.


Pumpkin_Puree_Collage_2

Yum

Every year, the boys and I visit a pumpkin patch. Every year after visiting the pumpkin patch, I bake a few of the pumpkins we bring home so that I’ll have plenty of pureed pumpkin in the freezer for pies, breads, muffins and other treats throughout the year. Every year, in order to bake the pumpkins, I slice them in half to put them into a baking dish.

Ever tried slicing a raw pumpkin in half? It’s horribly not enjoyable or easy. Now don’t make fun of me, because it is a fact that I have very wimpy muscles. Therefore, I find that cutting a pumpkin in half makes me a little cranky -and also a little bit scared that I’m going to lose a finger.

This year, I decided to rebel – mostly because after the trip to the pumpkin patch with six boys (I took extras), I was a little tired and in no mood to lose a finger.

I’m not sure why I haven’t been cooking the pumpkin in its whole form all along – but now that I know it works so well, I will for sure be doing it this way from now on. Or at least on the days I don’t feel like losing a finger.

How to Make Pumpkin Puree from a Whole Pumpkin

First wash your pumpkin so that there will be no chance for soil or squished bugs to be mistaken for raisins in your muffins on a cloudy, autumn morning.

Next, give your pumpkin 6-10 nice stabs with a knife. There’s no better way to say it – there’s no such thing as gently poking a fork into a raw pumpkin. It must be stabbed. Although, I’m the one with the wimpy muscles, so what do I know?

Third, place your pumpkin in a baking dish, then into a 350° oven. I had to remove one of my oven racks to make this happen, but I figured I’d just saved at least three fingers, so this five second bit of labor was worth my time.

Bake your pumpkin for about an hour and a half or until poking it with a fork has become effortless.

Now slice the pumpkin in half – see how easy that is? Allow pumpkin to cool for 15-30 minutes.


Use a metal spoon to scrape out the seeds and the stringy stuff. Save the seeds for making roasted pumpkin seeds if you’d like.

Someone tell me what the real name of that stringy stuff is. It probably has some technical name like “glutinous threads”.

Scoop out the soft pumpkin – or turn the pumpkin over and easily slice away the rind.

All done:


Place a few slices into a food processor and puree until smooth.

Continue pureeing pieces of pumpkin until you’re finished, because that is the point at which you will be done. (Sometimes it’s fun to simply state the obvious.)

Freeze pumpkin puree in jars or freezer bags. I like to freeze it in two-cup portions for easy measuring while baking.

With my pumpkin puree, I make Pumpkin Pie, Pumpkin Chocolate Chip Muffins, Pumpkin Bars, and Pumpkin Pie Squares – plus a delicious Multi-Grain Pumpkin Pancake/Waffle recipe my friend Angie shared with me that I will in turn be sharing with you tomorrow.

How do you make pumpkin puree (or do you buy it already canned)? What do you like to make with pumpkin?

Disclaimer:  No fingers were lost while making this pumpkin puree. Let us all rejoice.

Heavenly Homemaker's Club Members: Access your homepage and all your fantastic resources here! Not a member yet? Please join us!

A Week of Apples

October 16, 2011 by Laura 50 Comments

This post may contain affiliate links. For more information, please see our disclosure policy.

I have a grand total of 110 pounds of apples in my kitchen right now. You know what this means don’t you? Yes, it means that by the end of this week my fingers are going to look brown and dirty. And they’ll stay that way for about two weeks until the brown wears off. It’ll be really cute and not at all embarrassing (as long as I keep my hands stuffed into my pockets while out in public).

Oh, and if I don’t wear an apron while I’m working with all of these apples, the front of my shirt will also be covered in brown splatter stains, which will never come out. I learned this the hard way a few years ago when I made applesauce all day, while wearing a cute Disney shirt, before going to a soccer game. I completed the task of making applesauce, ran it through the water bath process to can it and put the jars away in my pantry. I didn’t look down at my shirt until I was at the soccer game that night cheering for my boys. It was then that I noticed that Eeyore was completely covered in ugly brown specks. (Of course, it had to be Eeyore.)  I was by far the most pitiful looking mother out at the soccer field that day. Of all days to leave my jacket at home.

So now you know:  While you peel, core, slice and chop apples – the juice will spit and splatter everywhere. If you work on 110 pounds of apples, everything around you, including every crevice on your hands, will turn brown for days. There’s not much you can do about this, so just embrace the fact that you’ll look like you’ve been working under the hood of your car. To avoid answering any difficult-to-answer questions from the powers that be, remove all school papers, bills, library books, and photos before proceeding. And for the love of Eeyore, please wear an apron.

My 110 pounds of apples await, and I guess it goes without saying that my apron is ready for action. Here’s what I’m looking at doing this week:

I’ll start by making and canning as many jars of Applesauce as I can make before I get sick of making applesauce. I will probably be using a slightly different method than the one described here, so I’ll give an update on that sometime during the week.

applesauce11sm.JPG

If, in fact, I still have a few pounds of apples left after making applesauce, I hope to then make a few Mini Apple Pies. These are great to have in the freezer for a quick breakfast or dessert.

miniapplepies7sm

I may also can a few jars of Apple Pie Filling. This is great to have on hand to when throwing together a quick apple crisp or of course, to make a big apple pie. Here’s my Whole Wheat Pie Crust recipe if you’re interested.

Malachi_apple_pie_1

I may also use my Excalibur Food Dehydrator and make Apple Fruit Leather and/or dried apple rings. When you have 110 pounds of apples, you can just keep going with the apple preserving until you’ve got a wide variety of apple goodies, or until you faint onto the floor of your kitchen – whichever comes first. Don’t worry – I plan to get my boys busy helping me with these projects this week. They are great applesauce makers.

We also plan to simply eat a bunch of these apples. I love having so many apples on hand for snacks. If you haven’t tried making Caramel Apple Dip, I highly recommend it. It’s one of my favorite ways to eat apples.

Throughout the week, I’ll be snapping pictures and sharing my apple preserving progress. Prepare to get sticky around here. I might even experiment with Apple Butter like several of you requested last week!

What is your favorite way to eat apples? Ever ruined an Eeyore shirt with apple spatters? This is why aprons were invented.


Heavenly Homemaker's Club Members: Access your homepage and all your fantastic resources here! Not a member yet? Please join us!

Homemade Beef Summer Sausage

September 8, 2011 by Laura 111 Comments

This post may contain affiliate links. For more information, please see our disclosure policy.

My personal Funky Fresh Kitchen “Make it Yourself” Challenge was to make Homemade Beef Pepperoni, using a recipe I found at Tammy’s Recipes. I read through all of her reviews before trying the recipe and many of them suggested that this tastes more like Summer Sausage than Pepperoni. I completely agree – it does taste much more like Summer Sausage. But no matter what you call it, we all really loved the flavor.

I kept having to remind myself while we were eating (one entire log of sausage in one sitting) that we didn’t need to feel guilt or hold back on eating this. We have, on occasion, purchased beef summer sausage from the store to eat on the run. The boys love it, but I’ve always been hesitant because the store-bought sausage is so full of MSG and who knows what. To now have this recipe in my hip pocket to make as a healthy, convenience food for my family is super exciting!

And did I mention that it is crazy easy to make? Yes, practically effortless. I used our healthy Grass Fed Beef and made five pounds of this wonderful meat, which tastes good with cheese and crackers or on sandwiches. I put our leftover meat in the freezer to use later. This is going to be a perfect grab and go snack to take to soccer games this fall!

Making this summer sausage was a three day process (although not time consuming or difficult). On the third day, after we got to smell it cooking on low heat all day, we were thrilled to eat it with cheese and fruits and veggies for dinner. Awesome!

Next, I’d like to try Tammy’s Spicy Pepperoni, which sounds like it has more of a pepperoni flavor. Score! Now we can have healthy summer sausage and healthy pepperoni too!

Does your family like summer sausage and pepperoni? You’ve got to try Tammy’s recipes!

Heavenly Homemaker's Club Members: Access your homepage and all your fantastic resources here! Not a member yet? Please join us!

Funky Fresh Kitchen – The “Do You Really Need It?” Challenge

September 6, 2011 by Laura 140 Comments

This post may contain affiliate links. For more information, please see our disclosure policy.

What is all that stuffed crammed in the back of your utensil drawer? When’s the last time you used that fancy Blitzamachoppit that promised to make your life easier? And how many used twist-ties and drinking straws does it take to change a light bulb?

Oh wait. I think I just mixed two unrelated questions.

But still – I do believe it is time for some of us to take control of what is lurking in our kitchen drawers and cabinets. If you took advantage of the Do the Funky Kitchen ebook sale, you may have already started plucking unused items out of your kitchen and worked at finding them a better home (like in someone else’s kitchen – mwoohaha!!). If not, let me suggest to you that your kitchen will be a lot more fun and a lot more functional (funky!) if you get rid of items you are not using.

Here is a check-list of questions to ask yourself as you clean out cabinets and drawers in your kitchen (taken from the Do the Funky Kitchen ebook):

  1. Do I use it often?
  2. How many do I have?
  3. How many do I need?
  4. Did someone special give it to me?
  5. Does it work?

If you don’t use it, get rid of it. If you have too many, the extras need to go. If it doesn’t work, what is it still doing there anyway? And if you don’t even know what it is, you won’t miss it after you say goodbye. Keep only items that you use or items that are special to you.

If you are having a hard time deciding if you should get rid of something, do this:  Put the item in a potential “Garage Sale” box for a few weeks, but don’t get rid of it yet. Next Tuesday, if you’re preparing some food and suddenly remember the reason you had the Ultimate Onion Slicer (with built in tissues for inevitable tears, batteries not included) then by all means, go get it out of your box and put it back into your kitchen for future onion slicing and tear wiping needs. But if in fact you see that gadget in your “Garage Sale” box three months later and have to stand on your head while holding a flashlight so that you can try and figure out what in the world it is, I’m pretty sure you never needed it anyway and you can feel free to give it away or try to sell it.

Your Funky Fresh Kitchen Challenge today is to clean out at least ONE cabinet or drawer. Get rid of all items that are not useful to you. You’ll feel so much better, I promise!!

Leave a comment on this post letting us know one thing you can throw out or give away that will lessen any kitchen clutter you may have. Your comment will serve as your entry in the giveaway for one of five $10 gift certificates to our Heavenly Homemakers Shop.


Heavenly Homemaker's Club Members: Access your homepage and all your fantastic resources here! Not a member yet? Please join us!

No-Oven Treats for Summer

August 5, 2011 by Laura 25 Comments

This post may contain affiliate links. For more information, please see our disclosure policy.

We’re finally experiencing a little break in the heat here in Nebraska – as in – it’s only in the upper 80’s instead of 101° with a heat index of 115°. I know many of you from the south are experiencing drought and intense heat that makes my 115° seem like winter.

Regardless of how it’s cooled off to “only the 80’s”, I still don’t like heating up the house to do much baking if I can help it. Here are a few yummy treats we’ve enjoyed this summer that don’t require the use of an oven:

Peanut Butter Honey Fudge

Homemade Pudding Pops

Healthier Rice Crispy Treats

Mock Frozen Yogurt

Homemade Ice Cream

homemadeicecream3sm.JPG

Add to the list! What healthy, no-oven treats have you enjoyed this summer?!


Heavenly Homemaker's Club Members: Access your homepage and all your fantastic resources here! Not a member yet? Please join us!

Meals to Feed to a Large Crowd

July 24, 2011 by Laura

This post may contain affiliate links. For more information, please see our disclosure policy.

Have a large crowd to feed? We have over 39 great ideas to help you keep it simple!

I frequently feed crowds of 20 or more. I’ve truly gotten to a place where I can say, “Oh, it’s easy.” How? I keep these meals very simple! And my best tip of all:

The side dishes I serve are made up of fresh fruits and vegetables. Nothing fancy or difficult! I simply wash strawberries and put them in a big bowl. I dump baby carrots onto a tray, slice some cucumbers, and set out some ranch dip. I steam several pounds of frozen green beans, peas, or corn.

My buffets always look so pretty and inviting because of these fruits and veggies! People love this! But I’ve gone to very little trouble. It’s a great win-win!

bunco_food

junefood 1

Tips for Feeding a Large Crowd

  • Do as much food prep ahead of time as possible. Here are my best tips about working ahead before company arrives.
  • Don’t be afraid to say yes to help! If someone asks, “What can I do to help?” give them a job!
  • Create a menu with one simple main dish (ideas below) and as mentioned above, set out simple fruit and veggie side dishes to accompany the meal.
  • Watch for French and Italian bread on the mark-down trays at your grocery stores. Slice them in half length-wise, butter them, and warm them in the oven for an additional, filling simple side dish.
  • If you’re going to make mashed potatoes (for a crowd or just for your family) you must follow this simple mashed potato making method!
  • Serve water. Other fun drinks are great if you have time. But when I have a houseful of teens or college students, I usually set out jars of water and a stack of solo cups. It’s easy and well, spilled water isn’t a concern like spilled grape juice. Oy!
  • Smile often. Smile while you prepare the food and while you’re serving it. Let your guests know you are glad they are there!
  • Good home design can also play a factor in making your kitchen more functional for large groups. If you are building a home or remodeling your current kitchen, consider an open plan with an island or plenty of countertop space for buffet-style entertaining. Staying up-to-date with the best home décor ideas from sites like DesignIdeasGuide can spark your creativity.

Meals to Feed to a Large Crowd

burrito buffet

Setting up a buffet in which people line up and fix their plate according to their preference is the easiest all the way around. This also ensures that people with food allergies or those who are picky can fill their plate the way they need and like. Here are my best ideas for simple main dishes that can be made in bulk and fed easily to a large crowd:

  1. Build-Your-Own Burrito Bar
  2. Breakfast Burrito Buffet (great any time of the day!)
  3. Nacho or Taco Bar (This meaty cheese dip recipe is our favorite! It’s easy to make in bulk and is always a crowd pleaser.)
  4. Baked Potato Bar (Bake potatoes in a crock pot or large roaster to make it easy. Set out diced meat or chili, grated cheese, chopped veggies, sour cream, and olives for toppings.)
  5. Sub Sandwich Bar (Set out hoagie rolls, a variety of lunch meat and sliced cheese, mayo, mustard, lettuce, tomatoes, sliced cucumbers, olives, and any other favorite sandwich fixins.)
  6. Chef Salad Bar
  7. Pasta Salad Bar
  8. Simple Spanish Rice Bowls
  9. Sloppy Joes
  10. Chili (served with toppings like Fritos, shredded cheese, sour cream, and olives)
  11. Burgers and Dogs on the Grill (great for spring and summer!)
  12. Simple Grilled Chicken

How about casseroles that are easy to make in bulk to feed to a large crowd?

After all, if you’re going to make one, you might as well make…more than one. Each of these feeds 8-12, so double or quadruple accordingly!

  1. Lasagna (Use this method to make it easy to build several Lasagnas at once. This is always a huge crowd pleaser!)
  2. Easy Breakfast Casserole (served with a variety of homemade muffins – recipes below – and fresh fruit)
  3. Simple Crock Pot Taco Pasta
  4. Simple Pizza Chicken Bake
  5. Simple Lasagna Casserole (For Instant Pot or Crock Pot)
  6. Simple Hashbrown Casserole (For Instant Pot, Crock Pot or Oven!)
  7. Simple Crock Pot Pizza Casserole
  8. Layered Cheesy Salsa Enchiladas
  9. Beefy Enchilada Bake
  10. Cheesy Beef and Rice
  11. Pizza Casserole
  12. Italian Pasta Bake

Easy Meat Dishes that are Great to Feed to a Crowd

You’ve got to love how the word “Simple” is in each of these. These recipes each take just a few minutes of prep!

  1. Simple Barbecue Beef Roast
  2. Simple Overnight Saucy Crock Pot Chicken
  3. Simple Overnight Melt-in-Your-Mouth Beef Roast
  4. Simple Oven Fried Chicken
  5. Simple Honey Mustard Chicken Legs
  6. Simple Roasted Rotiserie Chicken
  7. Simple Hawaiian Beef Roast
  8. Simple Garlic Parmesan Chicken Legs

Soups and Stews That Are Great to Feed a Large Crowd

Make a big pot or two of these. Serve with fresh fruits and veggies, maybe bread, muffins, or corn chips. So easy and good!

  1. Calico Beans
  2. The Simplest White Chicken Chili
  3. Simple Hamburger Soup
  4. Simple Crock Pot Chicken Soup with a Kick
  5. Last-Minute Lentil Chili
  6. 20-Minute Taco Soup
  7. Potato Soup
  8. Chili

Pssst! If you like keeping life in the kitchen simple, while still putting nourishing and delicious food on the table for your family, you should consider becoming a Simple Meals Member! We cut down on your time and effort, save you money, and provide you with all that you need to make great and simple meals all week long!

728x90

Desserts that are Great to Feed to a Large Crowd

soccer_food_12

I typically choose to make cookies into bars when I am feeding a crowd. This cuts down on my time investment!

  1. Butterscotch Bars (my most requested dessert recipe when I’m feeding a crowd!)
  2. Monster Chocolate Chip Cookie Bars
  3. Build a Brownie Sundae Bar
  4. Peanut Butter Apple Cookie Bars
  5. Build a Fruit Salad Bar

Easy Bread and Muffin Recipes to Feed a Large Crowd

  1. Four Varieties of Cheesecake Muffins
  2. Peanut Butter Muffins (naturally grain, gluten, and dairy free!)
  3. Twenty-Three Wholesome and Delicious Muffin Recipes
  4. Whole Wheat Stir-and-Pour Bread (unbelievably easy!)
Meals to Feed a Large Crowd
Now your turn! Please share in the comments any and all of your ideas for cooking for a crowd. What are your favorite dishes to make for company? What dishes work well to make for large groups of people? If you have recipe links, share those too. Thanks all!
Heavenly Homemaker's Club Members: Access your homepage and all your fantastic resources here! Not a member yet? Please join us!

What to Do About Crystallized Honey

July 12, 2011 by Laura 67 Comments

This post may contain affiliate links. For more information, please see our disclosure policy.

When I shared that I buy a year’s supply of honey at one time, many of you wondered if it crystallized and if so, what I did to solve that. Yes, my honey does crystallize, but it’s very easy to fix that issue.

By the way, have you ever read the words “do not microwave” on the side of your Honey Bear? That really means, “DO NOT MICROWAVE”. Many a Honey Bear has quickly become a sticky, melted mess within just a few seconds of being in the microwave. In fact, I believe you’d even be able to hear your Honey Bear moan, “I’m mellllttttiiiiiinnnggg….” as he turns into a plastic honey pool. Bless his little heart.

So, don’t microwave your honey to solve your crystallized honey issues. (I don’t recommend using a microwave for anything actually, but that’s another post for another day.)

Instead, I put my container of crystallized honey into with a few inches of water and heat it on the stove. If your honey is raw and you’d like to keep it that way, you want to heat the water very slowly and at low heat. It will eventually dissolve the honey.

The following picture is a little bit blurry – that would be because my Honey Bear is in a steamy sauna, and the steam fogged up my camera lens.

If you have a larger jug of honey, simply use a larger pot of water. Then, I find it helpful to pour the runny honey into smaller containers, preferably jars – go figure! :)

A little post update – myhnymybb makes a great point in her comment about not heating anything in plastic. I totally know that – and yet I did it anyway, then took a picture of it. Perhaps this is one of those “Duh Moments” I was talking about. I don’t want plastic leaching chemicals into my honey, which is why I usually store and heat my honey in glass jars. I just so happened to have a honey bear with crystallized honey, so I grabbed it and took a picture for this post. But yeah, plastic isn’t great, especially when it’s heated. So don’t follow my example. Put your honey into glass if possible.

But I still say don’t use a microwave to melt down the honey, no matter if it’s in glass or in a honey bear.

“I’m mellllttttiiiiiinnnggg….”


How do you store your honey? Do you buy bulk amounts of honey? Have you ever melted a Honey Bear in the microwave?

Heavenly Homemaker's Club Members: Access your homepage and all your fantastic resources here! Not a member yet? Please join us!

How to Soak Corn Meal for Better Digestion

June 24, 2011 by Laura 37 Comments

This post may contain affiliate links. For more information, please see our disclosure policy.

Taco Corn Fritters

I’ve shared how to soak wheat flour or oats to aid in digestion. (I’ve also shared that I’m not a die-hard grain soaker, I just do the best I can.)

I’ve been asked several times recently to share how to soak corn meal for easier digestion. Soaking corn is different from soaking wheat flour or oats. For some reason I’d never looked into it much. What, did I think it would be difficult? FYI – it’s not difficult. I figured it out after about ten minutes of reading my Nourishing Traditions book on the subject of soaking corn. I took a few pictures of the process, but really? They turned out silly. You do not need a full picture tutorial to show you how to pour pickling lime into water. Your five year old could do it.

I said all of that to say, “Sorry I didn’t share this four years ago. It’s not that hard.” 

How to Make Lime Water to Soak Cornmeal:

  1. Pour 1 inch of pickling lime into a half gallon jar.
  2. Fill the jar with water. Put the lid on the jar because next you need to…
  3. Shake the jar.
  4. Let the jar stand overnight until the lime settles. 
  5. The clear liquid at the top is your Lime Water.
  6. Store in a cool place (but not necessarily the fridge). 

To soak your cornmeal using Lime Water, it seems to me that most of the recipes in the Nourishing Traditions book recommend that you stir together 1 cup of cornmeal with 3/4-1 cup of Lime Water and allow it to sit for 7 hours before stirring in the wheat flour and cultured dairy and then continuing to soak for another 12 hours or so.

Now, just so you know, I shared this because I had some requests, and I’m always happy to learn new things in the kitchen. Will I be practicing this soaking of cornmeal thing much?  I’m not sure.  I wanted to share the idea with you in case you’d like to look into it more, but I don’t see the huge, incredible benefits to make this worth my efforts. If YOU see the huge, incredible benefits of soaking the cornmeal each time I make Cornbread or Taco Corn Fritters, please do pass them on. I’d really love to learn!

What all do you make with cornmeal?

Heavenly Homemaker's Club Members: Access your homepage and all your fantastic resources here! Not a member yet? Please join us!
« Previous Page
Next Page »

Join Our Community!

 Facebook Twitter E-mail Instagram Pinterest

Popular Posts

~ Will All of the Real Moms Please Stand Up?
~ Easy! Stir-and-Pour Whole Wheat Bread
~ How to Make Gatorade
~ 31 Real Food Breakfast Ideas
~ Dear Teenage Girls...
~ When Mom Takes a Step Back
~ The Inexpensive Health Insurance We Love!
~ Let's Talk Real Food Grocery Budgets

Check out our latest posts!

  • Big Family Food and Fun: May 3-9, 2026
  • Help Your Kids Become Independent in the Kitchen!
  • Big Family Food and Fun: April 26-May 2, 2026
  • Big Family Food and Fun: April 19-25, 2026
  • Big Family Food and Fun: April 12-18, 2026
Home  ~  Simple Meals  ~  Club Membership  ~  Shop  ~  Privacy Policy  ~  Disclosure  ~ Contact

Copyright © 2026 · Beautiful Pro Theme on Genesis Framework · WordPress · Log in