Heavenly Homemakers

Encouraging women in homemaking, healthy eating and parenting

  • Home
    • About
    • FAQs
  • Recipes
    • Bread and Breakfast
    • Condiments
    • Dairy
    • Main Dishes
    • Side Dishes and Snacks
    • Desserts
    • Gluten Free
    • Instant Pot
    • Crock Pot
    • Heavenly Homemaker’s Weekly Menus
  • Homemaking
    • Real Food Sources
  • Store
  • Contact
    • Advertise
    • Disclosure
    • Privacy Policy
  • Simple Meals
  • Club Members!

Low Sugar Granookie: Granola Cookie

October 25, 2020 by Tasha Hackett Leave a Comment

This post may contain affiliate links. For more information, please see our disclosure policy.

Tasha brought these Granookies to our family along with a meal when our newborn moved in with us in September. They are SO GOOD and I felt great letting our toddlers eat them along with the rest of us! (Bonus peek at “Baby Sister”—>)


Low Sugar Granookie: Granola Cookie

by Tasha Hackett
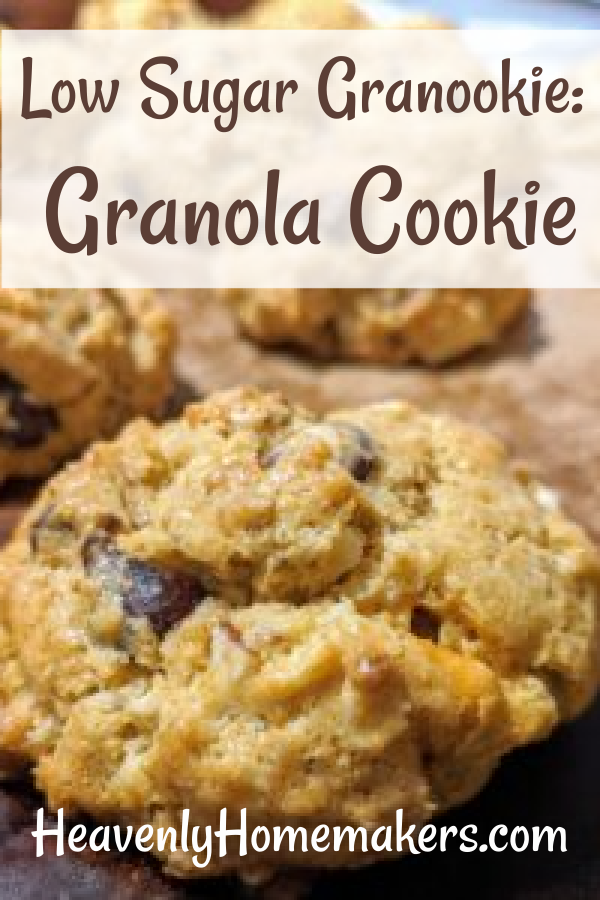
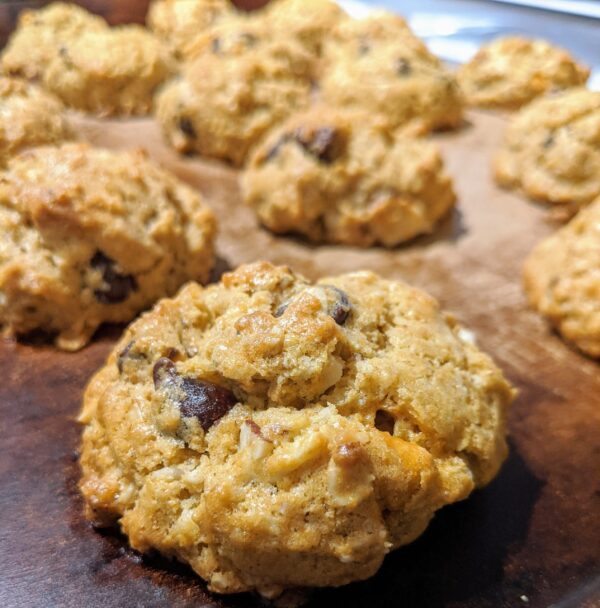
When you want a cookie, but you’re actually starving and what you need is a hearty snack or breakfast? Never fear, granookie is here! Granookie is a granola cookie and is the next best thing to stir-and-pour bread. (Go ahead and add Granookie to your dictionary.

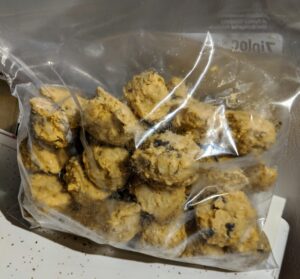
No, it’s not spelled wrong, your computer just isn’t up with the times.) It’s not simple, being that it has about a thousand ingredients and then there’s the whole stirring and making into cookie balls and baking. . . okay, it’s still pretty simple. Especially so because this recipe makes 5-6 dozen cookies. I bake one pan for eating right away, and I freeze the rest into premade cookie balls for a fresh granookie snack or breakfast or dessert for later. Tip: Freeze on a flat pan and then transfer to a bag once frozen.

bagged granola cookie

Yum

Granola Cookie: Granookie

Before you skim straight to the recipe for the granookie, you may want to take a few things into account. These are low-sugar and mildly sweet, but not nearly as sweet as cookies, nor even as sweet as traditional granola. In addition, there is a hearty mix of nuts and seeds that makes them deliciously healthy, along with the whole grain addition to stock you up on healthy carbs, fiber, and an exorbitant amount of vitamins and minerals. However, can we cut the healthy talk and just be amazed at how delicious these are and hand them out guilt free? 

Whole grain for the win!

I always use fresh-ground flour when baking these. Either soft or hard wheat will work, though I use soft white wheat as it is marginally cheaper than hard wheat. If you’re using store-bought flour, you may need a touch less in your recipe. But it’s a fairly forgiving recipe. 

I developed over the past year after much frustration of my granola crumbling everywhere. I’ll sheepishly tell you that I changed it every time because I didn’t follow the recipe… but people kept asking me how to made these granola cookies (and I’d correct them, “It’s called a granookie.”) so I was determined to write down legit measurements and this is the winner! 
Granola Cookie

Enjoy!


homeschool momTasha Hackett is a friend of Laura and a bedroom closet jalapeno Cheeto eater. She lives in the great Midwest where the winter whisks your breath away and the summer smothers. Laura is still here, but likes to take a shower every now and then and let Tasha play on the blog. In other news, Tasha’s debut novel, a historical fiction romance, is currently being evaluated by a publisher. She’s been lost in the 1800’s for decades, dreaming of ways to bring her heroes to a happily ever after.


Low Sugar Granookie: Granola Cookie
Low Sugar Granookie: Granola Cookie
 
Save Print
Prep time
15 mins
Cook time
10 mins
Total time
25 mins
 
Author: Tasha
Recipe type: cookie
Serves: 60
Ingredients
  • 2 Cups of Butter
  • ¾ Cup Brown Sugar
  • 5 Eggs
  • 1 tsp Caramel Flavoring (I use this one.)
  • 1 Tbs Vanilla Extract
  • 1½ tsp baking soda
  • 1½ tsp baking powder
  • 1 tsp salt
  • 3 Cups Flour
  • 3 Cups Thick Rolled Oats
  • 1 Cup Unsweetened Shredded Coconut
  • 1 Cup Slivered Almonds
  • ½ Cup Pumpkin Seeds
  • ⅓ Cup Sunflower Seeds
  • 1 Cup Chocolate Chips
  • ½ Cup Butterscotch Chips
Instructions
  1. Whip the butter and sugar until fluffy, add the eggs, flavoring, and dry ingredients. Add the nuts and seeds and chips. Dough will be quite firm.
  2. Form into cookie sized balls and bake at 375* for 8-10 minutes (until golden brown). They do not flatten much.
3.5.3251
Heavenly Homemaker's Club Members: Access your homepage and all your fantastic resources here! Not a member yet? Please join us!

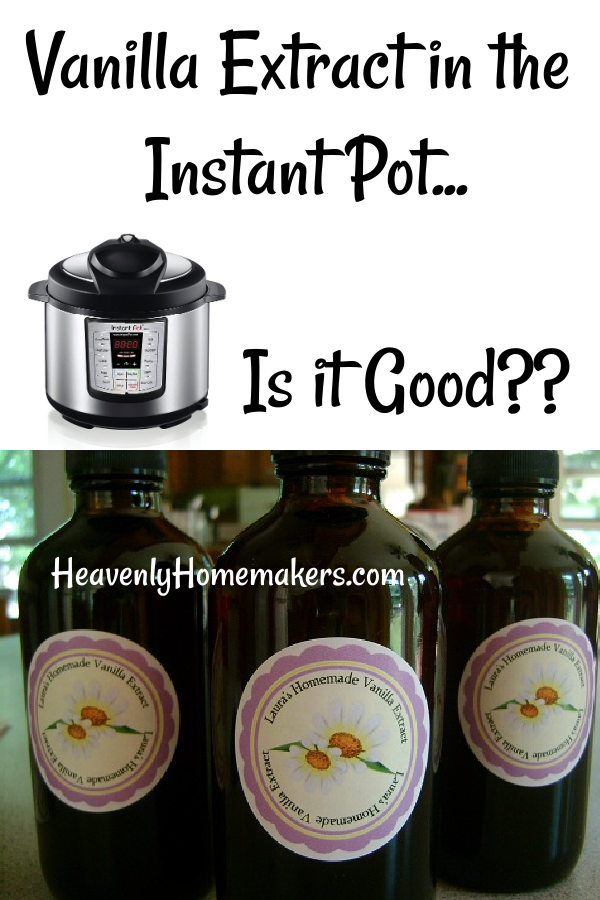
Vanilla Extract in the Instant Pot. Is it Good??

October 21, 2020 by Laura 6 Comments

This post may contain affiliate links. For more information, please see our disclosure policy.

I’ve heard about making Vanilla Extract in the Instant Pot. But I had to wonder: Is it good? As good as the Homemade Vanilla Extract I usually brew for 6 months? I decided to give it a try!

Yum

I’ve been making my own vanilla extract since 2009. It’s super easy to make, but it does take 4-6 months to finish extracting so that we end up with good strong vanilla.

Recently I saw on the internet that you can make vanilla extract in the Instant Pot – in 40 minutes!!! Fun fact: 40 minutes is a lot less time to wait on homemade vanilla compared to waiting for 6 months. I figured it wouldn’t cost much to try it out and compare it to my super special 6-month homemade vanilla. So I gave it a try!

First, let’s look at how this works:

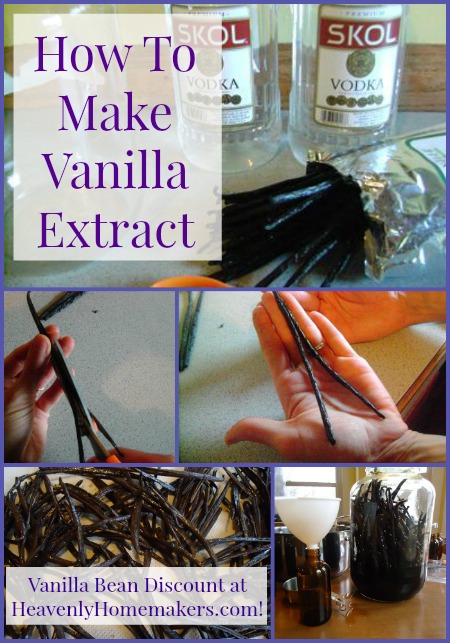
When I long-brew my vanilla extract, I cut my beans and put them into a big jar filled with vodka for 4-6 months. It’s as simple as can be and turns out THE MOST AMAZING vanilla extract!

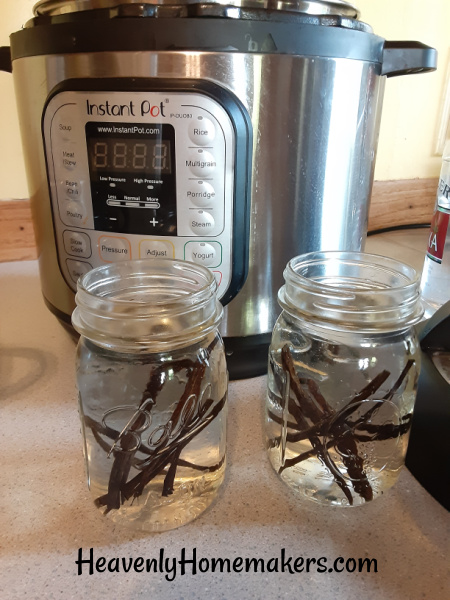
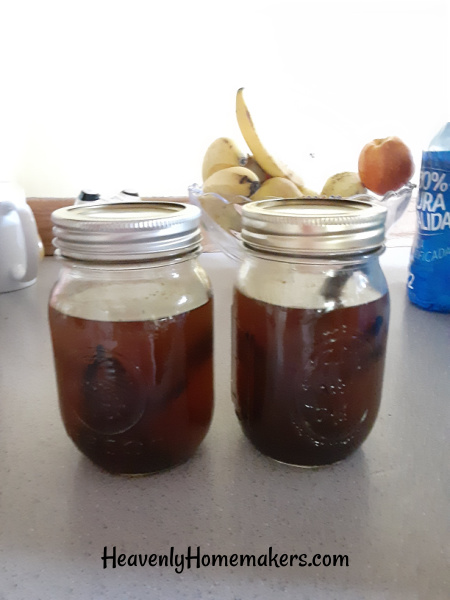
The Instant Pot method for making vanilla extract takes fewer beans and way less time. I cut a total of 6 beans – first the long way, then in half so they fit into pint-sized jars.

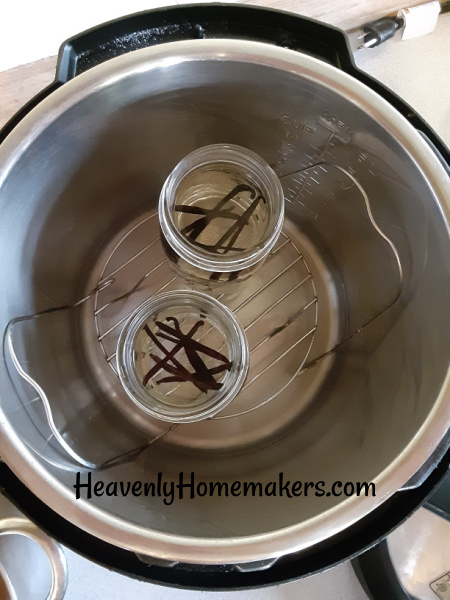
I then fill the jars with vodka and put them on the trivet in my Instant Pot. Carefully set lids on the jars, but do not screw on tightly. Add water to the Instant Pot, seal, and set the timer to 40 minutes at high pressure.

Allow the vanilla extract to pressure cook for 40 minutes, then carefully quick release the pressure so that you can open your Instant Pot lid. The result?

Beautiful vanilla extract in just 40 minutes!!!

How to make Vanilla Extract in the Instant Pot

Vanilla Extract in the Instant Pot. Is it Good??
 
Save Print
Author: Laura
Serves: 32 ounces
Ingredients
  • 6 vanilla beans (use the code HOME for a 20% discount!)
  • 1 quart of vodka
  • 2 pint jars with lids
Instructions
  1. Cut vanilla beans along down the middle of the bean, then cut them in half and place them into 2 pint-sized jar. (3 beans per jar)
  2. Pour vodka over the beans.
  3. Place a trivet into your Instant Pot.
  4. Add 1 cup of water to the bottom of the pot.
  5. Set the prepared jars of vodka/vanilla beans onto the trivet.
  6. Loosely place the lids on the jars, not sealing tightly.
  7. Lock on the Instant Pot lid and seal the pressure valve.
  8. Cook on manual setting for 40 minutes at high pressure.
  9. Quick release the pressure valve (watch out for the steam!)
  10. Carefully remove the jar and allow the vanilla to cool.
3.5.3251

How does it compare?

The old fashioned me wants to say, “Oh, the long brew method of making vanilla extract is so much better!!” But the truth is that I actually can’t tell much difference.

Therefore, the simple-cook me gets to say, “Hey, want to save A LOT of time and effort making vanilla extract? Try making it in your Instant Pot!!”

So in summary, we’ve got a win-win here! If you decide to stick with the regular, long brew method you’ll turn out wonderful vanilla extract! And if you have an Instant Pot and decide to make a fast batch, you will still turn out wonderful (tho not quite as strong) vanilla extract!

Make this for Christmas gifts!

If you do have an Instant Pot, you can order your beans and make a bunch of vanilla for gifts – it’s not too late!! People love receiving homemade vanilla as a gift – teachers, family members, neighbors, co-workers!

Where to buy vanilla beans:

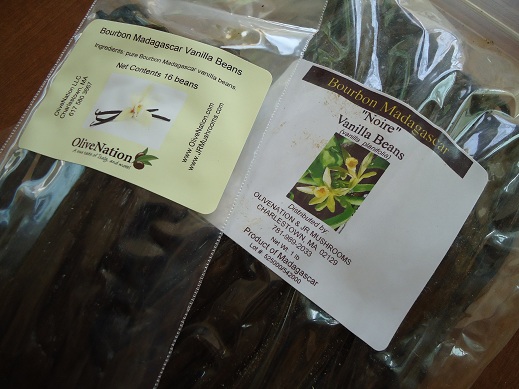
I always buy my vanilla beans from Olive Nation. I’ve tried other sources to “save money” but instead ended up wasting money because the quality of the beans from cheap sources was terrible!

Olive Nation beans are so, so good. I’ve used their beans for years. They love working with us here at Heavenly Homemakers so they offer us 20% off when we use the coupon code: home. Plus we get free shipping on orders over $50!

Cost Breakdown to Make Vanilla in the Instant Pot:

I ordered the 25-bean package on this page and used the lovely discount code, home. This landed me 15% off plus free shipping, so total cost for 25 beans was $50.14. With these beans, I can make 4 quarts of vanilla!! (I’ve just made 1 quart so far.)

Cost for one quart of vanilla in my Instant Pot:

  • 6 beans = 12.00
  • 1 quart of vodka = $5.50
  • TOTAL = $17.50

With this, I can put together four 8-ounce bottles of vanilla for gifts!! This makes each 8-ounce bottle cost just $4.38! That is an incredible price!!

(Cost at the store for high-quality vanilla? Most of what I find has water added, and it’s still $8.97 for just TWO OUNCES. Homemade cost for two ounces is just $1.10!!!)

Extra resources:

  • Read this post to learn how to finish and strain your vanilla after 4-6 months if you choose to do the long-brew method.
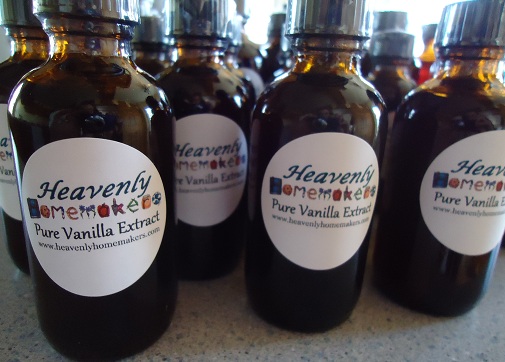
  • You can purchase dark amber bottles here.
  • Order personalized vanilla stickers for bottles and gifts here.
  • Get your beans here, and use the code HOME to get 20% off!

I’m super excited about this option for making vanilla extract! Have you tried it before?!

Heavenly Homemaker's Club Members: Access your homepage and all your fantastic resources here! Not a member yet? Please join us!

Special (Easy) Breakfast: Chocolate Syrup on Pancakes

September 27, 2020 by Laura Leave a Comment

This post may contain affiliate links. For more information, please see our disclosure policy.

If you want to turn a regular breakfast into a special breakfast, simply pour chocolate syrup on your pancakes! Here are two chocolate sauce recipes for you (one is dairy-free and low in sugar!).

I have all sorts of recipes for you, actually.

  1. First, we’ll talk about pancakes.
  2. Then, I’ll give you these great chocolate sauce recipes.
  3. Then, I’ll share different homemade whipped cream recipes to top everything off!

What’s great about this idea is that it turns ordinary pancakes into something super special! And if you’re hesitant about putting chocolate sauce on your pancakes because of the sugar, might I remind you that maple syrup is straight sugar also (even if it’s pure maple syrup)? ;) Not only that, if you make the Dairy Free Chocolate Sauce recipe below you’ll actually have a lower-sugar option to pour (or spread) all over your pancakes!

Pancake Recipe Ideas:

  • Simple Pancake Mix Pancakes
  • Whole Wheat Pancakes
  • Peanut Butter Pancakes (with chocolate on top? YES PLEASE.)
  • Pumpkin Pancakes
  • Easy Whole Grain Chocolate Pancakes
  • Simple Banana Pancakes
  • Whole Wheat Applesauce Pancakes
  • Baked Apple Pancake
  • Easy Pancake Muffins
  • Whole Wheat Waffles (even better than pancakes!)

Chocolate Syrup for PancakesYum

Hot Fudge Sauce

Chocolate Fudge Sauce
 
Save Print
Author: Laura
Serves: 2 cups
Ingredients
  • 1 ½ cups heavy cream
  • 1 cup brown sugar or sucanat
  • ½ cup cocoa
  • 1 stick butter
  • 1 teaspoon vanilla
Instructions
  1. In medium saucepan, stir together cream, sugar, cocoa and butter.
  2. Cook on medium heat until butter is melted and ingredients are thoroughly combined.
  3. Remove from heat and stir in vanilla.
3.5.3251


Dairy Free Chocolate Sauce

Dairy Free Chocolate Sauce
 
Save Print
Author: Laura
Serves: 2 cups
Ingredients
  • 13.5 ounce can of full fat, unsweetened coconut milk
  • ⅓ cup unsweetened cocoa powder
  • ¼ - ½ cup sweetener (honey, sucanat, or brown sugar)
Instructions
  1. Mix ingredients in a small saucepan, cooking and stirring on medium heat until well combined.
  2. Serve warm or cold.
  3. Store this sauce in a covered container in the refrigerator, rewarming on the stove-top as needed. It will keep for up to a month in the fridge.
3.5.3251

Drizzle or spread these onto your pancakes and you’ve got an amazing feast. But really, it’s thousands of times better if you then top it all with whipped cream!

Whipped Cream Recipes:

  • Homemade Whipped Cream
  • Chocolate Whipped Cream
  • Peanut Butter Whipped Cream

Still want more ideas?

Bonus Pancake Topping Recipes:

  • Real Maple Syrup
  • Apple Butter
  • Blueberry Pancake and Waffle Syrup
  • Peach Syrup (for pancakes and waffles)
  • Peanut Butter (just peanuts!)
  • Peanut Butter (super creamy – like Skippy or Jif)
  • Raspberry Syrup

What’s your favorite way to top a pancake?

Heavenly Homemaker's Club Members: Access your homepage and all your fantastic resources here! Not a member yet? Please join us!

Simple Homemade Pizza

September 9, 2020 by Laura 1 Comment

This post may contain affiliate links. For more information, please see our disclosure policy.

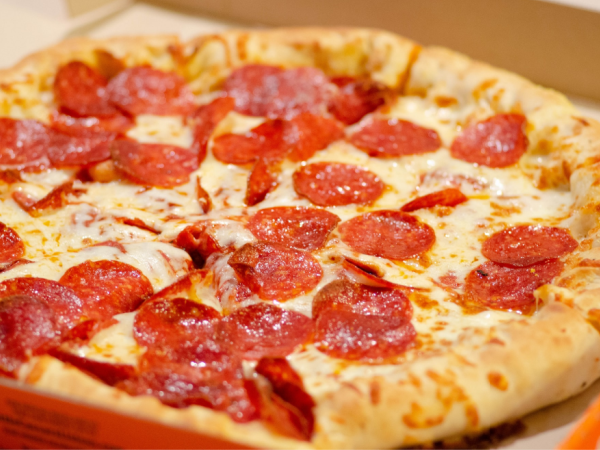
Pizza might be one of my favorite meals, so of course, we need to have Simple Homemade Pizza recipe options!

Confession: I order pizza more often than I used to now that we have little ones again. Ok, that’s not really a confession, it’s just truth, but I don’t actually feel that it needs to be confessed. As if ordering pizza is evil??

Sure, I don’t make every single thing from scratch anymore. Sure, not everything we eat is top-notch anymore. We still strive to eat nourishing foods so we can stay healthy. How else are we going to keep up with this tribe?! But God’s strength is bigger than ours, and that’s the real way we’re thriving through this journey.

So. I order pizza sometimes. Guilt-free. I praise God for this option on busy days I have to be at court hearings or team meetings while juggling littles and bigs.

Also, we eat it on paper plates. This is a beautiful thing.

Well anyway, pizza. The homemade kind. It truly tastes better, and we have fun building it to our liking. Here are my top three homemade pizza methods, from easiest to hardest. But the hardest way isn’t really hard, because do you even know me at all?

How to make simple homemade pizzaYum

  1. Buy pre-made crusts. Keep them in your freezer. Add toppings and bake. SO EASY. Plus cheaper and better tasting than ordering pizza.
  2. Make crust from Stir and Pour Bread recipe. Flour your hands and press it onto a pan. Add toppings and bake. VERY EASY.
  3. Make Whole Wheat Pizza Crust, because it is the most delicious. Make crusts ahead and freeze them if you’re as ambitious as I used to be and may be again sometime. Add toppings and bake. STILL EASY.

Here are the crust recipes for you!

Stir-and-Pour Pizza Crust

5.0 from 1 reviews
Simple Homemade Pizza
 
Save Print
Author: Laura
Serves: 2 large pizzas
Ingredients
  • 4 cups whole wheat flour (I use freshly ground hard white wheat)
  • 2 teaspoons active rise yeast
  • 2 Tablespoons sucanat or sugar or honey
  • 1 teaspoon sea salt
  • 2 cups warm water
Instructions
  1. Stir all ingredients together.
  2. Cover and allow it to sit for 30 minutes.
  3. Spread dough on two *well-buttered* large pizza pans (three if you want a thinner crust)
  4. Bake in a 375° oven for 10 minutes.
  5. Pull partially baked crust out of the oven and top it however you like.
  6. Bake for 10-15 minutes more or until cheese has melted and becomes bubbly.
3.5.3251

Whole Wheat Pizza Crust

5.0 from 1 reviews
Simple Homemade Pizza
 
Save Print
Author: Laura
Serves: 2 large pizzas
Ingredients
  • 5 cups whole wheat flour (I use freshly ground flour from hard white wheat)
  • 1 teaspoon sea salt
  • 4½ teaspoons active dry yeast (or 2 pouches)
  • 2 cups warm water (The water should feel warm, but not hot.)
Instructions
  1. Mix all ingredients together, knead for 3-4 minutes, then allow the dough to “rest” for about 10 minutes (give or take).
  2. This dough makes 2 large pizzas, or 18 mini pizzas.
  3. Shape dough into desired pizza sizes and place on baking sheets.
  4. Bake in a 375° oven for 5-7 minutes.
  5. Remove crusts from oven, allow them to cool, then freeze in freezer bags.
  6. Or, top hot pizza crusts with desired pizza toppings.
  7. When you're ready, bake the pizzas at 375° for 10 minutes or until cheese is bubbly and beginning to brown.
3.5.3251

What’s your favorite kind of pizza?

Heavenly Homemaker's Club Members: Access your homepage and all your fantastic resources here! Not a member yet? Please join us!

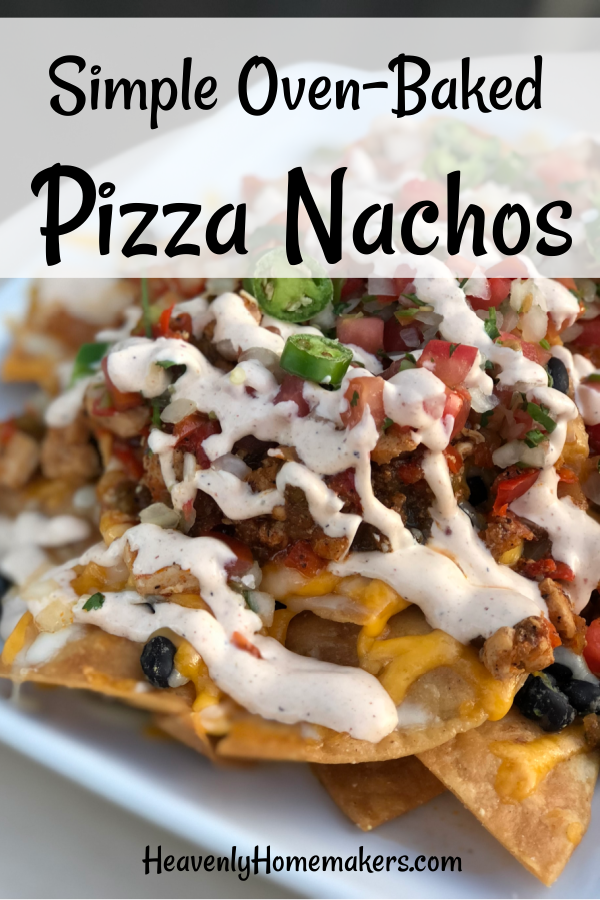
Simple Oven-Baked Pizza Nachos

August 23, 2020 by Tasha Hackett 4 Comments

This post may contain affiliate links. For more information, please see our disclosure policy.

Ready for a great recipe from Tasha? This is a pretty fantastic idea!

Yum

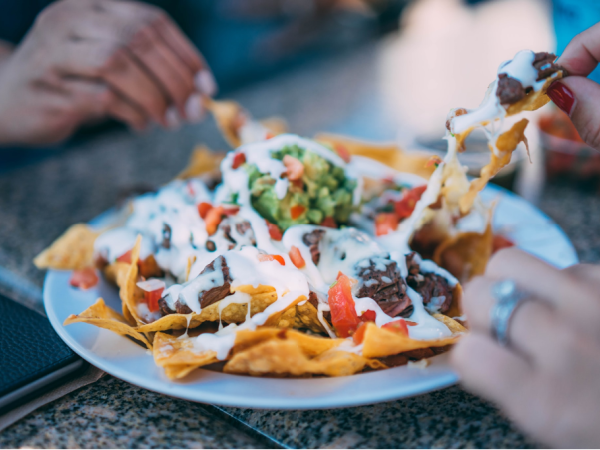
What happened when Pizza met Nachos? Pizza Nachos. 

by Tasha Hackett

You can probably go on your merry way and figure this one out: Oven-Baked Pizza Nachos. Got it? But wait! Come back! I have a secret tip that takes this to the next level. Dip in warmed pizza sauce!

If you asked my family, “What’s better than nachos for dinner?” They will tell you it’s Pizza. Coincidentally, “What’s better than pizza for dinner?” Nachos. But I bet you can’t guess the newest thing I’m in love with…? Okay, fine, you got me. Pizza Nachos!!

But how simple is simple? Like, do I have to wash a bowl? 

This simple and easy dinner has become one of my favorite go-to meals where I feel like I’m meeting all the food groups (*cough* VEGETABLES) while still pleasing even the picky eaters. I started making this a few years ago, but I limited myself to traditional pizza toppings such as pepperoni, olives, mushrooms, peppers, etc., and mozzarella cheese. But this summer I realized, “I can hide all sorts of vegetables in mozzarella cheese!” (Namely zucchini.) One day, when I happened to be out of everything fresh I pulled canned chicken from my emergency pantry. Because even though I’m pretty talented at life, Laura still is mentoring me on the whole meal-plan-ahead-thing. Thus began the weekly Pizza Nacho extravaganza because even though Stir-and-Pour Pizza Crust is amazing and simple and easy, even that is too much for me right now. (Let’s be real, stirring and pouring I can handle, it’s the waiting and baking and that extra bowl to wash that does me in.) 

Okay, Karen, you can stop scrolling. Here’s how SIMPLE Pizza Nachos are made. 

  1. Spread a baking dish with tortilla chips. I use my large pampered chef jelly-roll pan. But you can use any pan you like that has an edge to keep the chips from falling into your oven and burning and setting off your smoke alarm and will leaving you wishing you had just ordered pizza like Susan does every weekend and then maybe you wouldn’t be pulling out the fire-extinguisher on a busy evening. So… I’ve used two 9″ X 13″ pans before and that works well. 
  2. Sprinkle a very sparse layer of shredded mozzarella on the chips. This is the glue to hold your toppings together.
  3. Add your toppings of choice. Feel free to be creative or not. I’ve been enjoying diced zucchini and green peppers with canned chicken on mine! Garden fresh basil and jalapenos are delightful. 
  4. Sprinkle with just a touch of Italian seasoning, salt, and garlic.
  5. Add the rest of the cheese to completely cover any sneaky vegetables you don’t want certain family members to know about. 
  6. Bake in the oven at 350° until the cheese is melted and just starting to brown. About 8 minutes. You CAN use broil for a couple minutes instead and you will have dinner, like, yesterday. But broil is not for the faint of heart, or the easily distracted, and you may want to go back to step #1 read it through carefully before you ever ever ever use the broil function… you’re welcome. #TashaCantBroil #BurnedFoodGuaranteed #TrueStory #GoAheadAndUseBroilifYoureVeryBrave
  7. While your Pizza Nachos are baking (or not burning under the broiler thing), warm up your pizza sauce of choice and do a little dance, but not too much dancing if you’re broiling. 
  8. Serve with metal salad tongs, because I don’t know any other way, and dip in pizza sauce.

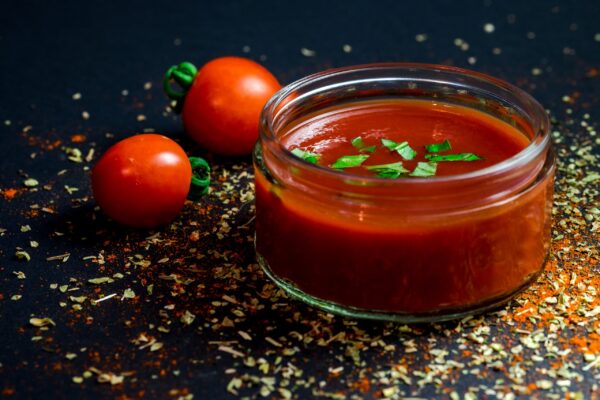
pizza sauce

What are you waiting for? Go forth and make simple food.

And now I’m going to go eat one of those chocolate peanut butter cups that I have stored in my refrigerator because Laura made me do it and now I’m addicted and all this talk about pizza and nachos has me drooling.

Have you ever made pizza nachos before? I feel like I made this up, but I probably did not. Also, serious question: Is it even possible to broil without walking away and forgetting about what’s turning black in the oven? I know I’m a super unique and wonderful individual human person, but I can’t be only one with this skillset. 

P.S. You’re still allowed to plan ahead with this meal and write it on your meal plan that Laura has been teaching us about, and then you can relax that you have one less thing to worry about because you don’t even have to wash a dough bowl. 


tasha

Tasha Hackett is an unpublished Christian romance author who sometimes lives in a dream world of the Midwest 1800s with her characters. Graciously, Laura lets her play on the blog a few times a month! Tasha likes to encourage women, stay out of debt, read wonderful books, and homeschools with her four children. You can find her playing on Instagram @HackettAcademy and @heavenlyhomemaker.

Heavenly Homemaker's Club Members: Access your homepage and all your fantastic resources here! Not a member yet? Please join us!

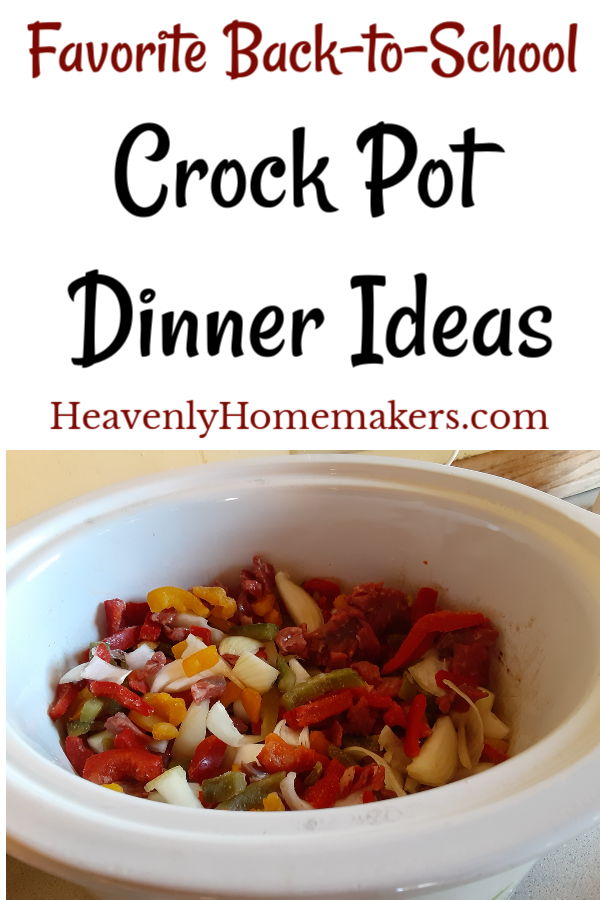
10 Favorite Back-to-School Crock Pot Dinner Ideas

August 9, 2020 by Laura 2 Comments

This post may contain affiliate links. For more information, please see our disclosure policy.

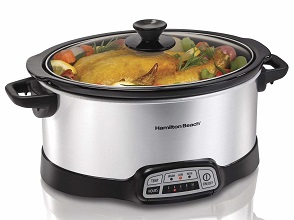
Need some Back-to-School Crock Pot Dinner ideas? Here are my favorites!

Yum

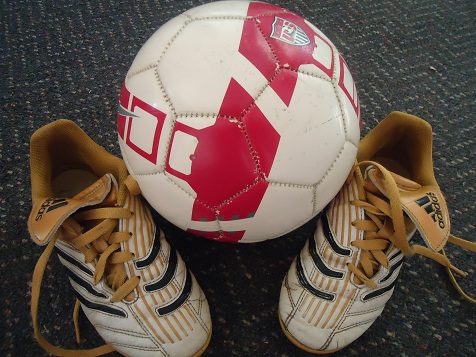
It’s time for me to get organized. Back to school at our house means much more than “get your pencils sharpened.” I usually consider this time of year “Back-to-Soccer” season and brace myself for the crazy that comes with it. Matt coaches our York College women’s team so usually in August I smile at him and say something like, “Whelp, see ya in November.”

Elias (who moved into the college dorm over the weekend; I’m not ready to talk about it, ha) will be playing on the YC men’s team. Malachi (15) will referee as many rec-league and club team games as he can. And Brayden (6) will play on a rec-league team. I try to pack everyone up and go to as many home YC games as I can, plus of course, I’ll be Brayden’s biggest cheerleader.

Awwww. There’s Malachi, back in his baby-soccer days. Now here we are again with our new set of Littles!

I’ve done this soccer-mom-wife life for so many years now that I know full well what it’ll be like. And as much as I know that it will be challenging as it always is (especially now that we’ve got so many little ones again!), may I just say this very loudly:

I AM SO THANKFUL SCHOOL IS STARTING and that WE GET TO HAVE A SOCCER SEASON!!!!

Last spring, we weren’t sure, you know? In early March, we sent all of our beloved college students home with barely a good-bye. We trudged through quarantine like so many of you did, wondering when or if life would ever be back to normal.

I’m not sure we can call everything “normal” yet, but praise God, students are moving back and soccer season is happening.

So as I celebrate this and also get ready for a very busy season, I’m putting these Crock Pot Dinner Ideas in my back pocket to make our mealtimes easier! These 10 ideas are the recipes I tend to fall back on first…

10 Favorite Back-to-School Crock Pot Dinner Ideas

  1. Crock Pot Chicken Soup with a Kick
  2. Hawaiian Crock Pot Chicken
  3. Overnight Saucy Crock Pot Chicken
  4. Overnight Melt-in-Your-Mouth Beef Roast
  5. Crock Pot Pizza Casserole
  6. Barbecue Beef Roast
  7. The Simplest White Chicken Chili
  8. Cheeseburger Noodle Crock Pot Dinner
  9. Hearty Bean Casserole (which can be made on the stovetop, but is perfect to make ahead and keep warm in a crock pot until dinnertime!)
  10. Crock Pot Fajitas

All of these recipes require almost no work or prep time. That’s why I like these best!

Oh, and if you like simple recipes like this, you will love our Simple Real Food Recipes Cookbook. These are my go-to recipes now!

What does your fall season look like this year?

Heavenly Homemaker's Club Members: Access your homepage and all your fantastic resources here! Not a member yet? Please join us!

Simple Spicy Chicken Burgers

July 19, 2020 by Laura Leave a Comment

This post may contain affiliate links. For more information, please see our disclosure policy.

Gather five basic ingredients, and you can make these delicious and unique Simple Spicy Chicken Burgers!

You might recognize part of this recipe if you’ve ever made our Simple Chicken Cheeseballs with a Kick. This proves, once again, how easy it is to take one recipe and tweak it to make it into something new! This saves brainpower, while still giving us lots of fun recipes to enjoy with our family!

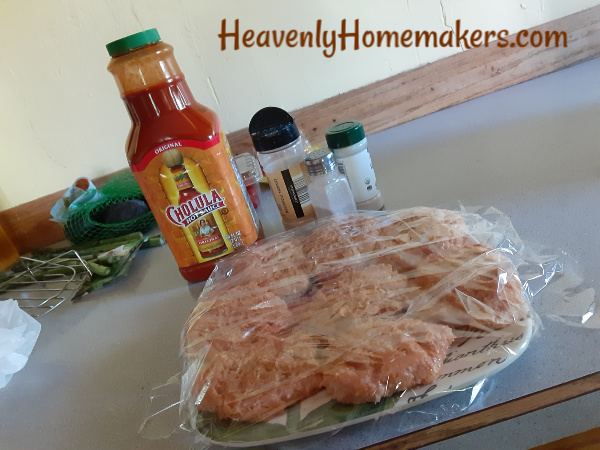
Oh hey, speaking of spicy burgers, remember that one time I ordered a bottle of Cholula online? It went a little something like this:

My family was running low on hot sauce, and I like to keep it on hand because all of our older boys love it. In true Laura style, I ordered it from Amazon because if I can possibly have something sent directly to my porch to save myself from overflowing my grocery cart at the store, I will absolutely have the item sent to my porch.

Also in true Laura style, I wasn’t thorough when reading the description of the bottle of Cholula that I put into my Amazon cart. It looked like a biggish bottle, and that sounded good to me because we have a biggish family full of biggish eaters. I thought nothing more about my Cholula until I pulled it out of the box a few days later.

And wow. Well, we didn’t know they made Cholula bottles that large!

Laura had ordered a 64-ounce bottle of Cholula, which is the same as a half-gallon, thankyouverymuch. Picture a 2-liter of soda and you’ve got our Cholula bottle. We shall not run out of Cholula any time soon, or so it seems. But then again, we REALLY like these Spicy Chicken Burgers so we may go through the bottle faster than we think.

I appreciate that this is a recipe that allows me to mix up the ingredients quickly in the morning, shape the burgers for later, refrigerate, then pull them out at dinnertime to quickly grill and eat. Read this post for more ideas about getting ahead and making dinner early in the day!

It’s also fun to note that ground chicken costs less than ground beef. So this recipe will save you money!

Beyond that, our family finds it fun to have yet another variety of burgers to grill in the summertime. These have a great, unique flavor that isn’t too spicy, but is super tasty!

Simple Spicy Chicken BurgersYum

Simple Spicy Chicken Burgers
 
Save Print
Author: Laura
Serves: 8
Ingredients
  • 2 pounds ground chicken
  • 1½ teaspoons onion powder
  • 1 teaspoon garlic powder
  • ½ teaspoon sea salt
  • 2-4 Tablespoons hot sauce (I use Cholula)
Instructions
  1. Mix all ingredients in a bowl until well combined.
  2. Shape into 8 patties.
  3. Cook patties on a grill or in a skillet on the stovetop until the meat is golden brown and cooked through and through.
  4. Serve on buns with sliced cheese, lettuce, tomatoes, or any of your favorite burger toppings! Ranch dressing is a tasty topping with these burgers!
3.5.3251

If you’re grilling these, you’ll find that you need to leave them alone for quite some time before you flip them. They don’t hold together as well as beef burgers. Allow them to cook slowly on the grill until they have solidified somewhat, then they’ll turn easily!

Have you ever tried grilling a chicken burger? Give these a try – hope you love them as much as we do!

Heavenly Homemaker's Club Members: Access your homepage and all your fantastic resources here! Not a member yet? Please join us!

Easy Salads for Summertime

June 7, 2020 by Laura Leave a Comment

This post may contain affiliate links. For more information, please see our disclosure policy.

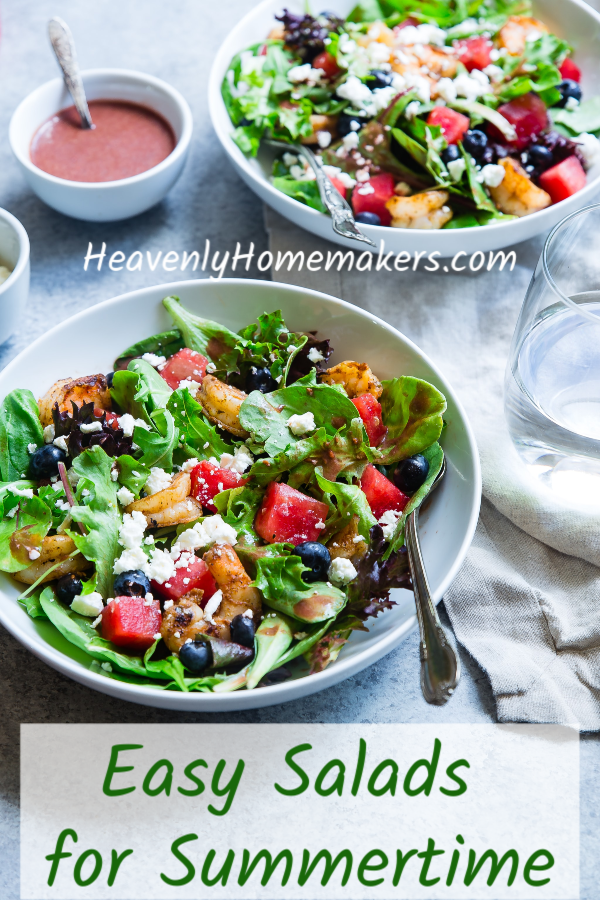
Need some easy salads for summertime?

I’ve confessed here before that I often just grab mixed greens out of the fridge and eat them on the fly. No dressing. No bowl. No fork. Mixed greens are finger food for this busy mom.

But do I truly enjoy them that way? Not really. I just eat them because I need them and know that they will give me nourishment. Weird and boring…I know. But it works because I need it to work.

Meanwhile, these awesome salad recipes are sitting here waiting to be actually enjoyed. They taste amazing, include fantastic and flavorful add-ins, and they don’t take a lot of time to prepare.

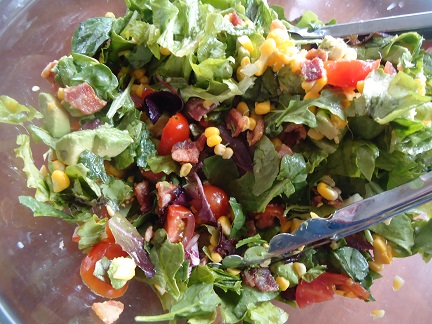
My favorite by far is this BLT Chopped Salad. Wow is this a fantastic combination of flavors! This salad is worth getting out a bowl and a fork for!

Some of the salads in this list are an entire meal all by themselves. Some make a wonderful side dish. All of them are wonderful to take on a picnic or potluck. Some have fruit, some include greens, some even include cream cheese because God is good.

Easy Salads for SummertimeYum

  • Bacon, Egg, and Avocado Salad
  • Black Bean Taco Salad
  • BLT Chopped Salad
  • Easy Taco Salad
  • Chicken Chef Salad
  • Tuna Salad
  • Perfect Pasta Salad
  • Simple Bacon Broccoli Salad
  • Easy Blue Raspberry Salad
  • Strawberry Spinach Salad with Vinaigrette
  • Easy Salsa Chicken Salad
  • Strawberry Christmas Salad
  • Pineapple Fluff Salad
  • Build-a-Fruit-Salad Bar
  • Hawaiian Fruit Salad
  • Simple Strawberry Fluff Salad

What are your favorite summertime salads?

Heavenly Homemaker's Club Members: Access your homepage and all your fantastic resources here! Not a member yet? Please join us!

Simple Salsa Burgers

June 3, 2020 by Laura Leave a Comment

This post may contain affiliate links. For more information, please see our disclosure policy.

Need a fun idea for a tasty new burger to grill this summer? You have to try these Simple Salsa Burgers!

Yum

You know me. I love to make food extra special, but I don’t like to spend a lot of time doing it. I’m simply not a gourmet cook.

But how easy is it to stir a little something special into regular ol’ hamburger meat? So easy. In fact, you might remember these three super easy Burger Recipes I’ve shared through the years:

  • Simple Make-Ahead Parmesan Burgers
  • Simple Cheese-Stuffed Burgers
  • Cheddar Ranch Burgers

Not that regular ol’ burgers aren’t pretty awesome in and of themselves.

But now we’ll do something wild and crazy and dump some salsa into our meat before we shape patties. If you want, you can also stir in some shredded cheese. We prefer to leave out the cheese and instead melt a slice of cheese on top of our Salsa Burgers.

And we like to top it with this Easy Guacomole. So good!!!


Simple Salsa Burgers

Simple Salsa Burgers
 
Save Print
Author: Laura
Serves: 8
Ingredients
  • 2 pounds ground hamburger
  • 1 cup salsa
  • 1 cup shredded cheese (optional)
Instructions
  1. Mix together ground meat and salsa.
  2. Stir in shredded cheese if you like.
  3. Shape mixture into 8 patties.
  4. Grill or fry per your preference!
3.5.3229

What are your favorite ways to make burgers?

~~~~~~~~~~~~~~~~~~~~~~~~~~~~~~~~~~~~~~~~~~~~~~~~~~~~~~~~~~~

Psssst! Everyone be sure to grab our Simple Real Food Recipes cookbook full of amazingly tasty and simple real food recipes like this one!

Heavenly Homemaker's Club Members: Access your homepage and all your fantastic resources here! Not a member yet? Please join us!

How to Make Stick-of-Butter Rice in the Instant Pot

May 27, 2020 by Laura 2 Comments

This post may contain affiliate links. For more information, please see our disclosure policy.

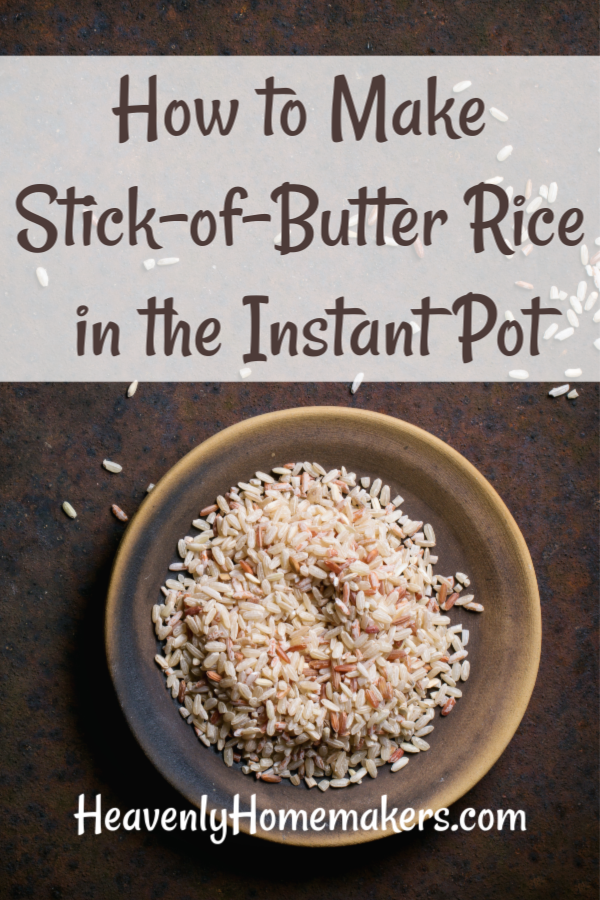
If you have an Instant Pot, this method for cooking Stick-of-Butter Rice cuts the cook time in half!

Yum

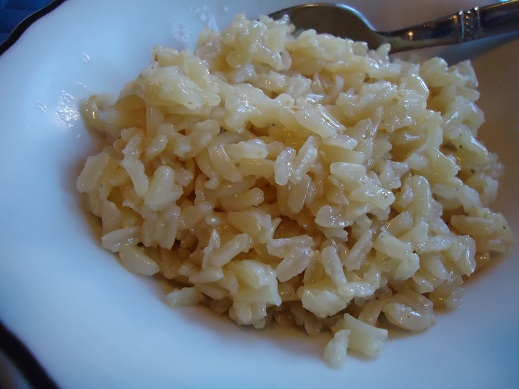
Once I learned to make Stick-of-Butter-Rice, I’ve never gone back to making it the “regular” way again. This recipe is TOO DELICIOUS. My entire family likes this – even the ones who never really cared about rice before. It’s the butter, of course. Also the onion. And the broth. The mixture makes incredibly tasty rice!

If you bake this recipe in an oven, it takes a solid hour. This is fine if you have an hour. If you don’t, and you have an Instant Pot, try it this way instead! It can be done in just a half hour!

I love making batches of rice ahead of time. Typically I’ll make this and use what we need for a meal, then use the rest to stir into recipes like:

  • Beef and Cheese Burritos
  • Chicken Burritos
  • Cheesy Beef and Rice
  • Spanish Rice

Then I can get two meals out of one!

Here’s how we often eat our freshly made rice, served with:

  • Hawaiian Crock Pot Chicken
  • Simple Overnight Saucy Crock Pot Chicken
  • Simple Overnight Melt-in-Your-Mouth Beef Roast
  • Simple Barbecue Beef Roast
  • Simple Hawaiian Beef Roast
  • Simple Crock Pot Salsa Shredded Beef

But truly, this rice is so flavorful that it’s perfect as a side dish all by itself. I think you’ll be like me once you try this and never go back to regular rice again!

How to Make Stick-of-Butter Rice in the Instant Pot

How to Make Stick-of-Butter Rice in the Instant Pot
 
Save Print
Author: Laura
Serves: 6-8
Ingredients
  • 2 cups brown rice (uncooked)
  • 2 cups beef or chicken broth
  • ¼ teaspoon sea salt
  • 2 Tablespoons dry minced onions
  • 1 stick of butter, cut into 6 chunks (1/2 cup)
Instructions
  1. Place ingredients in your Instant Pot and stir.
  2. Seal pot and cook on the manual setting at high pressure for 22 minutes.
  3. Allow the pot to release naturally after cooking.
  4. Stir and enjoy!
3.5.3229


Heavenly Homemaker's Club Members: Access your homepage and all your fantastic resources here! Not a member yet? Please join us!
« Previous Page
Next Page »

Join Our Community!

 Facebook Twitter E-mail Instagram Pinterest

Popular Posts

~ Will All of the Real Moms Please Stand Up?
~ Easy! Stir-and-Pour Whole Wheat Bread
~ How to Make Gatorade
~ 31 Real Food Breakfast Ideas
~ Dear Teenage Girls...
~ When Mom Takes a Step Back
~ The Inexpensive Health Insurance We Love!
~ Let's Talk Real Food Grocery Budgets

Check out our latest posts!

  • Big Family Food and Fun: August 9-15, 2026
  • Big Family Food and Fun: August 2-8, 2026
  • Big Family Food and Fun: July 26-August 1, 2026
  • Big Family Food and Fun: July 19-25, 2026
  • Easy Baked Spanish Rice Recipe
Home  ~  Simple Meals  ~  Club Membership  ~  Shop  ~  Privacy Policy  ~  Disclosure  ~ Contact

Copyright © 2026 · Beautiful Pro Theme on Genesis Framework · WordPress · Log in