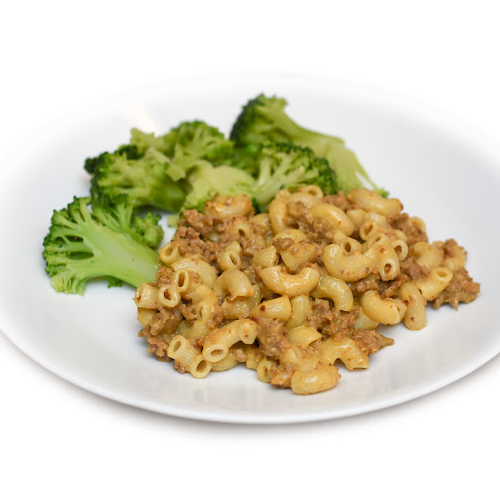
Heavenly Homemakers

Encouraging women in homemaking, healthy eating and parenting

  • Home
    • About
    • FAQs
  • Recipes
    • Bread and Breakfast
    • Condiments
    • Dairy
    • Main Dishes
    • Side Dishes and Snacks
    • Desserts
    • Gluten Free
    • Instant Pot
    • Crock Pot
    • Heavenly Homemaker’s Weekly Menus
  • Homemaking
    • Real Food Sources
  • Store
  • Contact
    • Advertise
    • Disclosure
    • Privacy Policy
  • Simple Meals
  • Club Members!

Mini Crustless Jelly Swirl Cheesecake Cups (5 Ingredients!)

April 9, 2023 by Laura Leave a Comment

This post may contain affiliate links. For more information, please see our disclosure policy.

These Mini Crustless Jelly Swirl Cheesecake Cups are so easy and only 5 ingredients!

Why are these crustless? Because it’s easier that way and they taste just as good! I love blending the cheesecake ingredients together, scooping the mixture into cups, swirling in a little jelly, then baking as-is. These are such a good grab-and-go breakfast or snack!

Why not dessert? Well sure, they can be a dessert too! I just find them to be filling as a breakfast option also simply because they are low in sugar and high in protein. They are great with a cup of coffee in the morning!

Make a batch of these and keep them in your fridge for easy meal and snack options!

Mini Crustless Jelly Swirl Cheesecake CupsYum

Mini Crustless Jelly Swirl Cheesecake Cups
 
Save Print
Author: Laura
Serves: 12
Ingredients
  • 2 8-ounce packages of cream cheese, softened
  • 2 eggs
  • 4 Tablespoons maple syrup
  • 1 teaspoon vanilla extract
  • ⅓ cup 100% fruit jelly (any kind)
Instructions
  1. Blend first four ingredients together until smooth.
  2. Pour into 12 muffin cups. (I use a silicone muffin "pan" for this and they pop right out once cooled.)
  3. Spoon a small amount of jelly into each cup and swirl with a butter knife.
  4. Bake in a 350 degree oven for 20 minutes.
  5. Turn off heat, open the oven door, and leave the cheesecakes in the oven for an additional 20 minutes. (Cheesecakes will puff up during baking but deflate while continuing to sit in the oven.)
  6. Transfer cheesecakes to the fridge and chill for at least two hours before serving.
3.5.3251

How about Peanut Butter and Jelly Swirl Cheesecake Cups?!

Yes, please! Simply blend 1/3 cup of natural creamy peanut butter into the cheesecake ingredients along with an additional egg. Follow the rest of the recipe as directed!

 

Heavenly Homemaker's Club Members: Access your homepage and all your fantastic resources here! Not a member yet? Please join us!

Simple Bran Muffin Recipe

March 29, 2023 by Laura 2 Comments

This post may contain affiliate links. For more information, please see our disclosure policy.

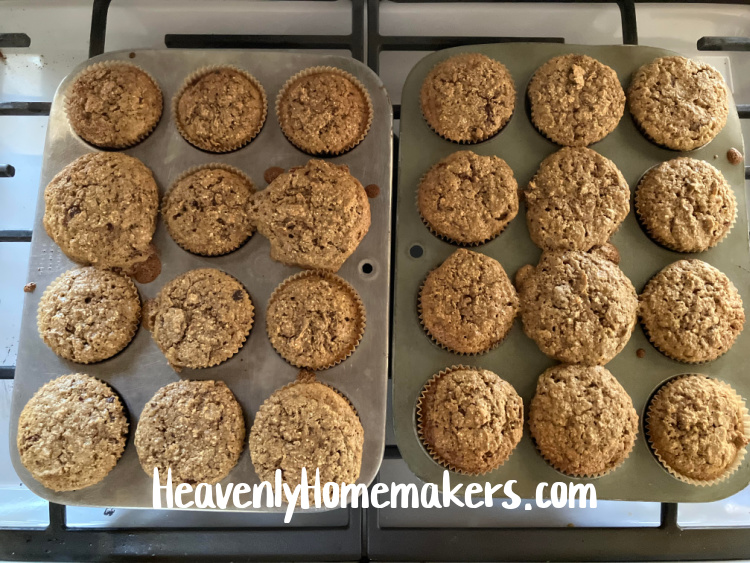
Silly as it may be, I think this Simple Bran Muffin Recipe may be my favorite of all the muffins.

And trust, me, there are a lot of muffins. I have over 40 muffin recipes here, and many of them include chocolate chips or a cheesecake topping! So to say that these Bran Muffins are a favorite is saying something.

I believe it stems back to my college days when the cafeteria sometimes featured a muffin like this one. I didn’t love many of the cafeteria foods, but those muffins were a favorite and I always got excited when they were serving them!

These stir together easily and you can use any brand of Bran Flakes cereal you like!

Simple Bran Muffin RecipeYum

Simple Bran Muffin Recipe
 
Save Print
Author: Laura
Serves: 12
Ingredients
  • 1 ½ cups whole wheat flour
  • ½ cup brown sugar or rapadura
  • 1 teaspoon baking soda
  • ½ teaspoon ground cinnamon
  • ¼ teaspoon sea salt
  • 1 egg
  • 1 ½ cups milk
  • 2 tablespoons melted coconut oil
  • 3 cups Bran Flakes cereal
  • ½ cup raisins (optional)
Instructions
  1. Mix together flour, brown sugar, soda, cinnamon, and salt.
  2. Add egg, milk, and oil.
  3. Stir in cereal until well combined (along with raisins if you like)
  4. Scoop mixture into 12 paper-lined muffin tins.
  5. Bake in a 400 degree oven for 20-22 minutes or until muffins are golden brown.
3.5.3251

One of my kids favorite ways to eat a muffin is if I cut them in half, smear butter on them, then warm them in our big air fryer. (We use our air fryer as a toaster oven as it works great to fill it with bread, bagels, or muffins and warm/toast them slightly. YUM!)

These taste great for breakfast, and also as a side dish with soup.

Are you an “add raisins to your muffins” kind of person or a “raisins don’t belong in muffins or cookies” kind of person? (Raisins are a no-go for me, except for snacks for the kids, ha!)

Heavenly Homemaker's Club Members: Access your homepage and all your fantastic resources here! Not a member yet? Please join us!

Easy Meatballs with Sweet Sauce (Freezer Friendly)

March 26, 2023 by Laura 2 Comments

This post may contain affiliate links. For more information, please see our disclosure policy.

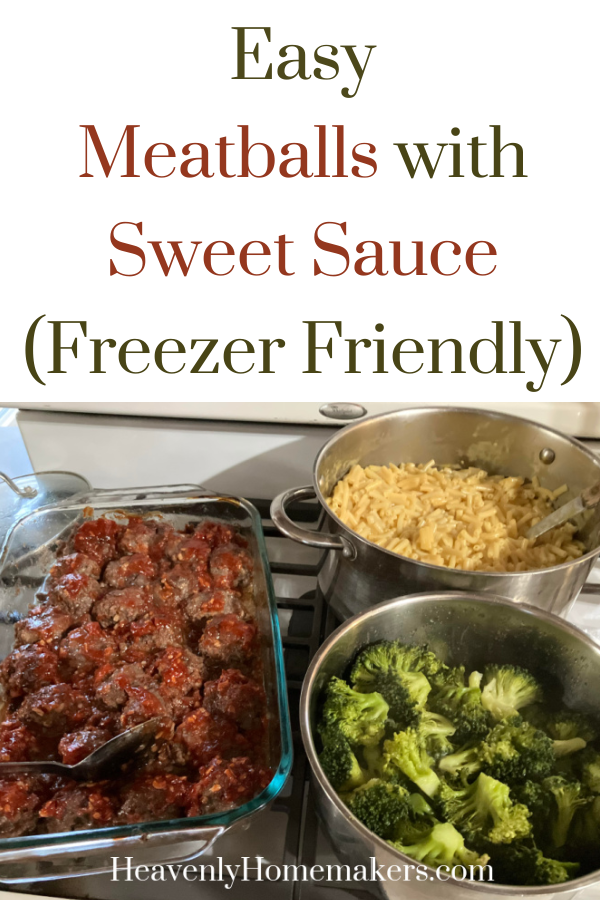
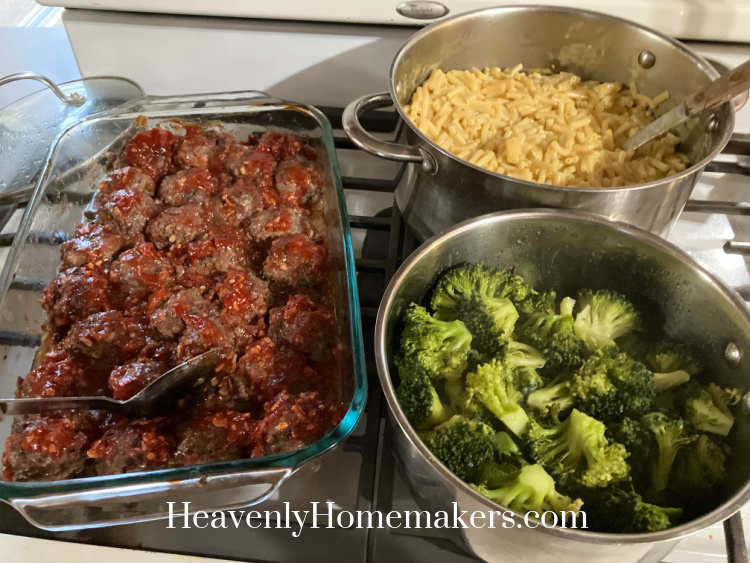
Ready to make these Easy Meatballs with Sweet Sauce?

This is a favorite recipe from our newlywed days. I’d given up on making them for a couple of reasons:

  1. Meatballs aren’t Matt’s favorite.
  2. I don’t have time to scoop out cute balls of meat anymore.

So I’ve been cheating and buying frozen meatballs at Costco. The kids LOVE those. But Matt (who doesn’t love meatballs anyway) and I (one who does love meatballs but NOT the frozen packaged kind) couldn’t stand it anymore. We would either go meatball-less, or I’d find a few extra minutes to make them myself.

Ah, and I suppose there is a third reason I haven’t been making meatballs as of late:

3. Ground beef has gotten pretty expensive.

We’ve been opting for more chicken and pork and less beef these days. Meatballs weren’t making the cut when it came to inexpensive meals we could make for our large family.

But doggonit, I was hungry for meatballs. The real kind. The good kind. And after the packaged variety, even Matt welcomed the homemade variety.

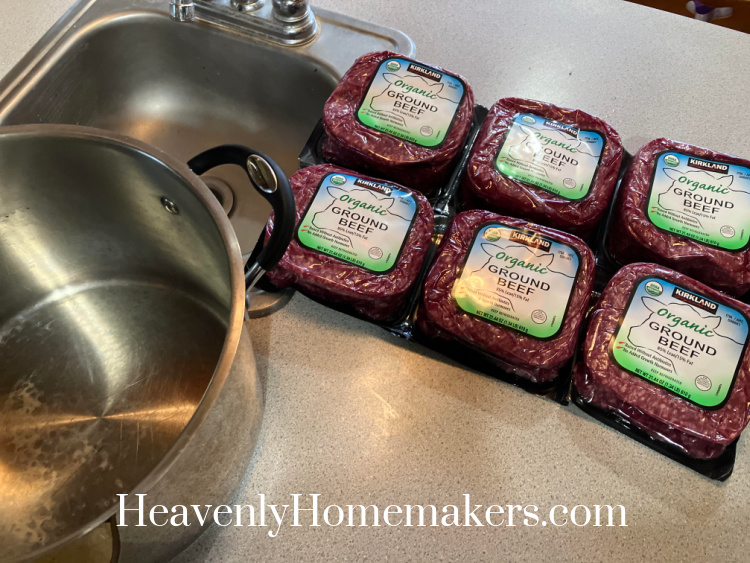
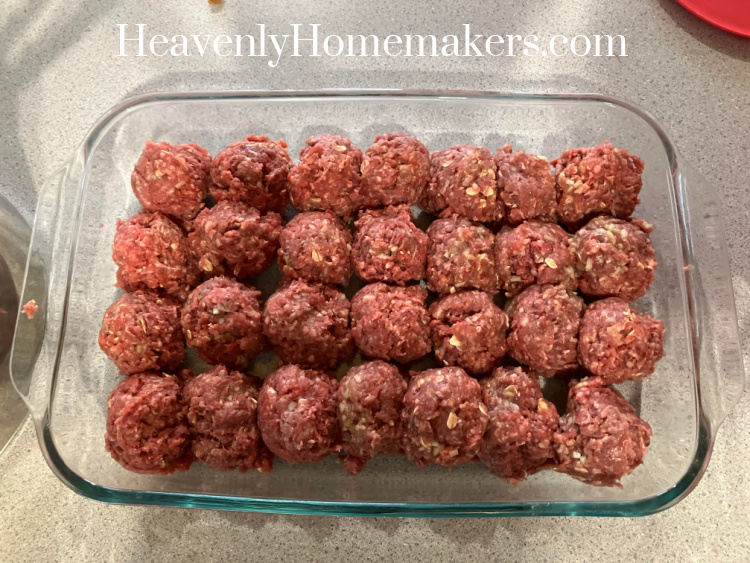
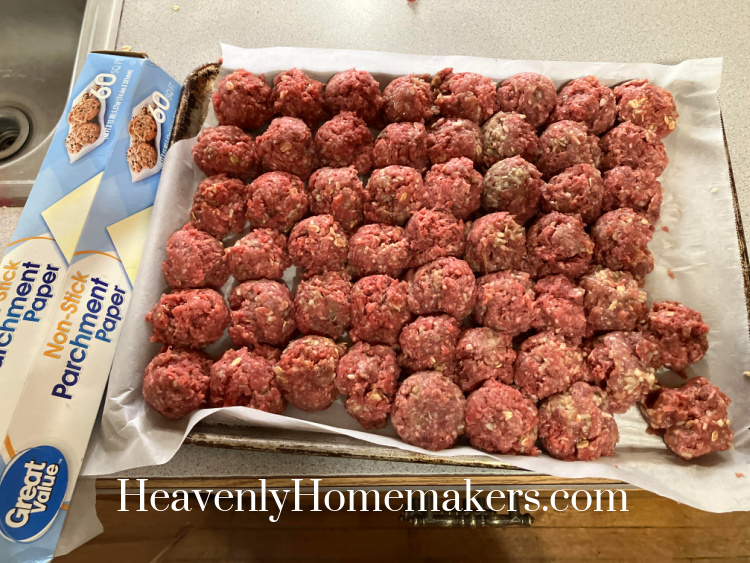
I’d “splurged” on some of the good ground beef one day at Costco, and I decided to use all six pounds of it to make these meatballs. This gave us three wonderful meals!! I baked two pounds the night I made them, then I froze the remaining 4 pounds of pre-made (unbaked) meatballs to thaw and bake another day. Wonderful!

This meal is a huge hit with our family, and having these meatballs premade in the freezer is a huge time saver!

Easy Meatballs with Sweet SauceYum

Easy Meatballs with Sweet Sauce
 
Save Print
Author: Laura
Ingredients
  • 2-pounds ground beef
  • 3 Tablespoons minced onion
  • ½ teaspoons garlic powder
  • ¼ teaspoon sea salt
  • ½ cup milk
  • 2 eggs
  • 4 Tablespoons rolled oats
  • Sauce for Meatballs
  • ¾ cup ketchup
  • 2 Tablespoons minced onion
  • ¼ teaspoons garlic powder
  • 1 teaspoon liquid smoke
  • 2 Tablespoons brown sugar, molasses or honey
Instructions
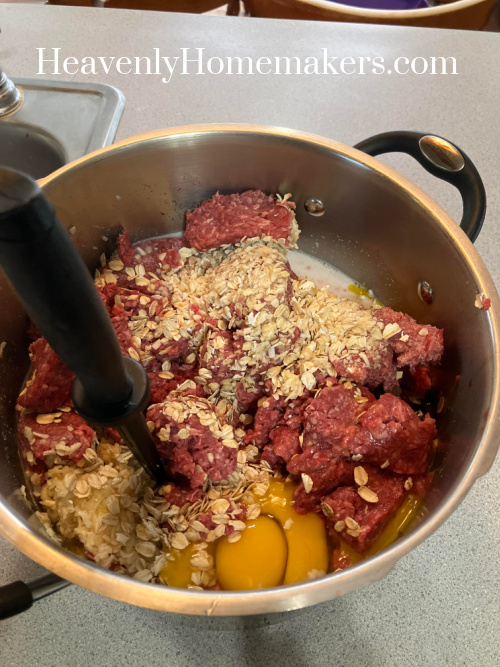
  1. Mix first seven ingredients together thoroughly.
  2. Form into 1½ inch balls and place side by side in a 9x13 inch glass casserole dish.
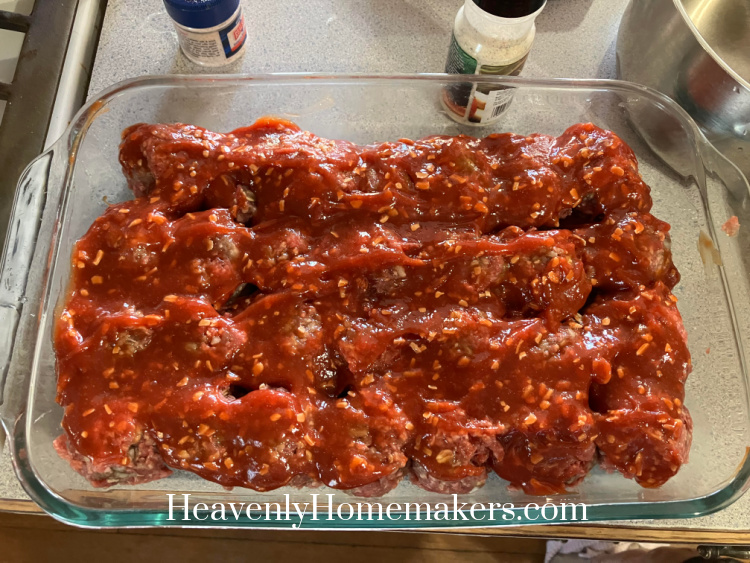
  3. Stir sauce ingredients together in a small bowl, then spread over each meatball.
  4. Bake uncovered in at 350 degrees for one hour.
3.5.3251

NOTE: I estimated our meal cost a total of around $22.00, which fed 4 adults and 7 kids that night, plus we had some leftovers. So a little over $2.00/person, even with “expensive” ground beef. Not bad! :)
Heavenly Homemaker's Club Members: Access your homepage and all your fantastic resources here! Not a member yet? Please join us!

How to Make Uncrustables

March 22, 2023 by Laura 2 Comments

This post may contain affiliate links. For more information, please see our disclosure policy.

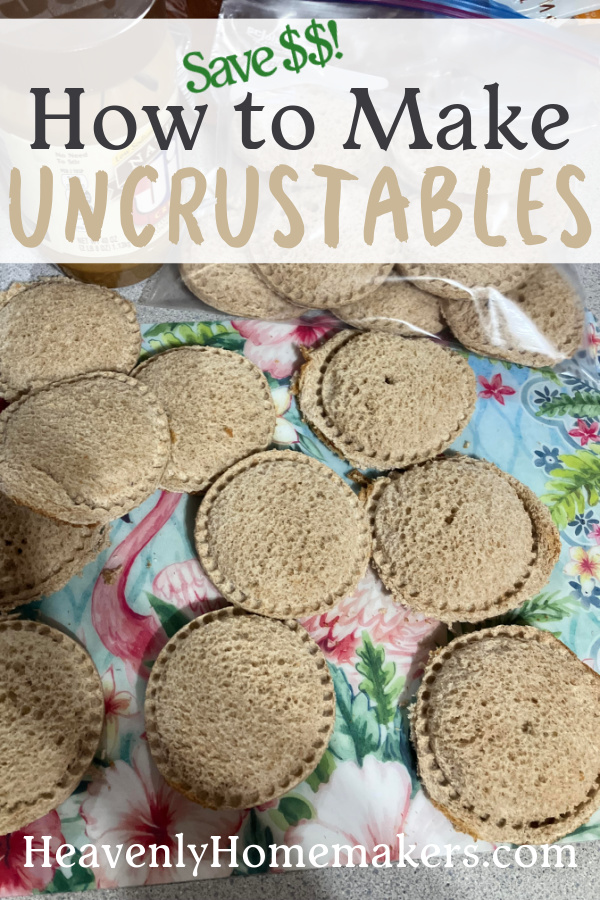
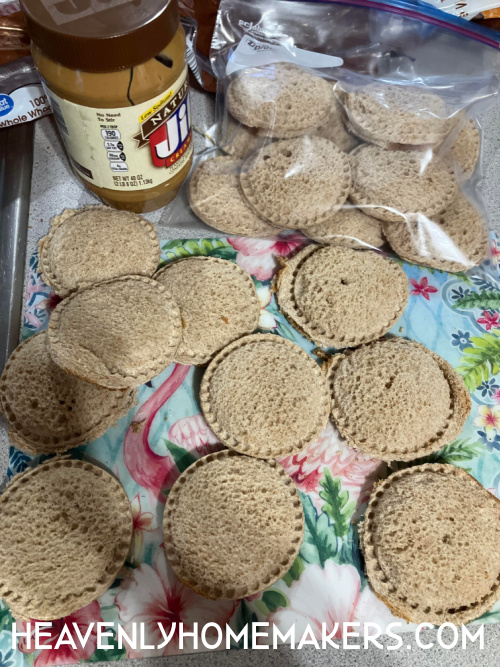
Let’s talk about how to make Uncrustables and all the reasons you should make them at home!

Yum

What is an Uncrustable?

Uncrustables are a lovely convenience item found in the freezer section of the grocery store. They are pre-made peanut butter and jelly sandwich with crusts removed. Perfect for most of our kids, right?

Yes, but the cost.

I can’t let myself spend $4.18 for just four crustless pb&j sandwiches. Surely it costs much less to throw together a simple sandwich at home, right? Right.

Here’s what you need to make Uncrustables:

100% Whole Wheat Bread: $0.19/sandwich
Natural Peanut Butter: $0.13/sandwich
100% Fruit Jelly: $0.13/sandwich

Uncrustables at the store: $1.05 per sandwich (made with less-nourishing ingredients)
Cost for a Homemaade Uncrustable: $0.45 (made with much better ingredients)

Oh, and you’ll need this handy tool which is a one-time, very worth it purchase.

Don’t waste the crust!!

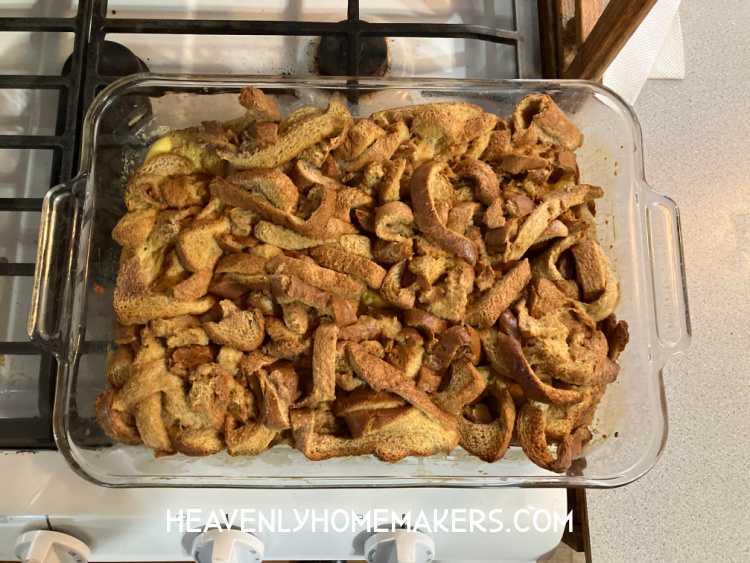
When I use two loaves of bread to make 20 Uncrustables, I end up with a 10×13 inch pyrex full of crusts. I can’t stand the idea of throwing them out, so I use them to make Easy Bread Pudding. My family loves this and I love that nothing goes to waste!

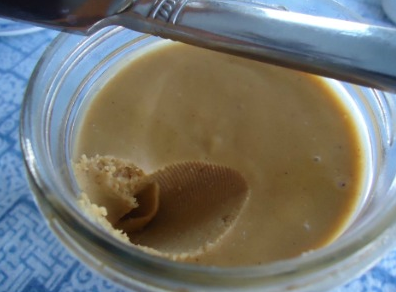
How to make your own Peanut Butter

Want to make your own peanut butter? It’s truly the most delicious! Here’s the recipe. It’s so very easy to make!

If you don’t make your own peanut butter, look for brands that don’t have hydrogenated oils in them. Those oils are best avoided. :)

The joy of Homemade Uncrustables

If you make Uncrustables, I recommend making many at once so that you get more mass for your mess. :) I make two loaves of bread worth each time I make Uncrustables (which produces 20). Then I freeze them to pull out for quick lunches for my kids (either at home or in lunchboxes at school). Having these ready in the freezer is so handy! And if we’re at home and want to eat them straight from the freezer, we put them into our air fryer for a minute or two to thaw/crisp up. So good!

Heavenly Homemaker's Club Members: Access your homepage and all your fantastic resources here! Not a member yet? Please join us!

The Easiest No-Bake Cheesecake

March 19, 2023 by Laura 5 Comments

This post may contain affiliate links. For more information, please see our disclosure policy.

Ready for the Easiest No-Bake Cheesecake recipe?

This cheesecake is always a hit when I serve it and since it’s so easy to make, I can serve it to guests often.

Ingredient Info

I buy cream cheese at Aldi by the case because it is a great price for great cream cheese (not all off-brand cream cheese is good). So there’s my cream cheese recommendation. :)

Meanwhile, I have learned the hard way that higher-quality whipping cream does not work as well in this recipe. :(  When I used Horizon Organic Whipping Cream, I couldn’t get this mixture to thicken and set up. But when I used regular whipping cream from Walmart, it worked like a charm. So there you go. For this recipe, use low-quality whipping cream. Ugh, who even am I anyway??

The Easiest No-Bake CheesecakeYum

The Easiest No-Bake Cheescake
 
Save Print
Author: Laura
Serves: 15
Ingredients
  • 2 sleeves honey graham crackers
  • 2 sticks butter
  • 2 8-ounce packages cream cheese, softened
  • 1 cup raw sugar
  • 1 cup heavy whipping cream
  • 1 teaspoon vanilla
Instructions
  1. In a gallon sized Ziploc bag, crush graham crackers with a rolling pin.
  2. Melt butter in a small saucepan.
  3. Pour crushed graham crackers and melted butter into a 9 x 13 inch pan.
  4. Stir ingredients together and pat it down to create crust. Set aside.
  5. In a high power blender or using a hand mixer, blend together cream cheese, sugar, whipping cream and vanilla until mixture is combined and thick.
  6. Smooth mixture over the crust. Chill for at least two hours before serving.
3.5.3251

This cheesecake is great as-is, but you can also add fresh berries to make it fancier. Or, you can top it with candy bars for a fun treat! (One week, I had a package of a variety of candy bars that I wanted to get rid of so I used them up for a college student lunch. It was a huge hit!)

If you study the above picture, you’ll see that on the left, I used the cheapo whipping cream that actually thickened. On the right, I used good whipping cream and the mixture remained runny. I served it to our guests anyway and it all tasted great. But now you can see what I was talking about regarding whipping cream above. :)

Heavenly Homemaker's Club Members: Access your homepage and all your fantastic resources here! Not a member yet? Please join us!

Breakfast Cookie Cups – Perfect for Grab-and-Go!

March 5, 2023 by Laura 5 Comments

This post may contain affiliate links. For more information, please see our disclosure policy.

I turned my breakfast cookie recipe into Breakfast Cookie Cups. This is genius. Plus below I’ve shared several other great grab-and-go breakfast ideas!

Not that Breakfast Cookies aren’t already convenient as a quick grab-and-go breakfast or snack option. But somehow having them in cupcake wrappers and baked in a muffin tin makes them even easier. Maybe they’re less crumbly? I dunno, but I really like them this way!

My kids are loving them, however, for our littlest, I skipped the chocolate chips to avoid extra messes. (How do they end up with chocolate chips melted onto their bottoms every time, I don’t know. So chocolate chip-less Breakfast Cookie Cups for all who are two and under at our house.)

Breakfast Cookie CupsYum

Breakfast Cookie Cups - Perfect for Grab-and-Go!
 
Save Print
Author: Laura
Serves: 18
Ingredients
  • 1 cup melted butter
  • ½ cup honey
  • 2 eggs
  • 1 teaspoon sea salt
  • 1 teaspoon ground cinnamon
  • 1 teaspoon baking soda
  • 1 teaspoon vanilla extract
  • 2 cups whole wheat flour
  • 2 cups rolled oats
  • ½ cup raisins or chocolate chips
Instructions
  1. Mix butter, honey, eggs, salt, cinnamon, baking soda, and vanilla.
  2. Stir in flour and oats.
  3. Fold in raisins or chocolate chips.
  4. Scoop heaping tablespoons of dough into paper-lined muffin tins.
  5. Bake at 350 degrees for 20 minutes.
3.5.3251

I double this recipe every time I make it simply because these freeze well and they are great to have in the freezer to serve as needed.

TIP: Add 1 cup of peanut butter to these if you want to add some protein. No other adjustments necessary.

Here are a few more great ideas for grab-and-go breakfasts:

  • Pancake and Sausage Muffins
  • Poptarts
  • Warm Chocolate Soother, Warm Pumpkin Custard, Warm Vanilla Soother in to-go mugs
  • Make-Ahead Breakfast Sandwiches
  • Flourless Brownie Muffins (hearty and great for breakfast!)
  • Crustless Cheesecake Cups
Heavenly Homemaker's Club Members: Access your homepage and all your fantastic resources here! Not a member yet? Please join us!

Hot Cocoa Oatmeal

February 8, 2023 by Laura 4 Comments

This post may contain affiliate links. For more information, please see our disclosure policy.

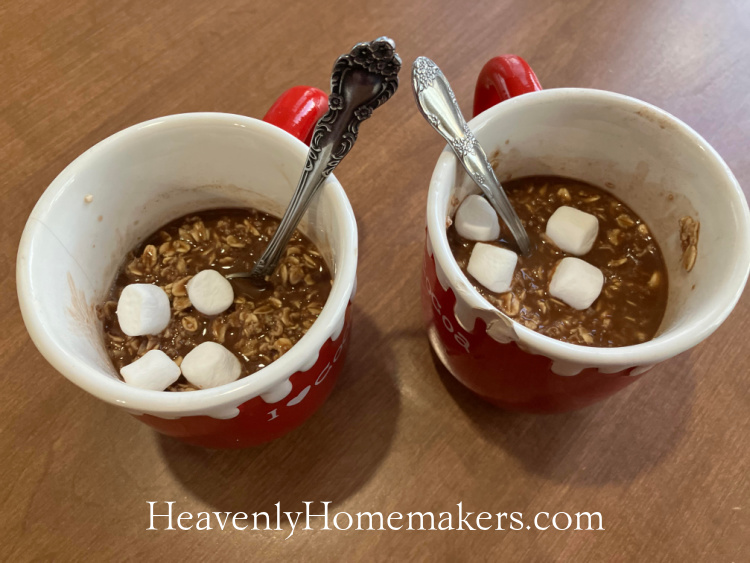
Look at this fun idea for Hot Cocoa Oatmeal!

Yum

My 7-year-old daughter found this idea in a magazine and we decided to try it at home. Whoa, but let me just pause for one moment to say: I never knew I’d be able to use “my” and “daughter” in the same sentence. And now I have four beautiful daughters plus two daughters-in-law!! Pictures to come as soon as our little girls’ adoptions are final!

So back to my 7-year-old daughter. :) She found a Hot Cocoa Oatmeal recipe in a Highlights magazine and wanted to try it. I don’t usually keep mini marshmallows on hand, but for this, I picked some up to surprise her. You can certainly make this breakfast or snack without them. I let my kids have four each instead of letting them fill their mugs. :)

This recipe is fun because you can make it ahead of time, then make a mug full whenever you need it. Beyond the marshmallows, this really is a healthy breakfast or snack option. My kids LOVED the chocolate flavor of this!

Hot Cocoa Oatmeal

Hot Cocoa Oatmeal
 
Save Print
Author: Laura
Ingredients
  • 10 cup whole oats (divided)
  • 2 cups brown sugar or sucanat
  • 1 cup unsweetened cocoa powder
  • 2 teaspoons sea salt
  • Mini marshmallows (optional)
Instructions
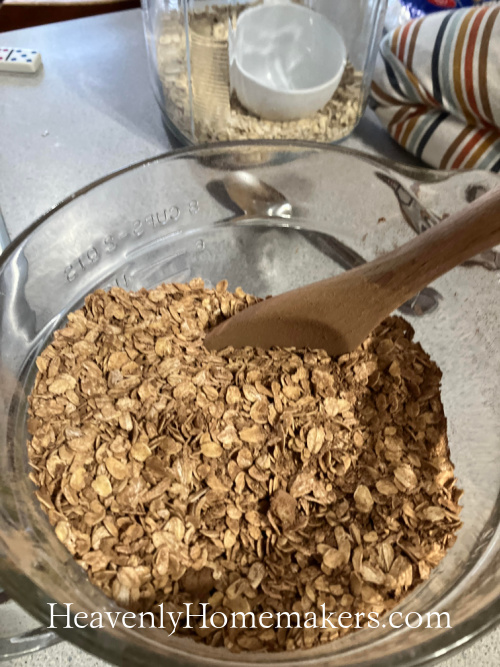
  1. Measure 7 cups of oats into a large mixing bowl.
  2. Blend the remaining 3 cups (1/2 cup at a time) until powdery and stir into the mixing bowl.
  3. Add brown sugar, cocoa powder, and sea salt.
  4. Mix well.
  5. Store in a large, airtight container.
  6. When ready to serve the oatmeal, scoop ½ cup of mix into a mug.
  7. Add ¾ cup boiling water.
  8. Stir.
  9. Allow the oatmeal and water to sit for about 5 minutes.
  10. Stir, add marshmallows if you like, and eat.
3.5.3251


As you can see, this is a big-batch recipe. I love making recipes like this for my family so I can use my time and energy well. Having a large container of this on hand means I can boil water in the morning, scoop oatmeal mixture into mugs, and have a very quick and fun breakfast ready in just a few minutes with very little effort.


Heavenly Homemaker's Club Members: Access your homepage and all your fantastic resources here! Not a member yet? Please join us!

Easy Chocolate Waffles

February 1, 2023 by Laura Leave a Comment

This post may contain affiliate links. For more information, please see our disclosure policy.

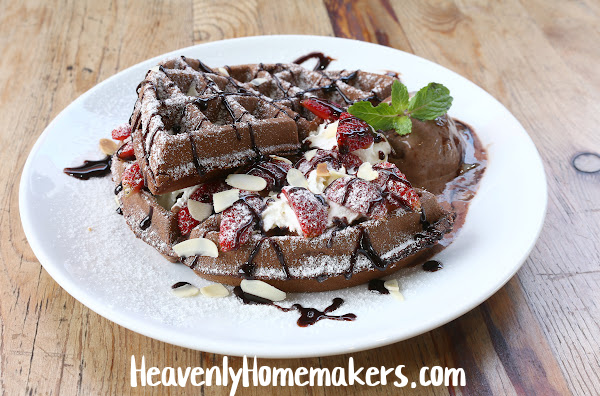
Check it out! Chocolate Waffles!

This recipe is as simple as whisking some cocoa powder into your waffle batter, but suddenly you’ve created a specialty breakfast. Better yet, make these for dinner sometime for a fun, unique evening meal.

What I especially love about this waffle batter is that you can put leftover batter into the fridge to store and use later. This makes prep even easier, as all you have to do is pull out the ready-to-use batter and make yourself some waffles!

Easy Chocolate WafflesYum

Easy Chocolate Waffles
 
Save Print
Author: Laura
Serves: 6-8
Ingredients
  • 3 cups whole wheat flour (I use freshly ground soft white wheat for these)
  • 1 heaping teaspoon baking powder
  • ½ teaspoon sea salt
  • 1 Tablespoon sucanat or brown sugar
  • 3 heaping Tablespoons unsweetened cocoa powder
  • 4 eggs
  • 2½ cups milk
  • ½ cup melted coconut oil
Instructions
  1. Whisk ingredients together until smooth.
  2. Cook ½-3/4 cup mixture in a waffle iron for 3-4 minutes or until golden brown.
  3. Serve with fresh fruit and whipped cream.
  4. Store leftover batter in a secure container in the fridge.
3.5.3251

Serve these Chocolate Waffles with regular (real) maple syrup. Or make this awesome Chocolate Syrup.

Here are more options for toppings:

  • Homemade Whipped Cream
  • Chocolate Whipped Cream
  • Peanut Butter Whipped Cream
  • Apple Butter
  • Blueberry Pancake and Waffle Syrup
  • Peach Syrup (for pancakes and waffles)
  • Peanut Butter (just peanuts!)
  • Peanut Butter (super creamy – like Skippy or Jif)
  • Raspberry Syrup
  • Fresh Fruit

Have you ever tried Chocolate Waffles?

Heavenly Homemaker's Club Members: Access your homepage and all your fantastic resources here! Not a member yet? Please join us!

Easy Chili Cheese Dip

January 25, 2023 by Laura 3 Comments

This post may contain affiliate links. For more information, please see our disclosure policy.

Have leftover chili? Make Easy Chili Cheese Dip!

One of my favorite things to do in the kitchen is to clear out leftovers by making something new with them. This Easy Chili Cheese Dip is a perfect example of how to do this.

On the other hand, this dip is delicious enough that you might want to make chili just so you can have leftovers to make this dip. Or make the chili, skip eating the chili, and make lots of dip. OR, cheat as needed and simply buy a can of chili to use in this recipe!

Easy Chili Cheese DipYum

Easy Chili Cheese Dip
 
Save Print
Author: Laura
Ingredients
  • 2 cups leftover chili
  • 8-ounces softened cream cheese
  • 1 cup salsa
Instructions
  1. Blend all ingredients together until smooth.
  2. Serve hot or cold with tortilla chips.
3.5.3251

What’s great about this recipe is that it’s more than a snack. This can be your entire meal along with fruits and veggies on the side.

Serve it hot or cold, whichever you like!

This recipe works great for my family because I blend everything up which makes a smooth dip without chunks. If you prefer a chunky dip, just stir ingredients together instead of blending.

Need some chili recipes? Use one of these:

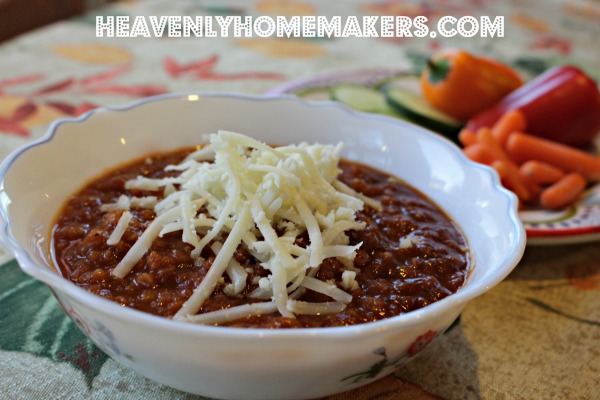
  • You can keep your costs for this dip to a minimum when you make this Lentil Chili.
  • This Hearty Chili is meatless, but feel free to cook hamburger or ground turkey to add more protein.

Here are more dip recipes to look through and enjoy!

  1. Easy White Queso
  2. Simple Bean and Cheese Salsa Dip
  3. Creamy Chocolate Fruit Dip
  4. Creamy Italian Veggie Dip
  5. Cream Cheese Salsa Dip
  6. Bacon Ranch Chip Dip
  7. French Onion Dip
  8. Bacon Tomato Dip
  9. Black Bean Salsa
  10. Easy Veggie Dip
  11. Healthier Cheese Dip 
  12. Hot Spinach and Artichoke Dip
  13. Nacho Cheese Pretzel Dip
  14. Easy Guacomole
  15. Easy Cheesy Bean Dip
  16. Hamburber Sauerkraut Dip
  17. Cream Cheese Fruit Dip
Heavenly Homemaker's Club Members: Access your homepage and all your fantastic resources here! Not a member yet? Please join us!

How to Make 5 Meals with 1 Pork Roast

January 22, 2023 by Laura 2 Comments

This post may contain affiliate links. For more information, please see our disclosure policy.

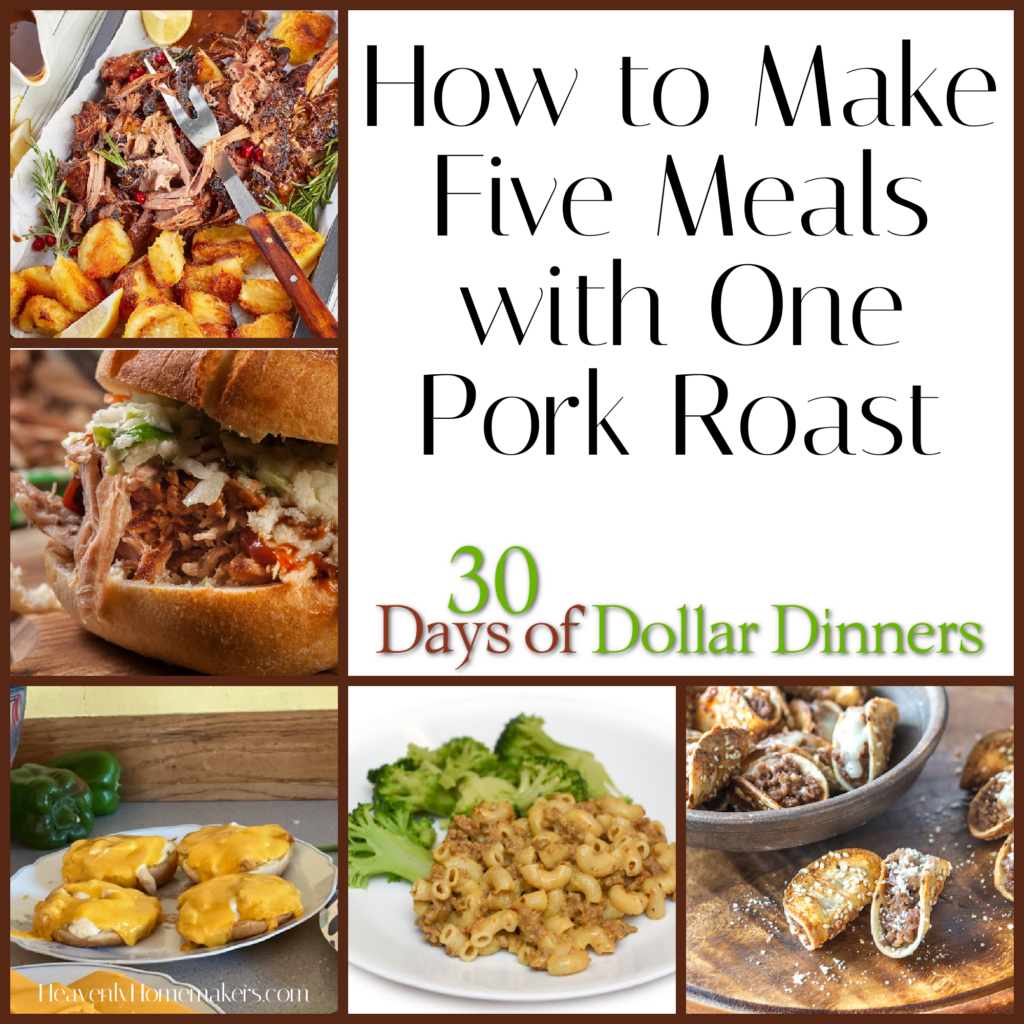
Here’s how to make 5 meals with 1 pork roast!

Yum

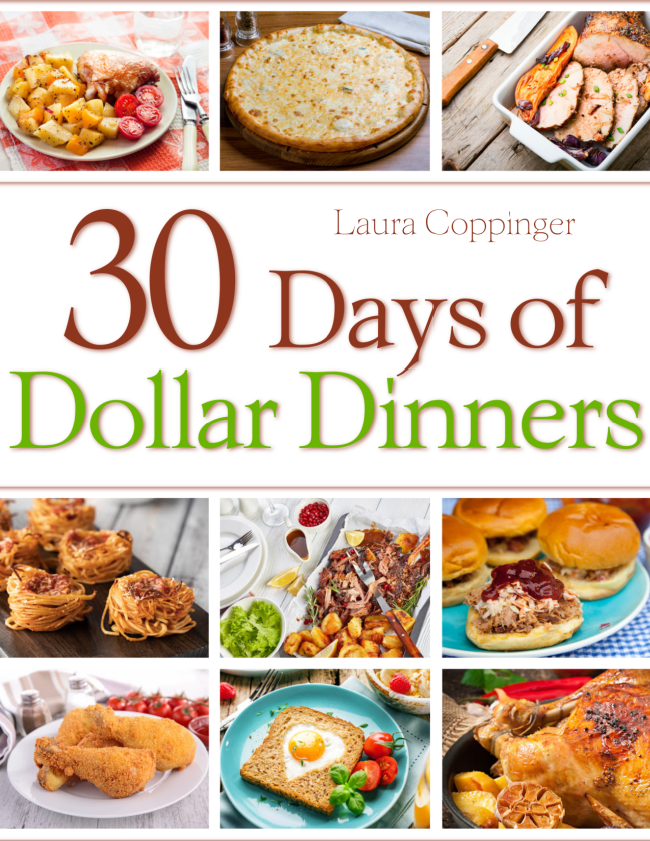
This might be one of my favorite Dollar Dinner menu items – x5! If you take a look at our 30 Days of Dollar Dinners calendar, you’ll see that these pork roast meals break down into these:

  1. Pork Roast and Potatoes $3.74
  2. Shredded Pork Tacos $4.08
  3. Pork Roast Melts $3.90
  4. Cheesy Mac and Pork $4.05
  5. Pork Sandwiches $3.90

The recipes for these five meals feed four people, which as you can see, divides down to just over $1.00 or just under $1.00 per person!

In my case, I had a 5-pound pork roast in the freezer that I’d picked up marked down to just $1.79/pound. So my $8.95 purchase was divided into four full meals.

Wait, just four meals, Laura?

Yes indeed, we have way more than 4 people in our house. 10 to be exact. And for a couple of our pork roast meals, we had guests. So I most definitely made our pork roast stretch, as it fed a LOT of people four different meals! But I just couldn’t stretch it into five. ;)

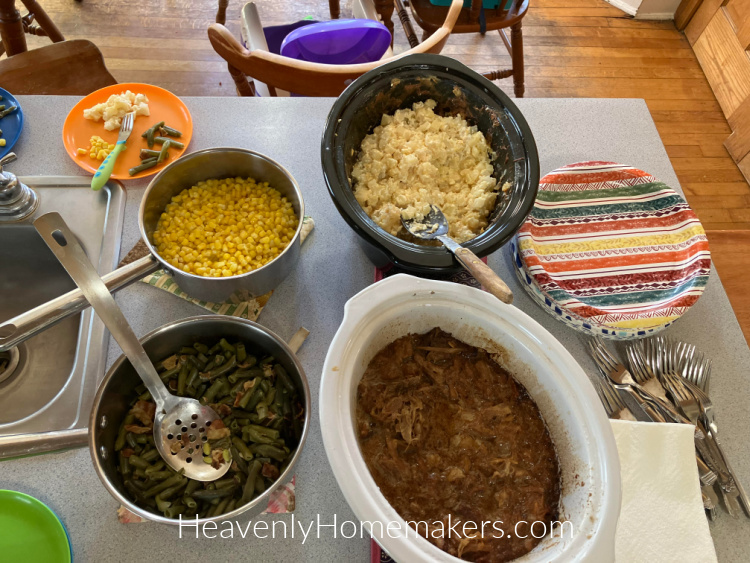
First, I made the roast (recipe below) with cheesy potatoes, green beans, corn, pumpkin bread, and cookies. For this particular meal, we fed 6 adults and 6 kids.

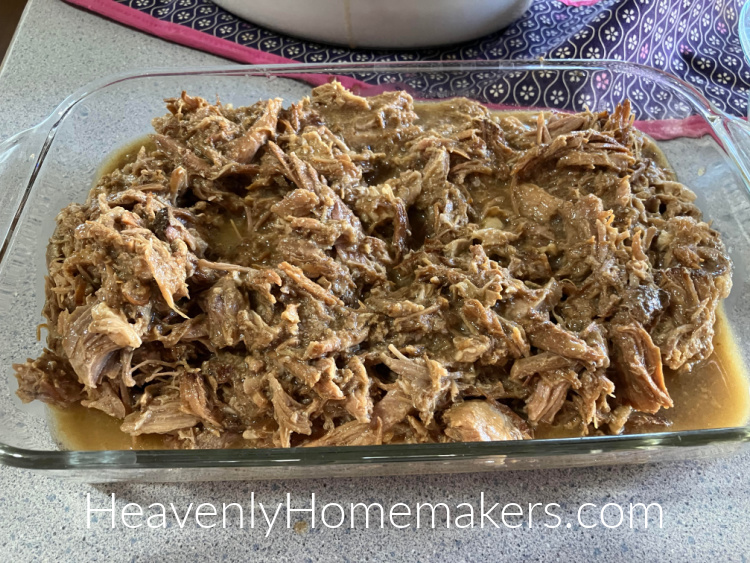
Everyone ate until they were full, then we still had this much meat left over.

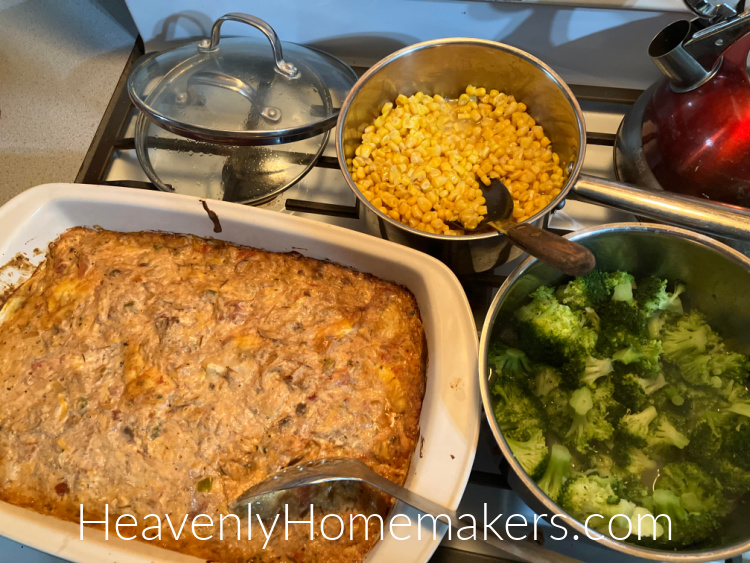
With these leftovers, we made Pork Roast Melts, Enchiladas like this (with leftover shredded pork roast instead of ground beef), and Cheesy Mac and Pork. The night we had enchiladas, we had company again so there were five adults and six kids. Fruit and veggie side dishes really help the meat stretch throughout a meal, which is a huge money saver!

How to Make 5 Meals with 1 Pork Roast

Here’s how to make a Pork Roast:

How to Make 5 Meals with 1 Pork Roast
 
Save Print
Author: Laura
Ingredients
  • 5-pound pork roast
  • 1 chopped onion
  • Sea salt to taste
  • 2 teaspoons garlic powder
Instructions
  1. Put all ingredients into a slow cooker and cook on low for 10 hours or until met shreds easily.
  2. Shred cooked meat and divide it into five equal portions.
  3. Serve one portion over baked potatoes.
  4. Save the remaining portions for four additional meals: Pork Roast Melts, Shredded Pork Tacos, Pork Sandwiches, and Cheesy Mac and Pork.
3.5.3251


To make it stretch to last through five meals, you’ll eat one portion the night you cook it. Then you’ll save four portions to make other meals as detailed in our 30 Days of Dollar Dinners eCookbook. And hey, guess what?

The eCookbook is READY!!

We finished the cook a few weeks ahead of schedule, so we’re ready to offer it to you now!

This book contains all 30 days worth of recipes so you can make all of our delicious dollar meals! Here are the meals and recipes you’ll find in the book, as well as the dollar amount it takes to make each recipe for 4 people:

  1. Chili = $3.80
  2. Chili on Baked Potatoes $2.82
  3. Broth Rice with Veggies $3.77
  4. Grilled Cheese and Soup $4.59
  5. Pork Roast and Potatoes $3.74
  6. Shredded Pork Tacos $4.08
  7. Pork Roast Melts $3.90
  8. Cheesy Mac $3.09
  9. Cheesy Mac and Pork $4.05
  10. Pork Sandwiches $3.90
  11. Italian Honey’d Chicken Thighs $4.02
  12. Cottage Cheese and Pineapple Bowls with Toast $3.20
  13. Egg in a Nest $3.54
  14. Whole Chicken with Potato Wedges $3.99
  15. Parmesan Chicken and Rice $4.02
  16. Creamy Potato Soup $3.98
  17. Personal Cheese Pizzas $3.99
  18. Cheese Calzones $3.99
  19. Italian Chicken Legs $4.01
  20. Amazing Fried Chicken $4.32
  21. Crepes $3.44
  22. Biscuits and Gravy $3.32
  23. Lemon Garlic Chicken Thighs with Biscuits $4.19
  24. Seasoned Pork Loin with Roasted Broccoli $3.56
  25. Pork Loin Sandwiches $4.02
  26. Scrambled Egg Sandwiches $3.08
  27. Baked Spaghetti Nests $3.10
  28. Pancakes and Eggs $3.48
  29. Bean and Cheese Burritos $3.98
  30. Tex Mex Casserole $3.45

Amazing, right?!

Here’s how to get our 30 Days of Dollar Dinners eCookbook:

If you are a Heavenly Homemakers Club Member, simply log in and head to the eBook section. You’ll find it there so you can use and enjoy it right away!

Not a member? Please join us here so you can have access to all of our eBook, printables, eCurriculum, menu planning resources, and so much more!

Not interested in becoming a member of our club? Head to our shop here to buy the 30 Days of Dollar Dinners eCookbook independently.

Heavenly Homemaker's Club Members: Access your homepage and all your fantastic resources here! Not a member yet? Please join us!
« Previous Page
Next Page »

Join Our Community!

 Facebook Twitter E-mail Instagram Pinterest

Popular Posts

~ Will All of the Real Moms Please Stand Up?
~ Easy! Stir-and-Pour Whole Wheat Bread
~ How to Make Gatorade
~ 31 Real Food Breakfast Ideas
~ Dear Teenage Girls...
~ When Mom Takes a Step Back
~ The Inexpensive Health Insurance We Love!
~ Let's Talk Real Food Grocery Budgets

Check out our latest posts!

  • Big Family Food and Fun: August 30-September 5, 2026
  • Big Family Food and Fun: August 23-29, 2026
  • Big Family Food and Fun: August 16-22, 2026
  • Big Family Food and Fun: August 9-15, 2026
  • Big Family Food and Fun: August 2-8, 2026
Home  ~  Simple Meals  ~  Club Membership  ~  Shop  ~  Privacy Policy  ~  Disclosure  ~ Contact

Copyright © 2026 · Beautiful Pro Theme on Genesis Framework · WordPress · Log in