Heavenly Homemakers

Encouraging women in homemaking, healthy eating and parenting

  • Home
    • About
    • FAQs
  • Recipes
    • Bread and Breakfast
    • Condiments
    • Dairy
    • Main Dishes
    • Side Dishes and Snacks
    • Desserts
    • Gluten Free
    • Instant Pot
    • Crock Pot
    • Heavenly Homemaker’s Weekly Menus
  • Homemaking
    • Real Food Sources
  • Store
  • Contact
    • Advertise
    • Disclosure
    • Privacy Policy
  • Simple Meals
  • Club Members!

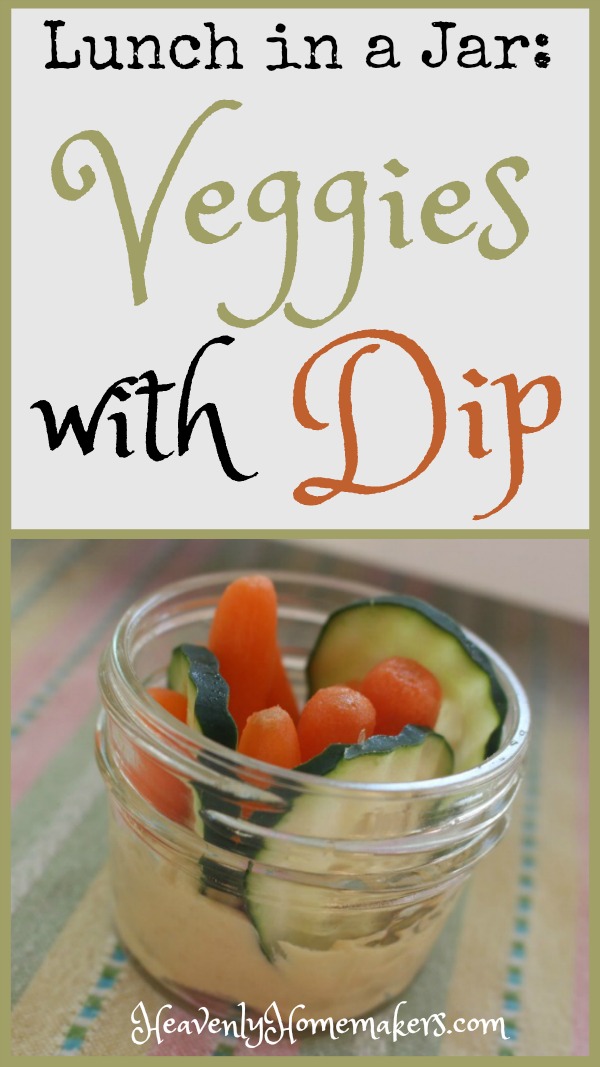
Lunch in a Jar: Veggies with Dip

August 7, 2018 by Laura 3 Comments

This post may contain affiliate links. For more information, please see our disclosure policy.

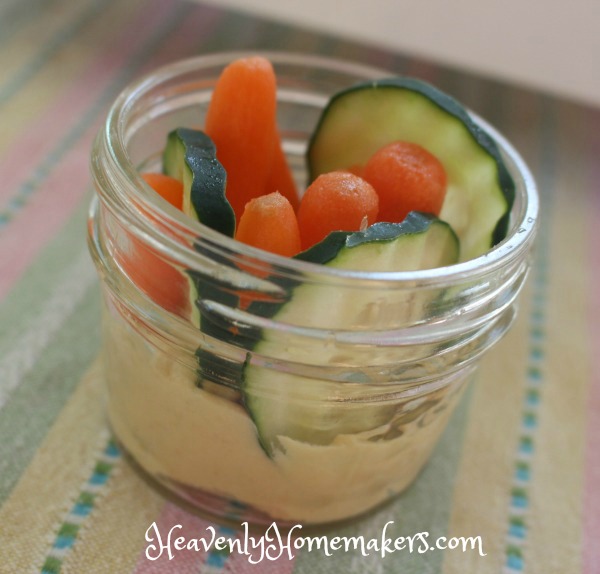
Hopefully you’ve already seen this genius idea for putting veggies with dip in a jar and packing it for lunch. This has become one of my favorite ways to eat well on the road!

Do you see that?

  1. You put Ranch Dip or Hummus or any of your favorite veggie dips into the bottom of small jar.
  2. Then you add your favorite raw veggies.
  3. Put on a lid and you’re good to go.

When it’s time to eat, your veggies are already dipped. Pick up a carrot, eat the carrot covered in dip. How can eating well get any easier than this?

—-> Did you see the fun list of supplies and jars I recommend for packing lunches? <—–

Our Favorite Veggie Dips to Pack in Lunches

  • Ranch Dip
  • Spicy Ranch Dip
  • French Onion Dip
  • Creamy Italian Veggie Dip
  • Easy Veggie Dip

Our Favorite Veggies to put with our Dips

  • Petite Baby Carrots (so much sweeter and easier to eat!)
  • Sliced Cucumbers
  • Broccoli
  • Cauliflower
  • Sweet Peppers
  • Celery (ok, not really our favorite, but still worth adding it to the list in case it’s one of yours!)

Great add-ins to your Veggies with Dip Lunch in a Jar

  • Popcorn Chicken with Ranch
  • Quick Bread in a Jar
  • Simple Oatmeal Cookies
  • Flourless Peanut Butter Brownies
  • Sweet and Salty Almonds or Pecans
  • Honey Sweetened Flourless Peanut Butter Bars
  • Orange Glazed Poppyseed Bread

We’ve got 10 super fun Lunch in a Jar ideas to share this month – perfect for your Back to School lunchbox! Subscribe here so you won’t miss a post!


Next up, fruits and dips. Wait until you see all the fun ideas!!

Some of these links are my affiliate links.

Heavenly Homemaker's Club Members: Access your homepage and all your fantastic resources here! Not a member yet? Please join us!

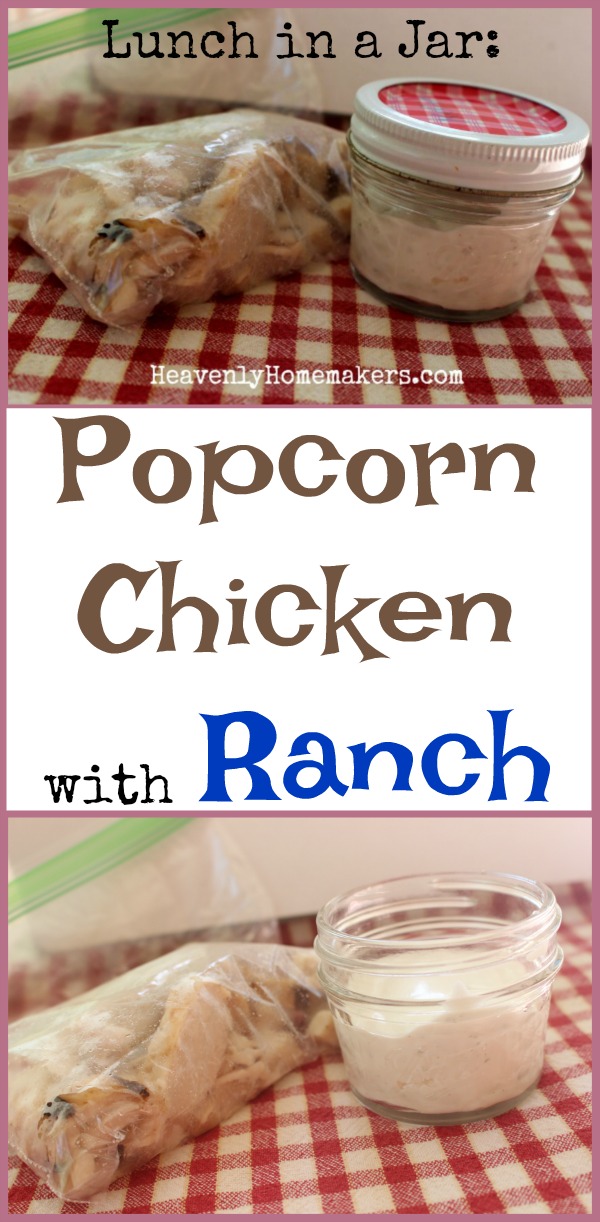
Lunch in a Jar: Popcorn Chicken with Ranch

August 5, 2018 by Laura Leave a Comment

This post may contain affiliate links. For more information, please see our disclosure policy.

This month we’re talking about lunches that can be packed in jars to take on the road, to work, or to school. We’re about to get creative. Whose ready to pack some Popcorn Chicken with Ranch Dip?

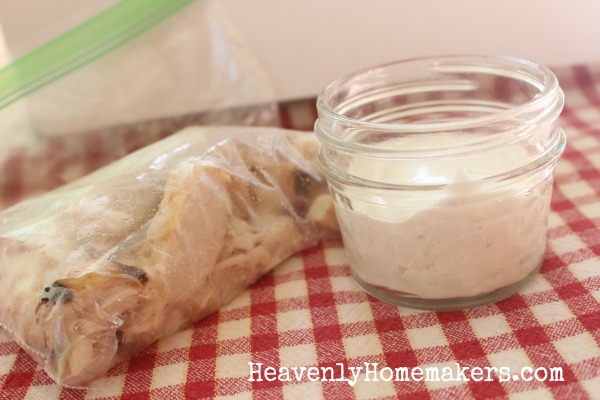
Silly me. I forgot to pack the chicken in a jar the day I took these pictures. I grabbed a baggie instead. The ranch dip though? Well, it went into one of my favorite little 4-ounce jars. These jars are perfect for transporting dips and dressings!

—-> Did you see the fun list of supplies and jars I recommend for packing lunches? <—–

Here’s the thing about fried chicken: It’s good hot or cold. Therefore, we can make a big batch of Popcorn Chicken, separate it in jars or baggies to send in lunches to be eaten with dip. What a fun lunch!

Our Favorite Dips to Pack in Lunches

  • Barbeque Sauce
  • Ranch Dip
  • Spicy Ranch Dip

These dips can also be made ahead in big batches, then packaged in jars to grab and go. I love how easy this is!

You might remember Popcorn Chicken – one of the first recipes I shared here long ago. I’ll post it for you again here for easy access!

Simple Popcorn Chicken with Ranch

Lunch in a Jar: Popcorn Chicken with Ranch
 
Save Print
Author: Laura
Serves: 3-6
Ingredients
  • 3 large boneless, skinless chicken breasts or thighs
  • ¾ cup whole grain flour
  • ½ teaspoon sea salt
  • ½ teaspoon garlic powder
  • butter
Instructions
  1. In a medium sized bowl, stir together flour, salt and garlic powder.
  2. Using kitchen shears, cut chicken breasts into tiny bite sized pieces.
  3. Toss chicken in flour mixture to coat well.
  4. Smear a thick layer of butter on the bottom of a 9x13 inch baking dish.
  5. Pour coated chicken into dish, spreading so that they are in a single layer.
  6. Bake at 350° for 10 minutes. Stir chicken and bake another 10 minutes.
3.5.3229

Need your chicken to be gluten free? Use your favorite gluten free flour. (I’ve made these successfully with Brown Rice Flour.)

Need Popcorn Chicken in large amounts (how well I understand!)? Double, triple, and quadruple this recipe without problem.

Want to really get ahead? Make this Popcorn Chicken in huge batches and freeze them. This will make packing lunches so easy!

Great add-ins to your Popcorn Chicken with Ranch Lunch

  • Carrot Sticks
  • Grapes
  • Cherries
  • Bread and Butter
  • Quick Bread in a Jar

We’ve got 10 super fun Lunch in a Jar ideas to share this month – perfect for your Back to School lunchbox! Subscribe here so you won’t miss a post!
Some of these links are my affiliate links.

Heavenly Homemaker's Club Members: Access your homepage and all your fantastic resources here! Not a member yet? Please join us!

Do You Love the Pineapple?

August 2, 2018 by Laura Leave a Comment

This post may contain affiliate links. For more information, please see our disclosure policy.

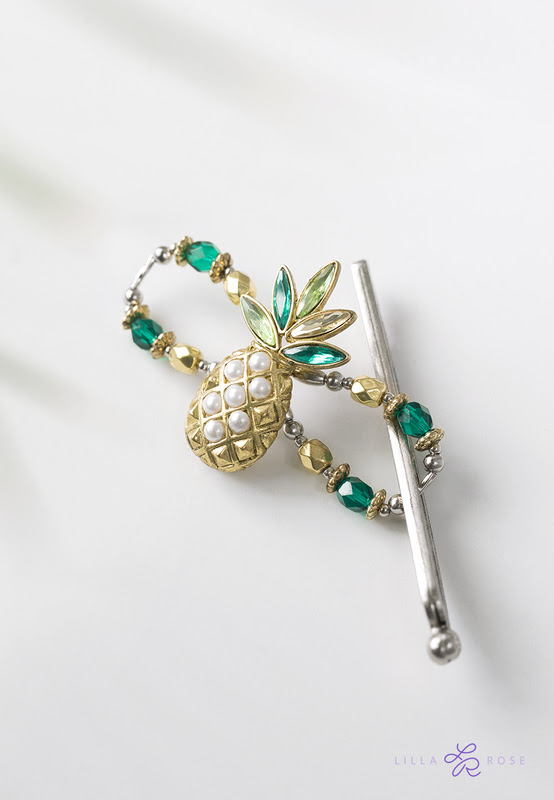
Look what just came out at Lilla Rose for August?!

Sizes are selling out quickly, so I wanted to let you now right away. :)

Take advantage of the August special while you’re at it. Lilla Rose!


Huge thanks to Paula at Lilla Rose for sponsorship and always letting us know the latest and greatest!

Heavenly Homemaker's Club Members: Access your homepage and all your fantastic resources here! Not a member yet? Please join us!

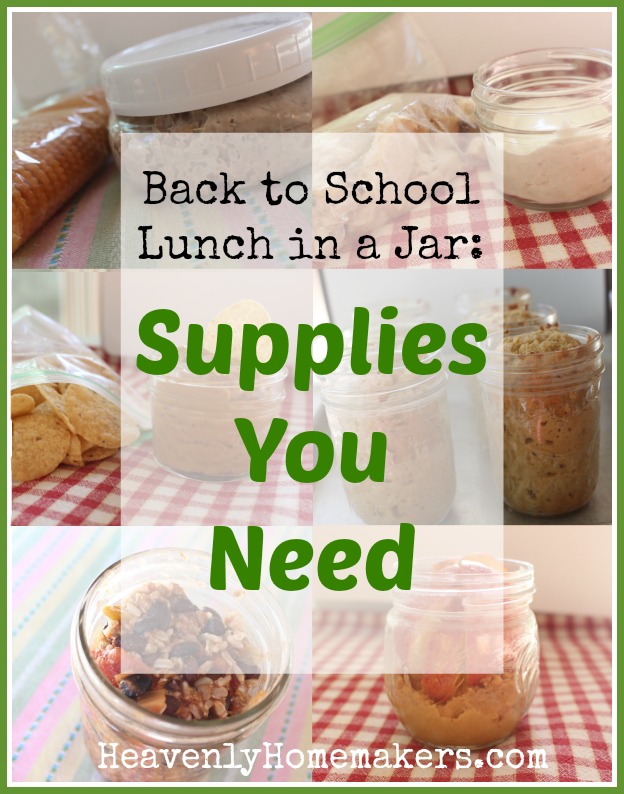
Back to School Lunch in a Jar: Supplies You’ll Need

August 2, 2018 by Laura 2 Comments

This post may contain affiliate links. For more information, please see our disclosure policy.

Ready to discover great Back to School Lunch ideas that you can make and pack in jars? It’s time to get your supplies ready!

Why pack lunches in jars? Let me count the reasons:

  1. Packing lunches in jars means you can make great food ahead of time, then grab it from the fridge and take it in a hurry.
  2. Jars protect food from becoming smashed in a lunch box.
  3. Jars are see-through, so you can discover your options with a quick glance in the fridge.
  4. Glass is safe for food storage, so you don’t have to worry about dangerous plastics.
  5. Jars are reusable, so you’ll save all kinds of money in the long run.
  6. You can purchase jars in all sizes, giving many options to put together a perfect lunch box!

I think it goes without saying that jars are cute and beautiful and pretty and delightful. Indeed, I really love jars. :)

Back to School Lunch in a Jar: Supplies You’ll Need

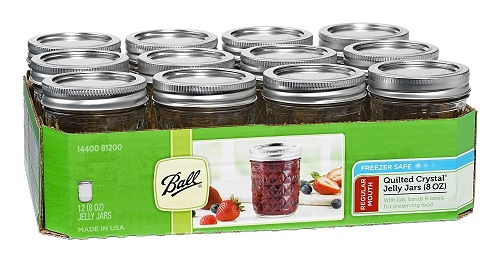
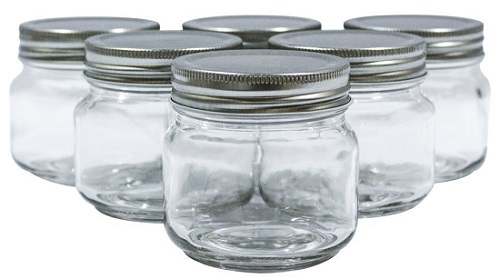
I have jars in a variety of sizes, which comes in very handy depending on whether I’m packing tiny jars with dips for veggies or bigger jars full of soup. Here are my top suggestions for jars to use to pack lunches:

These Basic 8-Ounce Jars are a common household item. They are great for baking quick bread, and for packing berry parfaits and any number of small lunch items.

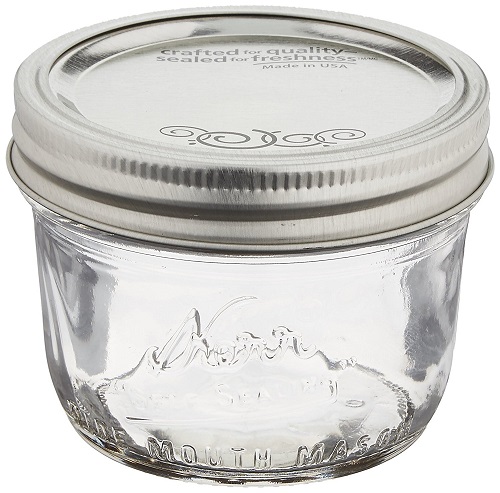
These 8-ounce jars (with regular lids) are short and squat-y. They are wonderful for packing sliced fruit, homemade pudding, cooked meat chunks, and much more.

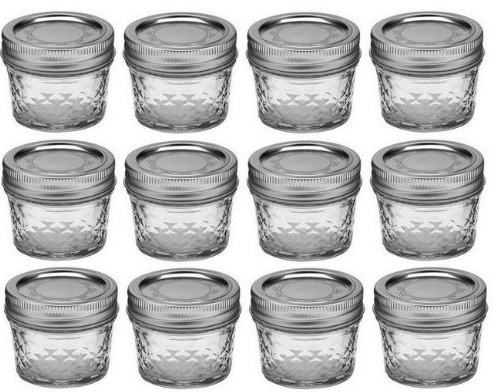
I LOVE these tiny 4-ounce jars for packing fruit or veggie dips!


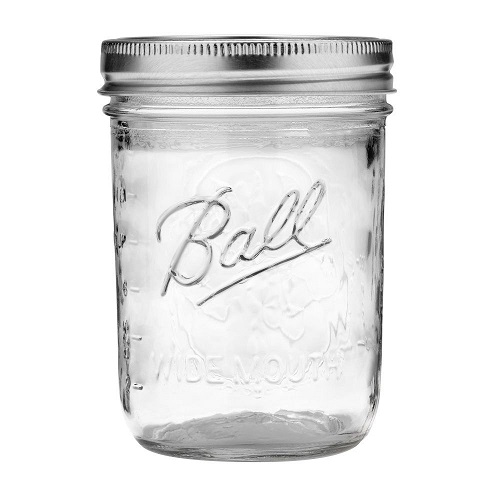
It’s hard to tell the size in the picture below, but these 16-ounce wide mouth jars are a favorite for packing main dish items and salads in lunch boxes.

Wide mouth jars make eating directly out of the jar so much easier! They are also easier to clean. I have a set of these 8-ounce wide mouth jars and use them all the time for packing fruit salads and other side dishes.

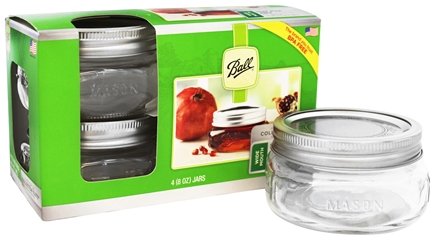
My favorite, favorite (because obviously I can’t decide which jars are my favorite) are these 8-ounce wide mouth jars. They are so handy for packing, well, just about any side dish item in a lunch box.

For both wide mouth and regular jars, I keep a supply of these plastic lids. They are the best! Check out wide mouth plastic lids and regular plastic lids.

Did you try Baking Quick Bread in Jars? So fun! We’ve got 10 super fun Lunch in a Jar ideas to share this month – perfect for your Back to School lunchbox! Subscribe here so you won’t miss a post!
Some of these links are my affiliate links.

Heavenly Homemaker's Club Members: Access your homepage and all your fantastic resources here! Not a member yet? Please join us!

Simple Meals for a New School Year!

August 1, 2018 by Laura Leave a Comment

This post may contain affiliate links. For more information, please see our disclosure policy.

It’s almost “Back to School” time and I can’t decide how I feel about it. Mostly I’ve just decided that here it is, ready or not. At least there are books involved, right? Lots and lots of delicious books!

My boys are huge and adultish now,
but I WILL make them pose in the school supply aisle for me again this year.

Oh, baby.

But speaking of delicious, it occurred to me that just like every other year at this time, I am doing everything I can to get ahead in the kitchen so I’m ready for a school schedule and soccer season schedule. Must. Be. Organized!!!

While I love Simple Recipes and the plans that come with Simple Meals all year ’round, I think I like them best in the fall when my schedule is the craziest and my need to be organized is the most important. Ironically though, I don’t always have TIME to get organized when I need it the most. So Simple Meals plans and lists SAVE MY LIFE and feed my family. :)

Simple Meals Subscriptions Include:

  • Complete menu plans for every week of the year
  • Seasonal food ideas
  • Incredibly easy recipes (seriously so, so easy!)
  • Tips to make your kitchen time efficient
  • Complete grocery list for each menu plan
  • Gluten Free adaptations
  • Ideas for meals on the fly
  • Bonus recipes for breakfast
  • Resource guide…

Download a FREE SAMPLE Simple Meals Planning Packet.

As a special Back-to-School bonus, for one week only we’re going to give you $10 off your first year’s subscription. This makes the cost of every Simple Meals plan a tiny little $0.81 each! Incredible!

Ready to get $10 off your first year’s Simple Meals subscription?

728x90

Save time, save energy, save money. Put wonderful, simple meals on the table in the most efficient way possible, thanks to our Simple Meals Planning Packets. They’ll come to your inbox each Thursday morning. You’ll LOVE all they offer each week, from menus to recipes to time saving tips and more.

(Need to eat Gluten Free? The packets include adaptations needed to accommodate you.)

Hurry to take advantage of this discount offer!

Sign up below – While this shows up at the regular $52 price-tag, once you click to purchase you’ll see that the price you pay for your first year’s subscription is only $42! Enjoy the great discount and the wonderful meal plans this year!!

[wp_eStore_subscribe_fancy id=28]

Offer ends Wednesday, August 8.

Heavenly Homemaker's Club Members: Access your homepage and all your fantastic resources here! Not a member yet? Please join us!

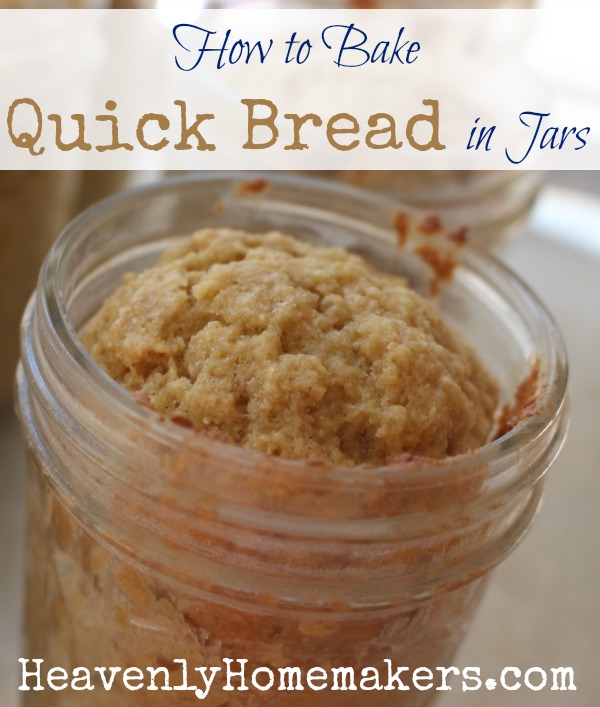
How to Bake Quick Bread in Jars (With 10 Recipes!)

July 31, 2018 by Laura 24 Comments

This post may contain affiliate links. For more information, please see our disclosure policy.

I’ve long been fascinated that it is possible to bake quick bread in jars. I finally took a little time to learn the tricks!

Whether we like it or not, it’s time to think about getting back into a school routine. For all who need to pack a lunch (and even for all who don’t!), we’re excited about our new Lunch in a Jar series!

We’ve got 10 super fun Lunch in a Jar ideas to share this month – perfect for your Back to School lunchbox! Subscribe here so you won’t miss a post!
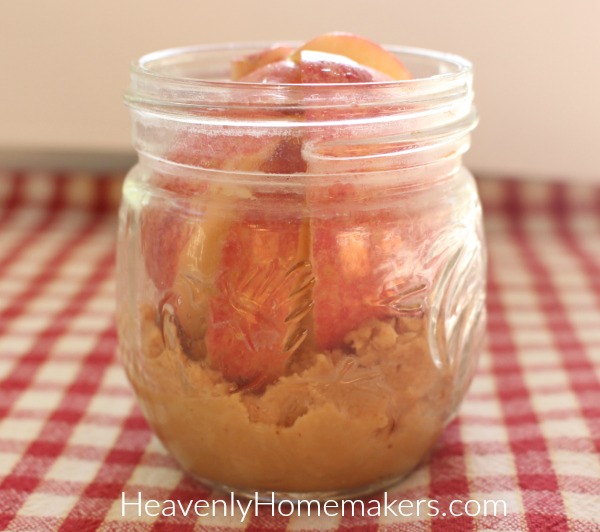
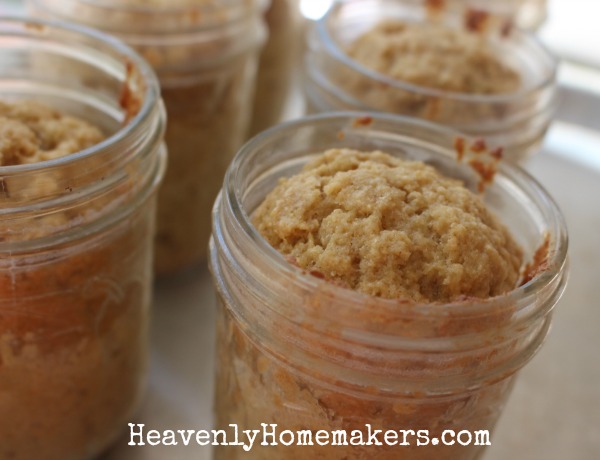
I love the idea of making a batch of Quick Bread in Jars, then grabbing them out of the fridge as needed to pack in lunches!

Why bake Quick Bread recipes in jars and not simply bake muffins to pack in lunches? Simple! Jars keep the breads/muffins from becoming smashed. It’s genius really. Bake them, stash them, grab them, pack them. It’s super fun!

How to Bake Quick Bread in Jars

5.0 from 2 reviews
How to Bake Quick Bread in Jars (With 11 Recipes!)
 
Save Print
Author: Laura
Serves: 6
Ingredients
  • 1 batch of your favorite quick bread (see recipes below!)
Instructions
  1. Mix up a batch of Quick Bread as directed.
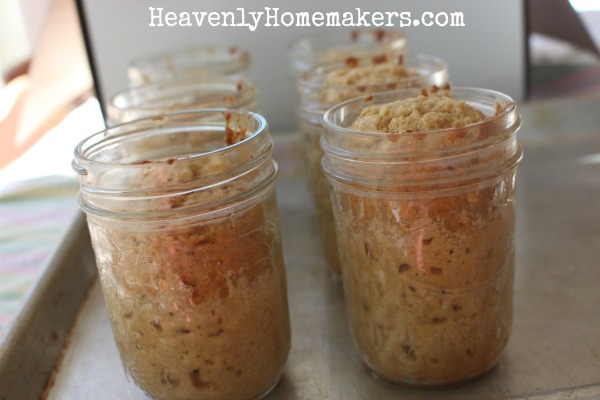
  2. Scoop batter into six buttered 8-ounce jars (do not fill jars over half full).
  3. Place prepared jars on a cookie sheet.
  4. Bake in a 350 degree oven for 45 minutes or until a toothpick inserted in the middle comes out clean.
  5. Place a lid/ring on the jar immediately after removing the bread jars from the oven so they will seal. (This step isn't entirely necessary if you are storing the bread in the fridge. But sealing will allow the bread to keep for an extra week inside the fridge.)
  6. Allow bread jars to cool completely before transferring them to the refrigerator.
3.5.3229

Here are 10 of our favorite Quick Bread/Muffin recipes!

  • Applesauce Bread
  • Chocolate Chocolate Chip Bread
  • Lemon Bread
  • Peanut Butter Chocolate Chip Bread
  • Pumpkin Chocolate Chip Bread
  • Strawberry Bread
  • Zucchini Carrot Bread
  • Whole Wheat and Honey Zucchini Bread
  • Banana Bread
  • Chocolate Zucchini Bread

Stay tuned for an entire month of Lunch in a Jar ideas!!!

Heavenly Homemaker's Club Members: Access your homepage and all your fantastic resources here! Not a member yet? Please join us!

Simple Summer Supper: Perfect Pasta Salad

July 29, 2018 by Laura 1 Comment

This post may contain affiliate links. For more information, please see our disclosure policy.

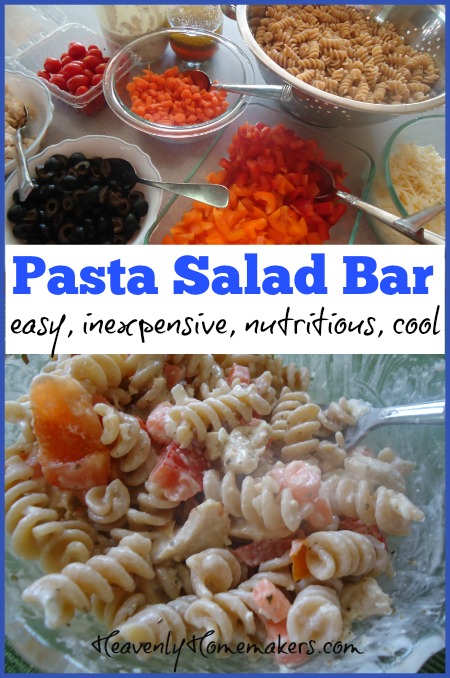
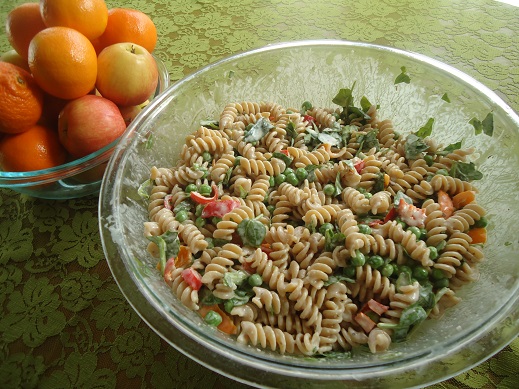
What makes this Perfect Pasta Salad perfect? You do, of course! You build it the way you like it, making it the perfect salad for you!

Perfect Pasta Salad Tips:

  • Save leftover Grilled Chicken or Grilled Salmon to stir into your Pasta Salad.
  • Pull other fun leftover tidbits from your fridge to use up in your Pasta Salad (peas, beans, chopped veggies, etc.).
  • Set out a variety of options and let everyone build their own Perfect Pasta Salad. This is, of course, is what makes it perfect for everyone!

Except for the people who refuse to add any veggies to their pasta salad. I have kids at my house who try this. This makes the Pasta Salad not so perfect. Pasta and meat – what else do they need? VEGGIES. They need veggies. This is not difficult.

Perfect Pasta Salad Options:

  • Cooked and cooled whole wheat or brown rice pasta – any shape
  • Chopped sweet peppers
  • Chopped carrots
  • Chopped tomatoes
  • Cooked chicken, tuna, steak, roast beef, salmon or other meat that sounds good
  • Chickpeas or other cooked beans
  • Corn
  • Olives
  • Shredded cheese
  • Favorite salad dressings – we prefer homemade Italian Salad Dressing and Ranch Salad Dressing
  • Other delicious add-ins of your choosing!

Set out any options you know your family or guests would enjoy. Set out bowls and forks. Slice a watermelon. Now you’ve got yourself a Simple Summer Supper in the form of a Perfect Pasta Salad!

Have you seen our other Simple Summer Suppers? Here’s a running list:

  • Simple BLT Wraps
  • Simple Bacon Broccoli Salad
  • Simple Sloppy Joes
  • Simple Sloppy Grilled Cheese Sandwiches
  • Simple Taco Salad
  • Simple Grilled Tortilla Pizza
  • 16 Simple Summer Dips
  • Simple Tuna Salad Wraps
  • The Perfect Grilled Chicken
  • Farmer’s Market Finds
  • BLT Chopped Salad
  • Simple Grilled Salmon

Don’t miss any of our new ideas we’ve got coming! Subscribe for free so all the latest can come directly to your inbox!

Have you become a Simple Meals member yet? You will LOVE how simple all the recipes are, and better yet, you’ll love that we do all the planning for you!

Heavenly Homemaker's Club Members: Access your homepage and all your fantastic resources here! Not a member yet? Please join us!

Last Day for $400 FREE Back to School Printables!

July 27, 2018 by Laura 4 Comments

This post may contain affiliate links. For more information, please see our disclosure policy.

Did you get yours yet?

Today is the final day to take advantage of this incredible freebie offer, and seriously, it’s just free. You don’t have to buy anything to get your freebies. Crazy people like me are simply giving their stuff away today, to the tune of $400 worth of Back to School Freebies!

We included our brand new, gorgeous Family Scripture Printables Pack – Proverbs!

We’ve been working hard to put this together for you this summer and I am in love with every single page. (That’s saying something because this package includes 85 pages!)

What’s included in this Proverbs Family Scripture Printables Pack

Work as a family to memorize and apply 12 passages from Proverbs – learning about wisdom, trust, and listening to God. Each of the 12 scriptures you’ll work on has the following printables:

  • Scripture Wall Decor (beautiful enough to frame!!)
  • Scripture Copywork
  • Scripture Handwriting Practice Pages (both print and cursive)
  • Scripture Memory Doodling Page
  • Fill in the Blank Activity Page (to work on scripture memorization)
  • Bible Journaling Page

This printable packet is FUN, practical, beautiful, and most of all, beneficial for the Christian walk of your family. 85 pages in all, this packet is perfect for families of all sizes and ages.

It is incredibly important to be in the Word with our families. This Proverbs Family Scripture Printables Pack is a perfect resource to help you do just that.

Cost for the valuable package is only $14.95, which is a steal considering that it includes 85 all the printables that you can use with your family over and over. You can get it for half price today and tomorrow when you use the code PROVERBS50. But wouldn’t you rather get it for FREE? :)

[wp_eStore_fancy1 id=36]

Wait!! Want it for FREE!?

Seriously! Today through TODAY only, we’re giving this entire Family Scripture Printables Pack away for FREE!! It’s a part of this year’s Back to School Freebies package worth $400! Amazing, huh? Yep!

This free offer has now ended.

Dig into the Word with your family. Enjoy!

Heavenly Homemaker's Club Members: Access your homepage and all your fantastic resources here! Not a member yet? Please join us!

Simple Summer Supper: Grilled Salmon

July 26, 2018 by Laura 2 Comments

This post may contain affiliate links. For more information, please see our disclosure policy.

There’s nothing fancy about this Simple Grilled Salmon. But who needs “fancy” when “delicious” fills the plate?

I know there are more flavor-packed ways to grill salmon. The recipes for such are all over the internet and they look amazing.

But do you know what is also delicious? Salmon thrown on the grill with no preparation or prior thought. I hesitated to try this because I’d heard salmon didn’t grill well straight on the grates.

Lazy cook that I am (and by lazy, of course I mean clever), I decided one night to try grilling our salmon as-is. No prep. No seasoning. No cedar plank that had been soaked in newborn baby kisses (or whatever delightful options we read about that promise to present us with perfectly grilled salmon).

Would it be good? Would my family eat it? Would it be a waste of good salmon?

Or would it be yet another simple meal idea we could keep in our back pocket?

You guys! Why must we make real food cooking difficult? Just go get you some salmon fillets and throw them on the grill. My family devoured this deliciously simple grilled salmon. My 13 year old ate three fillets before I could stop him. There were no leftovers and I will be making this all summer long.

Might you want to squeeze a lemon over your grilled salmon? Absolutely. Should you consider making homemade tartar sauce (recipe below) to accompany this deliciously grilled meat? Certainly. Do we need to slave over and baby our salmon before we grill it? Not unless we want to.

For the record, I don’t want to. Because I’m lazy. I mean clever.

Simple Grilled Salmon with Homemade Tartar Sauce

Simple Summer Supper: Grilled Salmon
 
Save Print
Author: Laura
Ingredients
  • Wild caught salmon fillets (1-2 per person)
  • Homemade Tartar Sauce:
  • 1 cup mayonnaise (I use Hain Safflower Mayo)
  • ¼ cup sweet pickle relish
Instructions
  1. Grill salmon on low heat for approximately 20 minutes, turning once or twice as needed.
  2. While the meat is grilling, mix mayo and pickle relish to serve with the salmon.
  3. This is so easy it barely qualifies as a recipe.
3.5.3229


Serve this Simple Grilled Salmon with any fresh summer sides you have on hand: Fresh greens, corn on the cob, berries or other fruit, green beans or zucchini – what an amazing meal! Pineapple Fluff is a wonderful addition to this meal.

Have you seen our other Simple Summer Suppers? Here’s a running list:

  • Simple BLT Wraps
  • Simple Bacon Broccoli Salad
  • Simple Sloppy Joes
  • Simple Sloppy Grilled Cheese Sandwiches
  • Simple Taco Salad
  • Simple Grilled Tortilla Pizza
  • 16 Simple Summer Dips
  • Simple Tuna Salad Wraps
  • The Perfect Grilled Chicken
  • Farmer’s Market Finds
  • BLT Chopped Salad

Don’t miss any of our new ideas we’ve got coming! Subscribe for free so all the latest can come directly to your inbox!

Have you become a Simple Meals member yet? You will LOVE how simple all the recipes are, and better yet, you’ll love that we do all the planning for you!

Heavenly Homemaker's Club Members: Access your homepage and all your fantastic resources here! Not a member yet? Please join us!

Simple Summer Supper: BLT Chopped Salad

July 24, 2018 by Laura 1 Comment

This post may contain affiliate links. For more information, please see our disclosure policy.

Of all the salads in the world, this BLT Chopped Salad is my very favorite.

I shared this back in 2015 after I fell in love with a variety of this salad from the Cheesecake Factory. Just when you thought people went there for the cheesecake, I give a shout out about a salad. But for the record, their cheesecake is also delicious. :)

What I love about this salad is that every single bite is packed with flavor. Between the savory-ness and salty-ness offered by the bacon and feta cheese, the sweetness provided by the tomatoes and corn, the tartness of the lime juice – this salad packs an incredible flavor punch!

It is also filling, which makes it a great Simple Summer Supper. Some salads leave my family hungry and asking for more food. Not this one!

BLT Chopped Salad

Simple Summer Supper: BLT Chopped Salad
 
Save Print
Author: Laura
Serves: 4-6
Ingredients
  • 6 cups chopped mixed greens, lettuce, or spinach (any combination you like)
  • 2 chopped tomatoes
  • ½ pound bacon, cut into bites, cooked, and drained
  • 1-2 cups sweet corn, cooked and cooled
  • 1-2 chopped avocado
  • 4 ounces feta cheese crumbles
  • Dressing:
  • 2 Tablespoons olive oil
  • Juice of one lime (about 2 Tablespoons)
  • salt and pepper to taste (I put in a few shakes of each)
Instructions
  1. Toss salad ingredients into a large bowl.
  2. In a small jar, shake together dressing ingredients.
  3. Pour over salad and toss.
  4. Serve right away!
3.5.3229


Have you seen our other Simple Summer Suppers? Here’s a running list:

  • Simple BLT Wraps
  • Simple Bacon Broccoli Salad
  • Simple Sloppy Joes
  • Simple Sloppy Grilled Cheese Sandwiches
  • Simple Taco Salad
  • Simple Grilled Tortilla Pizza
  • 16 Simple Summer Dips
  • Simple Tuna Salad Wraps
  • The Perfect Grilled Chicken
  • Farmer’s Market Finds

Don’t miss any of our new ideas we’ve got coming! Subscribe for free so all the latest can come directly to your inbox!

Have you become a Simple Meals member yet? You will LOVE how simple all the recipes are, and better yet, you’ll love that we do all the planning for you!

Heavenly Homemaker's Club Members: Access your homepage and all your fantastic resources here! Not a member yet? Please join us!
« Previous Page
Next Page »

Join Our Community!

 Facebook Twitter E-mail Instagram Pinterest

Popular Posts

~ Will All of the Real Moms Please Stand Up?
~ Easy! Stir-and-Pour Whole Wheat Bread
~ How to Make Gatorade
~ 31 Real Food Breakfast Ideas
~ Dear Teenage Girls...
~ When Mom Takes a Step Back
~ The Inexpensive Health Insurance We Love!
~ Let's Talk Real Food Grocery Budgets

Check out our latest posts!

  • Big Family Food and Fun: September 13-19, 2026
  • Big Family Food and Fun: September 6-12, 2026
  • Big Family Food and Fun: August 30-September 5, 2026
  • Big Family Food and Fun: August 23-29, 2026
  • Big Family Food and Fun: August 16-22, 2026
Home  ~  Simple Meals  ~  Club Membership  ~  Shop  ~  Privacy Policy  ~  Disclosure  ~ Contact

Copyright © 2026 · Beautiful Pro Theme on Genesis Framework · WordPress · Log in