Heavenly Homemakers

Encouraging women in homemaking, healthy eating and parenting

  • Home
    • About
    • FAQs
  • Recipes
    • Bread and Breakfast
    • Condiments
    • Dairy
    • Main Dishes
    • Side Dishes and Snacks
    • Desserts
    • Gluten Free
    • Instant Pot
    • Crock Pot
    • Heavenly Homemaker’s Weekly Menus
  • Homemaking
    • Real Food Sources
  • Store
  • Contact
    • Advertise
    • Disclosure
    • Privacy Policy
  • Simple Meals
  • Club Members!

Barbecue Beef and Cheese Hot Pockets ~ The Make-Ahead Lunch Box

September 4, 2014 by Laura 5 Comments

This post may contain affiliate links. For more information, please see our disclosure policy.

Hot pockets can actually be eaten cold. Who knew?

The Make-Ahead Lunch Box

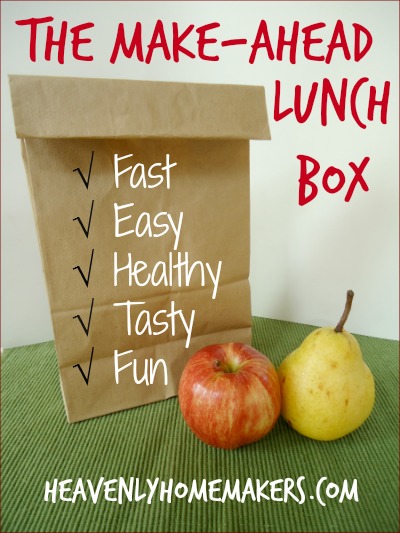
When I asked you what you needed in a packed lunch, this is what you told me:

  • Quick and easy
  • Can be eaten cold
  • Hearty and filling

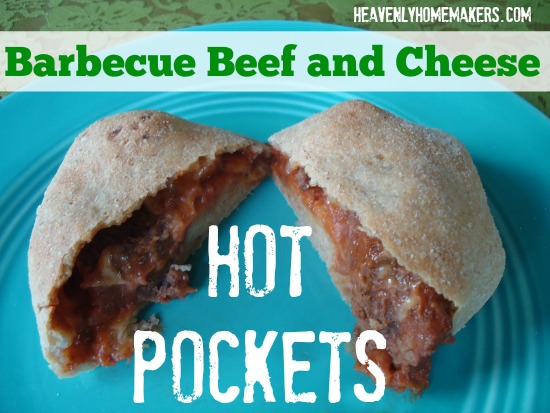
These Barbecue Beef and Cheese Hot Pockets are all that plus they are delicious. You can make them big or small, accommodating big or small appetites. They taste great hot or cold. You can make them ahead of time and pull them out as needed. They freeze well. What more do you need? Just the recipe I guess…

Barbecue Beef and Cheese Hot PocketsYum

Barbecue Beef and Cheese Hot Pockets ~ The Make-Ahead Lunch Box
 
Save Print
Author: Laura
Serves: 16
Ingredients
  • 2 pounds beef stew meat
  • 1 batch homemade barbecue sauce (more if you like)
  • 2 cups shredded cheese
  • 1 batch whole wheat pizza dough
Instructions
  1. Place stew meat and barbecue sauce in a skillet.
  2. Cook on low heat for about an hour, stirring occasionally, until meat is cooked and tender.
  3. In the meantime, mix the whole wheat pizza dough and set it aside to rise.
  4. Once both meat and dough are ready, remove meat from the heat.
  5. Stir in cheese until it is melted.
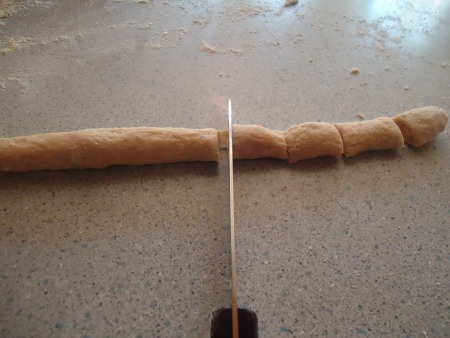
  6. Divide dough into about 16 pieces.
  7. Roll each piece of dough into a thin circle.
  8. Spoon meat mixture into the center of the circle, then gather up the edges of the dough and pinch to seal.
  9. Place pinched side down on a baking sheet.
  10. Once all dough is filled with meat, allow the pockets to rise about 15 minutes more.
  11. Bake in a 375° oven for 15-25 minutes or until pockets are golden brown.
3.4.3177

Barbecue Beef and Cheese Hot Pockets

This would be a great way to use up leftover roast beef. In addition, you can fill hot pockets with any variety of meats and cheeses. They are a great, versatile meal idea!

~~~~~~~~~~~~~~~~~~~~~~~~~~~~~~~~~~~~~~

http://www.dreamstime.com/royalty-free-stock-images-retro-seamless-pattern-set-image20825059

If you’re hitting the restart button with us this fall, I challenge you to find one recipe (maybe this Barbecue Beef and Cheese Hot Pocket recipe?) that you can make ahead of time and freeze. Having food prepared like this in the freezer is a life saver on busy days when you need a healthy meal quickly. You’ll find all of our Make-Ahead Meal recipes here.

Once you’ve completed the challenge, come back to this post and leave a comment letting us know what you made. Can’t wait to hear!

Heavenly Homemaker's Club Members: Access your homepage and all your fantastic resources here! Not a member yet? Please join us!

Homemade Bubble Bath

March 11, 2014 by Laura 4 Comments

This post may contain affiliate links. For more information, please see our disclosure policy.

I’ve had this Homemade Bubble Bath recipe on my site for over six years. Since it’s become buried among all the food recipes, I decided to pull it out and share it again. I first made this when Elias turned 6. As far as I can remember, his 6th birthday was about twenty minutes ago. But in fact, Elias is now 12 – and not so much into bubble baths. (He is learning some great card tricks, though!)

Why make homemade bubble bath? Well, because it’s fun. Because it is very inexpensive. Because you can personalize it if you want to give it as a gift. And because you can use ingredients you feel good about.

I think making this together with your kids, then letting them enjoy using it might just be a very helpful way to get through these spring/winter/warm/cold/rainy/windy/crazy days many of us are experiencing this March!

Homemade Bubble Bath

1/2 cup shampoo (I use this shampoo)
3/4 cup water
1/4 teaspoon sea salt

In a bowl, mix the shampoo and water until well combined. Add salt and stir until it thickens slightly. Use a funnel to pour it into a bottle.

Homemade Bubble Bath
To use this Bubble Bath, pour a few Tablespoons into the bath water as the tub is filling. Have fun!

Want more fun activities to do with your kids?

  • Free Downloadable Spring Activity Packets
  • Free Fun, Fabulous, and Mostly Free Preschool Projects ebook
  • Homemade Flubber
  • Homemade Tootsie Roll Candy
  • Recipe Card Holder Craft
  • Valentine Kiss-Tac-Toe Game
  • Owl Gift Sacks
  • Animal Muffin Toppers
Heavenly Homemaker's Club Members: Access your homepage and all your fantastic resources here! Not a member yet? Please join us!

Make Some Healthy Mixes. You’ll Save So Much Time and Money! {31 Days of Real Food Reality ~ Day 22}

January 21, 2014 by Laura 13 Comments

This post may contain affiliate links. For more information, please see our disclosure policy.

Make Homemade Mixes With Real Food Ingredients

Once you get the hang of making meals and snacks from real food ingredients, you’ll find that there are all sorts of ways to save time, energy, and money. This site is full of ideas, and all of my favorite, most loved and used ideas are in my book, Oh, For Real: Real Food, Real Family, Real Easy. Having that book means you have all of my best tips and recipes right in your kitchen! Read about the book here.

One of the tasks I do often in an effort to prepare real food in a short amount of time is to make homemade mixes. Everything from salad dressing and dip mixes to homemade bisquik-type mixes are available for purchase, and you can even find healthier varieties of each. But they can be pricey!! Plus, you don’t get to choose the ingredients in those. Making these mixes at home saves a wad of money, plus tastes even better, in my opinion.

Below are the mix recipes I’ve shared on this site. Take some time to put a few of them together and see if you don’t save lots of time and money on these healthy, real foods!

Taco Seasoning Mix

I use the Taco Seasoning Mix for tacos and fajitas, for Taco Potatoes, Taco Corn Fritters, and any recipe I come across that calls for packaged taco seasoning mix.

Ranch Salad Dressing Mix

This one is my favorite! I use Ranch Salad Dressing for salad dressing and dip, of course. But I also use it in Cheddar Ranch Burgers, Turkey Ranch Pinwheels, Ranch Potato Wedges, Ranch Cheese Ball, and many other recipes that call for ranch dressing or ranch seasoning packets.

Italian Salad Dressing Mix

Beyond salad dressing, I use Italian Salad Dressing Mix to marinate meat, to make Italian Cream Cheese Chicken, Italian Pasta Bake, Italian Roast Wraps, Italian Stew, and many other recipes that call for Italian dressing or Italian seasoning packets.

Homemade Italian Salad Dressing

Onion Soup Mix

This Onion Soup Mix is great to have on hand for dips and seasoning, as well as to make this great One Dish Meat And Potato Casserole.

Quick Baking Mix

I can’t say enough good about the Whole Wheat Quick Baking Mix! I love having this on hand for Quick Mix Biscuits, Quick Mix Fruit Pizza, Quick Mix Honey Cinnamon Muffins, Quick Mix Very Vanilla Cookies, Quick Mix Pancakes, and more recipes which call for baking mix. (There are more recipes in my book too.)

Whole Wheat Quick Mix

Having these mixes in my pantry (or freezer) means that all I have to do is grab what I need and throw it in a bowl or cooking pot. In just a few minutes, I have made salad dressing, seasoned my meat, started a meal in the crock pot, or mixed up a batch of dough. So, so easy and yummy.

What mixes have you tried making yourself? Which are your favorites?

Heavenly Homemaker's Club Members: Access your homepage and all your fantastic resources here! Not a member yet? Please join us!

Easy Homemade Nacho Cheese Pretzel Dip

November 14, 2013 by Laura 31 Comments

This post may contain affiliate links. For more information, please see our disclosure policy.

Obviously, this nacho cheese pretzel dip can be eaten with other foods beyond pretzels. I’m thinking tortilla chips, steamed veggies, popcorn chicken…

pretzel_bites_4

But with these Homemade Soft Pretzel Bites? So delicious!

What’s fun about this recipe is that you can make it as spicy or as mild as you like. In fact, our family made individual bowls of the cheese dip, then added as much hot sauce as we each preferred.

Easy Nacho Cheese Pretzel DipYum

Easy Homemade Nacho Cheese Pretzel Dip
 
Save Print
Author: Laura
Ingredients
  • 4 ounces cream cheese
  • 8 ounces cheddar cheese, cut into cubes
  • 1 to 1½ cups milk
  • hot sauce to taste (we like Cholula)
Instructions
  1. In a medium saucepan, slowly melt cream cheese and cheddar cheese cubes on medium low heat, stirring constantly.
  2. Once melted, gradually add milk and whisk together while continuing to heat.
  3. Once the sauce reaches the consistency you desire, remove from heat and serve - adding hot sauce to taste.
3.4.3177

nacho_cheese_pretzel_dip_1

My boys were so impressed that I was able to make something that tasted so much like the canned fake cheese dip. But never fear – because this is made with real ingredients, it tastes much better than what comes out of a can.

Let’s take a vote: Who likes the cheese stuff that pours out of a can?  Love it? Hate it? Don’t feel bad admitting that you like it. We all have our lingering non-food cravings (says the lady who still chooses Nacho Cheese Doritos when given the opportunity).

But speaking of Doritos and Velveeta (which we weren’t actually speaking of but hang with me here). If you want to avoid cheese from a can and cheese from a box – but you really love Nacho Cheese Dip – I have a recipe you are going to love!

After years of trying, I came up with Real Food “Velveeta” and Rotel Dip.

Real Food Velveeta and Rotel Dip

You guys. This recipe changed my life and I now make this dip every couple of weeks because we love it so much. I exaggerate frequently and am sarcastic often – but I am very serious about this dip.

So there you go. You now have two amazing homemade, real food dips to try so that you can forever and always avoid processed cheese. Amen and amen.

Heavenly Homemaker's Club Members: Access your homepage and all your fantastic resources here! Not a member yet? Please join us!

Cranberry Nut Trail Mix

November 7, 2013 by Laura 4 Comments

This post may contain affiliate links. For more information, please see our disclosure policy.

This healthy, make-ahead snack is kind of a no-brainer, and not really a recipe at all. But it’s still worth mentioning as we focus on getting ahead with healthy snacks. Why? Because there’s chocolate in it. Obviously.  And also because it’s easy and good for you and all that other stuff.

Last week, I mixed up a big bowl of Cranberry Nut Trail Mix with items we had on hand. Then, I scooped it into individual grab-and-go baggies. Don’t like the dried fruit and nut options I mention below? No biggie – just use what you have and what you like. No matter what, you’ll be putting together a healthy snack. (Unless you add candy corns or m&ms, c’mon.)

And have you purchased bagged trail mix? Talk about pricey! They can’t help but be. Ingredients like nuts and dried fruit can be expensive. Therefore, I’ve decided that I don’t need to pay someone to stir my ingredients and put them into a bag for me. I can do that myself thankyouverymuch and save some bucks while I’m at it. (I buy my nuts in bulk at Braga Farms.)

Cranberry Nut Trail Mix

So here you go – Cranberry Nut Trail Mix, the recipe. Which isn’t a recipe. Far be it for me to tell you how nutty you should be on any given day.

Cranberry Nut Trail MixYum

Almonds
Cashews
Dried Cranberries
Golden Raisins
Dark Chocolate Chips

Stir any combination of the ingredients together in a bowl. Store in an airtight container (like a jar!), or scoop mixture into individual baggies for grab-and-go snacks.

What other trail mix combinations do you like?

Heavenly Homemaker's Club Members: Access your homepage and all your fantastic resources here! Not a member yet? Please join us!

Homemade Soft Pretzel Bites Recipe

November 5, 2013 by Laura 31 Comments

This post may contain affiliate links. For more information, please see our disclosure policy.

How’s the Getting Ahead {Snacks} Challenge going for you? I’m having a blast in the kitchen, but I can’t say I’m really getting ahead. We’re eating the food as fast as I make it. And by we, I mean my four boys. Okay fine, except for the Raspberry Oatmeal Bars. I took care of those very well without much help. {grins sheepishly}

You are going to love today’s idea! This one really did help me get ahead. I turned out so many pretzel bites, we ate on them all day, then I was able to stash some in the freezer too. This recipe is more time consuming than the other easy snack recipes I’ve shared. But trust me, these are worth the extra work! I didn’t stop and count how many pretzel bites this recipe makes (for obvious sanity reasons), but I would say this recipe would fill a two gallon ziplock bag and then some. Yep! You’ll get ahead with this recipe for sure!

pretzel_bites

Yum

Homemade Soft Pretzel Bites (Adapted from my Soft Pretzel Recipe)

1 cup water
2 Tablespoons yeast
2 teaspoons honey
2 1/2 cups milk
1 stick butter
1/2 cup honey
4 teaspoons sea salt
8 cups whole wheat flour (more or less as necessary)
butter
salt

In a large bowl, mix 1 cup warm water, yeast, and 2 teaspoons of honey. Stir this together and allow it to sit. Meanwhile, heat butter, milk, 1/2 cup honey, and salt in a medium saucepan on the stove until mixture has reached 120°. Stir contents in saucepan into the yeast mixture. Begin adding flour, two cups at a time until a nice dough has formed. Knead for 3-4 minutes. Place dough in bowl, cover, and allow it to rise for 1-2 hours.

On a well floured surface, roll fistful sized balls of dough into “snakes.” Cut into one inch bites.

pretzel_bites_1

Place on a baking sheet or stone. No need to allow for rising time, but if they sit there a while, that’s okay too. Bake in a 350° oven for 15-20 minutes or until golden brown.

pretzel_bites_3
Place baked pretzel bites in a bowl, drizzle on some melted butter, toss until coated, then sprinkle sea salt and toss again. Serve warm, serve cold, or cool and freeze the bites in a freezer bag for up to three months. Thaw and reheat in the oven.
pretzel_bites_2
I experimented with a Nacho Cheese Dip for these pretzel bites. Check it out here!

pretzel_bites_4

 Give me more dipping ideas for these soft pretzel bites!!

Heavenly Homemaker's Club Members: Access your homepage and all your fantastic resources here! Not a member yet? Please join us!

Dark Chocolate Almond Granola Recipe {Real Food Dollar Menu}

September 17, 2013 by Laura 48 Comments

This post may contain affiliate links. For more information, please see our disclosure policy.

Ever paid over $6 for a tiny box of cereal, and then witnessed that the contents in the tiny box only fed three people one small serving? As delicious and convenient as the box of Dark Chocolate Almond Granola was from Cascadian Farm – that is one pricey breakfast.

I actually got a box of this cereal with some Vitacost credit I had – just to try it. It was a huge hit in our family. That’s what made me decide that surely I could figure out a similar recipe and make my own. Besides, I like the idea of eating chocolate for breakfast. What a way to start the day. :)

The result of my experimenting turned out delicious! I did a little rough math to determine how much money I saved. These aren’t the cheapest of ingredients, but they are hearty and can stick to the ribs. I found that I cut the cost from over $2 per serving to around 75¢ per serving – even using mostly organic ingredients.

What I love best is that this is a recipe that can be made ahead of time for a quick meal or snack. (It’s a perfect recipe to work into your Getting Ahead in the Kitchen routine.)

dark_chocolate_almond_granola

Dark Chocolate Almond GranolaYum

Dark Chocolate Almond Granola Recipe {Real Food Dollar Menu}
 
Save Print
Author: Laura
Ingredients
  • 4 cups rolled oats
  • ¾ cup shredded, unsweetened coconut
  • 1 cup slivered almonds
  • ¾ cup honey
  • ¾ cup coconut oil
  • ½ cup dark chocolate chips or chunks
Instructions
  1. In a small saucepan, melt coconut oil and honey together.
  2. Stir oats, shredded coconut, and slivered almonds together in a large bowl.
  3. Drizzle on the honey/coconut oil mixture and stir well.
  4. Pour mixture onto a large, parchment paper-lined baking sheet (or two 9x13 inch dishes).
  5. Bake at 300° for 35-45 minutes, stirring after the first 20 minutes.
  6. Allow mixture to cool.
  7. Stir in dark chocolate chunks.
  8. Store granola in an air-tight container.
  9. Makes 12-14 servings.
3.4.3177

You may have noticed that this recipe is in the Healthy Breakfast Made Simple eBook. Haven’t downloaded that yet? Get it here for free!

dark_choc_granola_3
Just a couple of days left in our Getting Ahead for Breakfast Challenge. How’s it going for you? Have you made some breakfast foods ahead to save you the effort in the morning?

Looking for more meals on our Real Food Dollar Menu? Here are the recipes I’ve shared so far:

  • Hearty Chili
  • Spanish Rice
  • Pasta Alfredo
  • Crock Pot Barbecue Chicken
  • Crock Pot Beef Stew
  • Easy Chicken Pot Pie
  • Chili Mac
  • Breakfast Pizza
Heavenly Homemaker's Club Members: Access your homepage and all your fantastic resources here! Not a member yet? Please join us!

Homemade Chocolate Peanut Butter Cups {Real Food Recipe Makeover}

July 9, 2013 by Laura 21 Comments

This post may contain affiliate links. For more information, please see our disclosure policy.

This recipe was inspired by Laura S., someone I met at the Colorado Springs Meet and Greet. Not only was her idea brilliant, I think her name is absolutely beautiful. ;)

I wasn’t able to make these Chocolate Peanut Butter Cups look perfect and beautiful like one you’d pull out of a Reese’s wrapper. But I did make them taste better, so we’ll go with “taste before beauty” on this one. And of course, with these, you avoid the hydrogenated oils and turn out an even more delicious treat than one that comes from a factory.

Chocolate Peanut Butter Cups
Warning:  These are super rich and slightly messy. Children and adults alike may end up with chocolaty fingers and faces, not to mention a sugar high. You’re welcome and I’m sorry.

Chocolate Peanut Butter CupsYum

1/4 cup natural peanut butter
2 teaspoons honey
1 cup chocolate chips
2 Tablespoons Butter

Stir together peanut butter and honey in a small bowl. Set aside. Prepare six regular sized or 15 mini-sized muffin cups with paper liners.

In a small saucepan, melt chocolate chips and butter, stirring until melted. Spoon half of the melted chocolate mixture into the prepared paper-lined muffin cups.

pb_cups_4

Place a spoonful of peanut butter mixture into each cup, dividing the mixture evenly among the cups. Top each with the remaining chocolate, smoothing it the best you can to cover the peanut butter.

pb_cups_5

Refrigerate for two hours until solid. (Or place in the freezer for about thirty minutes to speed the process.)  Store in the refrigerator until ready to serve.

pb_cups_2
pb_cups_3
You’ll be happy to know that while playing with this idea, I also came up with a Chocolate Caramel Cup. Recipe coming soon…

Heavenly Homemaker's Club Members: Access your homepage and all your fantastic resources here! Not a member yet? Please join us!

Easy Chicken Pot Pie {Real Food Dollar Menu}

January 16, 2013 by Laura 87 Comments

This post may contain affiliate links. For more information, please see our disclosure policy.

FAQs of Easy Chicken Pot Pie…

Question:  What do you get when you mix one cup of milk, one cup of mayonnaise, and one cup of whole wheat flour?

Answer:  The most amazingly delicious crust you can imagine.

Question:  What is the easiest way to make a crust for a Chicken Pot Pie?

Answer:  You know the “one cup of milk, one cup of mayonnaise, and one cup of flour” I referred to? Mix it up and pour it over the top of your pot pie filling, then bake. It doesn’t get any easier. No mess. No rolling. No problem.

Question:  How much does it cost to make this healthy, hearty Chicken Pot Pie?

Answer:  Would you believe me if I told you that it only costs $6.00*? It’s true. This recipe feeds 8-10 people. (Eight if you’re my family. Ten if you aren’t feeding teenage boys.)  That makes the cost of this recipe between $0.60 and $0.75 per person. And it’s a complete, filling, healthy meal.

Question:  Is the rest of this post going to be as cheesy as what I’ve read so far?

Answer:  Ummm…no. But I do want you to know that I’m currently working on more ideas for this milk/mayo/flour crust mixture. I got the idea from Matt’s cousin Monica, and I’m thinking that the possibilities are definitely not limited to Chicken Pot Pie. Can’t wait to figure out more ideas!

chicken_pot_pie_1

Easy Chicken Pot Pie

Yum

6 cups chicken broth
2 cups cooked chicken, cut into bites
4 large carrots, peeled and cut into bite sized pieces
6 medium potatoes, peeled and cut into bite sized pieces
2 cups frozen peas
Sea salt and pepper to taste
1/3 cup cold water
2 Tablespoons organic corn starch or arrowroot powder
1 cup milk
1 cup mayonnaise (I use Hain Safflower Mayonnaise)
1 cup whole wheat flour (I use freshly ground flour from hard white wheat)

In a large cooking pot, boil broth, chicken, carrots, potatoes, and peas until veggies are tender. Mix cornstarch with water until smooth. Stir mixture into the broth/veggies, cooking for about one minute on the stove to help the mixture thicken. Pour contents into a 9×13 inch baking dish.

chicken_pot_pie_2

In a separate bowl, stir together milk, mayo, and flour. Spread mixture over the veggies in the baking dish.

chicken_pot_pie_3

Bake in a 350° oven for about 45 minutes or until the crust is golden brown.

chicken_pot_pie_4

chicken_pot_pie_5

Easy Chicken Pot Pie {Real Food Dollar Menu}
 
Save Print
Author: Laura
Serves: 10 servings
Ingredients
  • 6 cups chicken broth
  • 2 cups cooked chicken, cut into bites
  • 4 large carrots, peeled and cut into bite sized pieces
  • 6 medium potatoes, peeled and cut into bite sized pieces
  • 2 cups frozen peas
  • Sea salt and pepper to taste
  • ⅓ cup cold water
  • 2 Tablespoons organic corn starch, arrowroot powder, or wheat flour
  • 1 cup milk
  • 1 cup mayonnaise (I use Hain Safflower Mayonnaise)
  • 1 cup whole wheat flour (I use freshly ground flour from hard white wheat)
Instructions
  1. In a large cooking pot, boil broth, chicken, carrots, potatoes, and peas until veggies are tender.
  2. Mix cornstarch with water until smooth.
  3. Stir mixture into the broth/veggies, cooking for about one minute on the stove to help the mixture thicken.
  4. Pour contents into a 9x13 inch baking dish.
  5. In a separate bowl, stir together milk, mayo, and flour.
  6. Spread mixture over the veggies in the baking dish.
  7. Bake in a 350° oven for about 45 minutes or until the crust is golden brown.
3.4.3177


Chicken Pot Pie

This is a great way to use up leftover chicken and broth. And I love one-dish meals!

This is just one more recipe that proves that healthy eating doesn’t have to be expensive!

Looking for more meals on our Real Food Dollar Menu? Here are the recipes I’ve shared so far:

  • Hearty Chili
  • Spanish Rice
  • Pasta Alfredo
  • Crock Pot Barbecue Chicken
  • Crock Pot Beef Stew

Stay tuned for many more recipes and ideas for our Real Food Dollar Menu!

*I calculated my cost based on the food sources and prices I have available to me. Most of the ingredients I use are organic. Your cost may be slightly more or less depending on where you find your ingredients.

P.S. I think this recipe would work great for creating personal sized frozen Chicken Pot Pies. :)

Heavenly Homemaker's Club Members: Access your homepage and all your fantastic resources here! Not a member yet? Please join us!

EASY! Overnight, No Knead Yeast Bread

September 19, 2012 by Laura 263 Comments

This post may contain affiliate links. For more information, please see our disclosure policy.

No Knead Bread. Let’s make life easier, shall we?

No-Knead Bread

I love having smart friends.

Smart friends who give me great, easy, healthy recipes are my favorite kind of friends. As are my friends who give me chocolate. Or jars. Or hugs. Or the friends who listen to my constant and sometimes nonsensical chatter. And the ones who put up with my unreasonable freak-out moments of stress. And the ones who pray with me. And the ones who deal with me during soccer season when I can’t finish sentences.

Let me just pause and wipe a tear. I really have the best friends ever…

Well now. (stops to loudly blow nose and gain composure)  I really brought all that up to say that one of my great friends, Nikki, shared this recipe with me. She’s one of my smart friends who I believe has done all of the above and then some (God bless her).

Once when I was at her house, she let me try some of the bread she had made that morning. It was great! And then she started telling me how she made it. How you don’t have to knead it. How you start it the night before and how it takes about three minutes to mix up. I think I grabbed her neck, hugged her fiercely, and knocked her over when she handed me the recipe. Not really. I truly can control myself. Usually. But hey, there was a great recipe involved, so no guarantees. See, I told you my friends are great to put up with me.

And now, the easiest bread recipe in the world…

No Knead Yeast BreadYum

5.0 from 1 reviews
EASY! Overnight, No Knead Yeast Bread
 
Save Print
Author: Laura
Ingredients
  • 3 cups flour (This recipe works a little better with unbleached white flour, but I prefer to use freshly ground hard white wheat so that it is healthier.)
  • 1 ¾ teaspoon sea salt
  • ½ teaspoon active rise yeast
  • 1 ½ cups water
Instructions
  1. Stir ingredients together in the evening. (No need to proof the yeast.)
  2. Cover and allow dough to sit over-night on the counter-top.
  3. In the morning, dump the dough onto a well floured surface.
  4. Shape it into a ball.
  5. Let it sit for 30 minutes.
  6. Preheat the oven to 450°, heating the baking dish in the oven at the same time.
  7. Place the dough in the hot baking dish.
  8. Cover and bake for 30-40 minutes.
3.4.3177

Note:  You need a covered dish to bake this bread.  I found a deep-dish casserole dish with a lid that worked for me, similar to this one. But if I can save up and splurge on this one, would that not be the coolest?

When you mix it and cover it in the evening, it starts out looking like this:

In the morning it will look like this:

After you bake it, it will look like this:

And when you slice it it will look like this:

Once you serve it, it will look like this:

(There’s no picture. The bread is gone. Obviously.)

I highly recommend that you give this recipe a try, and that you consider serving it with this wonderful Calico Beans dish. It’s a wonderful combo!

Heavenly Homemaker's Club Members: Access your homepage and all your fantastic resources here! Not a member yet? Please join us!
« Previous Page
Next Page »

Join Our Community!

 Facebook Twitter E-mail Instagram Pinterest

Popular Posts

~ Will All of the Real Moms Please Stand Up?
~ Easy! Stir-and-Pour Whole Wheat Bread
~ How to Make Gatorade
~ 31 Real Food Breakfast Ideas
~ Dear Teenage Girls...
~ When Mom Takes a Step Back
~ The Inexpensive Health Insurance We Love!
~ Let's Talk Real Food Grocery Budgets

Check out our latest posts!

  • Big Family Food and Fun: May 10-16, 2026
  • Big Family Food and Fun: May 3-9, 2026
  • Help Your Kids Become Independent in the Kitchen!
  • Big Family Food and Fun: April 26-May 2, 2026
  • Big Family Food and Fun: April 19-25, 2026
Home  ~  Simple Meals  ~  Club Membership  ~  Shop  ~  Privacy Policy  ~  Disclosure  ~ Contact

Copyright © 2026 · Beautiful Pro Theme on Genesis Framework · WordPress · Log in