One day when I was nibbling on a little piece of lightly sweetened and buttery Shortbread, it occurred to me: This would make a fantastic cheesecake crust. Then one day when I was baking a pumpkin, it occurred to me: I should use that pumpkin to make pumpkin cheesecake. These were both very, very good ideas, if I do say so myself.
Why a shortbread crust? I’m not sure why, but making a graham cracker crust for cheesecakes always seems like too much work to me. Probably because that was always my job when I was growing up, so now I have deep-seated graham cracker crust baggage from my past. That, and I never have graham crackers on hand and I don’t want to make a batch of homemade Graham Crackers only to crush them for a crust. Seriously, who knew a graham cracker crust could be such cause for discussion that it would take up an entire paragraph when I could just be sharing this great recipe with you?
So Shortbread Crust. I highly recommend it. Stir the three ingredients together, press them onto the bottom of a dish, and bake. You can’t go wrong, especially because this recipe includes lots of butter. That, of course, makes it amazing.
No-Bake Pumpkin Cheesecake
Shortbread Crust:
3 cups whole wheat flour (I use freshly ground hard white wheat for this)
1/2 cup sucanat (or brown sugar if you prefer)
1 1/2 cups melted butter
Stir flour and sucanat together in a bowl. Add melted butter, combining well. Press mixture into a 9×13 inch baking pan. Bake in a 350° oven for 12-15 minutes or until golden brown.
Pumpkin Cheesecake Filling:
2 8-ounce packages softened cream cheese
1 1/2 cups heavy whipping cream
2 cups pureed pumpkin
1 1/2 teaspoons ground cinnamon
1/2 teaspoon ground nutmeg
1/2 teaspoon ground cloves
Real maple syrup or liquid stevia to taste (I used 4 droppers full of stevia)
Blend all ingredients together until smooth. Pour over prepared shortbread crust. Spread until smooth. Chill in refrigerator for at least two hours before serving.
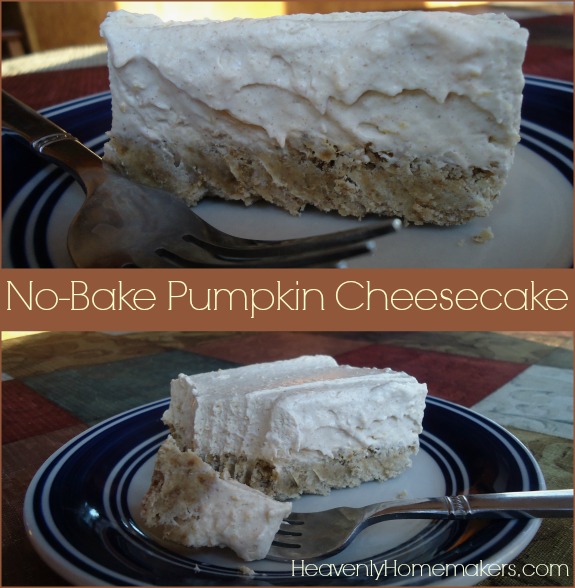
My system doesn’t handle much sugar any more (which seriously limits my cheesecake eating opportunities, woe is me). Making this simple cheesecake with stevia (a natural sweetener, not a sugar or an artificial sweetener) is a fantastic option. This treat is not super sweet, although you can make it as sweet as you like by simply adding more stevia, maple syrup, or even sugar if you like. Now that I know that stevia makes a cheesecake and shortbread makes a great crust, my cheesecake lovin’ self is happy and my graham cracker crust anxt is minimized.
What is your relationship with the graham cracker crust? You should join me in loving a shortbread crust. Easy, delicious, and full o’ buttah!