Who decided that sugar coated sugar dobbers and frosted sprinked poptarts were the best way to start the day? I also want to know why the aforementioned choices…or a pancake drenched in syrup is considered a great breakfast food…yet an apple pie is considered to be a dessert.
Remember, I like to think outside the box when it comes to breakfast. I’m all about Giant Breakfast Cookies, Breakfast Cake, Funnel Cake, Whole Wheat Donuts…and if you recall…even Homemade Ice Cream for breakfast. And what about our Valentine’s day Peach Cobbler? Yes, I think breakfast should be enticing, delicious, nutritious and sometimes even fun. And I think Apple Pie should be okay to eat for breakfast.
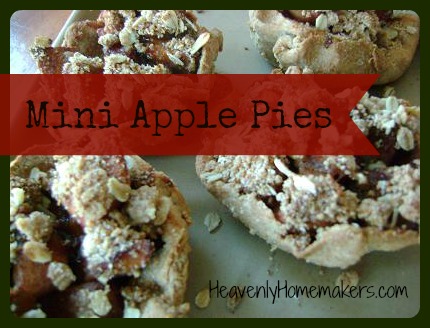
This Mini Apple Pie recipe is a new one I’ve come up with as I work on creating more Healthy Make-Ahead Meals. These freeze well (unbaked) – then you can just pull out a little pie (or 3) per person and bake.
Make them for breakfast…and your family will smell them baking, jump out of bed and come running into the kitchen and plow you over onto the kitchen floor (out of joy and love of course).
You can make these a couple of different ways: Mini Apple Pies, or Apple Pie Pockets…depending on what works best for you. I use the same crust recipe I use for my Homemade Pizza Pockets. Follow the same instructions for the pizza pockets to create an Apple Pie Pocket…

The following directions are for Mini Apple Pies:
Crust:
3 1/2 cups whole wheat flour
1 t. sea salt
1 cup melted butter
1 cup plain yogurt
Stir ingredients together until thoroughly mixed. Use the dough right away to create pockets or pies…or let the dough sit overnight on the countertop to break down the phytates and make the grains more digestable. This dough is MUCH easier to work with if you work it like playdough in your hands a while before you try to roll it out.
Filling:
3 pounds of apples – about 11-12 smallish apples (any kind you like)
1/4 – 3/4 cup sucanat (your preference)
1 Tablespoon ground cinnamon
Topping:
1/2 cup whole wheat flour
1/2 cup rolled oats
2-4 Tablespoons sucanat
3 Tablespoons melted butter
To make Mini Apple Pies:
 Peel apples and cut them into bite sized chunks.
 Add sucanat and cinnamon.
 Stir well and cook over medium heat until apples are
tender and a syrup has formed (about 10 minutes).
 In the meantime, separate dough into 21-24 pieces.
Roll each piece into a little circle with a rolling pen.
As you can see, I am NOT a perfectionist. If I was making these for a
ladies’ brunch or something…I might take the time to make them pretty.
But for my family of boys?
Do you think they really care if their pies are pretty?
They eat them in three minutes flat. Thus my sloppy dough squishing.
Squish (or place nicely) your dough circles into well buttered MUFFIN PANS. Using a muffin pan for these Mini Apple Pies eliminates the need to go buy 24 little mini pie pans.
 Fill each (unbaked) crust with apple pie filling.
 In a bowl, stir together topping ingredients until the dry ingredients are moistened.
I find that melting the butter and stirring it into the flour, oats and sucanat makes a great crumb topping…much less effort than “cutting in the butter”.
 Sprinkle topping all over the top of your little pies.
Try if you can to be as messy about this process as I am. Sheesh.
Freeze your pies in your buttered muffin pans for a couple of hours.
 Remove your muffin pans from the freezer and allow them to sit on the counter for 10-15 minutes. Use a fork to gently pry the pies out of the pan. Place them carefully into freezer bags and put them bag into the freezer.
To bake your Mini Apple Pies:
Take desired number of pies out of the freezer and place them on a baking pan. Bake in a 375° oven for 35-45 minutes. You can let them thaw first if you want…but I find that the frozen pies bake just fine!
And now I’d like to point out that (depending on how much you use) there is about 1/2 cup of sucanat divided by 24 little pies…making this a very healthy, very low in sugar breakfast. Much less even than my Applesauce Bread or something otherwise considered a breakfast food.
Bring on the Breakfast Pie! Shucks…maybe we should even serve it with Ice Cream!
What’s your opinion about serving cobbler or pie for breakfast? Do I sound like a weirdo? (Wait, don’t answer that.)
——————————————-
Need more healthy and family friendly breakfast recipes? I’ve got a whole page of ’em here! And yes, would you believe…you can easily make Homemade Poptarts!!


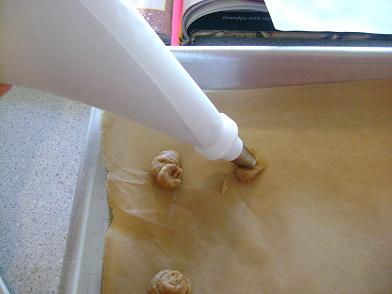
 About the time the chocolate chips are almost melted,
 Spread mixture into a pie pan and chill for about two hours.
 Lick the pan while you wait for truffles to chill because…
 Roll mixture into 1 inch balls.
 In a saucepan, cook and melt sugar, stirring with a fork.
 Remove melted sugar from heat and stir in cream.
 See, it finally melted. Now you have caramel.
 Remove from heat and stir in chocolate chips, vanilla and salt.
 Roll mixture into 1 inch balls and chill on parchment paper until set.