Heavenly Homemakers

Encouraging women in homemaking, healthy eating and parenting

  • Home
    • About
    • FAQs
  • Recipes
    • Bread and Breakfast
    • Condiments
    • Dairy
    • Main Dishes
    • Side Dishes and Snacks
    • Desserts
    • Gluten Free
    • Instant Pot
    • Crock Pot
    • Heavenly Homemaker’s Weekly Menus
  • Homemaking
    • Real Food Sources
  • Store
  • Contact
    • Advertise
    • Disclosure
    • Privacy Policy
  • Simple Meals
  • Club Members!

Decadent Simple Paleo Pudding

February 22, 2021 by Tasha Hackett Leave a Comment

This post may contain affiliate links. For more information, please see our disclosure policy.

Decadent Simple Paleo Pudding

by Tasha Hackett

I was Surprised by my Love of Paleo Puddings 

I’ve been eating a paleo diet since December 20th. Do some math there—it’s been a few days! And for most of that time, there was no pudding. Truthfully, I was blindsided at first: No sugar of any kind, no grains of any kind, no legumes of any kind, and no dairy of any kind. Quickly I discovered a whole new world of food that has brought delight to my family as well. One of our favorites is Salisbury steak with a mushroom gravy and mashed potatoes and asparagus. I’m drooling just typing about it. 
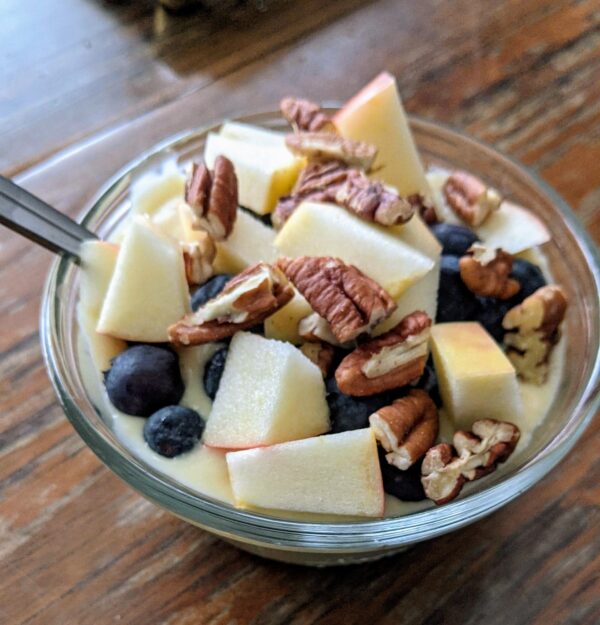
coconut vanilla pudding

Yum

paleo vanilla pudding

And Then There was Coconut Vanilla and Pumpkin Pudding

Most winters I make Laura’s vanilla and other flavored soothers for my family. Instead of hot chocolate when they come in from the snow, they get a protein packed healthy version.

My paleo version, I believe is even healthier, doesn’t have any dairy, hardly any sweetener, and a solid amount of healthy fat for growing kids and all of us using up so much energy trying to stay warm this winter. 

Dairy-Free Paleo Pudding Special Ingredients

Coconut Cream  

I ordered a case of this from my local grocery store for a small discount. It’s not cheap. But I found I can get it for much cheaper from Azure Standard. (Currently $2.30/can.) Though I haven’t tried the Azure ordered cans yet, it will be coming on the truck in a couple weeks! Canned coconut milk has a higher percentage of liquid and less of the fat/oil. You can use that in this recipe instead of canned coconut cream, just factor in the extra liquid. You may need to add more thickener. 

Coconut Milk in a jug

I buy the jug in the cold aisle and go through about one a week. Be sure to buy unsweetened and check labels if there are options at your grocery and get one with the fewest amount of added ingredients. I use this in my coffee, smoothies, baking, and pudding! It is much yummier than almond milk. I’m just going to pretend I didn’t even mention almond milk, because I like to pretend it doesn’t exist. Almond Milk in my opinion is one of the most disgusting . . . blech. So, don’t even. Get yourself some unsweetened coconut milk from the jug. 

Egg Yolks

You can make this recipe with whole eggs, but I’ve had better luck just using the yolks. Egg whites will curdle and get chunky if you heat past 165* and nobody in my family wants to eat curdled pudding. Save the whites in another bowl because you can use them in baking or scramble with a few other eggs. Go ahead and store them in the fridge for a few days. 

Arrowroot Powder

I ordered a bag of this years ago and use it in place of cornstarch. If you’re not on a restrictive diet, cornstarch will work. Or you can skip this entirely if you want to drink your pudding. A healthy gelatin powder, or collagen works to thicken puddings, but they thicken upon cooling. To recap: if you use gelatin to thicken pudding, it will not thicken on the stovetop!

Sweetener

My preference is maple syrup. For the vanilla pudding recipe, I only used one tablespoon. I think the natural coconut cream is quite sweet. The vanilla extract needs the sweetener, I think. If you wanted to try this with NO syrup, I suggest going very easy on the vanilla extract. The pumpkin recipe calls for two tablespoons to counter the spices and vanilla. Start with less, you can always add more. Feel free to experiment with honey or stevia or other sweeteners of your choice. 

Simple Paleo Vanilla Pudding

  • Four egg yolks
  • One 13.6 oz can of coconut cream
  • 13.6 oz of coconut milk from the jug (use empty can to measure)
  • A couple dashes of salt

Mix those three together in a pot and then turn on the heat. Be careful not to boil.

Scoop out a ¼ cup of pudding and mix a slurry with ¼ cup of arrowroot powder and stir it back in the pot.

Once it begins to thicken, turn off the burner and add in:

  • One teaspoon of vanilla extract
  • One tablespoon of maple syrup. 

Taste and adjust sweetener if necessary. 

Either drink warm or chill for pudding. 

Frequently I serve this chilled for breakfast with toasted shredded coconut and pecans, blueberries, sliced bananas, apples, or any other toppings to create a full breakfast. We love this for a make-ahead breakfast. My kids can’t get enough. 

Simple Paleo Pumpkin Pudding

The same as the vanilla pudding, except add in:

  • A can of pumpkin,
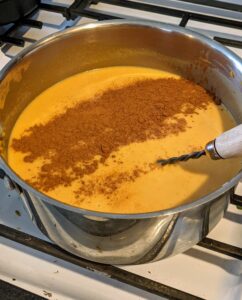
  • 2-3 teaspoons of pumpkin spice
  • An extra tablespoon of maple syrup to counter the spices 

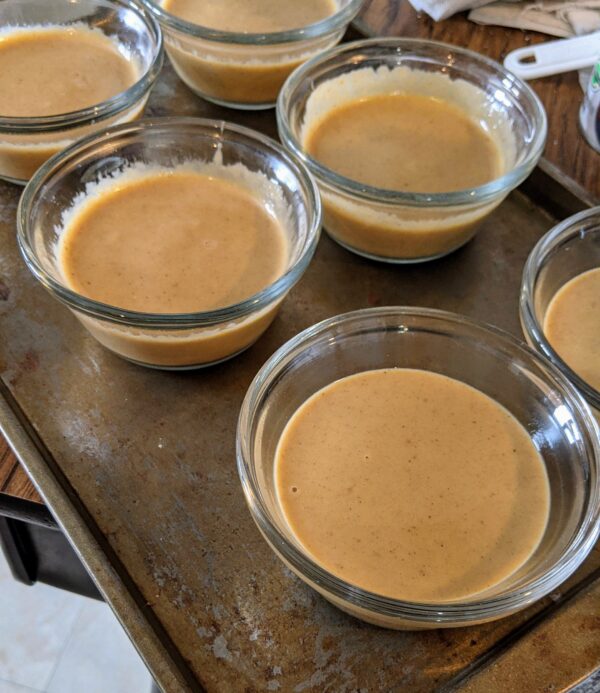
I poured this one in a paleo pie crust and pretended I was eating pumpkin pie for breakfast and had enough for six small servings for the next day. (No, it wasn’t as thick as a traditional pumpkin pie. But it was just as good!)
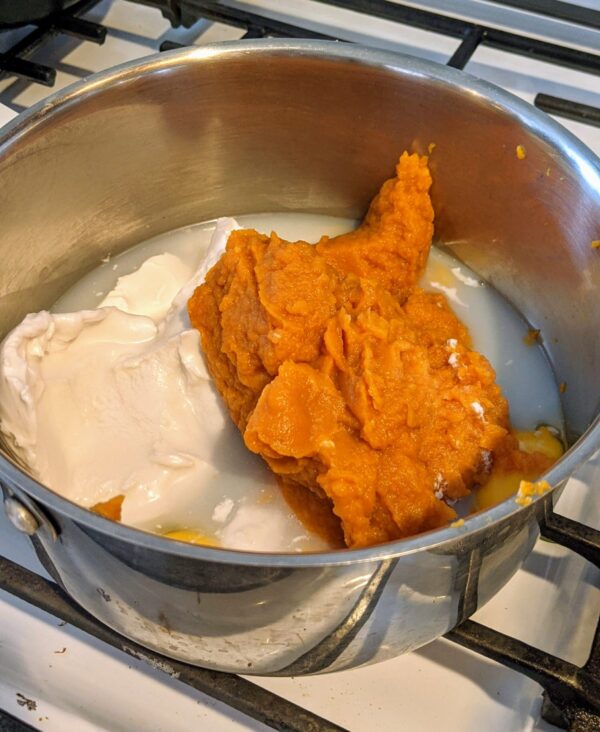
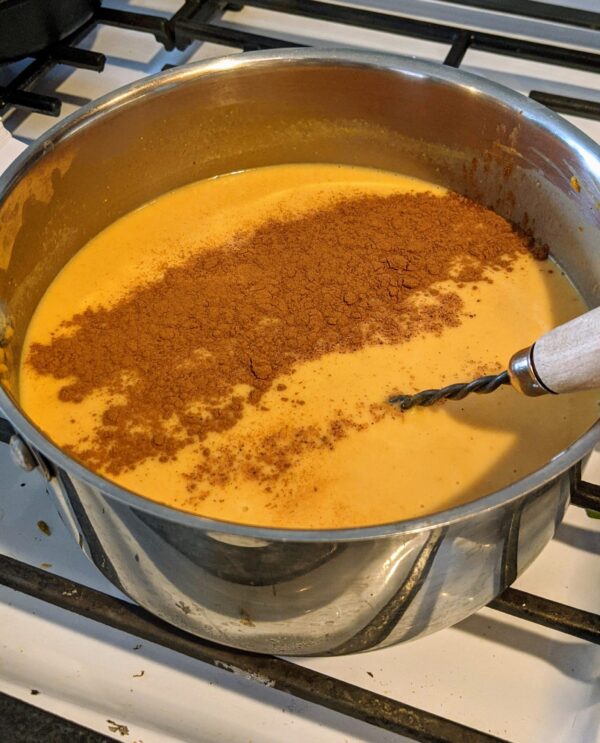
paleo puddingpumpkin puddingpumpkin paleo pudding

Psssst! All of these great ingredients can be purchased from Azure Standard!

Paleo isn’t a Prison

Clearly I’m not saying everyone must eat the way I do, but I have found it to be more freeing than I ever expected. My motivation for staying on this diet is different than most. If you’re curious about that, ask any questions you have! I’d love to chat about it. I’ll just briefly explain, though some people have found great success losing weight with this meal plan, that is not my goal. I’ve suffered headaches for over a decade, and recent lab results show evidence of chronic inflammation and infection among other things. In a nutshell, the paleo diet eliminates all foods that are prone to causing inflammation, as well as cutting out any processed foods that add toxins that prevent my body from healing itself. 

God is Greater than Paleo

While I 100% agree that love is better than food and who even cares about free-range chicken anymore? I know I’m on the right path. Laura spent years developing simple recipes and then they were there for her when she needed them! I believe the same has happened to me, for the first time in my life I have the budget to purchase more meat, vegetables, and nuts, to fill in the extra calories I’m no longer receiving from grains and beans and other “cheap” fillers.

Honestly, two years ago I fed my family on $200 a month. Six months ago it was about $450 a month. Paleo food for six (thankfully three of them are still tiny) is costing me $900 a month. If a doctor had told me to eat this way three years ago I would have cried. Point is: Food isn’t everything. Do what you can. Love your people. Love yourself.

Right now, for me, loving my people and myself means spending more time in the kitchen figuring out how to make paleo simple. For Laura, it means spending less time in the kitchen and more chicken nuggets. And we are not trying to confuse you. Ha! 
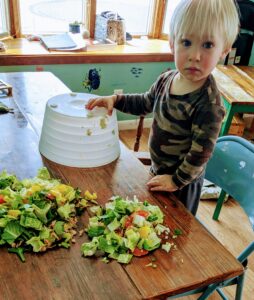
toddler messes

And just in case you think I have my act together, this salad-dumbing disaster, in some form, happens daily. Canned chicken on salad is a go-to lunch for us and that is not the face of a repentant toddler.

What’s your greatest struggle in the kitchen right now? Are you spending more or less time in the kitchen these days? Have you ever been put on an elimination diet of some form?
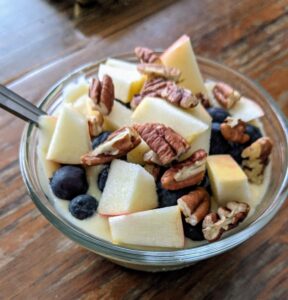
Paleo Coconut Vanilla Pudding
 
Save Print
Prep time
2 mins
Cook time
8 mins
Total time
10 mins
 
Author: Tasha
Recipe type: Breakfast
Serves: 6
Ingredients
  • 4 egg yolks
  • 1 13.6 OZ can of coconut cream
  • 1 13.6 OZ of coconut milk from the jug (use empty can to measure)
  • A couple dashes of salt
  • ¼ C arrowroot powder
  • 1 teaspoon vanilla extract
  • 1 Tablespoon real maple syrup
Instructions
  1. Mix egg yolks, coconut cream, and coconut milk, in a medium-sized pan.
  2. Add a few dashed of salt.
  3. Heat mixture on the stove being careful not to boil. Stir constantly.
  4. Remove ¼ cup of the mix and make a slurry with the arrowroot powder. Mix it all together in the pot.
  5. Keep stirring and just as the mixture begins to thicken, turn off the burner and add in the vanilla, and maple syrup. Taste and adjust sweetener if necessary.
  6. Drink warm or chill for pudding.
  7. Serve chilled pudding with a variety of toppings for breakfast or snack: sliced apples, bananas, cherries, blueberries, toasted coconut, pecans, etc.
3.5.3251

Try both and tell us your favorite!

Paleo Pumpkin Pudding
 
Save Print
Prep time
2 mins
Cook time
8 mins
Total time
10 mins
 
Author: Tasha
Recipe type: Breakfast / Snack
Serves: 6
Ingredients
  • 4 egg yolks
  • 1 13.6 OZ can of coconut cream
  • 1 13.6 OZ of coconut milk from the jug (use empty can to measure)
  • 1 can of pureed pumpkin
  • A couple dashes of salt
  • ¼ C arrowroot powder
  • 3 teaspoons of pumpkin spice
  • 1 teaspoon vanilla extract
  • 1 Tablespoon real maple syrup
Instructions
  1. Mix egg yolks, coconut cream, and coconut milk in a medium-sized pan.
  2. Add a few dashes of salt.
  3. Heat mixture on the stove being careful not to boil. Stir constantly.
  4. Remove ¼ cup of the mix and make a slurry with the arrowroot powder. Mix it all together in the pot.
  5. Keep stirring and just as the mixture begins to thicken, turn off the burner and add in the vanilla , spice, and maple syrup. Taste and adjust sweetener if necessary.
  6. Drink warm or chill for pudding.
  7. Serve chilled pudding with a variety of toppings for breakfast or snack: sliced apples, bananas, cherries, blueberries, toasted coconut, pecans, etc.
3.5.3251


Tasha HackettTasha Hackett, friend of Laura and author of Bluebird of the Prairie, a Christian romance releasing Spring 2021, is fueled by sunshine, paleo pudding, or hot chocolate—whichever is more readily available. Though she often pretends to be a ballerina while unloading the dishwasher, her favorite thing is writing with hope and humor to entertain and encourage women. Her time is spent with four chatty children and an incredibly supportive husband. They give her the kind of love people write books about. You can connect with her at www.tashahackett.com or Instagram @hackettacademy or for Laura @heavenlyhomemaker.

Heavenly Homemaker's Club Members: Access your homepage and all your fantastic resources here! Not a member yet? Please join us!

Paleo Southwest Crockpot Chicken Supper

February 7, 2021 by Tasha Hackett 2 Comments

This post may contain affiliate links. For more information, please see our disclosure policy.

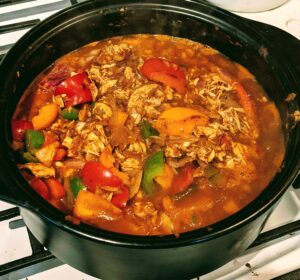
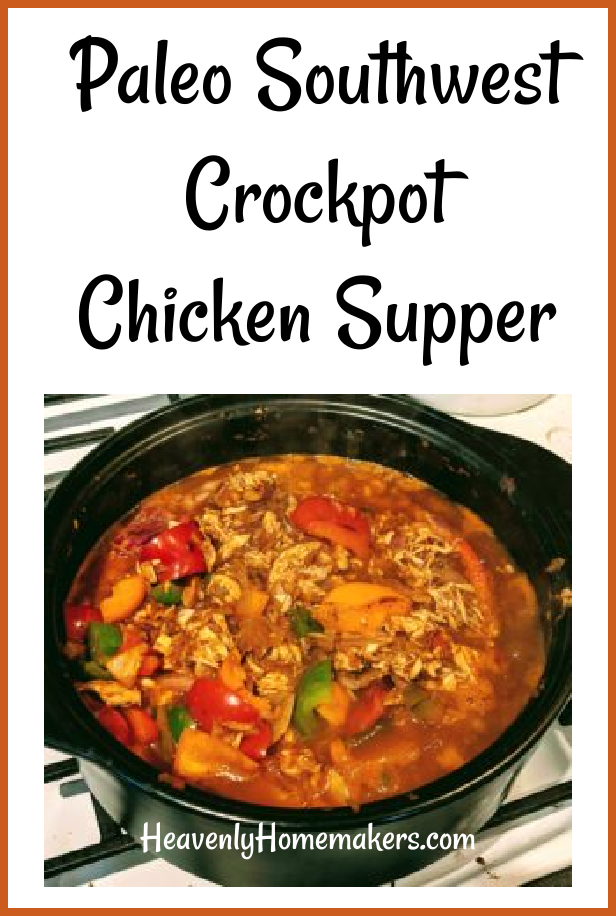
Since when does Laura care about paleo foods? Oh, dear. Well, she doesn’t. But Tasha is trying a new thing with surprisingly great success. Paleo Southwest Crockpot Chicken Supper has been a favorite and it will definitely be added to the regular rotation.

I bet you’re wondering what’s with the trendy diet we’ve jumped on. Here’s the thing… I’ve never been inclined to jump on any type of diet because I didn’t believe in the idea of cutting out entire food groups. Let’s not even get into the details about how jumping is a high impact exercise and could be harmful if you are dealing with chronic achy joints and headaches. (I recommend yoga and stretching for beginners.) But elimination diets? I’m not here to argue the case of the paleo food choices. Except I will tell you, I paid a good amount of money to a doctor to get to the root of my achy joints and headaches and weird mood swings. He is making me eat paleo. At first, I was incredibly discouraged. I ranted and raved about how much I disagreed with the concept.

What is Paleo?

NO Dairy and NO Grains (including corn, oats, rice, quinoa, etc) and NO Legumes (including peanuts and soy) and NO sugar. WHAT IS LEFT!?!?!? BROCCOLI AND CHICKEN!? Poor Tasha. She can only eat broccoli and chicken. I was at Laura’s house (and we should have snapped a picture to document the momentous occasion) and I pulled a Laura and ate the spinach leaves directly out of the tub because I was so stinking hungry, but a few days later an amazing thing happened.

First, I must have gotten over the sugar craving hump because I wasn’t starving all the time anymore. Secondly, I discovered recipes that included a variety of flavors and foods I had never tried before. Dressing recipes with fresh squeezed orange juice, almond butter and garlic. Say whaaa? But it was amazing. I began making my own nut butters because all the ones I found in the store were too expensive and had added sugars.

Paleo supper isn’t always simple . . . so far.

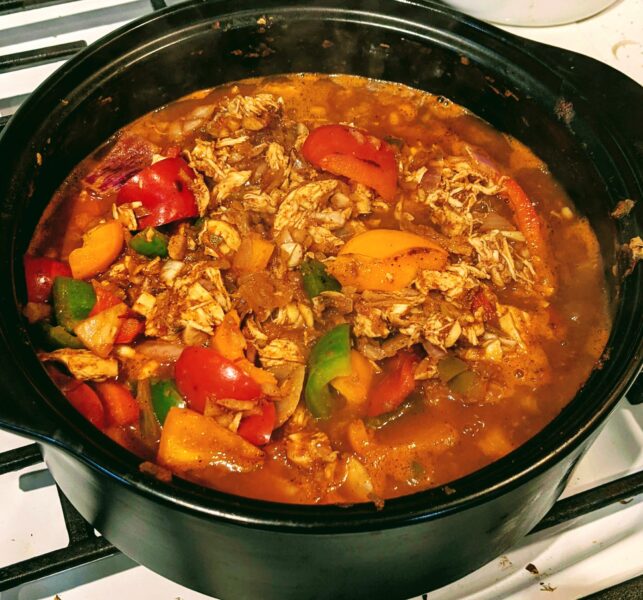
paleo chicken supper

Yum

Because I’m still in the newish phase of this paleo food thing and I’m following a lot of other people’s recipes, food prep has been a priority of my life lately. Slowly I have been adapting the recipes I like to fit the simple standard that Laura has been teaching us. But the amount of chopping and sautéing that I’ve been doing the last 45 days is more than I would prefer. One important thing I’ve been learning is to start seeing onions and peppers as a solid filler, not a seasoning. Many of the paleo recipes call for a hefty amount of vegetables.

Southwest Crockpot Chicken Supper

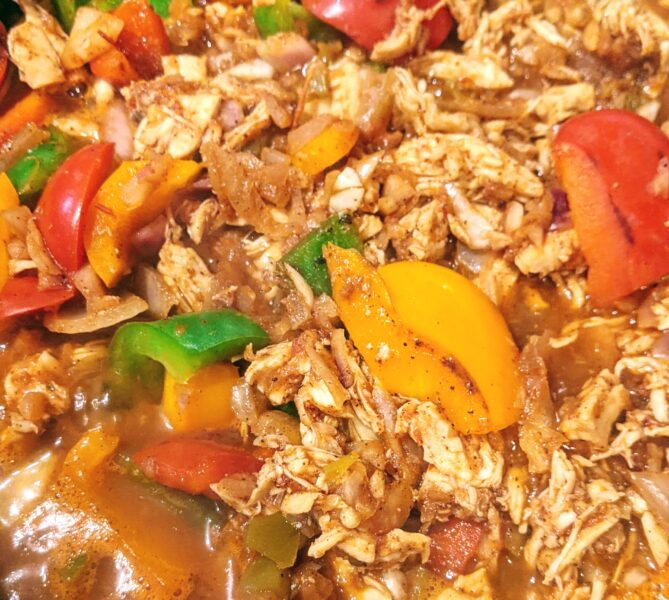
paleo chicken

From start to finish this recipe took 5 hours. 10 minutes of chopping (but I use my nifty food processor for onions and garlic), leave it in the crockpot for four hours. Another 10 minutes of work to shred the chicken, chop the peppers and then let it simmer together for a few minutes. Work time for this paleo chicken supper? Perhaps 15 minutes. I served with avocados on top and ate it as-is. You could serve on top of a bed of greens or if you’re not on a restrictive diet, then you can add chips or tortillas and sour cream.

Paleo Southwest Crockpot Chicken Supper

Paleo Southwest Crockpot Chicken Supper
 
Save Print
Prep time
15 mins
Cook time
4 hours
Total time
4 hours 15 mins
 
Author: Tasha
Recipe type: Main
Cuisine: Southwest
Serves: 8
Ingredients
  • 4 pounds boneless skinless chicken breasts or thighs
  • 2 red onions, chopped
  • 4 cups salsa
  • 6 garlic cloves, minced
  • 3 Tablespoons homemade taco seasoning
  • 2 jalapeño peppers (optional)
  • 4 bell peppers, chopped
  • 2 avocados, chopped
Instructions
  1. In a crockpot, combine everything except the bell peppers and avocados.
  2. Cover and cook on low for 6-8 hours or high 3-4 hours.
  3. Remove chicken and shred with a fork and return to pot.
  4. Chop peppers and sear in a skillet for 4 to 5 minutes until roasted.
  5. Add peppers to crockpot.
  6. Stir and cover.
  7. Let simmer on high for another 20 minutes, adding water if needed for desired consistency.
  8. Top each serving with chopped avocados.
  9. Reheats well for left-overs.
3.5.3251

Paleo tricks

Did you know Laura already had a ton of paleo recipes on her blog? Or at least ones that are easily made paleo by adjusting only a few ingredients. Here are three treats that I have returned to a few times this year.

Chocolate Peanut Butter Cups (subbing almond butter and I use double the cocoa powder and a pinch of salt)

Simple Almond Flour Muffins (either cheat and use the butter or sub coconut oil)

Vanilla Pudding (Sub coconut milk and top with fruit and nuts for a full breakfast)

Do you have any favorite dairy-free, grain-free, legume-free, sugar-free recipes?


Tasha HackettTasha Hackett, friend of Laura and author of Bluebird of the Prairie, (a Christian romance releasing Spring 2021), is fueled by sunshine or hot chocolate—whichever is more readily available. Though she often pretends to be a ballerina while unloading the dishwasher, her favorite thing is writing with hope and humor to entertain and encourage women. Her time is spent with four chatty children and an incredibly supportive husband. They give her the kind of love people write books about. You can connect with her at www.tashahackett.com or Instagram @hackettacademy or for Laura @heavenlyhomemaker.

Heavenly Homemaker's Club Members: Access your homepage and all your fantastic resources here! Not a member yet? Please join us!

How to Make Chicken Wings

February 3, 2021 by Laura Leave a Comment

This post may contain affiliate links. For more information, please see our disclosure policy.

Here’s how to make chicken wings at home. You’ll wonder why you never tried this before!

Truly, this is as easy as the “Just Dump Some Sauce on Some Chicken” idea I shared a while ago. I’ll share a recipe below, but if you don’t even want to read that far let me just give you the simple instructions now:

How to Make Chicken WingsYum

  1. Put chicken wings in a crock pot. Who cares if they are still frozen?
  2. Dump on some sauce. Use whatever sauce you have. The final plops of three different bottles will work just fine.
  3. Cook this on low for a few hours.
  4. Eat the chicken as it falls off the bones.
  5. Smile and wipe yo mouth.

Chicken wings seem to be something we only order at restaurants. They seem like one of those hard-to-make special foods when in fact, all you have to do is dump some sauce on some chicken and let your crock pot do the rest.

I love fun food like this. {Sheds a tear.}

Oh, and if you serve your Chicken Wings with some Homemade Sweet Potato Fries, you will make your family feel like they’ve gone to a restaurant when in fact you’ve all stayed home and spent a total of $5.78 to feed your entire family.

Other great side dishes to serve with your Chicken Wings

  • A tossed salad
  • A steamed vegetable (such as green beans, peas, broccoli, cauliflower)
  • A roasted vegetable
  • Cream Cheese Corn
  • Honey’d carrots
  • Baked beans

How to Make Chicken Wings

How to Make Chicken Wings
 
Save Print
Author: Laura
Serves: 4-8
Ingredients
  • 2-5 pounds of chicken wings
  • 8-16 ounces of sauce (barbecue, teriyaki, sweet and sour, anything you like!)
Instructions
  1. Put chicken and sauce in a crock pot.
  2. Cook on low heat for 6 hours or until chicken is falling off the bone.
3.5.3251

I wish I could give more specific instructions but truly there are no perfect measurements for such a simple recipe idea. Just put your chicken in your crock pot. Cover it with sauce. Let your crock pot do the rest. You’re going to love this!

Heavenly Homemaker's Club Members: Access your homepage and all your fantastic resources here! Not a member yet? Please join us!

Simple Green Beans in the Air Fryer

December 20, 2020 by Laura 2 Comments

This post may contain affiliate links. For more information, please see our disclosure policy.

I love how simple and tasty it is to make green beans in the air fryer!

Do you have an Air Fryer? If no, you might consider putting it on your Christmas wish-list. Here’s how I’ve found it to save a lot of money. Not to mention it turns out some super fun foods, making us feel like we’re eating a treat meal from a restaurant!

So green beans in the Air Fryer? Well, these are super healthy and our kids gobble them up because they’re so delicious. They take about two minutes to prepare, so you can’t go wrong there.

Simple Green Beans in the Air FryerYum

Simple Green Beans in the Air Fryer
 
Save Print
Author: Laura
Serves: 4-6
Ingredients
  • 12-ounces frozen fine green beans
  • 1 teaspoon olive oil
  • ¼ teaspoon sea salt
  • ¼ teaspoon garlic powder (optional)
Instructions
  1. Pour green beans into a bowl (or cheat by cutting open the bag of green beans to use it as a disposable bowl!)
  2. Add olive oil, salt, and garlic powder.
  3. Toss with a spoon or tongs to coat the green beans.
  4. Cook in your Air Fryer at 400 degrees for 7-10 minutes, tossing them half-way through cook time to make sure they are cooking evenly.
3.5.3251

These have an awesome crunch. And did you see that simple hack I shared in the recipe? I simply open a bag of frozen green beans and use the bag as a bowl! Drizzle in the olive oil, sprinkle in the seasonings, shake the bag, and pour the coated green beans into the air fryer. No dishes!! NO DISHES!!!! That is my favorite part, besides of course, the fact that we can make this awesome vegetable in the air fryer. Nourishing and fun all in one!

P.S. I have this Air Fryer and we’ve been very happy with it!

Heavenly Homemaker's Club Members: Access your homepage and all your fantastic resources here! Not a member yet? Please join us!

High Five Recipes – PRINTED COOKBOOK!!!!

November 3, 2020 by Laura 1 Comment

This post may contain affiliate links. For more information, please see our disclosure policy.

High Five Recipes, our most popular eBook, has now been turned into a printed cookbook! And just in time for Christmas!

I love the simplicity of this cookbook and how you can now have it in your kitchen, ready to use every day to make your kitchen life easier. Find recipes from Breakfast Casserole to Pizza Chicken Bake to Homemade Ice Cream to Homemade Ranch Dressing – and over a hundred more! And all of them call for only 5 or fewer ingredients!!

High Five Recipes

High quality recipes, five or fewer ingredients. Bring it in for a high five!!

Cooking for your family has never been easier. Especially because your family will love how delicious all these meals and snacks taste! When you make these recipes, your time and energy can be used to do what is more important – loving people.

Take a peek inside the book and get hungry as you read the table of contents:

Grab a copy for yourself and some for family members, teachers, friends, and neighbors too. This book makes a fantastic gift and saves everyone time.

Can’t wait for you all to enjoy all that this cookbook will offer you. Be blessed and fall in love with these delicious, simple recipes!

Get your High Five Recipes Cookbook here.

Heavenly Homemaker's Club Members: Access your homepage and all your fantastic resources here! Not a member yet? Please join us!

The Easiest Pulled Pork

October 28, 2020 by Laura Leave a Comment

This post may contain affiliate links. For more information, please see our disclosure policy.

Need a meal to feed a crowd? Make the Easiest Pulled Pork!

You know I’m not a gourmet cook. I’m not even super eager to try new spices in my recipes, simply because I like to stick with basics that I always have on hand. It’s just easier for me this way and saves brain energy and effort.

The food is still delicious!

One of the first times I made this Easiest Pulled Pork and fed it to our YC soccer teams, one of the coaches told Matt, “I don’t know what your wife does to season that meat, but it is so good!”

Truth: Matt’s wife barely does anything to season the meat. But shh. Don’t tell!

I just find that food can really taste great without going to a lot of trouble and taking a lot of time. Since it was a hit last year, I made pulled pork again for the teams this year. I made 20 pounds of pork, and I’m pretty sure it only took 5 minutes of prep.

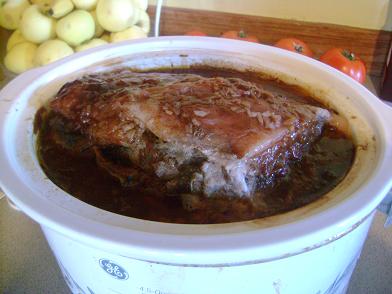
How I make pulled porkYum

  1. Put the pork butt in the slow cooker (when I make huge amounts, I use a large roaster instead of a crockpot).
  2. Sprinkle on salt and garlic powder.
  3. Peel a few onions if I have time. Cut them and throw them in with the meat.
  4. Cover and walk away.
  5. Well yeah, plug it in and turn it on low first. Then cover and walk away.

The meat slow cooks for hours then falls apart at the end of the day. It practically shreds itself. Then it can be served on buns with barbecue sauce and that’s that!

Now, those of you with smokers can surely turn out much better-tasting pulled pork than I! But this is a method that any of us can do if we have a slow cooker of some kind. And pulled pork is an inexpensive and easy way to feed a crowd!

The Easiest Pulled Pork

The Easiest Pulled Pork
 
Save Print
Author: Laura
Serves: 24 servings
Ingredients
  • 6-8 pound pork butt
  • sea salt
  • garlic powder
  • 2-3 onions (optional)
Instructions
  1. Place the pork in a slow cooker.
  2. Sprinkle on seasonings liberally.
  3. Peel onions and chop them on top of the meat.
  4. Cook on low for 10 hours.
  5. Use a knife and fork to shred the meat, which pulls apart quite easily after the meat has cooked slow and low!
3.5.3251

Don’t need to feed a crowd, just your family? You can still make this easy meal and then freeze the shredded meat in meal-sized portions to pull out and rewarm as needed. SO EASY!

Feeding a crowd and want to get ahead? Make this meat days or weeks ahead. Put the shredded, cooled meat into freezer bags to save in the freezer until you need it. Then thaw and reheat as needed.

Great Sides to Serve with Your Pulled Pork

  • Buns and Barbecue Sauces
  • Party Potatoes
  • Simple Cream Cheese Corn
  • Simple Baked Beans
  • Raw Veggies with Dip
  • Fruit like grapes, watermelon, or cantaloupe
Heavenly Homemaker's Club Members: Access your homepage and all your fantastic resources here! Not a member yet? Please join us!

Low Sugar Granookie: Granola Cookie

October 25, 2020 by Tasha Hackett Leave a Comment

This post may contain affiliate links. For more information, please see our disclosure policy.

Tasha brought these Granookies to our family along with a meal when our newborn moved in with us in September. They are SO GOOD and I felt great letting our toddlers eat them along with the rest of us! (Bonus peek at “Baby Sister”—>)


Low Sugar Granookie: Granola Cookie

by Tasha Hackett

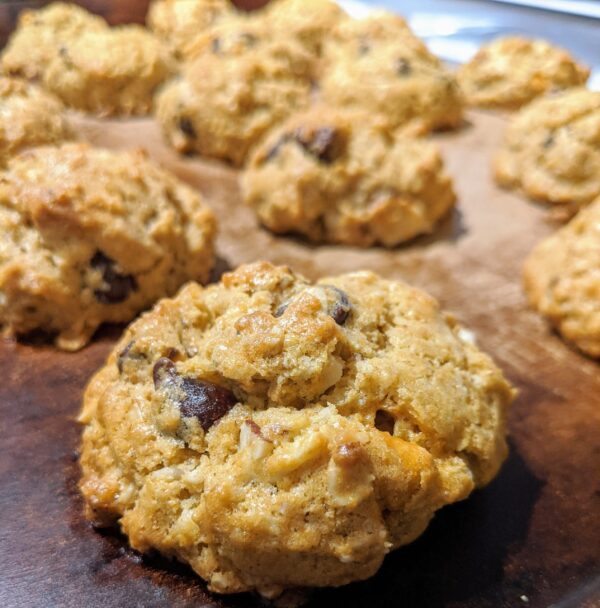
When you want a cookie, but you’re actually starving and what you need is a hearty snack or breakfast? Never fear, granookie is here! Granookie is a granola cookie and is the next best thing to stir-and-pour bread. (Go ahead and add Granookie to your dictionary.

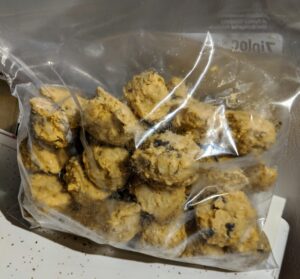
No, it’s not spelled wrong, your computer just isn’t up with the times.) It’s not simple, being that it has about a thousand ingredients and then there’s the whole stirring and making into cookie balls and baking. . . okay, it’s still pretty simple. Especially so because this recipe makes 5-6 dozen cookies. I bake one pan for eating right away, and I freeze the rest into premade cookie balls for a fresh granookie snack or breakfast or dessert for later. Tip: Freeze on a flat pan and then transfer to a bag once frozen.

bagged granola cookie

Yum

Granola Cookie: Granookie

Before you skim straight to the recipe for the granookie, you may want to take a few things into account. These are low-sugar and mildly sweet, but not nearly as sweet as cookies, nor even as sweet as traditional granola. In addition, there is a hearty mix of nuts and seeds that makes them deliciously healthy, along with the whole grain addition to stock you up on healthy carbs, fiber, and an exorbitant amount of vitamins and minerals. However, can we cut the healthy talk and just be amazed at how delicious these are and hand them out guilt free? 

Whole grain for the win!

I always use fresh-ground flour when baking these. Either soft or hard wheat will work, though I use soft white wheat as it is marginally cheaper than hard wheat. If you’re using store-bought flour, you may need a touch less in your recipe. But it’s a fairly forgiving recipe. 

I developed over the past year after much frustration of my granola crumbling everywhere. I’ll sheepishly tell you that I changed it every time because I didn’t follow the recipe… but people kept asking me how to made these granola cookies (and I’d correct them, “It’s called a granookie.”) so I was determined to write down legit measurements and this is the winner! 

Granola Cookie

Enjoy!


homeschool momTasha Hackett is a friend of Laura and a bedroom closet jalapeno Cheeto eater. She lives in the great Midwest where the winter whisks your breath away and the summer smothers. Laura is still here, but likes to take a shower every now and then and let Tasha play on the blog. In other news, Tasha’s debut novel, a historical fiction romance, is currently being evaluated by a publisher. She’s been lost in the 1800’s for decades, dreaming of ways to bring her heroes to a happily ever after.


Low Sugar Granookie: Granola Cookie

Low Sugar Granookie: Granola Cookie
 
Save Print
Prep time
15 mins
Cook time
10 mins
Total time
25 mins
 
Author: Tasha
Recipe type: cookie
Serves: 60
Ingredients
  • 2 Cups of Butter
  • ¾ Cup Brown Sugar
  • 5 Eggs
  • 1 tsp Caramel Flavoring (I use this one.)
  • 1 Tbs Vanilla Extract
  • 1½ tsp baking soda
  • 1½ tsp baking powder
  • 1 tsp salt
  • 3 Cups Flour
  • 3 Cups Thick Rolled Oats
  • 1 Cup Unsweetened Shredded Coconut
  • 1 Cup Slivered Almonds
  • ½ Cup Pumpkin Seeds
  • ⅓ Cup Sunflower Seeds
  • 1 Cup Chocolate Chips
  • ½ Cup Butterscotch Chips
Instructions
  1. Whip the butter and sugar until fluffy, add the eggs, flavoring, and dry ingredients. Add the nuts and seeds and chips. Dough will be quite firm.
  2. Form into cookie sized balls and bake at 375* for 8-10 minutes (until golden brown). They do not flatten much.
3.5.3251
Heavenly Homemaker's Club Members: Access your homepage and all your fantastic resources here! Not a member yet? Please join us!

Low Sugar Pecan Cookies

October 14, 2020 by Laura Leave a Comment

This post may contain affiliate links. For more information, please see our disclosure policy.

It’s baking season! These Low Sugar Pecan Cookies are buttery and delicious!

You might remember our other Low Sugar Cookie recipes. Here are just a few of our favorites:

  • Easy {Low} Sugar Cookies
  • Low Sugar Lemon Melt-Away Cookies
  • Low Sugar Almond Melt-Away Cookies
  • Low Sugar Orange Melt-Away Cookies
  • Low Sugar Lime Melt-Away Cookies
  • Low Sugar Chocolate Fudge Cookies
  • Low Sugar Oatmeal Cookies

We adapted a few of those to create these Low Sugar Pecan Cookies because it’s so easy to make a tiny tweak to create a brand new recipe!

The “melt-away” cookies listed above are my favorites simply because they are so buttery. This truly makes them melt in your mouth! No one can tell that these are low in sugar OR that they are made with whole grain flour. And the toasted pecans give these such a delightful flavor and crunch!

Low Sugar Pecan CookiesYum

Low Sugar Pecan Cookies
 
Save Print
Author: Laura
Serves: 20
Ingredients
  • 1½ cups melted butter (3 sticks)
  • ½ cup sugar (sucanat, raw, brown)
  • 1 teaspoon vanilla extract
  • 3 cups whole grain flour (I use freshly ground soft white wheat)
  • ½ cup pecan pieces toasted in 2 Tablespoons butter
Instructions
  1. Toast pecans by stirring them in a small saucepan over low heat for 2-4 minutes. Set aside.
  2. In a mixing bowl, stir together butter, sugar, vanilla, and flour.
  3. Fold in toasted pecans.
  4. Scoop ½ inch sized balls of dough onto a cookie sheet.
  5. Press balls down with the end of a drinking glass.
  6. Bake in a 350 degree oven for 10-15 minutes or until cookies are golden brown.
3.5.3251

Want to cut down on sugar while still enjoying occasional treats?

We have an entire eBook full of Low Sugar Treats, which you can check it out here. But it makes more sense to join our Heavenly Homemakers Membership Club so that you can enjoy ALL of our eBooks and much more any time, anywhere. :)

Heavenly Homemaker's Club Members: Access your homepage and all your fantastic resources here! Not a member yet? Please join us!

Simple Honey’d Italian Chicken and Potatoes

October 8, 2020 by Laura Leave a Comment

This post may contain affiliate links. For more information, please see our disclosure policy.

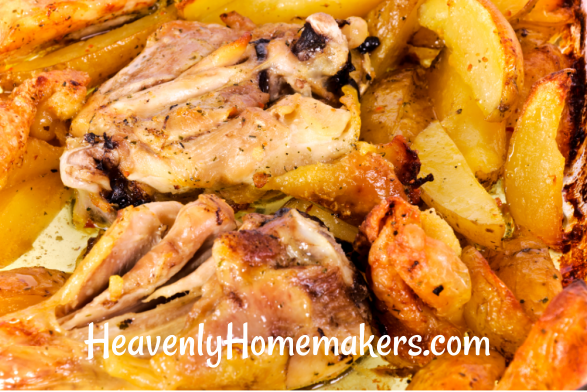
This Simple Honey’d Italian Chicken and Potatoes will take you just a few minutes to prep!

Our amazing across-the-street neighbors decided in the midst of April quarantine to start raising and butchering chickens. They generously asked if we wanted in on it.

Wellllllll. Yes. We wanted some chickens, most definitely. But we knew nothing about raising them and butchering them, and we didn’t have time to commit to it. They assured us that they’d take care of the hard part (which sounded more fun than hard to them). So how could we say no?!

We helped pay for feed and other supplies, saved all of our food scraps for the growing chicks, and best of all? Our littlest guys learned to stop whatever they were doing outside to holler “doodle-do!” across the street whenever their roosters started crowing. Cutest. Thing. Ever.

So now we have several locally grown chickens in our freezer (can it possibly get more local than ACROSS THE STREET?!). They even went so far as to cut legs and thighs off for us during the butchering process.

I’ve been using the thighs in this Honey’d Italian Chicken recipe and not only is it incredibly simple to put this all together, but it is also super delicious! I can quickly slide this into the oven to bake, then steam a veggie and get out mixed greens to go with it. So easy!

Simple 4-Ingredient Honey’d Italian ChickenYum

Simple 4-Ingredient Honey'd Italian Chicken
 
Save Print
Author: Laura
Serves: 4-6
Ingredients
  • 2 pounds boneless or bone-in chicken thighs or breasts
  • 2 pounds yellow or red potatoes
  • 3 Tablespoons honey
  • ¾ cup Italian Dressing
Instructions
  1. Place chicken in a baking dish.
  2. Scrub potatoes and cut them into wedges, placing them in the dish with the chicken.
  3. In a small saucepan, mix honey and Italian dressing over low heat until combined.
  4. Drizzle dressing mixture over the chicken.
  5. Bake, uncovered, in a 425 degree oven for 45 minutes or until chicken is no longer pink.
3.5.3251

If you prefer to use boneless chicken in this recipe, cut the baking time down to 25-35 minutes.

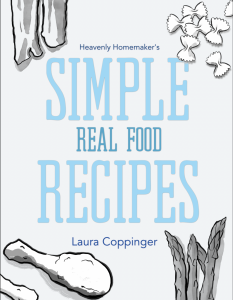
If you like simple recipes like this, you will love our Simple Real Food Recipes Cookbook. These are my go-to recipes now!

Heavenly Homemaker's Club Members: Access your homepage and all your fantastic resources here! Not a member yet? Please join us!

Special (Easy) Breakfast: Chocolate Syrup on Pancakes

September 27, 2020 by Laura Leave a Comment

This post may contain affiliate links. For more information, please see our disclosure policy.

If you want to turn a regular breakfast into a special breakfast, simply pour chocolate syrup on your pancakes! Here are two chocolate sauce recipes for you (one is dairy-free and low in sugar!).

I have all sorts of recipes for you, actually.

  1. First, we’ll talk about pancakes.
  2. Then, I’ll give you these great chocolate sauce recipes.
  3. Then, I’ll share different homemade whipped cream recipes to top everything off!

What’s great about this idea is that it turns ordinary pancakes into something super special! And if you’re hesitant about putting chocolate sauce on your pancakes because of the sugar, might I remind you that maple syrup is straight sugar also (even if it’s pure maple syrup)? ;) Not only that, if you make the Dairy Free Chocolate Sauce recipe below you’ll actually have a lower-sugar option to pour (or spread) all over your pancakes!

Pancake Recipe Ideas:

  • Simple Pancake Mix Pancakes
  • Whole Wheat Pancakes
  • Peanut Butter Pancakes (with chocolate on top? YES PLEASE.)
  • Pumpkin Pancakes
  • Easy Whole Grain Chocolate Pancakes
  • Simple Banana Pancakes
  • Whole Wheat Applesauce Pancakes
  • Baked Apple Pancake
  • Easy Pancake Muffins
  • Whole Wheat Waffles (even better than pancakes!)

Chocolate Syrup for PancakesYum

Hot Fudge Sauce

Chocolate Fudge Sauce
 
Save Print
Author: Laura
Serves: 2 cups
Ingredients
  • 1 ½ cups heavy cream
  • 1 cup brown sugar or sucanat
  • ½ cup cocoa
  • 1 stick butter
  • 1 teaspoon vanilla
Instructions
  1. In medium saucepan, stir together cream, sugar, cocoa and butter.
  2. Cook on medium heat until butter is melted and ingredients are thoroughly combined.
  3. Remove from heat and stir in vanilla.
3.5.3251


Dairy Free Chocolate Sauce

Dairy Free Chocolate Sauce
 
Save Print
Author: Laura
Serves: 2 cups
Ingredients
  • 13.5 ounce can of full fat, unsweetened coconut milk
  • ⅓ cup unsweetened cocoa powder
  • ¼ - ½ cup sweetener (honey, sucanat, or brown sugar)
Instructions
  1. Mix ingredients in a small saucepan, cooking and stirring on medium heat until well combined.
  2. Serve warm or cold.
  3. Store this sauce in a covered container in the refrigerator, rewarming on the stove-top as needed. It will keep for up to a month in the fridge.
3.5.3251

Drizzle or spread these onto your pancakes and you’ve got an amazing feast. But really, it’s thousands of times better if you then top it all with whipped cream!

Whipped Cream Recipes:

  • Homemade Whipped Cream
  • Chocolate Whipped Cream
  • Peanut Butter Whipped Cream

Still want more ideas?

Bonus Pancake Topping Recipes:

  • Real Maple Syrup
  • Apple Butter
  • Blueberry Pancake and Waffle Syrup
  • Peach Syrup (for pancakes and waffles)
  • Peanut Butter (just peanuts!)
  • Peanut Butter (super creamy – like Skippy or Jif)
  • Raspberry Syrup

What’s your favorite way to top a pancake?

Heavenly Homemaker's Club Members: Access your homepage and all your fantastic resources here! Not a member yet? Please join us!
« Previous Page
Next Page »

Join Our Community!

 Facebook Twitter E-mail Instagram Pinterest

Popular Posts

~ Will All of the Real Moms Please Stand Up?
~ Easy! Stir-and-Pour Whole Wheat Bread
~ How to Make Gatorade
~ 31 Real Food Breakfast Ideas
~ Dear Teenage Girls...
~ When Mom Takes a Step Back
~ The Inexpensive Health Insurance We Love!
~ Let's Talk Real Food Grocery Budgets

Check out our latest posts!

  • Big Family Food and Fun: August 30-September 5, 2026
  • Big Family Food and Fun: August 23-29, 2026
  • Big Family Food and Fun: August 16-22, 2026
  • Big Family Food and Fun: August 9-15, 2026
  • Big Family Food and Fun: August 2-8, 2026
Home  ~  Simple Meals  ~  Club Membership  ~  Shop  ~  Privacy Policy  ~  Disclosure  ~ Contact

Copyright © 2026 · Beautiful Pro Theme on Genesis Framework · WordPress · Log in