Heavenly Homemakers

Encouraging women in homemaking, healthy eating and parenting

  • Home
    • About
    • FAQs
  • Recipes
    • Bread and Breakfast
    • Condiments
    • Dairy
    • Main Dishes
    • Side Dishes and Snacks
    • Desserts
    • Gluten Free
    • Instant Pot
    • Crock Pot
    • Heavenly Homemaker’s Weekly Menus
  • Homemaking
    • Real Food Sources
  • Store
  • Contact
    • Advertise
    • Disclosure
    • Privacy Policy
  • Simple Meals
  • Club Members!

Taco Quesadillas ~ The Make-Ahead Lunch Box

September 16, 2014 by Laura 34 Comments

This post may contain affiliate links. For more information, please see our disclosure policy.

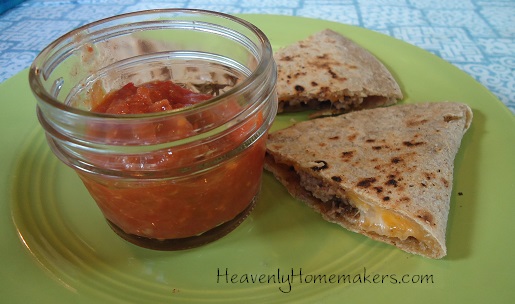
taco quesadillas 2

Have you ever made quesadillas, let them cool, then put them into the fridge or freezer for another day? You should do this.  They are perfect for your Make-Ahead Lunch Box.

Now you’re thinking, why would I do that? Quesadillas are already my easy go-to meal to make on the fly. How would it help to make them ahead of time?

Come closer. I have something to tell you. If you make quesadillas ahead of time, then they will already be made when you want to serve or eat them.  <— It has taken years of research, trial, and error to arrive at wise and knowledgeable comments such as these.

Okay fine. I just figured it out last week. It should have been obvious to me long ago, but I thought melty cheese should always be warm. Yes, somehow I forgot cold pizza was a food group for some people. Who knew cold quesadillas were also good? And if you don’t want to eat them cold, but instead want them warm again, simply warm them up at serving time. <—- Again, the brilliance of advice read here must continue to amaze you.

Now, the best part about a quesadilla is that you can fill them with whatever you like. Cheese, obviously. But what about varieties of meat and/or veggies? Taco Quesadillas are my current favorite, dipped in a small bowl of fresh salsa. I will tell you from experience that these taste great warm or cold. Warm would be my top choice, but we threw a bunch of cold ones into a bag to take to a soccer game recently and they were delicious. This means you can make these ahead of time and throw them in your lunch box for work or school. Perfect!

Taco QuesadillasYum

Your favorite tortillas (we like my homemade whole wheat tortillas)
Shredded cheese (my fav is Colby jack or white cheddar)
Leftover cooked taco meat
Salsa

Place a tortilla in a skillet and top with shredded cheese and cooked meat. Top with an additional tortilla. (I do feel a little bit silly telling you how to make a quesadilla, as if you don’t know how to make a quesadilla. But hey, if you didn’t know before, now you do.)  Cook on medium heat for about 2 minutes on each side until cheese has melted.

Watch to be sure tortillas don’t burn. <—- Breaking out one more time with more never-heard-before, ground breaking advice. You’re welcome.
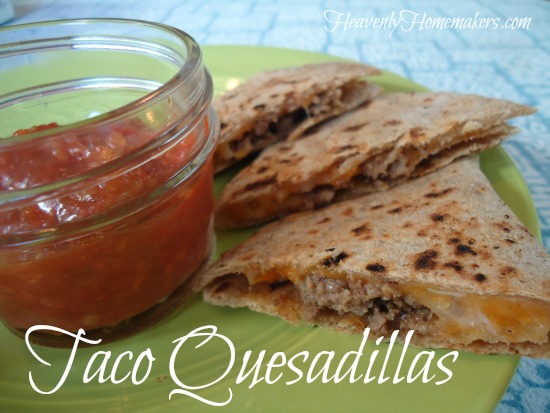
Taco Quesadillas

I would love to hear how you like to fill your quesadillas and if you have ever tried eating them cold. What are your favorite meats and veggies used to fill tortillas?

Have any earth-shattering advice for us? Here’s one more nugget of wisdom from me, completely unrelated to quesadillas:  When it is cold outside, you should wear a coat. Now, your turn.
The Make-Ahead Lunch Box

Find all of our Make-Ahead Lunch Box recipes and ideas here.

Heavenly Homemaker's Club Members: Access your homepage and all your fantastic resources here! Not a member yet? Please join us!

Fresh Peach Milkshakes

September 7, 2014 by Laura 11 Comments

This post may contain affiliate links. For more information, please see our disclosure policy.

It’s story time, children. Please sit down, criss-cross-applesauce, and listen quietly.

Once upon a time, there was a lady who got a new blender. It wasn’t just any blender. It was the blender of all blenders, the Blend-Tec blender that she’d been waiting patiently to purchase.

She was super excited to make a peach milkshake with the fresh peaches she had in her kitchen, and figured that reading all the fine print in the “blender handbook” would be a waste of time. “How hard can it be?” she thought, “It’s just a blender.”

And so, the uninformed lady proceeded to fill the blender to the top with delicious whole milk, slices of fresh peach, maple syrup, and vanilla. With excitement, she placed the lid on the blender and pushed the on button.

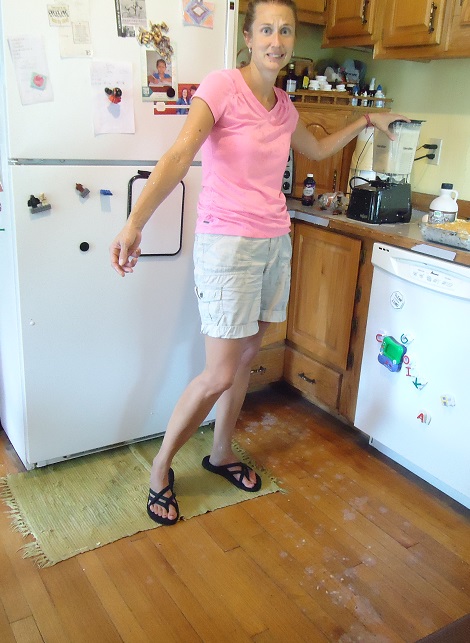
Before the lady could say “one Mississippi” the force within the blender sent the lid shooting right off the top. With a shout that sounded something like, “Aaoourrhheeeewwryeeeoo!” the lady quickly smacked the off button. But no matter. Peach milkshake had been sent to the ceiling, to the floor, to the stack of mail beside the blender, to the casseroles sitting on the countertop, to the side of the refrigerator, to surfaces she found three days later, and I think it goes without saying, to the clothes, arms, legs, shoes, and hair of the befuddled lady.

She stood, quite shocked and motionless, for approximately 8 Mississippi’s, before calling in her 12 year old son. With a chuckle, said 12 year old brought in the camera, as moments such as this should be documented and preserved forever in ones memory and computer picture file.

peach milkshakes 1

This picture does not do the situation justice.
“The lady” was covered, the rug was covered, everything was covered. 

Thus lunch-time was delayed, and the kitchen got a much needed scrubbing. The lady soon smelled sour from being drenched with dairy product, and even though she changed her clothes before going to a soccer game, was surprised to find flecks of dried peach stuck to her knees and ankles during half time.

The moral of the story: Read the directions, do not overfill your blender, and do not be surprised to find crusty milkshake residue four feet away on the front of the silverware drawer next Friday.

The end.

~~~~~~~~~~~~~~~~~~~~~~~~~~~~

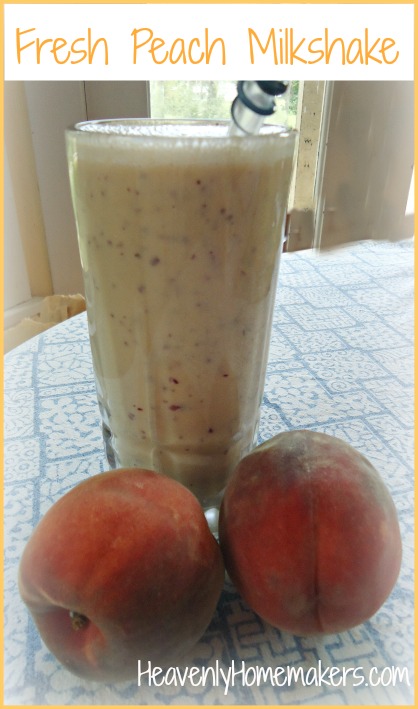
Everybody hungry for a Peach Milkshake now? Below you’ll find a recipe, which only makes about 2 servings. Trying to make 6 servings at once, no matter how large your blender, is a bad, bad, bad idea. I’m still not quite over it.

Fresh Peach MilkshakesYum

2 cups whole milk
2 fresh peaches, sliced
1 Tablespoon real maple syrup
1/2 teaspoon vanilla extract

Place ingredients in a blender, making sure the blender is only half-full, trust me on this one. Place lid on the blender, plug it in, and give it a whirl until ingredients are well blended.

Fresh Peach Milkshake

Make this milkshake at your own risk.

Heavenly Homemaker's Club Members: Access your homepage and all your fantastic resources here! Not a member yet? Please join us!

Barbecue Beef and Cheese Hot Pockets ~ The Make-Ahead Lunch Box

September 4, 2014 by Laura 5 Comments

This post may contain affiliate links. For more information, please see our disclosure policy.

Hot pockets can actually be eaten cold. Who knew?

The Make-Ahead Lunch Box

When I asked you what you needed in a packed lunch, this is what you told me:

  • Quick and easy
  • Can be eaten cold
  • Hearty and filling

These Barbecue Beef and Cheese Hot Pockets are all that plus they are delicious. You can make them big or small, accommodating big or small appetites. They taste great hot or cold. You can make them ahead of time and pull them out as needed. They freeze well. What more do you need? Just the recipe I guess…

Barbecue Beef and Cheese Hot PocketsYum

Barbecue Beef and Cheese Hot Pockets ~ The Make-Ahead Lunch Box
 
Save Print
Author: Laura
Serves: 16
Ingredients
  • 2 pounds beef stew meat
  • 1 batch homemade barbecue sauce (more if you like)
  • 2 cups shredded cheese
  • 1 batch whole wheat pizza dough
Instructions
  1. Place stew meat and barbecue sauce in a skillet.
  2. Cook on low heat for about an hour, stirring occasionally, until meat is cooked and tender.
  3. In the meantime, mix the whole wheat pizza dough and set it aside to rise.
  4. Once both meat and dough are ready, remove meat from the heat.
  5. Stir in cheese until it is melted.
  6. Divide dough into about 16 pieces.
  7. Roll each piece of dough into a thin circle.
  8. Spoon meat mixture into the center of the circle, then gather up the edges of the dough and pinch to seal.
  9. Place pinched side down on a baking sheet.
  10. Once all dough is filled with meat, allow the pockets to rise about 15 minutes more.
  11. Bake in a 375° oven for 15-25 minutes or until pockets are golden brown.
3.4.3177

Barbecue Beef and Cheese Hot Pockets

This would be a great way to use up leftover roast beef. In addition, you can fill hot pockets with any variety of meats and cheeses. They are a great, versatile meal idea!

~~~~~~~~~~~~~~~~~~~~~~~~~~~~~~~~~~~~~~

http://www.dreamstime.com/royalty-free-stock-images-retro-seamless-pattern-set-image20825059

If you’re hitting the restart button with us this fall, I challenge you to find one recipe (maybe this Barbecue Beef and Cheese Hot Pocket recipe?) that you can make ahead of time and freeze. Having food prepared like this in the freezer is a life saver on busy days when you need a healthy meal quickly. You’ll find all of our Make-Ahead Meal recipes here.

Once you’ve completed the challenge, come back to this post and leave a comment letting us know what you made. Can’t wait to hear!

Heavenly Homemaker's Club Members: Access your homepage and all your fantastic resources here! Not a member yet? Please join us!

Hit the Restart Button: Eat More Salads ~ Try Our Homemade Salad Dressing Recipes

September 2, 2014 by Laura 17 Comments

This post may contain affiliate links. For more information, please see our disclosure policy.

I have homemade salad dressing recipes for you!

http://www.dreamstime.com/royalty-free-stock-images-retro-seamless-pattern-set-image20825059

Yum

Let’s just say you are hitting the restart button this fall in an effort be healthier. If I could give you just one piece of advice for making one simple change, it would have to be this:  Eat more salads.

And also drink more water and cut back on sugar. And eat real butter instead of margarine. 

Apparently I feel strongly about more than one aspect of making healthy changes and I just can’t not mention butter in a post about making changes in your diet. But today, I really do want to focus on eating salads. With a big glass of water on the side. Plus you should never, ever eat margarine.

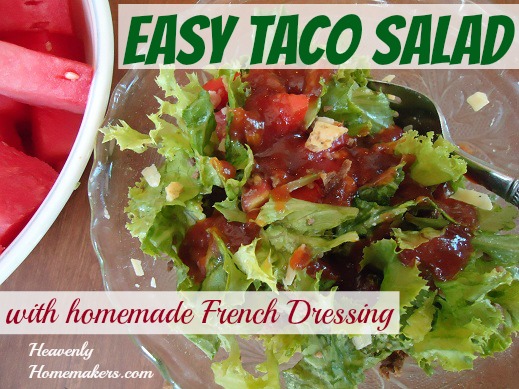
Easy Taco Salad with homemade French Dressing

Soooo, salads. We all know they are good for us. The reason I bring them up today is because I think they are a fantastic way for all of us to hit the restart button and fill up on nourishing foods. The possibilities are endless when it comes to building a salad. This means that none of us have excuses as to “not liking” what’s in front of us. You can pick what you put in it, for goodness sake. Green leaf, red leaf, romaine, spinach, cucumbers, peas, carrots, tomatoes, mushrooms, sweet peppers, onions, and on it goes. Then you can put dressing all over it – the kind you like best. You can even put bacon and cheese in your salad. If that’s not a reason to eat a bowl full of green leafy vegetables, I don’t know what is.

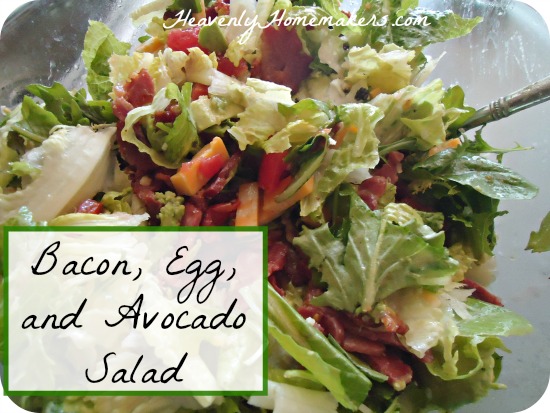
Bacon, Egg, and Avocado Salad

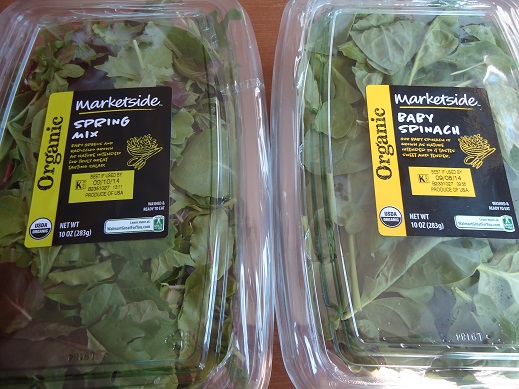
It is now easier than ever to make super healthy salads. Do you have these little gems at your grocery store?

easiest salad ever

They are pre-washed, so all you have to do is throw the greens in a bowl or on your plate. No excuses!

I highly encourage you to make a variety of tossed salads a bigger part of your life. I highly encourage you to make your own salad dressings with pure ingredients to keep your salads healthy. And I encourage you to eat butter. 

Need some easy salad dressing recipe ideas? Hit the restart button by making a new salad dressing or two. You’ll find that it’s so nice to have Ranch Salad Dressing Mix and Italian Salad Dressing Mix made up in bulk so that you can quickly mix in liquid ingredients for fresh, healthy dressings.

Favorite Simple Homemade Salad Dressing Recipes 2

You’ll find all of our homemade salad dressing recipes on this page (along with many other fun condiment recipes you’ll love). Here are our favorites at a quick glance…

Homemade Salad Dressing Recipes

  • French Dressing
  • Italian Salad Dressing
  • Ranch Salad Dressing
  • Thousand Island Salad Dressing

How many times each week do you eat salad? Could you eat them more often? What is your favorite kind of salad dressing?

Heavenly Homemaker's Club Members: Access your homepage and all your fantastic resources here! Not a member yet? Please join us!

Coconut Fudge Bars

August 27, 2014 by Laura 17 Comments

This post may contain affiliate links. For more information, please see our disclosure policy.

Whether it’s because I’m getting older or getting healthier, my body no longer handles sugar well. This is a great problem to have, obviously. I’m really quite grateful, as I used to eat wayyyyyyyy too much sugar. But what is a chocolate lover to do when she has a chocolate craving? Suck on a bar of unsweetened chocolate? Mmmm, no.

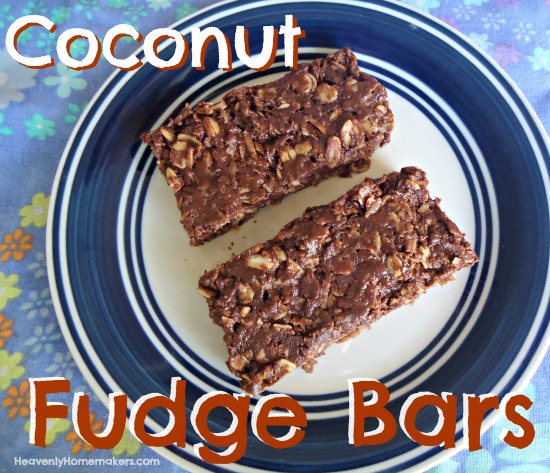
Chocolate Whipped Cream on Strawberries to the rescue. Also, last week I played with my Chewy Granola Bars recipe. I used to make them with chocolate chips – but that obviously adds extra sugar. This time, I came up with a dark chocolate variety that is only lightly sweet, super coconuty, and oh so chocolaty rich.

Coconut Fudge BarsYum

5.0 from 2 reviews
Coconut Fudge Bars
 
Save Print
Author: Laura
Serves: 8-10
Ingredients
  • ½ cup peanut butter or sunbutter
  • ¼ cup honey
  • ¼ cup coconut oil (or another oil of your choice)
  • ½ cup cocoa powder
  • 1½ cup rolled oats
  • 1 cup unsweetened coconut flakes
Instructions
  1. In a medium sized saucepan, melt together peanut butter, honey, coconut oil, and cocoa.
  2. Remove from heat and stir in oats and coconut flakes.
  3. Spread mixture into a 9x9 inch pan.
  4. Chill for 2 hours before serving.
  5. Makes 8-16 bars, depending on how big/small you cut them.
3.4.3177

Coconut Fudge Bars

These store best in the fridge, otherwise they are melty and will get chocolate all over your hands and face. If this is not a problem for you, by all means, store them on the countertop. If you want to pack these in a lunch, I recommend wrapping them individually, freezing them, and sending a spoon or fork along to make them less messy for the consumer. If having chocolate all over your child’s hands and face at school is not a problem for you, by all means, send them without a utensil.

These are super rich and only barely sweet. Feel free to add more honey if you prefer.

So tell me:  Are you a dark chocolate fan?

Heavenly Homemaker's Club Members: Access your homepage and all your fantastic resources here! Not a member yet? Please join us!

Bacon, Egg, and Avocado Salad ~ Make-Ahead Lunch Box

August 24, 2014 by Laura 3 Comments

This post may contain affiliate links. For more information, please see our disclosure policy.

How do we get our family to eat a lot of greens? Put bacon, eggs, and avocado in the bowl with the lettuce.

The Make-Ahead Lunch Box

Rarely is my family of men pleased to see a lovely bowl of salad as the main dish at lunchtime. You can almost see the “am I gonna get full?!” look of panic in their eyes. After all, typically a tossed salad lunch just doesn’t stick with a person very long into the afternoon. But if there’s bacon in it? And boiled eggs? And avocado? And cheese? Well, now we’re on to something.

My family devoured this last week when I made it – even the boys who don’t typically love eating avocados. With all the other flavors mixed in, this salad with all its goodness works for even my pickiest eaters. Along with the salad, I served fresh pineapple, fresh cantaloupe, and a new recipe I was experimenting with: Coconut Fudge Bars. We were all very full after our meal – and stayed full until after we got back from swimming that evening at 5:15. At that point we were all ready to eat our own beach towels – but that’s typical no matter what we’ve eaten for lunch.

This recipe is hardly a recipe. Simply throw together whatever amounts of each ingredient you feel is best for each family member. We all ate great big bowls full, because that’s what we do around here. Need to this be Gluten Free? It’s GF without having to try. Need it to be Dairy Free? Leave out the cheese.  You might have been able to figure that one out by yourself.  ;)

Bacon, Egg, and Avocado Salad

Bacon, Egg, and Avocado SaladYum

Bacon, Egg, and Avocado Salad ~ Make-Ahead Lunch Box
 
Save Print
Author: Laura
Serves: 6-8
Ingredients
  • Bacon, cut into bites, cooked, and drained
  • Boiled eggs
  • Avocado, cut into bites (as well as you can cut an avocado into bites)
  • Cheddar or Colby jack cheese, cut into small chunks
  • Mixed greens, lettuce, and spinach of choice
  • Tomatoes, chopped
  • Salad dressing of choice
Instructions
  1. Toss ingredients together and have a feast.
3.4.3177

To prepare for the lunch box:

Prepare all ingredients in advance, from cooking the bacon to boiling the eggs to chunking the cheese. Toss the fixin’s into a jar or bowl with a lid before heading out for the day. Put the dressing into a separate container to add just before eating.

These ingredients, prepared in advance, will last a week or two in the fridge for quick salad prep. If you chop your avocado ahead of time, simply place the avocado pit into the container to help maintain the nice green color.

Side dish ideas:

  • Fresh fruit like pineapple, cantaloupe, watermelon, apples, oranges, and/or grapes
  • Carrot sticks with hummus
  • Coconut Fudge Bars or Chewy Granola Bars
  • A favorite muffin or slice of quick bread
  • Crispy Cheese Crackers
  • Fruit and kefir/yogurt smoothie

You really have to try this salad. Really – even people who don’t normally love salad should love this one. It has bacon in it, for crying out loud. It’s happiness in a bowl.

Hey, have any of you tried the “Salad in a Jar” idea? I am excited to try that sometime, both because it’s a great packaging idea…and of course, because it involves a jar. It’s happiness in a jar. With bacon (for crying out loud).

Find more Make-Ahead Lunch Box recipes and be sure to follow along in this series for more fun ideas!

Heavenly Homemaker's Club Members: Access your homepage and all your fantastic resources here! Not a member yet? Please join us!

Raspberry Lemon Cream Cups ~ Perfect For Your Make-Ahead Lunch Box

August 21, 2014 by Laura 6 Comments

This post may contain affiliate links. For more information, please see our disclosure policy.

The Make-Ahead Lunch Box

Allow me to introduce you to my new love, the Raspberry Lemon Cream Cup ~ Five simple ingredients, easy to make, and perfect to make ahead of time to pull out for your lunch box or table. Add this one to our High Five Recipes collection. Put this on your list of side dishes to go with lunch. Hope and pray it stays in the fridge long enough to actually serve for lunch.

Yeah, I’m just saying that it may not last that long. My first batch disappeared about 10 minutes after I made it. Time to triple the recipe, maybe Laura? Yes, I think so.

Raspberry Lemon Cream CupsYum

1 cup raspberries
20 drops stevia or 2 Tablespoons maple syrup
1 Tablespoon lemon juice
1/2 cup sour cream
2/3 cup heavy whipping cream

In a bowl, smash raspberries with a fork. Stir in sweetener of choice, lemon juice, and sour cream. Set aside. In another bowl, whip the heavy whipping cream until soft peaks form. Fold raspberry mixture into the whipped cream. Pour into individual serving containers and chill for at least 2 hours. (Or for 10 minutes if you are my family and can’t wait 2 incredibly long hours.)  This recipe makes 4-6 servings.

I love this side dish idea for make-ahead lunches! If you pack lunches for work or school, this can easily be prepared in bulk and packaged for a filling treat to go with the main dish. Pucker up – this recipe is a tart one. That’s what makes it so good. :)

Raspberry Lemon Cream Cups

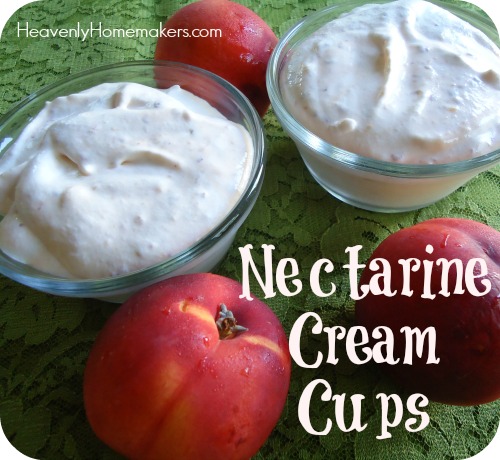
You know what else is good? Subbing a different variety of fruit for the raspberries. Since we liked the Raspberry Lemon Cream Cups so much (and ate them so quickly), the following day I blended up nectarines to stir into this treat. I can’t decide which one I like more.

Nectarine Cream Cups

1 cup pureed nectarines
20 drops stevia or 2 Tablespoons maple syrup
1/2 cup sour cream
2/3 cup heavy whipping cream

Stir pureed nectarines, sweetener of choice, and sour cream together and set aside. In another bowl, whip the heavy whipping cream until soft peaks form. Fold nectarine mixture into the whipped cream. Pour into individual serving containers and chill for at least 2 hours. This recipe makes 4-6 servings.

nectarine cream cups

These fruit cream cups are healthy, filling, and a perfect side dish to go with other Make-Ahead Lunch Box recipes like Ham and Cheese Pasta Salad or Whole Wheat Pizza Swirls.

What other fruit should we try blending into in these cream cups?

Heavenly Homemaker's Club Members: Access your homepage and all your fantastic resources here! Not a member yet? Please join us!

Cinnamon Nectarine Muffins

August 14, 2014 by Laura 10 Comments

This post may contain affiliate links. For more information, please see our disclosure policy.

I am well aware that I feed an army each day. But sometimes, the reality of how much food it actually takes to feed this army leaves me with my mouth hanging open.

Take, for instance, the fact that we got 20 pounds of nectarines last week in our Azure Standard order. Within only 5 days, our family had polished off 15 pounds of them. Do you know how many nectarines that is? Neither do I. But it was a lot of nectarines.

As the box was emptying, I decided to get a little bit creative. Some of the nectarines were getting pretty soft – a little too soft to slice nicely. Therefore, into the food processor they went, skin and all. (I did remove the pit. I thought I’d mention that for those of you who were considering throwing the entire piece of fruit directly into the machine. Don’t do that.)  The food processor turned out a very nice nectarine puree, which when stirred into other fine ingredients, turned out a most deliciously moist muffin.

Feel free to sub peaches for nectarines in this recipe. :)

Cinnamon Nectarine Muffins

Cinnamon Nectarine MuffinsYum

1 1/2 cups whole wheat flour
1/4 cup sucanat
3/4 teaspoons baking powder
1/2 teaspoon sea salt
1/2 teaspoon ground cinnamon
1 3/4 cups nectarine or peach puree (4-5 peaches or nectarines)
1/3 cup sour cream
1/4 cup melted butter
1/2 teaspoon vanilla extract
1 egg

In a large bowl, mix together flour, sucanat, baking powder, salt, and cinnamon. Stir in pureed fruit, sour cream, melted butter, vanilla, and egg. Once mixed, scoop batter into well buttered or paper-lined muffin tins. Bake in a 400° oven for 25-30 minutes or until muffins are golden brown. Makes about 15 muffins.

I found that these muffins required a little more baking time than a typical muffin. You may want to prick one with a toothpick to make sure it comes out clean so the muffins aren’t doughy.

Which do you like best: nectarines or peaches?

Heavenly Homemaker's Club Members: Access your homepage and all your fantastic resources here! Not a member yet? Please join us!

Whole Wheat Pizza Swirls ~ The Make-Ahead Lunch Box

August 10, 2014 by Laura 13 Comments

This post may contain affiliate links. For more information, please see our disclosure policy.

The Make-Ahead Lunch Box

I’m excited to kick off our new Make-Ahead Lunch Box series with a fun new recipe I recently tried for my family. We all love these Whole Wheat Pizza Swirls.  Here are my favorite perks to this recipe, and why I think this is perfect for your Make-Ahead Lunch Box:

  • You can make Pizza Swirls ahead of time, wrap them individually, and store them in the freezer until you need them.
  • You can fill the Pizza Swirls with any of your favorite toppings, making this recipe versatile and ideal for accommodating food preferences.
  • These taste great both hot and cold.
  • Pizza Swirls are simple to make.
  • Pizza Swirls are filling and easy to eat.

Whole Wheat Pizza SwirlsYum

1 recipe of Whole Wheat Pizza Dough
1 cup pizza sauce
2 cups shredded cheddar or mozzarella cheese
3 Tablespoons grated parmesan cheese
variety of pizza fillings – your choice – like meat, olives, and veggies
2 Tablespoons olive oil (optional)

Mix Whole Wheat Pizza Dough as directed. On a clean, well floured surface, roll dough into a long oval until it is about 1/4 inch thick. Spread pizza sauce over the dough. Sprinkle with cheeses and your favorite pizza toppings. Roll the dough up, beginning on the long side. Tuck the ends under. Place on a cookie sheet. Spread olive oil over the top if you like. Bake in a 375° oven for about 15 minutes or until the top is golden brown. Slice and serve. Makes about 8-10 Pizza Swirls.

Whole Wheat Pizza Swirls

Bonus Tips:

  • Want to pack these Pizza Swirls to go? Once the swirls have cooled completely, wrap them individually and place them in an air tight container in the freezer. Set frozen wrapped Pizza Swirl in the fridge overnight to thaw to pack in a lunch box the next day.
  • Need to eat Gluten Free? Copy the idea and use your favorite gluten free dough recipe.
  • Tired of pizza? Skip the sauce and use turkey or chicken with cheese to make Meat and Cheese Swirls.

Great to Serve with Pizza Swirls:

  • Fresh fruit like apple slices, orange slices, peaches, cantaloupe, pineapple, or pears
  • Carrot sticks, sliced cucumbers, celery, or sweet peppers
  • Olives or pickles

I double, triple, or quadruple this recipe so that I can make lots at once to make my getting-ahead efforts worthwhile. This also means I can make a variety of different Pizza Swirls to have on hand. Our favorites are:

  • Pepperoni and Cheese
  • Combination (meat, cheese, green peppers, mushrooms, olives)
  • Hamburger and Green Pepper
  • Pepperoni and Olive

What kind of pizza swirls do you think your family will like? Have any other ideas you feel would be good to serve with Pizza Swirls (especially ideas that will pack well in a lunch box)?

Heavenly Homemaker's Club Members: Access your homepage and all your fantastic resources here! Not a member yet? Please join us!

Cream Cheese Filling For Your Crepes

July 30, 2014 by Laura 13 Comments

This post may contain affiliate links. For more information, please see our disclosure policy.

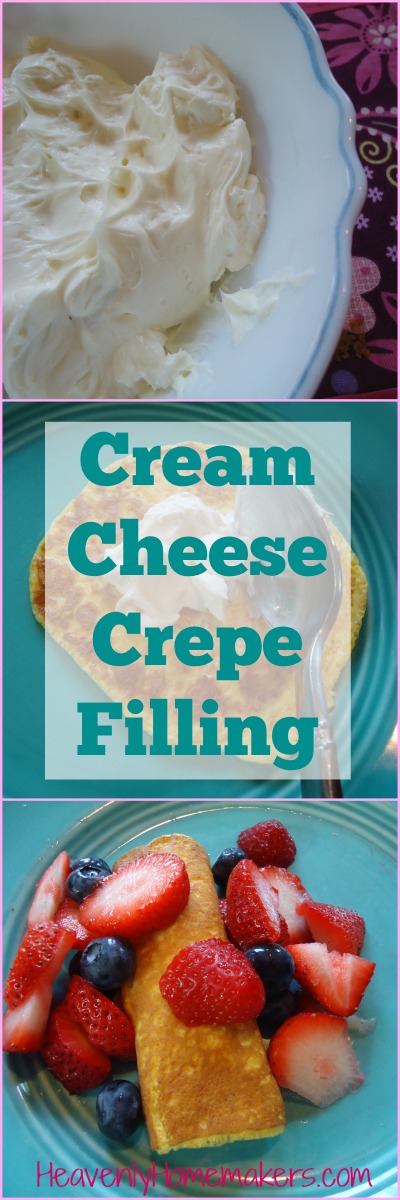
Want a Cream Cheese Crepe Filling that will change your life? I’m not even exaggerating (because I never do that). It doesn’t hurt that my Crepe recipe is super simple and delicious too. Need to eat gluten free? Gotcha covered. The crepes are made without flour and of course the filling is gf too. These are all real food and so, so good!

Quick and Easy Crepes

While Matt and I were cooking out at camp a couple weeks ago, we were blessed to work with a very talented lady who has been cooking for campers for years. One of her specialties? Homemade Crepes with cream cheese filling, topped with berries. You should have heard the kids as they walked by the kitchen and saw we were making crepes. “Is it crepe day tomorrow?!? I’ve been waiting all year for this day!”

Seriously, the campers love them. I believe we cranked out over 300 crepes in preparation for “Crepe Day.” Phew, what a job! But it was worth it. The crepes were amazing! The key to making these so great had to be the filling. Cream cheese filling.  Sooooo good!

We used powdered sugar at camp, but when I got home, I played with the idea to make the filling with stevia or maple syrup. Yum, yum, yummy.

Cream Cheese Crepe Filling

Cream Cheese Crepe FillingYum

Cream Cheese Filling For Your Crepes
 
Save Print
Author: Laura
Ingredients
  • 8 ounces softened cream cheese
  • 10 drops liquid stevia or 2 Tablespoons real maple syrup
  • ½ teaspoon vanilla extract
Instructions
  1. Beat ingredients together until smooth.
  2. Place about 2 teaspoons of filling in each crepe.
3.4.3177

I whip my cream cheese filling ingredients together in my Blendtec, which takes about thirty seconds.

Here’s my super easy Crepe Recipe.  Wholesome, filling, and delicious. And with cream cheese and berries? Heavenly. :)

Want more Simple Recipes like this one?

We’ve got a long list of quick and easy recipes for you to enjoy here! Subscribe for FREE to Heavenly Homemakers so you won’t miss all the new Simple Recipes we share!

  • Simple Baked Salmon and Asparagus
  • Simple Crock Pot Chicken Soup with a Kick
  • Simple Skillet Taco Pasta
  • Last-Minute Lentil Chili
  • Simple Sweet and Sour Baked Chicken Legs
  • 20-Minute Taco Soup
  • Simple Cheesy Baked Chicken
  • Simple Creamy Chicken Stew in the Crock Pot
  • Simple Italian Beef and Broccoli Skillet
  • Simple Bacon Ranch Chicken
  • Simple Hawaiian Crock Pot Chicken
  • Simple Taco Rice Dinner
  • Simple Last Minute Nacho Plate
  • Simple Chicken Cheeseballs with a Kick
  • Simple Beanie Weanies
  • Simple Crock Pot BBQ Spareribs
  • Simple Pizza Chicken Bake
  • Simple Italian Chicken and Green Bean Bake
  • Last Minute Creamy Bacon Spaghetti
  • Simple Hamburger Soup
  • Simple Parmesan Broiled Fish
  • Simple Overnight Saucy Crock Pot Chicken
  • Simple 15-Minute Meal
  • Simple Overnight Melt-in-Your-Mouth Beef Roast
  • Simple 3-Cheese Crock Pot Pasta
  • Simple Oven Fried Chicken
  • Simple Honey Mustard Chicken Legs
  • The Easiest Mashed Potatoes in the World
  • Simple Garlic Butter Shrimp
  • Simple Crunchy Ranch Chicken Strips
  • Simple Crock Pot Shredded Ranch Chicken (for salad or tacos)
  • Simple Crock Pot Pizza Casserole
  • Simple Barbecue Beef Roast
  • Simple Spanish Rice Bowls
  • Simple Roasted Rotiserie Chicken
  • Simple Green Chile Chicken
  • Simple Tex-Mex Creamy Chicken
  • Simple Waffle Omelets
  • Simple Crock Pot Taco Pasta
  • Simple Grilled Chicken
  • Simple Hawaiian Beef Roast
  • Simple Crock Pot Creamy Stew Meat
  • Simple Cheese Stuffed Burgers
  • Simple Hashbrown Casserole (For Instant Pot, Crock Pot or Oven!)
  • Simple Lasagna Casserole (For Instant Pot or Crock Pot)
  • Simple Chili Mac
  • Simple Bacon Cheeseburger Casserole
  • From Burrito Bar to Casserole (a 5-Minute Meal!)
  • Simple Bacon Cheeseburger Roll
  • Simple Garlic Parmesan Chicken Legs
  • Super Simple Lasagna
  • The Simplest White Chicken Chili
  • Simple Lentil Nachos
  • Simple Tuna Patties
  • Simple Banana Pancakes

Enjoy all these recipes without effort when you become a Simple Meals member! Every week we’ll send you a great menu plan full of Simple Recipes like this one. We’ll equip you with a grocery list. We’ll break everything down so that your meal prep is as simple as possible. We’ll give you bonus tips and recipes and freebies. And this is all for just $1 each week. You’ll love it! Get all the details.

Heavenly Homemaker's Club Members: Access your homepage and all your fantastic resources here! Not a member yet? Please join us!
« Previous Page
Next Page »

Join Our Community!

 Facebook Twitter E-mail Instagram Pinterest

Popular Posts

~ Will All of the Real Moms Please Stand Up?
~ Easy! Stir-and-Pour Whole Wheat Bread
~ How to Make Gatorade
~ 31 Real Food Breakfast Ideas
~ Dear Teenage Girls...
~ When Mom Takes a Step Back
~ The Inexpensive Health Insurance We Love!
~ Let's Talk Real Food Grocery Budgets

Check out our latest posts!

  • Big Family Food and Fun: September 6-12, 2026
  • Big Family Food and Fun: August 30-September 5, 2026
  • Big Family Food and Fun: August 23-29, 2026
  • Big Family Food and Fun: August 16-22, 2026
  • Big Family Food and Fun: August 9-15, 2026
Home  ~  Simple Meals  ~  Club Membership  ~  Shop  ~  Privacy Policy  ~  Disclosure  ~ Contact

Copyright © 2026 · Beautiful Pro Theme on Genesis Framework · WordPress · Log in