Special thanks to Basic Invite for sponsoring this post.
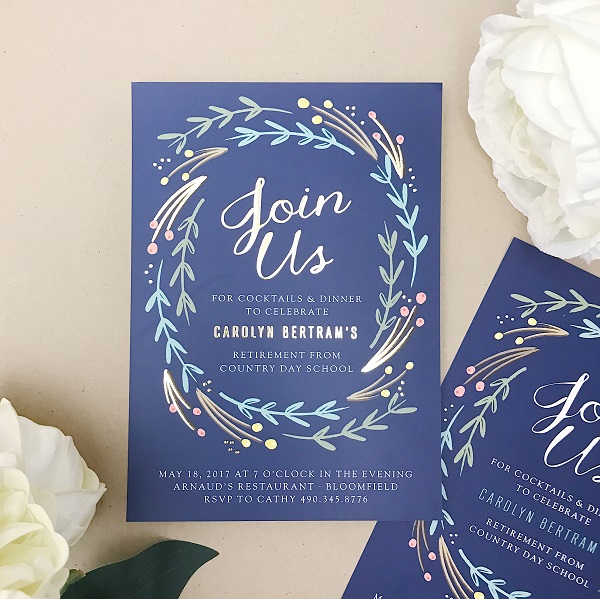
Just a few weeks ago I was on the hunt for the best price on Graduation Announcements for our son Justus. Did you know that rounded corners cost extra? But of course.
Thankfully, Justus isn’t picky and didn’t mind that I chose something basic for his announcements. But it was fun to see all the options available for so many occasions and preferences!
Recently Basic Invite contacted me to see if I’d share what they have to offer! Don’t mind if I do.
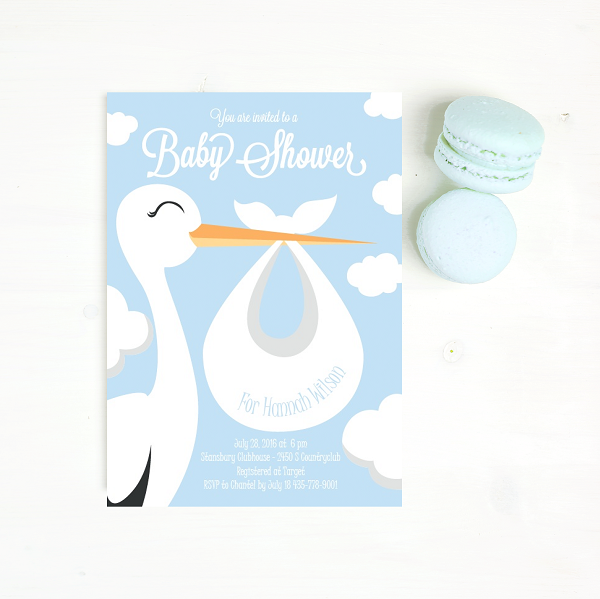
From graduation announcements to basic girl baby shower invitations to specific princess theme baby shower invitations, you can have lots of fun shopping around.

What you’ll find at Basic Invite
Almost Unlimited Colors – Basic Invite is one of the few websites that allows customers almost unlimited color options with instant previews online. Once you select a design you can change the color of each element on the card to over 180 different color options so you can make sure the card is exactly how you want it down to the littlest detail. This is what we feel sets us apart from almost any other online stationery company and is what we feel is our biggest draw.
Custom Samples – Basic Invite is one of the few websites that allows customers the ability to order a printed sample of their actual invitation so they can see exactly how it will print as well as the paper quality before they ever have to place their final order.
Over 40 Different Colors of Envelopes – Basic Invite is just as colorful with our envelopes as we are with our invitations. Customers can choose from over 40 different colors when it comes to their envelopes so that they can make their invitation stand out even before it is opened. All of our envelopes are peel and seal so the envelopes can be quickly and securely closed.
Address Capturing Service – Basic Invite offers an address capturing service that allows customers to simply share a link on Facebook, Twitter, Instagram, or any other form of social media to request their friends and family’s addresses which will be stored in the customer’s account and can then be selected during the design process. Basic Invite offers recipient address printing at no cost on all Christmas card orders.
Foil – Foil cards are available in gold, silver, and rose gold. Customers can choose flat or raised foil on all of Basic Invite’s foil designs.
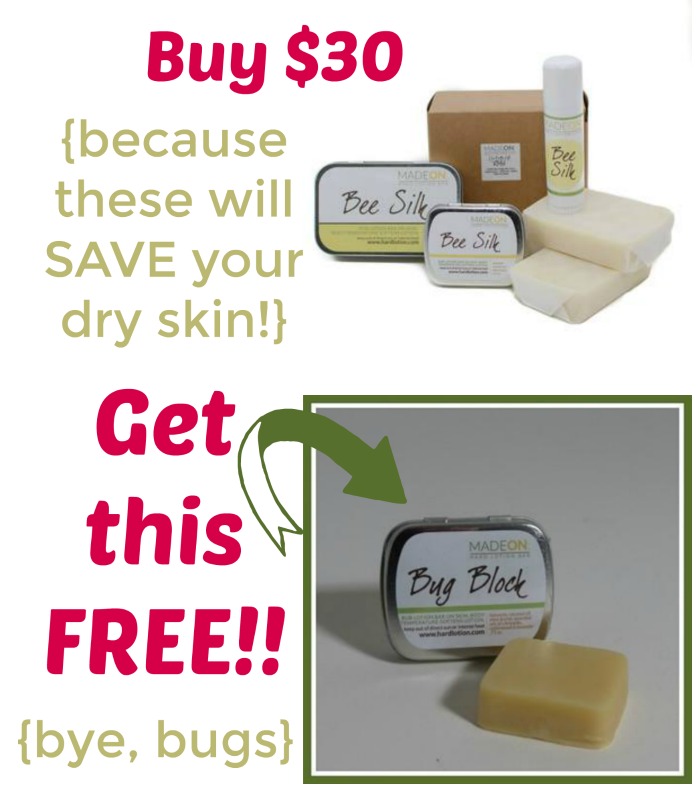
Right now Basic Invite is offering 15% off with coupon code: 15FF51. Shop around to see what fits your needs best!
A word to the wise: Today you’ll order your baby announcements. Tomorrow you’ll order that same baby’s graduation announcements. So says the mom who just graduated Son #2. :)


 Today, I’m reminding you of it again to share an awesome offer Renee is giving all of us here.