Heavenly Homemakers

Encouraging women in homemaking, healthy eating and parenting

  • Home
    • About
    • FAQs
  • Recipes
    • Bread and Breakfast
    • Condiments
    • Dairy
    • Main Dishes
    • Side Dishes and Snacks
    • Desserts
    • Gluten Free
    • Instant Pot
    • Crock Pot
    • Heavenly Homemaker’s Weekly Menus
  • Homemaking
    • Real Food Sources
  • Store
  • Contact
    • Advertise
    • Disclosure
    • Privacy Policy
  • Simple Meals
  • Club Members!

How to Make Chicken Wings

February 3, 2021 by Laura Leave a Comment

This post may contain affiliate links which won’t change your price but will share some commission.

Here’s how to make chicken wings at home. You’ll wonder why you never tried this before!

Truly, this is as easy as the “Just Dump Some Sauce on Some Chicken” idea I shared a while ago. I’ll share a recipe below, but if you don’t even want to read that far let me just give you the simple instructions now:

How to Make Chicken WingsYum

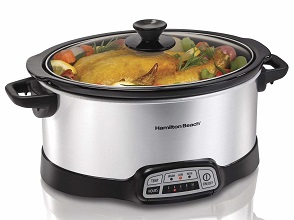
  1. Put chicken wings in a crock pot. Who cares if they are still frozen?
  2. Dump on some sauce. Use whatever sauce you have. The final plops of three different bottles will work just fine.
  3. Cook this on low for a few hours.
  4. Eat the chicken as it falls off the bones.
  5. Smile and wipe yo mouth.

Chicken wings seem to be something we only order at restaurants. They seem like one of those hard-to-make special foods when in fact, all you have to do is dump some sauce on some chicken and let your crock pot do the rest.

I love fun food like this. {Sheds a tear.}

Oh, and if you serve your Chicken Wings with some Homemade Sweet Potato Fries, you will make your family feel like they’ve gone to a restaurant when in fact you’ve all stayed home and spent a total of $5.78 to feed your entire family.

Other great side dishes to serve with your Chicken Wings

  • A tossed salad
  • A steamed vegetable (such as green beans, peas, broccoli, cauliflower)
  • A roasted vegetable
  • Cream Cheese Corn
  • Honey’d carrots
  • Baked beans

How to Make Chicken Wings

How to Make Chicken Wings
 
Save Print
Author: Laura
Serves: 4-8
Ingredients
  • 2-5 pounds of chicken wings
  • 8-16 ounces of sauce (barbecue, teriyaki, sweet and sour, anything you like!)
Instructions
  1. Put chicken and sauce in a crock pot.
  2. Cook on low heat for 6 hours or until chicken is falling off the bone.
3.5.3251

I wish I could give more specific instructions but truly there are no perfect measurements for such a simple recipe idea. Just put your chicken in your crock pot. Cover it with sauce. Let your crock pot do the rest. You’re going to love this!

Heavenly Homemaker's Club Members: Access your homepage and all your fantastic resources here! Not a member yet? Please join us!

Simple Green Beans in the Air Fryer

December 20, 2020 by Laura 2 Comments

This post may contain affiliate links which won’t change your price but will share some commission.

I love how simple and tasty it is to make green beans in the air fryer!

Do you have an Air Fryer? If no, you might consider putting it on your Christmas wish-list. Here’s how I’ve found it to save a lot of money. Not to mention it turns out some super fun foods, making us feel like we’re eating a treat meal from a restaurant!

So green beans in the Air Fryer? Well, these are super healthy and our kids gobble them up because they’re so delicious. They take about two minutes to prepare, so you can’t go wrong there.

Simple Green Beans in the Air FryerYum

Simple Green Beans in the Air Fryer
 
Save Print
Author: Laura
Serves: 4-6
Ingredients
  • 12-ounces frozen fine green beans
  • 1 teaspoon olive oil
  • ¼ teaspoon sea salt
  • ¼ teaspoon garlic powder (optional)
Instructions
  1. Pour green beans into a bowl (or cheat by cutting open the bag of green beans to use it as a disposable bowl!)
  2. Add olive oil, salt, and garlic powder.
  3. Toss with a spoon or tongs to coat the green beans.
  4. Cook in your Air Fryer at 400 degrees for 7-10 minutes, tossing them half-way through cook time to make sure they are cooking evenly.
3.5.3251

These have an awesome crunch. And did you see that simple hack I shared in the recipe? I simply open a bag of frozen green beans and use the bag as a bowl! Drizzle in the olive oil, sprinkle in the seasonings, shake the bag, and pour the coated green beans into the air fryer. No dishes!! NO DISHES!!!! That is my favorite part, besides of course, the fact that we can make this awesome vegetable in the air fryer. Nourishing and fun all in one!

P.S. I have this Air Fryer and we’ve been very happy with it!

Heavenly Homemaker's Club Members: Access your homepage and all your fantastic resources here! Not a member yet? Please join us!

Holidays? Moms Need Help in the Trenches

November 23, 2020 by Tasha Hackett Leave a Comment

This post may contain affiliate links which won’t change your price but will share some commission.

Whatever time of year, I can attest to the fact that moms need help. But during the holidays, we may need help even more and in a different way. Enjoy this gem from Tasha…

Holidays? Moms Need Help in the Trenches

By Tasha Hackett

When moms need help desperately but don’t even know where to start…

Shucks, life is fun, amiright? Those cute baby snuggles, warm apple pie, bright orange leaves in piles, glittering snow, creamy hot-chocolate, sizzling butter and garlic… mmmm. But geez, Moms need help. I need help. We mothers of young people are overwhelmed. The close-knit communities aren’t there anymore. Everyone has their own life and responsibilities. Social media, though originally designed to bring us together, only makes us feel worse. With the holidays upon us, where can I even start to get help? 

“Happiness is a decision,” said the well-meaning, but unhelpful person.

I’m sure you’ve heard that before. Happiness is a decision. For the overwhelmed mom, that is as unhelpful as telling her, “Enjoy them! They grow up so fast.” (Read Laura’s post on what to say instead.) Truthfully, it’s not helpful to say either of those things to the mother who dreads going to sleep at night because she knows the baby is going to wake in 45 minutes and then cry for the next two hours before he sleeps for another 45 … and the mother who dreads the morning because the other three littles are going to want to eat and wear clothes and they’re going to chatter and need love and attention and they’ll play and make messes.

Perhaps that mom is dealing with a cloud of emotional strain and doesn’t even know what she needs because her brain is overwhelmed from the aforementioned sleep deprivation and she forgot to eat food again. (Would it fool anyone if I said these were hypothetical examples? I was there last year.)

To quote Rabbit and Winnie-the-Pooh, “How about Lunch?”

Don’t tell her happiness is a decision, what she needs is (Okay, yes, Jesus. She needs Jesus, but also,) sleep. She needs sleep and she needs food, and she needs to know that she is in a place that won’t last forever. Her people need to support her with prayers for peace from the Holy Spirit in order to fully embrace life at home with littles. What really helps her is an older mom to say, “It’s gonna be okay. And I’ll bring dinner over at 5:00 pm.” And when that is offered, she needs to accept it and say, “Thank you.” If all the real moms will please stand up and support each other, we’ll be okay.

Moms need help. Mmk? We may need lots of help for the Holidays. The sooner we can embrace that, the happier we will be. 

When my firstborn was a few months old, Ben and I had opposite shifts. I worked days, he worked evenings and weekends. Saturdays were LOOOOONG. I was 100% an extravert (still am), trapped at home for 12 hours with a tiny baby that didn’t sleep much and cried when left alone. The emotional strain to be EVERYTHING for this tiny human ate at my core and I was isolated, worn out, drained, and lonely. 

I was (am) an interesting person with a broad skill set and none of that mattered on a twelve-hour workday with an infant. What mattered was giving, and giving, and giving. Spit-up on my pants, milk stains on my shirts, the house falling apart, chores half-done… you know. Foremost priority was loving this child, but it was breaking me in two.

One evening I sucked up my pride and walked myself to the neighbors: “I need help. I feel like I’m falling to pieces. He cries unless I hold him, and I’ve hardly been able to eat and I could really use a shower. Would you be willing to keep him for half an hour?” She said she’d gladly hold him for as long I needed. I showered. Cried. I ate some food. Cried. I pulled myself together and went back to claim my baby. He was happy. The neighbors were happy. And that evening will stick with me forever as the first time I was brave enough to ask for help. 

What does this have to do with moms and help for the holidays?

This season is going to be different. Know your limits and go easy on yourself. Don’t try to make everything perfect. Ask for help. Take time to enjoy this season as best as you can. Have fun. 

As a mother, wife, and homemaker, why do we play the martyr when no one has asked it of us? I’ve been in hard places far too many times the past eight years where the service of my community has kept me from falling apart. 

I’m afraid to share this because you may be astounded, “Tasha sounds depressed! She has anxiety.” What if you read this and think, “I can’t relate to this at all. Tasha needs help…” Um… yes. That’s the whole thing here. I do need help, but listen up, I’ve talked with many other young moms and we are all in the same boat! Some more than others, of course, but the general consensus is that WE DON’T HAVE IT FIGURED OUT. The water is pouring in faster than we can bail it out. We are in desperate need of older women to come alongside and get into the trenches to show us the way out.

Calling all experienced mothers! Moms need help! 

In tears, five years ago I called an older friend, (her youngest was six, oldest in high school,). I was home with a baby and a chatty 3-year-old. I said, “I have to get out. Can you come? I just need 10 minutes.” She said, “I’ll be there in five.” 

No joke. I had my coat on, boots tied, and was pulling on my gloves when she pulled into my driveway. I left the house and took off running. Literally. I’m sure I was a sight. I made it three blocks before I slowed because January-in-Nebraska. Five degrees is too cold to be gulping air. 

I let the wind suck my breath away. Crying, I begged God to bring me peace. What was wrong with me that I couldn’t enjoy my two precious babies? 

Dear mothers of young children, you are not broken. 

Author Johann Hari says to those with depression/anxiety, “You are not broken, you’re not weak, you’re not crazy. You’re not a machine with broken parts, you are a human being whose needs are not being met.” Loneliness, loss of control of your environment, the inability to get outside, feeling your life has no purpose, not feeling valued, emotional needs that are not being met, grief (perhaps the grief of lost freedoms?) are all causes of depression and anxiety. (Watch his TED Talk here.) If you’d like to learn more about this, read Hari’s book Lost Connections. He is not a Christian, but his research is phenomenal and while reading his book, I was astounded at how many things correlated with the overwhelm that is common with stay-at-home moms. 

tasha

Help for the weary (even during the holidays)

God promises rest for the weary and my logical brain argues, “Yea, but… you gave me four kids.” He promises peace and I say, “Yea, but, somebody still has to make food and do dishes.” When he reprimands Martha and nods in approval at Mary sitting at his feet, I say, “Mmmk…. But, I have toddler boys who literally pee all over the toilet and the floor.” 

Laura keeps reminding us that Jesus takes over and it’s not her doing it, but him. What does that look like? I think it looks like being able to have fun, being at peace, even while wiping pee off the floor. 

For the older moms: 

Look around your community and find a young mother to adopt.

Pray for the young mothers by name and ask for peace.

For the younger moms: 

  • Know your limits.
  • Use simple meals when time and brain power is limited.
  • Ask for help.
  • Hire help if you can.
  • Set limits for yourself for what you can realistically accomplish.
  • Don’t be a martyr when no one is asking it of you.
  • Reach out to other young moms and get together regularly.
  • Go outside at least once a day.
  • Buy the High Five Recipes Printed Cookbook or Simple Real Food Recipes Cookbook for every adult (especially single adult brothers) on your Christmas list and consider your shopping done.
  • Stop praying for God to take away the trials, instead pray for peace.
  • Stop praying for patience, instead pray for peace.
  • Pray for peace.
  • Start a gratitude journal—it will be a blessing to look over it later.

Isaiah 40:11 “He gently leads those that have young.”

This is a revealing post. Rest assured, I am doing okay. Know why? Because I am continually asking for help. My heart aches for moms whose needs are not being met. I implore you to seek help. Help for moms can come in many different forms. For me, I’ve received it from doctors, counselors, parents, siblings, friends, neighbors, bible class teachers, elders, cousins, college roommates, my fitness coach, my husband, the librarian, and even my best friend from preschool.

Truly, you do not have to do this alone.


Tasha HackettTasha Hackett, friend of Laura, has four chatty children and a wonderfully supportive husband. It’s possible she was born in the wrong century, as she always dreamed of being friends with Laura Ingalls and Anne Shirley. Her debut novel, Bluebird on the Prairie, a historical romance set in 1879 Nebraska, will release Spring 2021. The clumsy antics of the hero, huge misunderstandings, and a humorous brother/sister relationship will keep you smiling, but you may need a tissue as the heroine works through grief. Thankfully, word on the street is the story has a happily ever after.

Heavenly Homemaker's Club Members: Access your homepage and all your fantastic resources here! Not a member yet? Please join us!

The Easiest Pulled Pork

October 28, 2020 by Laura Leave a Comment

This post may contain affiliate links which won’t change your price but will share some commission.

Need a meal to feed a crowd? Make the Easiest Pulled Pork!

You know I’m not a gourmet cook. I’m not even super eager to try new spices in my recipes, simply because I like to stick with basics that I always have on hand. It’s just easier for me this way and saves brain energy and effort.

The food is still delicious!

One of the first times I made this Easiest Pulled Pork and fed it to our YC soccer teams, one of the coaches told Matt, “I don’t know what your wife does to season that meat, but it is so good!”

Truth: Matt’s wife barely does anything to season the meat. But shh. Don’t tell!

I just find that food can really taste great without going to a lot of trouble and taking a lot of time. Since it was a hit last year, I made pulled pork again for the teams this year. I made 20 pounds of pork, and I’m pretty sure it only took 5 minutes of prep.

How I make pulled porkYum

  1. Put the pork butt in the slow cooker (when I make huge amounts, I use a large roaster instead of a crockpot).
  2. Sprinkle on salt and garlic powder.
  3. Peel a few onions if I have time. Cut them and throw them in with the meat.
  4. Cover and walk away.
  5. Well yeah, plug it in and turn it on low first. Then cover and walk away.

The meat slow cooks for hours then falls apart at the end of the day. It practically shreds itself. Then it can be served on buns with barbecue sauce and that’s that!

Now, those of you with smokers can surely turn out much better-tasting pulled pork than I! But this is a method that any of us can do if we have a slow cooker of some kind. And pulled pork is an inexpensive and easy way to feed a crowd!

The Easiest Pulled Pork

The Easiest Pulled Pork
 
Save Print
Author: Laura
Serves: 24 servings
Ingredients
  • 6-8 pound pork butt
  • sea salt
  • garlic powder
  • 2-3 onions (optional)
Instructions
  1. Place the pork in a slow cooker.
  2. Sprinkle on seasonings liberally.
  3. Peel onions and chop them on top of the meat.
  4. Cook on low for 10 hours.
  5. Use a knife and fork to shred the meat, which pulls apart quite easily after the meat has cooked slow and low!
3.5.3251

Don’t need to feed a crowd, just your family? You can still make this easy meal and then freeze the shredded meat in meal-sized portions to pull out and rewarm as needed. SO EASY!

Feeding a crowd and want to get ahead? Make this meat days or weeks ahead. Put the shredded, cooled meat into freezer bags to save in the freezer until you need it. Then thaw and reheat as needed.

Great Sides to Serve with Your Pulled Pork

  • Buns and Barbecue Sauces
  • Party Potatoes
  • Simple Cream Cheese Corn
  • Simple Baked Beans
  • Raw Veggies with Dip
  • Fruit like grapes, watermelon, or cantaloupe
Heavenly Homemaker's Club Members: Access your homepage and all your fantastic resources here! Not a member yet? Please join us!

Simple Honey’d Italian Chicken and Potatoes

October 8, 2020 by Laura Leave a Comment

This post may contain affiliate links which won’t change your price but will share some commission.

This Simple Honey’d Italian Chicken and Potatoes will take you just a few minutes to prep!

Our amazing across-the-street neighbors decided in the midst of April quarantine to start raising and butchering chickens. They generously asked if we wanted in on it.

Wellllllll. Yes. We wanted some chickens, most definitely. But we knew nothing about raising them and butchering them, and we didn’t have time to commit to it. They assured us that they’d take care of the hard part (which sounded more fun than hard to them). So how could we say no?!

We helped pay for feed and other supplies, saved all of our food scraps for the growing chicks, and best of all? Our littlest guys learned to stop whatever they were doing outside to holler “doodle-do!” across the street whenever their roosters started crowing. Cutest. Think. Ever.

So now we have several locally grown chickens in our freezer (can it possibly get more local than ACROSS THE STREET?!). They even went so far as to cut legs and thighs off for us during the butchering process.

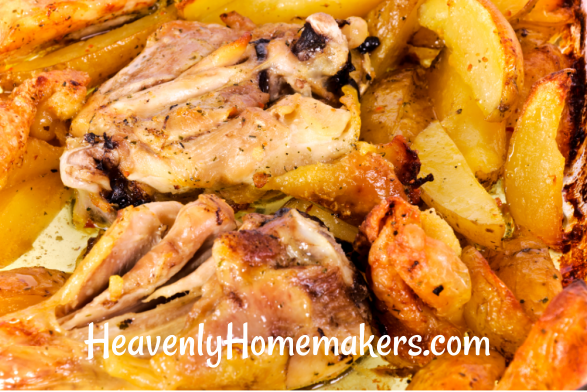
I’ve been using the thighs in this Honey’d Italian Chicken recipe and not only is it incredibly simple to put this all together, but it is also super delicious! I can quickly slide this into the oven to bake, then steam a veggie and get out mixed greens to go with it. So easy!

Simple 4-Ingredient Honey’d Italian ChickenYum

Simple 4-Ingredient Honey'd Italian Chicken
 
Save Print
Author: Laura
Serves: 4-6
Ingredients
  • 2 pounds boneless or bone-in chicken thighs or breasts
  • 2 pounds yellow or red potatoes
  • 3 Tablespoons honey
  • ¾ cup Italian Dressing
Instructions
  1. Place chicken in a baking dish.
  2. Scrub potatoes and cut them into wedges, placing them in the dish with the chicken.
  3. In a small saucepan, mix honey and Italian dressing over low heat until combined.
  4. Drizzle dressing mixture over the chicken.
  5. Bake, uncovered, in a 425 degree oven for 45 minutes or until chicken is no longer pink.
3.5.3251

If you prefer to use boneless chicken in this recipe, cut the baking time down to 25-35 minutes.

If you like simple recipes like this, you will love our Simple Real Food Recipes Cookbook. These are my go-to recipes now!

Heavenly Homemaker's Club Members: Access your homepage and all your fantastic resources here! Not a member yet? Please join us!

Simple Homemade Pizza

September 9, 2020 by Laura Leave a Comment

This post may contain affiliate links which won’t change your price but will share some commission.

Pizza might be one of my favorite meals, so of course, we need to have Simple Homemade Pizza recipe options!

Confession: I order pizza more often than I used to now that we have little ones again. Ok, that’s not really a confession, it’s just truth, but I don’t actually feel that it needs to be confessed. As if ordering pizza is evil??

Sure, I don’t make every single thing from scratch anymore. Sure, not everything we eat is top-notch anymore. We still strive to eat nourishing foods so we can stay healthy. How else are we going to keep up with this tribe?! But God’s strength is bigger than ours, and that’s the real way we’re thriving through this journey.

So. I order pizza sometimes. Guilt-free. I praise God for this option on busy days I have to be at court hearings or team meetings while juggling littles and bigs.

Also, we eat it on paper plates. This is a beautiful thing.

Well anyway, pizza. The homemade kind. It truly tastes better, and we have fun building it to our liking. Here are my top three homemade pizza methods, from easiest to hardest. But the hardest way isn’t really hard, because do you even know me at all?

How to make simple homemade pizzaYum

  1. Buy pre-made crusts. Keep them in your freezer. Add toppings and bake. SO EASY. Plus cheaper and better tasting than ordering pizza.
  2. Make crust from Stir and Pour Bread recipe. Flour your hands and press it onto a pan. Add toppings and bake. VERY EASY.
  3. Make Whole Wheat Pizza Crust, because it is the most delicious. Make crusts ahead and freeze them if you’re as ambitious as I used to be and may be again sometime. Add toppings and bake. STILL EASY.

Here are the crust recipes for you!

Stir-and-Pour Pizza Crust

Simple Homemade Pizza
 
Save Print
Author: Laura
Serves: 2 large pizzas
Ingredients
  • 4 cups whole wheat flour (I use freshly ground hard white wheat)
  • 2 teaspoons active rise yeast
  • 2 Tablespoons sucanat or sugar or honey
  • 1 teaspoon sea salt
  • 2 cups warm water
Instructions
  1. Stir all ingredients together.
  2. Cover and allow it to sit for 30 minutes.
  3. Spread dough on two *well-buttered* large pizza pans (three if you want a thinner crust)
  4. Bake in a 375° oven for 10 minutes.
  5. Pull partially baked crust out of the oven and top it however you like.
  6. Bake for 10-15 minutes more or until cheese has melted and becomes bubbly.
3.5.3251

Whole Wheat Pizza Crust

Simple Homemade Pizza
 
Save Print
Author: Laura
Serves: 2 large pizzas
Ingredients
  • 5 cups whole wheat flour (I use freshly ground flour from hard white wheat)
  • 1 teaspoon sea salt
  • 4½ teaspoons active dry yeast (or 2 pouches)
  • 2 cups warm water (The water should feel warm, but not hot.)
Instructions
  1. Mix all ingredients together, knead for 3-4 minutes, then allow the dough to “rest” for about 10 minutes (give or take).
  2. This dough makes 2 large pizzas, or 18 mini pizzas.
  3. Shape dough into desired pizza sizes and place on baking sheets.
  4. Bake in a 375° oven for 5-7 minutes.
  5. Remove crusts from oven, allow them to cool, then freeze in freezer bags.
  6. Or, top hot pizza crusts with desired pizza toppings.
  7. When you're ready, bake the pizzas at 375° for 10 minutes or until cheese is bubbly and beginning to brown.
3.5.3251

What’s your favorite kind of pizza?

Heavenly Homemaker's Club Members: Access your homepage and all your fantastic resources here! Not a member yet? Please join us!

Simple Oven-Baked Pizza Nachos

August 23, 2020 by Tasha Hackett 4 Comments

This post may contain affiliate links which won’t change your price but will share some commission.

Ready for a great recipe from Tasha? This is a pretty fantastic idea!

Yum

What happened when Pizza met Nachos? Pizza Nachos. 

by Tasha Hackett

You can probably go on your merry way and figure this one out: Oven-Baked Pizza Nachos. Got it? But wait! Come back! I have a secret tip that takes this to the next level. Dip in warmed pizza sauce!

If you asked my family, “What’s better than nachos for dinner?” They will tell you it’s Pizza. Coincidentally, “What’s better than pizza for dinner?” Nachos. But I bet you can’t guess the newest thing I’m in love with…? Okay, fine, you got me. Pizza Nachos!!

But how simple is simple? Like, do I have to wash a bowl? 

This simple and easy dinner has become one of my favorite go-to meals where I feel like I’m meeting all the food groups (*cough* VEGETABLES) while still pleasing even the picky eaters. I started making this a few years ago, but I limited myself to traditional pizza toppings such as pepperoni, olives, mushrooms, peppers, etc., and mozzarella cheese. But this summer I realized, “I can hide all sorts of vegetables in mozzarella cheese!” (Namely zucchini.) One day, when I happened to be out of everything fresh I pulled canned chicken from my emergency pantry. Because even though I’m pretty talented at life, Laura still is mentoring me on the whole meal-plan-ahead-thing. Thus began the weekly Pizza Nacho extravaganza because even though Stir-and-Pour Pizza Crust is amazing and simple and easy, even that is too much for me right now. (Let’s be real, stirring and pouring I can handle, it’s the waiting and baking and that extra bowl to wash that does me in.) 

Okay, Karen, you can stop scrolling. Here’s how SIMPLE Pizza Nachos are made. 

  1. Spread a baking dish with tortilla chips. I use my large pampered chef jelly-roll pan. But you can use any pan you like that has an edge to keep the chips from falling into your oven and burning and setting off your smoke alarm and will leaving you wishing you had just ordered pizza like Susan does every weekend and then maybe you wouldn’t be pulling out the fire-extinguisher on a busy evening. So… I’ve used two 9″ X 13″ pans before and that works well. 
  2. Sprinkle a very sparse layer of shredded mozzarella on the chips. This is the glue to hold your toppings together.
  3. Add your toppings of choice. Feel free to be creative or not. I’ve been enjoying diced zucchini and green peppers with canned chicken on mine! Garden fresh basil and jalapenos are delightful. 
  4. Sprinkle with just a touch of Italian seasoning, salt, and garlic.
  5. Add the rest of the cheese to completely cover any sneaky vegetables you don’t want certain family members to know about. 
  6. Bake in the oven at 350° until the cheese is melted and just starting to brown. About 8 minutes. You CAN use broil for a couple minutes instead and you will have dinner, like, yesterday. But broil is not for the faint of heart, or the easily distracted, and you may want to go back to step #1 read it through carefully before you ever ever ever use the broil function… you’re welcome. #TashaCantBroil #BurnedFoodGuaranteed #TrueStory #GoAheadAndUseBroilifYoureVeryBrave
  7. While your Pizza Nachos are baking (or not burning under the broiler thing), warm up your pizza sauce of choice and do a little dance, but not too much dancing if you’re broiling. 
  8. Serve with metal salad tongs, because I don’t know any other way, and dip in pizza sauce.

pizza sauce

What are you waiting for? Go forth and make simple food.

And now I’m going to go eat one of those chocolate peanut butter cups that I have stored in my refrigerator because Laura made me do it and now I’m addicted and all this talk about pizza and nachos has me drooling.

Have you ever made pizza nachos before? I feel like I made this up, but I probably did not. Also, serious question: Is it even possible to broil without walking away and forgetting about what’s turning black in the oven? I know I’m a super unique and wonderful individual human person, but I can’t be only one with this skillset. 

P.S. You’re still allowed to plan ahead with this meal and write it on your meal plan that Laura has been teaching us about, and then you can relax that you have one less thing to worry about because you don’t even have to wash a dough bowl. 


tasha

Tasha Hackett is an unpublished Christian romance author who sometimes lives in a dream world of the Midwest 1800s with her characters. Graciously, Laura lets her play on the blog a few times a month! Tasha likes to encourage women, stay out of debt, read wonderful books, and homeschools with her four children. You can find her playing on Instagram @HackettAcademy and @heavenlyhomemaker.

Heavenly Homemaker's Club Members: Access your homepage and all your fantastic resources here! Not a member yet? Please join us!

10 Favorite Back-to-School Crock Pot Dinner Ideas

August 9, 2020 by Laura 2 Comments

This post may contain affiliate links which won’t change your price but will share some commission.

Need some Back-to-School Crock Pot Dinner ideas? Here are my favorites!

Yum

It’s time for me to get organized. Back to school at our house means much more than “get your pencils sharpened.” I usually consider this time of year “Back-to-Soccer” season and brace myself for the crazy that comes with it. Matt coaches our York College women’s team so usually in August I smile at him and say something like, “Whelp, see ya in November.”

Elias (who moved into the college dorm over the weekend; I’m not ready to talk about it, ha) will be playing on the YC men’s team. Malachi (15) will referee as many rec-league and club team games as he can. And Brayden (6) will play on a rec-league team. I try to pack everyone up and go to as many home YC games as I can, plus of course, I’ll be Brayden’s biggest cheerleader.

Awwww. There’s Malachi, back in his baby-soccer days. Now here we are again with our new set of Littles!

I’ve done this soccer-mom-wife life for so many years now that I know full well what it’ll be like. And as much as I know that it will be challenging as it always is (especially now that we’ve got so many little ones again!), may I just say this very loudly:

I AM SO THANKFUL SCHOOL IS STARTING and that WE GET TO HAVE A SOCCER SEASON!!!!

Last spring, we weren’t sure, you know? In early March, we sent all of our beloved college students home with barely a good-bye. We trudged through quarantine like so many of you did, wondering when or if life would ever be back to normal.

I’m not sure we can call everything “normal” yet, but praise God, students are moving back and soccer season is happening.

So as I celebrate this and also get ready for a very busy season, I’m putting these Crock Pot Dinner Ideas in my back pocket to make our mealtimes easier! These 10 ideas are the recipes I tend to fall back on first…

10 Favorite Back-to-School Crock Pot Dinner Ideas

  1. Crock Pot Chicken Soup with a Kick
  2. Hawaiian Crock Pot Chicken
  3. Overnight Saucy Crock Pot Chicken
  4. Overnight Melt-in-Your-Mouth Beef Roast
  5. Crock Pot Pizza Casserole
  6. Barbecue Beef Roast
  7. The Simplest White Chicken Chili
  8. Cheeseburger Noodle Crock Pot Dinner
  9. Hearty Bean Casserole (which can be made on the stovetop, but is perfect to make ahead and keep warm in a crock pot until dinnertime!)
  10. Crock Pot Fajitas

All of these recipes require almost no work or prep time. That’s why I like these best!

Oh, and if you like simple recipes like this, you will love our Simple Real Food Recipes Cookbook. These are my go-to recipes now!

What does your fall season look like this year?

Heavenly Homemaker's Club Members: Access your homepage and all your fantastic resources here! Not a member yet? Please join us!

Simple Spicy Chicken Burgers

July 19, 2020 by Laura Leave a Comment

This post may contain affiliate links which won’t change your price but will share some commission.

Gather five basic ingredients, and you can make these delicious and unique Simple Spicy Chicken Burgers!

You might recognize part of this recipe if you’ve ever made our Simple Chicken Cheeseballs with a Kick. This proves, once again, how easy it is to take one recipe and tweak it to make it into something new! This saves brainpower, while still giving us lots of fun recipes to enjoy with our family!

Oh hey, speaking of spicy burgers, remember that one time I ordered a bottle of Cholula online? It went a little something like this:

My family was running low on hot sauce, and I like to keep it on hand because all of our older boys love it. In true Laura style, I ordered it from Amazon because if I can possibly have something sent directly to my porch to save myself from overflowing my grocery cart at the store, I will absolutely have the item sent to my porch.

Also in true Laura style, I wasn’t thorough when reading the description of the bottle of Cholula that I put into my Amazon cart. It looked like a biggish bottle, and that sounded good to me because we have a biggish family full of biggish eaters. I thought nothing more about my Cholula until I pulled it out of the box a few days later.

And wow. Well, we didn’t know they made Cholula bottles that large!

Laura had ordered a 64-ounce bottle of Cholula, which is the same as a half-gallon, thankyouverymuch. Picture a 2-liter of soda and you’ve got our Cholula bottle. We shall not run out of Cholula any time soon, or so it seems. But then again, we REALLY like these Spicy Chicken Burgers so we may go through the bottle faster than we think.

I appreciate that this is a recipe that allows me to mix up the ingredients quickly in the morning, shape the burgers for later, refrigerate, then pull them out at dinnertime to quickly grill and eat. Read this post for more ideas about getting ahead and making dinner early in the day!

It’s also fun to note that ground chicken costs less than ground beef. So this recipe will save you money!

Beyond that, our family finds it fun to have yet another variety of burgers to grill in the summertime. These have a great, unique flavor that isn’t too spicy, but is super tasty!

Simple Spicy Chicken BurgersYum

Simple Spicy Chicken Burgers
 
Save Print
Author: Laura
Serves: 8
Ingredients
  • 2 pounds ground chicken
  • 1½ teaspoons onion powder
  • 1 teaspoon garlic powder
  • ½ teaspoon sea salt
  • 2-4 Tablespoons hot sauce (I use Cholula)
Instructions
  1. Mix all ingredients in a bowl until well combined.
  2. Shape into 8 patties.
  3. Cook patties on a grill or in a skillet on the stovetop until the meat is golden brown and cooked through and through.
  4. Serve on buns with sliced cheese, lettuce, tomatoes, or any of your favorite burger toppings! Ranch dressing is a tasty topping with these burgers!
3.5.3251

If you’re grilling these, you’ll find that you need to leave them alone for quite some time before you flip them. They don’t hold together as well as beef burgers. Allow them to cook slowly on the grill until they have solidified somewhat, then they’ll turn easily!

Have you ever tried grilling a chicken burger? Give these a try – hope you love them as much as we do!

Heavenly Homemaker's Club Members: Access your homepage and all your fantastic resources here! Not a member yet? Please join us!

Potato and Bacon Foil Packs on the Grill

July 15, 2020 by Laura 1 Comment

This post may contain affiliate links which won’t change your price but will share some commission.

Make yourself some Potato and Bacon Foil Packs for the grill! You will not be disappointed!

I may have to make this every week of the summer! The flavor is unbelievably good. And of course, these are really easy to make!

I like to prep them in the afternoon while the babies are napping. Then at dinnertime, we throw them on the grill. While they cook, we steam some veggies. And the meal is perfection!

First things first, make yourself a batch of this Ranch Dressing Mix. I like keeping a full jar of this mix in my pantry to use in recipes like this!

Second, consider making a batch of Bacon Bits like this. I love having these ready to grab and use in recipes!


If you’ve got those prepped ahead, you can make these Potato and Bacon Foil Packs super quickly!

Ready to put yours together?

Potato and Bacon Foil Packs on the GrillYum

Potato and Bacon Foil Packs on the Grill
 
Save Print
Author: Laura
Serves: 6-8
Ingredients
  • Heavy-duty foil
  • 5 pounds baby red potatoes
  • ½ pound cut and cooked bacon
  • 4 Tablespoons ranch dressing mix (or 1 pouch)
  • 1 stick of butter, cut into 12 slabs
  • Shredded cheese and sour cream for serving (optional)
Instructions
  1. Wash potatoes and slice them into very thin slices.
  2. Place them in a large bowl.
  3. Stir in cooked bacon and ranch dressing mix.
  4. Prepare foild packets using a double layer of foil filled with potato mixture. (I try to make my foil packets thin so they will cook faster on the grill. So I make this recipe into 3 large, flat foil pouches.)
  5. Top potato mixture with slabs of butter.
  6. Close pouches securely for the grill.
  7. Cook pouches on the grill for 15-30 minutes, turning occasionally for even cooking.
  8. When you can easily poke a fork into the pouches, you'll know the potatoes are thoroughly cooked.
  9. Pull potato pouches off the grill and serve with cheese and sour cream!
3.5.3229


Need more recipes for the grill? Here’s a great list!

Heavenly Homemaker's Club Members: Access your homepage and all your fantastic resources here! Not a member yet? Please join us!
« Previous Page
Next Page »

Join Our Community!

 Facebook Twitter RSS E-mail Instagram Pinterest

Popular Posts

~ Will All of the Real Moms Please Stand Up?
~ Easy! Stir-and-Pour Whole Wheat Bread
~ How to Make Gatorade
~ 31 Real Food Breakfast Ideas
~ Dear Teenage Girls...
~ When Mom Takes a Step Back
~ The Inexpensive Health Insurance We Love!
~ Let's Talk Real Food Grocery Budgets

Check out our latest posts!

  • How to Make Uncrustables
  • The Easiest No-Bake Cheescake
  • Do I Still Buy Organic Food?
  • How I Shop and Budget for Our Large Family
  • Why I Make Little Birthday Cakes for my Big Family
Home  ~  Simple Meals  ~  Club Membership  ~  Shop  ~  Privacy Policy  ~  Disclosure  ~ Contact

Copyright © 2023 · Beautiful Pro Theme on Genesis Framework · WordPress · Log in