Heavenly Homemakers

Encouraging women in homemaking, healthy eating and parenting

  • Home
    • About
    • FAQs
  • Recipes
    • Bread and Breakfast
    • Condiments
    • Dairy
    • Main Dishes
    • Side Dishes and Snacks
    • Desserts
    • Gluten Free
    • Instant Pot
    • Crock Pot
    • Heavenly Homemaker’s Weekly Menus
  • Homemaking
    • Real Food Sources
  • Store
  • Contact
    • Advertise
    • Disclosure
    • Privacy Policy
  • Simple Meals
  • Club Members!

How to EASILY Make Broth in the Instant Pot

January 10, 2019 by Laura 4 Comments

This post may contain affiliate links which won’t change your price but will share some commission.

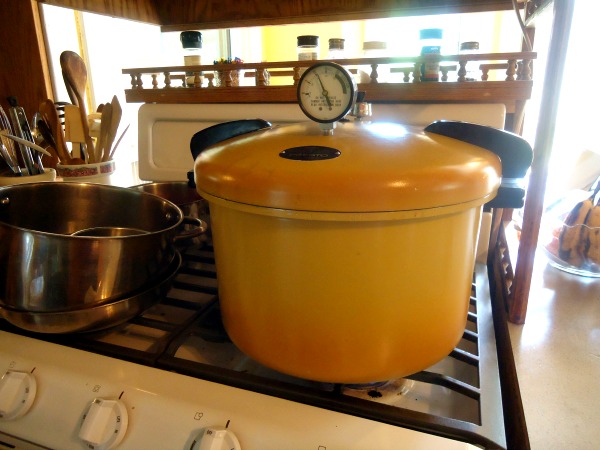
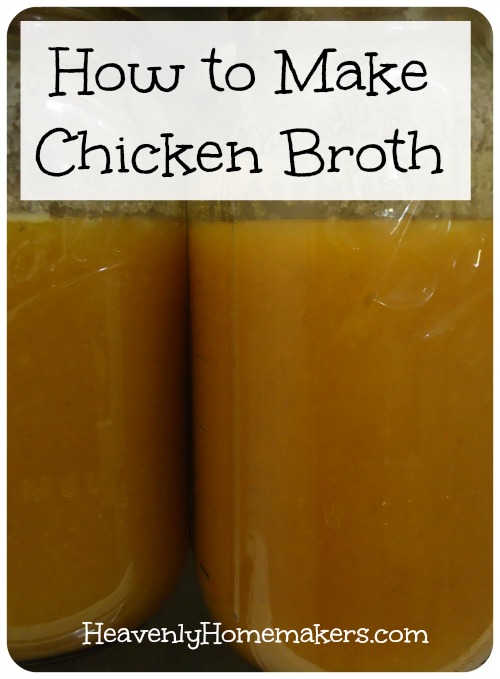
It’s hard to beat homemade broth when it comes to nutrition and flavor. Now that I’ve learned to make broth in the Instant Pot, I’m never going back!

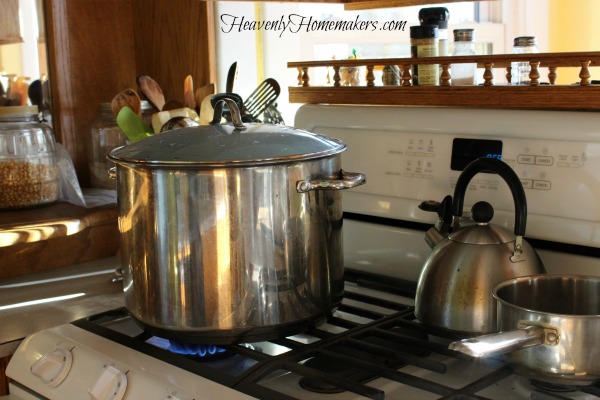
Don’t have an Instant Pot? Here are my stove-top, stock pot instructions for how I make Chicken Broth and Beef Broth. I’ve been making broth that way for years and would continue to do so had I not invested in my beloved Instant Pot.

I had a difficult time believing that making broth in such a short time in the Instant Pot (just a little more than an hour) could turn out the same wonderful product as making broth in my stock pot (for 4-6 hours). But it’s true. Broth made in the Instant Pot is just as fabulous as broth made slowly in a stock pot on the stove!

Have I convinced you yet to get an Instant Pot? Oh how I love mine!

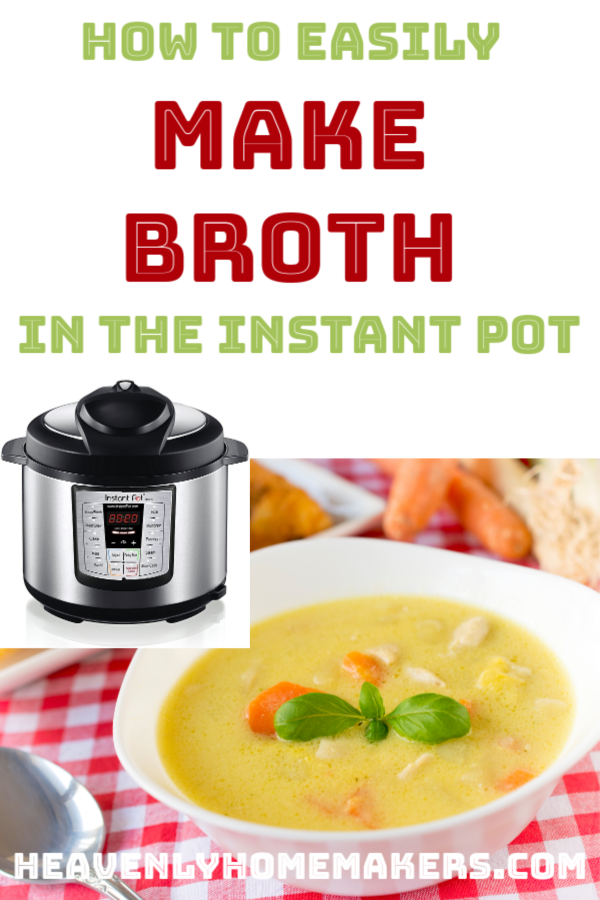
How to Easily Make Broth in the Instant Pot

How to EASILY Make Broth in the Instant Pot
 
Save Print
Author: Laura
Serves: Roughly 1 gallon
Ingredients
  • Beef soup bones or chicken bones
  • Variety of carrots, celery, onions, and leeks per your family's preference. (I usually use 3-4 pounds of veggies per batch of broth.
  • Sea salt
  • Water
Instructions
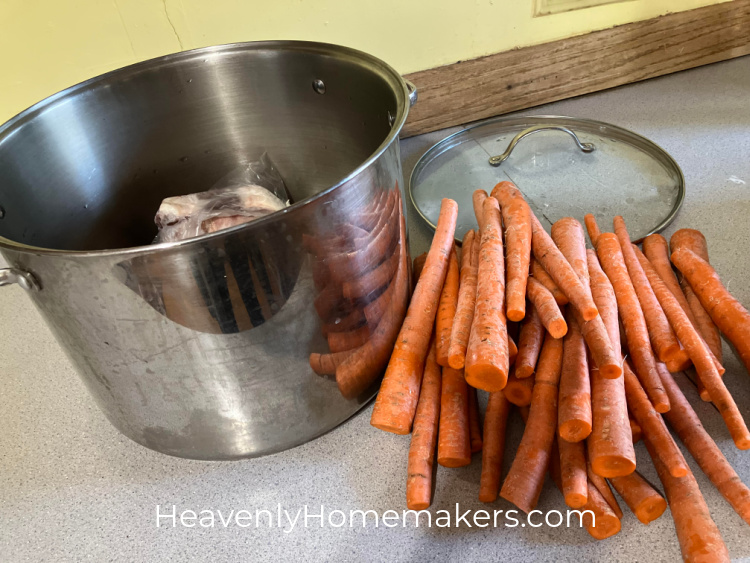
  1. Put chicken or beef bones into your Instant Pot.
  2. Add as many vegetables as you can - carrots, celery, onions, leeks.
  3. Sprinkle sea salt liberally.
  4. Fill pot to the Max-Fill line with water.
  5. Seal Instant Pot, and cook on High Pressure for 55 minutes.
  6. Allow pressure to release naturally for at least 30 minutes.
  7. Release pressure, and strain vegetables and bones out of liquid.
  8. Blend vegetables in a blender until smooth.
  9. Add blended veggies into the liquid broth. This adds more flavor and nourishment!
  10. Re-use bones to make another batch of broth if you like! The second batch of broth isn't as rich, but I like getting a two-for-one!
3.5.3229

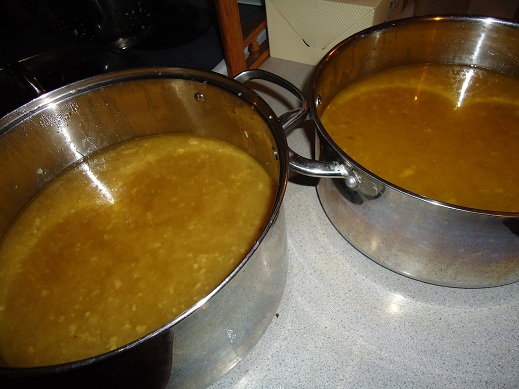
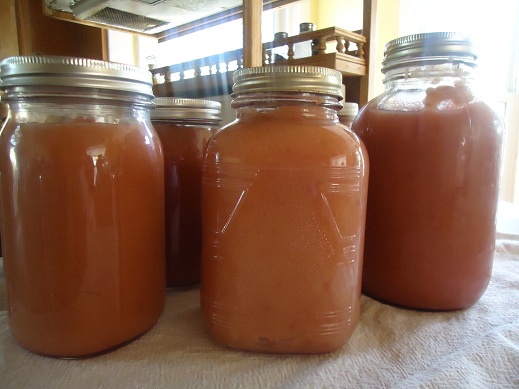
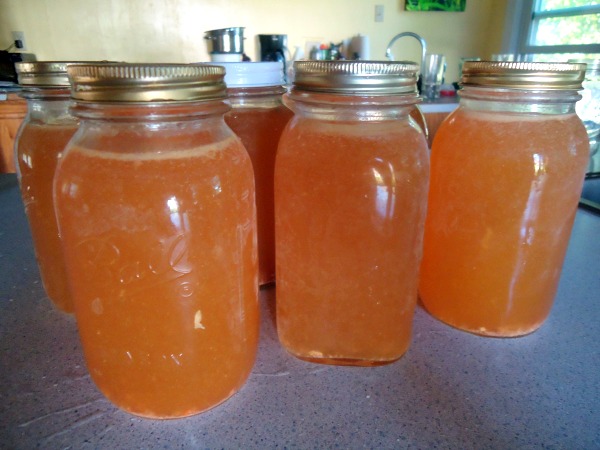
When people eat soup I’ve made with this broth, they always ask for my secret. I believe it is the veggies cooked into the broth then blended and added back in. Once I blend the veggies and stir them into the broth, I have a rich, thick, orange broth – much different than store-bought. And so, so much better!

Coming up in my next post, I will remind you of my family’s favorite soup recipes to use with this great broth!

Heavenly Homemaker's Club Members: Access your homepage and all your fantastic resources here! Not a member yet? Please join us!

Use Chicken or Beef Broth Instead of Water

January 8, 2019 by Laura 6 Comments

This post may contain affiliate links which won’t change your price but will share some commission.

Today let’s talk about using Chicken or Beef Broth instead of water when cooking!

Around these parts, I am a little bit famous for making all the people drink water.

  • Not feeling well? Go drink water.
  • Feeling run down? Go drink water.
  • Cramping up? Go drink water.
  • Can’t lose weight? Go drink water.
  • Don’t feel like doing an Algebra lesson? Go drink water. (And then go do your Algebra.)
  • Feeling bored or unmotivated? Go drink water.
  • Haven’t had any water yet today? For the love, go drink water.

Little sips, here and there, all day long. Go drink the water.

I preach this to my family, to all the college students in and out of my house, to all the dear ones I’m reaching out to in our community, to everyone who has a complaint. It’s a simple start to anything that needs fixing.

I say it so often that people tease me about it when something happens – like when my shoe comes untied at a soccer game. “Well, Laura. It looks like you need to drink some water.” Touche.

Drinking water is necessary and vital and crucial (my thesaurus and I could go on and on). Our health depends on it.

But do you know what is even better than water? Bone Broth. Indeed.

Bone broth is made with water, but also with vegetables and sea salt. Vitamins and minerals AND water? Yes. And also gelatin from the bones, which is awesome for our skin, teeth, bones, digestive system, and more.

Use Broth Instead of Water

I say all of this to encourage us – if possible – to use broth instead of water while we are cooking meals for our families.

  • Cook rice in broth instead of water.
  • Cook pasta in broth instead of water.
  • Cook potatoes in broth instead of water.
  • Steam vegetables in broth instead of water.
  • Drink broth instead of water. (And then go do your Algebra.)

Not only will we enjoy many more nutrients when using broth instead of water, but we will also be enjoying an incredible boost in flavor. Rice cooked in broth is incredible! Veggies steamed in broth are many notches above.

Make the broth. Or buy the broth. (I do both. I buy broth to have on hand in a pinch so I can use it often. I make broth as much as possible so I can be ensured of maximum nutrition and flavor!)

How to Make Super Nutritious Bone Broth

  • How I make Chicken Broth
  • How I make Beef Broth
  • Where to buy a case of broth to have on hand. (Truly, there is nothing better than homemade broth. But I do order these cases from Amazon. I also like to pick some up when I have a chance to shop at Aldi.)

Confession: Lately I’ve been making pot after pot of Beef Broth instead of Chicken Broth. Why? Because it’s much faster BECAUSE THERE ARE NO CHICKENS TO BONE!!! Taking meat off chickens is not my favorite job. You already know this about me. So instead, I almost always make broth with Beef Soup Bones. Then the meat falls off the bones and my job is done. Amen, hallelujah.

My latest broth-making-thrill is that I’ve started making it in my Instant Pot. Boy does that save time! How to Make Broth in the Instant Pot…post coming next!

Some of these links are my affiliate links.

Heavenly Homemaker's Club Members: Access your homepage and all your fantastic resources here! Not a member yet? Please join us!

Simple Noodle Soup on a Simple Budget

January 23, 2018 by Laura Leave a Comment

This post may contain affiliate links which won’t change your price but will share some commission.

Did you save your bones from the Simple Lemon Garlic Chicken Legs so you could use them to make broth? You’ll need that great broth in this Simple Noodle Soup recipe!

noodle soup12

See how orange my broth is? That’s because I always cook a lot of carrots and other veggies with my chicken or beef bones when I make broth. Then I blend up the mushy, cooked veggies and stir them back into the broth. I’m telling you, this tip makes our broth super delicious and obviously very packed with nutrients!!

Here are the links which share how I make broth:

  • Chicken Broth
  • Beef Broth

I store my broth in 1/2 gallon jars in my fridge to pull out and use as needed. Usually when I make soup, I add more veggies so we’re getting veggies upon veggies and our soups are very nourishing!

This particular Simple Noodle Soup recipe I’m sharing today can really be made according to your family’s preferences. I simply cook sliced carrots and whole wheat noodles in the broth, salt it liberally, and call it a meal. If I serve it with salad then we’re getting even more nutrients and if I throw some fruit on the table we’re golden.

The best part is that this soup is comforting, warm, tasty, and quick to put on the table. It costs very little to make, especially if you’ve kept chicken bones from past meals like these Simple Lemon Garlic Chicken Legs.

noodle soup13

Simple Noodle Soup

Simple Noodle Soup on a Simple Budget
 
Save Print
Author: Laura
Serves: 4-6
Ingredients
  • 4 cups of your favorite broth
  • 2-3 carrots
  • 1½ cups of your favorite whole grain pasta, any shape or variety
  • Salt and pepper to taste
  • Additional veggies your family likes in soup
Instructions
  1. Pour broth into a large cooking pot.
  2. Slice carrots (and other veggies if you like) and add to the pot.
  3. Bring broth and carrots to a boil.
  4. Add pasta, salt, and pepper.
  5. Cook until pasta is tender, about 8 minutes.
3.4.3177

Simple Noodle Soup on a Simple Budget

There’s no meat in this soup, but if you’ve got some leftover chicken hanging around, feel free to stir it in for extra nourishment and protein!

Catch the running list of Simple Meals on a Simple Budget here.

Simple Recipes on a Simple Budget

Want even more Simple Recipes?

  • Simple Baked Salmon and Asparagus
  • Simple Crock Pot Chicken Soup with a Kick
  • Simple Skillet Taco Pasta
  • Last-Minute Lentil Chili
  • Simple Sweet and Sour Baked Chicken Legs
  • 20-Minute Taco Soup
  • Simple Cheesy Baked Chicken
  • Simple Creamy Chicken Stew in the Crock Pot
  • Simple Italian Beef and Broccoli Skillet
  • Simple Bacon Ranch Chicken
  • Simple Hawaiian Crock Pot Chicken
  • Simple Taco Rice Dinner
  • Simple Last Minute Nacho Plate
  • Simple Chicken Cheeseballs with a Kick
  • Simple Beanie Weanies
  • Simple Crock Pot BBQ Spareribs
  • Simple Pizza Chicken Bake
  • Simple Italian Chicken and Green Bean Bake
  • Last Minute Creamy Bacon Spaghetti
  • Simple Hamburger Soup
  • Simple Parmesan Broiled Fish
  • Simple Overnight Saucy Crock Pot Chicken
  • Simple 15-Minute Meal
  • Simple Overnight Melt-in-Your-Mouth Beef Roast
  • Simple 3-Cheese Crock Pot Pasta
  • Simple Oven Fried Chicken
  • Simple Honey Mustard Chicken Legs
  • The Easiest Mashed Potatoes in the World
  • Simple Garlic Butter Shrimp
  • Simple Crunchy Ranch Chicken Strips
  • Simple Crock Pot Shredded Ranch Chicken (for salad or tacos)
  • Simple Crock Pot Pizza Casserole
  • Simple Barbecue Beef Roast
  • Simple Spanish Rice Bowls
  • Simple Roasted Rotiserie Chicken
  • Simple Green Chile Chicken
  • Simple Tex-Mex Creamy Chicken
  • Simple Waffle Omelets
  • Simple Crock Pot Taco Pasta
  • Simple Grilled Chicken
  • Simple Hawaiian Beef Roast
  • Simple Crock Pot Creamy Stew Meat
  • Simple Cheese Stuffed Burgers
  • Simple Hashbrown Casserole (For Instant Pot, Crock Pot or Oven!)
  • Simple Lasagna Casserole (For Instant Pot or Crock Pot)
  • Simple Chili Mac
  • Simple Bacon Cheeseburger Casserole
  • From Burrito Bar to Casserole (a 5-Minute Meal!)
  • Simple Bacon Cheeseburger Roll
  • Simple Garlic Parmesan Chicken Legs
  • Super Simple Lasagna
  • The Simplest White Chicken Chili
  • Simple Lentil Nachos
  • Simple Tuna Patties
  • Simple Banana Pancakes
  • Simple Crock Pot Applesauce BBQ Chicken
  • Simple Hashbrown and Egg Nests
  • Simple Cornbread Waffles with Chili
  • Simple Veggie Fritters
  • Simple Lemon Garlic Chicken Legs

Enjoy all these recipes without effort when you become a Simple Meals member! Every week we’ll send you a great menu plan full of Simple Recipes like this one. We’ll equip you with a grocery list. We’ll break everything down so that your meal prep is as simple as possible. We’ll give you bonus tips and recipes and freebies. And this is all for just $1 each week. You’ll love it!

[wp_eStore_subscribe_fancy id=19]

Heavenly Homemaker's Club Members: Access your homepage and all your fantastic resources here! Not a member yet? Please join us!

The Time Laura Canned Chicken Broth in a Pressure Cooker and Didn’t Blow Up Her Kitchen

September 22, 2016 by Laura 24 Comments

This post may contain affiliate links which won’t change your price but will share some commission.

I’ve been putting this off for my entire 22 years of married life.

See, I’ve been canning acidic foods like applesauce and tomato sauce from the time my kids were little because all you have to do is run those jars through a water bath to seal them. Easy. Not scary. Anyone can do it.

applesauce_2

For such a long time, I’ve so badly wanted to branch out and can less acidic food items (like veggies and meat) that have to be processed in a pressure canner.

But alas. I was afraid of blowing myself up.

#truestory
#noshame

Not only have I aspired to learn how to pressure can, I’ve actually had my mom’s pressure canner in my basement for 12 years. Every year I would be determined to learn to use it. Every year I would chicken out. It has provided a wonderful home for several spider families down in our basement, so at least it hasn’t been entirely useless.

I’ve had an excuse (beside the extreme fear thing) for letting it sit idle. The manual that originally came with the canner was long ago misplaced. Also, my mom has been gone for quite some time so I couldn’t ask her to teach me how to use it. I think we all know that we should never use a pressure canner without first knowing how to use it safely.

#feartheexplosion
#saynotobotulism

Don’t even tell me that I could have found a manual online or perhaps could have asked one of many dozens of women or men who could have taught me how to use one. I know this. Apparently I wasn’t ready to face my fears or wash the spider webs out of my canner.

Until now.

This year, I finally washed my pressure canner (goodbye spiders) and guess what? I learned to use it! I think my mama would be proud.

canning1

Have you ever seen a 43-year old act giddy like a little girl? That was me three weeks ago when I pulled my first jar of chicken broth out of my pressure canner. I did it! I DID IT!!!! The jars sealed. The broth is beautiful. More importantly, nothing blew up.

canning2

It truly wasn’t even hard.

Not only am I thankful to have finally conquered my fear of the pressure canner, I’m so excited to now have the ability to make more healthy convenience foods to keep in my pantry! Chick broth, Chili, Veggie Soup, the list goes on and on. This is going to be so amazing! (Once I get over my “don’t open those, they are just for looks” issue. I can’t help it. It’s fun to have and stare at full jars of home-canned food in the pantry.)

How I finally learned to use my pressure canner

After being afraid to even try using my pressure canner, I found what ended up being a wonderful teacher and confidence builder for me. I took the Home Canning With Confidence Mini-eCourse (which was full of videos so I could actually see how it all worked) and now here I am, canning like it’s 1970.

The course taught me about all the parts of my canner, showed me how to put it together and use it safely, gave me some great recipes, and by the time I had watched the videos and read through the downloads, I was so inspired and eager to get started that the spiders living in my canner didn’t have a chance.

home-canning-with-confidence_2x

Then I watched all the videos and read the downloads again, just to be safe. Shoot. I knew I was ready to do it but canning with a pressure canner still seemed like such a big deal.

Finally, I went for it!! (I may have also called my friend Tana for some moral support. She’s been pressure canning for years. She affirmed all I was doing and told me I was on the right track. Yay!)

Lookie!! I canned chicken broth in a pressure canner!

canning2

Once I canned my first batch of chicken broth and had busted my way through the learning curve, the pressure canning monster in me was unleashed.

I’ve since canned 14 jars of Chili and 14 jars of Vegetable Soup!!!! (All the exclamation marks show how a 43-year old types like when she feels like a giddy little girl.)

canned-soups

This is, in some ways, even better than freezer cooking because:

  • Jars go in the pantry, saving freezer space!
  • I don’t have to thaw anything. We have ready-made soups and broth in the pantry ready to go!

Afraid of the Pressure Canner?

Don’t be. I mean, I get it. You know I get it. But all it takes is having someone to teach us how to do it and then boom! A whole new world is opened up to us in the kitchen! Pressure canning is actually not even hard. I thought it would be. But nope. It’s easy.

If you have any interest in canning at all, take this Home Canning With Confidence eCourse. Do you know how much time and money we’ll all save ourselves? It’s even worth buying a pressure canner if you don’t have one. I was ready to click the purchase button on a new one if my mom’s decided it was too old. That’s how motivating the eCourse was to me.

I’d love to hear if you are a fan of pressure canning and how you like to use it!

Heavenly Homemaker's Club Members: Access your homepage and all your fantastic resources here! Not a member yet? Please join us!

Homemade Chicken Broth

September 9, 2010 by Laura 148 Comments

This post may contain affiliate links which won’t change your price but will share some commission.

Making homemade chicken broth is one of my favorite ways to save money and pack in the nourishment too.

How to Make Chicken Broth

Yum

Last weekend I had a big party with some chickens in my kitchen. Three extra large chickens to be exact, purchased from a farm nearby that allows their chickens to do the chicken dance all over their yard while feasting on bugs all day long.

I decided that since I was going to cook one chicken, I might as well cook three. One mess, one day…all done. You can, of course, make this broth using only one chicken…but the pictures below are going to be of the big chicken party.

First, thaw your chicken. Or not. I got my chickens out of the freezer and put them in the fridge overnight, but they were still pretty frozen the next morning when I was ready to start my broth. No matter. Frozen chickens thaw quickly in boiling water (imagine that).

chicken_broth_1

Check it out, it’s a tower of chickens.

How to Make Chicken Broth

Put your chicken into a large pot. I used my huge stock pot since I was going to be boiling three large birds. Fill the pot three-quarters full of water.

chicken_broth_2

Add veggies to the pot…as many as you want and any variety you want. My favorites are:  carrots, onions, leaks and celery. I pretty much throw in whichever veggies I have at the time. There is no rhyme or reason to my chicken broth making madness…you really can’t hurt your broth by putting in too many veggies. You can overflow your pot, but I’ll just assume you’ll use common sense on that one.

Shake a nice amount of sea salt into the pot.

chicken_broth_3

Bring your pot of chicken, veggies, water and salt to a boil. Turn the burner down and simmer (with the lid on) for several hours. By several, I mean check it every so often in between clipping your child’s fingernails, matching up a basket of socks, and chasing your naked toddler down the street to bring him back into the house for his bath. When the chicken starts to spread apart and the meat is falling off the bone…ding! He’s done.

chicken_broth_4

Carefully lift the chicken(s) out of the pot and onto another dish. Allow it to cool for a little while (but not too long because de-boning a cold chicken is a lot harder than de-boning a warm one). Take all the meat off the bone once the chicken is cool enough for you to touch it without screaming.

chicken_broth_5

This is the part I usually like to hand over to Matt. I’m not a big fan of de-boning a chicken, even though it isn’t hard. Matt doesn’t mind doing it because he usually sneaks bites of cooked chicken while he works. And I let him because he’s de-boning the chicken so I don’t have to.

chicken_broth_7

Use your chicken bones to make broth

Throw all the bones and skin back into the pot of broth, and fill the pot with water, onions, and carrots. Now you can make a second round of broth – getting the most out of your chicken and bones!

chicken_broth_6

chicken_broth_8

Cover the pot and simmer for 4-10 hours to really “suck the good stuff out of the bones and into the broth.”

chicken_broth_9

In the meantime, you can put all your cooked chicken into containers for future meals. I happened to get TEN meals worth of meat from my three extra large chickens because I like to make my chickens stretch as much as I can. These jars went into the freezer (after they cooled completely). Yes, I put lids on them first.

chicken_broth_10

After the bones and skin have cooked for a couple of hours, strain the carcass out of the broth with a colander. Lookie, a big colander of chicken carcass. I don’t really like the word carcass. And yet, I keep saying carcass. Someone stop me. (What is the plural form of carcass? Carcasses? Carci? Seriously, someone stop me.)

chicken_broth_12

Mmm, look at that good, rich broth. I always run it through my blender (if I feel like it that day) to smooth out all the veggies. They’re usually pretty mushy by then anyway, and blending them into the broth adds even more nourishment and good flavor.

chicken_broth_13

Now, I actually have a hard time letting go of my chicken bones and skin (otherwise known as the carcass), so if I have an ounce of energy left at the end of my full day of chicken cooking and de-boning and broth making, I will then put the contents of my colander into my crock pot, fill it with water and leave it on low all night to make yet another round of broth. It isn’t as rich, but it still makes a good broth.

Chicken broth freezes very well, you’ll just want to make sure it has completely cooled before you put it into the freezer. I freeze mine in jars and in freezer bags. If you freeze it in jars, be sure to leave several inches open at the top to allow for the broth to expand. Otherwise your jar will bust and it will be sad.

chicken_broth_14

And there you have it. If this isn’t a great way to stretch chickens, I don’t know what is. From three big chickens I got four or more meals of chicken broth and ten meals of cooked chicken. LOVE. IT.

Heavenly Homemaker's Club Members: Access your homepage and all your fantastic resources here! Not a member yet? Please join us!

Join Our Community!

 Facebook Twitter RSS E-mail Instagram Pinterest

Popular Posts

~ Will All of the Real Moms Please Stand Up?
~ Easy! Stir-and-Pour Whole Wheat Bread
~ How to Make Gatorade
~ 31 Real Food Breakfast Ideas
~ Dear Teenage Girls...
~ When Mom Takes a Step Back
~ The Inexpensive Health Insurance We Love!
~ Let's Talk Real Food Grocery Budgets

Check out our latest posts!

  • Easy Meatballs with Sweet Sauce (Freezer Friendly)
  • How to Make Uncrustables
  • The Easiest No-Bake Cheescake
  • Do I Still Buy Organic Food?
  • How I Shop and Budget for Our Large Family
Home  ~  Simple Meals  ~  Club Membership  ~  Shop  ~  Privacy Policy  ~  Disclosure  ~ Contact

Copyright © 2023 · Beautiful Pro Theme on Genesis Framework · WordPress · Log in