Heavenly Homemakers

Encouraging women in homemaking, healthy eating and parenting

  • Home
    • About
    • FAQs
  • Recipes
    • Bread and Breakfast
    • Condiments
    • Dairy
    • Main Dishes
    • Side Dishes and Snacks
    • Desserts
    • Gluten Free
    • Instant Pot
    • Crock Pot
    • Heavenly Homemaker’s Weekly Menus
  • Homemaking
    • Real Food Sources
  • Store
  • Contact
    • Advertise
    • Disclosure
    • Privacy Policy
  • Simple Meals
  • Club Members!

Easy Chocolate Cream Cheese Marble Cake (Low Sugar, Whole Grain)

October 25, 2018 by Laura 2 Comments

This post may contain affiliate links. For more information, please see our disclosure policy.

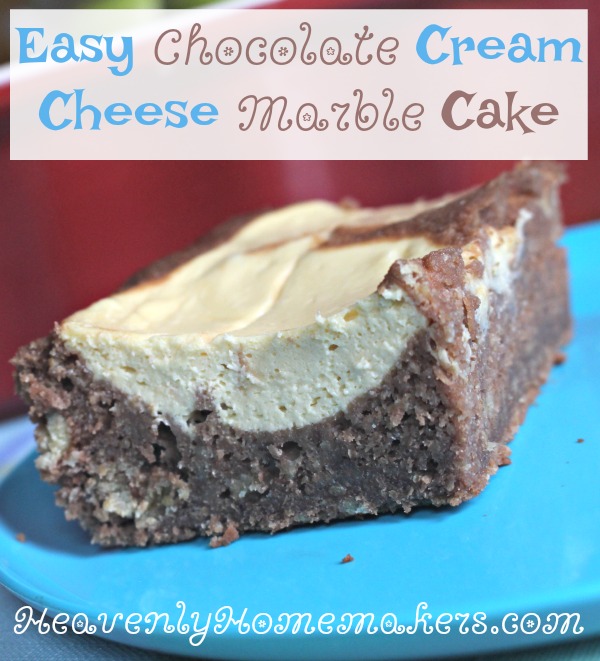
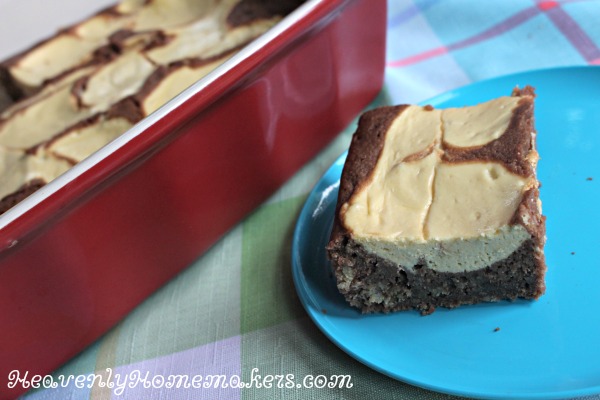
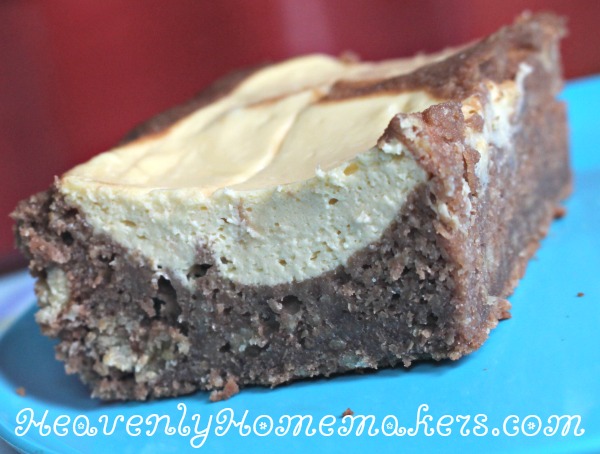
Not too sweet, but still sweet enough: That’s what my taste-tester husband had to say when he first dug into this Easy Chocolate Cream Cheese Marble Cake.

Oh, and did I mention that he dug into said cake before I’d had a chance to take a picture of it for you? The nerve! ;) Here I’ve been blogging for almost 11 years and everyone in the house knows to say, “Can I eat this or do you need a picture first?” Somehow, the cake looked too good. It was much too tempting. That and the poor dear was too tired and hungry to consider my picture-taking needs.

So there he was, spooning bites into his mouth while my jaw dropped to the floor and I mumbled something like, “oooohhh, I was going to take a picture of that…” Oops {sheepish grin through a mouthful of cake}.

Seeing as the world didn’t end – not even a little bit – I told him he might as well grab himself a second piece. Which he happily did. And then he gave the cake a glowing review, which I told him I would share with all of you….AFTER I threw him under the bus for ruining my picture. Ha.

So Matt’s praise of the Easy Chocolate Cream Cheese Marble Cake is this: “I love that it tastes so good, but that it isn’t super sweet! The cheesecake fits in perfectly with the chocolate cake and you should definitely make this again. Also Laura, you are so beautiful and practically perfect in every way.” (There’s a small chance I don’t remember his exact quote so I embellished as I saw fit. It is my blog after all, and Matt ate my cake before I had a chance to take a picture.)

Trust me when I say that this cake, in its whole form is super pretty with its cheesecake marbling through the chocolate. I agree with Matt that it is the perfect level of not-too-sweet-but-just-sweet-enough. And it’s cheesecake and chocolate together, so basically that is perfection in a pan.

Easy Chocolate Cream Cheese Marble Cake

Easy Chocolate Cream Cheese Marble Cake (Low Sugar, Whole Grain)
 
Save Print
Author: Laura
Serves: 12-18
Ingredients
  • 1 cup melted coconut oil
  • 1 cup water
  • 4 Tablespoons unsweetened cocoa powder
  • 2 cups whole wheat pastry flour
  • ½ cup sucanat or brown sugar
  • dash of sea salt
  • 1 teaspoon baking soda
  • ½ cup sour cream
  • 2 eggs
  • Cream Cheese Marble Filling:
  • 16-ounces softened cream cheese
  • 2 eggs
  • 3 Tablespoons real maple syrup
  • 1 teaspoon vanilla extract
Instructions
  1. In a large mixing bowl, stir together flour, sucanat, salt, and baking soda.
  2. Set aside. In a saucepan, bring oil, water, and cocoa to a boil.
  3. Pour liquid mixture into the bowl with the dry ingredient mixture.
  4. Stir well.
  5. Add sour cream and eggs, mixing well.
  6. Pour batter into a 9x13 inch baking pan.
  7. Blend Cream Cheese Filling ingredients in a blender or with a hand mixer until smooth.
  8. Drizzle mixture over the unbaked chocolate cake.
  9. Use a butter knife to swirl the filling throughout the cake batter.
  10. Bake in a 350° oven for 20-25 minutes or until a toothpick inserted in the middle comes out clean.
3.5.3229

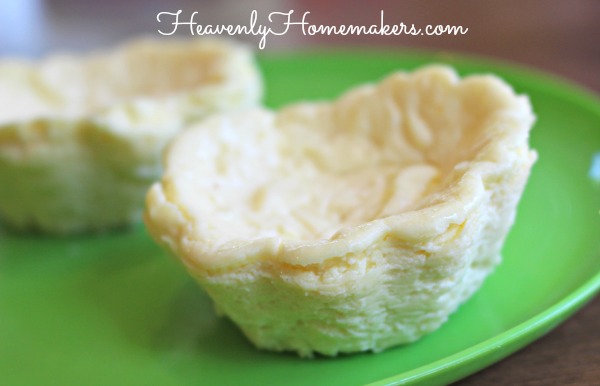
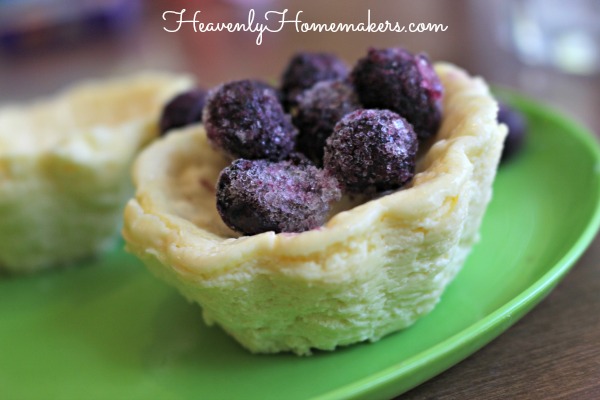
For the record, I took my Low Sugar Super Moist Chocolate Cake recipe and mixed it with my Mini Crustless Cheesecake recipe to make this Easy Chocolate Cream Cheese Marble Cake.

Give it a try! And maybe take a picture to send to me if you can possibly take one before someone in your family digs into it. :)

Heavenly Homemaker's Club Members: Access your homepage and all your fantastic resources here! Not a member yet? Please join us!

Sweet and Simple Buttery Almond Cookies (4 Ingredients!)

September 30, 2018 by Laura 4 Comments

This post may contain affiliate links. For more information, please see our disclosure policy.

Once upon a time I decided I wanted the delicious flavor of Almond Extract in a light and buttery cookie. So I mixed up these Sweet and Simple Buttery Cookies and I subbed Almond Extract for Vanilla Extract. Just like that, we had a batch of Buttery Almond Cookies. Recipe tweaks? They can be ridiculously easy. (Just like the recipe I’m about to show you!)

Recently one of my favorite 6th grade girls was at our house visiting. She LOVES cooking (almost as much as I do), so as she tasted each item of food from our table that day, she asked about the ingredients and how I had made it. Super cute!

Later, she told her mom, “Ms. Laura’s recipes are all so simple. Most of them only have 5 or fewer ingredients!” Her mom laughed with the proclamation, because you see, her mom is the one that designed this book for me:

Indeed. All of Ms. Laura’s recipes are simple, and many of them do only use five or fewer ingredients. High fives all around!

You’ll find our High Five Recipes eBook here, and you’ll love it because there are 111 recipes that come together in no time. Meanwhile, we’ve got a new cookie recipe to share, and it uses only 4 little ingredients!

If you’ve tried our Sweet and Simple Butter Cookies recipe, you’ll see that this is the exact same recipe with a key flavor ingredient switched. Sub vanilla extract for almond extract and suddenly the taste of this cookie changes significantly. I can’t decide which I like better, but it doesn’t matter because they are both buttery and light, low in sugar, and delicious! How fun that one little tweak creates a brand new cookie!

Buttery Almond Cookies

Sweet and Simple Buttery Almond Cookies
 
Save Print
Author: Laura
Serves: 15-18
Ingredients
  • 1½ cups melted butter
  • ⅓-1/2 cup sugar (raw, white, brown, or sucanat)
  • 1 tablespoons almond extract
  • 3 cups whole wheat flour (I use freshly ground soft white wheat)
Instructions
  1. Cream butter and sugar together in a bowl.
  2. Stir in almond extract.
  3. Mix in flour until well combined.
  4. Scoop Tablespoon-sized balls of dough onto cookie sheets.
  5. Press the dough down with your fingers or a fork.
  6. Bake in a 350 degree oven for 8-12 minutes or until cookies are golden brown.
3.5.3229


Enjoy these cookies with a cup of tea or coffee. Enjoy them with a friend. Enjoy them during quiet time with God.

Get 111 more High Five Recipes to simplify your real food kitchen!

[wp_eStore_fancy1 id=32]

Heavenly Homemaker's Club Members: Access your homepage and all your fantastic resources here! Not a member yet? Please join us!

Mini Crustless Lemon Cheesecakes (Low Sugar!)

September 25, 2018 by Laura 8 Comments

This post may contain affiliate links. For more information, please see our disclosure policy.

I’ve been wanting to try this Mini Crustless Lemon Cheesecakes recipe idea for months! (Apparently my to-do list is a little bit backed up?)

Why did it take so long to finally give these a try? Goodness, I don’t know. Life. People. Ministry. Unexpected foster care in our home. Graduation. Soccer season. Church camp. Moving not one but TWO sons into the college dorm in August.

We never quite know what God has for us each day, do we? It’s fun to look forward to learning what He has planned. So what if it takes six months to get around to trying a new recipe? Good things come to those who wait.

I met a new friend at my kids’ homeschool basketball tournament back in March. She said, “I make your Mini Crustless Cheesecakes all the time, but I always add lemon. You should try it! And top it with fruit!” Oh man, did that sound good.

Of course I couldn’t wait to try it and share the idea with you!! Except that I did wait. Six entire months.

So here we are, without further ado, and without any more delays (says the girl who actually started writing this post back in July…).

Mini Crustless Lemon Cheesecakes

Mini Crustless Lemon Cheesecakes (Low Sugar!)
 
Save Print
Author: Laura
Serves: 12
Ingredients
  • 16 ounces softened cream cheese
  • 3 Tablespoons lemon juice (or the juice of one lemon, plus zest if you like!)
  • 2 eggs
  • 2 Tablespoons maple syrup or sugar
  • 2 full droppers of liquid stevia
  • 1 teaspoon vanilla extract
Instructions
  1. Blend all ingredients together until smooth.
  2. Pour into 12 muffin cups.
  3. Bake in a 350 degree oven for 20 minutes.
  4. Turn off heat, open the oven door, and leave the cheesecakes in the oven for an additional 20 minutes. (Cheesecakes will puff up during baking but deflate while continuing to sit in the oven.)
  5. Transfer cheesecakes to the fridge and chill for at least two hours before serving.
3.5.3229

Add fresh or frozen fruit to your cheesecakes for an added burst of flavor.

P.S. I find it easiest to bake my Mini Cheesecakes in a silicone baking pan like this. Once they’ve cooled, they pop right out and the pan is super easy to wash out!

Heavenly Homemaker's Club Members: Access your homepage and all your fantastic resources here! Not a member yet? Please join us!

Easy No-Bake Chocolate Peanut Butter Oatmeal Bars (Low Sugar!)

August 28, 2018 by Laura 2 Comments

This post may contain affiliate links. For more information, please see our disclosure policy.

I originally created these Easy No-Bake Chocolate Peanut Butter Oatmeal Bars as a fun option for all of us to include in a lunch box. How was I to know they would also be great to eat for breakfast?

Some things simply can’t be helped. Before I knew what was happening, I had my morning coffee in one hand and a plate with one of these bars in the other. I was in my recliner before I realized, “How did I get here? Who gave this to me? What am I supposed to do with this thing? Eat it? For breakfast?”

There was nothing I could do.

I had made them the night before and slid them into the fridge. I spotted them when I reached in for the half-n-half to embellish my coffee to perfection. I saw the bars. Oats, peanut butter, uh…chocolate. Yes, it did sound a lot like breakfast.

When in need, a person can justify just about anything, am I right?

Well, you look at those and tell me you could resist choosing to eat one with your morning coffee. Especially when trying to make such an important decision BEFORE drinking the said coffee. No one can make good decisions before drinking the coffee.

Though I decided rather quickly that eating these with my morning coffee was actually a brilliant idea. So apparently I can make good decisions before coffee when there is chocolate involved.

I have now made the decision for you. Go ahead. Eat these for breakfast with your coffee. It’s a perfect way to start the day.

Easy No-Bake Chocolate Peanut Butter Oatmeal Bars

5.0 from 1 reviews
Easy No-Bake Chocolate Peanut Butter Oatmeal Bars (Low Sugar!)
 
Save Print
Author: Laura
Serves: 18
Ingredients
  • ½ cup butter (1 stick)
  • 2 Tablespoons brown sugar, sucanat, or honey
  • 3 cups whole rolled oats
  • 1 cup dark chocolate chips (semi sweet or milk chocolate is fine too, but will add to the sugar content)
  • ½ cup natural peanut butter
Instructions
  1. In a saucepan, melt butter and brown sugar together until smooth.
  2. Add rolled oats and stir over medium heat for about 30 seconds until oats are toasted in the butter/sugar mixture.
  3. Press half of the oat mixture into a 8x8 inch or 2-quart oblong baking dish.
  4. Set the remaining mixture aside.
  5. In another saucepan, stir the chocolate chips and peanut butter together over medium heat until melted and smooth.
  6. Spread chocolate mixture over the oat mixture in the pan.
  7. Sprinkle remaining oat mixture over the chocolate.
  8. Refrigerate for 2 or more hours.
  9. Cut into bars and serve.
3.5.3229

After you eat these for breakfast, consider also packing one for lunch. That is, after all, the original reason I created these. Details, details.

More great additions to your lunch box:

  • Quick Bread in a Jar
  • Veggies With Dip in a Jar
  • Flourless Brownie Muffin
  • Mini Crustless Quiche in a Jar
  • Chips with Guacamole
  • Burrito Bowl in a Jar
  • Tuna Salad with Crackers
  • Salad in a Jar
  • Popcorn Chicken with Ranch
  • Fruit Cheesecake Parfait

Pssst! Want more recipes like this one that include only five or fewer ingredients? This is for you!

[wp_eStore_fancy1 id=32]

Heavenly Homemaker's Club Members: Access your homepage and all your fantastic resources here! Not a member yet? Please join us!

36 Favorite Low Sugar Chocolate Recipes

June 19, 2018 by Laura 1 Comment

This post may contain affiliate links. For more information, please see our disclosure policy.

Summer is my favorite season. And chocolate is one of my favorite food groups. So to celebrate summer, I thought it would be fun to share some of my favorite low sugar chocolate recipes!

Don’t let the “low sugar” thing fool you. These recipes are all sweetened naturally and sweetened just enough to satisfy.

14 Recipes That Include Chocolate Chips

My favorite chocolate chips are soy free Enjoy Life Chocolate Chips. The following recipes are low in sugar, but then of course, the chocolate chips add a bit more sugar. Still, we can feel good about feeding these chocolate recipes to our families!

  • Simple Chocolate Chip Cookie Dough Treats
  • No Bake Chocolate Chip Cookie Bars
  • Dark Chocolate Peppermint Mousse
  • Simple Peanut Butter Chocolate Chip Cheesecake
  • Chocolate Peanut Clusters
  • Chocolate Chip Cheesecake Muffins
  • Chocolate Chip Breakfast Bars
  • Whole Wheat Oatmeal Chocolate Chip Muffins
  • Chewy Granola Bars
  • Chocolate Chocolate Chip Muffins
  • Coconut Flour Muffins
  • Baked Oatmeal Cups
  • Pumpkin Chocolate Chip Muffins
  • Dark Chocolate Almond Granola

22 Recipes that Include Unsweetened Cocoa Powder

This is my favorite Organic Unsweetened Cocoa Powder. Many of the following recipes do not include any sugar at all as they are sweetened with liquid stevia (a naturally sweet herb). If your family doesn’t like stevia, feel free to sub your sweetener/sugar of choice.

  • The Best Coconut Flour Chocolate Cupcakes
  • Creamy Chocolate Fruit Dip
  • No Bake Cookie Cups 
  • Chocolate Cheesecake Fudge
  • Real Food Chocolate Pie Crust
  • Homemade Hot Cocoa
  • Chocolate Caramel Coffee Creamer
  • Chocolate Whipped Cream for Coffee
  • Peppermint Cream Cocoa
  • Easy Chocolate Cheesecake Muffins
  • Healthy Chocolate Peanut Butter Cups
  • Whole Wheat Chocolate Zucchini Muffins
  • Low Sugar, No Churn Chocolate Ice Cream
  • Homemade Nesquik
  • Dairy Free Chocolate Sauce (3 Ingredients!)
  • Chocolate Frappe
  • Chocolate Cheesecake Parfaits
  • No Bake Chocolate Fudge Bites
  • Low Sugar Chocolate Cake
  • Chocolate Cheesecake Dessert
  • Super Moist Flourless Peanut Butter Brownies
  • Honey Sweetened No Bake Cookies

What are your favorite chocolate recipes?

Heavenly Homemaker's Club Members: Access your homepage and all your fantastic resources here! Not a member yet? Please join us!

Simple Chocolate Chip Cookie Dough Treats

April 17, 2018 by Laura 6 Comments

This post may contain affiliate links. For more information, please see our disclosure policy.

I’ll admit it. My family took one look at these Simple Chocolate Chip Cookie Dough Treats sitting in the fridge and asked, “Mom, what are those things that look like Poop Emojis?!”

What can I say? I whipped them up and plopped them down and this is what they turned out looking like. You don’t even want to make them now, do you?

I promise they taste delicious! I suppose if you took more time to make them pretty, you can avoid this conundrum at your house. But what’s the fun in that? Forever and always, these snacks will be called Poop Emojis at our house. I don’t even remember what the actual title of this recipe is. Chocolate Chip Cookie something or other?? Meh, the new name is much more fun.

I suppose I’ll find a little maturity here and tell you that these Poo Chocolate Chip Cookie Dough Treats are naturally grain/gluten free, full of protein, are low in sugar, are full of healthy fats, and are a very filling and delicious snack. There you go. See, I can be a grown up when I want to.

{Giggles and pokes an elbow into your ribs while showing you this picture}

I am so sorry. I can’t even. Apparently today, I’m a nine-year old boy. Um, so uh, just whip the ingredients, fold in the chocolate chips, and then freeze the mixture into these funny looking globs and with that, I must stop writing words and just give you the recipe.

Simple Chocolate Chip Cookie Dough Treats

Simple Chocolate Chip Cookie Dough Treats (Low Sugar, Grain Free, 5 Ingredients)
 
Save Print
Author: Laura
Serves: 12
Ingredients
  • 8 ounces softened cream cheese
  • 12 ounces almond butter (1½ cups)
  • ½ cup softened butter
  • 30 drops liquid stevia, 3 Tablespoons real maple syrup, or a combination of both
  • 2 Tablespoons mini chocolate chips
Instructions
  1. Combine cream cheese, almond butter, butter, and sweetener in a high power blender or in a bowl with a hand mixer, whipping until smooth.
  2. Fold in chocolate chips.
  3. Scoop mixture onto a parchment paper-lined or silicone lined cookie sheet.
  4. Freeze for 30 minutes.
  5. Transfer treats to an air tight container and store in the fridge.
3.5.3229

What do I have to say for myself?

If you can’t beat ’em, join ’em?

I’ll go read my Bible now.

~~~~~~~~~~~~~~~~~~~~~~~~~~~~~~~~~~~~~~~~~~~~~~~~~~

Want more awesome recipes that only include 5 or fewer ingredients? We’re pretty excited about this gem!

[wp_eStore_fancy1 id=32]

Heavenly Homemaker's Club Members: Access your homepage and all your fantastic resources here! Not a member yet? Please join us!

The Best Orange Glazed Poppyseed Quick Bread

April 10, 2018 by Laura 3 Comments

This post may contain affiliate links. For more information, please see our disclosure policy.

This Orange Glazed Poppyseed Quick Bread will shock you, especially when you see that it is made with whole wheat flour. How can something made with whole wheat be so moist? Ahh, let me tell you athe secrets.

First, I believe a huge factor in making this bread delicious while baking with whole grain is that I use freshly ground soft white wheat. There is a big difference in wheat flour ground from hard red berries (which makes heavy, dark whole wheat flour), wheat flour ground from hard white berries (which makes lighter whole wheat flour), and wheat flour ground from soft white berries (which becomes a light pastry flour – still whole wheat!).

Read more details about these varieties of wheat here. I use hard and soft white wheat berries, depending on what I’m baking. (Hard wheat must be used in recipes that call for yeast.) For recipes like this Orange Glazed Poppyseed Quick Bread, I use soft wheat berries. The pastry flour this makes is so light it seems like I’m using all-purpose white flour. But it’s whole grain – and full of nutrients!

Beyond the kind of flour used in this recipe, I believe the Orange Glaze is what gives this bread an extra measure of moistness! Mix a little orange juice with honey, add almond and vanilla extract, and this glaze is incredible!

And speaking of almond extract, I’m going to make this ingredient the MVP of this Poppyseed Bread recipe. Wow, does the almond extra take this bread from a one-star to a five! This, from a girl who loves vanilla extract. Sorry, vanilla. It’s almond that wins the prize this time. :)

Orange Glazed Poppyseed Quick Bread

The Best Orange Glazed Poppyseed Quick Bread
 
Save Print
Author: Laura
Serves: 2 loaves
Ingredients
  • 3 cups whole wheat pastry flour
  • ¾ cup sucanat, brown sugar, or raw sugar
  • 1 ½ teaspoons baking powder
  • 1 ½ teaspoons sea salt
  • 1 ½ cups milk
  • 1 ½ teaspoons vanilla extract
  • 1 ½ teaspoons almond extract
  • 3 eggs
  • 1 cup melted butter or coconut oil
  • 1 ½ Tablespoons poppy seeds
  • ORANGE GLAZE:
  • ¼ cup orange juice
  • ¼ cup honey
  • ½ teaspoon vanilla extract
  • 1 teaspoon almond extract
Instructions
  1. Mix flour, sucanat or sugar, baking powder, and salt.
  2. Add eggs, milk, extracts, oil, and poppy seeds.
  3. Mix well.
  4. Pour batter into 2 well-buttered loaf pans (or six small loaf pans).
  5. Bake 45-60 minutes at 350°.
  6. FOR GLAZE:
  7. Whisk ingredients together until smooth.
  8. Pour mixture over loaves of poppyseed bread about 3 minutes after they have been removed from the oven, but before removing the loaves from the baking pans.
3.5.3229

I guess it’s clear that while this is a Poppyseed Quick Bread recipe, poppy seeds aren’t the ingredient that gets my attention. Those are important too, but whole wheat pastry flour, orange glaze, and almond extract are the key to making this recipe absolutely amazing!!

  • Read more about grinding flour in a grain mill here.
  • Not able to grind your own flour right now? You can buy Whole Wheat Pastry Flour like this.
  • Want to make your own Vanilla Extract? Here’s how.
  • Need Almond Extract for this recipe? Here’s my favorite brand.
  • Not sure where to buy poppy seeds? I either buy them in bulk from Azure Standard, or I find them at Amazon.

By the way, I love doubling this recipe and freezing extra loaves to pull out and serve another time. This bread doesn’t get dry in the freezer and thaws to be a perfect convenience food!

Some of these links are my affiliate links.

Heavenly Homemaker's Club Members: Access your homepage and all your fantastic resources here! Not a member yet? Please join us!

Simple Snack Recipe: Honey Sweetened Flourless Peanut Butter Bars

February 22, 2018 by Laura 5 Comments

This post may contain affiliate links. For more information, please see our disclosure policy.

This Honey Sweetened Flourless Peanut Butter Bars recipe has been a family favorite for many years!

pb bars11

Though actually, I used to always make this recipe into cookies. And I used to use regular sugar. And I used to use 2 cups of that sugar! (Whoa.)

Now I use just 1/3 cup of honey and I simply mix up the three needed ingredients to make Honey Sweetened Peanut Butter Bars instead of cookies.

I love that even though I’ve drastically cut the sweetener, these cookie bars are sweet enough that my kids still enjoy them, but they aren’t so sweet that I can’t enjoy them too. But the best part, of course, is that they stir together super quickly and provide a wholesome snack for the family in just a few minutes!

The cookie version of this low sugar recipe is great too. You’ll find it here. I just like the ease of spreading the batter into a pan and baking. Shortcuts are our friend!

pb bars22

Honey Sweetened Flourless Peanut Butter Bars

5.0 from 1 reviews
Honey Sweetened Flourless Peanut Butter Bars
 
Save Print
Author: Laura
Serves: 18
Ingredients
  • 2 cups natural peanut butter
  • ⅓ cup honey
  • 1 egg
Instructions
  1. Mix the ingredients together until smooth.
  2. Spread mixture into an 9x13 inch baking dish
  3. Bake in a 350° oven for 15-20 minutes or until bars are lightly browned.
  4. Allow the pan to cool for 10 minutes before cutting into bars.
3.4.3177

I prefer making Homemade Peanut Butter, simply because it tastes amazing and I can be confident about the ingredients! Here are my two favorite Peanut Butter recipes/methods:

  • Peanut Butter (just peanuts!)
  • Peanut Butter (super creamy and spreadable – like Skippy or Jif – only healthy!)

Honey Sweetened Flourless Peanut Butter Bars

Looking for more Simple Snack Recipes?

We’re sharing new recipes all month! So far here’s what we’ve come up with:

  • No Bake Cookie Cups (5 minute prep!)
  • Cream Cheese Salsa Dip (2 ingredients!)
  • Pineapple Coconut Quick Bread (blends together fast!)
  • Parmesan Crisps (so easy you won’t believe it!)
  • Sweet and Salty Almonds or Pecans
  • Chocolate Cheesecake Fudge
  • Creamy Italian Veggie Dip
  • No Bake Chocolate Chip Cookie Bars
Heavenly Homemaker's Club Members: Access your homepage and all your fantastic resources here! Not a member yet? Please join us!

Simple Snack Recipe: Chocolate Cheesecake Fudge (Stevia or Honey Sweetened)

February 15, 2018 by Laura 5 Comments

This post may contain affiliate links. For more information, please see our disclosure policy.

Who says we can only eat fudge during a holiday season? This Chocolate Cheesecake Fudge is so low in sugar we can eat it in the middle of February, every other Thursday, and if you’re really feeling sassy, on a Monday afternoon after you’ve washed the breakfast dishes.

fudge1

Or not. I mean, you don’t have to actually wash the dishes before rewarding yourself with this fudge. I think it is enough work to have dirtied the dishes in the first place, am I right? Indeed. Fudge all around!

This Chocolate Cheesecake Fudge needs no special occasion. Though it will feel like a special occasion while you’re eating it because of the fact that it is fudge and it tastes amazing. I suppose the fact that it has the word “cheesecake” in the title also proves its greatness. You will be tempted to feel guilt over splurging on this treat since Christmas was two months ago and you’ve been doing such a good job of eating right since the first of the year. But no guilt is allowed or even warranted because this fudge isn’t full of sugar! Yep. It’s sweetened with a little honey and a little stevia. That’s it.

Of course this qualifies as a Simple Snack Recipe because you can blend all the ingredients together in just a couple of minutes. What a treat!

Chocolate Cheesecake Fudge

Simple Snack Recipe: Chocolate Cheesecake Fudge (Stevia or Honey Sweetened)
 
Save Print
Author: Laura
Serves: 18 pieces
Ingredients
  • ½ cup softened butter
  • 8-ounces softened cream cheese
  • 2 Tablespoons unsweetened cocoa powder
  • 2 Tablespoons honey
  • 30 drops liquid stevia (I like NuNaturals brand best)
Instructions
  1. Blend ingredients together in a high power blender.
  2. Spread mixture in an 8x8 inch dish.
  3. Chill in the fridge for at least one hour.
  4. Cut into pieces and serve.
  5. Store fudge in the refrigerator.
3.4.3177

Simple Low Sugar Chocolate Cheesecake Fudge

This recipe is easy to adapt. Add more or less honey, stevia, and cocoa powder per your preference. You can find NuNaturals Liquid Stevia here (my affiliate link).

Looking for more Simple Snack Recipes?

We’re sharing new recipes all month! So far here’s what we’ve come up with:

  • No Bake Cookie Cups (5 minute prep!)
  • Cream Cheese Salsa Dip (2 ingredients!)
  • Pineapple Coconut Quick Bread (blends together fast!)
  • Parmesan Crisps (so easy you won’t believe it!)
  • Sweet and Salty Almonds or Pecans

Can’t wait to share more!

Heavenly Homemaker's Club Members: Access your homepage and all your fantastic resources here! Not a member yet? Please join us!

Dark Chocolate Peppermint Mousse

December 19, 2017 by Laura 13 Comments

This post may contain affiliate links. For more information, please see our disclosure policy.

This Dark Chocolate Peppermint Mousse recipe was originally published here in 2014. I decided it deserved to be bumped back up to the top of my site so you can relive the deliciousness. It’s such an easy recipe that you can quickly make it during these last few days before Christmas!

chocolate mint mousse 3

This is one of the easiest treats you will ever make. You’ll especially appreciate the final step. Allow me to explain…

Many a recipe (including this one) will instruct us to:

    1. Mix ingredients.
    2. Pour mixture into serving dishes.
    3. Chill for at least two hours.

Is it just me, or does it seem that in order to follow the directions diligently we should mix our ingredients, pour the mixture into serving dishes, then promptly “put our feet up and do nothing for at least two hours?” It says to “chill” right? If we read this literally, I do believe we are being told to do absolutely nothing. Relax. Take a breather. Chill out already.  For two entire hours (or more – don’t forget the “or more”).

Is anyone else thinking about Amelia Bedelia right now?  (If you haven’t read those children’s books, you’re missing out.)

Now I’m not exactly sure what to think about recipe instructions that say, “chill until firm.” Rarely do I notice more defined muscle tone when I’m chillin’ in my chair for two hours or more. “Chill until it jiggles in the middle” – well now, unfortunately that makes quite a bit more sense.

I’ll be the first to admit that taking time to rest doesn’t come easy for me. I’d love to “chill” after mixing up a recipe – but who will take care of all those dirty dishes? Amelia Bedelia, perhaps?  If only.

While I’m sure we could have a lovely discussion about taking time to rest, washing dishes, or encouraging healthy muscle tone – I will now turn the conversation back to this new recipe I’d like to share, letting you know that in fact, once you mix it up, it needs to be poured into serving dishes and chilled.

Dark Chocolate Peppermint Mousse

Dark Chocolate Peppermint MousseYum

Dark Chocolate Peppermint Mousse
 
Save Print
Author: Laura
Serves: 6
Ingredients
  • 1½ cups heavy whipping cream, divided
  • 1 cup dark chocolate chips
  • ½ teaspoon peppermint extract
Instructions
  1. Measure ¾ cup cream into a sauce pan.
  2. Heat until hot, but not boiling.
  3. Remove from heat.
  4. Add chocolate chips, stirring until melted.
  5. Stir in peppermint extract and set mixture aside.
  6. Whip the remaining ¾ cup cream in a bowl until firm peaks form.
  7. Fold chocolate mixture gently into whipped cream.
  8. Spoon mousse into 6-8 bowls or cups.
  9. And finally, the instructions you've all been waiting for: Chill for at least two hours before serving.
3.4.3177

To be clear, this means that you need to put the mousse into the refrigerator for at least two hours until you are ready to serve it to your family or guests. Before the pan and bowl get crusty, wash your dishes and wipe down the counter-tops. Then hug your children, check the mail, return a phone call, switch out the laundry, get out meat for dinner, scrub the gunk off the floor, and re-hang the curtain that got pulled down.

After that, by all means, you should chill. :)

Heavenly Homemaker's Club Members: Access your homepage and all your fantastic resources here! Not a member yet? Please join us!
« Previous Page
Next Page »

Join Our Community!

 Facebook Twitter E-mail Instagram Pinterest

Popular Posts

~ Will All of the Real Moms Please Stand Up?
~ Easy! Stir-and-Pour Whole Wheat Bread
~ How to Make Gatorade
~ 31 Real Food Breakfast Ideas
~ Dear Teenage Girls...
~ When Mom Takes a Step Back
~ The Inexpensive Health Insurance We Love!
~ Let's Talk Real Food Grocery Budgets

Check out our latest posts!

  • Big Family Food and Fun: May 10-16, 2026
  • Big Family Food and Fun: May 3-9, 2026
  • Help Your Kids Become Independent in the Kitchen!
  • Big Family Food and Fun: April 26-May 2, 2026
  • Big Family Food and Fun: April 19-25, 2026
Home  ~  Simple Meals  ~  Club Membership  ~  Shop  ~  Privacy Policy  ~  Disclosure  ~ Contact

Copyright © 2026 · Beautiful Pro Theme on Genesis Framework · WordPress · Log in