Heavenly Homemakers

Encouraging women in homemaking, healthy eating and parenting

  • Home
    • About
    • FAQs
  • Recipes
    • Bread and Breakfast
    • Condiments
    • Dairy
    • Main Dishes
    • Side Dishes and Snacks
    • Desserts
    • Gluten Free
    • Instant Pot
    • Crock Pot
    • Heavenly Homemaker’s Weekly Menus
  • Homemaking
    • Real Food Sources
  • Store
  • Contact
    • Advertise
    • Disclosure
    • Privacy Policy
  • Simple Meals
  • Club Members!

The Easiest No-Bake Cheesecake

March 19, 2023 by Laura 5 Comments

This post may contain affiliate links. For more information, please see our disclosure policy.

Ready for the Easiest No-Bake Cheesecake recipe?

This cheesecake is always a hit when I serve it and since it’s so easy to make, I can serve it to guests often.

Ingredient Info

I buy cream cheese at Aldi by the case because it is a great price for great cream cheese (not all off-brand cream cheese is good). So there’s my cream cheese recommendation. :)

Meanwhile, I have learned the hard way that higher-quality whipping cream does not work as well in this recipe. :(  When I used Horizon Organic Whipping Cream, I couldn’t get this mixture to thicken and set up. But when I used regular whipping cream from Walmart, it worked like a charm. So there you go. For this recipe, use low-quality whipping cream. Ugh, who even am I anyway??

The Easiest No-Bake CheesecakeYum

The Easiest No-Bake Cheescake
 
Save Print
Author: Laura
Serves: 15
Ingredients
  • 2 sleeves honey graham crackers
  • 2 sticks butter
  • 2 8-ounce packages cream cheese, softened
  • 1 cup raw sugar
  • 1 cup heavy whipping cream
  • 1 teaspoon vanilla
Instructions
  1. In a gallon sized Ziploc bag, crush graham crackers with a rolling pin.
  2. Melt butter in a small saucepan.
  3. Pour crushed graham crackers and melted butter into a 9 x 13 inch pan.
  4. Stir ingredients together and pat it down to create crust. Set aside.
  5. In a high power blender or using a hand mixer, blend together cream cheese, sugar, whipping cream and vanilla until mixture is combined and thick.
  6. Smooth mixture over the crust. Chill for at least two hours before serving.
3.5.3251

This cheesecake is great as-is, but you can also add fresh berries to make it fancier. Or, you can top it with candy bars for a fun treat! (One week, I had a package of a variety of candy bars that I wanted to get rid of so I used them up for a college student lunch. It was a huge hit!)

If you study the above picture, you’ll see that on the left, I used the cheapo whipping cream that actually thickened. On the right, I used good whipping cream and the mixture remained runny. I served it to our guests anyway and it all tasted great. But now you can see what I was talking about regarding whipping cream above. :)


Heavenly Homemaker's Club Members: Access your homepage and all your fantastic resources here! Not a member yet? Please join us!

Breakfast Cookie Cups – Perfect for Grab-and-Go!

March 5, 2023 by Laura 5 Comments

This post may contain affiliate links. For more information, please see our disclosure policy.

I turned my breakfast cookie recipe into Breakfast Cookie Cups. This is genius. Plus below I’ve shared several other great grab-and-go breakfast ideas!

Not that Breakfast Cookies aren’t already convenient as a quick grab-and-go breakfast or snack option. But somehow having them in cupcake wrappers and baked in a muffin tin makes them even easier. Maybe they’re less crumbly? I dunno, but I really like them this way!

My kids are loving them, however, for our littlest, I skipped the chocolate chips to avoid extra messes. (How do they end up with chocolate chips melted onto their bottoms every time, I don’t know. So chocolate chip-less Breakfast Cookie Cups for all who are two and under at our house.)

Breakfast Cookie CupsYum

Breakfast Cookie Cups - Perfect for Grab-and-Go!
 
Save Print
Author: Laura
Serves: 18
Ingredients
  • 1 cup melted butter
  • ½ cup honey
  • 2 eggs
  • 1 teaspoon sea salt
  • 1 teaspoon ground cinnamon
  • 1 teaspoon baking soda
  • 1 teaspoon vanilla extract
  • 2 cups whole wheat flour
  • 2 cups rolled oats
  • ½ cup raisins or chocolate chips
Instructions
  1. Mix butter, honey, eggs, salt, cinnamon, baking soda, and vanilla.
  2. Stir in flour and oats.
  3. Fold in raisins or chocolate chips.
  4. Scoop heaping tablespoons of dough into paper-lined muffin tins.
  5. Bake at 350 degrees for 20 minutes.
3.5.3251

I double this recipe every time I make it simply because these freeze well and they are great to have in the freezer to serve as needed.

TIP: Add 1 cup of peanut butter to these if you want to add some protein. No other adjustments necessary.

Here are a few more great ideas for grab-and-go breakfasts:

  • Pancake and Sausage Muffins
  • Poptarts
  • Warm Chocolate Soother, Warm Pumpkin Custard, Warm Vanilla Soother in to-go mugs
  • Make-Ahead Breakfast Sandwiches
  • Flourless Brownie Muffins (hearty and great for breakfast!)
  • Crustless Cheesecake Cups
Heavenly Homemaker's Club Members: Access your homepage and all your fantastic resources here! Not a member yet? Please join us!

Easy Chili Cheese Dip

January 25, 2023 by Laura 3 Comments

This post may contain affiliate links. For more information, please see our disclosure policy.

Have leftover chili? Make Easy Chili Cheese Dip!

One of my favorite things to do in the kitchen is to clear out leftovers by making something new with them. This Easy Chili Cheese Dip is a perfect example of how to do this.

On the other hand, this dip is delicious enough that you might want to make chili just so you can have leftovers to make this dip. Or make the chili, skip eating the chili, and make lots of dip. OR, cheat as needed and simply buy a can of chili to use in this recipe!

Easy Chili Cheese DipYum

Easy Chili Cheese Dip
 
Save Print
Author: Laura
Ingredients
  • 2 cups leftover chili
  • 8-ounces softened cream cheese
  • 1 cup salsa
Instructions
  1. Blend all ingredients together until smooth.
  2. Serve hot or cold with tortilla chips.
3.5.3251

What’s great about this recipe is that it’s more than a snack. This can be your entire meal along with fruits and veggies on the side.

Serve it hot or cold, whichever you like!

This recipe works great for my family because I blend everything up which makes a smooth dip without chunks. If you prefer a chunky dip, just stir ingredients together instead of blending.

Need some chili recipes? Use one of these:

  • You can keep your costs for this dip to a minimum when you make this Lentil Chili.
  • This Hearty Chili is meatless, but feel free to cook hamburger or ground turkey to add more protein.

Here are more dip recipes to look through and enjoy!

  1. Easy White Queso
  2. Simple Bean and Cheese Salsa Dip
  3. Creamy Chocolate Fruit Dip
  4. Creamy Italian Veggie Dip
  5. Cream Cheese Salsa Dip
  6. Bacon Ranch Chip Dip
  7. French Onion Dip
  8. Bacon Tomato Dip
  9. Black Bean Salsa
  10. Easy Veggie Dip
  11. Healthier Cheese Dip 
  12. Hot Spinach and Artichoke Dip
  13. Nacho Cheese Pretzel Dip
  14. Easy Guacomole
  15. Easy Cheesy Bean Dip
  16. Hamburber Sauerkraut Dip
  17. Cream Cheese Fruit Dip
Heavenly Homemaker's Club Members: Access your homepage and all your fantastic resources here! Not a member yet? Please join us!

How to Make 5 Meals with 1 Pork Roast

January 22, 2023 by Laura 2 Comments

This post may contain affiliate links. For more information, please see our disclosure policy.

Here’s how to make 5 meals with 1 pork roast!

Yum

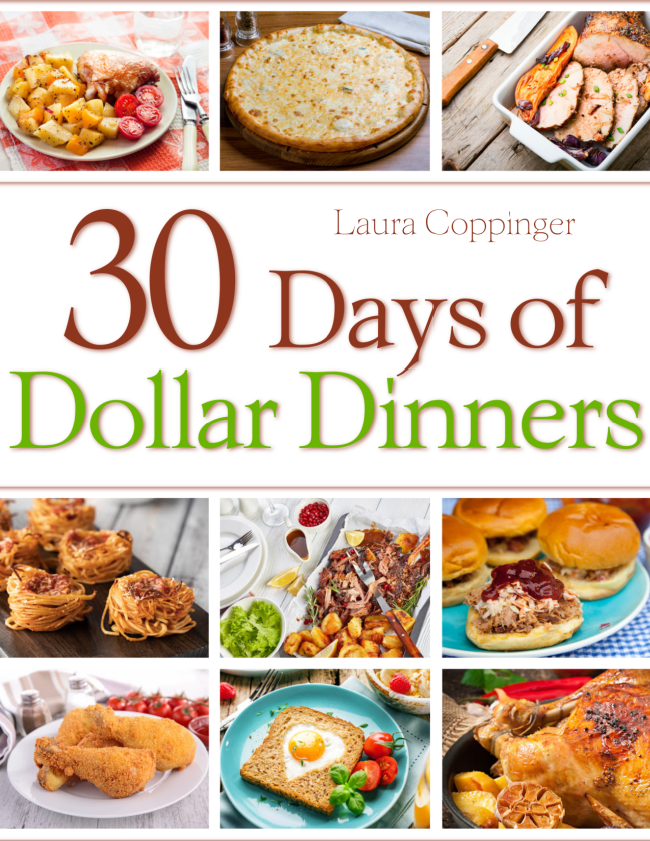
This might be one of my favorite Dollar Dinner menu items – x5! If you take a look at our 30 Days of Dollar Dinners calendar, you’ll see that these pork roast meals break down into these:

  1. Pork Roast and Potatoes $3.74
  2. Shredded Pork Tacos $4.08
  3. Pork Roast Melts $3.90
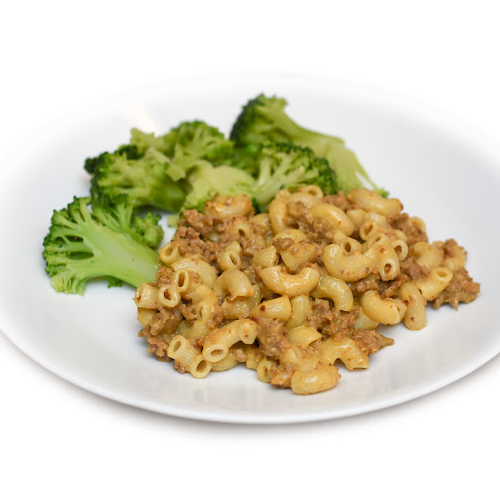
  4. Cheesy Mac and Pork $4.05
  5. Pork Sandwiches $3.90

The recipes for these five meals feed four people, which as you can see, divides down to just over $1.00 or just under $1.00 per person!

In my case, I had a 5-pound pork roast in the freezer that I’d picked up marked down to just $1.79/pound. So my $8.95 purchase was divided into four full meals.

Wait, just four meals, Laura?

Yes indeed, we have way more than 4 people in our house. 10 to be exact. And for a couple of our pork roast meals, we had guests. So I most definitely made our pork roast stretch, as it fed a LOT of people four different meals! But I just couldn’t stretch it into five. ;)

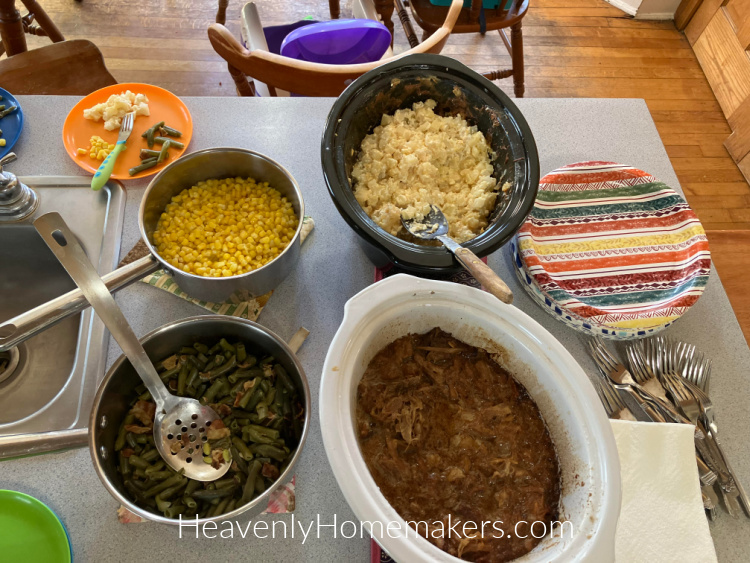
First, I made the roast (recipe below) with cheesy potatoes, green beans, corn, pumpkin bread, and cookies. For this particular meal, we fed 6 adults and 6 kids.

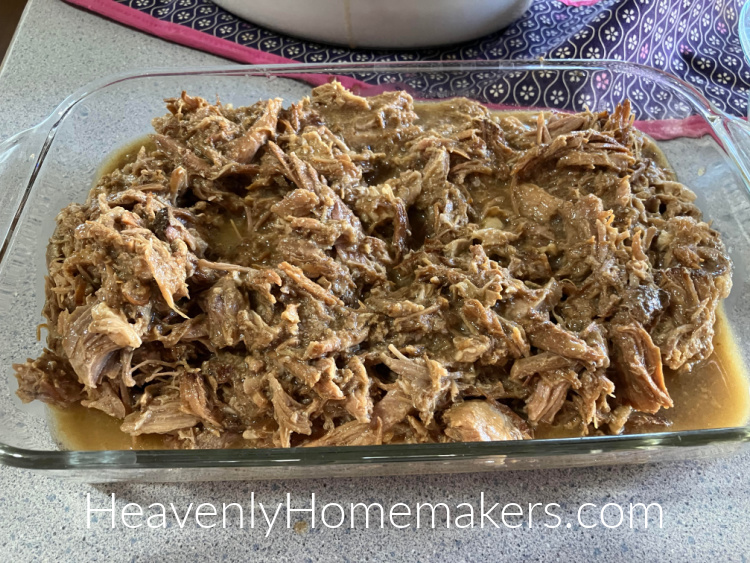
Everyone ate until they were full, then we still had this much meat left over.

With these leftovers, we made Pork Roast Melts, Enchiladas like this (with leftover shredded pork roast instead of ground beef), and Cheesy Mac and Pork. The night we had enchiladas, we had company again so there were five adults and six kids. Fruit and veggie side dishes really help the meat stretch throughout a meal, which is a huge money saver!

How to Make 5 Meals with 1 Pork Roast

Here’s how to make a Pork Roast:

How to Make 5 Meals with 1 Pork Roast
 
Save Print
Author: Laura
Ingredients
  • 5-pound pork roast
  • 1 chopped onion
  • Sea salt to taste
  • 2 teaspoons garlic powder
Instructions
  1. Put all ingredients into a slow cooker and cook on low for 10 hours or until met shreds easily.
  2. Shred cooked meat and divide it into five equal portions.
  3. Serve one portion over baked potatoes.
  4. Save the remaining portions for four additional meals: Pork Roast Melts, Shredded Pork Tacos, Pork Sandwiches, and Cheesy Mac and Pork.
3.5.3251


To make it stretch to last through five meals, you’ll eat one portion the night you cook it. Then you’ll save four portions to make other meals as detailed in our 30 Days of Dollar Dinners eCookbook. And hey, guess what?

The eCookbook is READY!!

We finished the cook a few weeks ahead of schedule, so we’re ready to offer it to you now!

This book contains all 30 days worth of recipes so you can make all of our delicious dollar meals! Here are the meals and recipes you’ll find in the book, as well as the dollar amount it takes to make each recipe for 4 people:

  1. Chili = $3.80
  2. Chili on Baked Potatoes $2.82
  3. Broth Rice with Veggies $3.77
  4. Grilled Cheese and Soup $4.59
  5. Pork Roast and Potatoes $3.74
  6. Shredded Pork Tacos $4.08
  7. Pork Roast Melts $3.90
  8. Cheesy Mac $3.09
  9. Cheesy Mac and Pork $4.05
  10. Pork Sandwiches $3.90
  11. Italian Honey’d Chicken Thighs $4.02
  12. Cottage Cheese and Pineapple Bowls with Toast $3.20
  13. Egg in a Nest $3.54
  14. Whole Chicken with Potato Wedges $3.99
  15. Parmesan Chicken and Rice $4.02
  16. Creamy Potato Soup $3.98
  17. Personal Cheese Pizzas $3.99
  18. Cheese Calzones $3.99
  19. Italian Chicken Legs $4.01
  20. Amazing Fried Chicken $4.32
  21. Crepes $3.44
  22. Biscuits and Gravy $3.32
  23. Lemon Garlic Chicken Thighs with Biscuits $4.19
  24. Seasoned Pork Loin with Roasted Broccoli $3.56
  25. Pork Loin Sandwiches $4.02
  26. Scrambled Egg Sandwiches $3.08
  27. Baked Spaghetti Nests $3.10
  28. Pancakes and Eggs $3.48
  29. Bean and Cheese Burritos $3.98
  30. Tex Mex Casserole $3.45

Amazing, right?!

Here’s how to get our 30 Days of Dollar Dinners eCookbook:

If you are a Heavenly Homemakers Club Member, simply log in and head to the eBook section. You’ll find it there so you can use and enjoy it right away!

Not a member? Please join us here so you can have access to all of our eBook, printables, eCurriculum, menu planning resources, and so much more!

Not interested in becoming a member of our club? Head to our shop here to buy the 30 Days of Dollar Dinners eCookbook independently.

Heavenly Homemaker's Club Members: Access your homepage and all your fantastic resources here! Not a member yet? Please join us!

Sweet and Salty Nut and Pretzel Snack Mix

November 27, 2022 by Laura Leave a Comment

This post may contain affiliate links. For more information, please see our disclosure policy.

This Sweet and Salty Nut and Pretzel Snack Mix is great to have on hand to serve guests during the holidays or even to package up and give as gifts!

You can use any of your favorite nuts in this recipe. Our favorites are almonds and cashews. The salty combo of nuts with pretzels with the light sugary coating is perfect!

Sweet and Salty Nut and Pretzel Snack MixYum

Simple Nut and Pretzel Snack Mix
 
Save Print
Author: Laura
Ingredients
  • ½ cup sucanat or brown sugar
  • 2 teaspoons ground cinnamon
  • ½ teaspoon sea salt
  • 1 egg white
  • 1 teaspoon vanilla extract
  • 2 teaspoons water
  • ½ pound any nuts you like
  • 8-ounces pretzels
Instructions
  1. Mix sucanat, cinnamon, and salt in a gallon-sized ziploc-type bag.
  2. Set aside.
  3. Whisk egg white, vanilla, and water in a large bowl until frothy.
  4. Toss in nuts and pretzels, coating them all with liquid.
  5. Pour the coated pecans into the bag with sucanat/cinnamon/salt mixture.
  6. Seal the bag and shake gently to coat the pecans as evenly as possible.
  7. Spread the coated pecans on a parchment paper or silicone mat lined cookie sheet.
  8. Bake in a 250° oven for 1 hour - stirring every 20 minutes.
3.5.3251

Our favorite source for organic nuts is Braga Farms. We visited their farm a few years ago. They are fantastic people. I buy from them when I can. :)
Heavenly Homemaker's Club Members: Access your homepage and all your fantastic resources here! Not a member yet? Please join us!

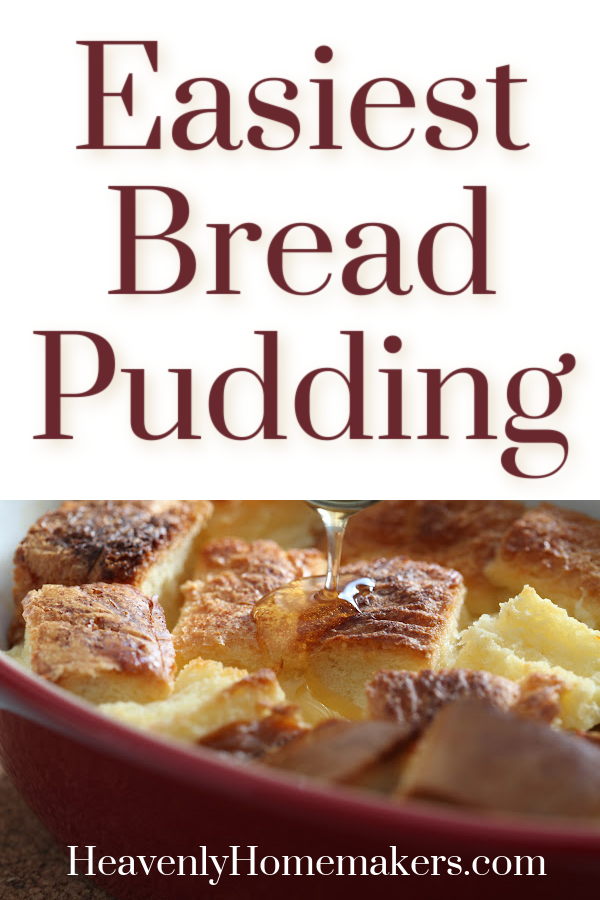
Easiest Bread Pudding

October 30, 2022 by Laura 2 Comments

This post may contain affiliate links. For more information, please see our disclosure policy.

Can I claim that this is the Easiest Bread Pudding recipe when, in fact, I’ve never made a different recipe in which to compare it??

Just like any recipe, I wouldn’t share it if it wasn’t easy to make. I’d actually never attempted Bread Pudding until recently when I:

  • Had a bag of leftover pancakes in my fridge and
  • Needed something special to feed a large group.

So I did a little research, then adapted and created this. It’s a huge hit!

Easiest Bread PuddingYum

Easiest Bread Pudding
 
Save Print
Author: Laura
Serves: 6-8
Ingredients
  • 6 slices stale bread or leftover pancakes
  • 3 Tablespoons of melted butter
  • 4 eggs
  • 2 cups milk
  • ½ cup brown sugar
  • 1 teaspoon vanilla extract
  • 1 teaspoon cinnamon
  • Topping:
  • 3 tablespoon butter
  • 1 tablespoon brown sugar
  • 1 teaspoon vanilla extract
Instructions
  1. Butter a 9x13 inch baking dish.
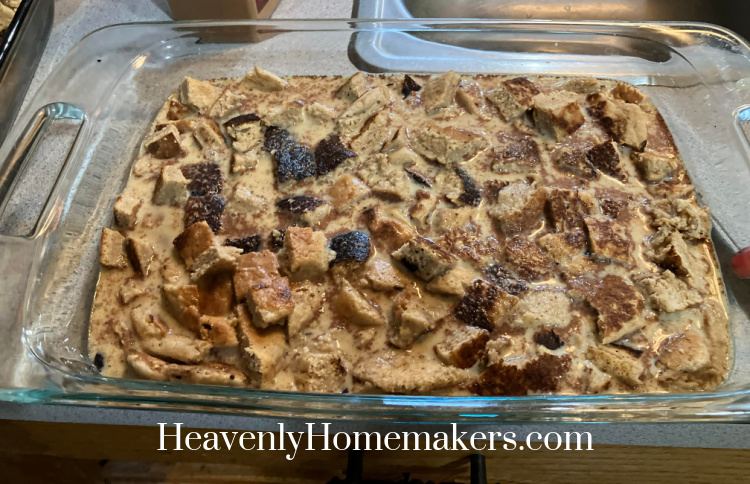
  2. Tear bread or pancakes into small pieces and put them into the dish.
  3. Whisk together remaining ingredients and pour mixture over the bread pieces.
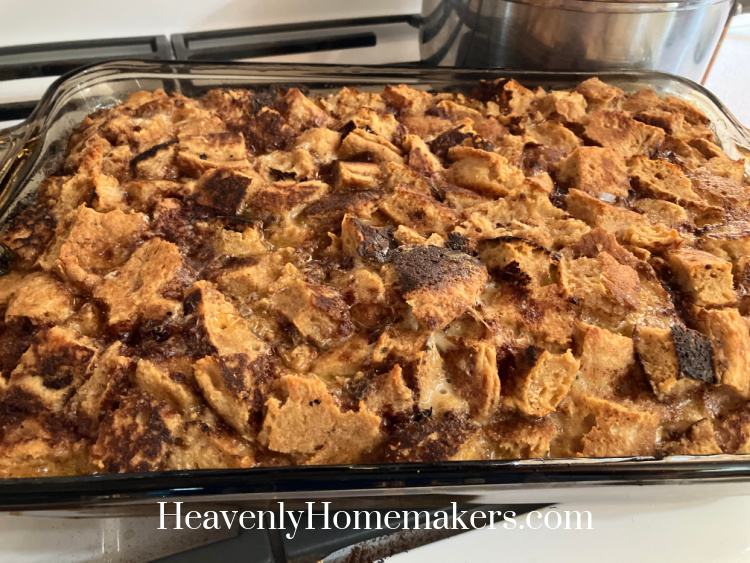
  4. Bake in a 350 degree oven for 35-45 minutes or until the middle doesn't jiggle.
  5. Just before Bread Pudding has finished baking, whisk the topping ingredients over low heat in a saucepan until melted and mixed.
  6. After removing pudding from the oven, drizzle topping over it right away.
3.5.3251

This is truly a great option to make with leftover pancakes. I find that re-warming pancakes isn’t as tasty as serving them fresh off a griddle. So to cut them up and douse them in this milk and egg mixture to make Bread Pudding? Such a perfect idea!

The soccer team enjoyed this treat, as did our family. Are you a Bread Pudding fan?

Heavenly Homemaker's Club Members: Access your homepage and all your fantastic resources here! Not a member yet? Please join us!

Blueberry Shortcake with Cream Topping

October 12, 2022 by Laura 2 Comments

This post may contain affiliate links. For more information, please see our disclosure policy.

So, it takes three easy steps to make this Blueberry Shortcake with Cream Topping? It’s worth it!

Usually, I’m a “mix it together and throw it into the oven” kind of treat maker. But in the case of this case, we are making an exception and writing a recipe that takes three steps. THREE. What in the world?

Don’t worry. This is still an easy recipe. I’ll write it all out in the simplest of forms. And you really will see that it’s worth every bit of “effort!”

Blueberry Shortcake with Cream ToppingYum

Blueberry Shortcake with Cream Topping
 
Save Print
Author: Laura
Ingredients
  • 2⅔ cups flour (I use freshly ground whole wheat)
  • 1 teaspoon baking powder
  • 4 eggs
  • ½ cup honey or 1 cup sugar
  • ⅔ cup oil (I use coconut oil)
  • 1 teaspoon vanilla extract
  • 1 cup milk
Instructions
  1. Mix ingredients well.
  2. Pour mixture into a buttered 9x13 inch baking dish.
  3. Bake in a 350 degree oven for 25-30 minutes or until a toothpick inserted in the middle comes out clean. (While it's baking, prepare the blueberry topping.)
3.5.3251

Blueberry Topping

Blueberry Topping
 
Save Print
Author: Laura
Ingredients
  • 2 cups fresh or frozen blueberries
  • ¼ cup sugar
Instructions
  1. While the shortcake is baking, place blueberries and sugar in a small saucepan.
  2. Cook and stir, uncovered, over low heat for 10 minutes until blueberry syrup has formed.
  3. When the shortcake has finished baking, remove it from the oven and poke holes in the top with a toothpick.
  4. Pour warm blueberry topping over the cake while it is still warm.
  5. Allow cake to cool completely before adding Cream Topping.
3.5.3251

Cream Cheese Topping

Blueberry Shortcake with Cream Topping
 
Save Print
Author: Laura
Ingredients
  • 16-ounces softened cream cheese
  • 2 cups heavy whipping cream
  • 3 Tablespoons sugar, maple syrup, or honey
  • ½ teaspoon vanilla extract
Instructions
  1. Whip all ingredients together with a hand mixer or in a high power blender until it is thick and smooth.
  2. Spread topping over cooled cake.
3.5.3251


Heavenly Homemaker's Club Members: Access your homepage and all your fantastic resources here! Not a member yet? Please join us!

Moist Chocolate Muffins (With Hidden Spinach, ha)

September 13, 2022 by Laura 7 Comments

This post may contain affiliate links. For more information, please see our disclosure policy.

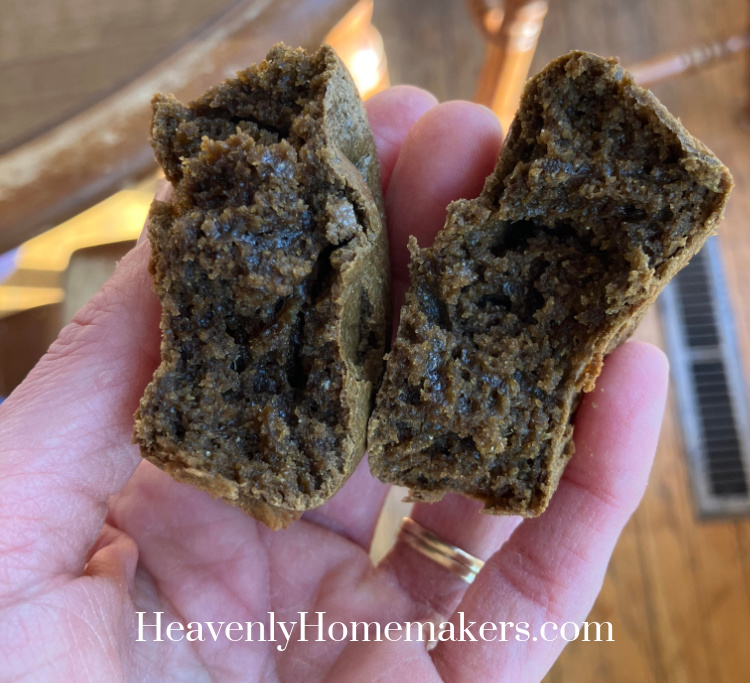
These Moist Chocolate Muffins are truly made moist because of spinach. And yes, it’s like a new obsession with me, apparently.

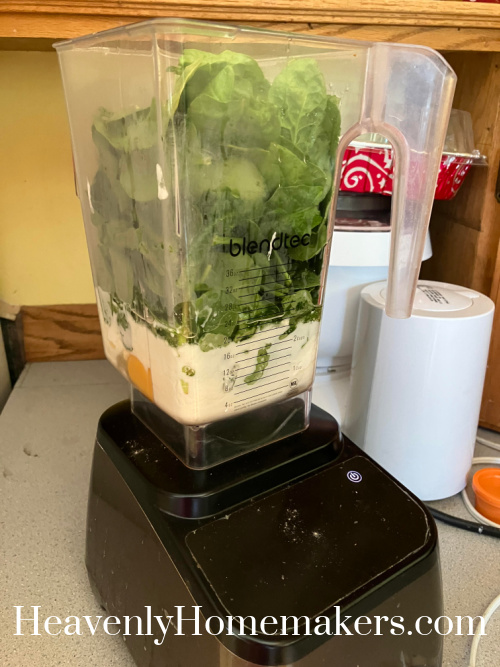
What’s an obsession? Oh, just that I keep blending spinach into my chocolate baked goods because guess what? NO ONE CAN TELL. It adds nourishment, and as an added bonus, it is making all of our chocolate baked goods extra moist. True story.

See, it’s chocolate cake. With spinach. And it’s awesome.

Read these to learn more and to join the craze:

  • Add spinach to cake mix
  • Add spinach to Pumpkin Chocolate Cake
  • Add veggies to everything you can possibly think of
  • Add spinach to cake and bake it in a crock pot

And now, we are adding spinach to our Chocolate Muffins. It changes nothing about the taste of the muffins. It only makes them moist and easy to eat. Alrighty-then. Why have we not been doing this all along?

Moist Chocolate MuffinsYum

Moist Chocolate Muffins (With Hidden Spinach, ha)
 
Save Print
Author: Laura
Serves: 24
Ingredients
  • ½ cup melted coconut oil
  • 1 cup milk
  • ½ cup sour cream
  • 2 eggs
  • 3ish handfuls of fresh spinach
  • ½ - ⅔ cup brown sugar or sucanat
  • ½ cup unsweetened cocoa powder
  • 3 cups whole grain flour
  • 1¼ teaspoon baking powder
  • 1 teaspoon sea salt
Instructions
  1. Place all ingredients into a high power blender, beginning with liquids.
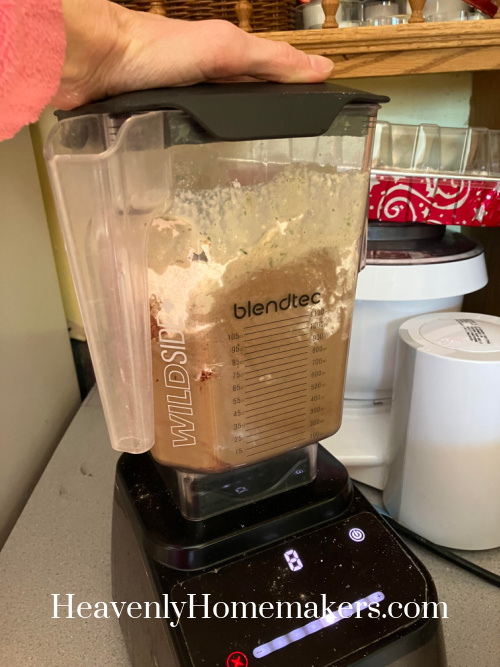
  2. Cover blender and blend on high until the spinach is pureed and all ingredients are thoroughly mixed.
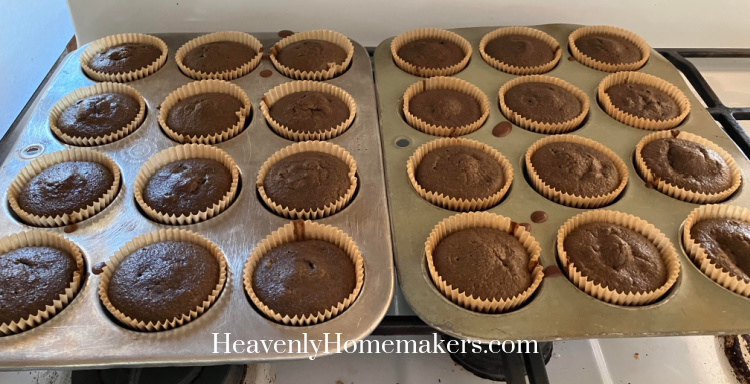
  3. Pour into 24 prepared muffin tins.
  4. Bake in a 400 degree oven for 20-24 minutes or until a toothpick inserted in the middle of a muffin comes out clean.
3.5.3251


Can you make these muffins without a blender? Yes. But make sure you puree the spinach with the liquids first so that it isn’t chunky in your muffins.

When I mix all of my ingredients together in my Blendtec, I find that the spinach is no longer recognizable and simply adds moisture to the batter! Plus it makes the mixing part of this recipe super easy!

NOTE: I bake for a large family so this recipe is the double version. Cut ingredients in half if you only want to make a regular 12-muffin batch!

Heavenly Homemaker's Club Members: Access your homepage and all your fantastic resources here! Not a member yet? Please join us!

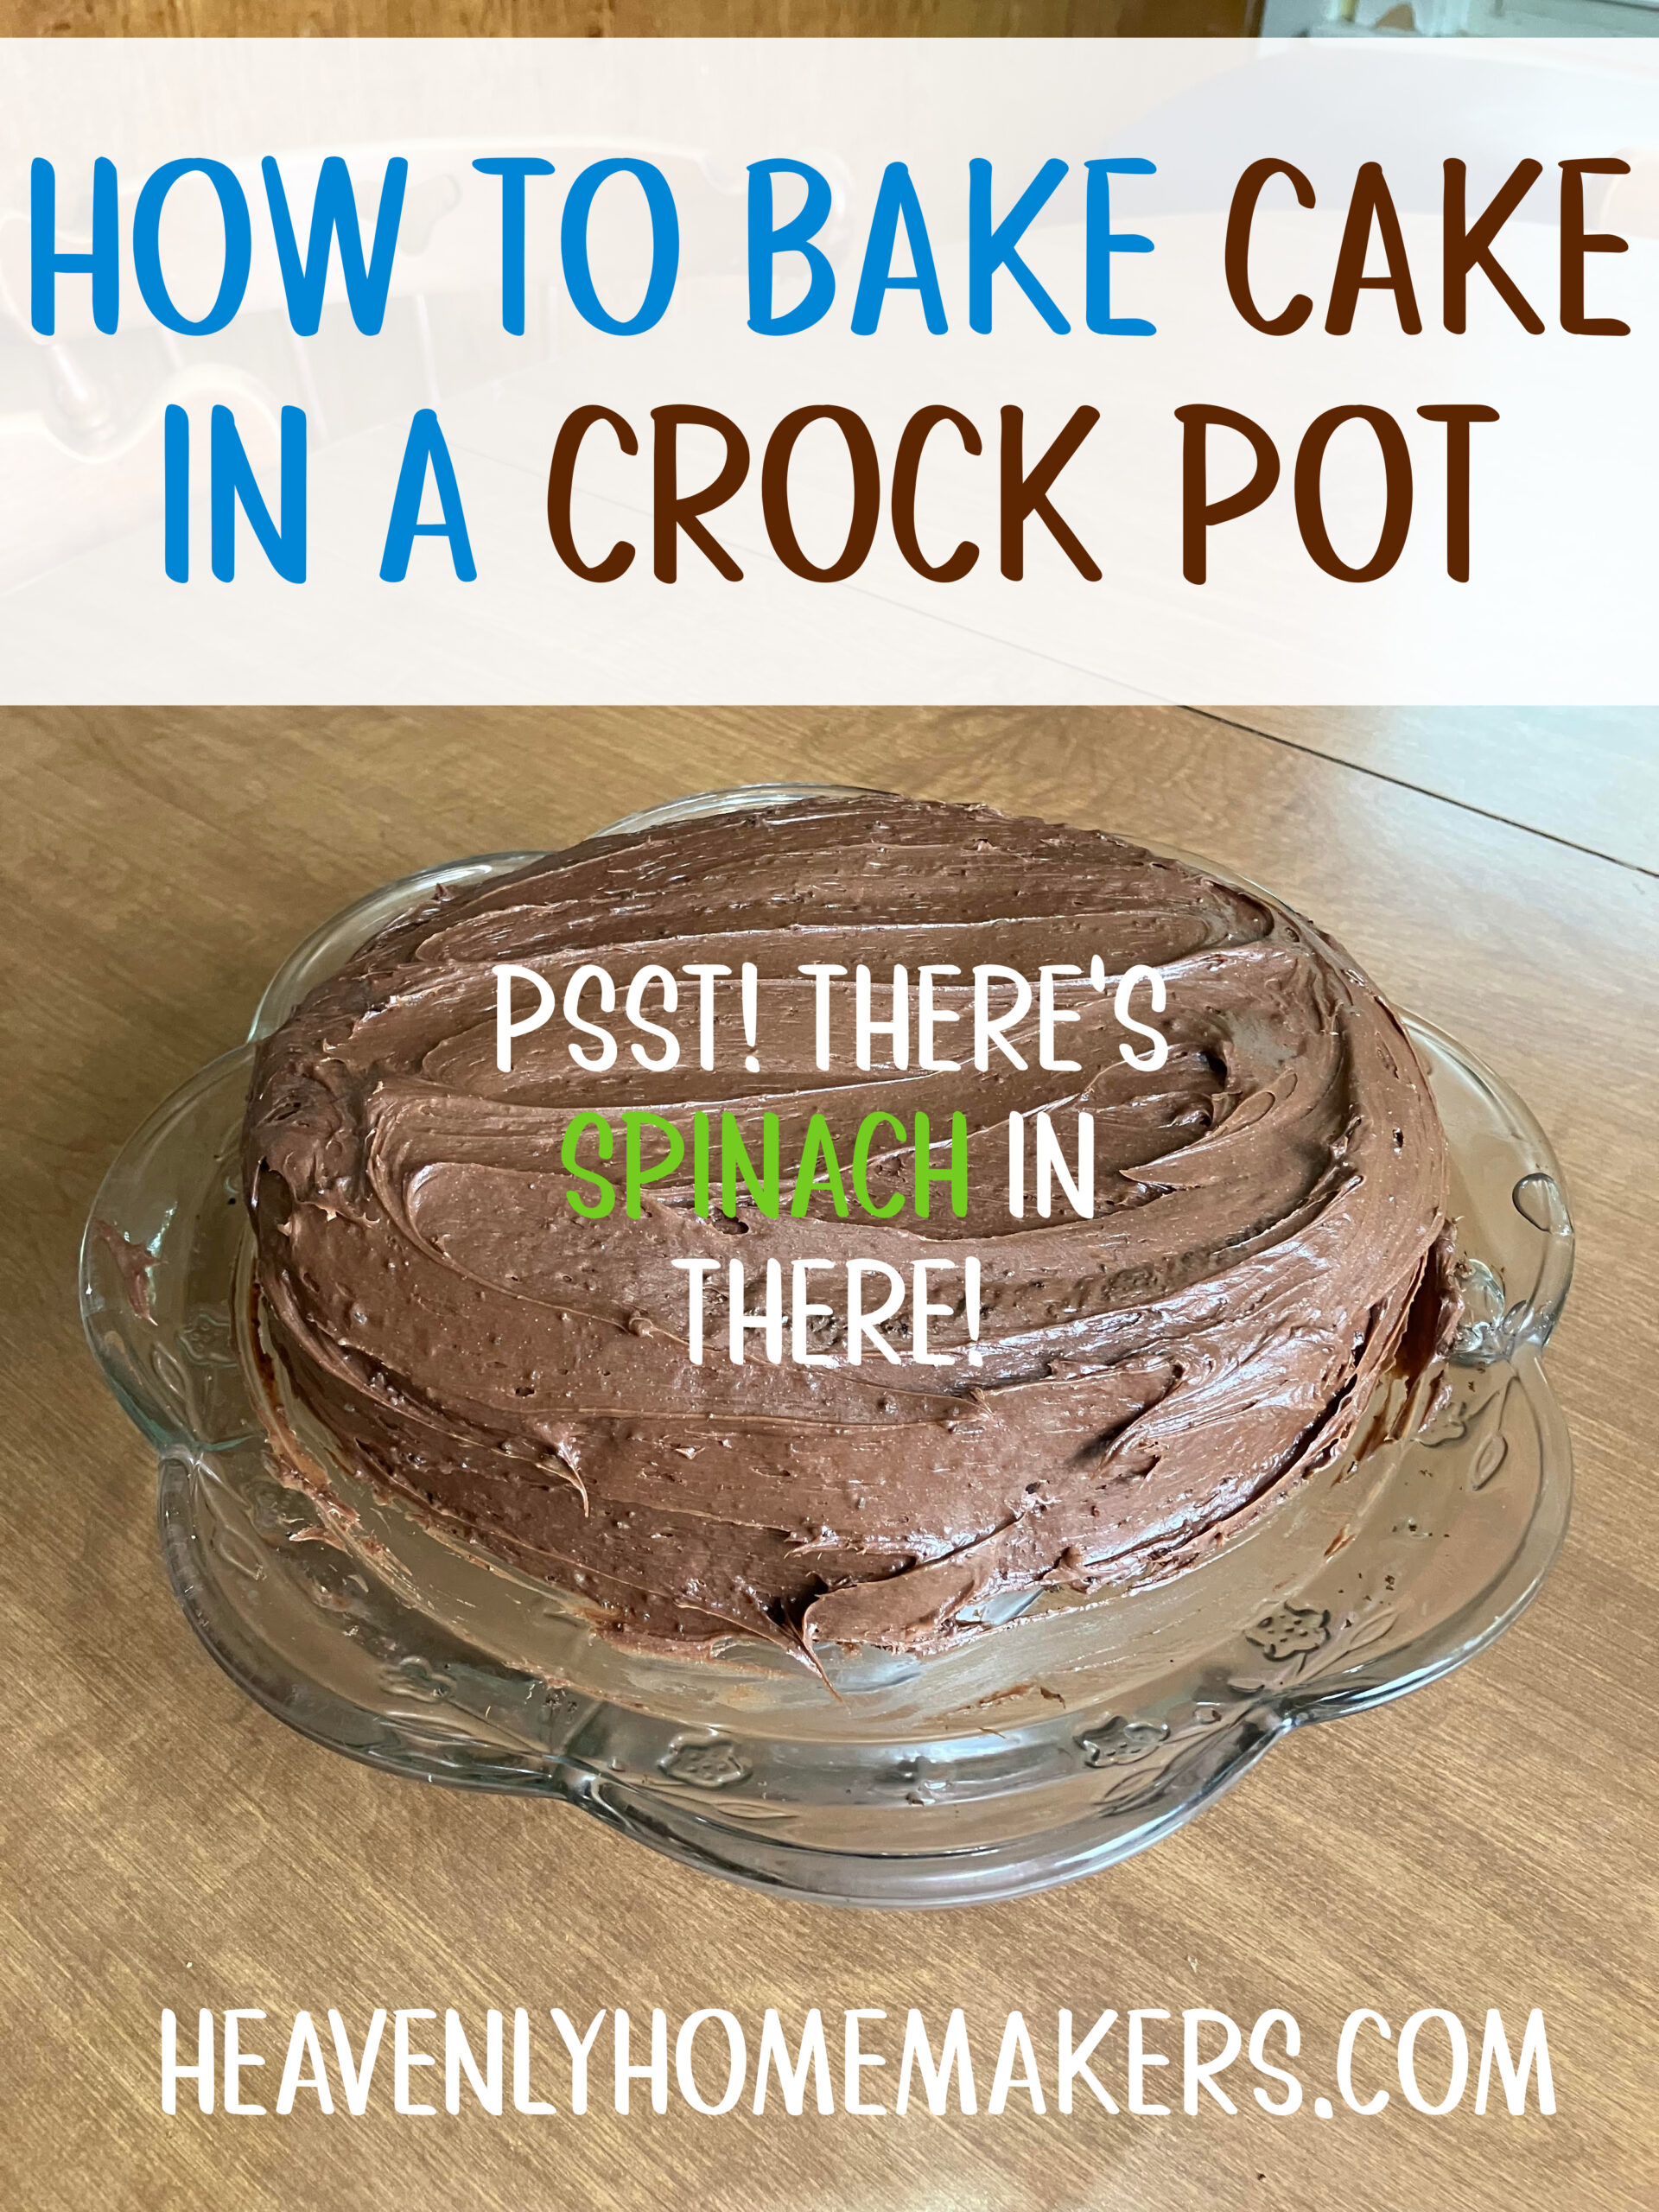
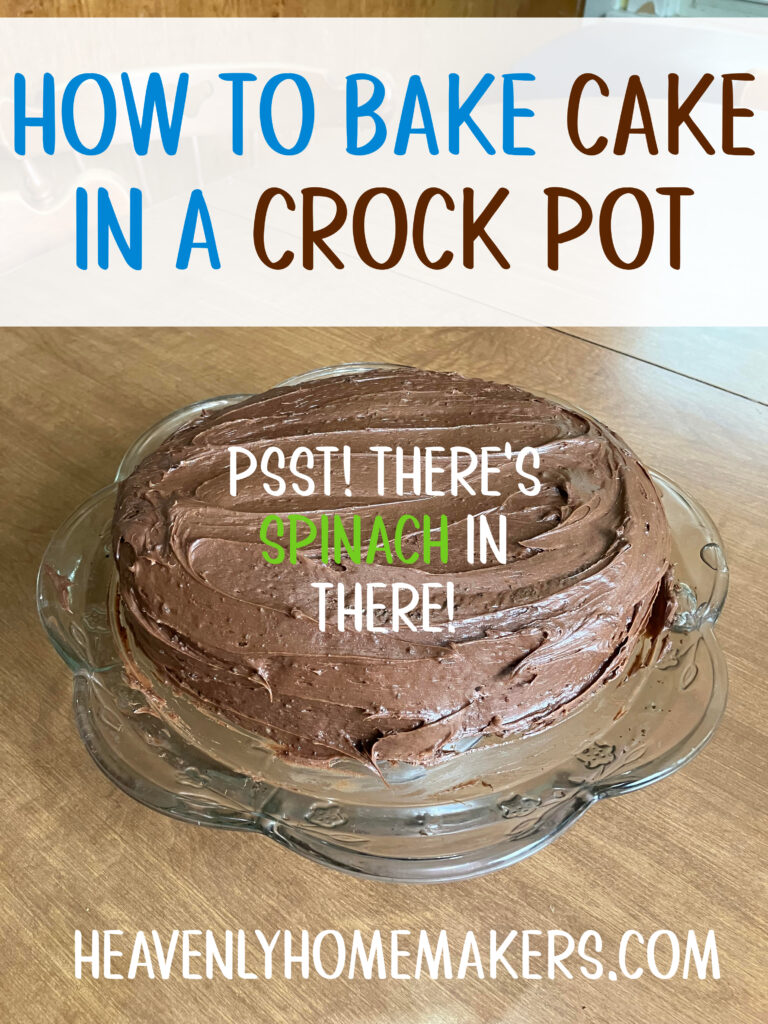
How to Bake Cake in a Crock Pot (with spinach, of course)

July 17, 2022 by Laura 1 Comment

This post may contain affiliate links. For more information, please see our disclosure policy.

Too hot to turn on the oven? Here’s how to bake cake in a crock pot!

I’d like to say there was a day that “we needed cake” but did we actually need cake? Meh. Define “need.”

But on this day that we “needed cake” it was 101 degrees outside. So baking was a silly idea. “I wonder if my spinach in a cake situation would work in a crock pot,” thought I. With this in mind, I looked on the internet a bit and sure enough, it seemed quite doable.

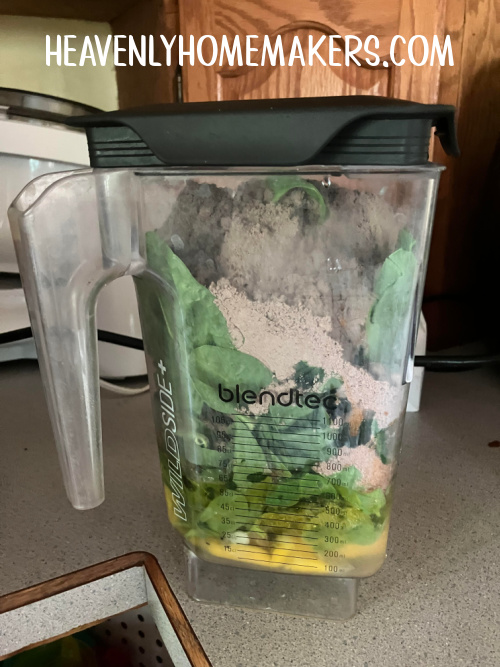
Look at all the spinach that I blended into our cake. So did we need cake? Yes, because of the spinach.

This is what you need to know about adding spinach to cake:

  • You can’t taste it.
  • You can’t see it.
  • It makes the cake extra moist, which is actually better than eating a cake without spinach. True story.

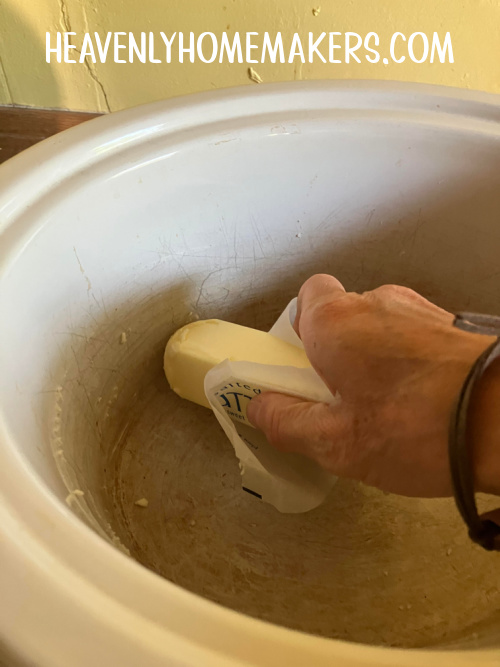
I buttered my crock pot. It looked like this. And now you can see my crock pot stains. This thing is well-used.

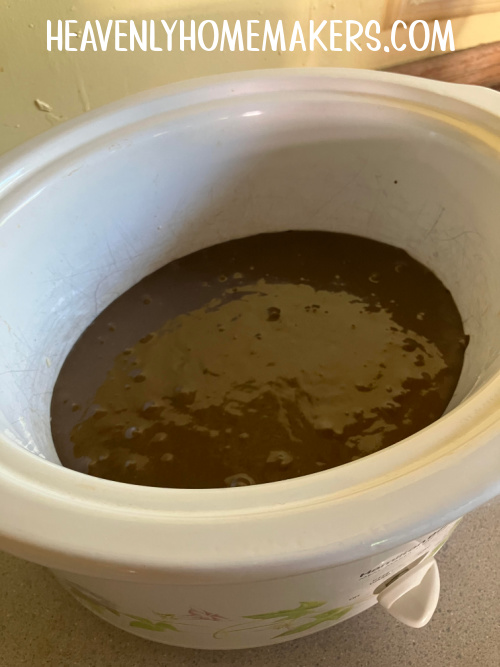
I blended the cake ingredients along with the spinach, and poured in the batter which looked like this. See, you can’t tell there’s spinach in there:

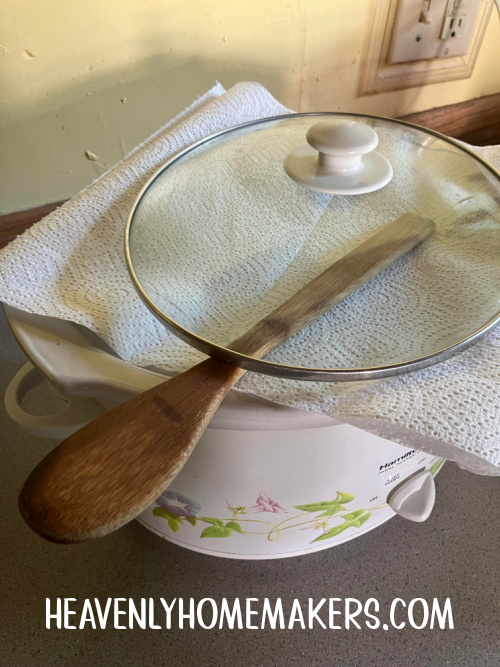
Next, we worked a little crock-pot-cake magic. This calls for a paper towel, a wooden spoon to prop the lid, and then a lid placed cock-eyed over the paper towel and spoon. This lets the crock pot vent a bit while it bakes. We all need to vent sometimes.

At one point when I checked on my cake’s progress, my paper towels fell and got chocolatey. I share this picture with you to make you feel better about your messy towels if and when this happens to you:

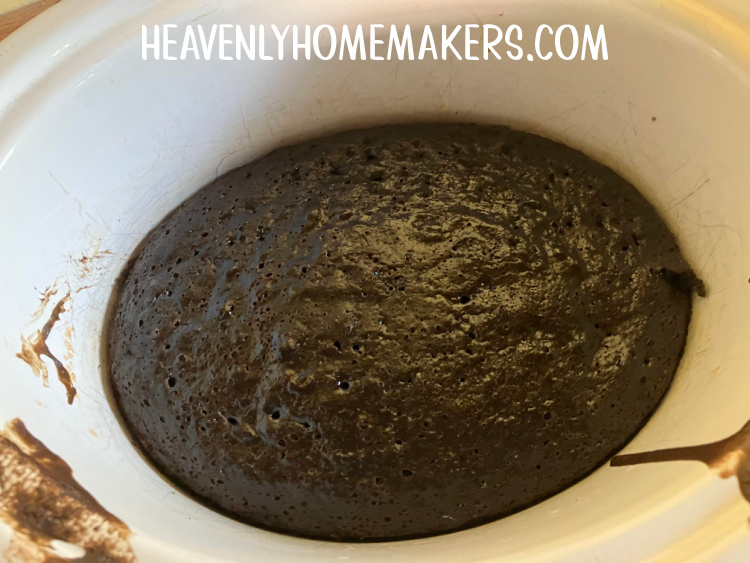
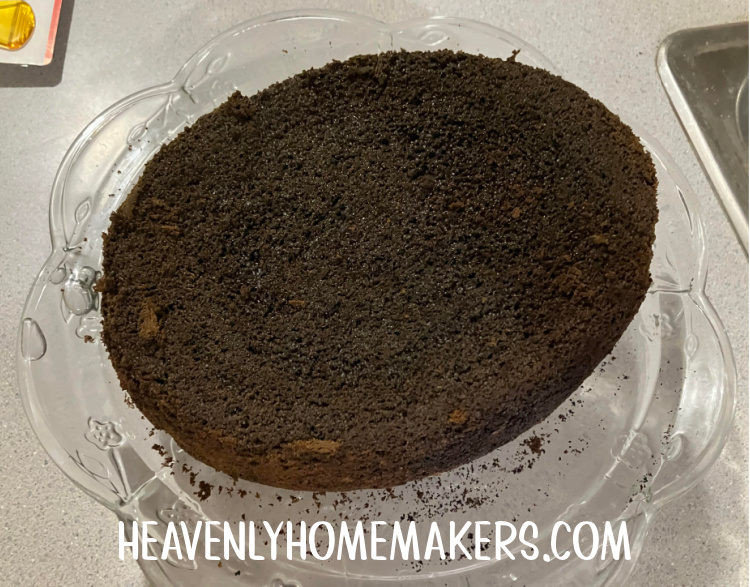
After about an hour and a half, our house smelled amazing and our cake looked like this. The kitchen was still nice and cool while the oven sat alone and unused.

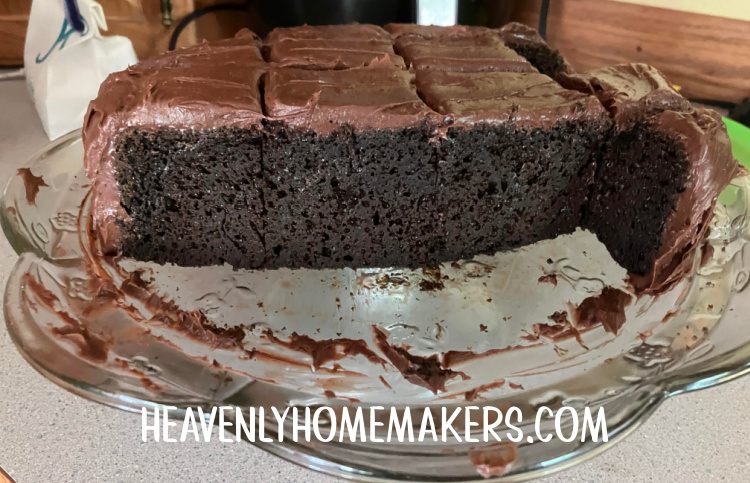
The babies were up from their naps at this point and it was time for dinner and an outing for the evening. So I left the cake sitting all night in the crock pot (lid on after it cooled). The next morning, I carefully loosened the edges and worked it out of the pot, turning it out like this:

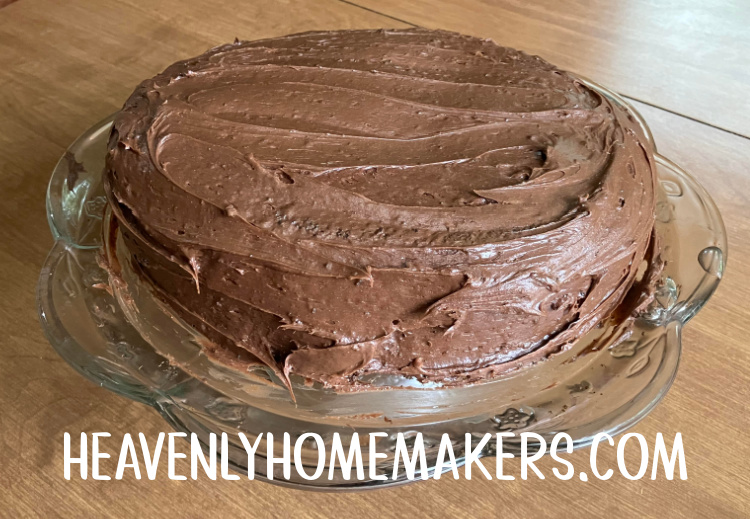
Then I frosted the cake, which made the kids sing “Happy Birthday to Nobody” because why would Mom be making a fancy cake like this since it wasn’t anyone’s birthday?

Would you look at this amazingness? What spinach? I don’t see any spinach.

Listen, you have got to try this! Use a cake mix, use your favorite wholesome cake recipe, just add spinach to cake and then bake it in a crock pot to avoid the oven. We are huge fans! This cake is so moist and good!

How to Bake Cake in a Crock PotYum

How to Bake Cake in a Crock Pot (with spinach, of course)
 
Save Print
Author: Laura
Serves: 16-24
Ingredients
  • 1 chocolate cake mix
  • 1¼ cups water
  • ½ cup olive oil
  • 3 eggs
  • 3-4 cups fresh spinach
Instructions
  1. Blend everything up in a high power blender.
  2. Pour the batter into a buttered crock pot.
  3. Lay paper towels to cover the top of the crock.
  4. Place a wooden spoon between the paper towels and the crock pot lid to allow for venting.
  5. Cook on Hi for one to one and a half hours or until a toothpick inserted in the middle comes out clean.
  6. Once completely cooled, gently work the cake out of the crock with a spatula.
  7. Frost and serve!
3.5.3251

How to frost your cake

I recommend this Chocolate Fudge Frosting (though I no longer make powdered sugar from sucanat like I used to, eeee).

My favorite-favorite is actually Cream Cheese Frosting.

And if you want to cut way back on the sugar, here’s a Stevia Sweetened Cream Cheese Frosting that is really good. Add a pinch of sugar to take away the bitterness without adding much sugar.

Last idea: Simply whip some cream like this and plop it on top. Super good!

But wait, there’s more. What if we topped it with Peanut Butter Cup Whipped Cream??!

Or this Peanut Butter Cream Frosting?!

Let me know which turns out to be your favorite!

Heavenly Homemaker's Club Members: Access your homepage and all your fantastic resources here! Not a member yet? Please join us!

Least Expensive Burrito Recipe

May 25, 2022 by Laura 6 Comments

This post may contain affiliate links. For more information, please see our disclosure policy.

Is this the least expensive burrito recipe? Or is it a nifty trick teaching us how to use leftovers creatively? Hmmm….

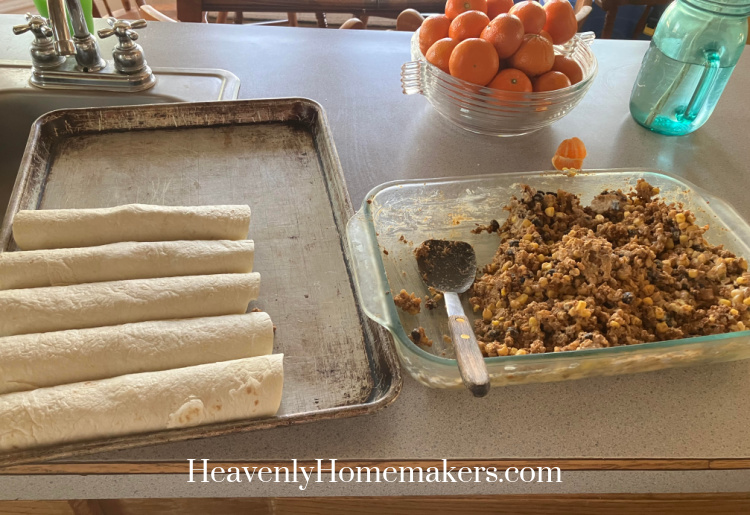
I’ll give you a recipe. But I’m also going to give you a license. A license to use up what you have and stir it into a mixture and slap it into a tortilla. Roll it up and call it a burrito. It works deliciously every time!

This is what makes this recipe the “least expensive.” You’re using up leftovers that you’ve already prepared. You’re cleaning out your fridge and avoiding waste. You’re saving time and having fun and the best part is that you’re making something your family will love!

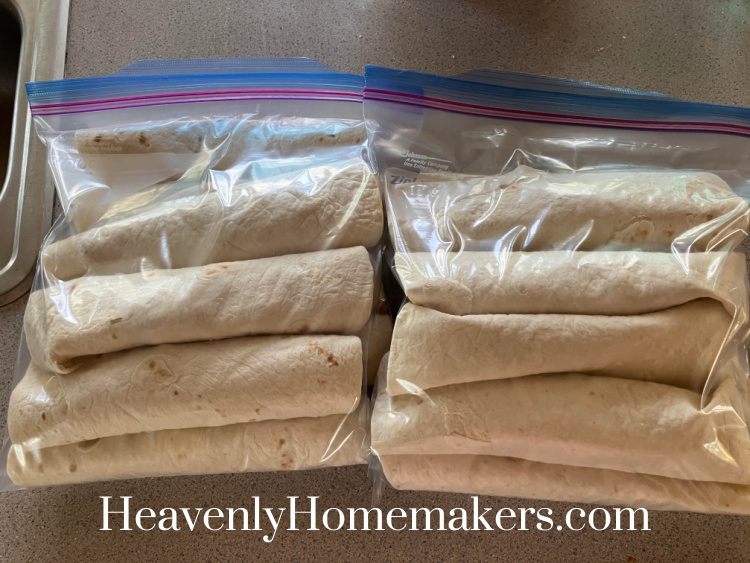
As an added bonus, you can make as many of these as you need and freeze them to warm them up as needed! My older kids love having these in the freezer so that they can pull some out for an easy lunch or a late night second-dinner. :)
Here’s the kind-of recipe. Later, I’ll give more of an actual recipe for those who would prefer more specifics!

Least Expensive Burritos – the Use Up Leftovers Recipe Version

  1. First, make a meal in which you offer cooked meat, rice, beans, salsa, cheese, corn, olives, tomatoes, lettuce, and sour cream.
  2. Let everyone build a burrito bowl, a burrito, or a taco dip to eat with chips.
  3. After your meal, stir all of your leftovers into a dish.
  4. Use this mixture to make burritos for an easy-to-grab meal.

See how great this is? How easy? It’s how I make frozen burritos every time we have a burrito bar at our house!

Least Expensive Burrito (Actual) RecipeYum
5.0 from 2 reviews
Least Expensive Burrito Recipe
 
Save Print
Author: Laura
Serves: 12
Ingredients
  • 1 can black beans
  • 1 can corn, drained
  • 2 cups cooked rice
  • 1 cup salsa
  • 2 cups leftover cooked chicken or beef (optional)
  • 1 cup shredded cheese
  • 12 soft tortillas
Instructions
  1. Mix together all burrito filling ingredients.
  2. Scoop mixture into tortillas and roll up.
  3. Serve right away or freeze and warm up later.
3.5.3251


Heavenly Homemaker's Club Members: Access your homepage and all your fantastic resources here! Not a member yet? Please join us!
« Previous Page
Next Page »

Join Our Community!

 Facebook Twitter E-mail Instagram Pinterest

Popular Posts

~ Will All of the Real Moms Please Stand Up?
~ Easy! Stir-and-Pour Whole Wheat Bread
~ How to Make Gatorade
~ 31 Real Food Breakfast Ideas
~ Dear Teenage Girls...
~ When Mom Takes a Step Back
~ The Inexpensive Health Insurance We Love!
~ Let's Talk Real Food Grocery Budgets

Check out our latest posts!

  • Big Family Food and Fun: August 9-15, 2026
  • Big Family Food and Fun: August 2-8, 2026
  • Big Family Food and Fun: July 26-August 1, 2026
  • Big Family Food and Fun: July 19-25, 2026
  • Easy Baked Spanish Rice Recipe
Home  ~  Simple Meals  ~  Club Membership  ~  Shop  ~  Privacy Policy  ~  Disclosure  ~ Contact

Copyright © 2026 · Beautiful Pro Theme on Genesis Framework · WordPress · Log in