Heavenly Homemakers

Encouraging women in homemaking, healthy eating and parenting

  • Home
    • About
    • FAQs
  • Recipes
    • Bread and Breakfast
    • Condiments
    • Dairy
    • Main Dishes
    • Side Dishes and Snacks
    • Desserts
    • Gluten Free
    • Instant Pot
    • Crock Pot
    • Heavenly Homemaker’s Weekly Menus
  • Homemaking
    • Real Food Sources
  • Store
  • Contact
    • Advertise
    • Disclosure
    • Privacy Policy
  • Simple Meals
  • Club Members!

Simple Salsa Burgers

June 3, 2020 by Laura Leave a Comment

This post may contain affiliate links. For more information, please see our disclosure policy.

Need a fun idea for a tasty new burger to grill this summer? You have to try these Simple Salsa Burgers!

Yum

You know me. I love to make food extra special, but I don’t like to spend a lot of time doing it. I’m simply not a gourmet cook.

But how easy is it to stir a little something special into regular ol’ hamburger meat? So easy. In fact, you might remember these three super easy Burger Recipes I’ve shared through the years:

  • Simple Make-Ahead Parmesan Burgers
  • Simple Cheese-Stuffed Burgers
  • Cheddar Ranch Burgers

Not that regular ol’ burgers aren’t pretty awesome in and of themselves.

But now we’ll do something wild and crazy and dump some salsa into our meat before we shape patties. If you want, you can also stir in some shredded cheese. We prefer to leave out the cheese and instead melt a slice of cheese on top of our Salsa Burgers.

And we like to top it with this Easy Guacomole. So good!!!


Simple Salsa Burgers

Simple Salsa Burgers
 
Save Print
Author: Laura
Serves: 8
Ingredients
  • 2 pounds ground hamburger
  • 1 cup salsa
  • 1 cup shredded cheese (optional)
Instructions
  1. Mix together ground meat and salsa.
  2. Stir in shredded cheese if you like.
  3. Shape mixture into 8 patties.
  4. Grill or fry per your preference!
3.5.3229

What are your favorite ways to make burgers?

~~~~~~~~~~~~~~~~~~~~~~~~~~~~~~~~~~~~~~~~~~~~~~~~~~~~~~~~~~~

Psssst! Everyone be sure to grab our Simple Real Food Recipes cookbook full of amazingly tasty and simple real food recipes like this one!

Heavenly Homemaker's Club Members: Access your homepage and all your fantastic resources here! Not a member yet? Please join us!

How to Make Stick-of-Butter Rice in the Instant Pot

May 27, 2020 by Laura 2 Comments

This post may contain affiliate links. For more information, please see our disclosure policy.

If you have an Instant Pot, this method for cooking Stick-of-Butter Rice cuts the cook time in half!

Yum

Once I learned to make Stick-of-Butter-Rice, I’ve never gone back to making it the “regular” way again. This recipe is TOO DELICIOUS. My entire family likes this – even the ones who never really cared about rice before. It’s the butter, of course. Also the onion. And the broth. The mixture makes incredibly tasty rice!

If you bake this recipe in an oven, it takes a solid hour. This is fine if you have an hour. If you don’t, and you have an Instant Pot, try it this way instead! It can be done in just a half hour!

I love making batches of rice ahead of time. Typically I’ll make this and use what we need for a meal, then use the rest to stir into recipes like:

  • Beef and Cheese Burritos
  • Chicken Burritos
  • Cheesy Beef and Rice
  • Spanish Rice

Then I can get two meals out of one!

Here’s how we often eat our freshly made rice, served with:

  • Hawaiian Crock Pot Chicken
  • Simple Overnight Saucy Crock Pot Chicken
  • Simple Overnight Melt-in-Your-Mouth Beef Roast
  • Simple Barbecue Beef Roast
  • Simple Hawaiian Beef Roast
  • Simple Crock Pot Salsa Shredded Beef

But truly, this rice is so flavorful that it’s perfect as a side dish all by itself. I think you’ll be like me once you try this and never go back to regular rice again!

How to Make Stick-of-Butter Rice in the Instant Pot

How to Make Stick-of-Butter Rice in the Instant Pot
 
Save Print
Author: Laura
Serves: 6-8
Ingredients
  • 2 cups brown rice (uncooked)
  • 2 cups beef or chicken broth
  • ¼ teaspoon sea salt
  • 2 Tablespoons dry minced onions
  • 1 stick of butter, cut into 6 chunks (1/2 cup)
Instructions
  1. Place ingredients in your Instant Pot and stir.
  2. Seal pot and cook on the manual setting at high pressure for 22 minutes.
  3. Allow the pot to release naturally after cooking.
  4. Stir and enjoy!
3.5.3229


Heavenly Homemaker's Club Members: Access your homepage and all your fantastic resources here! Not a member yet? Please join us!

Easy Crock Pot Fajitas

May 17, 2020 by Laura Leave a Comment

This post may contain affiliate links. For more information, please see our disclosure policy.

Easy Crock Pot Fajitas? Yes!!! The easiest!

Yum

Stand at the stove and fry your fajita meat and veggies if you like. But as for me, I’ve learned to throw all of my fajita ingredients into my crock pot and I don’t think I can go back! I don’t think it changes the flavor one bit, and if anything, since the meat is cooked low and slow, I think these actually taste better!

It goes without saying that throwing everything into a crock pot makes meal prep so easy! And I’ll let you in on a couple of other little time-saving secrets:

  1. I cheat and buy meat already sliced for fajitas and ready to dump into my crock pot. (Yes, it costs a little more. But I’m spending my time with these cuties)
    I’m also spending time with my big kids and our new boys who fall somewhere in the middle, but I don’t usually take pictures of them helping me with laundry. They are still cute too, though.
  2. I found that buying a frozen bag of sliced sweet peppers is incredibly helpful and DOESN’T cost more than buying them fresh and cutting them myself! This is a huge perk and also helpful because:
    The babes have learned to climb on everything, and since there are two of them, it doesn’t work for me to turn my back to them while I cut sweet peppers.

So, now you know. I buy pre-cut meat and pre-cut veggies. Again, let me say that buying pre-cut frozen peppers costs the same or LESS than buying fresh peppers and taking the time to cut them myself. Score!

Now that I have my convenient, but still real-food ingredients, I can throw them into my crock pot, season it quickly, and five mintues later our dinner is cooking. My job here is done. Now I can go chase babies out of the…um, just about out of everything. Phew!

Easy Crock Pot Fajitas

Easy Crock Pot Fajitas
 
Save Print
Author: Laura
Serves: 4-6
Ingredients
  • 2-3 pounds steak or chicken, sliced in thin strips
  • 16-ounces frozen sweet peppers or 2-3 sweet peppers slicked in thin strips
  • 1 small onion, sliced in thin strips
  • Sea salt to taste
  • ½ teaspoon chili powder
  • ½ teaspoon garlic powder
Instructions
  1. Mix everything in a crock pot.
  2. Cook on low for 6 hours.
  3. Serve on tortillas or in a bowl of rice with any of your favorite fajita fillings!
3.5.3229

See how pretty the ingredients look after you put them into your crock pot, turn it on, and walk away?

We love serving these with this Easy Guacomole, and it gives me great joy that guac is a way to sneak veggies into my kids!

Our kids like wrapping these in tortillas like regular fajitas. But Matt and I have enjoyed putting our fajita filling into a bowl of rice made like this. SO flavorful and good!

Give these easy fajitas a try. You will love how simple and delicious they are!

~~~~~~~~~~~~~~~~~~~~~~~~~~~~~~~~~~~~~~

Psssst! Everyone be sure to grab our Simple Real Food Recipes cookbook full of amazingly tasty and simple real food recipes like this one!

Heavenly Homemaker's Club Members: Access your homepage and all your fantastic resources here! Not a member yet? Please join us!

Tips for Making a Gluten Free Diet (or Any Diet) EASY!

May 13, 2020 by Laura 1 Comment

This post may contain affiliate links. For more information, please see our disclosure policy.

If you eat a gluten free diet, or even if you don’t, you’ll want to check out these tips for making your meal prep easier!

You may recall that a few weeks ago I shared that my husband, Matt, was experimenting with a vegan diet to see if that helped some minor health issues he was having. I personally found that trying to cut meat, dairy, and eggs from his meals was pretty challenging! But that’s probably because I’m such a meat-loving, dairy-loving girl! So I was only able to come up with a few ideas for meat free, dairy free, egg free meals.

The results? That particular diet experiment didn’t really help, but it did boost our vegetable and fruit intake! So we’ve held onto that and been even more determined than we already were to be sure we’re all eating plenty of fruits and veggies!

Meanwhile, we visited our wholistic doctor in Lincoln to see what she might have to offer Matt. We are so thankful to have this resource closeby, and her remedies have been making a difference, praise God! Along with her remedies and treatments, she also recommended that Matt try cutting gluten for the short term to at least give his digestive system a break as it heals.

So our pendulum swung! Matt didn’t necessarily go back to eating lots of meat, dairy, and eggs, but it would be pretty tough to cut out gluten and not at least eat some meat and eggs! So he went cold turkey on gluten (without a complaint, because it truly wasn’t very hard – oh except for that one day someone took hundreds of fresh donuts to his work!) and added back in some meat and eggs, with the occasional dairy product.

My personal opinion is that eating gluten-free is MUCH EASIER than eating vegan. I didn’t have the least bit of difficulty making gluten free meals for Matt, and most of the time, the entire family eats what he’s eating because most gluten free meals are just…normal. Rice dishes, meat and potato meals, tacos made with corn tortilla shells? Normal. Easy. Tasty.

So that I could easily stay on top of our gluten free meal needs, I started making a few naturally gluten free foods in any spare moment so I could put meals together at night without much effort.

You guys, this isn’t just about eating gluten free. I do this any day, any time, and that’s where all these Simple Real Food Recipes  came from. If we all – GF or not! – spend a few minutes here and there getting ahead when we can? We can make are meal prep so much easier!

So you’ll notice that while these are the naturally gluten free foods I have been prepping ahead, these are also the normal foods I prep ahead. These just happen to be normal and gluten free at the same time. (Is it ok that I’m using the word “normal” here?! It’s just that many, many foods we normally eat are naturally gluten free. We don’t have to make this difficult! Let’s just eat normally! And also gluten free. Ok.)

Tips for Making a Gluten Free Diet (or Any Diet) EASY!

1. Make rice ahead of time

I make a batch or two of this Amazing Stick-of-Butter Rice, store it in the fridge, then pull out spoonfuls to make:

  • Spanish Rice
  • Build a Spanish Rice Bowl
  • Cheesy Beef and Rice
  • Simple Taco Rice Dinner

This make meal prep incredibly easy, especially if I:

2. Make hamburger meat ahead of time

You know that for years I’ve been cooking hamburger meat ahead of time and storing it in meal-size portions to pull out for easy meal prep. But now that I’ve learned how to make it in my Instant Pot? Wow, is it easy! And such a time saver!

I often have several pounds of cooked hamburger meat ready to grab and use. I can stir it in with the cooked rice as mentioned above, and we can have a meal ready in just 5 minutes! I love this!!

Here are some naturally gluten free meals I can make with my cooked hamburger meat:

  • 20-Minute Taco Soup
  • Calico Beans
  • Cheeseburger Macaroni – if I use gluten free pasta
  • Cheeseburger Soup
  • Cheeseburger Zucchini Boats
  • Cheesy Beef and Rice
  • Cheesy Salsa Enchiladas – if I use corn tortillas
  • Chili
  • Simple Crock Pot Taco Pasta – if I use gluten free pasta
  • Crustless Pizza
  • Hamburger Cream Cheese Dip
  • Hamburger Sauerkraut Dip
  • Pizza Soup – if I use gluten free pasta
  • Real Food “Velveeta” and Rotel Dip
  • Simple Spanish Rice Bowls
  • Skillet Taco Pasta
  • Sloppy Joes – Served over corn tortilla chips instead of on buns
  • Spanish Rice
  • Taco Corn Fritters
  • Taco Potatoes
  • Taco Rice Dinner
  • Taco Salad

3. Put meat in the crock pot early in the day

Then I can just add some fruit and veggie side dishes at meal time and we can quickly sit down and eat! Some of our favorite naturally gluten free meaty main dishes are:

  • Busy Day Baked Chicken
  • Simple Hawaiian Crock Pot Chicken
  • Simple Crock Pot BBQ Spareribs
  • Simple Overnight Saucy Crock Pot Chicken
  • Simple Overnight Melt-in-Your-Mouth Beef Roast
  • Simple Crock Pot Shredded Ranch Chicken
  • Simple Barbecue Beef Roast
  • Simple Hawaiian Beef Roast
  • Simple Crock Pot Salsa Shredded Beef

Now, I didn’t tackle gluten free breads or pancakes. Those take special-ish ingredients and I didn’t feel the need to “go there” because Matt was fine with all that we’ve had to offer. I did purchas some gluten free pasta to have on hand and I purchased a gluten free pizza crust for him to eat on days we were making pizza for ourselves. I’m thankful these are readily available to buy!

Gluten Free Snacks and TreatsYum

Oh, and for years I’ve kept Coconut Flour on hand because it’s nourishing and fun to work with! Since it’s naturally gluten free and I have fun recipes we like to make with it, I have tried to keep any variety of these fun treats made and in the fridge:

  • No-Bake Chocolate Fudge Cookie Bites
  • No-Bake Snickerdoodle Bites
  • No-Bake Peanut Butter Cookie Bites
  • No-Bake Chocolate Chip Cookie Dough Bites

Tapioca Pudding (which, for the record, makes a great breakfast!) is easy and we love it! So I made a big batch to grab from our fridge to eat as needed…

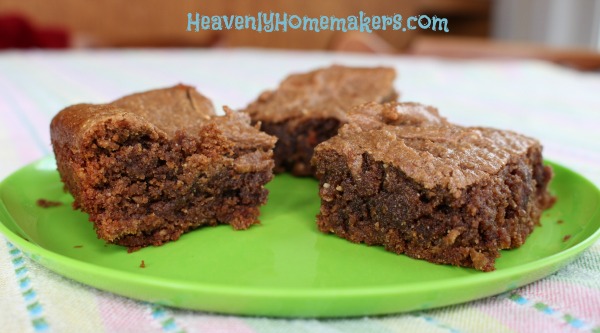
These Super Moist Flourless Brownies and Super Moist Flourless Peanut Butter Brownies are a favorite of ours also! They are completely grain free and I’ve made them for a couple of years now just because they are delicious and nourishing!

Muffins!

While I’m writing this, I am remembering that I have a fantastic Coconut Flour Muffin recipe that has been on my site since 2011! Time to dust that one off and make it again. They are so good!!

Ha! And I just remembered I have this recipe also for Coconut Flour Chocolate Cupcakes. How have I forgotten about these??!

See, this is why I started a Club Membership Site!! All these fantastic recipes and resources get buried and forgotten. Shucks, if I’ve forgotten them I’m quite sure you probably have. The Club Membership site makes it SO MUCH EASIER to access all of these recipes! Check it out and join us!

What are your favorite tips to get ahead to make meal prep (gluten free or not) easier?


Heavenly Homemaker's Club Members: Access your homepage and all your fantastic resources here! Not a member yet? Please join us!

Simple Spicy Cheesy Chicken

May 6, 2020 by Laura Leave a Comment

This post may contain affiliate links. For more information, please see our disclosure policy.

If you sense a theme going on, it’s because I’ve become obsessed with this Simple Spicy Chicken Cheese Dip and I keep tweaking it to make it into different dishes. This one becomes a very Simple Spicy Cheesy Chicken, simply by…well. You’ll have to read the recipe below to see.

Forgive me, friends, for bombarding you with so many variations of one basic recipe. I am sorry – not sorry – for making your meals so delicous without much effort.



Here’s what you’re going to do. You’re going to make this dip recipe – but instead of stirring in shredded chicken, topping with cheese, and baking it to eat as a dip, you’re going to spread the cheesy mixture over boneless chicken, and bake it to serve as a main dish.

Incredible. We just took the exact same ingredients and turned them into a brand new meal. Give yourself a round of applause. You just learned a brand new easy recipe and you can make it without thinking or working hard. What did we ever do before figuring out these simple recipes?

Speaking of Simple Recipes – you do have this cookbook don’t you? If not, run with haste to get yourself a copy forthwith (haha, if you watch Blue Bloods, you will laugh with me over this funny choice of words). It is FULL of delicious recipes that are made with real food and take only a few minutes to prepare. You will love it!

And now on to today’s simple recipe:

Simple Spicy Cheesy ChickenYum

Simple Spicy Cheesy Chicken
 
Save Print
Author: Laura
Serves: 4-6
Ingredients
  • 8-ounces softened cream cheese
  • ¼ cup hot sauce (your favorite)
  • ½ cup ranch dressing
  • 1 cup shredded cheese (we use Colby jack)
  • 2 pounds bone-in or boneless chicken thighs or breasts
Instructions
  1. In a blender or with a hand mixer, mix together the cream cheese, hot sauce, and ranch dressing until smooth.
  2. Fold in shredded cheese.
  3. Place chicken into a 9x13 inch baking dish.
  4. Spread cream cheese mixture over the chicken.
  5. Bake in a 350 degree oven for 30-50 minutes or until the chicken is cooked through. (Shorter time needed for boneless chicken; longer time needed for bone-in.)
3.5.3229

We like to fry leftover baked potatoes or Stick of Butter Rice for a delicious and easy side dish. We also serve this chicken with mixed greens and a steamed or roasted veggie!

Heavenly Homemaker's Club Members: Access your homepage and all your fantastic resources here! Not a member yet? Please join us!

How to Make a Gyro

May 3, 2020 by Bethany Lotulelei 3 Comments

This post may contain affiliate links. For more information, please see our disclosure policy.

Note from Laura: I asked my friend Bethany to share this. I’ve never attempted it – but she has mastered it! So now we can all learn how to make a gyro!

Gyro meat recipe

By Bethany:

I was pregnant, and I wanted a gyro.Yum

Needed a gyro. Couldn’t think of anything BUT a gyro. And so I began my search.

We live in a small town, and the closest restaurant with gyros was over an hour away. I knew I didn’t want to drive that far with a toddler in tow to buy one, so I took myself to our local Arby’s, and ordered a sandwich on their menu that included the word “gyro” in its description. A few minutes later I was sadly eating a subpar, roast beef sandwich. Strike out number one.

Next, I scoured Wal-Mart, and found a kit in the frozen food section for gyro sandwiches. I’m not usually one to frequent the fast food drive thru OR frozen food aisle, but–pregnancy craving–so I bought it, made it, and regretted it. Those “gyros” were even more pitiful than the Arby’s version. Strike out number two.

I searched the second grocery store in town for anything even vaguely resembling a gyro, but to no avail. Strike out number three.

Completely out of options, I opened my laptop, and researched how to make gyro meat. Then I got to work in the kitchen. I used ground beef, added tons of spices, blended the meat, baked it, sliced it, and served it in homemade pita bread with lots of toppings.

It wasn’t until my husband was eating a gyro, and asked me where I had found gyro meat, that I knew it tasted authentic! Yay!

And now, I am sharing the recipe with you, sweet readers!

Be Mindful of Your Blender

When I was making this recipe, I was blending the meat in the blender, and thinking wistfully about how both Laura and Tasha own and love their Blendtec blenders. I was wondering, as I merrily blended away, if/when my own generic blender of five years bit the dust I, too, could buy the Blender of all Blenders.

As I stood there, staring out the window, dreaming of another blender, smoke began seeping out of my own blender.

I think I killed it with my own disgruntled thoughts.

That, or attempting to blend too much meat all at one time.

So, readers, learn from me: perhaps blend the meat in small quantities to avoid any issues! Unless, of course, you are trying to kill your blender in order to buy a Blendtec. Ahem.

Gyro Meat
 
Save Print
Prep time
10 mins
Cook time
50 mins
Total time
1 hour
 
Author: Bethany Lotulelei
Serves: 6-8
Ingredients
  • 1 small onion peeled, and quartered
  • 2 pounds ground beef or lamb
  • 6 cloves minced garlic
  • 2 T Italian spices (oregano, rosemary, thyme)
  • 3 teaspoons ground cumin
  • 1 teaspoons salt
  • 1 teaspoons ground black pepper
Instructions
  1. Blend the onion chunks, and then put them into a paper towel and squeeze out the moisture.
  2. Stir all the ingredients, including the blended onions, together in a bowl and set in the fridge to marinate for 1-24 hrs.
  3. Remove meat mixture from fridge. Adding a little at a time, blend it in your blender.
  4. Take the meat mixture, and pack it into a bread pan, being careful to remove any air pockets.
  5. Bake at 350 for 50 minutes or until done.
  6. Remove the pan from the oven, pour off any oil that has accumulated.
  7. Wrap a brick or heavy bread pan in foil, and set on top of the gyro meat loaf, to compress the meat. After twenty minutes, remove the weight.
  8. Chill, and then slice into thin strips for your gyros!
3.5.3229

How to Construct a Perfect Gyro Sandwich

The perfect gyro meat is:

  • Heavily spiced (use lots of garlic, cumin, and Italian spices)
  • Has a dense texture (in order to achieve this at home, be sure to blend the meat, and then compress it after it is cooked)
  • Sliced into thin strips (after it is completely cooled)

How to serve the gyro:

  • Serve the meat in pita bread.
  • Add sweet onions, feta cheese, halved cherry tomatoes, and shredded lettuce.
  • Make your favorite cucumber yogurt dressing or Greek dressing to top it.

Additional Recipes:

  • This Pita Bread is a perfect for your gyro meat!
  • Either Homemade Fries or Sweet Potato Fries would make a great side dish!
  • I love to serve a Salad alongside my Gyro too!


Bethany is a stay-at-home mom to two. During her babies’ naptime, when she’s not dreaming of Blendtec blenders, she works behind the scenes for Laura.

Do you love gyros as much as I do?

Heavenly Homemaker's Club Members: Access your homepage and all your fantastic resources here! Not a member yet? Please join us!

Make-Your-Own Cane’s Sauce

April 15, 2020 by Laura 4 Comments

This post may contain affiliate links. For more information, please see our disclosure policy.

I can’t take the credit for this one! Malachi (15) came up with this and we all decided that you all needed to know how to Make-Your-Own Cane’s Sauce!

What’s Cane’s? Oh my, only the best chicken place around, according to the Coppinger family. Raising Cane’s is definitely our top restaurant choice when we go to Lincoln. We love their chicken – but it’s the dip that really makes it great!

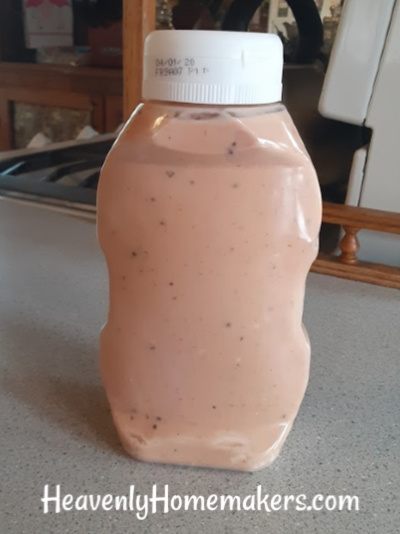
So when we made chicken strips at home recently, Malachi decided to try and duplicate their sauce for extra good dipping. What he came up with was so delicious, we all declared that he must make this for us to have on hand at all times. We even cleaned out an old ketchup bottle so we now have a special squeezy Cane’s Sauce bottle in the fridge alongside all of our other favorite condiments. #priorities

If that’s not a delicious way to reuse and recycle, I don’t know what is.

Make-Your-Own Cane’s SauceYum

Make-Your-Own Cane's Sauce
 
Save Print
Author: Laura
Ingredients
  • 1 cup mayonnaise (we use Hain Safflower mayo)
  • ½ cup ketchup
  • 1 teaspoon garlic powder
  • 1 teaspoon ground black pepper
  • 2 Tablespoons worcestershire sauce
  • ¼ teaspoon sea salt
Instructions
  1. Combine all ingredients with a whisk.
  2. Store in an airtight continer in the fridge.
3.5.3229


We’ve found it interesting to note that this sauce tastes great with just about everything. I even caught one of my kids using it to dip veggies, and who am I to argue with a  kid eating his veggies?

Try it with these Chicken Fried Steak Strips. Try it with Popcorn Chicken. Try it in Popcorn Chicken Tacos. Truly, this Cane’s Sauce is dreamy!

~~~~~~~~~~~~~~~~~~~~~~~~~~~~~~~~~~~~~~~~~~~~~~~~~~~

Want more Simple Real Food Recipes? We’ve got a beautiful cookbook full of them!


Heavenly Homemaker's Club Members: Access your homepage and all your fantastic resources here! Not a member yet? Please join us!

Oatmeal Cinnamon Yogurt Muffins

April 12, 2020 by Laura 4 Comments

This post may contain affiliate links. For more information, please see our disclosure policy.

Hmmm, Oatmeal Cinnamon Yogurt Muffins. I’m sure you’re wondering…what’s in these muffins? ;)

Perhaps a little oatmeal? Some cinnamon? Possibly a tad of yogurt? Wow, you guys are good. How’d you figure that out?

These simple muffins are the result of an experiment on a day I needed to use up some yogurt in my fridge. Yogurt makes muffins extra moist – though the oats make them a little more hearty. So the yogurt plus the oats work well together so that these muffins don’t turn out dry and crumbly!

And the cinnamon? Well, of course, that makes these muffins taste incredible!

We prefer these straight out of the oven, slathered in butter. You can use flavored yogurt if you’d like, though if you do, I’d recommend cutting down the sugar since flavored yogurts have sugar added. I use whole milk plain yogurt when I make these.

Oatmeal Cinnamon Yogurt MuffinsYum

5.0 from 1 reviews
Oatmeal Cinnamon Yogurt Muffins
 
Save Print
Author: Laura
Serves: 12
Ingredients
  • 1½ cups whole wheat flour (I use freshly ground soft white wheat)
  • 1 cup rolled oats
  • ¼ cup sucanat or brown sugar
  • 1 teaspoon baking powder
  • ½ teaspoon sea salt
  • 1 teaspoon cinnamon
  • ¾ cup whole milk plain yogurt
  • 2 eggs
  • ¼ cup melted coconut oil
Instructions
  1. Stir together dry intgredients in a large mixing bowl.
  2. Add yogurt, eggs, and oil, mixing well.
  3. Scoop batter into 12 paper-lined muffin tins.
  4. Bake in a 400 degree oven for 20-22 minutes or until muffins are golden brown.
3.5.3229

I especially like these because they remind me of a muffin I used to enjoy in our college cafeteria wayyyyy back in the day. I have no idea what was in those, but they were hearty with a hint of sweetness and cinnamon. Mmmm.

Is it crazy that I now have sons in college? And that I have babies again? And that I can still taste those college muffins from 29ish years ago? Life is crazy. Expect God to do great things!

Heavenly Homemaker's Club Members: Access your homepage and all your fantastic resources here! Not a member yet? Please join us!

Simple Omelet Muffins

April 5, 2020 by Laura 5 Comments

This post may contain affiliate links. For more information, please see our disclosure policy.

These Simple Omelet Muffins are super fun to make and eat for breakfast, brunch, lunch, or supper!

Not only do these Omelet Muffins work for any meal of the day, they are low in cost. You can make them ahead of time and rewarm them as needed. They freeze well. Annnnd…you can make them per everyone’s liking.

Add lots of meat. Add no meat at all. Throw in lots of veggies. Try a variety of cheeses. Have fun experimenting!

Some tasty add-in options are:

  • Chopped Ham
  • Bacon Bits (here’s how to make them yourself!)
  • Sausage Crumbles
  • Leftover Taco Meat
  • Shredded Chicken
  • Colby Jack Cheese
  • Mozzarella Cheese
  • Pepper Jack Cheese
  • Smoked Gouda Cheese
  • Blue Cheese
  • Diced Tomatoes
  • Diced Sweet Peppers
  • Diced Onion or Dried Minced Onion
  • Mushrooms
  • Sun Dried Tomatoes
  • Fresh Spinach
  • Broccoli
  • Black Beans
  • Sea Salt and Pepper to Taste

You really can enjoy a variety of mixtures using any of these add-in ideas or any others you can think of!

Simple Omelet MuffinsYum

Simple Omelet Muffins
 
Save Print
Author: Laura
Serves: 12
Ingredients
  • 10 eggs
  • 3 Tablespoons milk
  • ¼ teaspoon sea salt (more or less to taste)
  • Any variety of chopped meat, diced veggies, and shredded cheeses you like.
Instructions
  1. Whisk together eggs, milk, and salt.
  2. Add in any fillings you like.
  3. Spray 12 muffin cups with oil.
  4. Scoop omelet mixture into prepared muffin cups.
  5. Bake in a 400 degree oven for 20-25 minutes or until the muffins are set and golden brown.
3.5.3229


If you make these ahead of time, rewarm them in the oven or toaster oven at 350 degrees for just a few minutes.

To freeze these Omelet Muffins: Bake them as directed and allow them to cool completely. Put them into a freezer bag and freeze them for up to a month. Thaw and reheat as needed.

I think these would be great to pack and take to work for lunch – a great change of pace from packing a sandwich!

Do you have any other great add-in ideas for these Omelet Muffins?

Heavenly Homemaker's Club Members: Access your homepage and all your fantastic resources here! Not a member yet? Please join us!

How to Make Perfect French Toast

March 15, 2020 by Laura 3 Comments

This post may contain affiliate links. For more information, please see our disclosure policy.

Want to know the secret ingredient that makes Perfect French Toast? How about two secret ingredients? Mhmm, these ingredients are about to become not-so-secret…

I realize that these tricks may be what you’ve been doing all along to make Perfect French Toast. Still, it’s fun to share, just in case. Nothing like taking a delicious and easy breakfast, brunch, or dinner and making it just that much better!

How to Make Perfect French ToastYum

Here are the two tricks I use to take our French toast up a notch:

1. Add Vanilla Extract to the egg mixture.

2. Use Cinnamon Swirl Bread.

The vanilla adds a wonderful flavor to your French Toast. And using Cinnamon Swirl Bread instead of “regular ol’ bread” is a huge game-changer for the better. THIS MAKES FRENCH TOAST SO GOOD!!

I used to always make Cinnamon Swirl Bread at home. I started using:

  1. This Cinnamon Swirl Bread Recipe, then switched to an easier method which turned into:
  2. This Stir-and-Pour Cinnamon Swirl Bread Recipe

But now that we’ve added little ones to our home again and I find myself juggling my bigs, my littles, my marriage, my home, my work, court dates, case worker visits/meetings, appointments, my own health – well…

I happily and un-guiltily buy the cinnamon swirl bread.

Does it need to be said? Ok. Let’s review:

God is bigger than store-bought bread.

Amen.

Hallelujah.

However you would like to make your Perfect French Toast, with whatever bread works best for you, go for it and enjoy! But oh making it with Cinnamon Swirl Bread does make it so much better!

Perfect French Toast

5.0 from 1 reviews
How to Make Perfect French Toast
 
Save Print
Author: Laura
Serves: 4-6
Ingredients
  • 10 slices of Cinnamon Swirl Bread
  • 3 eggs
  • 3 Tablespoons cream
  • 1 teaspoon vanilla extract
  • Butter for cooking French Toast
  • Fruit and Real Maple Syrup
Instructions
  1. In a bowl, whisk together eggs, cream, and vanilla extract.
  2. Heat butter in a skillet until melted.
  3. Dip bread into the egg mixture, coating each slice entirely.
  4. Fry each coated slice of bread in the buttered skillet until both sides are golden brown.
  5. Serve with real maple syrup and fruit
3.5.3229

What about making homemade vanilla? Goodness I would but is the price of vanilla beans ever going to go back down?? C’mon beans. We need you. And we need you to cost less than our sons’ college tuition.

Have you tried using Cinnamon Swirl Bread when you make French Toast? And do you add a little shot of vanilla? Mmm, so good.

Heavenly Homemaker's Club Members: Access your homepage and all your fantastic resources here! Not a member yet? Please join us!
« Previous Page
Next Page »

Join Our Community!

 Facebook Twitter E-mail Instagram Pinterest

Popular Posts

~ Will All of the Real Moms Please Stand Up?
~ Easy! Stir-and-Pour Whole Wheat Bread
~ How to Make Gatorade
~ 31 Real Food Breakfast Ideas
~ Dear Teenage Girls...
~ When Mom Takes a Step Back
~ The Inexpensive Health Insurance We Love!
~ Let's Talk Real Food Grocery Budgets

Check out our latest posts!

  • Big Family Food and Fun: August 30-September 5, 2026
  • Big Family Food and Fun: August 23-29, 2026
  • Big Family Food and Fun: August 16-22, 2026
  • Big Family Food and Fun: August 9-15, 2026
  • Big Family Food and Fun: August 2-8, 2026
Home  ~  Simple Meals  ~  Club Membership  ~  Shop  ~  Privacy Policy  ~  Disclosure  ~ Contact

Copyright © 2026 · Beautiful Pro Theme on Genesis Framework · WordPress · Log in