Heavenly Homemakers

Encouraging women in homemaking, healthy eating and parenting

  • Home
    • About
    • FAQs
  • Recipes
    • Bread and Breakfast
    • Condiments
    • Dairy
    • Main Dishes
    • Side Dishes and Snacks
    • Desserts
    • Gluten Free
    • Instant Pot
    • Crock Pot
    • Heavenly Homemaker’s Weekly Menus
  • Homemaking
    • Real Food Sources
  • Store
  • Contact
    • Advertise
    • Disclosure
    • Privacy Policy
  • Simple Meals
  • Club Members!

Simple Green Beans in the Air Fryer

December 20, 2020 by Laura 2 Comments

This post may contain affiliate links which won’t change your price but will share some commission.

I love how simple and tasty it is to make green beans in the air fryer!

Do you have an Air Fryer? If no, you might consider putting it on your Christmas wish-list. Here’s how I’ve found it to save a lot of money. Not to mention it turns out some super fun foods, making us feel like we’re eating a treat meal from a restaurant!

So green beans in the Air Fryer? Well, these are super healthy and our kids gobble them up because they’re so delicious. They take about two minutes to prepare, so you can’t go wrong there.

Simple Green Beans in the Air FryerYum

Simple Green Beans in the Air Fryer
 
Save Print
Author: Laura
Serves: 4-6
Ingredients
  • 12-ounces frozen fine green beans
  • 1 teaspoon olive oil
  • ¼ teaspoon sea salt
  • ¼ teaspoon garlic powder (optional)
Instructions
  1. Pour green beans into a bowl (or cheat by cutting open the bag of green beans to use it as a disposable bowl!)
  2. Add olive oil, salt, and garlic powder.
  3. Toss with a spoon or tongs to coat the green beans.
  4. Cook in your Air Fryer at 400 degrees for 7-10 minutes, tossing them half-way through cook time to make sure they are cooking evenly.
3.5.3251

These have an awesome crunch. And did you see that simple hack I shared in the recipe? I simply open a bag of frozen green beans and use the bag as a bowl! Drizzle in the olive oil, sprinkle in the seasonings, shake the bag, and pour the coated green beans into the air fryer. No dishes!! NO DISHES!!!! That is my favorite part, besides of course, the fact that we can make this awesome vegetable in the air fryer. Nourishing and fun all in one!

P.S. I have this Air Fryer and we’ve been very happy with it!

Heavenly Homemaker's Club Members: Access your homepage and all your fantastic resources here! Not a member yet? Please join us!

After School Snacks to Have on Hand

August 26, 2020 by Laura Leave a Comment

This post may contain affiliate links which won’t change your price but will share some commission.

Even though we homeschool, I still need to have after school snacks on hand. After all, we’re hungry after we’ve finished our school day too!

Here are the snacks we like to have on hand to make our afternoons run more smoothly – especially if we’re heading out to soccer games in the evening!

After School Snacks to Have on HandYum

First, here are some little-to-no prep snack ideas:

  • Summer Sausage
  • Lunch Meat
  • Leftover Ham
  • Variety of cheese
  • Carrot Sticks with Ranch or Hummus
  • Cucumbers
  • Celery and Peanut Butter
  • Sweet Peppers
  • Olives
  • Pickles
  • Apples
  • Grapes
  • Bananas
  • Oranges
  • Strawberries
  • Blueberries
  • Cantaloupe
  • Raspberries
  • Pineapple
  • Peanuts
  • Almonds
  • Cashews
  • Crackers
  • Bread and Butter
  • Peanut Butter Honey Toast
  • Chips
  • Guacamole
  • Salsa
  • Smoothies
  • Popcorn

And if you have time to make or bake a fun recipe, here are some of our favorites!

  1. 4-Ingredient Chocolate Crunch Bars
  2. No Bake Cookie Cups (5 minute prep!)
  3. Cream Cheese Salsa Dip (2 ingredients!)
  4. Pineapple Coconut Quick Bread (blends together fast!)
  5. Parmesan Crisps (so easy you won’t believe it!)
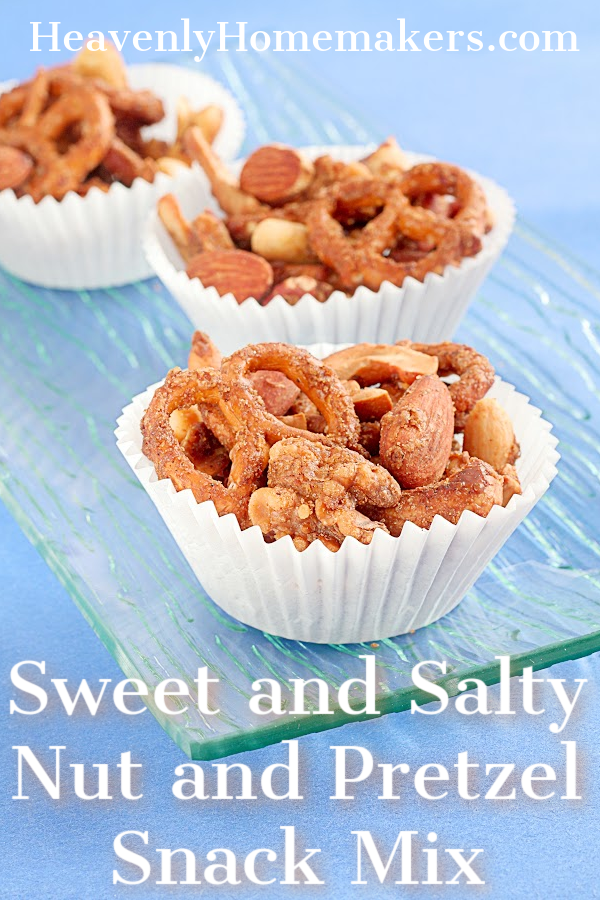
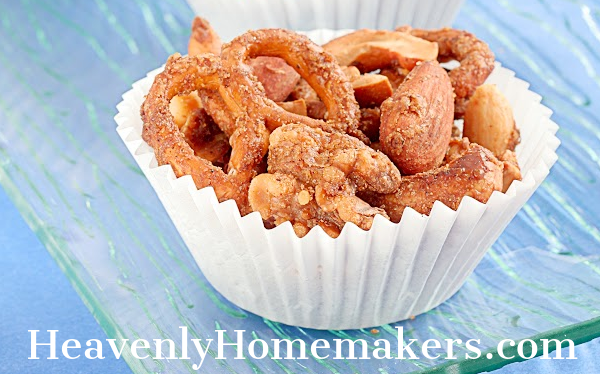
  6. Sweet and Salty Almonds or Pecans
  7. Chocolate Cheesecake Fudge
  8. Creamy Italian Veggie Dip
  9. No Bake Chocolate Chip Cookie Bars
  10. Honey Sweetened Flourless Peanut Butter Bars (3 ingredients!)
  11. Easy Cheesy Popcorn
  12. 3-Ingredient Peanut Butter Honey Rice Krispie Treats
  13. Homemade Chewy Granola Bars

It’s fun to have something homemade to treat the family with after a full day of learning!

Bonus: Here are 40 fun snack recipes that include peanut butter.

Want more? Here’s our 227 Healthy Snack Ideas eBook!

I also like to keep snacks like this on hand to grab and go to soccer games:

  • Veggie Straws
  • Applesauce Squeezies
  • Freeze Dried Fruit
  • Cheese Sticks
  • Fruit Leather

What are your favorite snacks to enjoy as After School treats?

Heavenly Homemaker's Club Members: Access your homepage and all your fantastic resources here! Not a member yet? Please join us!

Easy Salads for Summertime

June 7, 2020 by Laura Leave a Comment

This post may contain affiliate links which won’t change your price but will share some commission.

Need some easy salads for summertime?

I’ve confessed here before that I often just grab mixed greens out of the fridge and eat them on the fly. No dressing. No bowl. No fork. Mixed greens are finger food for this busy mom.

But do I truly enjoy them that way? Not really. I just eat them because I need them and know that they will give me nourishment. Weird and boring…I know. But it works because I need it to work.

Meanwhile, these awesome salad recipes are sitting here waiting to be actually enjoyed. They taste amazing, include fantastic and flavorful add-ins, and they don’t take a lot of time to prepare.

My favorite by far is this BLT Chopped Salad. Wow is this a fantastic combination of flavors! This salad is worth getting out a bowl and a fork for!

Some of the salads in this list are an entire meal all by themselves. Some make a wonderful side dish. All of them are wonderful to take on a picnic or potluck. Some have fruit, some include greens, some even include cream cheese because God is good.

Easy Salads for SummertimeYum

  • Bacon, Egg, and Avocado Salad
  • Black Bean Taco Salad
  • BLT Chopped Salad
  • Easy Taco Salad
  • Chicken Chef Salad
  • Tuna Salad
  • Perfect Pasta Salad
  • Simple Bacon Broccoli Salad
  • Easy Blue Raspberry Salad
  • Strawberry Spinach Salad with Vinaigrette
  • Easy Salsa Chicken Salad
  • Strawberry Christmas Salad
  • Pineapple Fluff Salad
  • Build-a-Fruit-Salad Bar
  • Hawaiian Fruit Salad
  • Simple Strawberry Fluff Salad

What are your favorite summertime salads?

Heavenly Homemaker's Club Members: Access your homepage and all your fantastic resources here! Not a member yet? Please join us!

How to Make Stick-of-Butter Rice in the Instant Pot

May 27, 2020 by Laura 2 Comments

This post may contain affiliate links which won’t change your price but will share some commission.

If you have an Instant Pot, this method for cooking Stick-of-Butter Rice cuts the cook time in half!

Yum

Once I learned to make Stick-of-Butter-Rice, I’ve never gone back to making it the “regular” way again. This recipe is TOO DELICIOUS. My entire family likes this – even the ones who never really cared about rice before. It’s the butter, of course. Also the onion. And the broth. The mixture makes incredibly tasty rice!

If you bake this recipe in an oven, it takes a solid hour. This is fine if you have an hour. If you don’t, and you have an Instant Pot, try it this way instead! It can be done in just a half hour!

I love making batches of rice ahead of time. Typically I’ll make this and use what we need for a meal, then use the rest to stir into recipes like:

  • Beef and Cheese Burritos
  • Chicken Burritos
  • Cheesy Beef and Rice
  • Spanish Rice

Then I can get two meals out of one!

Here’s how we often eat our freshly made rice, served with:

  • Hawaiian Crock Pot Chicken
  • Simple Overnight Saucy Crock Pot Chicken
  • Simple Overnight Melt-in-Your-Mouth Beef Roast
  • Simple Barbecue Beef Roast
  • Simple Hawaiian Beef Roast
  • Simple Crock Pot Salsa Shredded Beef

But truly, this rice is so flavorful that it’s perfect as a side dish all by itself. I think you’ll be like me once you try this and never go back to regular rice again!

How to Make Stick-of-Butter Rice in the Instant Pot

How to Make Stick-of-Butter Rice in the Instant Pot
 
Save Print
Author: Laura
Serves: 6-8
Ingredients
  • 2 cups brown rice (uncooked)
  • 2 cups beef or chicken broth
  • ¼ teaspoon sea salt
  • 2 Tablespoons dry minced onions
  • 1 stick of butter, cut into 6 chunks (1/2 cup)
Instructions
  1. Place ingredients in your Instant Pot and stir.
  2. Seal pot and cook on the manual setting at high pressure for 22 minutes.
  3. Allow the pot to release naturally after cooking.
  4. Stir and enjoy!
3.5.3229


Heavenly Homemaker's Club Members: Access your homepage and all your fantastic resources here! Not a member yet? Please join us!

Easy White Queso

October 30, 2019 by Laura 2 Comments

This post may contain affiliate links which won’t change your price but will share some commission.

It’s my favorite splurge at any Mexican restaurant. So finally, I decided that it must be time to try making White Queso at home.

Why make White Queso at home?

Mostly, because of the deliciousness. Also, because of this:

At a birthday party several months ago, the hostess had picked up one of her birthday boy’s favorites: White Queso from our local Mexican restaurant. She set it out as a part of a delicious taco bar. Maybe I was just extra hungry that day (probably), or maybe my friend is an excellent cook (most definitely). But my taco plate that day tasted so good that I went back for more and wanted to duplicate it later at home.

So a few days later, I decided to surprise my husband and kids by picking up a large cup of White Queso to go with our taco dinner at home. Great idea, thought I. They will love it and be so surprised that Mom actually went to a restaurant to buy part of our dinner.

Were they surprised? Yes, and delighted. Was I a little bit sticker-shocked by how much it costs to buy a large, delicious cup of queso at the restaurant? Gulp.

So while it was fun and delicious, I knew I could only do something like that on a special occasion. A few months later, I was craving the White Queso and decided to try my hand at it. (Sometimes I wonder why it takes me so long to try to make something at home. Isn’t this my hobby?)

Take a few seconds to watch this fun video Malachi helped me make to show you how easy it is to make Easy White Queso at home!

Easy White Queso – See how it’s made —->

Guess what? It takes less time to make White Queso at home than it does to stand in line at a restaurant waiting for them to bring you a cup and take your money. Obviously it costs less. And while the authentically made queso at the restaurant is still better than mine, I’m so excited to be able to make and eat this regularly now instead of waiting for the very occasional splurge at a restaurant!

Easy White QuesoYum

Easy White Queso
 
Save Print
Author: Laura
Serves: 6-8
Ingredients
  • 8-ounces cream cheese
  • 16-ounces pepper jack cheese
  • ¾ cup sour cream
  • 1 cup half-and-half or whole milk
  • 10-ounce can Rotel (diced tomatoes and green chilies)
Instructions
  1. Place all ingredients into a medium-sized saucepan.
  2. Whisk over medium or low heat until mixture has melted together smoothly.
  3. Serve!
3.5.3229

See how easy that is!!?

What’s your favorite restaurant splurge?

Heavenly Homemaker's Club Members: Access your homepage and all your fantastic resources here! Not a member yet? Please join us!

Homemade Chewy Granola Bars

September 29, 2019 by Laura Leave a Comment

This post may contain affiliate links which won’t change your price but will share some commission.

Our Homemade Chewy Granola Bars recipe has been one of our most popular ever since I originally posted way back in 2010! So I decided it was time to bring it back, update it, and put it back on your radar as we all enjoy a new school year.

The beauty of this recipe – besides the fact that it uses only real food ingredients and NO corn syrup – is that you can add any of your family’s favorite ingredients. Leave out anything your family doesn’t like, add what they love! I love versatile recipes like this!

Homemade Chewy Granola BarsYum

Homemade Chewy Granola Bars
 
Save Print
Author: Laura
Serves: 12
Ingredients
  • ½ cup peanut butter, almond butter, or sunbutter
  • ⅓ cup honey
  • ¼ cup coconut oil (or another oil of your choice)
  • 1 cup oats
  • 1 cup total of any combination of: sesame seeds, coconut flakes, sunflower seeds, dried fruit, mini chocolate chips
Instructions
  1. In a medium sized saucepan, melt together peanut butter, honey and coconut oil.
  2. Remove from heat and add one cup of oats.
  3. Choose your favorite combination of coconut flakes, sesame seeds, sunflower seeds, dried fruit and mini chocolate chips, to equal a total of ONE CUP. (I just got out my one cup measuring cup and poured in the ingredients until the cup was full.)
  4. Pour in and stir well.
  5. Spread mixture into a 8x8 or 9x4 pan.
  6. Chill for two hours, then cut into bars.
3.5.3229


We often bag these individually to take on the go. I usually make them with whatever we have on hand, but I always have chocolate chips on hand, so it is a given that I always add them to these granola bars. Is there really any other way? (Well sure. Another way is to skip the chocolate chips and instead add chocolate chunks. I am nothing if not flexible.)

What are your favorite Granola Bar add-ins?

Heavenly Homemaker's Club Members: Access your homepage and all your fantastic resources here! Not a member yet? Please join us!

Homemade Crunchy Granola Bars

July 30, 2019 by Laura 5 Comments

This post may contain affiliate links which won’t change your price but will share some commission.

I’m sure you’re wondering: Why did Laura decide to make Homemade Crunchy Granola Bars?

Oh, you weren’t wondering? You’re just so used to me sharing recipes that you never question what inspired the recipe? And really, you probably don’t even care too much as you really just want to take a peek at the recipe to see if it looks easy and good enough to try.

It get you. I’m a “scroll to the bottom of the post and just read the recipe” kind of a gal too. But still, I wanted to tell you the question I asked myself before I looked up ideas for how to create Homemade Crunchy Granola Bars. The question was this:

What is a better use of my time – going to the store or making these at home?

It wasn’t really about money, even though making these homemade is going to save a buck or two. It wasn’t about the ingredients, even though making these homemade is going to ensure we only eat the best of the best. What was it about then?

See, now that we have little ones in the house again (currently a 5-year-old and an 8-month-old), along with our teens and college guys home for the summer, I am questioning my best use of my time for EVERYTHING. Not one minute can be wasted, you know?

We’ve been on a bit of a Nature Valley Granola Bar kick, because God is bigger than store-bought granola bars when you have a lot of people to love on. But then we ran out of the bars, and quite a few other staple snacks too. I mean, I did add them to the grocery list, but on that particular day and week, I was trying to avoid going to the store for as many days as possible.

We had fresh produce from our garden and milk from the farm. So all other meals and snacks could be made from what we had so that I wouldn’t have to mess with lugging babies to the store. Can anyone else relate to this?

So while Boy Babe was napping, Bonus Boy and I mixed these up after looking up a few ideas online. He had fun, I had fun, and you can bet that this recipe is super simple because if I’m too lazy to go to the store, I’m certainly not willing to make a difficult recipe, right?

We are very pleased with how these turned out! They include only simple, real food ingredients. They are great for breakfast or for a snack. And they pack well in the diaper bag to, you know, take to the store with us should we ever decide to go again. :)

Homemade Crunchy Granola BarsYum

5.0 from 1 reviews
Homemade Crunchy Granola Bars
 
Save Print
Author: Laura
Serves: 15
Ingredients
  • 3¼ cups rolled oats
  • ⅔ cups flour (I use freshly ground soft white wheat)
  • 3 tablespoons brown sugar or sucanat
  • ½ teaspoon baking soda
  • ½ teaspoon salt
  • ⅔ cup honey
  • ⅓ cup melted coconut oil
  • 1 teaspoon vanilla extract
Instructions
  1. In a large bowl, mix oats, flour, brown sugar, baking soda, and salt.
  2. Add honey, coconut oil, and vanilla, stirring until well combined.
  3. Press mixture down into a parchment paper-lined 9x13 pan.
  4. Bake in a 350 degree oven for 20-25 minutes or until golden brown.
  5. Remove pan from oven, and press the bars down with another piece of parchment paper so that they stay nice and tight while cooling.
  6. After 15 minutes, remove the bars from the pan to cool for a few more minutes.
  7. Cut them into 12 bars or break into snack-sized bites.
  8. Allow approximately 2 hours for the bars to become crunchy.
3.5.3229

In your current season of life, what is your preference? Buy most food store-bought or make do with what you have at home so you don’t have to mess with a grocery store run?

Heavenly Homemaker's Club Members: Access your homepage and all your fantastic resources here! Not a member yet? Please join us!

Simple Layered Pudding in a Jar

July 23, 2019 by Laura Leave a Comment

This post may contain affiliate links which won’t change your price but will share some commission.

Did you see our Homemade Vanilla Pudding Recipe? Now you’re going to need this Simple Layered Pudding in a Jar idea to go with it!

This idea is so fantastic because you can mix and match and make a treat exactly to your liking.

Take it to go!

This idea is beautiful enough to make for special gatherings, parties, and showers. But it’s also practical enough that you can make several jars ahead and take them on the go with you. Pack them for lunches. Carry them for snacks. Make everyone around you jealous that while you are eating a gorgeous and delicious Layered Pudding in a Jar treat, they are stuck with…well, anything but a Layered Pudding in a Jar treat.

Hmm, perhaps you should carry around extras to share with those around you. :)

Simple Layered Pudding in a JarYum

Simple Layered Pudding in a Jar
 
Save Print
Author: Laura
Serves: 6
Ingredients
  • 1 batch of homemade vanilla pudding*
  • 1 batch of homemade fruit syrup**
  • Whipped cream***
  • Slivered almonds or other nuts that you prefer (optional)
Instructions
  1. Make pudding, fruit syrup, and whipped cream as directed in each of the links below.
  2. Layer each in a jar according to your preference.
  3. Top with whipped cream and nuts if you like!
  4. Cover and store in the fridge to eat as needed.
3.5.3229

Ready for the recipe links?

*Homemade Vanilla Pudding

**Homemade Fruit Syrups:

  • Apple Butter
  • Peach Syrup
  • Easy Raspberry Syrup
  • Blueberry Syrup (sub strawberries if you want!)

***Homemade Whipped Cream

Don’t want to mess with making homemade fruit syrup?

Simply toss in sliced fresh fruit.

The sky is the limit to how you can create your Layered Pudding Parfaits. It should come as no surprise that strawberry is my favorite syrup to make and add to my pudding. But since I don’t want/need the added sugar needed to create a fruit syrup, I usually just add the strawberries as-is!

Enjoy and have fun!

Want more Food-in-a-Jar Ideas?

You’ll love these!

Need to know where to get great jars?

This post shares all!

Heavenly Homemaker's Club Members: Access your homepage and all your fantastic resources here! Not a member yet? Please join us!

No-Bake Chocolate Chip Cookie Dough Bites – (Gluten and Dairy Free)

July 7, 2019 by Laura 2 Comments

This post may contain affiliate links which won’t change your price but will share some commission.

You might notice that this No-Bake Chocolate Chip Cookie Dough Bites recipe looks identical to our No-Bake Chocolate Chip Cookie Dough Bars recipe. This one is a fun one to make with your kids!

Yep. You figured it out. Same recipe. One shaped into bars. One shaped into balls. We are so creative, are we not?

Speaking of creative, we’ve got three other simple varieties of this recipe here. Just a few ingredient variations will give you one of these!


Grab the No-Bake Cookie Dough Bite recipes here:

  • No-Bake Chocolate Fudge Cookie Bites
  • No-Bake Snickerdoodle Bites
  • No-Bake Peanut Butter Cookie Bites

Need Coconut Flour?

I found a great price here!

Need Almond Butter?

It’s hard to find a good price on this! Aldi has been my best option, if and when I can make it there to shop. (I live an hour away from the closest Aldi, boo!) Try to find one without added sugar. Or better yet, if you can find a good price on almonds, make Homemade Almond Butter!

Need Honey?

I much prefer and recommend buying local honey! Otherwise, I recommend buying a big jug from Azure Standard if that is an option for you.

Need Chocolate Chips?

My very favorite chips are these Enjoy Life Mini Chocolate Chips! They are usually more expensive in the summer as they don’t ship well in the heat. So watch for them to go down in price in the fall and winter months, then stock up!

Need Vanilla Extract?

Oh how I love making it myself! Unfortunately, the price of vanilla beans has gone up over the years. Boo. Still, I think it’s best to make it ourselves if we can! Learn how here!

And now, grab your kids and let them help you make these awesome little treats!

No-Bake Chocolate Chip Cookie Dough BitesYum

No-Bake Chocolate Chip Cookie Dough Bites - 5 Ingredients
 
Save Print
Author: Laura
Serves: 12-15
Ingredients
  • 1 cup natural creamy almond butter
  • ¼ cup honey
  • 1 teaspoon vanilla extract
  • ½ cup coconut flour
  • ¼ cup mini chocolate chips
Instructions
  1. Mix the ingredients together in a bowl until well combined.
  2. Roll the mixture into teaspoon-sized (or whatever sized) balls.
  3. Refrigerate for about 30 minutes before serving.
3.5.3229

We like using a cookie scoop like this one to make these Cookie Dough Bites.

Looking for more help as you pull your kids into the kitchen with you?

  • Grab our new and improved Teaching Your Kids to Cook eBook!
  • Here’s our Kids in the Kitchen discounted eBook collection.
  • This Kids Cook Real Food eCourse is fantastic! It is well worth the investment for all that it offers to your family!
  • Our Chocolate Covered Kids Cookbook and Resource Pack is filled with helpful tips, instructions, and of course, recipes!

If you really want to go all in and teach your kids to cook this summer, I encourage you to invest in Katie Kimball’s Kids Cook Real Food eCourse. I used this course with Malachi and plan to use it with Bonus Boy too. It is FANTASTIC!!! Get the details here. And pick up her awesome FREEBIE —>


Heavenly Homemaker's Club Members: Access your homepage and all your fantastic resources here! Not a member yet? Please join us!

Simple Seasoned Potato Wedges

June 9, 2019 by Laura Leave a Comment

This post may contain affiliate links which won’t change your price but will share some commission.

If these Simple Seasoned Potato Wedges are healthy to eat, they must be free of fat and flavor, right? Otherwise they couldn’t possibly be healthy, right? Wrong. It’s time to pull out the fryer, my friends.

I love that when made with good oils, fried food can be healthy. I mean, fried food tastes sooo good!

(Let’s be real. Don’t tell me you prefer fresh broccoli over fresh French fries. Okay then.)

No doubt, we need balance, and plenty of fresh green veggies too. But how sad to think we have to avoid chicken strips and French fries simply because they are fried.

Obviously, not all fried food is created equally – and many fried foods are unhealthy for our bodies. But the only thing that makes them unhealthy is the oil that they’re fried in. IF you fry your food in Coconut Oil or Palm Shortening/Oil – oils that can withstand high frying temperatures without compromising their health quality – you can enjoy fried food without guilt.

And I do mean enjoy. C’mon now, fresh French fries?? There’s almost nothing better.

If you don’t have a fryer, you can brush these Simple Seasoned Potato Wedges with oil and bake them in the oven, as they are super tasty that way too! I have and use this fryer, given to me by my men for Christmas several years ago. But either cooking method works great!

Make as many or as few as you would like, generally about one potato per person.

Simple Seasoned Potato WedgesYum

Simple Seasoned Potato Wedges
 
Save Print
Author: Laura
Ingredients
  • Yukon gold potatoes (any potato variety works, but these taste much better!)
  • Refined coconut oil or palm shortening
  • Seasoned salt
Instructions
  1. Wash and cut potatoes into 8-10 wedges each.
  2. Fry in hot oil for 6-10 minutes or until wedges are as crispy as you prefer.
  3. Remove from oil and sprinkle liberally with seasoned salt.
  4. OVEN METHOD:
  5. Melt coconut oil or palm shortening (about 1 Tablespoon per potato).
  6. Cut potatoes into wedges and spread them out in a single layer on a cookie sheet.
  7. Brush melted oil over each wedge.
  8. Sprinkle liberally with seasoned salt.
  9. Bake in a 425 degree oven for about 25 minutes or until potatoes are golden brown and crispy
3.5.3229

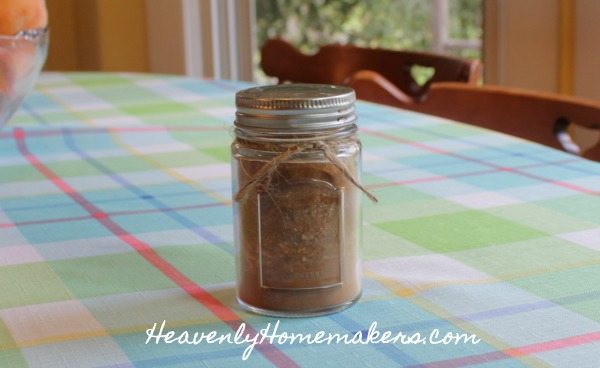
Grab our Seasoned Salt recipe here. Otherwise, you can purchase some like this.

Not sure where to find healthy oils to use in frying? Here are some quick links:

  • Organic Refined Coconut Oil (flavorless)
  • Healthy Traditions Organic Palm Shortening or Spectrum Organic Palm Shortening

Want some tasty recipes to serve alongside your Potato Wedges?

  • Simple Grilled Salmon
  • Simple Sloppy Joes
  • The Perfect Grilled Chicken
  • Simple Crunchy Ranch Chicken Strips
  • Simple Oven Fried Chicken
  • Simple Honey Mustard Chicken Legs
  • Simple Crock Pot BBQ Spareribs
  • Simple Sweet and Sour Baked Chicken Legs
  • Simple Chicken Cheeseballs with a Kick
  • Make-Ahead Parmesan Burgers
  • Cheese-Stuffed Burgers
  • Cheddar Ranch Burgers

‘Fess up! What are your favorite fried foods?

Some of these links are my affiliate links.

Heavenly Homemaker's Club Members: Access your homepage and all your fantastic resources here! Not a member yet? Please join us!
Next Page »

Join Our Community!

 Facebook Twitter RSS E-mail Instagram Pinterest

Popular Posts

~ Will All of the Real Moms Please Stand Up?
~ Easy! Stir-and-Pour Whole Wheat Bread
~ How to Make Gatorade
~ 31 Real Food Breakfast Ideas
~ Dear Teenage Girls...
~ When Mom Takes a Step Back
~ The Inexpensive Health Insurance We Love!
~ Let's Talk Real Food Grocery Budgets

Check out our latest posts!

  • 10 Fun Ideas to Try This Year
  • How to Drink Your Salad (and love it!)
  • Can Mom Have More Fun?
  • 7 Ideas to Make Your Home Extra Cozy
  • Who Even Cares Anymore About Free Range Chicken?
Home  ~  Simple Meals  ~  Club Membership  ~  Shop  ~  Privacy Policy  ~  Disclosure  ~ Contact

Copyright © 2021 · Beautiful Pro Theme on Genesis Framework · WordPress · Log in