Hey, it’s Tasha. Remember me? I’m Laura’s friend. The one who fell off the cliff and didn’t die. I homeschool a few kids and eat chocolate, AND I DRINK IT. Eating paleo took a turn for the better once I discovered some amazing chocolate tricks, but today is the day for the confessions of a paleo chocolate shake addict.
Chocolate Shake Confessions:
- I drink a chocolate shake every day. Sometimes more than one.
- Secretly, not so secretly anymore, I am happy a few of my kids don’t like my chocolate shakes—more for me.
- 16 oz of cacao powder barely lasts me one month = that means I eat approximately 3 Tablespoons a day.
- Once, mid-shake preparation, I was ravenous. Hungry, grumpy, starving. The cacao powder was not where it was supposed to be. I searched frantically through the cupboards to no avail. Mean Tasha came out. I yelled across the house to my husband and kids, “WHO MOVED THE CHOCOLATE STUFF??” No one answered Crazy Mama. Climbed up on the counter and searched the top shelf while yelling at my family that there was a crisis upon us. Turns out, the almost empty bag was found behind the Blentec. Right where I’d left it I’m sure.
- No, I’m not misspelling Cocoa. Cacao is a real thing.
Cacao vs. Cocoa?
Cacao is the name of the tree that grows pods with beans that are harvested and roasted like coffee to make cocoa powder and chocolate. But—woah—if you don’t roast the beans, it’s called cacao instead of cocoa. Unroasted beans are raw and contain significantly higher levels of minerals, fiber, and even some protein. So that’s what I chose to eat. Please check out the Subscribe & Save options available for Organic Cacao Powder.
Paleo Chocolate Shake Recipe
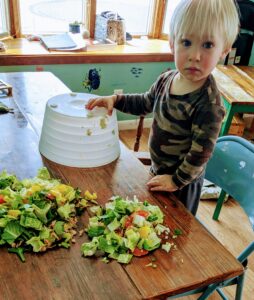
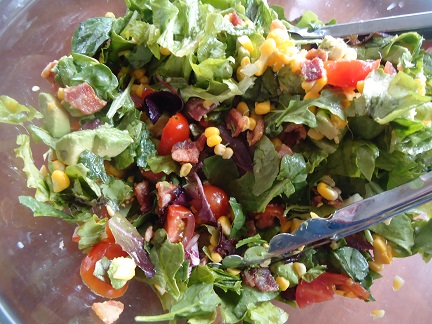
Clearly, Laura’s salad-drinking habits are commendable. But, another confession: I’m not a grown-up enough human to submit myself to such torture. What I meant to say is that Laura is a super human blessed by the Almighty with taste buds of steel. Hmm. Okay, how about this: I’m so deeply in love with chocolate shakes and I see no reason to give them up.
Sorry. The recipe(s).
I mostly make it the same every day, but has been evolving over the year. Therefore, I will give you two recipes. The first is when you only have 30 seconds to spare. The second is when you have 2 minutes.
Quick Fix Chocolate Shake
- 8 oz. coconut milk
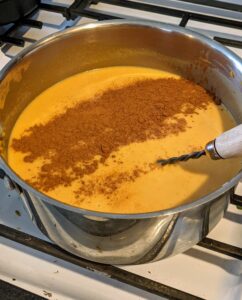
- 2 Tablespoons cacao or cocoa powder
- 2 pinches salt
- 1/2—1 teaspoon Super Sweet from THM or stevia/blend sweetener of choice
- Large handful of spinach
- 3 cubes ice
- Blend until smooth
- Drink
The above smoothie has approximately 4 grams of protein and 92 calories. It is enough to satisfy a chocolate craving and sweet tooth. If you want to trick your mouth into thinking you’re having a treat, and you’re in a hurry, give it a try. Don’t get me wrong, there are plenty of nutrients in the spinach, cacao, and coconut milk, but I wouldn’t recommend replacing a meal with this shake. Unless you’re planning to starve yourself to death, which I highly discourage.
Paleo Chocolate Shake with more stuff…
- 8 oz. coconut milk
- 2 Tablespoons cacao or cocoa powder
- 2 pinches salt
- 1/2—1 teaspoon Super Sweet from THM or stevia/blend sweetener of choice
- 2 Tablespoons integral collagen (paleo friendly dairy/soy-free protein)
- half of a banana (sliced and frozen is nice)
- 1/2 cup frozen fruit (blueberries or sweet cherries are good options)
- 1 Tablespoon almond butter
- Large handful spinach
- 3 cubes of ice
- Blend until smooth
- Drink in secret or make double to share with all the toddlers
This is the shake I drink daily. If we’re heading out and I’m not sure if there’s going to be paleo food for me, then I make a shake. Sometimes I drink with breakfast, or later in the day if I’m hungry and there’s no food in front of me. The full recipe is approximately 320 calories and 17 grams of protein.
What do you eat everyday?! Does it make you ask happy as this shake makes me? If not… maybe you should make this shake instead.
- 8 oz. coconut milk
- 2 Tablespoons cacao or cocoa powder
- 2 pinches salt
- ½—1 teaspoon Super Sweet from THM or stevia/blend sweetener of choice
- 2 Tablespoons integral collagen (paleo friendly dairy/soy-free protein)
- half of a banana (sliced and frozen is nice)
- ½ cup frozen fruit (blueberries or sweet cherries are good options)
- 1 Tablespoon almond butter
- Large handful spinach
- 3 cubes of ice
- Blend until smooth
- Drink in secret or make double to share with all the toddlers
 Tasha Hackett is a friend of Laura and author of the Christian Romance, Bluebird on the Prairie; available wherever books are sold and from her website, www.TashaHackett.com. She spends most of her time (drinking chocolate shakes) with four chatty children and an incredibly supportive husband. They give her the kind of love people write books about.