Heavenly Homemakers

Encouraging women in homemaking, healthy eating and parenting

  • Home
    • About
    • FAQs
  • Recipes
    • Bread and Breakfast
    • Condiments
    • Dairy
    • Main Dishes
    • Side Dishes and Snacks
    • Desserts
    • Gluten Free
    • Instant Pot
    • Crock Pot
    • Heavenly Homemaker’s Weekly Menus
  • Homemaking
    • Real Food Sources
  • Store
  • Contact
    • Advertise
    • Disclosure
    • Privacy Policy
  • Simple Meals
  • Club Members!

Simple Crock Pot Chocolate Peanut Butter Lava Cake

December 18, 2018 by Laura Leave a Comment

This post may contain affiliate links. For more information, please see our disclosure policy.

I shared this Simple Crock Pot Chocolate Peanut Butter Lava Cake with you many years ago! Christmas is the perfect time to bring it back, don’t you think?

This recipe looks rather involved, but would I be sharing it if it was difficult? Of course not. :) Putting this together is very simple, and worth every bit of your (small amount of) effort!

Simple Crock Pot Chocolate Peanut Butter Lava Cake

Simple Crock Pot Chocolate Peanut Butter Lava Cake
 
Save Print
Author: Laura
Serves: 6-8
Ingredients
  • 1 cup whole wheat flour
  • 2 Tablespoons unsweetened cocoa powder
  • ½ cup sucanat or brown sugar
  • 1½ teaspoon baking powder
  • ¼ teaspoon salt
  • ½ cup milk
  • 2 Tablespoons melted butter (or coconut oil)
  • 1 teaspoon vanilla
  • ½ cup natural peanut butter
  • ½ cup semi-sweet chocolate chips
  • TOPPING:
  • 3 Tablespoons cocoa powder
  • ½ cup sucanat or brown sugar
  • 1½ cups boiling water
Instructions
  1. Combine flour, cocoa, sucanat, baking powder, and salt. Mix well.
  2. Make a well in the center and add milk, butter, and vanilla.
  3. Stir well, until batter is smooth.
  4. Stir in peanut butter (heat if needed, to thin).
  5. Stir in chocolate chips.
  6. Spread the batter evenly into a well greased slow cooker.
  7. Make the topping:
  8. Mix cocoa and sucanat, whisk in boiling water until smooth.
  9. Gently pour over batter in crock pot, but don’t stir.
  10. Cover and cook on HIGH until puffed and the top layer is set, about 2- 2¼ hours.
  11. Turn off crock pot and let stand, covered for at least 30 minutes.
  12. Serve the cake (which is now on top) with ice cream or whipped cream and drizzle the fudgy pudding from the bottom over both.
3.5.3229
Top this awesome cake with freshly whipped cream!

How to Make Fresh Whipped Cream

Want to go a little chocolate and peanut butter CrAzY? Try this on top of your cake:

How to Make Chocolate Peanut Butter Cup Whipped Cream

Heavenly Homemaker's Club Members: Access your homepage and all your fantastic resources here! Not a member yet? Please join us!

A Practical but Fun Way to Bless People in Need

December 2, 2018 by Laura 3 Comments

This post may contain affiliate links. For more information, please see our disclosure policy.

I originally shared this idea back in 2015, but as God continues to show us more about loving others, I wanted to bring back the idea again this year. Truly this is a very practical but fun way to bless people in need this winter!

Here’s my original post from 2015:

I picked up several pairs of fun Christmas socks before Thanksgiving, so as expected, I bought some toothpaste and pencils to go with them. This is the obvious action to take when gifting Christmas socks. Everything I do is normal.

What actually happened is that I bought the fun Christmas socks with our adopted college students in mind. I figured I would package them up with some other goodies and put them in their campus mail. But then I came across the fun idea on Pinterest to fill the socks with treats and little gifts, and before I knew it (which really translates to several days and hours later) – I had six sets of these:

Christmas Sock Gift

These gifts were terrifically fun to put together! I went with basic wool socks for our three male adopted students, as you’ll see below. Since I’d gotten so many pairs of fun girly Christmas socks on sale, I decided to mix theirs up a bit. While it looks like they’re receiving mis-matched pairs, I actually rolled up the second sock of each pair and stuck it down inside the toes. So the girls are getting two pairs of cute socks. Sorry boys – yours are much more practical!

Christmas Sock Gifts

Speaking of practical – I included a few other practical items inside the guy’s socks. What college student wants to actually spend money on toothpaste and soap? Not to worry, I’m here to help. Their socks included soap, toothpaste, pens, candy cane chapstick, a small flashlight, gum, and candy (because not everything must be practical and at least I included toothpaste to brush away the sugar).

The girl’s socks were a little more on the fru-fru side because my inner girl rarely gets to come out in this household of men and all that I’d been holding back exploded in the dazzling Christmas aisles at Walmart. I got the girls sparkly lip balm and glittery nail polish, Christmas nail files, snowman pencils, face scrub, gum, and candy.

Our family then worked together to come up with a punny gift tag idea to attach to our socks. Our gift tag creativity hadn’t woken up yet that morning, however, so all we came up with was “Hope your Christmas doesn’t sock.” (Get it? Don’t try too hard.) Since that idea didn’t come close to making the cut, I searched online and came up with this:

mistle toes4

Yes. That’s better.

I then created a generic tag for all of you in case you’d like to steal this idea.

Mistle Toe Socks Gift Tag

Download FREE Mistle Toes Gift Cards

A great way to bless people in need!

Beyond using this idea as a fun gift option, consider using this idea to gift those around you who are less fortunate. Filling wool socks with practical items and turning them into fun gifts like this would surely be a blessing to recipients going through a tough time. In my town, we don’t have many homeless, but we do have many low-income individuals and families. I’m working on putting together packages for several people we’ve met and become friends with this year while volunteering at our local mission. I’ll write more about this experience sometime. :)

This time of year is so much fun!

Subscribe for FREE to Heavenly Homemakers so you won’t miss all the new Simple Recipes and ideas we share to save you money!

Heavenly Homemaker's Club Members: Access your homepage and all your fantastic resources here! Not a member yet? Please join us!

Easy Chocolate Chip Cookie Pie

October 28, 2018 by Laura Leave a Comment

This post may contain affiliate links. For more information, please see our disclosure policy.

This Easy Chocolate Chip Cookie Pie is basically one giant cookie baked in a pie pan. So say my children who would love to eat the entire thing saying, “What? I only ate one cookie…”

What is it about using a normal recipe but baking it in a new way that suddenly makes it taste better? This is the Chocolate Chip Cookie recipe I’ve been using since I was a 3rd grader (with the exception that I now use real butter and freshly ground whole wheat flour). I have always baked them as regular cookies or in a pan to make bar cookies.

But recently I decided to half the recipe, press the dough into a pie pan, and bake it as a thick cookie pie. The household was excited. My 16-year old drove to the store to buy ice cream to top it. (Hmm, I wonder if he would have run so eagerly to the store to buy mixed greens or broccoli had that been my request? Ha!)

This Chocolate Chip Cookie Pie, fresh out of the oven and topped with vanilla ice cream is a huge hit and a fun variation to boring ol’ cookies. As if there’s anything boring about homemade cookies.

Easy Chocolate Chip Cookie Pie

Easy Chocolate Chip Cookie Pie
 
Save Print
Author: Laura
Serves: 12
Ingredients
  • ½ cup melted or softened butter (1 stick)
  • ½ cup brown sugar or sucanat
  • ½ teaspoon baking soda
  • ¼ teaspoon sea salt
  • ¼ teaspoon vanilla extract
  • 1 egg
  • 1¼ cups whole grain flour (more or less to create desired dough consistency; I use freshly ground soft white wheat)
  • 1 cup chocolate chips
Instructions
  1. Cream together butter and sugar.
  2. Add baking soda, salt, vanilla, and eggs and mix well.
  3. Stir in flour until well combined.
  4. Fold in chocolate chips.
  5. Spread mixture into a 9 inch pie plate.
  6. Bake in a 350 degree oven for 20-25 minutes or until golden brown.
3.5.3229


I would imagine this Cookie Pie idea would work great with just about any cookie recipe. Hmmm, challenge accepted.

Heavenly Homemaker's Club Members: Access your homepage and all your fantastic resources here! Not a member yet? Please join us!

The BEST Chocolate Chip Cookie Cups

September 23, 2018 by Laura Leave a Comment

This post may contain affiliate links. For more information, please see our disclosure policy.

In case you are wondering, these Chocolate Chip Cookie Cups truly are the best. I didn’t just make that up. It’s a proven fact.

Who am I kidding? I rarely eat sugar so I only see and smell these gems when I make them for my family or for guests. But I remember the deliciousness and therefore, I taste them in my mind. (For the record, when I smell something wonderful I feel as though I’ve tasted it. Am I the only weird one? Who can relate?)

Ultimately, you can take any of your favorite cookie recipes and bake them in a muffin cup for a fun cookie twist. But my family has declared THIS Chocolate Chip Cookie recipe to be the best, and who am I to argue?

Scoop your cookie dough (with a large scoop like this one) into a prepared muffin cup. Bake and be happy. Eat and be happier. (Or just smell them and be happy. That works too.)

The BEST Chocolate Chip Cookie Cups

The BEST Chocolate Chip Cookie Cups
 
Save Print
Author: Laura
Serves: 24
Ingredients
  • 1 cup melted butter (2 sticks)
  • 1½ cups brown sugar
  • 2 eggs
  • ½ teaspoon baking soda
  • ½ teaspoon sea salt
  • ½ teaspoon vanilla extract
  • 2¼ cups whole grain flour, more or less as needed (I use freshly ground soft white wheat)
  • 1 cup chocolate chips
Instructions
  1. In a large mixing bowl, stir together butter and brown sugar.
  2. Add eggs, baking soda, salt, and vanilla.
  3. Stir in flour until well combined (tweaking the amount as needed depending on the flour you are using)
  4. Fold in chocolate chips.
  5. Use a large cookie scoop to add dough to 24 prepared muffin tins.
  6. Bake in a 350 degree oven for 15-20 minutes or until cookie cups are golden brown.
3.5.3229

There’s something about baking these cookies into a muffin cup that makes them extra chewy and good. These Chocolate Chip Cookie Cups are awesome for packing in a lunch box or taking on the road! Make these ahead and freeze them for easy access to a great dessert when you need one.

While this recipe is made with real butter (yay!) and whole grain (hooray!), it isn’t low in sugar, so don’t go too crazy. These Chocolate Chip Cookie Cups were meant to be shared!

Want to really have fun (while you’re sharing, that is)? Put a scoop of vanilla ice cream on top of these cookie cups when they first come out of the oven. Of course then the high sugar dessert becomes an even higher sugar dessert. But wow, so good.

Heavenly Homemaker's Club Members: Access your homepage and all your fantastic resources here! Not a member yet? Please join us!

Simple Cream Cheese Corn (4 Ingredients!)

June 21, 2018 by Laura 8 Comments

This post may contain affiliate links. For more information, please see our disclosure policy.

I just realized I’ve never shared my Simple Cream Cheese Corn recipe here. As such, I’m terribly afraid that you’ll try this recipe and wag your finger at me. “Laura!!” you’ll exclaim. “This corn is incredible! Where has this recipe been my whole life? Why have you not shared it with us before today? You’ve been blogging and sharing recipes for years and years!! And you wait until today to finally disclose this?”

I hang my head in shame. I have no excuses. There are no words I can say to explain this away. I have withheld one of the best recipes in the world, and if I could go back in time and erase this mistake, I most certainly would.

Please forgive me and know that I’ll never do it again. All of my tried and true, very best recipes are yours to be had. I’ll never not share one again. Except for when I do. After all, how am I to know what I am forgetting to remember?

Rest assured, as soon as I remember what I have forgotten, you’ll be the first to know.

This Simple Cream Cheese Corn is my go-to recipe to serve when hosting guests. Why? Because it makes a “fancy” dish without any effort. Steam your corn, add the beautiful cream cheese and butter, serve it to your guests, watch them pass out.

Oh, did I forget to tell you that part? (Seems I’m extra forgetful these days.) Your guests might pass out when they eat this. It can’t be helped. The corn tastes too amazing. The creaminess and the buttery goodness mixed with the sweetness of the corn is just too much for most people to handle. They cry tears of joy while eating it. They think you’re a rock star for cooking it. They go back for seconds and thirds. You’ve changed their lives.

All this, and somehow I forgot to share the recipe until now. I have nothing to say for myself.

Simple Cream Cheese Corn

You’re about to be shocked over how ridiculously easy this is to make.

5.0 from 1 reviews
Simple Cream Cheese Corn (4 Ingredients!)
 
Save Print
Author: Laura
Serves: 4-6
Ingredients
  • 16-ounces frozen corn
  • 4-ounces cream cheese
  • 4 Tablespoons butter
  • Sea salt to taste
Instructions
  1. Steam corn in a small amount of water until tender and hot (about five minutes).
  2. Drain excess water.
  3. Stir in cream cheese and butter until melted.
  4. Salt to taste.
  5. Serve.
3.5.3229

I wasn’t kidding when I said it was easy.

Here are 20 great main dish recipes that are simple and fun to serve with this Simple Cream Cheese Corn:

  • Simple Sweet and Sour Baked Chicken Legs
  • Simple Cheesy Baked Chicken
  • Simple Italian Beef and Broccoli Skillet
  • Simple Bacon Ranch Chicken
  • Simple Chicken Cheeseballs with a Kick
  • Simple Crock Pot BBQ Spareribs
  • Simple Pizza Chicken Bake
  • Simple Parmesan Broiled Fish
  • Simple Overnight Saucy Crock Pot Chicken
  • Simple Overnight Melt-in-Your-Mouth Beef Roast
  • Simple Oven Fried Chicken
  • Simple Honey Mustard Chicken Legs
  • Simple Garlic Butter Shrimp
  • Simple Crunchy Ranch Chicken Strips
  • Simple Barbecue Beef Roast
  • Simple Roasted Rotiserie Chicken
  • Simple Grilled Chicken
  • Simple Hawaiian Beef Roast
  • Simple Garlic Parmesan Chicken Legs
  • Simple Crock Pot Applesauce BBQ Chicken

Want more recipes that only include five or fewer ingredients? You’ll love this!

[wp_eStore_fancy1 id=32]

Heavenly Homemaker's Club Members: Access your homepage and all your fantastic resources here! Not a member yet? Please join us!

How to Feed Guests Who Can’t Eat Gluten

April 19, 2018 by Laura 8 Comments

This post may contain affiliate links. For more information, please see our disclosure policy.

Gluten intolerance has become a big issue in America. I could go into all the reasons for this, but for now, let’s just thank Jesus for being our bread of life. :) Regarding this very serious gluten situation, when serving food to friends or family members who can’t eat gluten, it is very important that we know how to extend hospitality so we can prevent our guests and loved ones from becoming sick.

Sick?? Yes. While some simply experiment with eating gluten free to see if it is a diet that helps them feel better or lose weight, there are some who have a solid diagnosis of Celiac Disease or other gluten intolerance that mean that they must avoid all gluten, all the time, no matter what.

What is gluten?

Gluten is the protein found in wheat, rye, and barley. Gluten can also be found in regular oats that have been processed in a facility that processes wheat, rye, or barley. (Oats that have been clearly labeled “Gluten Free Oats” are safe.)

How to Feed Guests Who Can’t Eat Gluten

Truth: A person with Celiac Disease can’t eat even one tiny morsel of something that contains gluten without getting sick. We’re talking about sauce that has been thickened with a tiny bit of wheat flour, chicken that has been breaded with crushed wheat crackers, or even a small nibble of communion bread at church. There’s no such thing as “don’t worry – this only has a little bit of wheat in it” when it comes to feeding someone who must eat gluten free. For these people, gluten free eating isn’t an option, it is a must.

Sooooo, be aware of this and be cautious! But don’t be afraid. I’ve learned over the past decade how to easily feed my friends who can’t eat gluten. I don’t even need to buy special food to do this! I simply cook regular food, making sure to read all labels and avoid wheat, oats, barley, and rye.

Easy Meals to Feed Gluten Free Friends

You’d be amazed at how many foods are naturally gluten free! When in doubt stick with meat, fruit, and veggies. For more ideas, check out this huge list of simple meal ideas! They are gluten free without even trying!

  • Simple Baked Salmon and Asparagus
  • Simple Crock Pot Chicken Soup with a Kick
  • Last-Minute Lentil Chili
  • Simple Sweet and Sour Baked Chicken Legs
  • 20-Minute Taco Soup
  • Simple Cheesy Baked Chicken
  • Simple Creamy Chicken Stew in the Crock Pot
  • Simple Italian Beef and Broccoli Skillet
  • Simple Bacon Ranch Chicken
  • Simple Hawaiian Crock Pot Chicken
  • Simple Taco Rice Dinner
  • Simple Last Minute Nacho Plate
  • Simple Chicken Cheeseballs with a Kick
  • Simple Beanie Weanies
  • Simple Crock Pot BBQ Spareribs
  • Simple Pizza Chicken Bake
  • Simple Italian Chicken and Green Bean Bake
  • Simple Hamburger Soup
  • Simple Parmesan Broiled Fish
  • Simple Overnight Saucy Crock Pot Chicken
  • Simple 15-Minute Meal
  • Simple Overnight Melt-in-Your-Mouth Beef Roast
  • Simple Honey Mustard Chicken Legs
  • The Easiest Mashed Potatoes in the World
  • Simple Garlic Butter Shrimp
  • Simple Crock Pot Shredded Ranch Chicken (for salad or tacos)
  • Simple Barbecue Beef Roast
  • Simple Spanish Rice Bowls
  • Simple Roasted Rotiserie Chicken
  • Simple Green Chile Chicken
  • Simple Tex-Mex Creamy Chicken
  • Simple Waffle Omelets
  • Simple Grilled Chicken
  • Simple Hawaiian Beef Roast
  • Simple Crock Pot Creamy Stew Meat
  • Simple Cheese Stuffed Burgers
  • Simple Hashbrown Casserole
  • Simple Bacon Cheeseburger Casserole
  • Simple Bacon Cheeseburger Roll
  • Simple Garlic Parmesan Chicken Legs
  • The Simplest White Chicken Chili
  • Simple Lentil Nachos
  • Simple Tuna Patties
  • Simple Crock Pot Applesauce BBQ Chicken
  • Simple Hashbrown and Egg Nests
  • Simple Veggie Fritters
  • Simple Lemon Garlic Chicken Legs

Easy Snacks to Feed Gluten Free Guests

  • No Bake Cookie Cups (5 minute prep!)
  • Cream Cheese Salsa Dip (2 ingredients!)
  • Parmesan Crisps (so easy you won’t believe it!)
  • Sweet and Salty Almonds or Pecans
  • Chocolate Cheesecake Fudge
  • Creamy Italian Veggie Dip
  • No Bake Chocolate Chip Cookie Bars
  • Honey Sweetened Flourless Peanut Butter Bars (3 ingredients!)
  • Easy Cheesy Popcorn
  • Creamy Chocolate Fruit Dip

What to Avoid When Cooking For People Who Can’t Eat Gluten

Again, the ingredients to stay away from when cooking gluten free are wheat, barley, rye, and regular oats. In addition, you need to avoid:

  • Previously opened ingredients: There might be wheat bread crumbs in your jar of peanut butter or on a used stick of butter. Start fresh to be sure your food isn’t contaminated with gluten!
  • Baking stones and cast iron: These can absorb gluten, so it’s best to use stainless steel or glass pans and bowls.
  • Wooden cutting boards and wooden spoons: Again, these can absorb gluten. Use stainless steel utensils and a plastic cutting board instead.

A Few More Gluten Free Cooking Tips

  • If you want to serve bread with your meal for guests who can eat gluten, place it away from the food that is gluten free.
  • It’s a good idea to cover a baking pan with parchment paper before putting food on it in an effort to protect it from gluten contamination.
  • If you use your blender or mixer, be sure to wash it thoroughly first.
  • If you’re planning to grill meat (a wonderful choice for cooking for GF friends!) be sure to clean the grill grates before cooking meat so you can keep the meat gluten free. (This is important if you ever use your grill to heat up bread or Texas toast.)
  • Don’t be offended if the person you’re feeding asks to see packages, ingredients lists, or if they ask specifics about how something is cooked! Their health depends on it and they must be assured that the food they are eating is safe for them!

Gluten Free Friends: What are your favorite meals? Are there any other tips you’d appreciate the rest of us knowing about?

Remember, cooking gluten free food truly isn’t difficult once you realize how many thousands of food options there are that are naturally gluten free. Again, be cautious and courteous, but don’t be afraid. You’ll find that making gluten free meals really is as easy as cooking meat, steaming veggies, and slicing fruit!

Heavenly Homemaker's Club Members: Access your homepage and all your fantastic resources here! Not a member yet? Please join us!

The Easiest Way to Make Lasagna

November 16, 2017 by Laura 13 Comments

This post may contain affiliate links. For more information, please see our disclosure policy.

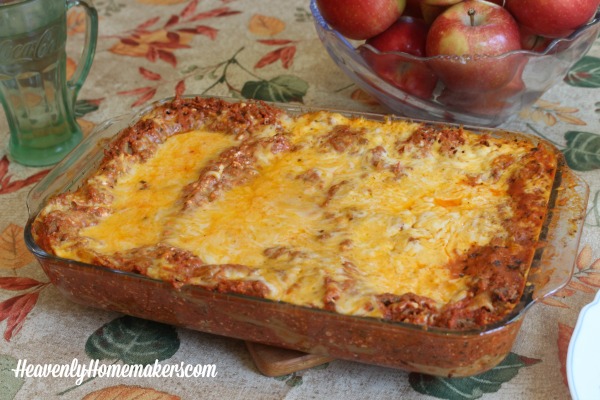
Raise your hand if you never make lasagna because you think it’s too difficult. Come closer, my friends. Allow me to let you in on a few secrets so that you can learn the easiest way to make lasagna for your family and for guests!

lasagna23

Ten years ago when I first launched my website, this was a recipe I included in my first cute little eBook series. I’ve since taken these eBooks out of my shop and shared most of these recipes on my blog. But somehow, I failed to ever share this recipe for The Easiest Lasagna!!

In the Kitchen eBooks

Awww. Remember these? Precious memories.

Until now. In celebration of 10 years of blogging, it is a must that I finally tell you my secrets for making the easiest lasagna on the planet. Forgive me for waiting this long. Your life will be better now that you can make lasagna with so little effort. Your family will be so happy!

lasagna33

Trick #1: Do not cook the lasagna noodles ahead of time. Simply lay the dry noodles in the pan and layer them with the sauce and cheese. Drizzle about 1/2 cup of water over the lasagna before baking and cover with foil. The water will cook the noodles while it bakes. Easy!

Trick #2: Stir the cottage cheese into the sauce instead of working in vain to spread it onto the noodles as you create layers in the pan. This makes no difference in the taste, but it sure does alleviate a challenging step in the lasagna-making process!

Trick #3: When making one lasagna, for the love of all things simple, make two or three. It takes no extra effort to do this! Then you can put the extra lasagnas into your freezer to effortlessly bake another day!

lasagna11

The Easiest Way to Make Lasagna

5.0 from 3 reviews
The Easiest Way to Make Lasagna
 
Save Print
Author: Laura
Serves: 6-10
Ingredients
  • 1 lb ground hamburger meat
  • 4 Tablespoons minced onion or chopped fresh onion
  • 32 ounces spaghetti sauce
  • ½ teaspoon sea salt
  • 8-ounces cottage cheese
  • 16-ounce box lasagna noodles
  • 3 cups shredded cheese (our favorite is Colby jack but you can also use mozzarella)
  • ⅓ cup water
Instructions
  1. In a large pot, cook hamburger meat with onion. Drain grease if necessary.
  2. Stir in pasta sauce and salt.
  3. Remove from heat and stir in cottage cheese.
  4. Lay ⅓ of the lasagna noodles (uncooked) to cover the bottom of a 9x13 inch baking dish.
  5. Pour ⅓ of the sauce mixture over the noodles and spread to cover the noodles.
  6. Sprinkle ⅓ of the shredded cheese over the top.
  7. Repeat these layers twice more.
  8. Drizzle ⅓ cup water over the lasagna.
  9. Cover tightly with foil.
  10. Bake for one hour at 350 degrees.
3.4.3177

The Easiest Way to make Lasagna

I can think of no better time to make this Easy Lasagna recipe! This is a fabulous meal to have in your freezer during these busy holiday weeks. In addition, Lasagna is a wonderful meal to feed guests! Get your ingredients rounded up, and crank out some Lasagnas!!

If you’d like to watch a video of me making three lasagnas, here you go! See how easy this is!

Now, can anyone tell me why Lasagna is spelled with a “g” in there? I may have figured out ways to make this dish simple, but I have  yet to learn why it is spelled so silly.

More Simple Recipes

  • Simple Baked Salmon and Asparagus
  • Simple Crock Pot Chicken Soup with a Kick
  • Simple Skillet Taco Pasta
  • Last-Minute Lentil Chili
  • Simple Sweet and Sour Baked Chicken Legs
  • 20-Minute Taco Soup
  • Simple Cheesy Baked Chicken
  • Simple Creamy Chicken Stew in the Crock Pot
  • Simple Italian Beef and Broccoli Skillet
  • Simple Bacon Ranch Chicken
  • Simple Hawaiian Crock Pot Chicken
  • Simple Taco Rice Dinner
  • Simple Last Minute Nacho Plate
  • Simple Chicken Cheeseballs with a Kick
  • Simple Beanie Weanies
  • Simple Crock Pot BBQ Spareribs
  • Simple Pizza Chicken Bake
  • Simple Italian Chicken and Green Bean Bake
  • Last Minute Creamy Bacon Spaghetti
  • Simple Hamburger Soup
  • Simple Parmesan Broiled Fish
  • Simple Overnight Saucy Crock Pot Chicken
  • Simple 15-Minute Meal
  • Simple Overnight Melt-in-Your-Mouth Beef Roast
  • Simple 3-Cheese Crock Pot Pasta
  • Simple Oven Fried Chicken
  • Simple Honey Mustard Chicken Legs
  • The Easiest Mashed Potatoes in the World
  • Simple Garlic Butter Shrimp
  • Simple Crunchy Ranch Chicken Strips
  • Simple Crock Pot Shredded Ranch Chicken (for salad or tacos)
  • Simple Crock Pot Pizza Casserole
  • Simple Barbecue Beef Roast
  • Simple Spanish Rice Bowls
  • Simple Roasted Rotiserie Chicken
  • Simple Green Chile Chicken
  • Simple Tex-Mex Creamy Chicken
  • Simple Waffle Omelets
  • Simple Crock Pot Taco Pasta
  • Simple Grilled Chicken
  • Simple Hawaiian Beef Roast
  • Simple Crock Pot Creamy Stew Meat
  • Simple Cheese Stuffed Burgers
  • Simple Hashbrown Casserole (For Instant Pot, Crock Pot or Oven!)
  • Simple Lasagna Casserole (For Instant Pot or Crock Pot)
  • Simple Chili Mac
  • Simple Bacon Cheeseburger Casserole
  • From Burrito Bar to Casserole (a 5-Minute Meal!)
  • Simple Bacon Cheeseburger Roll
  • Simple Garlic Parmesan Chicken Legs

728x90

Join Simple Meals

Make life even simpler when you sign up to receive our weekly Menu Planning Packets. One tiny price, loads of weekly help. Read about this and sign up here!

~~~~~~~~~~~~~~~~~~~~~~~~~~~~~~~~~~~~~~~~~~

Woohoo! In honor of our 10-year Heavenly Homemakers anniversary, be sure to pick up your very own printed copy of The Best of Heavenly Homemakers!!

best of cover4

Heavenly Homemaker's Club Members: Access your homepage and all your fantastic resources here! Not a member yet? Please join us!

How to Make Fun and Easy Sparkling 100% Juice

March 30, 2017 by Laura 16 Comments

This post may contain affiliate links. For more information, please see our disclosure policy.

I’m in it for the bubbles. Easy Sparkling 100% Juice is so very perfect.

sparkling juice 2

I shared all kinds of thoughts (that didn’t necessarily make sense) about “how much I love drinks” in this post. I guess with warmer weather coming, I’ve been thinking more about fun drinks (not that warm drinks aren’t fun in the colder months too, of course).

One of my boys’ favorite things to splurge on is Martenelli’s (and by boys’ splurge, I should clarify that they prefer it if we parents do the splurging, because it is much easier to enjoy something if someone else has paid for it).

Have you tried Martinelli’s? It’s a very tasty sparkling cider that is 100% juice, made especially fun because it comes in a cool bottle and pours out nice and bubbly. I find it in the juice aisle at Wal-mart.

Martinelli’s is great for a special occasion, like New Year’s Eve, when I might not mind spending close a few extra dollars for each of us to have a sip of sparkly bubbles. But for a random Tuesday, I’m a little more selective about where I put my grocery money.

Soooo, we’ve found a way to have our sparkling juice and drink it too. We call it “Mom-inelle’s” because I invented it and we are all quite proud. The boys are especially happy because this invention means they can enjoy this fizzy drink more often than every December 31.

This has become the drink we enjoy when friends come over, and it always receives rave reviews. Note that you can add any 100% juice that you choose. We’ve discovered that our favorite is 100% Cranberry. Who knew? 100% Grape is a close second.

You may also find it fun to make this with combo-juices like 100% Cran-Raspberry or 100% Cran-Grape or 100% Apple-Raspberry.

It may just be us, but we have also found that this Sparkling 100% Juice tastes best with Mexican food or Pizza. There’s just something about fizzy drinks with food that has a bit of a spice. Try this!

Easy Sparkling 100% Juice

How to Make Fun and Easy Sparkling 100% Juice
 
Save Print
Author: Laura
Serves: 4-6
Ingredients
  • 11.5 ounces of frozen juice concentrate (thawed, butnot diluted)
  • 33.8 ounces Seltzer water (carbonated water)
Instructions
  1. Pour the juice concentrate into a ½ gallon jar or pitcher.
  2. Slowly pour in the seltzer water (if you pour it too quickly, it could bubble over).
  3. Stir slightly so as to mix the two liquids but not release too much fizz.
3.4.3177

How to make Sparkling Juice

Do you love bubbles like I do? Ever tried making Sparkling Juice like this?

P.S. If you’re having a hard time giving up soda (pop/coke/whatever you call it where you live) – I recommend this fizzy juice as a great alternative. :)

Heavenly Homemaker's Club Members: Access your homepage and all your fantastic resources here! Not a member yet? Please join us!

How to Make Iced Coffee for a Crowd

May 3, 2016 by Laura 14 Comments

This post may contain affiliate links. For more information, please see our disclosure policy.

iced coffee

In three years I went from not liking coffee, to loving coffee, to becoming a coffee snob. I mean this in the sweetest way. I’ve learned that there’s coffee, and then there’s coffee. Can I help it if I prefer the coffee that makes me feel the actual love of Jesus flow over me? Well of course I can’t help this.

I blame my oldest son for my particular coffee preferences, because any time I can blame one of my children for something, I do. (I hate it when I spill something and none of my kids is around to blame. It’s very frustrating.)

Why are my coffee snob issues Asa’s fault? Because I was in my early years of drinking coffee about the time he took a mission trip to Ecuador two years ago. While he was there, I happily sipped my “coffee from a red canister that shall remain nameless” like I had done since I started my coffee drinking ways. When he came back home, he brought me a cute little Ecuador bracelet as a souvenir and a package of Ecuadorian coffee. How nice, I thought. Coffee from Ecuador. I’ll pray for the ministry there while I drink it. It will be so lovely.

Lovely didn’t even begin to describe this experience. I took my first sip and exclaimed, “Oh my goodness!! This coffee!! I’ve never had anything like it. I think this must be the most amazing thing I’ve ever tasted. I might even like this more than butter.”

From that moment on, no other cup of coffee measured up. Once you have the best, it’s hard to go back.

(Our second son, Justus, will have the delightful opportunity to go to Ecuador this summer for his first overseas mission trip. I am so excited for him to bring me back a suitcase full of coffee share the love of Jesus with people there.)

How to Cold Brew Coffee

Needless to say, I hoarded my little bag of Ecuador coffee and rationed it – saving it for the mornings I could truly savor it. I might not have shared even a drop with anyone, but I can’t remember all the details. I’ve since started buying (and yes, even sharing) these Guatemalan coffee beans online. I find the flavor to be very similar to the Ecuador beans. This coffee is so delicious!

I questioned myself. “Should I really be spending extra money on high quality coffee?” So I did the math.

I discovered that it costs between $0.50-$0.60 per pot of coffee when I use the good stuff. This is more than a pot of the cheaper coffee. But worth it? Well, is it worth it to spend more on butter instead of settling for margarine? Obviously! (I know. That’s not an apples to apples comparison because the butter/margarine thing is more about eating real food for good health, but still. I think it’s worth it to pay a little extra for good quality and taste.)

Iced Coffee for a Crowd

Well, all that to say – get yourself some good coffee and treat people to this delicious Iced Coffee I’m going to tell you about. Or just use the cheap stuff for this recipe since you’re adding sugar anyway. :)

Last week I was asked to provide drinks for a get-together. I made a gallon of Homemade Lemonade (with sugar instead of maple syrup to cut the cost). Then I decided to make a big jar of iced coffee just for fun. It was a hit, so I thought I’d better share the idea with you!

My rough calculations tell me that a half-gallon of this Homemade Iced Mocha Coffee costs about $1.00. (I priced it at the store a few days later. The cheapest one cost $2.66. Boom.)

How to Make Iced Coffee for a CrowdYum

How to Make Iced Coffee for a Crowd
 
Save Print
Author: Laura
Ingredients
  • 1 quart coffee
  • 1 tray coffee ice cubes
  • ½ cup heavy cream
  • ½ cup homemade chocolate fudge sauce (more or less to taste)
Instructions
  1. Cold brew coffee, or hot brew as normal, then chill.
  2. Stir cold coffee, coffee ice cubes, cream, and chocolate sauce into a half-gallon jar.
  3. Shake well before serving.
3.4.3177

Some helpful links for you:

  • How to make coffee ice cubes so you won’t water down your cold coffee
  • How to cold brew coffee (but you can just make a normal hot pot of coffee, then chill it)
  • How to make chocolate fudge sauce (not a low sugar recipe) :)

You might also enjoy this idea:

How to set up an Iced Coffee Bar

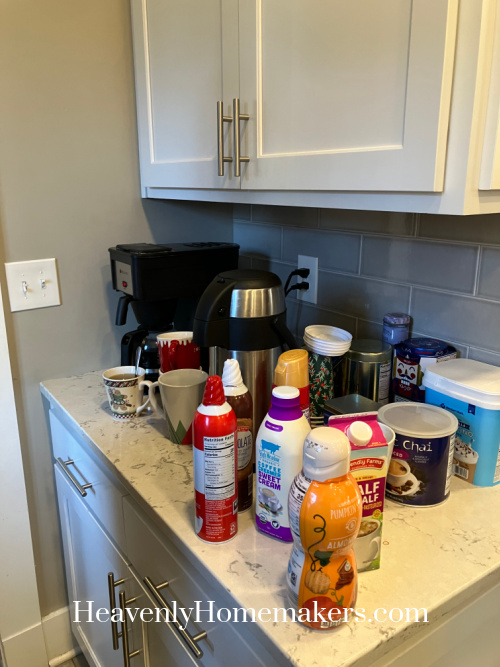
How to Make an Iced Coffee Bar

We set up that Iced Coffee Bar for my birthday guests last year and it was so much fun! See? I’m nice and share my good coffee now. I’ve grown so much.

Are you particular about what kind of coffee you drink?

Heavenly Homemaker's Club Members: Access your homepage and all your fantastic resources here! Not a member yet? Please join us!

The Week We NAILED it With Hospitality

February 12, 2016 by Laura 20 Comments

This post may contain affiliate links. For more information, please see our disclosure policy.

I thought you’d appreciate knowing that when it comes to hospitality – we totally nailed it this week. (Nailed rhymes with failed. There might be a connection there.) Details? Oh yes. You do want to know these details. Maybe. 

First, as you recall, we hosted 15 teenage boys last weekend. Crazy as that sounds, having them here was the least eventful of everything else I am about to share with you. Oh yes. The boys all trooped into our house on Friday and Saturday nights after fun times at the church building with youth from four different states. They kicked off their shoes; they crowded into our kitchen where Matt and I stood throwing out cheap junk food for an hour and a half each night; they went outside and played football in the snow at midnight.

By Sunday afternoon when everyone left for their homes – my floors were covered in mud and dirty towels. The sink was overflowing with dishes. I was going on about seven hours of accumulated sleep over the course of three days.

dirty_kitchen_1

This is when our new guests moved in. Sunday afternoon. When I was a zombie and there were no clean sheets or towels.

This time, instead of bunches of teenage boys, we were hosting a young family with two little ones. We’d planned it. I’d warned them about what they’d be walking into. They were extremely gracious. I got them settled (sort of) then excused myself to pass out in bed for a couple hours.

Fast-forward a couple of days. Young Family was still here. Young Husband began feeling a major allergic reaction. Upon checking more thoroughly in our guest room – we realized that mold was becoming a problem on a wall where we had recently had a leak. Oh my stars. We were slowly killing our guests.

Bleach was our friend (even though we hate bleach – we hate mold more). The wall became livable for the time being until we can find a moment to knock it out and replace it. Enter: more guests.

Young Family’s brother moved in along with his girlfriend. YF’s Brother camped out with our boys upstairs in their room. Girlfriend got guest room downstairs. We liked Girlfriend immediately (a good thing too, because YF’s Brother is like a son to us).

Girlfriend is low maintenance and sweet. This is probably why she did not mention the complete lack of hot water for her shower the first morning she was here.

Matt discovered it later that day when he was washing his hands in the downstairs bathroom and the water in the sink never got warm. He went to the basement to investigate. Sure enough. The hot water heater had a leak in the tank. There was nothing that could be done. It had lived its life. Time to buy a new one.

So let’s see. Mold. Cold showers. What else did we offer our guests this week?

On not much. Just a HUGE police investigation next door that revealed a Meth-Lab in the works. Wha??! I am so serious. That place was hopping for hours on Tuesday – with guys in Hazmat suits, firemen standing by in case of explosions, you know – just another day in our quiet neighborhood in small town Nebraska while we sit around sipping hot cocoa with company.

applecrispsm

When all was said and done, I’d say we’ve all still had a wonderful time visiting. Somehow I’ve caught up on sleep and laundry (which of course, doesn’t mean anything because there is no such thing as “caught up on laundry”). If nothing else, I’ve done my best to provide our guests with great food. I mean, if all else fails, feed people Apple Crisp and Blueberry Pancakes, right?

Anything exciting happen in your house or on your block this week? I’m voting for a few laid back days at our house next week. Please??

Heavenly Homemaker's Club Members: Access your homepage and all your fantastic resources here! Not a member yet? Please join us!
« Previous Page
Next Page »

Join Our Community!

 Facebook Twitter E-mail Instagram Pinterest

Popular Posts

~ Will All of the Real Moms Please Stand Up?
~ Easy! Stir-and-Pour Whole Wheat Bread
~ How to Make Gatorade
~ 31 Real Food Breakfast Ideas
~ Dear Teenage Girls...
~ When Mom Takes a Step Back
~ The Inexpensive Health Insurance We Love!
~ Let's Talk Real Food Grocery Budgets

Check out our latest posts!

  • Big Family Food and Fun: July 5-11, 2026
  • Big Family Food and Fun: June 28-July 4, 2026
  • Big Family Food and Fun: June 21-27, 2026
  • Big Family Food and Fun: June 14-20, 2026
  • Big Family Food and Fun: June 7-13, 2026
Home  ~  Simple Meals  ~  Club Membership  ~  Shop  ~  Privacy Policy  ~  Disclosure  ~ Contact

Copyright © 2026 · Beautiful Pro Theme on Genesis Framework · WordPress · Log in