Heavenly Homemakers

Encouraging women in homemaking, healthy eating and parenting

  • Home
    • About
    • FAQs
  • Recipes
    • Bread and Breakfast
    • Condiments
    • Dairy
    • Main Dishes
    • Side Dishes and Snacks
    • Desserts
    • Gluten Free
    • Instant Pot
    • Crock Pot
    • Heavenly Homemaker’s Weekly Menus
  • Homemaking
    • Real Food Sources
  • Store
  • Contact
    • Advertise
    • Disclosure
    • Privacy Policy
  • Simple Meals
  • Club Members!

Cream Cheese Filling For Your Crepes

July 30, 2014 by Laura 13 Comments

This post may contain affiliate links. For more information, please see our disclosure policy.

Want a Cream Cheese Crepe Filling that will change your life? I’m not even exaggerating (because I never do that). It doesn’t hurt that my Crepe recipe is super simple and delicious too. Need to eat gluten free? Gotcha covered. The crepes are made without flour and of course the filling is gf too. These are all real food and so, so good!

Quick and Easy Crepes

While Matt and I were cooking out at camp a couple weeks ago, we were blessed to work with a very talented lady who has been cooking for campers for years. One of her specialties? Homemade Crepes with cream cheese filling, topped with berries. You should have heard the kids as they walked by the kitchen and saw we were making crepes. “Is it crepe day tomorrow?!? I’ve been waiting all year for this day!”

Seriously, the campers love them. I believe we cranked out over 300 crepes in preparation for “Crepe Day.” Phew, what a job! But it was worth it. The crepes were amazing! The key to making these so great had to be the filling. Cream cheese filling.  Sooooo good!

We used powdered sugar at camp, but when I got home, I played with the idea to make the filling with stevia or maple syrup. Yum, yum, yummy.

Cream Cheese Crepe Filling

Cream Cheese Crepe FillingYum

Cream Cheese Filling For Your Crepes
 
Save Print
Author: Laura
Ingredients
  • 8 ounces softened cream cheese
  • 10 drops liquid stevia or 2 Tablespoons real maple syrup
  • ½ teaspoon vanilla extract
Instructions
  1. Beat ingredients together until smooth.
  2. Place about 2 teaspoons of filling in each crepe.
3.4.3177

I whip my cream cheese filling ingredients together in my Blendtec, which takes about thirty seconds.

Here’s my super easy Crepe Recipe.  Wholesome, filling, and delicious. And with cream cheese and berries? Heavenly. :)

Want more Simple Recipes like this one?

We’ve got a long list of quick and easy recipes for you to enjoy here! Subscribe for FREE to Heavenly Homemakers so you won’t miss all the new Simple Recipes we share!

  • Simple Baked Salmon and Asparagus
  • Simple Crock Pot Chicken Soup with a Kick
  • Simple Skillet Taco Pasta
  • Last-Minute Lentil Chili
  • Simple Sweet and Sour Baked Chicken Legs
  • 20-Minute Taco Soup
  • Simple Cheesy Baked Chicken
  • Simple Creamy Chicken Stew in the Crock Pot
  • Simple Italian Beef and Broccoli Skillet
  • Simple Bacon Ranch Chicken
  • Simple Hawaiian Crock Pot Chicken
  • Simple Taco Rice Dinner
  • Simple Last Minute Nacho Plate
  • Simple Chicken Cheeseballs with a Kick
  • Simple Beanie Weanies
  • Simple Crock Pot BBQ Spareribs
  • Simple Pizza Chicken Bake
  • Simple Italian Chicken and Green Bean Bake
  • Last Minute Creamy Bacon Spaghetti
  • Simple Hamburger Soup
  • Simple Parmesan Broiled Fish
  • Simple Overnight Saucy Crock Pot Chicken
  • Simple 15-Minute Meal
  • Simple Overnight Melt-in-Your-Mouth Beef Roast
  • Simple 3-Cheese Crock Pot Pasta
  • Simple Oven Fried Chicken
  • Simple Honey Mustard Chicken Legs
  • The Easiest Mashed Potatoes in the World
  • Simple Garlic Butter Shrimp
  • Simple Crunchy Ranch Chicken Strips
  • Simple Crock Pot Shredded Ranch Chicken (for salad or tacos)
  • Simple Crock Pot Pizza Casserole
  • Simple Barbecue Beef Roast
  • Simple Spanish Rice Bowls
  • Simple Roasted Rotiserie Chicken
  • Simple Green Chile Chicken
  • Simple Tex-Mex Creamy Chicken
  • Simple Waffle Omelets
  • Simple Crock Pot Taco Pasta
  • Simple Grilled Chicken
  • Simple Hawaiian Beef Roast
  • Simple Crock Pot Creamy Stew Meat
  • Simple Cheese Stuffed Burgers
  • Simple Hashbrown Casserole (For Instant Pot, Crock Pot or Oven!)
  • Simple Lasagna Casserole (For Instant Pot or Crock Pot)
  • Simple Chili Mac
  • Simple Bacon Cheeseburger Casserole
  • From Burrito Bar to Casserole (a 5-Minute Meal!)
  • Simple Bacon Cheeseburger Roll
  • Simple Garlic Parmesan Chicken Legs
  • Super Simple Lasagna
  • The Simplest White Chicken Chili
  • Simple Lentil Nachos
  • Simple Tuna Patties
  • Simple Banana Pancakes

Enjoy all these recipes without effort when you become a Simple Meals member! Every week we’ll send you a great menu plan full of Simple Recipes like this one. We’ll equip you with a grocery list. We’ll break everything down so that your meal prep is as simple as possible. We’ll give you bonus tips and recipes and freebies. And this is all for just $1 each week. You’ll love it! Get all the details.

Heavenly Homemaker's Club Members: Access your homepage and all your fantastic resources here! Not a member yet? Please join us!

How To Cold Brew Coffee

July 29, 2014 by Laura 18 Comments

This post may contain affiliate links. For more information, please see our disclosure policy.

Why? Why would we want to cold brew coffee instead of sticking with regular hot brewing methods?

Well, so that you can make iced coffee. Or iced coffee cubes for your iced coffee. Or so you can make this awesome and healthy Chocolate Frappe.

In the past, I’ve simply hot brewed coffee as normal, then chilled it for about 24 hours until it’s cold enough to make cold coffee drinks. That has worked just fine, and I assumed I needed some sort of special equipment to make cold coffee brew. Thanks to those of you who shared your easy cold brew coffee methods, I now know it’s as easy as can be – without any special equipment!

Cold brew coffee is less acidic, and has a wonderful, smooth taste. I’m loving this variety of coffee on a hot afternoon. My favorite way to drink cold coffee? Coffee ice cubes, cold coffee, and a shot of real cream. It is heaven. (And not at all sweet. I love it that way, but my family thinks I’m crazy. Yup.)

How to Cold Brew Coffee

How to Cold Brew Coffee

  1. Place 1/3 to 1/2 cup ground coffee (or more if you like your coffee really strong) in a French Press or quart-sized jar.
  2. Add 4 cups cold water.
  3. Allow this to sit on your countertop for 8-24 hours. I usually start mine at night so it’s ready in the morning.
  4. If using a French Press, simply press filter down to separate liquid from coffee grounds.
  5. If using a quart jar, carefully pour your cold brew coffee through a coffee filter to separate liquid from coffee grounds.
  6. Refrigerate. Or make Coffee Ice Cubes. Or you can do what I do and make some coffee ice cubes then refrigerate the rest to use them together for cold coffee drinks.

Some instructions I’ve read suggest using quite a bit more coffee in this brew. What has been your experience with this?

Are you a fan of cold coffee?

Heavenly Homemaker's Club Members: Access your homepage and all your fantastic resources here! Not a member yet? Please join us!

Gratituesday: Sister Symposium

July 28, 2014 by Laura 7 Comments

This post may contain affiliate links. For more information, please see our disclosure policy.

I grew up without any sisters. Matt’s sister grew up without any sisters. Matt’s brother’s wife grew up without any sisters. Now that we are all married and a part of the same family? We all have each other.  As much as we love our brothers, having sisters in our adult lives has been such a special blessing.

Perhaps the biggest blessing of all is that we all love being together. Not all sisters-in-law are able to enjoy this, and the three of us don’t take it for granted.

This is a picture of us two years ago when we got together for our bi-yearly “Sister Symposium.”

Since they both live in California, I’m the only one who has to travel far. Therefore, they are kind enough to share my airplane ticket expense to make this get-together possible. We save more expense by staying in one of their homes so we don’t have to pay lodging.

What do we do during the 2-3 days we’re together? We talk, and talk, and talk. We shop (oh yeah!). We eat out. We go to the beach (this Nebraska girl’s favorite place to visit!). And we pray together: for our husbands, for our children, for our parents, for each other.

With our lives all so full and busy with working and raising families, it keeps getting harder and harder to get away and find time to spend together like this. But never once have we regretted the effort it has taken. Our time together as sisters is always rich. This week is no different.

I’m so grateful to be spending time with my sisters this week. What are you thankful for?

Heavenly Homemaker's Club Members: Access your homepage and all your fantastic resources here! Not a member yet? Please join us!

Putting up Green Beans for Winter

July 27, 2014 by Laura 34 Comments

This post may contain affiliate links. For more information, please see our disclosure policy.

This was originally posted in 2008. This is evident in the fact that Justus and Elias are only 8 and 6 in the picture below. They are now 14 and 12. Time flies – and little boys become teenagers. The green bean freezer method is still the same, however. Since we have been harvesting many the past few weeks, I thought it would be fun to re-post this tutorial. :)

How to Freeze Fresh Green Beans

After posting about how I put up corn for winter, many of you asked about green beans. I just happen to be in the middle of crazy green bean season. So…here you go!!

beans5sm.JPG

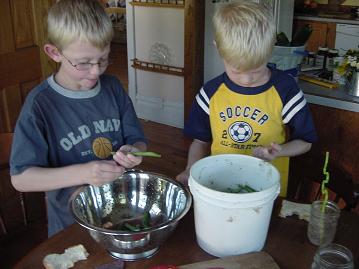
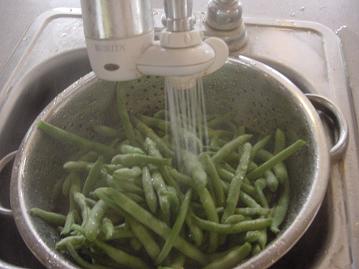
After picking our beans, I usually get my boys on “bean snapping duty” right away. (They never complain about this job. I think it’s because they are given permission to “break things”….what do you think?)  They snap off the ends and put the green beans into a colander. As soon as the colander is full I wash the beans to try to get as much “garden” (my nice way of saying bugs and dirt) off.

It is my understanding that in order to maintain as much green bean nutrition as possible, it is best to only snap the ends off the bean…not to snap the bean into pieces. It makes sense that if you snap the green bean into three pieces, when you cook the bean, more of the nutrients will be washed away in the water. But if it’s a whole bean…more of the nutrients stay inside the bean. (And you can have “My green bean is longer than your green bean” competitions while you eat dinner.)

beans1sm1.JPG

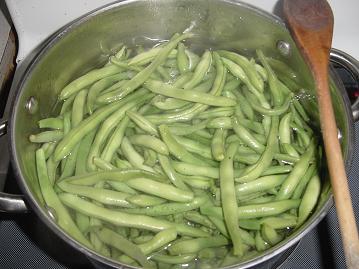
After washing the green beans, I then put them into a pot of boiling water. This blanching process stops their aging process. (No, you can not blanche people in order to stop their aging process.)

beans2sm1.JPG

After about two minutes in the boiling water, the green beans are a brighter green…and they go back into the colander where they are given a cold, cold shower. This process stops the cooking process that the blanching part started.

beans3sm1.JPG

After the green beans are cooled from the cold water shower, I then spread them out onto a dry towel. I use another towel to pat over the top of them to help dry them off more. If your beans are too wet when you put them into a freezer bag, you’ll have ice form around your beans. (You don’t want ice to form around your beans.)

beans4sm1.JPG

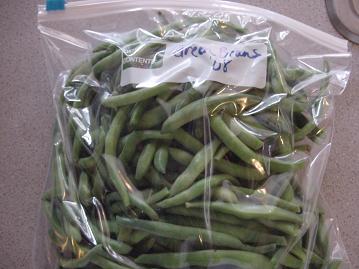
And then, I put my beans into a gallon freezer bag and label it. And into the freezer it goes. I know some people prefer to can their green beans. I don’t can them for two reasons:

1. Freezing them maintains more of the green bean’s nutrition.
2. I’m incredibly afraid of my pressure cooker. (When I got my mom’s pressure cooker, it didn’t have a manual with it. I have no idea how to use it properly.)  I do not need to cause an explosion in my kitchen.

So there you go! As I begin to can and freeze my tomatoes and fruit for the winter, I’ll be sure to show you those processes too! (Yeah, because those don’t require a pressure cooker, just a hot water bath…and I’m not so afraid of those.)

Heavenly Homemaker's Club Members: Access your homepage and all your fantastic resources here! Not a member yet? Please join us!

A Very Manly Menu Plan

July 27, 2014 by Laura Leave a Comment

This post may contain affiliate links. For more information, please see our disclosure policy.

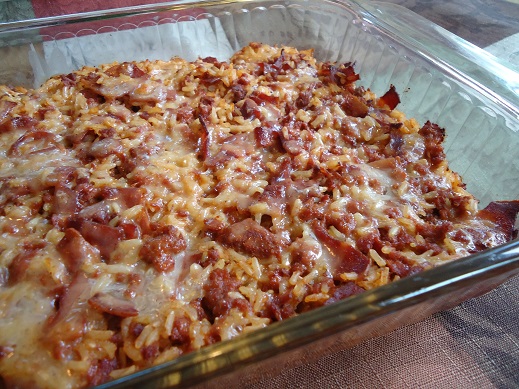
bacon_cheeseburger_casserole

Bacon Cheeseburger Casserole (recipe in Healthy Make-Ahead Meals and Snacks eBook)

For the first time in a couple of months, the six of us are all been home together again! All four of the boys are now home from camp. We’ve enjoyed some catch up time and heard lots of stories of adventures from the boys being away. We’re doing tons of loads of laundry and getting caught up on work we are behind on. I can’t tell you how nice it is to have all of us back under one roof, even if it is just for a couple of days.

So what does this week hold? Well, since this is the summer of crazy, you can bet it holds more excitement. I’m heading out tomorrow for a traditional “Sister Symposium.” (More on that for Gratituesday.)  Then the two younger boys will be heading to Kansas to spend several days with grandparents. Left at home will be Matt and our two oldest boys.

Since Asa and Justus have been at camps for weeks and weeks this summer, they’ll likely be spending quite a bit of time this week catching up on sleep. They’ll work with Matt on some house and garden projects. And what will they eat?

Well, I’m guessing they’d be just as happy as can be if I simply left them several pounds of bacon and some steak. :)  For the most part, they’ll be fending for them selves. But I did have the chance to do some freezer cooking in preparation for my being away. Here are some food choices I left for them:

Breakfasts:

Eggs, bacon, hashbrowns, sausage, homemade instant oatmeal, and plenty of fresh and frozen fruit for sides and smoothies

Lunches and Dinners:

Sandwiches, Meat and Cheese Burritos, Bacon Cheeseburger Casserole (recipe in Healthy Make-Ahead Meals and Snacks eBook), Tuna Salad or Tuna Casserole (they can easily make either one on their own), Spicy Avocado Dip, and plenty of fruits, veggies, and salad fixings.

My guys do great figuring out food when I’m away. I love it that they can all cook! I’m pretty sure they’ll even keep up with dirty dishes. :)

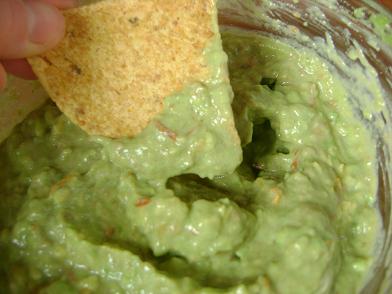
guacamoledipwithchipsm.JPG

Asa makes a great guacamole. I grabbed some avocados at the store so he can whip some up. Here’s the recipe!

Here’s to a great new week. Hope your summer has been awesome so far!

Heavenly Homemaker's Club Members: Access your homepage and all your fantastic resources here! Not a member yet? Please join us!

A Special Map to Send Your One Child Matters Sponsored Child

July 24, 2014 by Laura 6 Comments

This post may contain affiliate links. For more information, please see our disclosure policy.

It’s been a while since I mentioned One Child Matters here. Last week at camp, I was wearing my One Child Matters t-shirt. This sparked several discussions throughout the day with other camp staff members about what One Child Matters does, who they are, and why we as a family are so excited to be a participant with the organization. It was fun to share with others something we are so passionate about. Oh that everyone would/could help meet the needs of a child in another country by becoming a sponsor.

This might seem a little silly, but based on an idea we had a few months ago when we were writing a letter to our little girl, Gladis – I put together a printable you are welcome to use for your sponsored child. We used a map like the one below, colored in where we live, then colored in the area Gladis lives. We prayed over this, then sent it in our letter to Gladis. This is fun for many reasons, in particular because most children in these situations don’t have maps of their own to look at.

One Child Matters Map

If you’d like, print one of these maps to use in your next letter to your sponsored child:  Download One Child Matters Printable Map

Not sponsoring a child yet? Can I encourage you to please look into this, pray about it, and go for it if you feel God’s leading? One Child Matters is an awesome organization, and I’m so grateful and blessed to be working with them to spread the word about taking care of these precious children.

Heavenly Homemaker's Club Members: Access your homepage and all your fantastic resources here! Not a member yet? Please join us!

It’s Not Too Late To Start Making Vanilla For Christmas Gifts

July 24, 2014 by Laura 10 Comments

This post may contain affiliate links. For more information, please see our disclosure policy.

Just wanted to pop in real quick to mention:

  1. Homemade Vanilla Extract makes a wonderful Christmas gift.
  2. If you start making it within the next couple of weeks, it will be just right by Christmas.
  3. You need to get your supplies now and get ready to brew your vanilla!

Read all the details about How to Make Vanilla Extract. Order your vanilla beans using the exclusive Heavenly Homemaker discount Olive Nation gives us all. They have the best quality vanilla beans I’ve found anywhere, and they are very reasonably priced. Use the code home for 20% off plus free shipping!

How To Make Vanilla Extract

Heavenly Homemaker's Club Members: Access your homepage and all your fantastic resources here! Not a member yet? Please join us!

14 Oven-Free Breakfast Ideas for Summer

July 23, 2014 by Laura 9 Comments

This post may contain affiliate links. For more information, please see our disclosure policy.

Have I ever mentioned that we don’t have central air conditioning in our home? People think we’re crazy. Well, yeah. But there are a few important aspects to note about our variety of crazy – and about our lack of central air conditioning:

1. Our house is over 100 years old and was built to stay cool back before air conditioning was invented. We have high ceilings, which makes a significant difference.
2. We have an attic fan that sucks hot air out and pulls cool air in. (I believe I just told you that our attic fan sucks.)
3. When a person is used to air conditioning, a person tends to think they need air conditioning. When a person is not used to air conditioning, a person gets used to not having air conditioning.
4. I freeze to death when I go to Wal-Mart and other places with air conditioning and freezer sections. See #3 above.
5. We have several window air conditioning units. Remember this?  Ain’t she a beaut? We haven’t even installed it this summer. We haven’t been home long enough to care. But we have that one, another for out guest room, and another for our boys room upstairs. Window units work great for our needs.

All that to say:  I rarely turn our oven on during hot summer days. We typically deal with lack of air conditioning just fine – but avoiding the oven makes this much more doable. Baking muffins, quick breads, and egg casseroles is rarely an option. Instead, we stick with stove-top meals, toaster oven choices, or smoothies. Here are some of our favorite oven-free breakfasts, which of course can be made for lunch, snacks, or dinner too. Breakfast for dinner always rocks. Kind of like my attic fan sucks. (Oh, stop it.)

14 Oven Free Breakfast Ideas For Summer

14 Oven-Free Breakfast Ideas for Summer

  • Creamy Orange Cooler with scrambled eggs
  • Crepes with lots of fresh berries and whipped cream
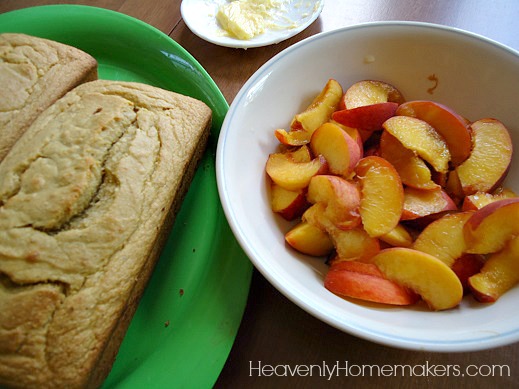
  • Green Machine Milkshakes with toast and peaches or nectarines
  • Fried eggs with Hashbrowns and strawberries
  • Instant Oatmeal Packets with fresh berries
  • Peanut Butter Pancakes with bananas
  • Pineapple Mango Smoothies with cheesy scrambled eggs
  • Quick Mix Pancakes with blueberries and Turkey Sausage
  • Strawberry Yogurt Fruit Dip with apples
  • Homemade Yogurt with fresh berries and toast
  • Whole Wheat Donuts (special treat!) with peaches, nectarines, or plums
  • Whole Wheat Waffles with fresh berries and whipped cream
  • Cinnamon Apple Toast with scrambled or fried eggs
  • Breakfast Burritos with grapes

It’s always fun to throw in the occasional bacon or sausage too, if I have time.  Fresh fruit in the summer time is amazing.  All the delicious berries, nectarines, plums, peaches, melons available – incredible. Yes indeed, summer time is my very favorite time of year – even without central air conditioning. :)

What are your favorite oven-free breakfast ideas?

Heavenly Homemaker's Club Members: Access your homepage and all your fantastic resources here! Not a member yet? Please join us!

Think About Such Things

July 22, 2014 by Laura 11 Comments

This post may contain affiliate links. For more information, please see our disclosure policy.

How easy it is to read scripture, love it, be fed by it, get a happy feeling from it, find God right there in it…then close the Book, walk away, and forget to live by the Truth we just read.

Don’t kick yourself over it. We’re never going to “arrive.” We’re human. We are fighting an enemy who wants nothing more than to see us struggle. He knows enough about us to know our weak points, and that’s exactly where he fires his arrows.

That’s why we eagerly read this read this…

Finally, brothers and sisters, whatever is true, whatever is noble, whatever is right, whatever is pure, whatever is lovely, whatever is admirable—if anything is excellent or praiseworthy—think about such things. Whatever you have learned or received or heard from me, or seen in me—put it into practice. And the God of peace will be with you. Philippians 4:8-9

Great scripture, right? It’s one of my favorites. Indeed, we can read it, love it, be fed by it, get a happy feeling from it, find God right there in it, and commit to focus here. But before we know it, we’re living like this:

Whatever is bothering you, whatever you’re worried about, whatever you have no control over, whatever makes you angry, whatever hurt your feelings, whatever made you sad, whatever may or may not happen, whatever is in the past that you can’t change…think about such things. Whatever you’ve seen and tried that doesn’t work, keep doing it and remain in that rut of despair. And overwhelming hopelessness will hold you in bondage.

Been there? Me too. It’s painful, pointless, and far too easy to remain in that ugly circle of anxious thoughts that serve only to keep us from peaceful rest in Christ.

It really is possible to re-train our thought life so that we drop-kick the negativity and worry. We definitely don’t want to stay in this camp, right? It is not fun here. It’s cold, muddy, and it rains all the time. There’s no joy in the prison of fear. Bleh. Get me out from under this dark cloud of self pity and bitterness.

And Jesus says, “Yes! I’d be happy to. In fact, I already did. I’m right there with you, everywhere you go. Turn your focus to Me. I am love. I am peace. I am joy.”

Because of the strength we gain when we take our weaknesses to the cross, we’ve got this! It takes the power of prayer. We have to intentionally stop the negative, pointless thoughts that want to take over our minds, take them captive, and make them obedient to Christ. (2 Corinthians 10:5)

Because of Jesus, we are living in victory! Remembering this truth sets our hearts free to focus on all that is true, noble, right, lovely, pure, admirable, excellent, and praiseworthy.

Think About Such Things

Want a daily reminder of these truths from scripture?
Download and print this if you like:  Think About Such Things

Heavenly Homemaker's Club Members: Access your homepage and all your fantastic resources here! Not a member yet? Please join us!

Transforming Your Kitchen With Great Deals on Cast Iron

July 22, 2014 by Laura 9 Comments

This post may contain affiliate links. For more information, please see our disclosure policy.

You all know I love using Cast Iron in my kitchen. Once you learn the benefit of ditching the Teflon, it’s easy to want to throw everything out and start over. Cast iron is a great alternative to Teflon for non-stick cooking needs. It’s pricier though, so setting your kitchen up with cast iron is a process. Check out garage sales, look for sales, and slowly but surely, you can replace your kitchenware for healthier choices.

Here are some great deals I found to share that may help make the transition easier:

I have a big cast iron skillet like this one and use it all the time. It’s great for scrambled and fried eggs, as well as for cooking meat. I love it so much! This Logic Mfg LCC3 10-1/4″, Pre-Seasoned, Cast Iron, Combination Deep Skillet & Shallow Skillet/Griddle With Lid is awesome.
lodge skillet with lid

I prefer my skillet with a lid, but having this Universal Housewares Pre-Seasoned Cast Iron 3 Piece Skillet Set is great too since it comes with a variety of sizes for different cooking needs.

cast iron 6

For pancakes, crepes, and hashbrowns, I love the Lodge LPGI3 Pro Grid Cast Iron Grill/Griddle. ($39.99 – down from $75.00)

cast iron 2

Have you made the switch to cast iron yet?  (P.S. Cast iron is great for non-stick, but I really love stainless steel cooking pots too.)

This post contains affiliate links.

Heavenly Homemaker's Club Members: Access your homepage and all your fantastic resources here! Not a member yet? Please join us!
« Previous Page
Next Page »

Join Our Community!

 Facebook Twitter E-mail Instagram Pinterest

Popular Posts

~ Will All of the Real Moms Please Stand Up?
~ Easy! Stir-and-Pour Whole Wheat Bread
~ How to Make Gatorade
~ 31 Real Food Breakfast Ideas
~ Dear Teenage Girls...
~ When Mom Takes a Step Back
~ The Inexpensive Health Insurance We Love!
~ Let's Talk Real Food Grocery Budgets

Check out our latest posts!

  • Big Family Food and Fun: September 6-12, 2026
  • Big Family Food and Fun: August 30-September 5, 2026
  • Big Family Food and Fun: August 23-29, 2026
  • Big Family Food and Fun: August 16-22, 2026
  • Big Family Food and Fun: August 9-15, 2026
Home  ~  Simple Meals  ~  Club Membership  ~  Shop  ~  Privacy Policy  ~  Disclosure  ~ Contact

Copyright © 2026 · Beautiful Pro Theme on Genesis Framework · WordPress · Log in