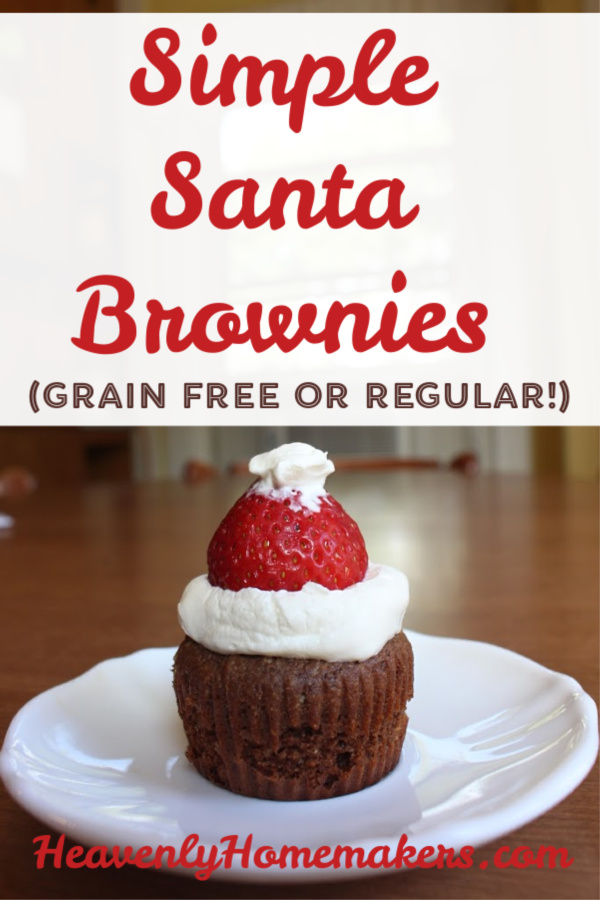
I found this idea for Simple Santa Brownies and decided that surely I could make a healthier version of them. I was not wrong. I was very right. And come to find out, Santa is very, very delicious.
Now obviously, you can take this idea and go with it no matter if you’re using a boxed brownie mix or a healthier brownie recipe. But I loved the idea of using my Super Moist Flourless Brownie Muffin recipe for this! It turned out fabulously.
Finding good strawberries this time of year is a little bit tricky, I realize. But for the sake of creating these awesome treats, I think it’s worth your purchase.
It’s probably also worth noting that if I can make these, anyone can make these. I’m no decorator. I rarely try to make cute food because I know I’m not good at it. But whipped cream and strawberries win the prize on these. Who knew real food could be used to decorate a fun Christmas treat!
I’ll repost my flourless brownie recipe for you here. But if you want my full sugar, full flour recipe, you’ll find it here!
Flourless Brownie Muffins for Simple Santa Brownies
- 1½ cups (12-ounces) Peanut Butter or Almond Butter
- ½ cup honey
- ½ cup unsweetened cocoa powder
- 2 eggs
- ½ teaspoon baking soda
- For Santas:
- 9 strawberries, washed and with greens removed
- 1½ cups heavy whipping cream
- 5 drops liquid stevia or 1 Tablespoon sugar
- Stir all ingredients together until well combined.
- Scoop batter into 9 paper-lined muffins cups.
- Bake in a 350 degree oven for 12-15 minutes. (Remove them from the oven when they are just slightly underdone so they come out moist!)
- Whip cream and stevia or sugar until stiff peaks form.
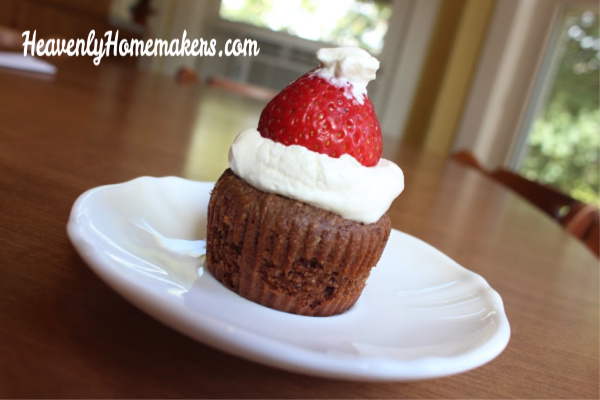
- Once brownie muffins have cooled, top them with whipped cream and a strawberry.
- Top the strawberry with a "snowball" of whipped cream.
What’s your favorite brownie recipe?