Heavenly Homemakers

Encouraging women in homemaking, healthy eating and parenting

  • Home
    • About
    • FAQs
  • Recipes
    • Bread and Breakfast
    • Condiments
    • Dairy
    • Main Dishes
    • Side Dishes and Snacks
    • Desserts
    • Gluten Free
    • Instant Pot
    • Crock Pot
    • Heavenly Homemaker’s Weekly Menus
  • Homemaking
    • Real Food Sources
  • Store
  • Contact
    • Advertise
    • Disclosure
    • Privacy Policy
  • Simple Meals
  • Club Members!

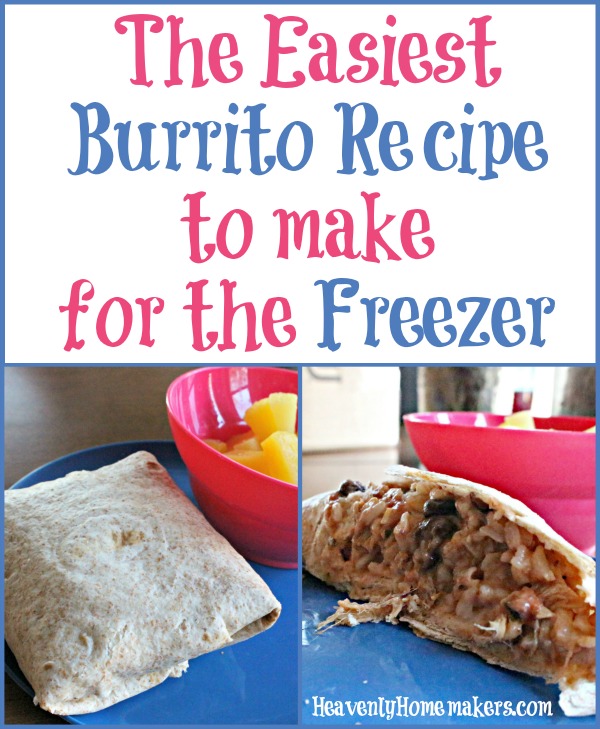
The Easiest Burrito Recipe to Make for the Freezer

June 7, 2018 by Laura 5 Comments

This post may contain affiliate links. For more information, please see our disclosure policy.

I remember the first time I made these burritos for the freezer. My oldest was a tiny baby and it was my first attempt at freezer cooking as a new mom. My friend had promised this was the easiest burrito recipe a person could make, but somehow I still felt I needed to make a big event out of the ordeal.

I blocked out the entire day. I had determined that I would start the intense burrito-making-process as soon as my baby had his first feeding of the morning. That way, if I needed to work on them slowly all day between taking care of his needs, I could be flexible and available.

Imagine my surprise when I had the entire batch of burritos ready for the freezer before Asa even woke up from his morning snooze! (Imagine my other surprise 21 years later when that tiny baby grew to be an incredible 6’4″ adult person. How did I get here?)

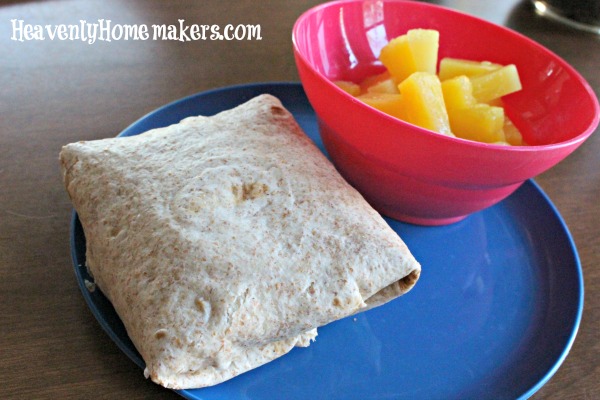
These burritos are so easy it’s almost ridiculous. Now that my first baby and all my other babies are all grown up and eating adult/teenage boy portions, I can’t tell you how glad I am to know how to make the easiest burritos on the planet! These are filling for the boys, easy for them to warm up, and I think we’ve already established that they are incredibly easy to make!

It’s ironic that I’m associating these burritos with having a newborn (pauses to sigh as she thinks back to the day her boys were tiny babies). Now, any time a friend has a baby, I almost always make a batch of these burritos to put in their freezer. It takes very little time for me to make, and it saves a new mom from having to cook for her family!

The most recent new mommy I delivered burritos to told me later that her husband was (kindly) demanding the recipe. “You must have made that sauce from scratch with fresh tomatoes!” she declared. I hated to burst her bubble, but I had to humbly admit, “Nope, that was store-bought salsa stirred into regular ol’ cooked meat and shredded cheese.” Shucks, and here she thought I’d labored on those burritos as long as she’d labored in the hospital having her sweet baby.

Ready to learn the secret of this fabulous freezer food?

The Easiest Burrito Recipe to Make for the Freezer

5.0 from 1 reviews
The Easiest Burrito Recipe to Make for the Freezer
 
Save Print
Author: Laura
Serves: 12
Ingredients
  • 3-pounds ground beef
  • 32-ounces salsa (any kind)
  • 3 cups shredded cheese
  • Sea salt to taste
  • 12-18 burrito-sized tortillas
  • Any add-ins you like to help stretch the mixture: Cooked rice, black beans, olives, additional spices
Instructions
  1. In a large pot, brown and drain meat.
  2. Stir in salsa and cheese.
  3. Scoop mixture into tortillas and fold.
  4. Freeze burritos on a cookie sheet, then transfer to a freezer bag once frozen.
  5. Heat in a 350 degree oven for about 15 minutes or until burrito is hot through and through. (You can microwave them for a couple minutes if you like. Our family no longer has a microwave.)
3.5.3229

With just five simple ingredients, you can make these wonderful burritos. Or, you can stir in cooked rice or a can of black beans to help the mixture stretch so you can make even more burritos!

Want more great 5-Ingredient recipes? You’ll definitely want to check out our newest High Five Recipes eBook!

[wp_eStore_fancy1 id=32]

Oh! And also, I’d love to point you to The Prayer Mugs Prayer Journal. I wrote it in honor of my firstborn turning 20 last year. Believe it or not, an entire year has gone by and that boy turns 21 today! The Prayer Mugs concept has been life changing for me as I turn from worry to faith in trusting God with my growing kids. For one week only, use the code TWENTYONE to get an $8 discount in honor of his birthday!!

[wp_eStore_fancy1 id=25]

Care to share a favorite homemaking memory from the days your kids were babies? Or maybe they’re babies right now. I’d love to hear the latest going on at your house!

Heavenly Homemaker's Club Members: Access your homepage and all your fantastic resources here! Not a member yet? Please join us!

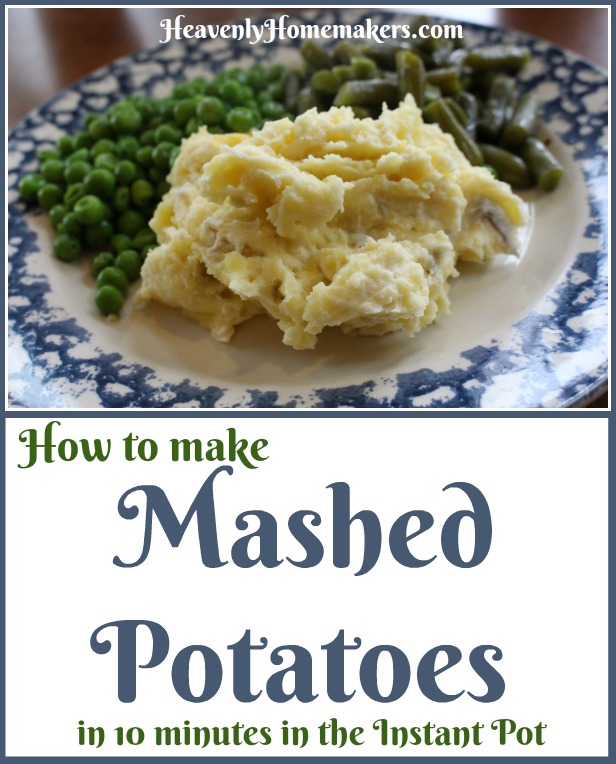
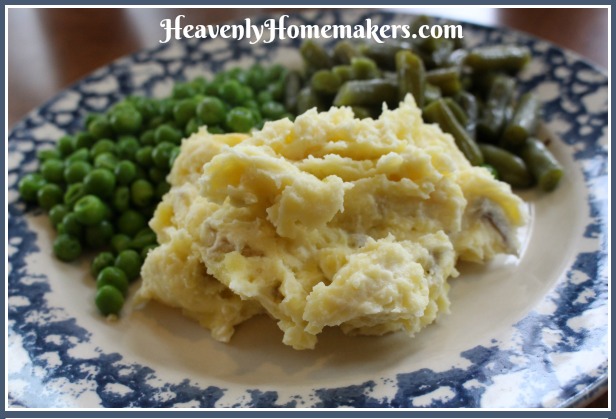
How to Make Mashed Potatoes in the Instant Pot

June 5, 2018 by Laura 4 Comments

This post may contain affiliate links. For more information, please see our disclosure policy.

If you have an Instant Pot and you have ten minutes, you can make mashed potatoes. I suppose it is also important that you have some potatoes available to work with. Butter is a must. Sea salt is a game changer. Wait until you see how simple it is to make these mashed potatoes!

Remember a few months ago when I figured out how to make Mashed Potatoes in my crock pot? That amazing trick took my family from the depths of mashed potato despair into the peak of mashed potato heaven. As it was, I had stopped making mashed potatoes altogether. After all, who had time for the effort? Who could afford the energy? Why must mashed potatoes make such a mess of pots and beaters and countertops and walls? (Confession: I am a messy cook. Mashed potatoes were the worst for me.)

So I stopped. We never ate mashed potatoes. There simply was no time.

Then I learned to make them in the most simple way possible, which meant that not only could we make mashed potatoes again, we could make them every week without trouble. And then, just when I thought I’d discovered the easiest way to make mashed potatoes…

I learned to make them in my Instant Pot (my affiliate link). In ten minutes.

You know how people always say, “Oh, life was so much better back in the pioneer days. Certainly life was much simpler then.” I agree to a certain extent but alas, the pioneers did not have Instant Pots. So let’s here it for the 21st century and its wonderful technology!

So would you believe you can wash potatoes, throw them into your Instant Pot with some water, let them cook for 10 minutes, then mash them and serve them and make everyone very happy? You, of course, will be the happiest of all because you didn’t have to slave over your potatoes. And if your children happen to be of age, you can ask them to scrub your potatoes, making your work load is even lighter!

How to Make Mashed Potatoes in the Instant Pot

How to Make Mashed Potatoes in the Instant Pot
 
Save Print
Author: Laura
Serves: 6-8
Ingredients
  • 5 pounds gold or red potatoes
  • 1 cup water
  • 1 cup whole milk, half-and-half, or cream
  • 2 cups sour cream
  • ¼-1/2 cup butter
  • sea salt to taste
Instructions
  1. Scrub, but don't peel the potatoes.
  2. Put them (whole) into an Instant Pot on the metal trivet, along with 1 cup of water.
  3. Seal and cook at hi pressure, manual setting, for 10 minutes.
  4. Release the pressure and open the Instant pot.
  5. Mash soft potatoes directly in the crock with a potato masher.
  6. While mashing, dump in the milk, sour cream, butter, and salt.
  7. Continue mashing until potatoes have reached desired consistency.
3.5.3229

Truly these are the most delicious!

Can you use russet potatoes to make these mashed potatoes? I don’t recommend it. They take a longer cooking time, they aren’t as nourishing, and they don’t taste as good. Gold or red potatoes are much preferred!

I like to also add shredded cheese to our potatoes to make them tastier and more substantial.

Want Simple Meal ideas to serve with your Simple Instant Pot Potatoes?

  • imple Baked Salmon and Asparagus
  • Simple Crock Pot Chicken Soup with a Kick
  • Simple Skillet Taco Pasta
  • Last-Minute Lentil Chili
  • Simple Sweet and Sour Baked Chicken Legs
  • 20-Minute Taco Soup
  • Simple Cheesy Baked Chicken
  • Simple Creamy Chicken Stew in the Crock Pot
  • Simple Italian Beef and Broccoli Skillet
  • Simple Bacon Ranch Chicken
  • Simple Hawaiian Crock Pot Chicken
  • Simple Taco Rice Dinner
  • Simple Last Minute Nacho Plate
  • Simple Chicken Cheeseballs with a Kick
  • Simple Beanie Weanies
  • Simple Crock Pot BBQ Spareribs
  • Simple Pizza Chicken Bake
  • Simple Italian Chicken and Green Bean Bake
  • Last Minute Creamy Bacon Spaghetti
  • Simple Hamburger Soup
  • Simple Parmesan Broiled Fish
  • Simple Overnight Saucy Crock Pot Chicken
  • Simple 15-Minute Meal
  • Simple Overnight Melt-in-Your-Mouth Beef Roast
  • Simple 3-Cheese Crock Pot Pasta
  • Simple Oven Fried Chicken
  • Simple Honey Mustard Chicken Legs
  • The Easiest Mashed Potatoes in the World
  • Simple Garlic Butter Shrimp
  • Simple Crunchy Ranch Chicken Strips
  • Simple Crock Pot Shredded Ranch Chicken (for salad or tacos)
  • Simple Crock Pot Pizza Casserole
  • Simple Barbecue Beef Roast
  • Simple Spanish Rice Bowls
  • Simple Roasted Rotiserie Chicken
  • Simple Green Chile Chicken
  • Simple Tex-Mex Creamy Chicken
  • Simple Waffle Omelets
  • Simple Crock Pot Taco Pasta
  • Simple Grilled Chicken
  • Simple Hawaiian Beef Roast
  • Simple Crock Pot Creamy Stew Meat
  • Simple Cheese Stuffed Burgers
  • Simple Hashbrown Casserole (For Instant Pot, Crock Pot or Oven!)
  • Simple Lasagna Casserole (For Instant Pot or Crock Pot)
  • Simple Chili Mac
  • Simple Bacon Cheeseburger Casserole
  • From Burrito Bar to Casserole (a 5-Minute Meal!)
  • Simple Bacon Cheeseburger Roll
  • Simple Garlic Parmesan Chicken Legs
  • Super Simple Lasagna
  • The Simplest White Chicken Chili
  • Simple Lentil Nachos
  • Simple Tuna Patties
  • Simple Banana Pancakes
  • Simple Crock Pot Applesauce BBQ Chicken
  • Simple Hashbrown and Egg Nests
  • Simple Cornbread Waffles with Chili
  • Simple Veggie Fritters
  • Simple Lemon Garlic Chicken Legs
  • Simple Noodle Soup
  • Simple Three Cheese Spaghetti
  • Simple Crock Pot Salsa Shredded Beef
  • Simple Cheeseburger Hashbrown Casserole

Join Simple Meals. You’ll love it!


Enjoy all these recipes without effort when you become a Simple Meals member! Every week we’ll send you a great menu plan full of Simple Recipes like this one. We’ll equip you with a grocery list. We’ll break everything down so that your meal prep is as simple as possible. We’ll give you bonus tips and recipes and freebies. And this is all for just $1 each week. You’ll love it!

[wp_eStore_subscribe_fancy id=19]

Heavenly Homemaker's Club Members: Access your homepage and all your fantastic resources here! Not a member yet? Please join us!

How to Host a Rockin’ Garage or Yard Sale {Plus a FREE Printable Checklist!}

June 4, 2018 by Laura Leave a Comment

This post may contain affiliate links. For more information, please see our disclosure policy.

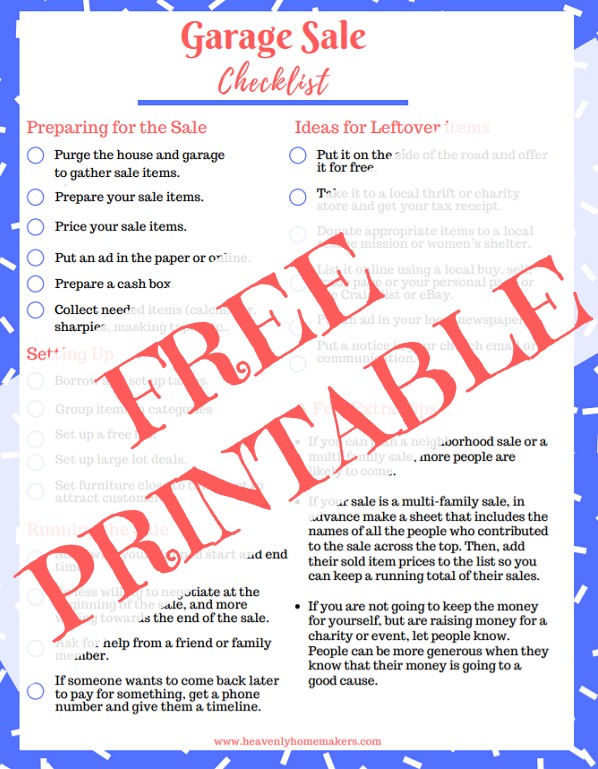
Hoping to clear out clutter from your house this summer? Here are some fabulous tips for hosting a ROCKIN’ garage or yard sale. Get rid of unneeded items from your home and make some extra cash too! (Be sure to get your Free Printable Checklist below!)

Kudos to my friend Kim (aka Garage Sale Queen) for providing all the wisdom for this post!

1. Prepare for your Garage or Yard Sale

Purge the House and Garage to Gather Sale Items

Several weeks before your sale, do a room by room purge. Check closets, cupboards, under beds, in storage places/tubs/shelves, etc. As you work your way through each room and see each item, ask yourself:

  • Are we using this?
  • Do we need it?
  • Can we do without it?
  • Would life be simpler if this was gone?
  • Is it more important to have a few dollars or cents in my hand or to still have this thing taking up space in my house?

If you see an item and hear yourself saying, “Why do we still have this?” – put it in the garage sale pile.

Prepare Your Sale Items

  • Wipe down everything that is dusty or dirty so they will look more appealing.
  • Put jewelry and other small items in ziploc bags to keep them from getting lost and so you can put a price tag on them more easily.
  • Group items in flat boxes so people can easily see what is inside.

Price Your Sale Items

If people cannot find a price, they will often choose not to purchase. In addition, most people do not like to “make an offer.” We recommend putting a price tag on everything!

  • Price items in 25 cent increments (eliminating the need for dimes, nickels, and pennies).
  • Use brightly colored stickers and large print to mark prices on each item.
  • Be willing to negotiate your prices if someone offers you a lower price that is still reasonable.

Put an Ad in the Paper or Online

It’s often worth the investment of putting an ad in the newspaper so more people know to come to your sale! What to consider when writing your ad:

  • Highlight major items like furniture, bicycles, appliances, unique items, homeschool curriculum, antiques and name brand clothing.
  • Think about what might make your garage sale stand out. Mention specific collectibles, children’s play equipment, tools, or outdoor furniture.
  • If you are doing a multi-family sale, emphasize that. It makes people more likely to come because there will be more things to see in one location.
  • If you are doing a moving sale and “everything must go”, say that because people know that you are more motivated to get rid of things.
  • If you are selling off baby equipment, make sure you say that. New moms are always looking for great deals on baby equipment- Grandmas and child care providers, too!
  • Include the specific dates and times you will hold your sale. Friday afternoon/evening and Saturday mornings tend to be the best times for most.
  • If your address is one that is hard to find, include directions in the ad.

This guy is incredibly excited to come to your sale after reading your ad.

Free Advertising: Post your ad to your local Facebook Selling Page. Consider posting it on your personal page.

A Note About Posting Online: People may ask about the prices of things and ask you to sell them “before” the sale, sometimes at a reduced price. While this can be nice, it can also make for some difficult situations, especially if you have already put that item in your newspaper ad. If someone came to your house specifically for that item at the beginning of your sale only to find that it is already sold, it can make for some not very nice exchanges.

Prepare a Cash Box

A bag, box, or drawer works nicely for your garage sale money. In advance of the sale, be sure to fill it so as to have change on hand for customers.

  • It is best to begin with about $20 in ones, $20 in fives, $40 in tens, plus at least one roll of quarters for making change. Keep track of what you began with so you have a more accurate total of your sales at the end.
  • Try to keep it organized throughout the sale. Keep ones together in front of fives, in front of tens, etc.
  • If your bag is getting full during the sale, take some inside your house (especially the checks and larger bills) and put it in a safe place.
  • Decide ahead of time: Are you willing to take checks? If so, do you have requirements? For instance, check has to be local and include a usable telephone number.
  • Most people are not set up to take credit or debit cards, but would you accept PayPal? This new way of paying is becoming more popular at garage sales, especially with the commonality of smart phones.

Collect Needed Items:

There are several items that are nice to have on hand before and during a garage or yard sale.

  • You might need masking tape to write on, to tape up signs, to mark prices, to hold boxes together, and group items together.
  • You might need scratch paper to make signs about prices, to write down additional information, etc.
  • Sharpies, both small and large point, come in handy.
  • Consider locating a tarps or two to cover sale items overnight.
  • Measuring tape is nice to have to lend to customers interested in specific items.
  • A calculator can come in handy unless you’re great at doing math in your head.

2. Setting Up Your Garage Sale or Yard Sale

  • Borrow and set up many tables to place sale items on. Tables are better than the grass or driveway in most cases because people don’t want to bend over. Make things easier for people to see and reach and you are more likely for them to sell.
  • Group things in categories:  kitchen, bath, kids toys, clothing, bedding, tools, books, curriculum, crafts, baby equipment, etc. Arrange furniture in nice groupings, if you can. Put the same size clothing and shoes together. Put bedding sizes together and mark them clearly.
  • Have a free box. If you don’t know how to price it and you’d price it super cheap, put it in the free box and watch it leave!
  • Make LARGE LOT deals: For example, “These books are 50 cents each or 12 for $5.” “This box of toys is $5 for the box.” “Clothing is “$1 each or 12 for $10.” It is amazing what people will take to make a great deal. The more they take, the less you have to deal with at the end.
  • Set furniture close to the street so it will attract buyers to your sale.

3. Running Your Garage or Yard Sale

  • Stick with your planned start and end times.
  • Ask for help. There are often times when you need two or more people to move a table, set up something quickly, get a drink, change the baby, or cover for you while you use the restroom.
  • Be less willing to negotiate at the beginning of the sale and much more willing to negotiate toward the end of the sale. If someone wants an amazing deal (like less than half the requested price), tell them you will think about it and call them back later. Get their number and give them yours. If it doesn’t sell later, call them and work on the amazing deal.
  • If someone wants to come back later to pay for something, consider that they might not come back and you might miss out on another sale. Get a phone number and give them a timeline. “If you are not back and/or have not paid for the item before XXX time, then I will make it available to someone else.”

Obviously the people helping you move furniture will be dressed in matching red overalls.

4. Other Considerations:

  • Larger sales are more likely to draw greater numbers of people. If you can plan a neighborhood sale or a multi-family sale, more people are likely to come.
  • If your sale is a multi-family sale, in advance make a sheet that includes the names of all the people who contributed to the sale across the top. Then, add their sold item prices to the list so you can keep a running total of their sales. Or have each family’s price stickers of a different color or mark price stickers with initials.
  • If you are not going to keep the money for yourself, but are raising money for a charity or event, let people know. People can be more generous when they know that their money is going to a good cause.

5. What to Do with Garage and Yard Sale Leftovers

Not sure what to do with items that don’t sell? Here are some ideas:

  • Put it on the side of the road and offer it for free. It will likely disappear.
  • Take it to a local thrift or charity store and get your tax receipt. That is not immediate money in your hand, but it might help with your taxes later on.
  • Donate appropriate items to a local rescue mission or women’s shelter.
  • List it online using a local buy, sell, trade page or your personal page. Use Craigslist or ebay, if you are savvy.
  • Put an ad in your local newspaper. Some newspapers offer one free ad after your garage sale if you advertised with them.
  • Put a notice in your church email or communication. You never know when the right person will be listening or know someone who “was looking for that.”

Get a FREE Garage Sale Checklist Printable.

Use this handy checklist to help you have a super effective garage or yard sale!

Get this free printable when you join our Heavenly Homemaker’s Savings Club. We love sharing great freebies, deals, and money saving tips with you!


Heavenly Homemaker's Club Members: Access your homepage and all your fantastic resources here! Not a member yet? Please join us!

16 Favorite Recipes to Make With Strawberries

June 3, 2018 by Laura 1 Comment

This post may contain affiliate links. For more information, please see our disclosure policy.

Hands down, strawberries are my favorite fruit. I can’t get enough. So today, as we head into summer, I thought it fitting to share my family’s favorite recipes to make with strawberries.


16 Favorite Recipes to Make With StrawberriesYum

Mix and match other berries or bananas if you wish.

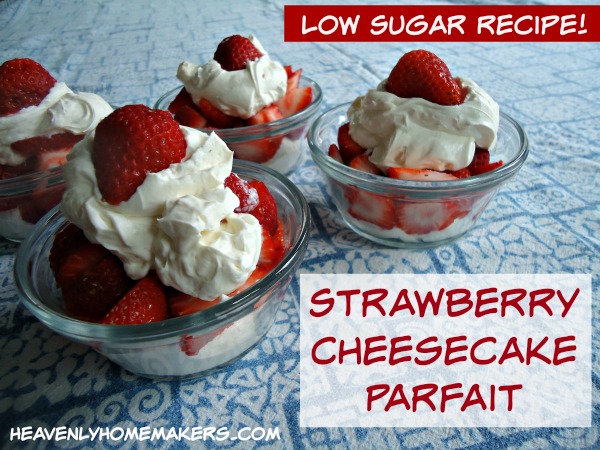
Cheesecake Parfaits

This recipe is hands down my favorite!

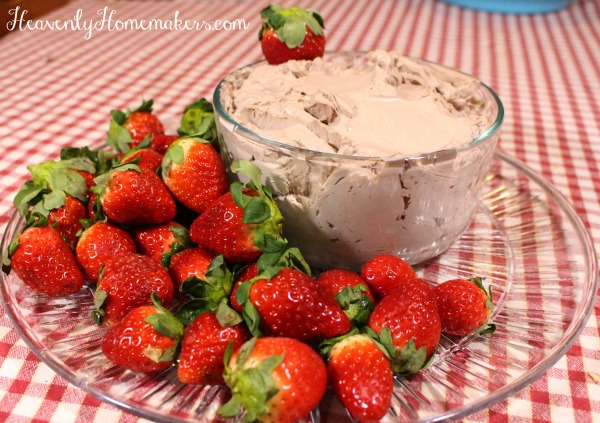
Chocolate Whipped Cream on Strawberries

This recipe is one I request my boys to make for me on Mother’s Day. Because obviously.

Strawberries on Whole Wheat Waffles

Now that we started making waffles like this, there is no turning back.


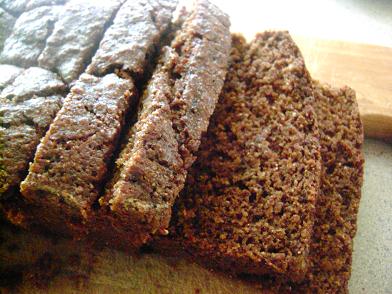
Strawberry Bread

This recipe makes it worth it to turn on the oven and heat up the kitchen during the summer.


Creamy Chocolate Fruit Dip for Strawberries

You will take a bite of this and become speechless. Or you will have many words to say about how amazing it is. Maybe a little bit of both.


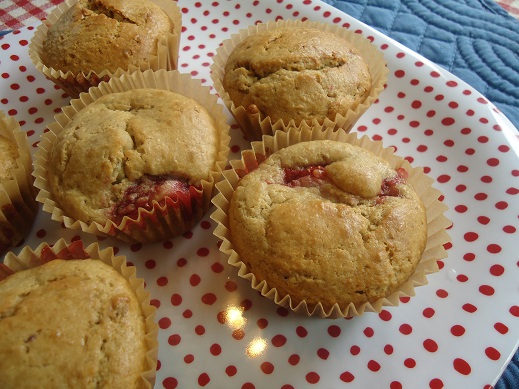
Strawberry Cream Muffins

These muffins make the word “moist” a happy word.


Strawberry-Peach Slushies

Don’t look now, but there’s a fresh spinach hiding in this slushy. You can’t tell? No one can. That’s the beauty of it!

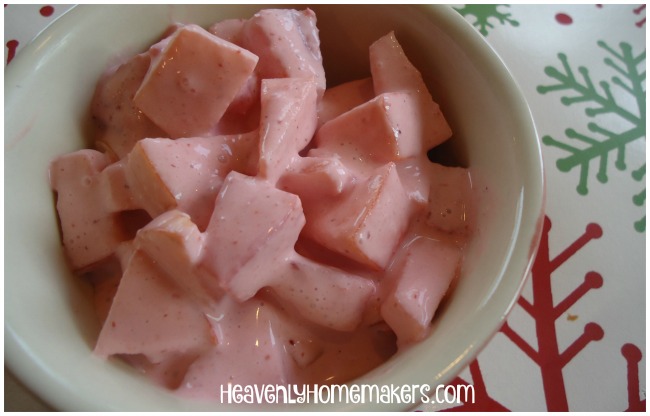
Strawberry Christmas Salad

No one said you have to wait until Christmas to eat this one. Christmas in July? Christmas next Thursday? Christmas every day? Okay then.


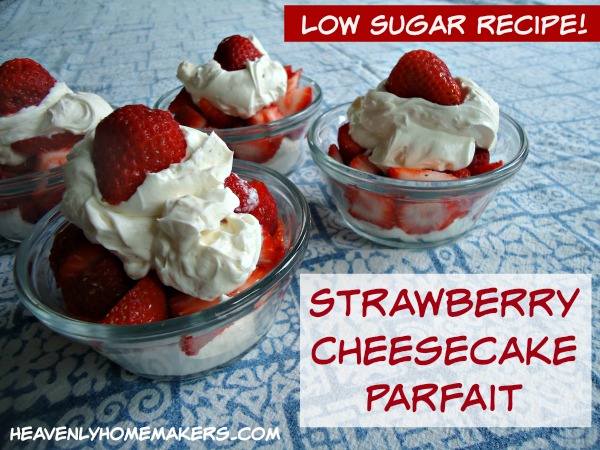
Low Sugar Strawberry Cheesecake Parfait

Where there are strawberries, there must be cheesecake parfait stuff in the fridge to go with them.


7-Minute Strawberry Ice Cream

Or maybe you can make this in 6 minutes. But who’s counting?


Strawberry Creamsicles

Be a kid again. Make and eat creamsicles. Share with the neighbors if you’re feeling extra nice.


Strawberry Shortcake

Sometimes we make and eat this for breakfast. Life’s too short to eat fruit loops.

Low Sugar Chocolate Cheesecake Parfaits

Sometimes our cheesecake parfaits need cocoa. No need to say more? Shucks, I had an entire speech prepared.

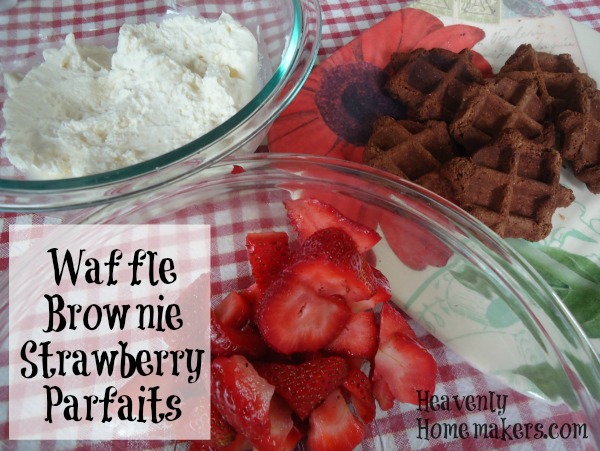
Waffle Brownie Strawberry Parfaits

Now this is just fun.

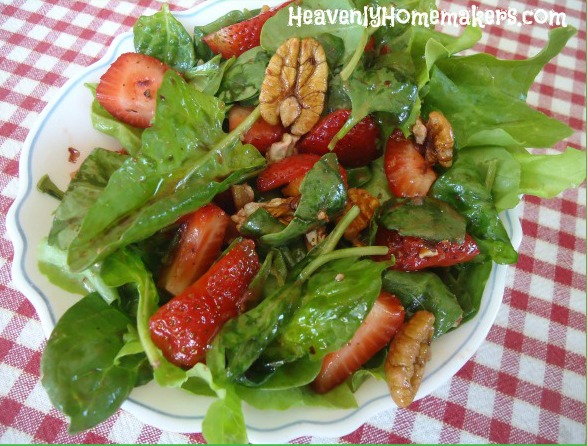
Strawberry Spinach Salad with Vinaigrette

There’s something about the combo of strawberries with pecans and the dressing that will make you feel you’re eating at a nice restaurant.

No Churn Strawberry Ice Cream

Just blend it and freeze it. It’s heaven in a bowl.

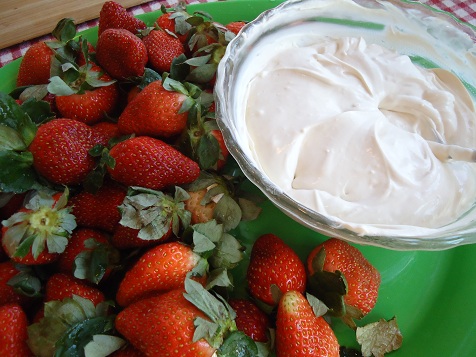
Cream Cheese Fruit Dip

Cream cheese. What would we do without you?

What are your favorite recipes to make with strawberries?

Heavenly Homemaker's Club Members: Access your homepage and all your fantastic resources here! Not a member yet? Please join us!

5 for $5 Kids in the Kitchen Collection – Final Day!

June 1, 2018 by Laura Leave a Comment

This post may contain affiliate links. For more information, please see our disclosure policy.

What are all the children doing this summer? They are learning to cook – every last one of them!

How? Well, they are pouring over all these books, picking out all the fun recipes they want to try, and they are begging their moms to buy more vegetables and fruit. Indeed. It’s a summertime miracle. This is not at all an exaggeration in any way.

Ok, fine. Some of the kids are begging to bake cookies. But who are we to argue or complain?

Do you and your kids need inspiration to get into the kitchen this summer and have fun learning together? This package is a must-have. 

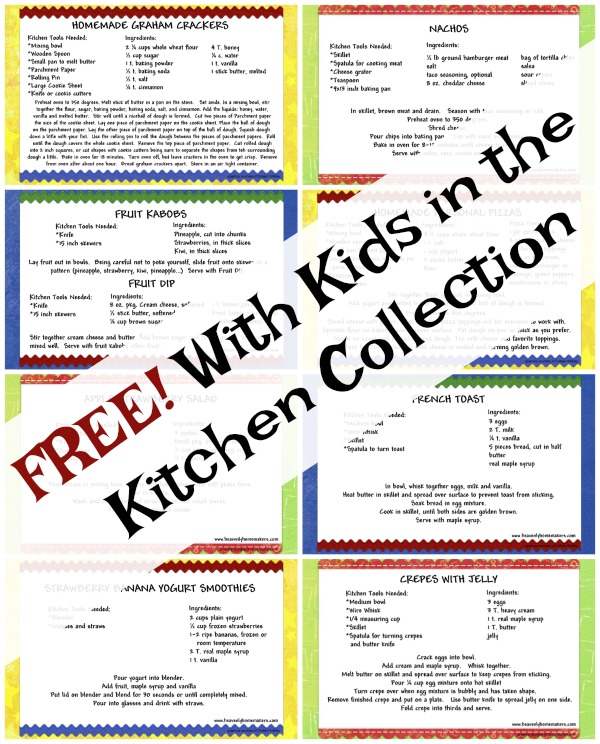
We put all these favorite Kids in the Kitchen eBooks together, and we knocked the price down from $32 to just $5! Then we added a freebie too! Your kids will love these fun recipe cards to go with their new cookbooks!

Get it all for just $5.

What to Do with the Kids in The Kitchen = One of the first eBooks we put together here. It includes 18 super simple, super fun and kid friendly recipes.
Malachi’s Favorite Cookbook = This one includes 17 of our son Malachi’s favorite recipes to make by himself. He helped me write this cookbook while he was learning how to cook a few years ago. These recipes can be read in cookbook form or can be printed to be used in recipe card form, which makes it extra fun!

Learn to Cook = A book that can be handed to older kids (ages 8 and up) so they can read and practice and learn to cook independently! And would you believe, this book also contains 55 easy recipes that kids love? 55!!!

Fill ’em Up! = This one is unique and we love it! It contains 7 recipes to use within 7 Bible lessons. The recipes have spiritual applications to go with them – so as you’re cooking, you are talking about scripture with your kids. The lessons apply to kids ages 4-18, providing great family devotional time with a practical purpose!

Teaching Your Kids to Cook = This is a favorite because you can use this to guide you through teaching your little ones to cook – beginning at age 2! This book includes games and activities to do in the kitchen with your young ones. And even better, it includes 48 kid friendly recipes to make with your kids as they are learning.

Plus get the Kids in the Kitchen printable recipe card pack for free. There is so much winning going on with this package!

THIS OFFER ENDS TONIGHT! Grab it now and get into the kitchen with your kids!

[wp_eStore_fancy1 id=33]

Heavenly Homemaker's Club Members: Access your homepage and all your fantastic resources here! Not a member yet? Please join us!

The Easiest (and Fastest) Way to Cook Spaghetti Squash

May 31, 2018 by Laura 1 Comment

This post may contain affiliate links. For more information, please see our disclosure policy.

I just learned to cook spaghetti squash in ten tiny minutes, from start to finish. Unbelievable!

Is it just me, or is it incredibly fun that God created a squash that once cooked, shreds out like noodles? He did all the work. We simply have to cook it. (There is a deep spiritual parallel here we should adopt and live by: God does God’s work. We simply get to be His glorious tools to be a part of His work as we listen and obey Him. I love this.)

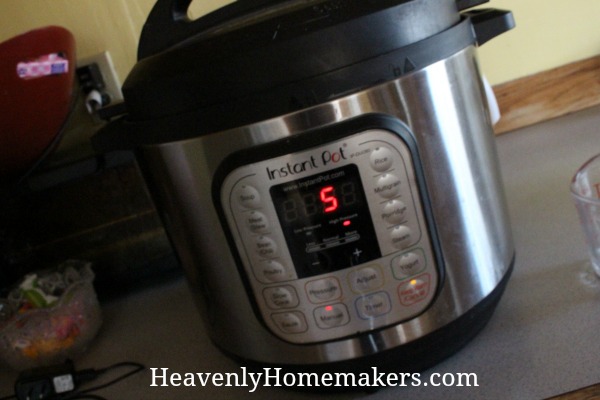
So God’s spaghetti squash. It’s always been easy to prepare in the oven, but I just learned how to make it in my Instant Pot. It cooks at high pressure for 5 minutes and just like that, the spaghetti squash is ready to shred and eat!

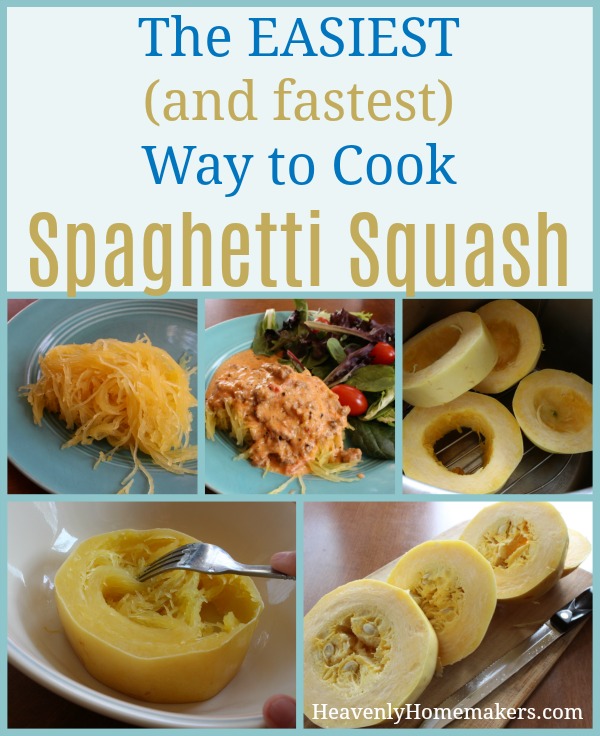
First, use a sharp knife to cut the spaghetti squash into four rings like this:

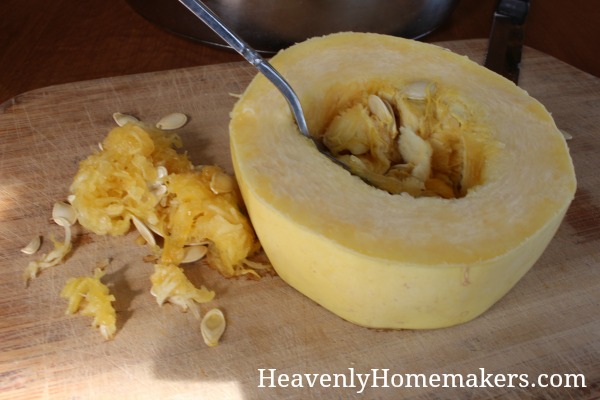
Use a spoon to dig out the seeds.

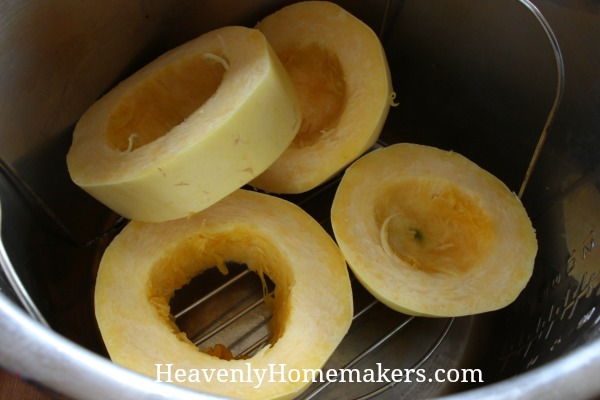
Place the spaghetti squash rings onto the metal trivet inside your Instant Pot. Put 1 cup of water under the trivet.

Put the lid on the Instant Pot and seal. Set it to manual, for 5 minutes at hi pressure.

The cooking process will be barely over this 5 minutes because the Instant Pot won’t come to full pressure or need to release. So in just these few minutes, the squash is cooked and ready!

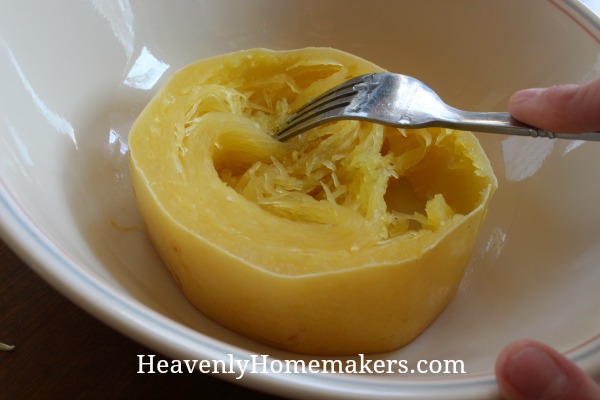
Use a fork to pull the squash apart into “noodles.”

So delicious as-is!

Or, my personal favorite: we mix leftover spaghetti sauce with leftover Alfredo Sauce and pour it over the spaghetti squash. What a nourishing meal!!

Warning: Spaghetti Squash doesn’t taste like regular pasta. I consider spaghetti squash to be a pasta replacement, but only as a vehicle to hold my sauce. I LOVE spaghetti squash covered in sauce, and in fact, I love it more than wheat pasta. But it doesn’t taste the same. It tastes like a mild vegetable covered with delicious sauce. Bring it on!

The Easiest (and Fastest) Way to Cook Spaghetti Squash

The Easiest (and Fastest) Way to Cook Spaghetti Squash
 
Save Print
Author: Laura
Serves: 3-6
Ingredients
  • 1 Spaghetti Squash
  • 1 cup water
Instructions
  1. Slice the squash into four rings.
  2. Remove the seeds with a metal spoon and discard.
  3. Pour one cup water into the Instant Pot.
  4. Place the prepared squash rings onto the metal trivet in the Instant Pot.
  5. Place the lid on and seal.
  6. Cook for 5 minutes at high pressure.
  7. Remove the cooked squash and pull the insides away from the rind with a fork.
  8. Serve as is or smothered in sauce.
3.5.3229

Don’t have an Instant Pot? Here’s what I think about mine. (Spoiler alert: I love it.)

How to Cook Spaghetti Squash in the Oven

  1. Slice the squash into four rings.
  2. Remove the seeds with a metal spoon and discard.
  3. Place the prepared squash rings into a 9×13 inch baking dish.
  4. Bake in a 350 degree oven for 30-45 minutes.
  5. Remove the cooked squash and pull the insides away from the rind with a fork.
  6. Serve as is or smothered in sauce.

Are you a spaghetti squash fan?

Heavenly Homemaker's Club Members: Access your homepage and all your fantastic resources here! Not a member yet? Please join us!

7 Ways I Save Money on Groceries With a Houseful of Teenage Boys

May 29, 2018 by Laura 5 Comments

This post may contain affiliate links. For more information, please see our disclosure policy.

I wrote this a few months ago to share as a guest post at MoneySavingMom.com. As I prepare to feed my teens and their friends throughout the summer, I thought it would be fun add a little to it and post it here for you! After all, who couldn’t use more ideas about ways to save money on groceries?

7 Ways I Save Money on Groceries With a Houseful of Teenage Boys

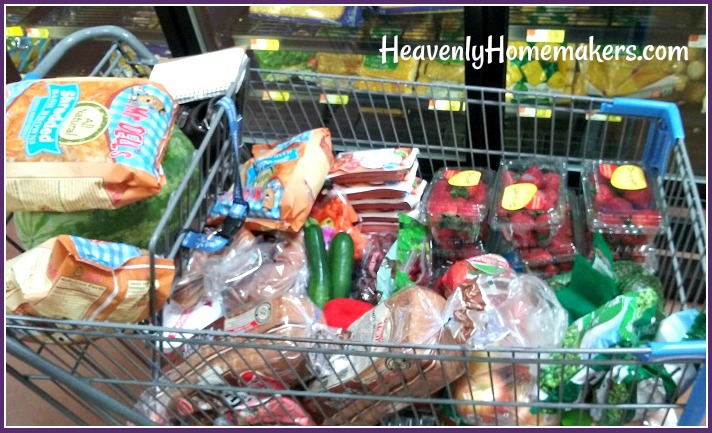
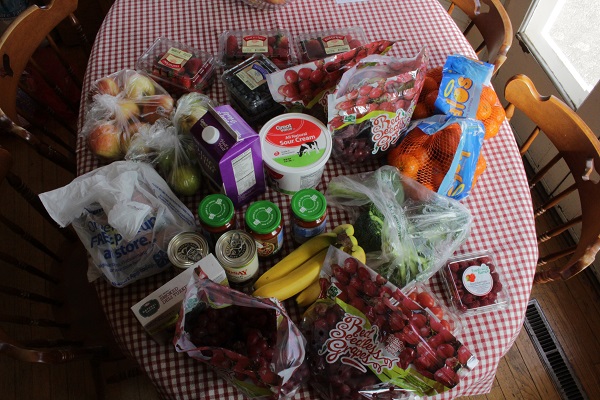
I just watched my 18-year old son eat an entire pound of strawberries for an afternoon snack. Tonight for dinner my family will plow through three pounds of boneless chicken,  three or four pounds of potatoes, a pound of frozen green beans, several handfuls of mixed greens, and a big bowl full of grapes. They’ll be hungry again before bed, no doubt.

This is my life. Four sons, all teenagers. My table is full and so is my heart. My grocery budget? Well, it’s not so small either.

When our four boys were little, people told me that I’d have to stock up on lots of potatoes, rice, and pasta as they got older so I could afford to feed them. I’ll admit these tricks help the grocery budget somewhat, but I’ll also tell you that I much prefer to fill my family with nourishment instead of empty calories.

That leaves me in a bit of a pickle then, doesn’t it? (Pickles? Oh yes. We go through a lot of those too.)

So how can we afford to feed four teenage boys (and frequently their friends!) without breaking the budget or compromising on nourishment? Well, it’s a continuous learning process, for sure, and I’ve been working at it for the past seven years. I’m excited to share some of my best grocery saving tips! But first let me say this:

Our grocery budget isn’t small. It can’t be – not if I want my kids to feel satisfied after a meal and to be filled with nutrients too. Did I mention all my sons are athletes and three out of four so far are over 6 feet tall? If you’re brave, you can click here to get an idea of how much we spend on groceries for our family every month. You’ll see that I’m certainly not one of the moms who spends”$50 a week to feed my family!” because of the huge appetites at our house and our preference for highly nourishing food. I love reading those mom’s tricks, though, because I always learn new ideas for ways to save.

So here we go!

How I save money on groceries with a house full of teenage boys:

1. We drink water.

I can’t imagine how much money this saves us (yes I can) and it’s a win-win! It’s healthier and saves money too! Our boys aren’t huge milk drinkers, so I buy one gallon of milk every week from local farmers, which I use for cooking and baking. If the boys want something special to drink, they buy it themselves as a treat. As you can see, the fact that we deprive our kids of fun drinks like juice and soda has left them terribly sulky and despondent.

family-sillysm

2. We eat soup.

Homemade broth is extremely nourishing, and I’ve found that it really helps stretch the meat in a meal. If I cook a chicken for one meal, then use the bones to make broth for soup, we’re getting a two-for-one! Here are our 12 Favorite Soup Recipes that help stretch our grocery budget.

3. We love meat, but still have meatless meals.

We love our cows and chickens (boy do we!) and I’m of the opinion that my active family needs the wholesome protein and nutrients that meat provides. But I’ve learned that we don’t need meat for every single meal. Beans and eggs and nuts and cheese help round out our menus and fill us with protein, and I’ve created many super simple recipes that are painlessly meatless.

4. We eat a lot of frozen veggies, fresh greens, and carrots.

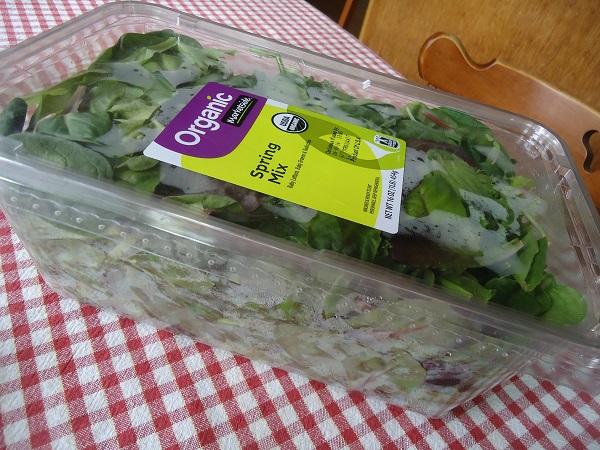
It’s extremely important to me that I serve several veggies throughout the day. I keep frozen peas and green beans on hand at all times – veggies that are inexpensive and happen to be our favorites. Fresh greens are a staple and one of the most nourishing options to fill our plates. I pay $6 for a big one-pound container, which lasts our family one week. I’d say that’s a pretty great price for awesome nourishment, wouldn’t you? Fresh carrots are inexpensive year-round so we eat them often! I make homemade dips and dressings, which makes it easier to get the veggies down.

mixed greens

5. I buy in bulk.

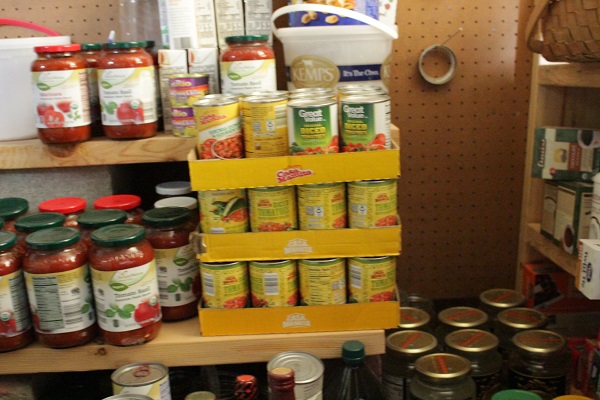
If you saw my storage room, you’d realize this was an understatement. I buy huge quantities of pretty much everything from meat to grains, which means I can buy when I find a sale, then use up our supply while I wait for another sale. I’ve saved thousands through the years shopping this way – and I love that I’ve also saved time and energy since I don’t have to run to the store for single ingredients very often. I just shop my food storage room!

—> Grab a list here of Simple Ingredients I try to keep on hand at all time. It’s a free download you can enjoy at your house too! <—

6. We eat at home.

While this post is about saving money on groceries, it is important to mention that eating at home saves us a great deal of money compared to eating out. Restaurant bills – even fast food bills – are quite large for our family. So we save eating out for special times when we are on the road (though we almost always pack food for travel too!). I wrote here about other ways our family saves money so we can afford a higher grocery bill. I bet you’ll find you save in many of these ways too!

—> Here are 111 of our favorite recipes, all of which use only 5 or fewer ingredients! <—

7. We eat Simple Meals.

Nothing fancy here. After all, my boys just want to eat. They don’t care if it looks good on Pinterest. I avoid recipes that take lots of steps to make and I use only simple ingredients, which we mix and match to put together hundreds of meals!

—> If you enjoy simple eating and want to save time in the kitchen while still putting great real food on the table, I recommend you check out our Simple Meals plan and join the fun! <—

A table full of teenagers? Bring it on! I’ll continue to find ways to be creative and save money as I load my shopping carts and fill my fridge and freezer. Ok fine. My two fridges and three freezers. What can I say? I feed a houseful of teenagers. :)

~~~~~~~~~~~~~~~~~~~~~~~~~~~~~~~~~~~~~~~~

P.S. It’s worth a mention that affording to feed these guys is only half the battle. Finding time to cook all the food is no small feat! Solution:

I taught all my kids how to cook.

I can’t say enough good about this.

My boys have spent hours of time with me in the kitchen through the years. Now that they are older, they are all very capable and can make entire meals if needed. Generally, we all work together to put food on the table. This is great for bonding but logistically speaking, their efforts and ability mean I’m not overworked in an effort to keep them all fed!

Learn more about how I taught my kids to cook here. And for just a few more days, take advantage of this great Kids in the Kitchen package offer!
[wp_eStore_fancy1 id=33]

Heavenly Homemaker's Club Members: Access your homepage and all your fantastic resources here! Not a member yet? Please join us!

The Most Amazing Flourless Chocolate Cake Recipe

May 27, 2018 by Laura 2 Comments

This post may contain affiliate links. For more information, please see our disclosure policy.

I am about to introduce you to The Most Amazing Flourless Chocolate Cake.

Why do I sometimes share flourless treat recipes? Because we can all stand to eat fewer grains. (But apparently I’ve decided that chocolate is still a necessity.) It’s also fun to bless the gluten free or grain free eaters among us. And I promise you this: EVERYONE will be blessed by this Amazing Flourless Chocolate Cake recipe!

I’m finding that flourless=moist. How about that? Want more of our family’s favorite flourless treat recipes? Here you go!

11 Flourless Treat Recipes

  • Super Moist Flourless Peanut Butter Brownies
  • Super Moist Flourless Brownies
  • Chocolate Cheesecake Fudge
  • No Bake Chocolate Chip Cookie Bars
  • Low Sugar Flourless Peanut Butter Cookies
  • No Bake Cookie Cups 
  • Honey-Sweetened Flourless Peanut Butter Bars
  • Low Sugar Flourless Peanut Butter Cookies
  • Flourless Fudge Cookies
  • Flourless Peanut Butter Chocolate Chip Cookies
  • Honey-Sweetened No Bake Cookies

Now how about the most Amazing Flourless Chocolate Cake?

I will warn you that while most of the recipes I share now are 1-step, simple as can be recipes – this Flourless Chocolate Cake is a bit more involved. Worth it? Oh, it is so worth it. I got this recipe years ago from my friend Kim and it is truly incredible!

The Most Amazing Flourless Chocolate Cake

The Most Amazing Flourless Chocolate Cake Recipe
 
Save Print
Author: Laura
Serves: 12
Ingredients
  • 12 ounces bittersweet chocolate chips or bittersweet chocolate, roughly chopped
  • 1 cup (2 sticks) plus 3 Tablespoons butter, cut into chunks
  • 1¼ cup sugar or sucanat (more or less to taste)
  • 6 eggs
  • 1 cup unsweetened cocoa powder
  • 1 Tablespoon milk
  • 1 Tablespoon honey
  • ¼ teaspoon vanilla
Instructions
  1. Preheat oven to 375°. Butter a 9-inch spring form pan, then line the bottom with a circle of parchment paper. Butter the paper, and set the pan aside.
  2. Place two-thirds (8 ounces) of the chocolate and 1 cup (2 sticks) of the butter in a medium saucepan over medium low heat. Stirring often, melt chocolate with butter until completely blended. Remove from heat and transfer to a large bowl. Add sucanat and mix well. Add eggs one at a time, whisking well after each addition. Sift cocoa into bowl and stir until just blended.
  3. Pour batter into prepared pan and bake for 35 to 40 minutes, or until cake has risen and top has formed a thin crust. The cake should be just firm in the center when done. Cool for 10 minutes, then invert onto a plate, removing sides of spring form pan. Remove and discard parchment paper and set cake aside to cool completely.
  4. While waiting for the cake to cool, make the chocolate glaze. Melt remaining 4 ounces chocolate and 3 tablespoons butter in a small saucepan over medium low heat, stirring until smooth. Remove from heat, then stir in milk, honey and vanilla. Set aside to cool slightly.
  5. When cake has cooled, pour glaze onto the center. Using a spatula or the back of a spoon, smooth the glaze very gently along the top and sides of the cake. Chill cake, uncovered, for 30 to 60 minutes before serving to set the glaze and make the cake easier to slice.
3.5.3229


Doesn’t that look fabulous? It is super rich and oh so chocolaty. Save this recipe to use at your next special occasion. Or next Thursday is fine too. :)

Heavenly Homemaker's Club Members: Access your homepage and all your fantastic resources here! Not a member yet? Please join us!

5 Kids in the Kitchen Cookbook Collection

May 24, 2018 by Laura Leave a Comment

This post may contain affiliate links. For more information, please see our disclosure policy.

One of the best things you can do this summer is get your kids in the kitchen. We decided to give you a little incentive in the form of a gorgeous pile of fun recipe books!

Kids in the Kitchen Collection

These books would cost $32 if you were to buy them individually. But we decided to give you the entire collection for just $20!

Now that my kids are 21, 18, 16, and 14 I cannot tell you how invaluable it is that they all know how to cook. Our kids MUST learn how to take care of themselves, feed themselves, and work hard. It is a tremendous gift that my kids are so capable in the kitchen. As an added bonus, my sons are all capable to provide their mother with chocolate as the need arises.

Here are my babies cooking when I could still get away with calling them babies. (Just kidding. I still call them my babies. Did you know babies can be 6’4″?)

No matter the ages of your kids, you’ve got to pull them into the kitchen with you. Not sure where to start or what to do? That’s what this fun eBook package is for!

Here’s what you’ll get for your $20 bill:

What to Do with the Kids in The Kitchen = One of the first eBooks we put together here. It includes 18 super simple, super fun and kid friendly recipes.

Malachi’s Favorite Cookbook = This one includes 17 of our son Malachi’s favorite recipes to make by himself. He helped me write this cookbook while he was learning how to cook a few years ago. These recipes can be read in cookbook form or can be printed to be used in recipe card form, which makes it extra fun!

Learn to Cook = A book that can be handed to older kids (ages 8 and up) so they can read and practice and learn to cook independently! And would you believe, this book also contains 55 easy recipes that kids love? 55!!!

Fill ’em Up! = This one is unique and we love it! It contains 7 recipes to use within 7 Bible lessons. The recipes have spiritual applications to go with them – so as you’re cooking, you are talking about scripture with your kids. The lessons apply to kids ages 4-18, providing great family devotional time with a practical purpose!

Teaching Your Kids to Cook = This is a favorite because you can use this to guide you through teaching your little ones to cook – beginning at age 2! This book includes games and activities to do in the kitchen with your young ones. And even better, it includes 48 kid friendly recipes to make with your kids as they are learning.

Get all 5 Kids in the Kitchen eBooks right now for just $20!

What a great set of resources for you to use this summer with your kids! (And/or if you really want to go nuts while teaching them to cook, I highly recommend this incredible Kids Cook Real Food eCourse!)

[wp_eStore_fancy1 id=33]

Want a Kids in the Kitchen freebie for added incentive?

As if this 5 for $20 deal can get any better…

Get this set of gorgeous Kids in the Kitchen printable recipe cards with your purchase of this Kids in the Kitchen eBook package!

Seriously? Get 5 great cookbooks for just $20, plus get free printable recipe cards? AND YOUR KIDS LEARN TO COOK????

Yes. Yes. Yes.

[wp_eStore_fancy1 id=33]

Heavenly Homemaker's Club Members: Access your homepage and all your fantastic resources here! Not a member yet? Please join us!

Simple Strawberry Cheesecake Cups (Low Sugar, 5 Ingredients)

May 24, 2018 by Laura Leave a Comment

This post may contain affiliate links. For more information, please see our disclosure policy.

If you’ve enjoyed the Healthy Chocolate Peanut Butter Cups recipe I shared several months ago, you’ll want to give these new Simple Strawberry Cheesecake Cups a try too!

Our family loves these Strawberry Cheesecake Cups because they are full of nourishing fats, protein, and fruit. I personally like them because they are pink and pretty. C’mon. That’s a good reason to like something, isn’t it?

I learned the hard way that these must stay in the freezer until you’re ready to eat one. The good news is that the weather is finally becoming warmer so a cold treat is welcome! Feel free to skip the muffin cups and put this mixture into popsicle molds to make Strawberry Cheesecake Pops!
Curious why we like high fat, low sugar treats at our house? Read here.
Simple Strawberry Cheesecake Cups

Simple Strawberry Cheesecake Cups (Low Sugar, 5 Ingredients)
 
Save Print
Author: Laura
Serves: 12
Ingredients
  • 1 cup fresh or frozen strawberries
  • 8 ounces softened cream cheese
  • ¼ cup softened butter
  • 30 drops liquid stevia or 3 Tablespoons honey
  • ½ teaspoon vanilla extract (optional)
Instructions
  1. Mix all ingredients together in a food processor or high power blender or hand mixer until smooth.
  2. Scoop mixture into silicone muffin molds, candy molds, or popsicle molds.
  3. Freeze for about 2 hours.
  4. Once frozen, remove Cheesecake Cups from molds and place in an air-tight container.
  5. Store in freezer.
3.5.3229

Like recipes like this one that are super simple and contain 5 or fewer ingredients? You’ve gotta grab this awesome High Five Recipes eBook! You’ll get 111 recipes that are super simple and only use five or fewer real food ingredients!

[wp_eStore_fancy1 id=32]

You also might enjoy our 227 Healthy Snacks eBook. So many ideas and recipes, so little time! But hey, at least the recipes will only take a small amount of time to make, so you’re golden!

[wp_eStore_fancy1 id=6]

Want a Chocolate Peanut Butter Cup that provides great fat and protein like this Strawberry Cheesecake Cups recipe? This one is our favorite!

Heavenly Homemaker's Club Members: Access your homepage and all your fantastic resources here! Not a member yet? Please join us!
« Previous Page
Next Page »

Join Our Community!

 Facebook Twitter E-mail Instagram Pinterest

Popular Posts

~ Will All of the Real Moms Please Stand Up?
~ Easy! Stir-and-Pour Whole Wheat Bread
~ How to Make Gatorade
~ 31 Real Food Breakfast Ideas
~ Dear Teenage Girls...
~ When Mom Takes a Step Back
~ The Inexpensive Health Insurance We Love!
~ Let's Talk Real Food Grocery Budgets

Check out our latest posts!

  • Big Family Food and Fun: September 13-19, 2026
  • Big Family Food and Fun: September 6-12, 2026
  • Big Family Food and Fun: August 30-September 5, 2026
  • Big Family Food and Fun: August 23-29, 2026
  • Big Family Food and Fun: August 16-22, 2026
Home  ~  Simple Meals  ~  Club Membership  ~  Shop  ~  Privacy Policy  ~  Disclosure  ~ Contact

Copyright © 2026 · Beautiful Pro Theme on Genesis Framework · WordPress · Log in