Heavenly Homemakers

Encouraging women in homemaking, healthy eating and parenting

  • Home
    • About
    • FAQs
  • Recipes
    • Bread and Breakfast
    • Condiments
    • Dairy
    • Main Dishes
    • Side Dishes and Snacks
    • Desserts
    • Gluten Free
    • Instant Pot
    • Crock Pot
    • Heavenly Homemaker’s Weekly Menus
  • Homemaking
    • Real Food Sources
  • Store
  • Contact
    • Advertise
    • Disclosure
    • Privacy Policy
  • Simple Meals
  • Club Members!

Simple Summer Supper: Grilled Salmon

July 26, 2018 by Laura 2 Comments

This post may contain affiliate links. For more information, please see our disclosure policy.

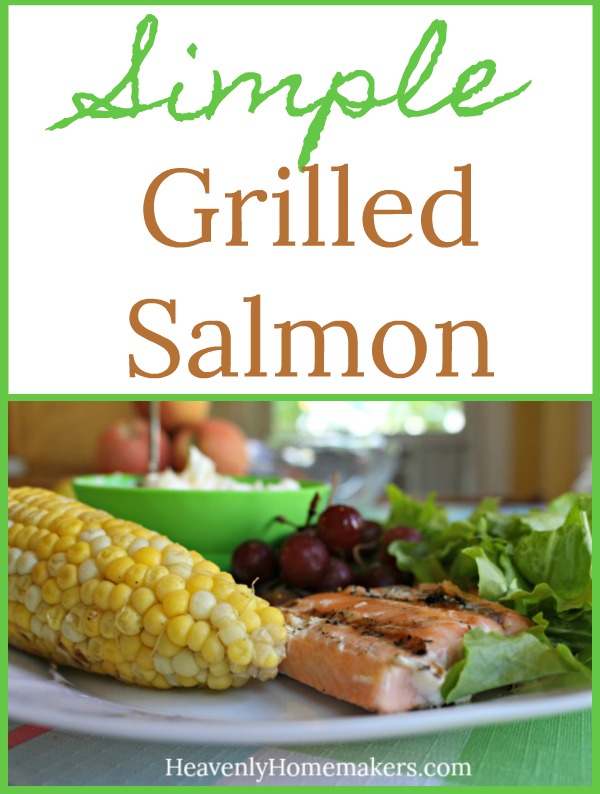
There’s nothing fancy about this Simple Grilled Salmon. But who needs “fancy” when “delicious” fills the plate?

I know there are more flavor-packed ways to grill salmon. The recipes for such are all over the internet and they look amazing.

But do you know what is also delicious? Salmon thrown on the grill with no preparation or prior thought. I hesitated to try this because I’d heard salmon didn’t grill well straight on the grates.

Lazy cook that I am (and by lazy, of course I mean clever), I decided one night to try grilling our salmon as-is. No prep. No seasoning. No cedar plank that had been soaked in newborn baby kisses (or whatever delightful options we read about that promise to present us with perfectly grilled salmon).

Would it be good? Would my family eat it? Would it be a waste of good salmon?

Or would it be yet another simple meal idea we could keep in our back pocket?

You guys! Why must we make real food cooking difficult? Just go get you some salmon fillets and throw them on the grill. My family devoured this deliciously simple grilled salmon. My 13 year old ate three fillets before I could stop him. There were no leftovers and I will be making this all summer long.

Might you want to squeeze a lemon over your grilled salmon? Absolutely. Should you consider making homemade tartar sauce (recipe below) to accompany this deliciously grilled meat? Certainly. Do we need to slave over and baby our salmon before we grill it? Not unless we want to.

For the record, I don’t want to. Because I’m lazy. I mean clever.

Simple Grilled Salmon with Homemade Tartar Sauce

Simple Summer Supper: Grilled Salmon
 
Save Print
Author: Laura
Ingredients
  • Wild caught salmon fillets (1-2 per person)
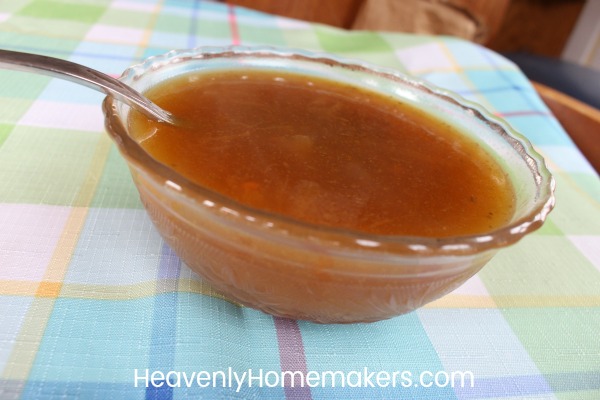
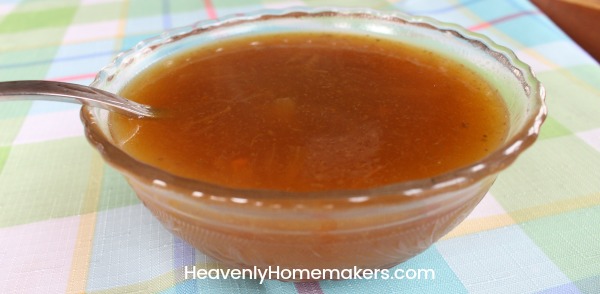
  • Homemade Tartar Sauce:
  • 1 cup mayonnaise (I use Hain Safflower Mayo)
  • ¼ cup sweet pickle relish
Instructions
  1. Grill salmon on low heat for approximately 20 minutes, turning once or twice as needed.
  2. While the meat is grilling, mix mayo and pickle relish to serve with the salmon.
  3. This is so easy it barely qualifies as a recipe.
3.5.3229


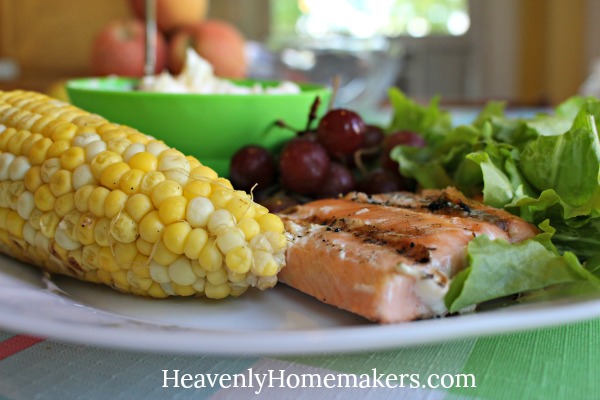
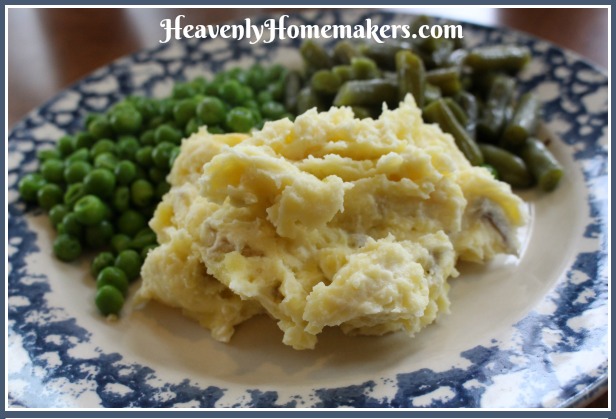
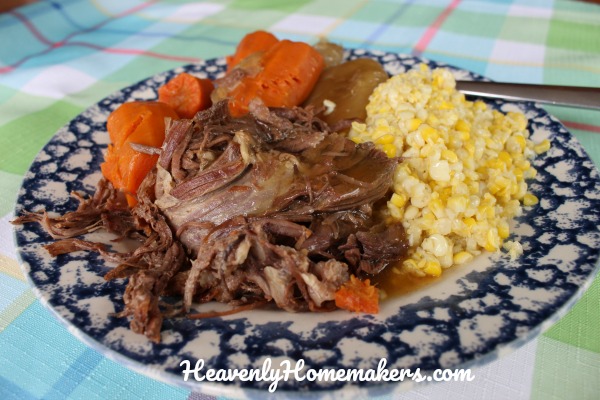
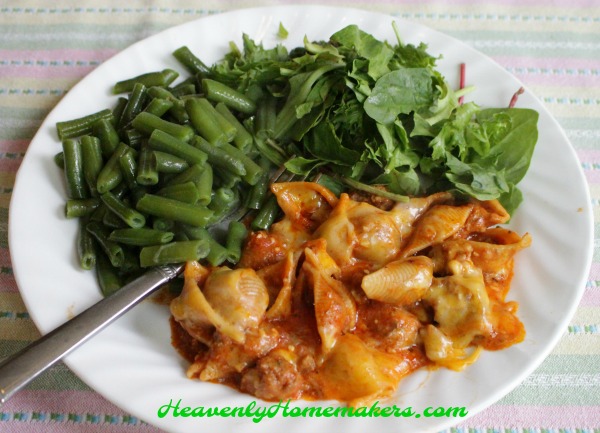
Serve this Simple Grilled Salmon with any fresh summer sides you have on hand: Fresh greens, corn on the cob, berries or other fruit, green beans or zucchini – what an amazing meal! Pineapple Fluff is a wonderful addition to this meal.

Have you seen our other Simple Summer Suppers? Here’s a running list:

  • Simple BLT Wraps
  • Simple Bacon Broccoli Salad
  • Simple Sloppy Joes
  • Simple Sloppy Grilled Cheese Sandwiches
  • Simple Taco Salad
  • Simple Grilled Tortilla Pizza
  • 16 Simple Summer Dips
  • Simple Tuna Salad Wraps
  • The Perfect Grilled Chicken
  • Farmer’s Market Finds
  • BLT Chopped Salad

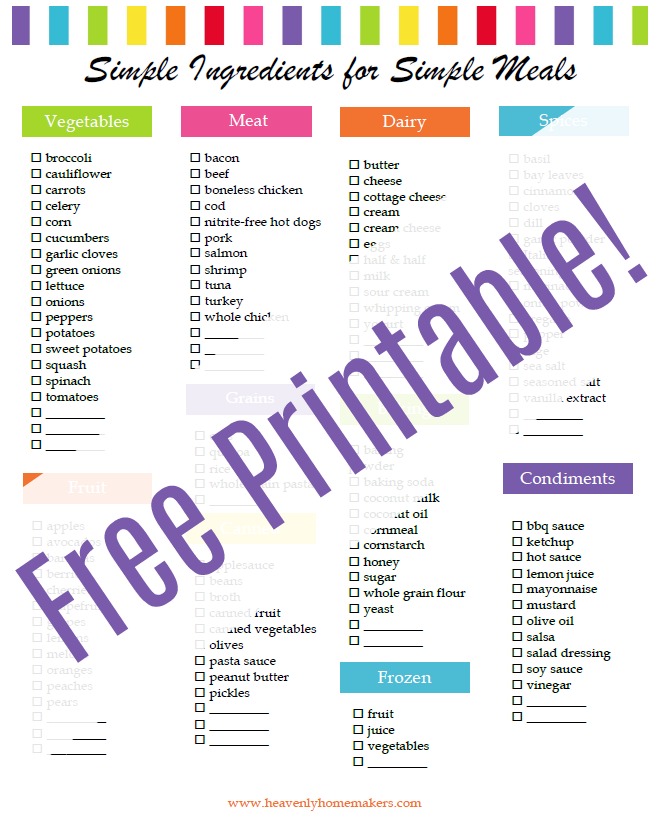
Don’t miss any of our new ideas we’ve got coming! Subscribe for free so all the latest can come directly to your inbox!

Have you become a Simple Meals member yet? You will LOVE how simple all the recipes are, and better yet, you’ll love that we do all the planning for you!

Heavenly Homemaker's Club Members: Access your homepage and all your fantastic resources here! Not a member yet? Please join us!

Simple Chocolate Frozen Yogurt (Low Sugar, Five Ingredients)

June 17, 2018 by Laura Leave a Comment

This post may contain affiliate links. For more information, please see our disclosure policy.

Just when you thought life couldn’t get any better, you learn that you get to eat Chocolate Frozen Yogurt for breakfast.

Why wouldn’t you be able to eat this for breakfast? Have you eaten regular yogurt for breakfast? Of course. So this is the frozen variety. It’s just as nourishing and just as delicious.

But it looks like dessert! And it feels so wrong to eat something like this for breakfast!

Then let me ask you this: Have you ever eaten a Cinnamon Roll for breakfast? A Poptart? A Donut? A bowl of Captain Crunch?

I rest my case.

Eat this Chocolate Frozen Yogurt and you’re in for a much healthier start compared to what most American “breakfast foods” offer. It’s perfect on a hot summer day!

I love that this can be made dairy free (with coconut milk and coconut yogurt) if that is a need you have. You can run this through your Ice Cream Maker if you like. I tend to make it the “lazy way” which I admit isn’t quite as creamy, but still very delicious!

Simple Chocolate Frozen Yogurt

Simple Chocolate Frozen Yogurt (Low Sugar, Five Ingredients)
 
Save Print
Author: Laura
Serves: 4-6
Ingredients
  • 32-ounces (4 cups) plain yogurt
  • ½ cup milk (regular or coconut)
  • ½ cup unsweetened cocoa powder
  • 1 teaspoon vanilla extract
  • 30 drops liquid stevia OR 4 Tablespoons real maple syrup (or a mixture of both)
Instructions
  1. Blend ingredients together until smooth.
  2. Spread mixture into an 8x8 inch dish.
  3. Cover and freeze for one hour.
  4. Scoop out Chocolate "Fro-Yo" and enjoy!
3.4.3177

Feel free to switch out the cocoa powder for blended fresh fruit to make different varieties of Simple Frozen Yogurt.

Want more great recipes that include only five or fewer real food ingredients? You’ll love this High Five Recipes eBook!

[wp_eStore_fancy1 id=32]

Want more No-Churn Ice Cream recipes?

  • Low Sugar No-Churn Chocolate Ice Cream
  • Low Sugar No-Churn Vanilla Ice Cream
  • Low Sugar No-Churn Strawberry Ice Cream

Want more Chocolate Recipes?

We’ve got an entire post filled with 36 of them, coming right up! Be sure to subscribe so you won’t miss all the fun!

Heavenly Homemaker's Club Members: Access your homepage and all your fantastic resources here! Not a member yet? Please join us!

Oatmeal Cookie Dough (That’s Safe to Eat!)

June 12, 2018 by Laura 9 Comments

This post may contain affiliate links. For more information, please see our disclosure policy.

Confession: When I was a kid, I used to frequently make a batch of cookie dough just so I could eat the dough. I know I’m not the only one. ‘Fess up. Who’s with me? And who of you is very excited to make this Oatmeal Cookie Dough recipe so you can have a child-hood throw back and enjoy eating balls of cookie dough without guilt?

As you have likely noticed, I never died (not even a little bit) from eating all that cookie dough back in the day, even though the dough was most definitely made with raw eggs. I would say that for the most part, I still don’t fear raw egg consumption, especially if the eggs come from well cared for, free range chickens. Still, I think we’ll all feel just a little bit better about eating cookie dough that we can be assured is free of salmonella.

Or maybe we don’t even care about food safety because we’re all just excited to eat cookie dough.

A few weeks ago, I shared this super easy (5 ingredient!) recipe for Simple Oatmeal Cookies. They come together fast and guess what? They are eggless. No pathogenic bacteria here. (What? I looked up the frightening facts about raw eggs and found big words. Impressive, eh?)

The first time I made these cookies I couldn’t help myself. I grabbed a spoon and took a tiny dip of dough. And then another. Then just one more. It took me back to my childhood days of baking cookies and nibbling dough. I began to feel sheepish until I realized, “Hey. I’m a grown-up now. I can do what I want.” So I took it upon myself to skip the baking step and to make beautiful cookie dough balls – on purpose. After all, why bake cookies when you can just eat cookie dough?

I was therefore behooved to bless you all with this fabulous opportunity to eat cookie dough like a kid. (Yes, more big words. Apparently I’m trying to strike a mature balance between eating cookie dough like a kid and writing about it like an adult.) So I took pictures and turned the idea into a blog post, because friends, I’m here for you. I understand your temptation to eat cookie dough and I do not underestimate the thrill and benefit of tasty childhood memories.

I also put oats in there so we could justify eating this cookie dough for breakfast. It’s as if I thought of everything.

So here we are, same recipe, second verse. Bake them like this if you want actual baked cookies (but why?). Or just make them into cookie dough balls following the easy directions below.

Oatmeal Cookie Dough

Oatmeal Cookie Dough (That's Safe to Eat!)
 
Save Print
Author: Laura
Serves: 15-18
Ingredients
  • 1½ cups melted butter
  • ⅓-1/2 cup sugar (raw, white, brown, or sucanat)
  • 1 tablespoons vanilla extract
  • 1½ cups whole rolled oats
  • 3 cups whole wheat flour (I use freshly ground soft white wheat)
Instructions
  1. Cream butter and sugar together in a bowl.
  2. Stir in vanilla.
  3. Mix in flour and oats until well combined.
  4. Scoop Tablespoon-sized balls of dough onto a plate or into a container.
  5. Store in the fridge in an airtight container.
3.5.3229


Grab a spoon. Eat cookie dough. Be free. This behavior is not at all capricious. (I felt it best to end my “eat cookie dough like a kid” post with a big word so you’d remember I’m actually an adult. Impressive, eh?)

Heavenly Homemaker's Club Members: Access your homepage and all your fantastic resources here! Not a member yet? Please join us!

The Easiest Burrito Recipe to Make for the Freezer

June 7, 2018 by Laura 5 Comments

This post may contain affiliate links. For more information, please see our disclosure policy.

I remember the first time I made these burritos for the freezer. My oldest was a tiny baby and it was my first attempt at freezer cooking as a new mom. My friend had promised this was the easiest burrito recipe a person could make, but somehow I still felt I needed to make a big event out of the ordeal.

I blocked out the entire day. I had determined that I would start the intense burrito-making-process as soon as my baby had his first feeding of the morning. That way, if I needed to work on them slowly all day between taking care of his needs, I could be flexible and available.

Imagine my surprise when I had the entire batch of burritos ready for the freezer before Asa even woke up from his morning snooze! (Imagine my other surprise 21 years later when that tiny baby grew to be an incredible 6’4″ adult person. How did I get here?)

These burritos are so easy it’s almost ridiculous. Now that my first baby and all my other babies are all grown up and eating adult/teenage boy portions, I can’t tell you how glad I am to know how to make the easiest burritos on the planet! These are filling for the boys, easy for them to warm up, and I think we’ve already established that they are incredibly easy to make!

It’s ironic that I’m associating these burritos with having a newborn (pauses to sigh as she thinks back to the day her boys were tiny babies). Now, any time a friend has a baby, I almost always make a batch of these burritos to put in their freezer. It takes very little time for me to make, and it saves a new mom from having to cook for her family!

The most recent new mommy I delivered burritos to told me later that her husband was (kindly) demanding the recipe. “You must have made that sauce from scratch with fresh tomatoes!” she declared. I hated to burst her bubble, but I had to humbly admit, “Nope, that was store-bought salsa stirred into regular ol’ cooked meat and shredded cheese.” Shucks, and here she thought I’d labored on those burritos as long as she’d labored in the hospital having her sweet baby.

Ready to learn the secret of this fabulous freezer food?

The Easiest Burrito Recipe to Make for the Freezer

5.0 from 1 reviews
The Easiest Burrito Recipe to Make for the Freezer
 
Save Print
Author: Laura
Serves: 12
Ingredients
  • 3-pounds ground beef
  • 32-ounces salsa (any kind)
  • 3 cups shredded cheese
  • Sea salt to taste
  • 12-18 burrito-sized tortillas
  • Any add-ins you like to help stretch the mixture: Cooked rice, black beans, olives, additional spices
Instructions
  1. In a large pot, brown and drain meat.
  2. Stir in salsa and cheese.
  3. Scoop mixture into tortillas and fold.
  4. Freeze burritos on a cookie sheet, then transfer to a freezer bag once frozen.
  5. Heat in a 350 degree oven for about 15 minutes or until burrito is hot through and through. (You can microwave them for a couple minutes if you like. Our family no longer has a microwave.)
3.5.3229

With just five simple ingredients, you can make these wonderful burritos. Or, you can stir in cooked rice or a can of black beans to help the mixture stretch so you can make even more burritos!

Want more great 5-Ingredient recipes? You’ll definitely want to check out our newest High Five Recipes eBook!

[wp_eStore_fancy1 id=32]

Oh! And also, I’d love to point you to The Prayer Mugs Prayer Journal. I wrote it in honor of my firstborn turning 20 last year. Believe it or not, an entire year has gone by and that boy turns 21 today! The Prayer Mugs concept has been life changing for me as I turn from worry to faith in trusting God with my growing kids. For one week only, use the code TWENTYONE to get an $8 discount in honor of his birthday!!

[wp_eStore_fancy1 id=25]

Care to share a favorite homemaking memory from the days your kids were babies? Or maybe they’re babies right now. I’d love to hear the latest going on at your house!

Heavenly Homemaker's Club Members: Access your homepage and all your fantastic resources here! Not a member yet? Please join us!

How to Make Mashed Potatoes in the Instant Pot

June 5, 2018 by Laura 4 Comments

This post may contain affiliate links. For more information, please see our disclosure policy.

If you have an Instant Pot and you have ten minutes, you can make mashed potatoes. I suppose it is also important that you have some potatoes available to work with. Butter is a must. Sea salt is a game changer. Wait until you see how simple it is to make these mashed potatoes!

Remember a few months ago when I figured out how to make Mashed Potatoes in my crock pot? That amazing trick took my family from the depths of mashed potato despair into the peak of mashed potato heaven. As it was, I had stopped making mashed potatoes altogether. After all, who had time for the effort? Who could afford the energy? Why must mashed potatoes make such a mess of pots and beaters and countertops and walls? (Confession: I am a messy cook. Mashed potatoes were the worst for me.)

So I stopped. We never ate mashed potatoes. There simply was no time.

Then I learned to make them in the most simple way possible, which meant that not only could we make mashed potatoes again, we could make them every week without trouble. And then, just when I thought I’d discovered the easiest way to make mashed potatoes…

I learned to make them in my Instant Pot (my affiliate link). In ten minutes.

You know how people always say, “Oh, life was so much better back in the pioneer days. Certainly life was much simpler then.” I agree to a certain extent but alas, the pioneers did not have Instant Pots. So let’s here it for the 21st century and its wonderful technology!

So would you believe you can wash potatoes, throw them into your Instant Pot with some water, let them cook for 10 minutes, then mash them and serve them and make everyone very happy? You, of course, will be the happiest of all because you didn’t have to slave over your potatoes. And if your children happen to be of age, you can ask them to scrub your potatoes, making your work load is even lighter!

How to Make Mashed Potatoes in the Instant Pot

How to Make Mashed Potatoes in the Instant Pot
 
Save Print
Author: Laura
Serves: 6-8
Ingredients
  • 5 pounds gold or red potatoes
  • 1 cup water
  • 1 cup whole milk, half-and-half, or cream
  • 2 cups sour cream
  • ¼-1/2 cup butter
  • sea salt to taste
Instructions
  1. Scrub, but don't peel the potatoes.
  2. Put them (whole) into an Instant Pot on the metal trivet, along with 1 cup of water.
  3. Seal and cook at hi pressure, manual setting, for 10 minutes.
  4. Release the pressure and open the Instant pot.
  5. Mash soft potatoes directly in the crock with a potato masher.
  6. While mashing, dump in the milk, sour cream, butter, and salt.
  7. Continue mashing until potatoes have reached desired consistency.
3.5.3229

Truly these are the most delicious!

Can you use russet potatoes to make these mashed potatoes? I don’t recommend it. They take a longer cooking time, they aren’t as nourishing, and they don’t taste as good. Gold or red potatoes are much preferred!

I like to also add shredded cheese to our potatoes to make them tastier and more substantial.

Want Simple Meal ideas to serve with your Simple Instant Pot Potatoes?

  • imple Baked Salmon and Asparagus
  • Simple Crock Pot Chicken Soup with a Kick
  • Simple Skillet Taco Pasta
  • Last-Minute Lentil Chili
  • Simple Sweet and Sour Baked Chicken Legs
  • 20-Minute Taco Soup
  • Simple Cheesy Baked Chicken
  • Simple Creamy Chicken Stew in the Crock Pot
  • Simple Italian Beef and Broccoli Skillet
  • Simple Bacon Ranch Chicken
  • Simple Hawaiian Crock Pot Chicken
  • Simple Taco Rice Dinner
  • Simple Last Minute Nacho Plate
  • Simple Chicken Cheeseballs with a Kick
  • Simple Beanie Weanies
  • Simple Crock Pot BBQ Spareribs
  • Simple Pizza Chicken Bake
  • Simple Italian Chicken and Green Bean Bake
  • Last Minute Creamy Bacon Spaghetti
  • Simple Hamburger Soup
  • Simple Parmesan Broiled Fish
  • Simple Overnight Saucy Crock Pot Chicken
  • Simple 15-Minute Meal
  • Simple Overnight Melt-in-Your-Mouth Beef Roast
  • Simple 3-Cheese Crock Pot Pasta
  • Simple Oven Fried Chicken
  • Simple Honey Mustard Chicken Legs
  • The Easiest Mashed Potatoes in the World
  • Simple Garlic Butter Shrimp
  • Simple Crunchy Ranch Chicken Strips
  • Simple Crock Pot Shredded Ranch Chicken (for salad or tacos)
  • Simple Crock Pot Pizza Casserole
  • Simple Barbecue Beef Roast
  • Simple Spanish Rice Bowls
  • Simple Roasted Rotiserie Chicken
  • Simple Green Chile Chicken
  • Simple Tex-Mex Creamy Chicken
  • Simple Waffle Omelets
  • Simple Crock Pot Taco Pasta
  • Simple Grilled Chicken
  • Simple Hawaiian Beef Roast
  • Simple Crock Pot Creamy Stew Meat
  • Simple Cheese Stuffed Burgers
  • Simple Hashbrown Casserole (For Instant Pot, Crock Pot or Oven!)
  • Simple Lasagna Casserole (For Instant Pot or Crock Pot)
  • Simple Chili Mac
  • Simple Bacon Cheeseburger Casserole
  • From Burrito Bar to Casserole (a 5-Minute Meal!)
  • Simple Bacon Cheeseburger Roll
  • Simple Garlic Parmesan Chicken Legs
  • Super Simple Lasagna
  • The Simplest White Chicken Chili
  • Simple Lentil Nachos
  • Simple Tuna Patties
  • Simple Banana Pancakes
  • Simple Crock Pot Applesauce BBQ Chicken
  • Simple Hashbrown and Egg Nests
  • Simple Cornbread Waffles with Chili
  • Simple Veggie Fritters
  • Simple Lemon Garlic Chicken Legs
  • Simple Noodle Soup
  • Simple Three Cheese Spaghetti
  • Simple Crock Pot Salsa Shredded Beef
  • Simple Cheeseburger Hashbrown Casserole

Join Simple Meals. You’ll love it!


Enjoy all these recipes without effort when you become a Simple Meals member! Every week we’ll send you a great menu plan full of Simple Recipes like this one. We’ll equip you with a grocery list. We’ll break everything down so that your meal prep is as simple as possible. We’ll give you bonus tips and recipes and freebies. And this is all for just $1 each week. You’ll love it!

[wp_eStore_subscribe_fancy id=19]

Heavenly Homemaker's Club Members: Access your homepage and all your fantastic resources here! Not a member yet? Please join us!

The Easiest (and Fastest) Way to Cook Spaghetti Squash

May 31, 2018 by Laura 1 Comment

This post may contain affiliate links. For more information, please see our disclosure policy.

I just learned to cook spaghetti squash in ten tiny minutes, from start to finish. Unbelievable!

Is it just me, or is it incredibly fun that God created a squash that once cooked, shreds out like noodles? He did all the work. We simply have to cook it. (There is a deep spiritual parallel here we should adopt and live by: God does God’s work. We simply get to be His glorious tools to be a part of His work as we listen and obey Him. I love this.)

So God’s spaghetti squash. It’s always been easy to prepare in the oven, but I just learned how to make it in my Instant Pot. It cooks at high pressure for 5 minutes and just like that, the spaghetti squash is ready to shred and eat!

First, use a sharp knife to cut the spaghetti squash into four rings like this:

Use a spoon to dig out the seeds.

Place the spaghetti squash rings onto the metal trivet inside your Instant Pot. Put 1 cup of water under the trivet.

Put the lid on the Instant Pot and seal. Set it to manual, for 5 minutes at hi pressure.

The cooking process will be barely over this 5 minutes because the Instant Pot won’t come to full pressure or need to release. So in just these few minutes, the squash is cooked and ready!

Use a fork to pull the squash apart into “noodles.”

So delicious as-is!

Or, my personal favorite: we mix leftover spaghetti sauce with leftover Alfredo Sauce and pour it over the spaghetti squash. What a nourishing meal!!

Warning: Spaghetti Squash doesn’t taste like regular pasta. I consider spaghetti squash to be a pasta replacement, but only as a vehicle to hold my sauce. I LOVE spaghetti squash covered in sauce, and in fact, I love it more than wheat pasta. But it doesn’t taste the same. It tastes like a mild vegetable covered with delicious sauce. Bring it on!

The Easiest (and Fastest) Way to Cook Spaghetti Squash

The Easiest (and Fastest) Way to Cook Spaghetti Squash
 
Save Print
Author: Laura
Serves: 3-6
Ingredients
  • 1 Spaghetti Squash
  • 1 cup water
Instructions
  1. Slice the squash into four rings.
  2. Remove the seeds with a metal spoon and discard.
  3. Pour one cup water into the Instant Pot.
  4. Place the prepared squash rings onto the metal trivet in the Instant Pot.
  5. Place the lid on and seal.
  6. Cook for 5 minutes at high pressure.
  7. Remove the cooked squash and pull the insides away from the rind with a fork.
  8. Serve as is or smothered in sauce.
3.5.3229

Don’t have an Instant Pot? Here’s what I think about mine. (Spoiler alert: I love it.)

How to Cook Spaghetti Squash in the Oven

  1. Slice the squash into four rings.
  2. Remove the seeds with a metal spoon and discard.
  3. Place the prepared squash rings into a 9×13 inch baking dish.
  4. Bake in a 350 degree oven for 30-45 minutes.
  5. Remove the cooked squash and pull the insides away from the rind with a fork.
  6. Serve as is or smothered in sauce.

Are you a spaghetti squash fan?

Heavenly Homemaker's Club Members: Access your homepage and all your fantastic resources here! Not a member yet? Please join us!

Simple Strawberry Cheesecake Cups (Low Sugar, 5 Ingredients)

May 24, 2018 by Laura Leave a Comment

This post may contain affiliate links. For more information, please see our disclosure policy.

If you’ve enjoyed the Healthy Chocolate Peanut Butter Cups recipe I shared several months ago, you’ll want to give these new Simple Strawberry Cheesecake Cups a try too!

Our family loves these Strawberry Cheesecake Cups because they are full of nourishing fats, protein, and fruit. I personally like them because they are pink and pretty. C’mon. That’s a good reason to like something, isn’t it?

I learned the hard way that these must stay in the freezer until you’re ready to eat one. The good news is that the weather is finally becoming warmer so a cold treat is welcome! Feel free to skip the muffin cups and put this mixture into popsicle molds to make Strawberry Cheesecake Pops!

Curious why we like high fat, low sugar treats at our house? Read here.

Simple Strawberry Cheesecake Cups

Simple Strawberry Cheesecake Cups (Low Sugar, 5 Ingredients)
 
Save Print
Author: Laura
Serves: 12
Ingredients
  • 1 cup fresh or frozen strawberries
  • 8 ounces softened cream cheese
  • ¼ cup softened butter
  • 30 drops liquid stevia or 3 Tablespoons honey
  • ½ teaspoon vanilla extract (optional)
Instructions
  1. Mix all ingredients together in a food processor or high power blender or hand mixer until smooth.
  2. Scoop mixture into silicone muffin molds, candy molds, or popsicle molds.
  3. Freeze for about 2 hours.
  4. Once frozen, remove Cheesecake Cups from molds and place in an air-tight container.
  5. Store in freezer.
3.5.3229

Like recipes like this one that are super simple and contain 5 or fewer ingredients? You’ve gotta grab this awesome High Five Recipes eBook! You’ll get 111 recipes that are super simple and only use five or fewer real food ingredients!

[wp_eStore_fancy1 id=32]

You also might enjoy our 227 Healthy Snacks eBook. So many ideas and recipes, so little time! But hey, at least the recipes will only take a small amount of time to make, so you’re golden!

[wp_eStore_fancy1 id=6]

Want a Chocolate Peanut Butter Cup that provides great fat and protein like this Strawberry Cheesecake Cups recipe? This one is our favorite!

Heavenly Homemaker's Club Members: Access your homepage and all your fantastic resources here! Not a member yet? Please join us!

How to Make Roast Gravy

May 3, 2018 by Laura 2 Comments

This post may contain affiliate links. For more information, please see our disclosure policy.

If you saw my recent “Easiest Way to Make Beef Roast in the Instant Pot” post, you saw that I promised to share How to Make Roast Gravy. Where there is roast, there must be gravy. There is no other way.

While I shared that I struggled with making a good roast for over 20 years before figuring it out, I perfected my gravy-making skills long ago. I guess that’s a good thing, seeing as my roasts weren’t great. At least we drown the dry meat in gravy.

Making gravy truly isn’t difficult, though in my case, it took some practice. Did I ever tell you about the first time I made gravy for Matt? He had to spread it onto his potatoes with a knife. Good times. (That was in our dating days. Praise God he saw gravy-making potential and still chose to marry me. It was probably because of how I rocked the big hair. Or the high waist pants, which are somehow now back in style. Why, girls? Why?)

How to Make Roast Gravy

How to Make Roast Gravy
 
Save Print
Author: Laura
Ingredients
  • 1-2 cups beef broth/drippings from a roast
  • ¼ cup cold water
  • 2 Tablespoons corn starch or arrowroot powder
  • Sea salt to taste
Instructions
  1. Pour the drippings from a cooked roast into a small sauce pan.
  2. Heat to boiling.
  3. Meanwhile, whisk together water and cornstarch in a small glass or jar.
  4. Slowly pour water/cornstarch mixture into the boiling beef broth, stirring/whisking constantly.
  5. Continue to cook and stir over medium heat until the mixture has thickened into gravy.
  6. Salt liberally as desired.
3.5.3229


Need to thicken your gravy? Make another mixture of water/cornstarch and whisk it in to the boiling broth little by little until you’ve reached the desired gravy consistency you want.

It is important that you mix the water and cornstarch together before stirring it into your drippings/broth! Sprinkling cornstarch directly into the hot drippings will only give you lumpy gravy. Ask me how I know.

What are you better at making: Roast or Gravy? Maybe now we can all be good at both!

Heavenly Homemaker's Club Members: Access your homepage and all your fantastic resources here! Not a member yet? Please join us!

The Easiest Way to Make Beef Roast in the Instant Pot

May 1, 2018 by Laura 9 Comments

This post may contain affiliate links. For more information, please see our disclosure policy.

My mom used to be the queen of perfect Sunday roasts. But for some reason, it’s taken me over 20 years to figure out how to get my roast to fall apart and taste delicious. Today I’ll share what I’ve learned about making beef roast in the Instant Pot. Aha! Now we’re on to something.

After years of trial and error, I finally learned to make a Melt–in-Your-Mouth Beef Roast in the Crock Pot. This is all well and good except for the days I don’t have 12 hours to wait for my beef roast to cook to perfection. A recent Sunday morning, “What can I make for lunch before we leave for church in ten minutes?!” panic led me to investigate how to make a beef roast in my Instant Pot.

Wait. You don’t have an Instant Pot? Trust me. I understand. It took me years of hearing about them to get on the Insta-Train. Now that I’m on board, I’m declaring it to be one of my favorite appliances. Is an Instant Pot worth your investment? I give an emphatic, “Absolutely!” (I have this one.)

So anyway, back to my pot roast. I discovered that there are many Instant Pot roast-making instructions out there. But I have to admit what you already know about me: I really do not like recipes that instruct me to take several steps before walking away from my food to let it cook. After all, what good is using a Crock Pot or Instant Pot if I have to spend 30 or more minutes prepping the food?

Therefore, while most recipes I found instructed that I sear both sides of the roast and sing it a lullaby before allowing the Instant Pot to work its magic, I decided to do what I do best: Throw the food into the pot, turn it on, and walk away. After all, I don’t have time to sear meat on a Sunday morning, nor am I interested in going to church smelling like caramelized onion. And all my fellow worshipers said amen.

I figured the worst that might happen if I took a few shortcuts is that my roast would be mediocre, something my family has dealt with for most of my roast-making life. This is why God invented gravy.

So into the Instant Pot went the roast. I dumped on some sea salt, worchestershire sauce, water, onion, and carrots. We went to church and came home to this:

The meat fell apart. The flavor was incredible. Continue to sear your roast if you must, but as for me and my house, I will continue to throw in the food and let the appliances do the work.

The Easiest Way to Make Beef Roast in the Instant Pot

The Easiest Way to Make Beef Roast in the Instant Pot
 
Save Print
Author: Laura
Serves: 6-8
Ingredients
  • 3 pound beef roast
  • 2 Tablespoons Worcestershire sauce
  • 1 medium-sized onion
  • Sea salt and pepper to taste
  • 5-8 medium-sized carrots
  • 1 cup water
Instructions
  1. Place roast on the metal trivet in your Instant Pot.
  2. Pour 1 cup water into the bottom of the pot.
  3. Cut onion into fourths and place in the pot.
  4. Peel carrots, cut them in half, then place them on the roast.
  5. Salt liberally, pepper as you like.
  6. Place the lid on the Instant Pot and seal it.
  7. Cook it at High Pressure, Manual Setting, for 70 minutes.
  8. I do natural release as I'm usually still at church during this time.
  9. Shred meat and serve!
3.5.3229


Add 3ish pounds of scrubbed and cut potatoes to the pot if you like. :)

Be on the lookout for a tutorial on making Roast Gravy.

Am I the only one who has struggled to make a good pot roast? Here’s hoping this recipe solves all your roast-making issues!

Some of the links in this post are affiliate links.

~~~~~~~~~~~~~~~~~~~~~~~~~~~~~~~~~~~~~~~~~~~~~~~~~~~~

Join Simple Meals!

728x90

We love how Simple Meals has been saving family time for so many, and helping people put great food on the table each night! Join us for just $1/week!

[wp_eStore_subscribe_fancy id=28]

Heavenly Homemaker's Club Members: Access your homepage and all your fantastic resources here! Not a member yet? Please join us!

Simple Ingredients for Simple Meals Printable! Gift for You!

April 5, 2018 by Laura Leave a Comment

This post may contain affiliate links. For more information, please see our disclosure policy.

After many a request, we’ve finally created a Simple Ingredients for Simple Meals printable list for you to work with. Just when you thought it wasn’t possible, simple cooking just got even easier!

Over the past several months, many of you have requested that I create a list of all the ingredients I like to keep on hand to make real food cooking easier. It’s taken a while, but I called in for back up and had one of my assistants help create what I declare to be beautiful, practical, and of course, simple!

Simple Ingredients List to the Rescue

The timing is perfect for this fun Simple Ingredients list to become available for you. Why? Because we just kicked out our High Five Recipes eBook, which shares 111 recipes that all include 5 or fewer simple ingredients. Wondering which ingredients can be mixed and matched to make all 111 of these recipes? This list pretty much covers it! And then some.

Don’t you love how easy this printable breaks down that basics of ingredient needs? All the ingredients listed are real food, nourishing, and un-complicated. Simple, simple, simple! Yes, real food cooking is SIMPLE!!! And it tastes great. This, of course, is a must.

Obviously we’re all going to have favorite items not listed here. But this is our go-to list for all Simple Ingredient needs for Simple Meal preparation. Add to it as needed for your family!

It’s our pleasure to give you this Simple Ingredients for Simple Meals printable list as a gift.

We hope it is a huge help in simplifying your real food cooking lifestyle. Use it as a guide so that grocery shopping will be simpler, so you can save money, and so you’ll be able to have basic ingredients on hand for creating Simple Meals.

Sign up here so we can send you this wonderful freebie. (As an added bonus, we’re including several surprise freebies too. Wait till you see!)

Heavenly Homemaker's Club Members: Access your homepage and all your fantastic resources here! Not a member yet? Please join us!
« Previous Page
Next Page »

Join Our Community!

 Facebook Twitter E-mail Instagram Pinterest

Popular Posts

~ Will All of the Real Moms Please Stand Up?
~ Easy! Stir-and-Pour Whole Wheat Bread
~ How to Make Gatorade
~ 31 Real Food Breakfast Ideas
~ Dear Teenage Girls...
~ When Mom Takes a Step Back
~ The Inexpensive Health Insurance We Love!
~ Let's Talk Real Food Grocery Budgets

Check out our latest posts!

  • Big Family Food and Fun: April 19-25, 2026
  • Big Family Food and Fun: April 12-18, 2026
  • Big Family Food and Fun: April 5-11, 2026
  • Big Family Food and Fun: March 29-April 4, 2026
  • My 2026 NON-Grocery Budget Update
Home  ~  Simple Meals  ~  Club Membership  ~  Shop  ~  Privacy Policy  ~  Disclosure  ~ Contact

Copyright © 2026 · Beautiful Pro Theme on Genesis Framework · WordPress · Log in