Heavenly Homemakers

Encouraging women in homemaking, healthy eating and parenting

  • Home
    • About
    • FAQs
  • Recipes
    • Bread and Breakfast
    • Condiments
    • Dairy
    • Main Dishes
    • Side Dishes and Snacks
    • Desserts
    • Gluten Free
    • Instant Pot
    • Crock Pot
    • Heavenly Homemaker’s Weekly Menus
  • Homemaking
    • Real Food Sources
  • Store
  • Contact
    • Advertise
    • Disclosure
    • Privacy Policy
  • Simple Meals
  • Club Members!

Simple Snack Recipe: Honey Sweetened Flourless Peanut Butter Bars

February 22, 2018 by Laura 5 Comments

This post may contain affiliate links. For more information, please see our disclosure policy.

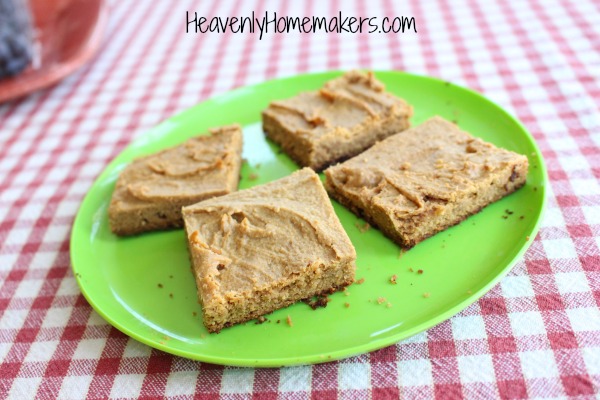
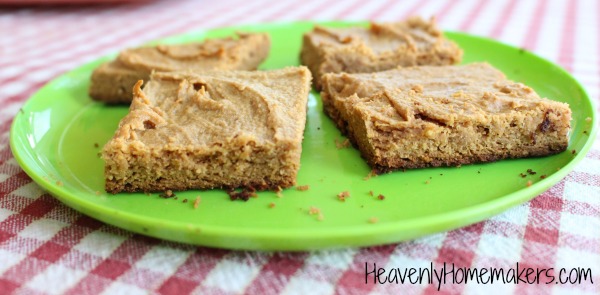
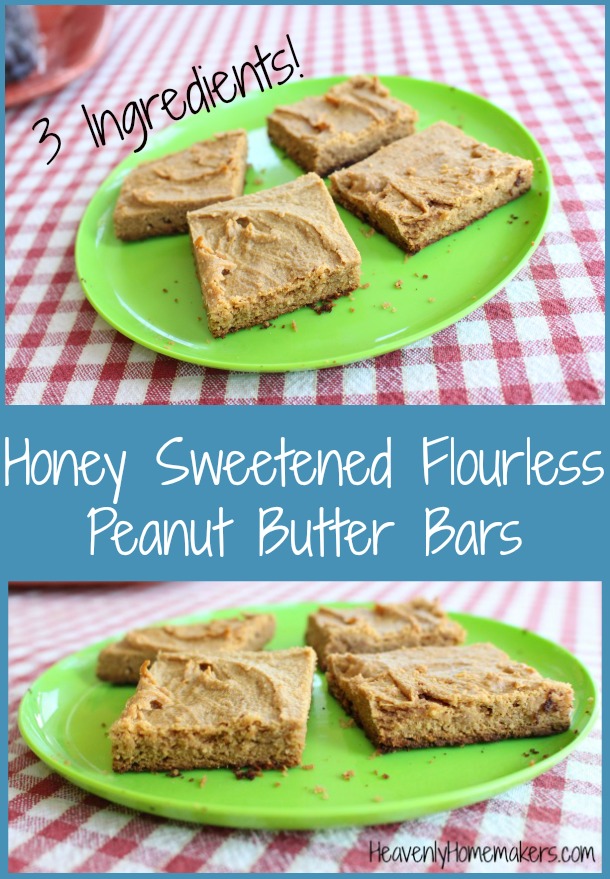
This Honey Sweetened Flourless Peanut Butter Bars recipe has been a family favorite for many years!
pb bars11

Though actually, I used to always make this recipe into cookies. And I used to use regular sugar. And I used to use 2 cups of that sugar! (Whoa.)

Now I use just 1/3 cup of honey and I simply mix up the three needed ingredients to make Honey Sweetened Peanut Butter Bars instead of cookies.

I love that even though I’ve drastically cut the sweetener, these cookie bars are sweet enough that my kids still enjoy them, but they aren’t so sweet that I can’t enjoy them too. But the best part, of course, is that they stir together super quickly and provide a wholesome snack for the family in just a few minutes!

The cookie version of this low sugar recipe is great too. You’ll find it here. I just like the ease of spreading the batter into a pan and baking. Shortcuts are our friend!
pb bars22

Honey Sweetened Flourless Peanut Butter Bars

5.0 from 1 reviews
Honey Sweetened Flourless Peanut Butter Bars
 
Save Print
Author: Laura
Serves: 18
Ingredients
  • 2 cups natural peanut butter
  • ⅓ cup honey
  • 1 egg
Instructions
  1. Mix the ingredients together until smooth.
  2. Spread mixture into an 9x13 inch baking dish
  3. Bake in a 350° oven for 15-20 minutes or until bars are lightly browned.
  4. Allow the pan to cool for 10 minutes before cutting into bars.
3.4.3177

I prefer making Homemade Peanut Butter, simply because it tastes amazing and I can be confident about the ingredients! Here are my two favorite Peanut Butter recipes/methods:

  • Peanut Butter (just peanuts!)
  • Peanut Butter (super creamy and spreadable – like Skippy or Jif – only healthy!)
Honey Sweetened Flourless Peanut Butter Bars

Looking for more Simple Snack Recipes?

We’re sharing new recipes all month! So far here’s what we’ve come up with:

  • No Bake Cookie Cups (5 minute prep!)
  • Cream Cheese Salsa Dip (2 ingredients!)
  • Pineapple Coconut Quick Bread (blends together fast!)
  • Parmesan Crisps (so easy you won’t believe it!)
  • Sweet and Salty Almonds or Pecans
  • Chocolate Cheesecake Fudge
  • Creamy Italian Veggie Dip
  • No Bake Chocolate Chip Cookie Bars
Heavenly Homemaker's Club Members: Access your homepage and all your fantastic resources here! Not a member yet? Please join us!

Simple Snack Recipe: Parmesan Crisps

February 11, 2018 by Laura 4 Comments

This post may contain affiliate links. For more information, please see our disclosure policy.

How many recipes can you make with just one ingredient? Can this even qualify as a recipe? Have you ever tried anything like these Parmesan Crisps? Should I write this entire post in question form?

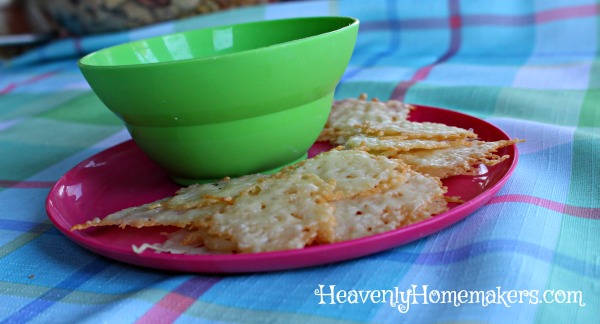
parmesan crisps11

These Parmesan Crisps are about to become your new best friend. They are so fast to make that you have no choice but to stand right in front of the oven while they bake because there is no time to walk away and come back before they are finished and ready to pull out. I mean, you slide these into the oven, you take a moment to breathe, then you open the oven and your snack is ready to eat.

For me, the most difficult part of making these Parmesan Crisps is getting out a cookie sheet while preventing my muffin tins to clatter down out of the cabinet at the same time. Someone should really organize that cabinet before someone gets hurt.

Simple Snack Recipes Series

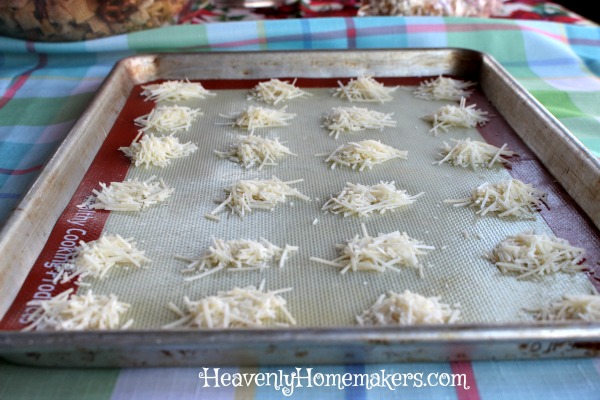
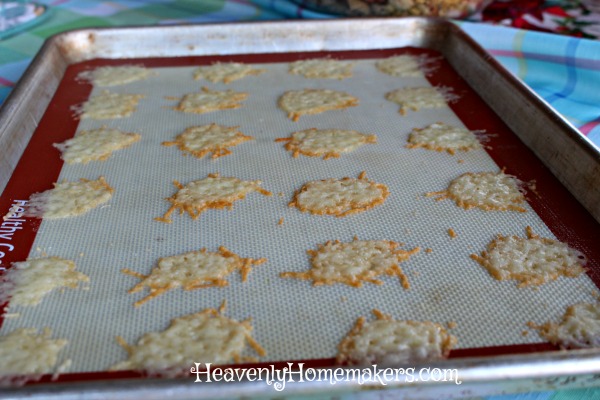
Once the cookie sheet has been successfully acquired, I find it best to lay down a silicone baking mat. At the very least, spread parchment paper on your cookie sheet so these crisps won’t stick to the pan. Then scoop about one tablespoon of cheese into little piles on the pan, leaving about one inch of space in between each pile like so:

parmesan crisps15

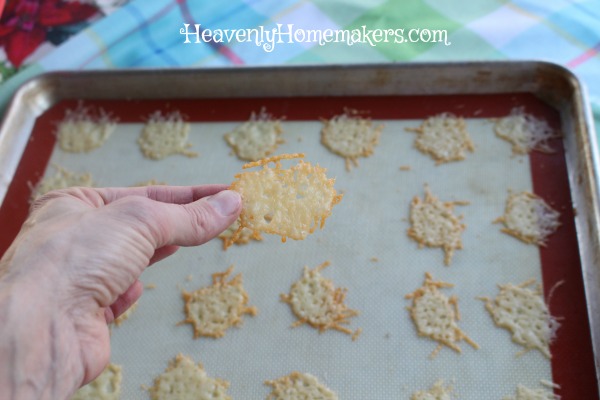
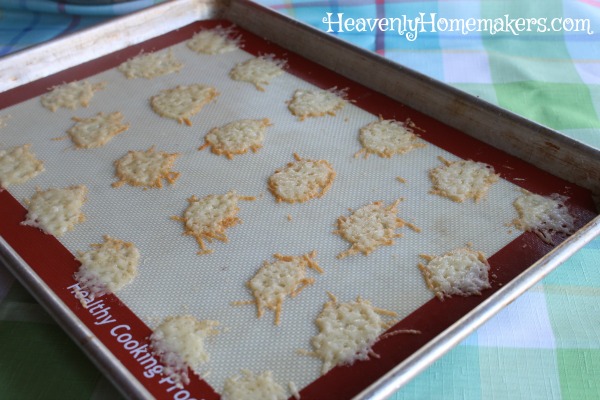
Slide the cookie sheet into a hot oven for 3-5 minutes so the cheese can melt and brown and tada! You have Parmesan Crisps.

parmesan crisps13

parmesan crisps14

parmesan crisps12

You can eat these right off the pan, but we like them best dipped in salsa.

Even better news: This idea works with any cheese you like. Colby jack is a winner. Cheddar. Pepper Jack. This is all too much fun.

Parmesan Crisps

5.0 from 1 reviews
Simple Snack Recipe: Parmesan Crisps
 
Save Print
Author: Laura
Serves: 1-2 servings
Ingredients
  • 1 cup shredded Parmesan cheese
Instructions
  1. Pre-heat oven to 400 degrees.
  2. Line a cookie sheet with a silicone baking mat or parchment paper.
  3. Scoop about one Tablespoon of cheese onto the pan, leaving about one inch of space in between each pile of cheese.
  4. Bake for 3-5 minutes or until edges are golden brown. Watch to be sure they don't over-bake!
3.4.3177

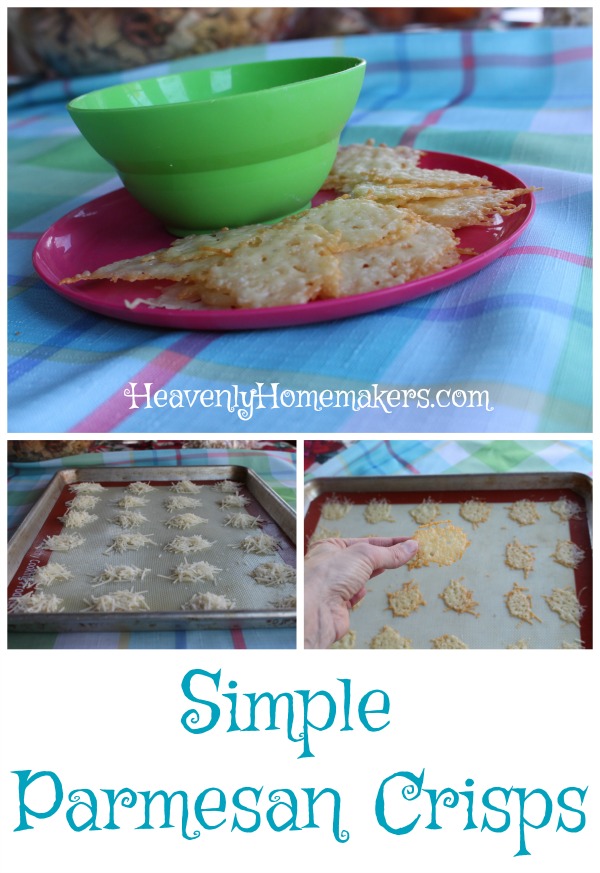
Simple Parmesan Crisps

I think the best thing about this Parmesan Crisps idea is that you can make them very quickly when your family needs a snack. This is a huge win at our house as we almost always have cheese on hand.

As for my cookie sheet and muffin tin cabinet, someone really should do something about organizing it before someone gets hurt.

Looking for more Simple Snack Recipes?

We’re sharing new recipes all month! So far here’s what we’ve come up with:

  • No Bake Cookie Cups (5 minute prep!)
  • Cream Cheese Salsa Dip (2 ingredients!)
  • Pineapple Coconut Quick Bread (blends together fast!)

Can’t wait to share more!

Heavenly Homemaker's Club Members: Access your homepage and all your fantastic resources here! Not a member yet? Please join us!

Simple Snack Recipe: Cream Cheese Salsa Dip

February 6, 2018 by Laura 8 Comments

This post may contain affiliate links. For more information, please see our disclosure policy.

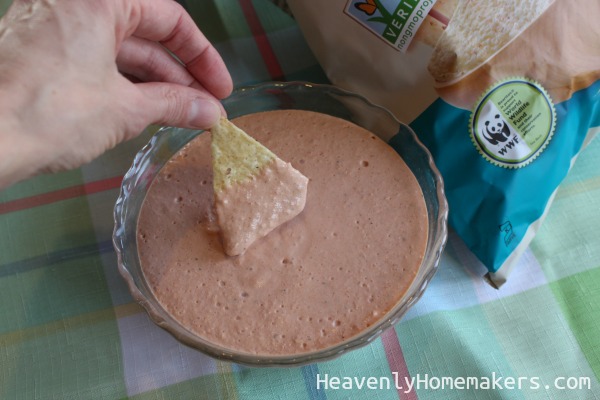
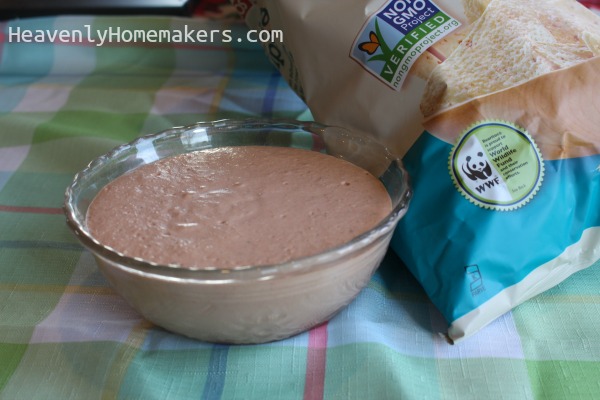
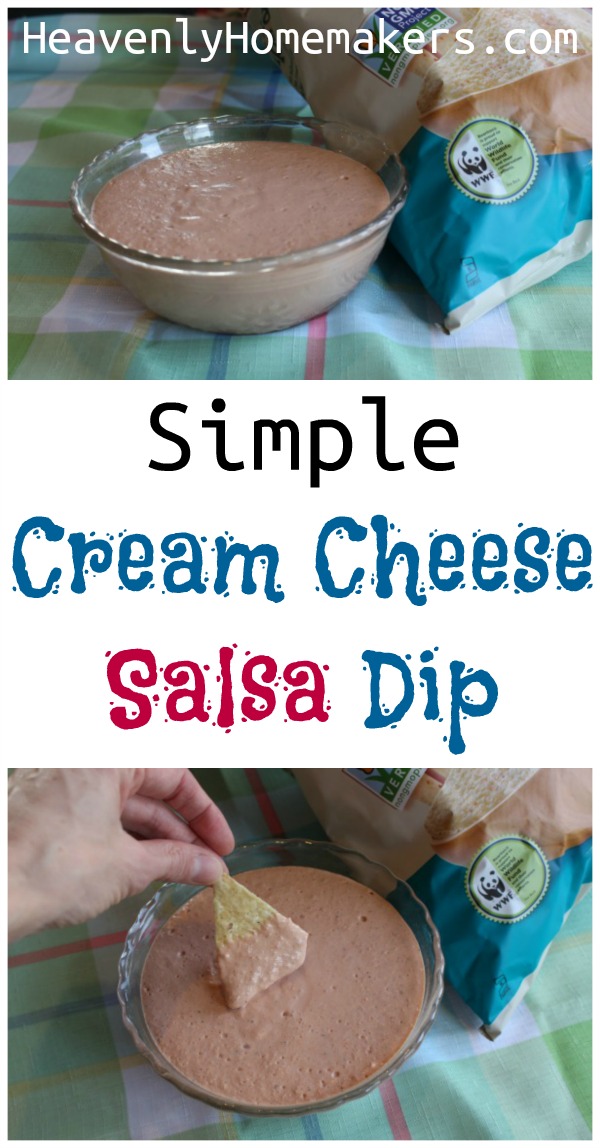
Two ingredients. TWO. That’s all it takes to make this simple and delicious Cream Cheese Salsa Dip.

cream cheese salsa 11

Welcome to Heavenly Homemakers!
Subscribe here for free so we can continue sharing simple recipes and encouragement!

Some of you might remember this recipe. I added it as a tiny little page way back in the beginning days of this site. I decided it was high time I re-share it as an actual post in easy-to-read and print form. It’s especially exciting to share as I’ve recently learned how to put it together more easily.

See, before it took six whole minutes to make. Now it only takes three. Too bad there’s not a way to cut every job in half. We’ll keep trying, though. :)

The six minute version: Put ingredients in a bowl and mix with a hand mixer. Watch to see that cream cheese and salsa don’t fly up and smear your glasses and forehead. Clean up many splatters all over the kitchen countertop. But at least the dip is good.

The three minute version: Put ingredients into a high power blender. (I have a Blendtec and don’t know how I ever lived without one.) The end.

cream cheese salsa 12

My kids make this Cream Cheese Salsa Dip regularly. They love eating it after soccer or basketball practice. It’s great to take to parties. It’s a huge hit no matter who we serve it to, and have I mentioned that it’s made with only two ingredients? Any guesses as to which two ingredients? It’s a tough one, given the very vague title of the recipe. Take your time.

Cream Cheese Salsa Dip

Simple Snack Recipe: Cream Cheese Salsa Dip
 
Save Print
Author: Laura
Serves: 3 cups
Ingredients
  • 16-ounces salsa (any variety)
  • 8-ounces softened cream cheese
Instructions
  1. Blend ingredients together (preferably in a blender, but a hand mixer works too!).
  2. Serve with corn tortilla chips.
3.4.3177

Simple Cream Cheese Salsa Dip

I daresay this Cream Cheese Salsa Dip with tortilla chips with a side of a No Bake Cookie Cup is a pretty good combo. A little sweet. A little salty. A lot of happiness.

Stay tuned for more Simple Snack Recipes still to come! Subscribe here for free so you won’t miss the fun!

Simple Snack Recipes Series

Heavenly Homemaker's Club Members: Access your homepage and all your fantastic resources here! Not a member yet? Please join us!

11 New Simple Snack Recipes!

February 1, 2018 by Laura Leave a Comment

This post may contain affiliate links. For more information, please see our disclosure policy.

Who’s up for a new series of posts sharing Simple Snack Recipes?!

Simple Snack Recipes Series

We’ve spent the past year and a half focusing on Simple Meals and creating Simple Recipes. This series of recipes has helped us all learn many, many tricks for putting great real food meals on the table with very little effort. I’ll keep these recipes coming so that instead of spending tons of time in the kitchen, we can instead spend more time loving people!

Save even more time when you let our Simple Meals Planning Packets do the thinking and planning for you! Read more and join here.

728x90

For a fun twist, during the next several weeks, we’ll be sharing all kinds of wonderful Simple Snack Recipes. After all, man cannot live on meals alone.

Well, I can’t. I mean, I can. Surely I can live on meals alone. But I really, really like good snacks. I tend to eat a little something every two hours. I’m basically like a newborn. At least I sleep through the night. But every two hours during the day I NEED SNACKS!!!! That is all.

Who else is a snack lover?

I think we can all agree that the simpler the snack recipe, the better. I’ve got a bunch of recipes to share that include just a few ingredients. They take just a few minutes to throw together. They make very little mess. They cost very little to make. They taste delicious. They are filling. They are fun.

Who’s ready for a series of Simple Snack Recipes?!

Simple Snack Recipes

As I post these Simple Snack Recipes throughout the month, I will add to the running list here.

  1. No Bake Cookie Cups (5 minute prep!)
  2. Cream Cheese Salsa Dip (2 ingredients!)
  3. Pineapple Coconut Quick Bread (blends together fast!)
  4. Parmesan Crisps (so easy you won’t believe it!)
  5. Sweet and Salty Almonds or Pecans
  6. Chocolate Cheesecake Fudge
  7. Creamy Italian Veggie Dip
  8. No Bake Chocolate Chip Cookie Bars
  9. Honey Sweetened Flourless Peanut Butter Bars (3 ingredients!)
  10. Easy Cheesy Popcorn
  11. Chocolate Fruit Dip

Stay tuned! Subscribe for free so you won’t miss any of these great recipes. Can’t wait to share!

~~~~~~~~~~~~~~~~~~~~~~~~~~~~~~~~~~~~~~~

Get the best of the best Healthy Snack Ideas and Recipes! 227 Healthy Snacks. Get ready to dig in!

[wp_eStore_fancy1 id=6]

Heavenly Homemaker's Club Members: Access your homepage and all your fantastic resources here! Not a member yet? Please join us!

30 Real Food Money Saving Tips

January 22, 2018 by Laura 2 Comments

This post may contain affiliate links. For more information, please see our disclosure policy.

I couldn’t have done it without you. I asked what YOUR best real food money saving tips might be, and oh did you come through!

It was so fun to put all of our heads together and put together this great (FREE!) resource full of Real Food Money Saving Tips! There truly are many great ways to save money on real food groceries!

groceries august17

I love it when high quality meat is marked down!

Sure, I know some great ways I’ve learned to save money on real food through the years. But so many of you have different experiences and ideas from what I’ve learned. Putting so many of your tips together into this little booklet means we all get just that much smarter! (Just when we thought we knew everything about buying apples…)

Real Food Money Saving TipsYum

Ready to get started? You’ll find all 30 tips detailed in this absolutely FREE resource. Here are some of my favorites:

  1. Crystal: I only have a family of 3, but because of prices of grass fed beef and organic chicken, I only use half a pound when I make spaghetti or a casserole and I use 1 chicken breast when I make a noodle dish or casserole that calls for chicken. I’m always using less meat than called for as a way to stretch it. That way I can afford higher quality meat. It works for us!
  2. Nicole: Last year I switched around how I menu planned instead of finding recipes then going shopping for those ingredients I now hit the produce & meat area buying what’s on sale (and good quality!) then I come home and find recipes that contain those items. Now I don’t feel obligated to buy the higher non sale item because of the time I already have invested in menu planning.
  3. Melody: We have meatless Mondays, tuna recipes for Tuesdays, and I “shop” my pantry and fridge/freezer first, then the on-line ads, and make my menu plan from that. I make out my grocery list for just the items I will need to make the items on my menu. We also use less meat than a recipe calls for and add beans to stretch out the meat in meals like tacos or casseroles.
  4. Susan: My best money saving advice is the skip fancy recipes that require you to buy ingredients you don’t have on hand or use often. I often leave out or substitute a fancy ingredient for a more economical or practical ingredient. I can’t be a 5 star cook on my budget and some days I wish I had fresh herbs or a fancy vinegar, but running out to buy them for 1 recipe isn’t the best use of my funds. I have been sticking to simple real food recipes with basic cost effective ingredients. I make menus based on my own pantry and sale items. Also, I use leftovers for casseroles or soups (freezing them if I am not using them right away). Leftover or stale bread is used to make croutons.


  5. Christy: Twice a year we clean out the pantry and freezer. We buy only milk, eggs and bread until we are down to almost nothing in the pantry. The meals get interesting, but it is great for the budget and can be as healthy as what you originally put in there.
  6. Mary Beth E: Right now–and tomorrow– I am waiting for UPS and/or FedEx to drop off packages of grocery staple items I buy in bulk. Because I cook whole foods at home, this will cover all our bread, rolls, tortillas, rice, pies, cakes, spices, seasonings, and much more, even toilet paper. I will place another order about mid-year. When I see almost any recipe, I have on hand the basics. When I go to the grocery store–every other week–I mainly buy fresh or frozen produce, eggs, and dairy. Buying in bulk and thinking of your budget in terms of a year rather than a week, really saves a lot of money.
  7. Birdie: Garden and can, however you are able. A small plot in your yard, partner with others on a shared plots, help a neighbor with a plot, encourage your apartment/duplex owner to allow some of you to garden in the yard (check bylaws), talk to the college in your area to see if they would be interested in allowing community gardens. Even create a raised bed so you can sit and garden from a chair or wheel chair if you are not as mobile. Container garden on a balcony or deck (remember to water often).If you can’t garden, buy meat, fruits and vegetables in super sales, can, freeze, and dehydrate. Approach a few farmers and see if you can have shares in their live stock. Participate in butcher time and you may receive a great deal on meat. If you can get your hands on garden herbs and spices from others, dry and add lots of flavor to your cooking.

  8. Nedrda: One way I save money on quality meat is to partner with my sister and mom to buy a grass-fed/pasture raised cow or hog. We can buy those meats at $4.00 a pound and then split the meat between the three of us. We also do this for the bulk coconut oil through Tropical Traditions and other items through Azure Standard and Amazon. By doing this, I do not have to come up with total amount myself to buy the beef/pork/oil and I can enjoy the quality for a great price. It also helps with storage issues to split the order!
  9. Crissi: For most of our grains, frozen fruits, some fresh fruits, and odds and ends we use Azure Standard. We’ve purchased foods from them for well over a year now, I’d highly recommend them. They have excellent customer service.
  10. Cassondra: One thing I do when I run out of something like a spice or condiment or anything else is look online to see if I can make it from scratch with items here at home. For example, I make our taco seasoning but was out of chili powder…so I went online and found a recipe for chili powder, had all the ingredients for it and it turned out great. So now I have one more from scratch recipe on hand.

Want to read all 30 Real Food Money Saving Tips?

We’ve compiled them all into this simple-to-read FREE eBook!

30 Real Food Money Saving Tips

This great little book is full of tips I compiled when I asked you, “What are your best tips for saving money on real food?” Since we’ve been talking about Simple Meals on a Simple Budget this month, I thought it would be fun to remind you about this great free download. I truly loved compiling these tips and learned great new ideas to try as I work to save money while feeding my family well!

How to get 30 Real Food Money Saving Tips

Enter your email address here, confirm that you would like to receive this information, and the freebie will land in your inbox! Easy as that!

Bonus Freebie:

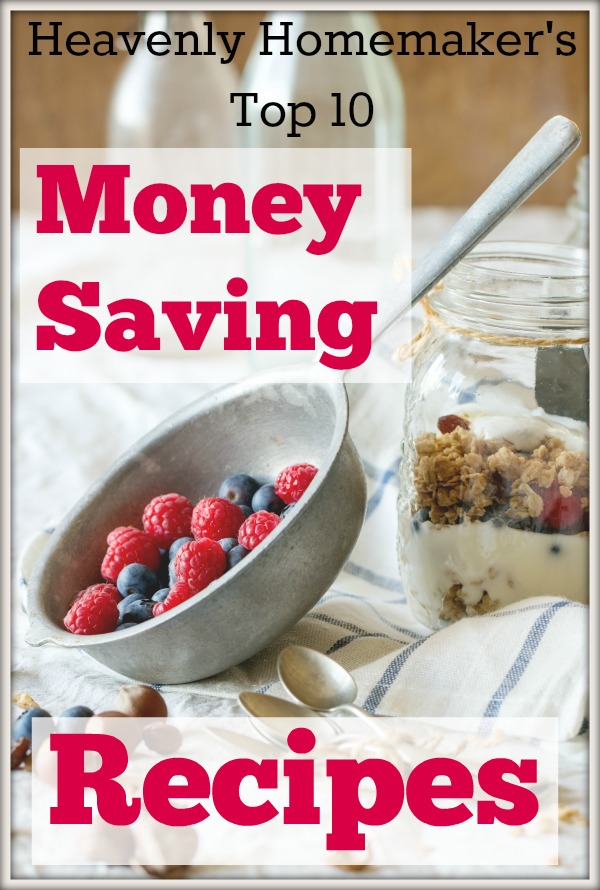
When you sign up to get the free 30 Real Food Money Saving Tips eBooklet, you’ll also get this free Heavenly Homemaker’s Top 10 Money Saving Recipes eBooklet! Don’t you love getting free books to help you learn more about saving money? It’s like we’re getting free grocery money! :)

Top 10 Money Saving Recipes

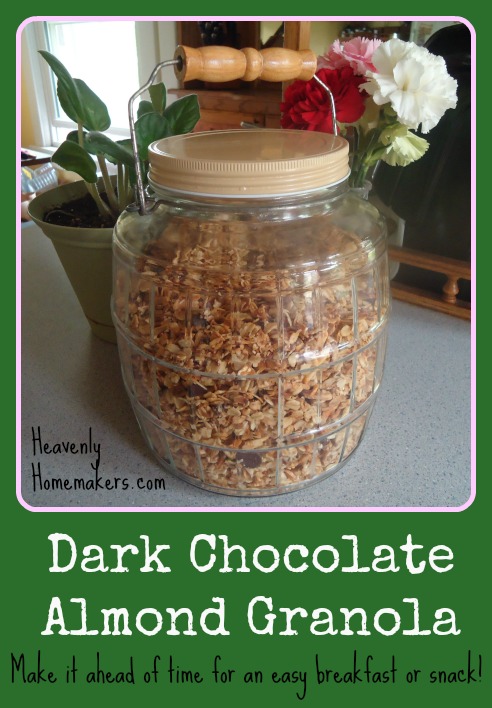
Want a sneak peek inside the 10 Money Saving Recipes eBook?? Here’s one of our favorites!

Dark Chocolate Almond Granola

(This recipe cuts the cost from $2.00/serving with store-bought granola to only $0.50/serving. Yep. The store-bought version really is that expensive!)

Dark Chocolate Almond Granola
 
Save Print
Author: Laura
Serves: 10-12
Ingredients
  • 4 cups rolled oats
  • ¾ cup shredded, unsweetened coconut
  • 1 cup slivered almonds
  • ¾ cup honey
  • ¾ cup coconut oil
  • ½ cup dark chocolate chips or chunks
Instructions
  1. In a small saucepan, melt coconut oil and honey together.
  2. Stir oats, shredded coconut, and slivered almonds together in a large bowl.
  3. Drizzle on the honey/coconut oil mixture and stir well.
  4. Pour mixture onto a large, parchment paper-lined baking sheet (or two 9x13 inch dishes).
  5. Bake at 300° for 35-45 minutes, stirring after the first 20 minutes.
  6. Allow mixture to cool.
  7. Stir in dark chocolate chunks.
  8. Store granola in an air-tight container.
  9. Makes 10-12 servings.
3.4.3177

Dark Chocolate Almond Granola - A Great Make-Ahead Meal

Saving money is fun when there’s chocolate involved.

I can’t wait for you to enjoy all of the money saving tips and recipes!

Sign up here and watch for these great free eBooks to hit your inbox!

P.S. Signing up for these great freebies will connect you to our free Savings Club so we can occasionally let you know of other wonderful food and homemaking deals we learn about!

Heavenly Homemaker's Club Members: Access your homepage and all your fantastic resources here! Not a member yet? Please join us!

Simple Veggie Fritters (on a Simple Budget)

January 18, 2018 by Laura 2 Comments

This post may contain affiliate links. For more information, please see our disclosure policy.

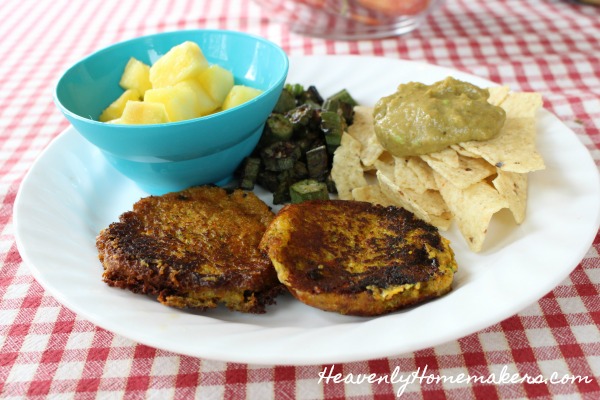
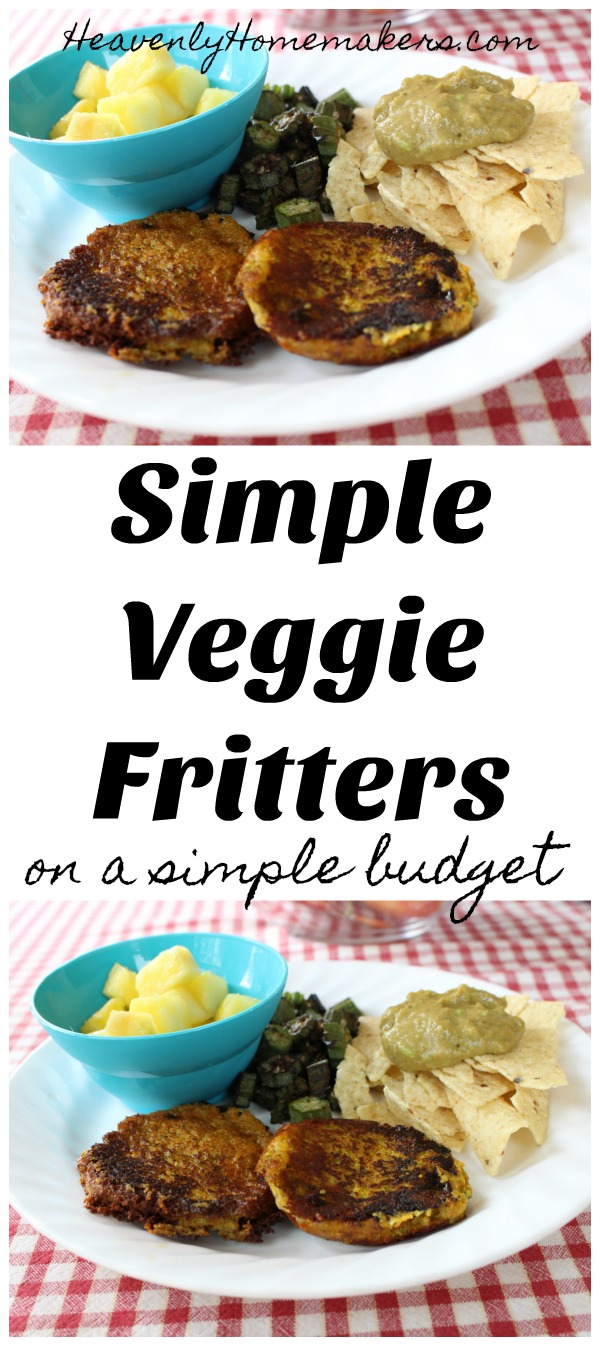
With these Simple Veggie Fritters, you can present your family with a satisfying meal made entirely of fruits and veggies!

veggie fritters11

I will admit: I wasn’t sure how well this recipe experiment would go over with my family. I was prepared to get out the Ranch Dip for them, assuming these Simple Veggie Fritters would taste extra good that way. But guess what? I didn’t even need to get out the dip.

My kids at the Veggie Fritters without coaxing. And here I had an entire speech prepared.

What I’m loving most about all these Simple Meals on a Simple Budget recipes is that it’s teaching us ways to go meatless a little more often. We definitely still love our meat around here, but there really are many ways to fill my family without killing the fatted calf. This is a great budget saver, something we can all be very grateful about!

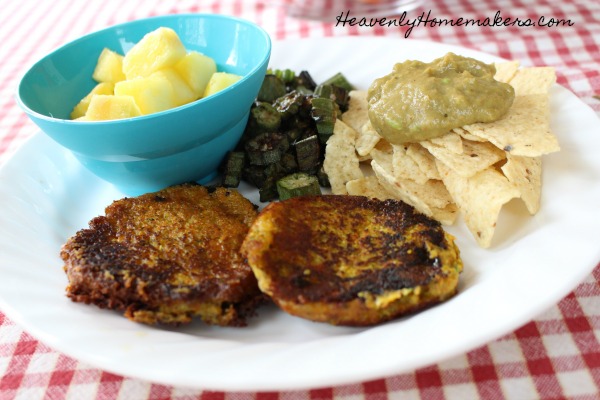
As you can see from the pictures, I served these Simple Veggie Fritters with a fun variety of other fruits and veggies that filled us up and offered us great nourishment! I dug garden okra out of our freezer from last summer and fried it in oil with salt. I cut a fresh pineapple. I got Homemade Guacamole out of the fridge. We ate like kings (and queen).

I’m sure we had meat with our evening meal later that day. But for lunch? We ate all the veggies and fruit and felt great!

veggie fritters22

Simple Veggie Fritters

5.0 from 1 reviews
Simple Veggie Fritters (on a Simple Budget)
 
Save Print
Author: Laura
Serves: 12 patties
Ingredients
  • 2 small zucchini
  • 2 medium-sized carrots
  • 2 Tablespoons dried minced onion
  • 1 cup grated cheese (we like Colby jack or cheddar best for these but any variety will work)
  • 1 cup flour (we use freshly ground hard white wheat for these but you can use your favorite!)
  • 1 cup milk
  • 1 egg
  • ½ teaspoon cayenne pepper (optional)
  • Sea salt and pepper to taste
  • Oil for frying (I recommend palm shortening or refined coconut oil as they are flavorless and remain stable at high temperatures.)
Instructions
  1. Grate the zucchini and carrots into a bowl.
  2. Add remaining ingredients and mix well.
  3. Heat about 3 Tablespoons of oil in a skillet.
  4. Scoop veggie mixture into hot oil, pressing down to make patties.
  5. Fry until each side is golden brown, about 2 minutes each.
3.4.3177

Simple Veggie Fritters on a Simple Budget

Catch the running list of Simple Meals on a Simple Budget here.

Simple Recipes on a Simple Budget

Want even more Simple Recipes?

  • Simple Baked Salmon and Asparagus
  • Simple Crock Pot Chicken Soup with a Kick
  • Simple Skillet Taco Pasta
  • Last-Minute Lentil Chili
  • Simple Sweet and Sour Baked Chicken Legs
  • 20-Minute Taco Soup
  • Simple Cheesy Baked Chicken
  • Simple Creamy Chicken Stew in the Crock Pot
  • Simple Italian Beef and Broccoli Skillet
  • Simple Bacon Ranch Chicken
  • Simple Hawaiian Crock Pot Chicken
  • Simple Taco Rice Dinner
  • Simple Last Minute Nacho Plate
  • Simple Chicken Cheeseballs with a Kick
  • Simple Beanie Weanies
  • Simple Crock Pot BBQ Spareribs
  • Simple Pizza Chicken Bake
  • Simple Italian Chicken and Green Bean Bake
  • Last Minute Creamy Bacon Spaghetti
  • Simple Hamburger Soup
  • Simple Parmesan Broiled Fish
  • Simple Overnight Saucy Crock Pot Chicken
  • Simple 15-Minute Meal
  • Simple Overnight Melt-in-Your-Mouth Beef Roast
  • Simple 3-Cheese Crock Pot Pasta
  • Simple Oven Fried Chicken
  • Simple Honey Mustard Chicken Legs
  • The Easiest Mashed Potatoes in the World
  • Simple Garlic Butter Shrimp
  • Simple Crunchy Ranch Chicken Strips
  • Simple Crock Pot Shredded Ranch Chicken (for salad or tacos)
  • Simple Crock Pot Pizza Casserole
  • Simple Barbecue Beef Roast
  • Simple Spanish Rice Bowls
  • Simple Roasted Rotiserie Chicken
  • Simple Green Chile Chicken
  • Simple Tex-Mex Creamy Chicken
  • Simple Waffle Omelets
  • Simple Crock Pot Taco Pasta
  • Simple Grilled Chicken
  • Simple Hawaiian Beef Roast
  • Simple Crock Pot Creamy Stew Meat
  • Simple Cheese Stuffed Burgers
  • Simple Hashbrown Casserole (For Instant Pot, Crock Pot or Oven!)
  • Simple Lasagna Casserole (For Instant Pot or Crock Pot)
  • Simple Chili Mac
  • Simple Bacon Cheeseburger Casserole
  • From Burrito Bar to Casserole (a 5-Minute Meal!)
  • Simple Bacon Cheeseburger Roll
  • Simple Garlic Parmesan Chicken Legs
  • Super Simple Lasagna
  • The Simplest White Chicken Chili
  • Simple Lentil Nachos
  • Simple Tuna Patties
  • Simple Banana Pancakes
  • Simple Crock Pot Applesauce BBQ Chicken
  • Simple Hashbrown and Egg Nests
  • Simple Cornbread Waffles with Chili

Enjoy all these recipes without effort when you become a Simple Meals member! Every week we’ll send you a great menu plan full of Simple Recipes like this one. We’ll equip you with a grocery list. We’ll break everything down so that your meal prep is as simple as possible. We’ll give you bonus tips and recipes and freebies. And this is all for just $1 each week. You’ll love it!

[wp_eStore_subscribe_fancy id=19]

Heavenly Homemaker's Club Members: Access your homepage and all your fantastic resources here! Not a member yet? Please join us!

Simple Cornbread Waffles with Chili (on a Simple Budget)

January 16, 2018 by Laura Leave a Comment

This post may contain affiliate links. For more information, please see our disclosure policy.

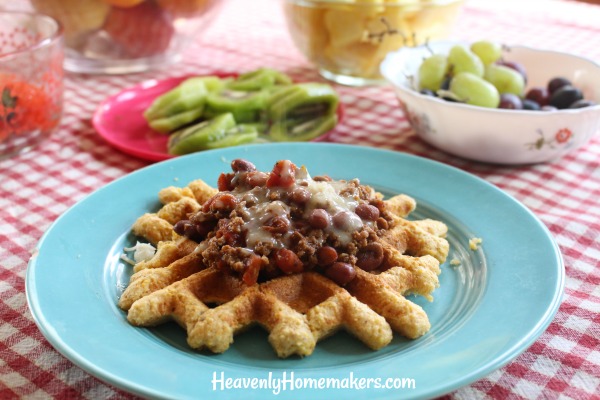
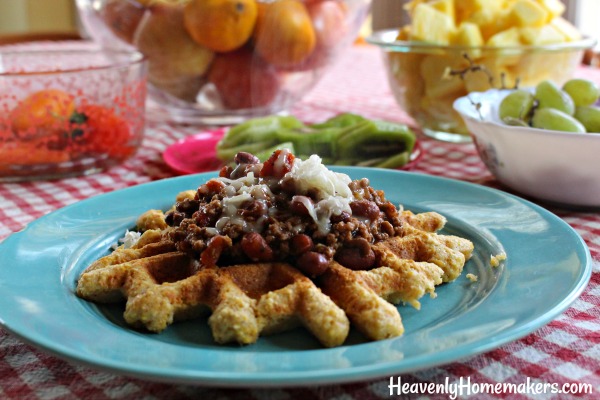
Just when you thought my Waffle Iron kick had ended, you find that I am revisiting my obsession. Friends, today I present to you Simple Cornbread Waffles with Chili.

cornbread waffles11

Aren’t they cute?

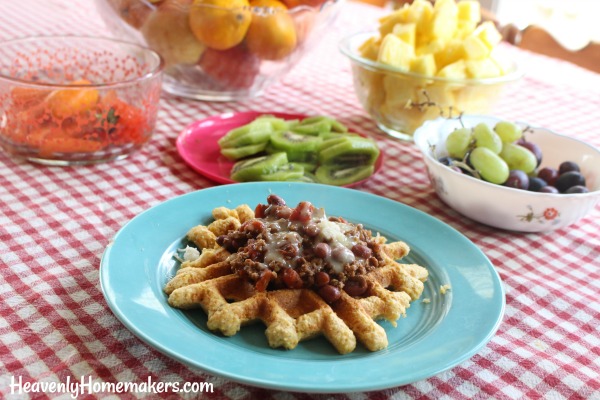
Simply scoop cornbread batter into your waffle iron, press and cook, then serve with your favorite chili and toppings. The cornbread waffle turns out crisp and tasty. The chili on top is warm and hearty. And we’ve got ourselves yet another Simple Meal on a Simple Budget!

cornbread waffles22

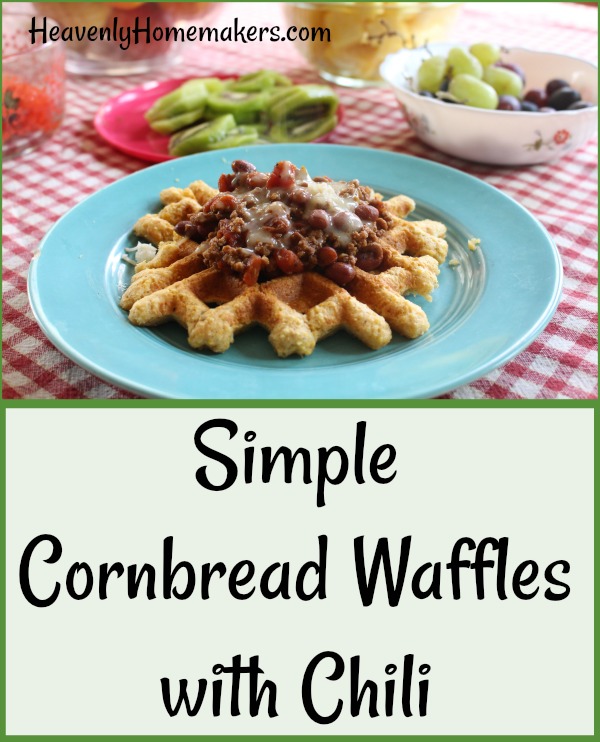
Simple Cornbread Waffles with Chili

Today, I don’t have new recipes to share. Instead, I will point you to favorite Cornbread and Chili recipes already posted here at Heavenly Homemakers.

  • You can keep your costs for this Simple Meal to a minimum when you make this Lentil Chili.
  • This Hearty Chili is meatless, but feel free to cook hamburger or ground turkey to add more protein.
  • My new favorite way to make Cornbread is to stir together a set of these Homemade Jiffy Cornbread Mixes to keep on hand.
  • If I’m out of my Homemade Cornbread Mix, I stir together this tried and true Cornbread Recipe. So good!

cornbread waffles44

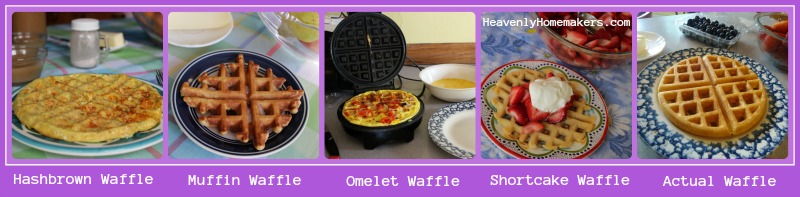
As a review, perhaps you’d enjoy a little peek at other fun Waffle Iron ideas I’ve shared:

  • Waffle Omelets
  • Egg and Cheese Hashbrown Waffles
  • Muffin Waffles
  • Strawberry Shortcake Waffles
  • Cookie and Brownie Waffles
  • Grilled Cheese in the Waffle Iron
  • Actual Waffles

Great Waffle Iron Hacks

It’s super fun to see all you can make in a waffle iron! I have a very simple Belgian Waffle Iron that is inexpensive and practical. I highly recommend buttering your waffle iron well before cooking Cornbread Waffles. This will keep them from sticking!

Simple Cornbread Waffles with Chili

Catch the running list of Simple Meals on a Simple Budget here.

Simple Recipes on a Simple Budget

Want even more Simple Recipes?

  • Simple Baked Salmon and Asparagus
  • Simple Crock Pot Chicken Soup with a Kick
  • Simple Skillet Taco Pasta
  • Last-Minute Lentil Chili
  • Simple Sweet and Sour Baked Chicken Legs
  • 20-Minute Taco Soup
  • Simple Cheesy Baked Chicken
  • Simple Creamy Chicken Stew in the Crock Pot
  • Simple Italian Beef and Broccoli Skillet
  • Simple Bacon Ranch Chicken
  • Simple Hawaiian Crock Pot Chicken
  • Simple Taco Rice Dinner
  • Simple Last Minute Nacho Plate
  • Simple Chicken Cheeseballs with a Kick
  • Simple Beanie Weanies
  • Simple Crock Pot BBQ Spareribs
  • Simple Pizza Chicken Bake
  • Simple Italian Chicken and Green Bean Bake
  • Last Minute Creamy Bacon Spaghetti
  • Simple Hamburger Soup
  • Simple Parmesan Broiled Fish
  • Simple Overnight Saucy Crock Pot Chicken
  • Simple 15-Minute Meal
  • Simple Overnight Melt-in-Your-Mouth Beef Roast
  • Simple 3-Cheese Crock Pot Pasta
  • Simple Oven Fried Chicken
  • Simple Honey Mustard Chicken Legs
  • The Easiest Mashed Potatoes in the World
  • Simple Garlic Butter Shrimp
  • Simple Crunchy Ranch Chicken Strips
  • Simple Crock Pot Shredded Ranch Chicken (for salad or tacos)
  • Simple Crock Pot Pizza Casserole
  • Simple Barbecue Beef Roast
  • Simple Spanish Rice Bowls
  • Simple Roasted Rotiserie Chicken
  • Simple Green Chile Chicken
  • Simple Tex-Mex Creamy Chicken
  • Simple Waffle Omelets
  • Simple Crock Pot Taco Pasta
  • Simple Grilled Chicken
  • Simple Hawaiian Beef Roast
  • Simple Crock Pot Creamy Stew Meat
  • Simple Cheese Stuffed Burgers
  • Simple Hashbrown Casserole (For Instant Pot, Crock Pot or Oven!)
  • Simple Lasagna Casserole (For Instant Pot or Crock Pot)
  • Simple Chili Mac
  • Simple Bacon Cheeseburger Casserole
  • From Burrito Bar to Casserole (a 5-Minute Meal!)
  • Simple Bacon Cheeseburger Roll
  • Simple Garlic Parmesan Chicken Legs
  • Super Simple Lasagna
  • The Simplest White Chicken Chili
  • Simple Lentil Nachos
  • Simple Tuna Patties
  • Simple Banana Pancakes
  • Simple Crock Pot Applesauce BBQ Chicken
  • Simple Hashbrown and Egg Nests

Enjoy all these recipes without effort when you become a Simple Meals member! Every week we’ll send you a great menu plan full of Simple Recipes like this one. We’ll equip you with a grocery list. We’ll break everything down so that your meal prep is as simple as possible. We’ll give you bonus tips and recipes and freebies. And this is all for just $1 each week. You’ll love it!

[wp_eStore_subscribe_fancy id=19]

Some of the links in this post are affiliate links.

Heavenly Homemaker's Club Members: Access your homepage and all your fantastic resources here! Not a member yet? Please join us!

Need to Detox After the Holidays?

December 29, 2017 by Laura Leave a Comment

This post may contain affiliate links. For more information, please see our disclosure policy.

Sure, I’ve eaten a few salads, steamed veggies, and raw veggies during the past few days of holiday fun. But I’ve also eaten a few too many bowls of chip and dip, a couple slices of pizza, and some amazing French fries that were well worth the splurge. It seems that perhaps a detox after the holidays is in order?

supersimplechipdipsm

Hmmm. You too?

Yesterday I went to the store and restocked all our fruits and veggies. I came home and immediately ate a half a cucumber all by myself. Never before had a cuke tasted so good. Then I dove into the carrots and avocado. Okay fine. I ate my avocado in the form of dip with chips. Whatever. I’m working my way off chips and dips slowly. It’s still the holiday season, right?

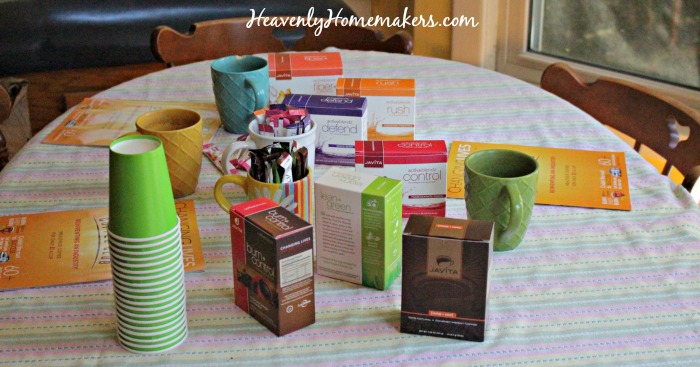
I do have to say that I am amazed at how good I feel, even with the junk food splurges, since I started drinking Javita products. Every day I start by drinking a Fiber drink. Then I enjoy a Burn and Control Coffee. Both of these have been fabulous to naturally rid my body of toxins. Since I started drinking these every day (since July of 2017) my gut is lighter, my pants fit better, my blood sugar is more regulated, and well, I go to the bathroom better. (Where is a cute little poop emoji when I need one?)

So first things first, if you’re interested in a natural way to detox every single day, read more that I wrote about Javita products here. I’ll be spending the next several days drinking extra water, eating extra greens, and being very thankful for Javita drinks and all the ways they help keep us healthy.

javita party2

Eating Better in 2018

Next, if the end of the year has you thinking about how you want to take more steps toward healthier eating in the future, I definitely want to turn your attention toward this gem being offered right now.

We created Simple Meals in 2016 as a way to save you hours of time and oodles of money every week while still putting great real food meals on the table regularly. This has been a huge help to many of you, and the price to be a member is ridiculously low! So if you aren’t yet a Simple Meals member, we excitedly invite you to become one!

OR

Perhaps this fun (limited time) promotion will be a perfect match for your family’s food needs!

Through January 5 only, you can pick up one (or more) of these Healthy Menu Planning Mini-Bundles that are beautifully categorized and highly discounted to meet your needs and to encourage you to start the new year off right! The mini-bundle recipe categories include:

  • Budget Meals
  • Freezer & Batch Cooking
  • Gluten-Free
  • Instant Pot & Slow Cooker
  • Ketogenic
  • Meal Planning
  • Paleo
  • Quick & Healthy
  • Real Food
  • Vegan

See any in the list that you want to jump in and focus on in 2018? Each mini-bundle is loaded with ebooks, recipes, and menu plans!

I’m most excited about the Instant Pot & Slow Cooker bundle, the Budget Meals bundle, the Freezer & Batch Cooking bundle, and the Quick and Healthy bundle. Which of these would you use the most?

The beauty of how this promotion is set up is that if I buy one mini-bundle it will cost $27. But if I want more than one, I can pay just $20 more and get THEM ALL!!

meal planning bundle options
Having access to all 10 categories gives us all 100 digital resources, 3,800 recipes, and 100 weeks of made-for-you menu plans. I’m in it for the whole package, baby!

Quick review: If you have special dietary restrictions you can pick one of the mini-bundles and get recipes dedicated to your way of eating for just $27! Or for just $20 more, get all 10 mini-bundles with every single recipe, eCookbook, and meal plan!

But you have to act fast — this sale ends on January 5th! Go get yours HERE.

I’m looking forward to getting back on track with regular healthy meals, how about you? And now, I shall eat the other half of that cucumber.

Some of these links are my affiliate links.

Heavenly Homemaker's Club Members: Access your homepage and all your fantastic resources here! Not a member yet? Please join us!

Simple Peanut Butter Chocolate Chip Cheesecake Pie

December 14, 2017 by Laura 2 Comments

This post may contain affiliate links. For more information, please see our disclosure policy.

Once you’ve got your Chocolate Pie Crust made, you’ll need this Peanut Butter Chocolate Chip Cheesecake Pie recipe to go with it.

peanut butter chocolate chip pie11

I will say right off the bat that if you must avoid peanuts at your house, simply leave the peanut butter out of this recipe and make a regular Chocolate Chip Cheesecake. This tastes amazing either way!

peanut butter chocolate chip pie12

Can you use a regular pie crust for this pie? Of course you can. I’m not the boss of you. You can even use a graham cracker crust. You can go crustless. So many options!

No matter what though, I do suggest that you make this pie. It is super easy and a huge hit!!

Simple Peanut Butter Chocolate Chip Cheesecake Pie

5.0 from 1 reviews
Simple Peanut Butter Chocolate Chip Cheesecake Pie
 
Save Print
Author: Laura
Serves: 8 pieces
Ingredients
  • 8 ounces softened cream cheese
  • 1 cup natural creamy peanut butter*
  • ⅔ cup sucanat or sugar OR 30 drops liquid stevia
  • 1½ cups heavy whipping cream
  • 1 teaspoon vanilla extract
  • ½ cup mini chocolate chips***
Instructions
  1. In a high power blender mix cream cheese, peanut butter, sweetener, cream, and vanilla until thick and smooth.
  2. Fold in chocolate chips.
  3. Spread into a prepared pie crust.**
  4. Chill pie in refrigerator for at least 2 hours before serving.
3.4.3177

*Get our Natural Peanut Butter recipe here.
**Find our Chocolate Pie Crust recipe here.
***These are our favorite Mini Chocolate Chips to use.

Simple Peanut Butter Chocolate Chip Cheesecake Pie

Need more cheesecake recipes? Some of these will be great in the Chocolate Pie Crust! Or in a Regular Whole Wheat Pie Crust. Or maybe they should remain crustless. Ohhhh, the options!

Easy Cheesecake Recipes

  • Pumpkin Cheesecake Whip
  • Low Sugar Pumpkin Cheesecake
  • Easy, Low Sugar Mini Crustless Cheesecakes
  • Strawberry Cheesecake Parfaits
  • Chocolate Strawberry Cheesecake Parfaits
  • Easy No-Bake Cheesecake
  • Chocolate Cheesecake Dessert
  • No-Bake Chocolate Peanut Butter Cheesecake

What are your favorite desserts to make at Christmas time? Think you should add this Chocolate Chip Cheesecake to your list?

Heavenly Homemaker's Club Members: Access your homepage and all your fantastic resources here! Not a member yet? Please join us!

Real Food Chocolate Pie Crust

December 12, 2017 by Laura 3 Comments

This post may contain affiliate links. For more information, please see our disclosure policy.

Why make a regular pie crust when you can make a Chocolate Pie Crust?

chocolate pie crust

Well now. Sometimes we actually do need a regular ol’ pie crust. Though pie crusts around here are anything but regular. We use whole wheat flour and palm shortening in our pie crust so that it is actually nourishing. But other than that…normal. Regular. Absolutely average. Nothing to see here. Just a regular ol’ pie crust.

pie_crust_palm_shortening_sm

Here I am calling pie crusts normal as if I make them all the time. No ma’am I do not. It’s rare that I actually take the time to make and roll out crusts these days. It must be a special occasion for me to “go to the trouble” to make a pie, because extra time I do not have.

But then suddenly, in between a History lesson with Malachi and taking time to proof-read a paper for Justus, I thought of the idea to turn a regular pie crust into a Chocolate Pie Crust. And would you believe? Tuesday afternoon became a special occasion, just like that. For no reason, I made a pie.

I mean, I do think one of the boys did exceptionally well on his math lesson that day. I did three loads of laundry like a boss. The mailman delivered some mail that wasn’t bills. The kitchen floor got swept. I answered several emails. For all these reasons and more, it seemed that a pie was in order. I can think of no other reason to celebrate, can you? Things like this call for pie with chocolate crust. Obviously.

Who says you can only make pie on special occasions?

Chocolate Pie Crust

Real Food Chocolate Pie Crust
 
Save Print
Author: Laura
Serves: 1 9"crust
Ingredients
  • 1 cup whole wheat flour
  • ¼ cup unsweetened cocoa powder
  • 2 teaspoons brown sugar
  • ¼ teaspoon sea salt
  • ⅓ cup Palm Shortening (or butter)
  • 4-5 Tablespoons cold water
Instructions
  1. Place flour, salt, cocoa, and brown sugar in a bowl or food processor.
  2. Stir to combine.
  3. Add palm shortening or butter.
  4. Blend until shortening is cut throughout the flour and the mixture resembles crumbs.
  5. Add cold water until a soft ball of dough has formed.
  6. Roll dough on a well-floured surface until it is slightly larger than your pie pan.
  7. Fold dough in half, then in half again.
  8. Place dough into pie pan and unfold to cover the pan.
  9. Shape edges as desired.
  10. Poke crust 4-5 times with a fork to prevent bubbles from forming while baking.
  11. Bake in a 450 degree oven for 10-12 minutes.
  12. Allow crust to cool before adding cream filling of choice!
3.4.3177

Real Food Chocolate Pie Crust

In a couple of days I will share a Peanut Butter Chocolate Chip Pie recipe with you that is simply perfect to fill this Chocolate Pie Crust. In the meantime, I also suggest filling your baked shell with:

  • Chocolate Peanut Butter Pie (which sounds like the new recipe I’m about to share, but I promise, it’s altogether different)
  • Chocolate Cheesecake Pie
  • Vanilla, Chocolate, or Butterscotch Cream Pie (use any of these pudding recipes to fill the Chocolate Pie Crust)
  • Peanut Butter Cream Pie (use this pudding recipe to fill the Chocolate Pie Crust)

And by the way, I get my palm shortening from Tropical Traditions. It’s fabulous and healthy. New customers at Healthy Traditions can get free shipping on their first order when you use the code FS10 at checkout!

Raise your hand if after seeing this recipe for Chocolate Pie Crust you just came up with a perfectly good (though random) reason to make a pie.

Heavenly Homemaker's Club Members: Access your homepage and all your fantastic resources here! Not a member yet? Please join us!
« Previous Page
Next Page »

Join Our Community!

 Facebook Twitter E-mail Instagram Pinterest

Popular Posts

~ Will All of the Real Moms Please Stand Up?
~ Easy! Stir-and-Pour Whole Wheat Bread
~ How to Make Gatorade
~ 31 Real Food Breakfast Ideas
~ Dear Teenage Girls...
~ When Mom Takes a Step Back
~ The Inexpensive Health Insurance We Love!
~ Let's Talk Real Food Grocery Budgets

Check out our latest posts!

  • Big Family Food and Fun: September 27-October 3, 2026
  • Big Family Food and Fun: September 20-26, 2026
  • Big Family Food and Fun: September 13-19, 2026
  • Big Family Food and Fun: September 6-12, 2026
  • Big Family Food and Fun: August 30-September 5, 2026
Home  ~  Simple Meals  ~  Club Membership  ~  Shop  ~  Privacy Policy  ~  Disclosure  ~ Contact

Copyright © 2026 · Beautiful Pro Theme on Genesis Framework · WordPress · Log in