Heavenly Homemakers

Encouraging women in homemaking, healthy eating and parenting

  • Home
    • About
    • FAQs
  • Recipes
    • Bread and Breakfast
    • Condiments
    • Dairy
    • Main Dishes
    • Side Dishes and Snacks
    • Desserts
    • Gluten Free
    • Instant Pot
    • Crock Pot
    • Heavenly Homemaker’s Weekly Menus
  • Homemaking
    • Real Food Sources
  • Store
  • Contact
    • Advertise
    • Disclosure
    • Privacy Policy
  • Simple Meals
  • Club Members!

More Healthy Food Convenience Foods

October 18, 2020 by Laura 4 Comments

This post may contain affiliate links. For more information, please see our disclosure policy.

A few years ago, I shared 10 of my favorite pre-packaged foods that are still a healthy option! I’ve since discovered even more! Here are several more healthy food convenience food options…
Healthy Food Convenience Foods

I’ll begin by reminding you of the 10 I shared in the former post. Then I’ll add the new ones I’ve discovered!

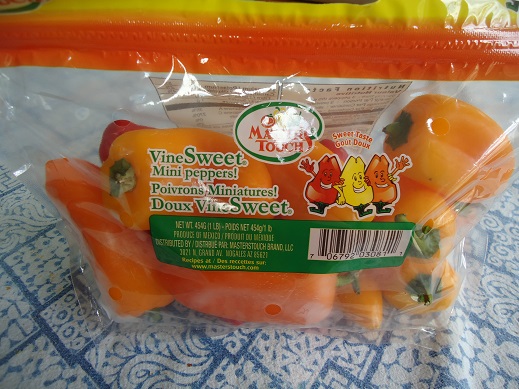
1. Mini Sweet Peppers

Oh my goodness, have you tried these? They are deliciously sweet, perfectly crunchy, and wonderful all by themselves or in a salad. We take these on the road trips, munch on them for snacks, add them to our lunch plates, and argue about which color tastes the sweetest. I can’t get enough of these.
packaged convenience 1

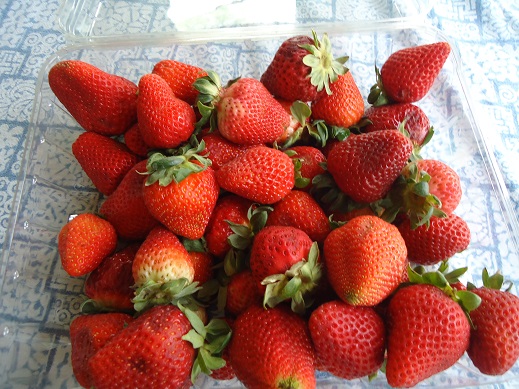
2. Fresh Berries

Without a doubt, you can not compete with fresh berries picked and eaten right out of the garden. But during the times those are not available, we look for the best deals on strawberries, blueberries, blackberries, and raspberries at the store. Wash ’em and eat ’em. It doesn’t get any easier than pulling out berries for a snack or a side dish with a meal.
packaged convenience 2

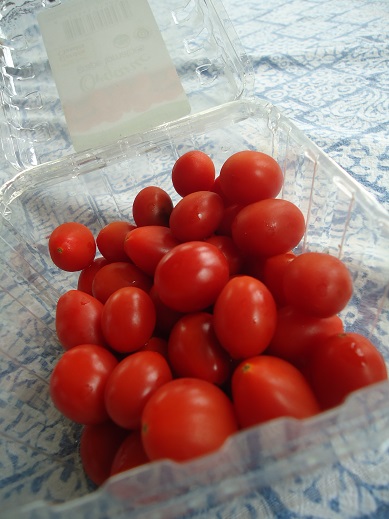
3. Grape or Cherry Tomatoes

Again, these are best fresh out of the garden. But since ours won’t be ready for another month or two, buying these pre-packaged works great for us.
packaged convenience 3
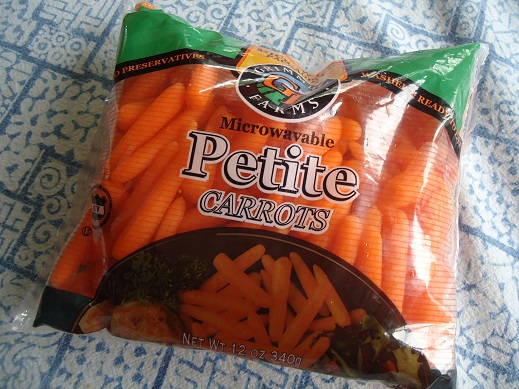
 4. Baby Carrots

There is some controversy over buying packaged baby carrots because of the information many have heard about baby carrots being soaked in chlorine before being packaged. Read this info and do with it what you wish. As for me, sometimes buying a package of baby carrots is a huge help in my effort to provide my family with extra veggies during a meal.
packaged convenience 4

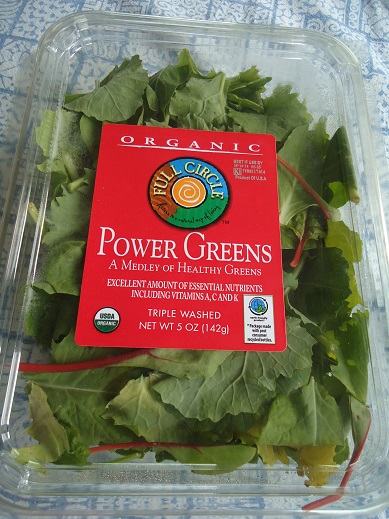
5. Mixed Greens

Think making salad is too time consuming? Oh for Pete’s sake. Just buy a container of mixed greens and throw it on the table. It’s pre-washed and ready to eat. We go through a couple packs of these each week.
packaged convenience 7

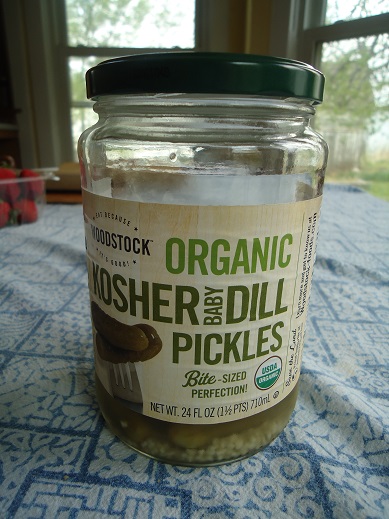
6. Pickles

Open a jar, put it on the table, your work here is done.
packaged convenience 6

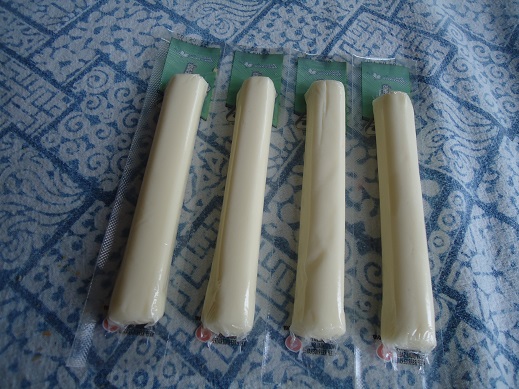
 7. Cheese Sticks

These can be a little pricey compared to buying a hunk of cheese and slicing it yourself. But when we’re talking about pre-packaged convenience foods, this one is a winner. Cheese is great for an on-the-go protein snack. Yay cheese.
packaged convenience 5

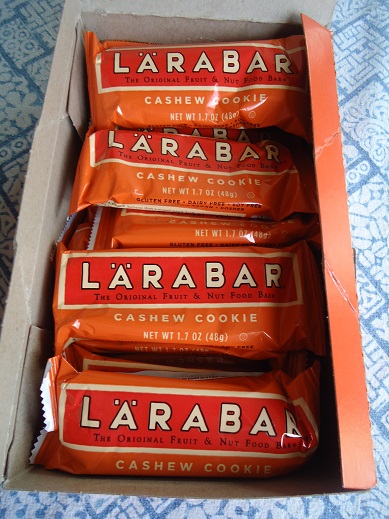
8. Larabars

Yes, you can made these homemade. I’ve done it myself many times. But sometimes my family needs something to stuff in a pocket to eat in between soccer games. I watch for great sales and coupons through Amazon and buy these by the case. They contain fruit and nuts only – a great healthy snack.
packaged convenience 8

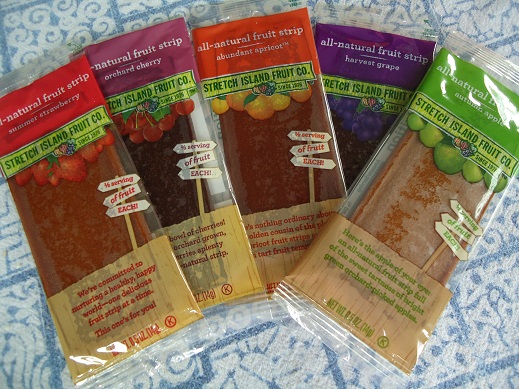
9. Fruit Leather

Again, I make this homemade sometimes too. But for a fun treat, I like getting pre-packaged fruit leather when I find it on sale.
packaged convenience 9

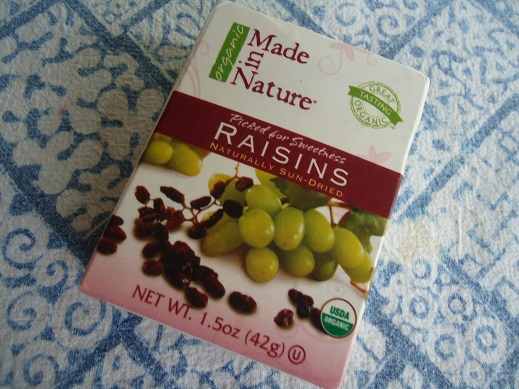
10. Raisins

Buy them by the bag or in individual serving sized boxes. This pre-packaged convenience food is awesome for snacking. And really, aren’t those tiny little boxes just the cutest?
packaged convenience 10

What else? Oh, I could list tons. Peanuts, cashews, almonds, bananas, apples, grapes, oranges – think of all the pre-packaged real foods there are to pick from! Never again can we ever claim that healthy eating is difficult. And never again should anyone carry my favorite pen out of my office, put it down, and forget about it.

Here are my favorite newly discovered convenient health foods!

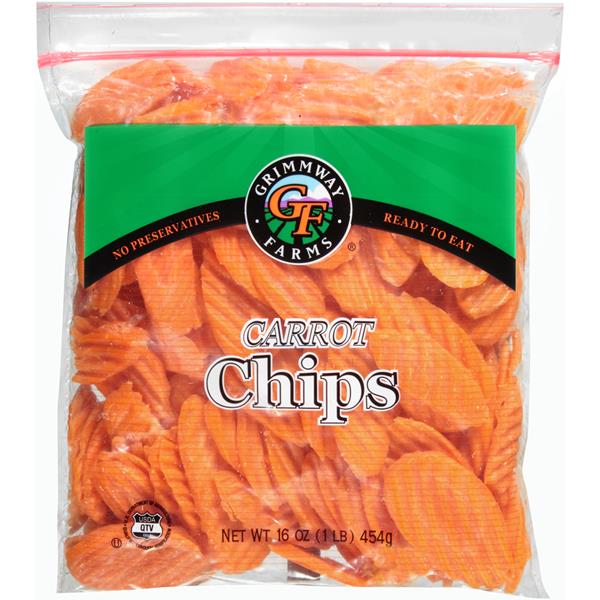
11. Carrot Chips

They are more expensive than whole carrots. But oh my loveliness, they are cut for me. While I juggle and bounce baby/toddlers, opening a bag of these carrots and tossing them into my Stir Fry or Steamed Veggie mixture is such a time saver. Spending a little extra for this convenience is worth it for me right now.
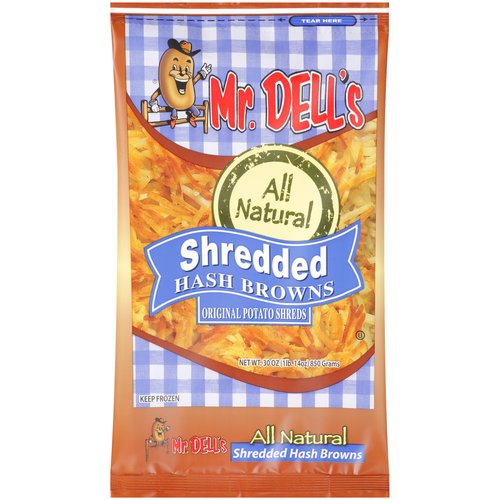
12. Mr. Dells Hashbrowns

I’ve talked about these here and there any time I’ve shared a new recipe that includes hashbrowns. They include one ingredient: Potatoes. SIGN ME UP.

Scroll through these recipes to find all the ways I like to use these when cooking quick meals for my family!
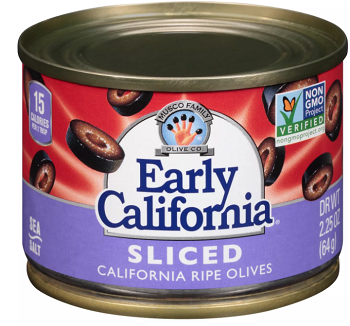
13. Sliced olives

Instead of whole olives. I know. But it saves time when I’m making pizza and that makes me happy.
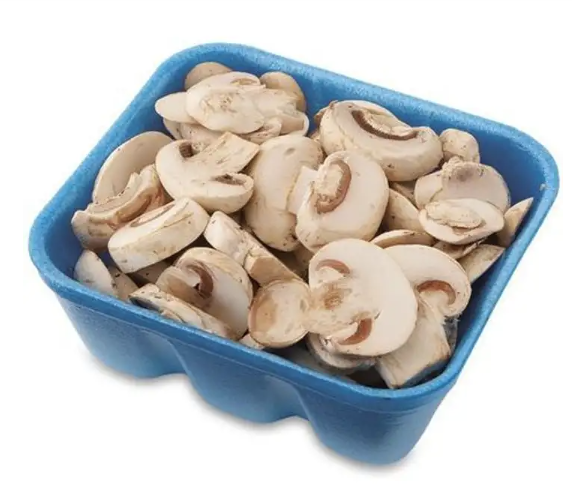
14. Sliced Mushrooms

Same story as above. Open the package, throw them on our pizza or into our stir fry.
I promise I’m not turning into a lazy cook. Or am I? I prefer to think that I’m still eating real food while spending less time in the kitchen and taking advantage of conveniences such as these as my life becomes more full! Perhaps you’d like to get in on this fun? Save time. Still eat well. Buy the sliced mushrooms. :)

What are your favorite healthy convenience foods?

Heavenly Homemaker's Club Members: Access your homepage and all your fantastic resources here! Not a member yet? Please join us!

Low Sugar Pecan Cookies

October 14, 2020 by Laura Leave a Comment

This post may contain affiliate links. For more information, please see our disclosure policy.

It’s baking season! These Low Sugar Pecan Cookies are buttery and delicious!

You might remember our other Low Sugar Cookie recipes. Here are just a few of our favorites:

  • Easy {Low} Sugar Cookies
  • Low Sugar Lemon Melt-Away Cookies
  • Low Sugar Almond Melt-Away Cookies
  • Low Sugar Orange Melt-Away Cookies
  • Low Sugar Lime Melt-Away Cookies
  • Low Sugar Chocolate Fudge Cookies
  • Low Sugar Oatmeal Cookies

We adapted a few of those to create these Low Sugar Pecan Cookies because it’s so easy to make a tiny tweak to create a brand new recipe!

The “melt-away” cookies listed above are my favorites simply because they are so buttery. This truly makes them melt in your mouth! No one can tell that these are low in sugar OR that they are made with whole grain flour. And the toasted pecans give these such a delightful flavor and crunch!

Low Sugar Pecan CookiesYum

Low Sugar Pecan Cookies
 
Save Print
Author: Laura
Serves: 20
Ingredients
  • 1½ cups melted butter (3 sticks)
  • ½ cup sugar (sucanat, raw, brown)
  • 1 teaspoon vanilla extract
  • 3 cups whole grain flour (I use freshly ground soft white wheat)
  • ½ cup pecan pieces toasted in 2 Tablespoons butter
Instructions
  1. Toast pecans by stirring them in a small saucepan over low heat for 2-4 minutes. Set aside.
  2. In a mixing bowl, stir together butter, sugar, vanilla, and flour.
  3. Fold in toasted pecans.
  4. Scoop ½ inch sized balls of dough onto a cookie sheet.
  5. Press balls down with the end of a drinking glass.
  6. Bake in a 350 degree oven for 10-15 minutes or until cookies are golden brown.
3.5.3251

Want to cut down on sugar while still enjoying occasional treats?

We have an entire eBook full of Low Sugar Treats, which you can check it out here. But it makes more sense to join our Heavenly Homemakers Membership Club so that you can enjoy ALL of our eBooks and much more any time, anywhere. :)

Heavenly Homemaker's Club Members: Access your homepage and all your fantastic resources here! Not a member yet? Please join us!

Simple Honey’d Italian Chicken and Potatoes

October 8, 2020 by Laura Leave a Comment

This post may contain affiliate links. For more information, please see our disclosure policy.

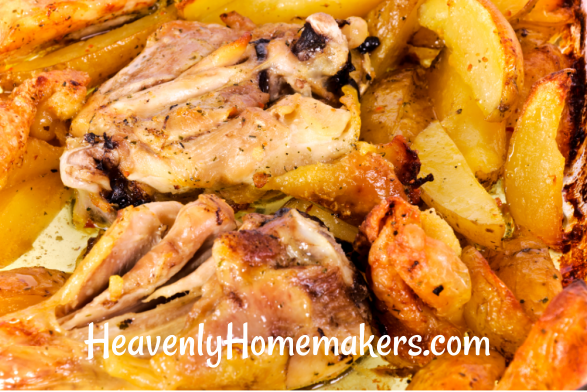
This Simple Honey’d Italian Chicken and Potatoes will take you just a few minutes to prep!

Our amazing across-the-street neighbors decided in the midst of April quarantine to start raising and butchering chickens. They generously asked if we wanted in on it.

Wellllllll. Yes. We wanted some chickens, most definitely. But we knew nothing about raising them and butchering them, and we didn’t have time to commit to it. They assured us that they’d take care of the hard part (which sounded more fun than hard to them). So how could we say no?!

We helped pay for feed and other supplies, saved all of our food scraps for the growing chicks, and best of all? Our littlest guys learned to stop whatever they were doing outside to holler “doodle-do!” across the street whenever their roosters started crowing. Cutest. Thing. Ever.

So now we have several locally grown chickens in our freezer (can it possibly get more local than ACROSS THE STREET?!). They even went so far as to cut legs and thighs off for us during the butchering process.

I’ve been using the thighs in this Honey’d Italian Chicken recipe and not only is it incredibly simple to put this all together, but it is also super delicious! I can quickly slide this into the oven to bake, then steam a veggie and get out mixed greens to go with it. So easy!

Simple 4-Ingredient Honey’d Italian ChickenYum

Simple 4-Ingredient Honey'd Italian Chicken
 
Save Print
Author: Laura
Serves: 4-6
Ingredients
  • 2 pounds boneless or bone-in chicken thighs or breasts
  • 2 pounds yellow or red potatoes
  • 3 Tablespoons honey
  • ¾ cup Italian Dressing
Instructions
  1. Place chicken in a baking dish.
  2. Scrub potatoes and cut them into wedges, placing them in the dish with the chicken.
  3. In a small saucepan, mix honey and Italian dressing over low heat until combined.
  4. Drizzle dressing mixture over the chicken.
  5. Bake, uncovered, in a 425 degree oven for 45 minutes or until chicken is no longer pink.
3.5.3251

If you prefer to use boneless chicken in this recipe, cut the baking time down to 25-35 minutes.

If you like simple recipes like this, you will love our Simple Real Food Recipes Cookbook. These are my go-to recipes now!

Heavenly Homemaker's Club Members: Access your homepage and all your fantastic resources here! Not a member yet? Please join us!

How to Create a Kid’s Craft Treasure Box

October 4, 2020 by Laura 2 Comments

This post may contain affiliate links. For more information, please see our disclosure policy.

Looking for a fun way to inspire your kids to get creative? Why not put together a Kid’s Craft Treasure Box!

I stole this idea from Tasha, who brought over her four kids and this fun craft box that her kids had received as a gift. Brayden sat down with her three oldest and they had fun making a mess creating everything from cards to swords for over an hour!

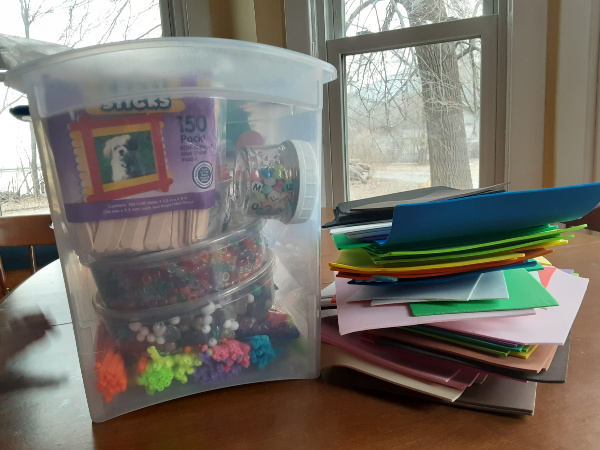
The box is full of foam pieces, beads, pipecleaners, popsicle sticks, glue, scissors, paper, pom poms, and more. Oh, and glitter. As much as I am open to offering fun creative times for my kids, I do draw the line at glitter.

Laura does not like glitter!!! And now you know.

For the record, I do love all things that sparkle. But I do not like sparkly glitter that gets all over the table and the floor and my face and never, ever comes off.

So as for me and my house, we will craft with everything fun – except for glitter. Sequins!! Those sparkle. We can use sequins instead!

After Tasha and her kids took off that day, knowing that Brayden had had so much fun creating with the variety of supplies, I put together a Craft Treasure Box of our own. I didn’t even have to buy anything! I already had almost everything in a cabinet. So instead of leaving it disorganized in the cabinet, I put it all into a tote so we can have all the supplies together in one place and pull it out to use at any time!

How to Create a Kid’s Craft Treasure Box

Grab a box or tote and fill it with any of these fun craft supply ideas!

  • Beads
  • Pipecleaners
  • Colored Paper
  • Colored Foam
  • Foam Stickers and Shapes
  • Pom Poms
  • Popsicle Sticks
  • Glue
  • Scissors
  • Markers
  • Crayons
  • Colored Pencils
  • Stencils
  • Googly Eyes
  • Sequins
  • Small paper bags
  • Paper Plates
  • Coffee Filters
  • Gemstones
  • Feathers
  • Colored Thread
  • Glitter

If you don’t already have these supplies on hand, this great craft box from Amazon is actually very reasonably priced and filled with fun supplies!

How to Use Your Kid’s Craft Treasure Box

Clear off a table, hand your kids the Craft Treasure Box and let them have at it, creating whatever they are inspired to create! Or, assign a specific project like:

  • Make cards to give to people you know who are struggling and need encouragement
  • Make beaded bracelets or ornaments with beads and pipecleaners
  • Make holiday decorations for whatever holiday is coming up
  • Glue together shapes to create a special design
  • Sky’s the limit!
Heavenly Homemaker's Club Members: Access your homepage and all your fantastic resources here! Not a member yet? Please join us!

What I Add to My Grocery Cart to Give Away

September 30, 2020 by Laura Leave a Comment

This post may contain affiliate links. For more information, please see our disclosure policy.

A few weeks ago, I encouraged us to consider how we can all be more aware of ways we can help feed people in need. Today I want to share more specifics of what I add to my grocery cart to give away.

Please know that this post is meant to inspire and offer tips and suggestions to get your juices flowing as you consider ways you can help people who might be facing food insecurity or who need love to be shown to them in the form of food. Your spiritual gifts are different than my spiritual gifts, so you may never give away food, but you might fix people’s cars or give people rides or wash people’s laundry or make encouraging phone calls or whatever it is God has you doing because of your gifts!!!

But if you feel called to help people with food needs they might have, here’s a post to share ways that work for me that just might work for you too!

Who I’m Blessed to Share With

First, I’ll tell you about some of the people that I often share food with so you know who I’m thinking of as I’m making grocery purchases for people beyond my family.

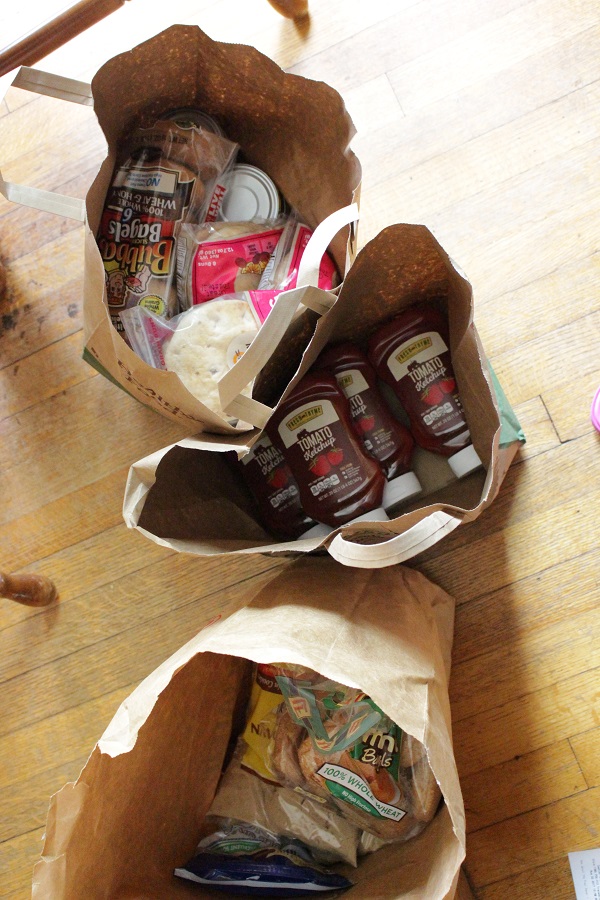
  • College Students – We feed a large group each Sunday after church for “Sunday Lunch.” I often send leftovers in disposable containers, extra cookies in baggies, slices of quick bread on a paper plate, and fresh fruit for them to have in their dorm rooms.
  • Disabled Widows – I’ve met several ladies in town who are on a fixed income for one reason or another. If anything out of the ordinary comes up during the month, sometimes their grocery budget takes a hit. They know to call me if they are running low on groceries (though they don’t always like to ask so I try to check in with them regularly). I take them small bags of staples and sometimes a small loaf of homemade bread or other homemade goodies if I have it.
  • Families – There are several families I check in with from time to time to see if they could use a few extra bags or boxes of groceries. Then I go through my freezers and pantry and see what all I’ve been able to stock up on when it was on sale. I put together a variety of staples and even treats if I have them. Sometimes I call on some friends to help me with this, simply because it’s so great to get others involved in the teamwork of loving people.
  • Local Mission – We have relationships with the employees at our local Living Water Rescue Mission so I keep in touch with them about their food needs. They feed their residents and anyone who walks through the door three meals each day. Plus they give free food boxes to families who have need. They rely on donations for this, so our family donates when we can. But better yet, we’ve gotten our entire church involved in collecting food when the mission was starting to get really low on supply!

Here’s our Elias standing with our van completely filled with groceries donated by our church members. He helped pick it up and deliver so they took this pic to post on their mission Facebook page.

What I Add to My Grocery Cart to Give Away

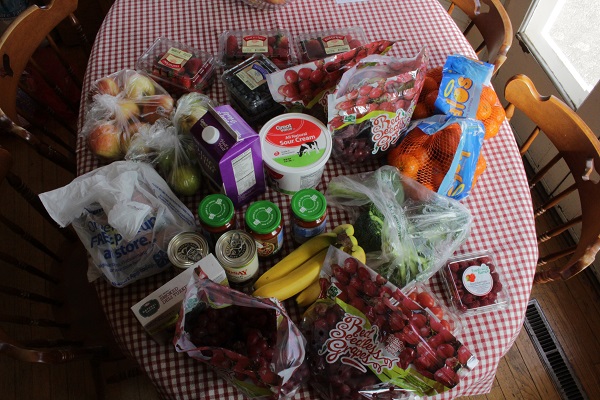
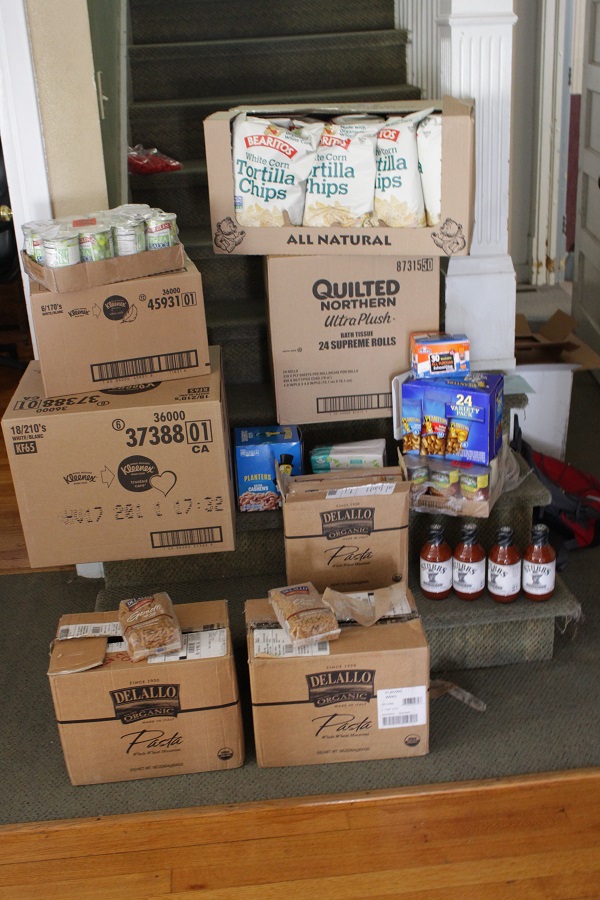
What you’ll see below are foods I buy for my family regularly. So I find that it’s easy to buy extra whether we need it or not. This helps with my orgniziation so that I always have food on hand to make simple meals for my family. But it’s also been so nice to have these extras ready to bag up and deliver to others. Here’s what I often “over buy” and share:

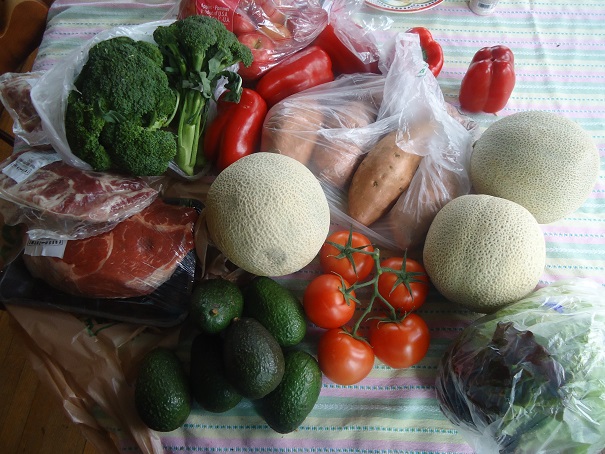
  • Sale items – especially meat mark-downs because this is such a valued gift I can give families.
  • Canned Fruit
  • Frozen Veggies
  • Applesauce Cups
  • Cereal
  • Instant Oatmeal Packets
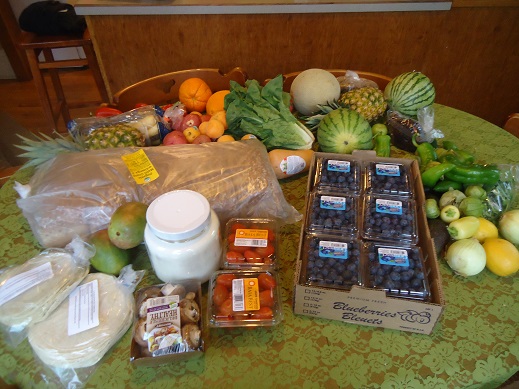
  • Fresh Fruit – If there are great deals on fruit I’ll buy several bags and hand them out to whoever God puts on my heart.
  • Pasta
  • Pasta Sauce
  • Rice
  • Granola Bars
  • Fun Coffee Creamers – Because the college kids who come over love coffee! We make several pots on Sundays and it’s fun to have different creamers for them to use. I just don’t read the ingredient label. ;)
  • Kleenex
  • Toilet Paper – This sure did get tricky for a while! But it was great to have some extra to share when some of our friends completely ran out!

What ways has God used you to bless others recently?

Heavenly Homemaker's Club Members: Access your homepage and all your fantastic resources here! Not a member yet? Please join us!

Special (Easy) Breakfast: Chocolate Syrup on Pancakes

September 27, 2020 by Laura Leave a Comment

This post may contain affiliate links. For more information, please see our disclosure policy.

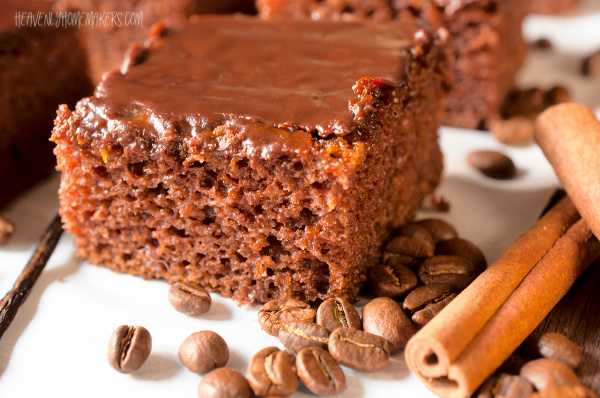
If you want to turn a regular breakfast into a special breakfast, simply pour chocolate syrup on your pancakes! Here are two chocolate sauce recipes for you (one is dairy-free and low in sugar!).

I have all sorts of recipes for you, actually.

  1. First, we’ll talk about pancakes.
  2. Then, I’ll give you these great chocolate sauce recipes.
  3. Then, I’ll share different homemade whipped cream recipes to top everything off!

What’s great about this idea is that it turns ordinary pancakes into something super special! And if you’re hesitant about putting chocolate sauce on your pancakes because of the sugar, might I remind you that maple syrup is straight sugar also (even if it’s pure maple syrup)? ;) Not only that, if you make the Dairy Free Chocolate Sauce recipe below you’ll actually have a lower-sugar option to pour (or spread) all over your pancakes!

Pancake Recipe Ideas:

  • Simple Pancake Mix Pancakes
  • Whole Wheat Pancakes
  • Peanut Butter Pancakes (with chocolate on top? YES PLEASE.)
  • Pumpkin Pancakes
  • Easy Whole Grain Chocolate Pancakes
  • Simple Banana Pancakes
  • Whole Wheat Applesauce Pancakes
  • Baked Apple Pancake
  • Easy Pancake Muffins
  • Whole Wheat Waffles (even better than pancakes!)

Chocolate Syrup for PancakesYum

Hot Fudge Sauce

Chocolate Fudge Sauce
 
Save Print
Author: Laura
Serves: 2 cups
Ingredients
  • 1 ½ cups heavy cream
  • 1 cup brown sugar or sucanat
  • ½ cup cocoa
  • 1 stick butter
  • 1 teaspoon vanilla
Instructions
  1. In medium saucepan, stir together cream, sugar, cocoa and butter.
  2. Cook on medium heat until butter is melted and ingredients are thoroughly combined.
  3. Remove from heat and stir in vanilla.
3.5.3251


Dairy Free Chocolate Sauce

Dairy Free Chocolate Sauce
 
Save Print
Author: Laura
Serves: 2 cups
Ingredients
  • 13.5 ounce can of full fat, unsweetened coconut milk
  • ⅓ cup unsweetened cocoa powder
  • ¼ - ½ cup sweetener (honey, sucanat, or brown sugar)
Instructions
  1. Mix ingredients in a small saucepan, cooking and stirring on medium heat until well combined.
  2. Serve warm or cold.
  3. Store this sauce in a covered container in the refrigerator, rewarming on the stove-top as needed. It will keep for up to a month in the fridge.
3.5.3251

Drizzle or spread these onto your pancakes and you’ve got an amazing feast. But really, it’s thousands of times better if you then top it all with whipped cream!

Whipped Cream Recipes:

  • Homemade Whipped Cream
  • Chocolate Whipped Cream
  • Peanut Butter Whipped Cream

Still want more ideas?

Bonus Pancake Topping Recipes:

  • Real Maple Syrup
  • Apple Butter
  • Blueberry Pancake and Waffle Syrup
  • Peach Syrup (for pancakes and waffles)
  • Peanut Butter (just peanuts!)
  • Peanut Butter (super creamy – like Skippy or Jif)
  • Raspberry Syrup

What’s your favorite way to top a pancake?

Heavenly Homemaker's Club Members: Access your homepage and all your fantastic resources here! Not a member yet? Please join us!

Be Warm and Well Fed? How to Actually Help Feed People in Need…

September 20, 2020 by Laura 3 Comments

This post may contain affiliate links. For more information, please see our disclosure policy.

Want to help feed people in need? Let’s move beyond an attitude of “be warm and well fed…” and actually help!

We all have different gifts given to us by our Creator. One of my gifts is food. I LOVE FOOD and I’m good at food.

You may not be good at food. That means you’re good at something else, and I bet it’s something I marvel at! I love this about God’s people. But even if you don’t love food as I do, or if you don’t consider yourself to be “good at food” – what we are all called to be good at is:

Loving our neighbor.

Every one of us. We can show this love in various forms, especially according to the gifts God has given us. This is so beautiful!

But today I am going to talk about loving our neighbor – with food.

Those of us who have never experienced food insecurity probably don’t think about those who suffer from it daily. How will we feed our family tomorrow? How will I make this food last until the next paycheck? How many meals can I skip so that my kids can eat?

I CAN’T EVEN.

Those of us who have plenty? We have to share.

First, Ask God

My food-loving heart is on high alert for those who don’t have enough to eat and feed their families. (Just like your gifted heart jumps on needs according to what God has blessed you to know and to do!)

If you don’t know anyone in your community who might be experiencing food insecurity or have needs in other ways, please prayerfully begin to get to know more people. Expand your circle.

If you only hang out with people who live like you, act like you, look like you, talk like you – you might be resting in a place that is comfortable instead of doing what Jesus did. He spent most of His time with the least of these. Walking with the marginalized. Seeing the poor and the lonely and the hurting and showing them love in the ways they needed love.

So my gift is food? Your gift might be something else. And WE ARE ALL CALLED TO LOVE.

Don’t tell me that you’re shy. (Laura used to hide behind that too.) Don’t explain what it’s like to be an introvert. (Laura laughs out loud at this as she hides in her quiet alone spot to refresh her introverted self and write this post.) Most importantly: Don’t be afraid.

God will be in every effort you make as you listen to His direction for reaching out to those around you who have needs of all kinds. This is very much something you’ll do with God. Not because it’s a nice thing to do. Not because good deeds are cool. Loving God and loving others is the only thing that’s cool. His way. Actually loving them.

So back to how to feed people in need.

Whatever your gifts, please be alerted to the fact that many in our communities face constant food insecurity. And many are hesitant to reach out and ask for help. I am learning this by painful experience, and friends, I live in York, Nebraska. This is a middle class, lovely small town of 8,000 and while it seems like everyone in our town is doing just fine, God has opened my eyes and heart and taught me that many people around me have big needs.

Thanks to Him, I now have multiple families or widows that I check in with regularly to make sure they have enough food to get them through until the next check or the next community food distribution.

If you don’t know anyone who is lacking – ask God to show you. He is faithful and He will do it. I know this from beautiful experience.

Then He will also show you what to do about it.

It starts with relationship. Love is more important than even a bag of groceries. So keep that in mind as you serve. People need food, but they need God’s love more. Looking into people’s eyes and learning more about their lives and sharing genuine laughs and tears and care? It is life-changing on all sides.

Bags of groceries are nice too.

Or prepared casseroles or a bucket of soup.

Ask God to show you. He is faithful and He will do it.

Soon, seeing the hurting and the hungry will become easy. Having conversations and reaching out and meeting new friends and getting to know people needs? Natural. It’s God’s way, after all.

What does this look like?

Well, I don’t know what God will do through you, but I can’t wait to hear!

Here are a couple of examples from my neck of the woods:

This week I took a fully prepared meal to a family in our community with six kids. One parent is sick. The other is trying to hold down the entire fort. They didn’t even care what food I prepared – they were just thankful to check “cook dinner” off the list for the night. This is meeting a different need compared to sharing groceries with people who have nothing. But it is still a need, and God will show you who and how. (Yep, ordering pizza for someone counts. There are no bonus points in heaven for making homemade meals. Just obey God and love people.)

Later in the same week, I babysat for a single mom so she could have a tiny break. When I dropped off her daughter later, I learned that she had cereal. As in…that’s it. She had in her house – cereal – to get her and her daughter through nine more days of the month before the next check.

NOT ON MY WATCH.

I went home and filled some bags and took them back to my friend. Thank you, God, for helping me learn of this need! 

Friends, ask God to show you who needs food. Money. Clothing. LOVE.

He will show you. And He will provide.

We are not called to be saviors.

Jesus. Is. Savior. But we are called to let the light of the Savior shine through us as we love those around us in any way He calls us to love.

Often, I show love with food. I do this because it meets a real need and provides the opportunity to share the Real Source of Strength.

How can you love? How can you serve? How can you see the needs of those around you and care for them?

Ask God. Then watch Him work – while you get to be a part of the delivery!

How to Help Feed People in Need…

Here is what works for me as I help make sure people have enough food to eat:

  • I ask what people like. Sure, sometimes if a person is hungry, they’ll eat anything. But I also know that a mama has to feed picky kids sometimes and I want to make that easier. I try to get a good idea of what families eat so that when I pick up groceries for them (or grab from our well-stocked pantry and freezers) I give them what I know will bless them and help them most.
  • I regularly buy more than what we need. Thankfully, we can afford this, and we want to use what God has given us to share with others. I always have a nice supply of just about everything from groceries to kleenex. This makes it easy to grab some boxes or bags and fill them from our own food supply. I especially appreciate this right now because, with all of our little ones, it’s hard for me to go to the store right away when I learn of a need. So shopping my own well-stocked food supply and dropping it off to our friends can happen regularly when I over-buy, on purpose.
  • I don’t give away weird stuff. As in, I don’t grab the can-of-whatever-no-one-in-my-family-likes and give it away. Nor do I give away crazy-organic-mega-health-food-no-one-has-heard-of. My goal is to bless people, not to give away our cast-offs or to make life hard because I’ve given them something confusing called “maca root…” Stick with the basics; bless people with what’s easy and what tastes good!

What have you found that works for you? How do you help people around you who are in need?

One more tip: Consider the times you have been the one in need. How have people helped you? What would have been helpful during those times? Tuck these thoughts away in your heart as you consider how you can help others!

Heavenly Homemaker's Club Members: Access your homepage and all your fantastic resources here! Not a member yet? Please join us!

The Surprising Reason I Spent Money on a Bosch Mixer

September 16, 2020 by Laura Leave a Comment

This post may contain affiliate links. For more information, please see our disclosure policy.

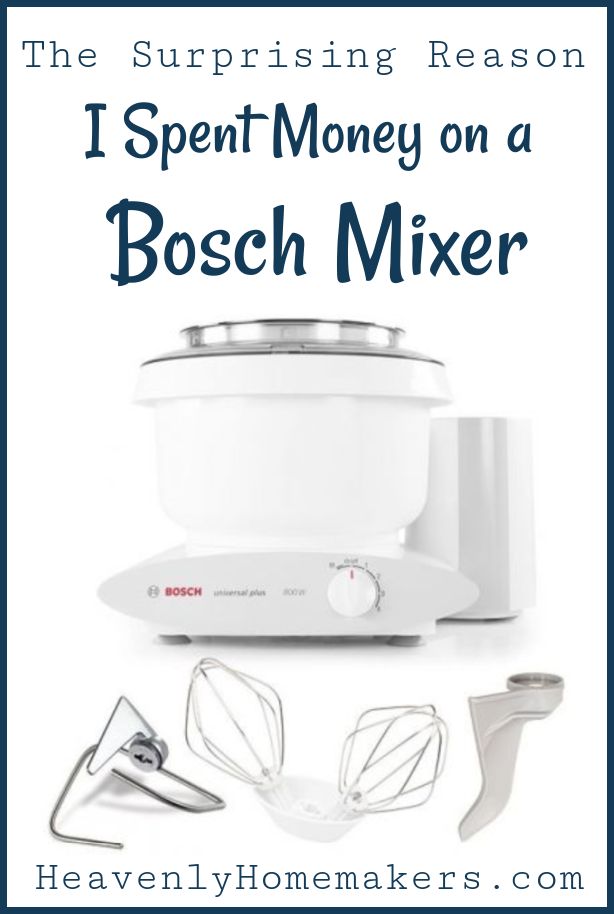
I’m not even sure if I’ve even told you that I bought a Bosch Mixer! So hey guess what?! I bought a Bosch Mixer. Here’s why…

Yum

First of all, I could spend a few words telling you why it took me so long to finally break down and spend the money on a Bosch Mixer. But it’s mostly because of this:

  • These beauties are pricey!
  • I’ve stirred my bread dough and cookie dough and brownie batter by arms for well over 40 years. Why did I need an expensive mixer seeing as I still have working arms and hands?

But all of you friends who have a Bosch or a Kitchen Aid have said to me, “With all the cooking and baking you do, how in the world do you actually survive without a mixer?” And I always went back to…

  • Expensive.
  • My arm works fine.

Yes, investing in a nice mixer has been in my mind for quite some time, and my desire for one went up a notch every time one of you told me how great they are.

So what finally pushed me over the edge to fork out the money for a Bosch Mixer?

It was a conversation with my friend Rhonda (and then it still took me several months to ruminate over it, but whatever).

Here’s what Rhonda said – and I will tell you that when Rhonda speaks, I listen. She knows things. She’s an awesome friend and has raised awesome kids and she says smart things.

Rhonda was sharing with me how she had recently become the recipient of a used but still wonderful Kitchen Aid Mixer. She was loving it and decided it was fantastic and then she said:

I wish I would have had this in my kitchen when my kids were still at home growing up.

She went on to talk about how much time it saved and about how nicely it mixed up batters and while I really liked hearing this part of her review, I just couldn’t let go of this thought:

Moms. We sacrifice. We skimp. We save. We make do. And God bless us for it!! I mean, after all, regarding the cooking and the baking and the batters and the doughs – I do have arms that work. My grandma used her arms. Why do I need to spend money on a mixer? I can make do.

But there I stood with Rhonda in the church foyer, with my adult and teen kids hanging out with their friends in the background and my new set of littles playing at my feet. And I realized yet again: I AM STARTING OVER!!! Just when I thought I was almost done raising kids, God started us fresh with new fellas, and friends? That means I’m going to be working at this “feeding a family” thing for a very long time.

Add to that all the friends we feed regularly, plus the daughters-in-law and grandbabes I’d like to think are a part of our future and I’m pretty sure I will be cranking food and food and more food out of my kitchen for many more years!

Shucks, here I’m tearing up again at the beauty of this life we didn’t know God had planned for us.

Well anyway. I chewed on Rhonda’s statement for several months, watched in awe as my teens and littles shared meals, and I decided to run it by Matt. This wouldn’t be just a small purchase, and would it be worth it?

We decided yes. I should get a mixer because I was embracing Rhonda’s advice about “oh how nice it would have been to have when my kids were at home growing up.”

Little Boys #round2

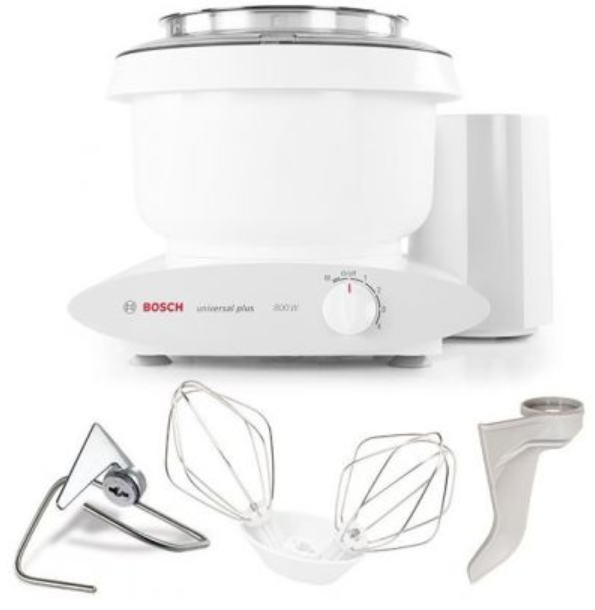
Before purchasing, I spend some time researching. One does not drop several hundred dollars on a kitchen tool without doing her homework. I landed on purchasing a Bosch Universal Plus. If I was going to spend big, I was going to get the best of the best. (Also, I purchased from Paula’s Bread because she’s a small business I trust and I wanted to support her with my big purchase!)

You guys. How did I ever get along with this? Well shucks, I used my arms I guess. :)

But Rhonda was right. This is a wonderful tool to have when you do a lot of cooking and baking,  for a family. My Bosch Mixer has already paid for itself in its efficiency and ease and time-saving gifts that it has given me as I work to take care of so many kids of different ages and while I feed many college kids and other guests too. I’m totally in love with it and am 100% grateful that we made this investment!

As for using my arms to stir and mix? Well, I’m going to focus on using my arms for more important endeavors. :)

Heavenly Homemaker's Club Members: Access your homepage and all your fantastic resources here! Not a member yet? Please join us!

Cream Cheese Pastries – the Healthier Way

September 13, 2020 by Laura Leave a Comment

This post may contain affiliate links. For more information, please see our disclosure policy.

Cream Cheese Pastries were one of my favorite treats when I was a kid. I finally got the idea to try and make them at home with freshly ground flour!

Have I ever told you how I like to keep recipes as simple as possible? Oh yes. I think I’ve mentioned that here a time or two. ;)

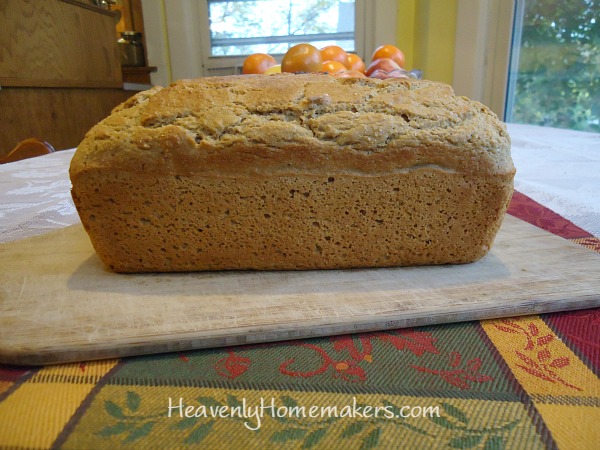
So that is why I decided to make these with my Stir-and-Pour Bread recipe. SO EASY! Mix the bread ingredients together. Walk away. Then you spoon the bread dough onto a pan, scoop on some cream cheese filling, and bake. Drizzle on the glaze. Enjoy your delicious treat!

I was thrilled with how these turned out, and I love that they are made with whole grain flour and less sugar than a typical pastry recipe. My pickiest eater ate three right in a row. :) Ready to give them a try?

Cream Cheese PastriesYum

Cream Cheese Pastries - the Healthier Way
 
Save Print
Author: Laura
Serves: 15
Ingredients
  • 4 cups whole grain flour (I use freshly ground hard white wheat)
  • 2 teaspoons active rise yeast
  • 2 Tablespoons sucanat or sugar or honey
  • 1 teaspoon sea salt
  • 1 egg (optional)
  • ¼ cup heavy cream (optional)
  • 2 cups warm water
  • CREAM CHEESE FILLING:
  • 8-ounces softened cream cheese
  • 3 Tablespoons lemon juice
  • ¼ cup sugar or maple syrup
  • 1 egg
  • GLAZE:
  • ¾ cup powdered sugar
  • 3 Tablespoons milk
Instructions
  1. Mix together the bread ingredients.
  2. Cover and allow the bread dough to rise for at least 30 minutes.
  3. Meanwhile, blend Cream Cheese Filling ingredients until smooth.
  4. Scoop small mounds of bread dough onto a buttered cookie sheet.
  5. Spoon the cream cheese filling onto each bread dough mound evenly.
  6. Bake in a 350 degree oven for about 20 minutes or until the bread is golden brown.
  7. Meanwhile mix up the glaze.
  8. Drizzle glaze over the baked pastries and serve.
3.5.3251

One more quick piece of info:

I finally invested in a Bosch Stand Mixer. I can’t even tell you how much I love it! I used it to mix the dough for these Cream Cheese Pastries so of course, that made this recipe even easier to make, if that’s even possible. More about my Bosch coming up soon!

Heavenly Homemaker's Club Members: Access your homepage and all your fantastic resources here! Not a member yet? Please join us!

Simple Homemade Pizza

September 9, 2020 by Laura 1 Comment

This post may contain affiliate links. For more information, please see our disclosure policy.

Pizza might be one of my favorite meals, so of course, we need to have Simple Homemade Pizza recipe options!

Confession: I order pizza more often than I used to now that we have little ones again. Ok, that’s not really a confession, it’s just truth, but I don’t actually feel that it needs to be confessed. As if ordering pizza is evil??

Sure, I don’t make every single thing from scratch anymore. Sure, not everything we eat is top-notch anymore. We still strive to eat nourishing foods so we can stay healthy. How else are we going to keep up with this tribe?! But God’s strength is bigger than ours, and that’s the real way we’re thriving through this journey.

So. I order pizza sometimes. Guilt-free. I praise God for this option on busy days I have to be at court hearings or team meetings while juggling littles and bigs.

Also, we eat it on paper plates. This is a beautiful thing.

Well anyway, pizza. The homemade kind. It truly tastes better, and we have fun building it to our liking. Here are my top three homemade pizza methods, from easiest to hardest. But the hardest way isn’t really hard, because do you even know me at all?

How to make simple homemade pizzaYum

  1. Buy pre-made crusts. Keep them in your freezer. Add toppings and bake. SO EASY. Plus cheaper and better tasting than ordering pizza.
  2. Make crust from Stir and Pour Bread recipe. Flour your hands and press it onto a pan. Add toppings and bake. VERY EASY.
  3. Make Whole Wheat Pizza Crust, because it is the most delicious. Make crusts ahead and freeze them if you’re as ambitious as I used to be and may be again sometime. Add toppings and bake. STILL EASY.

Here are the crust recipes for you!

Stir-and-Pour Pizza Crust

5.0 from 1 reviews
Simple Homemade Pizza
 
Save Print
Author: Laura
Serves: 2 large pizzas
Ingredients
  • 4 cups whole wheat flour (I use freshly ground hard white wheat)
  • 2 teaspoons active rise yeast
  • 2 Tablespoons sucanat or sugar or honey
  • 1 teaspoon sea salt
  • 2 cups warm water
Instructions
  1. Stir all ingredients together.
  2. Cover and allow it to sit for 30 minutes.
  3. Spread dough on two *well-buttered* large pizza pans (three if you want a thinner crust)
  4. Bake in a 375° oven for 10 minutes.
  5. Pull partially baked crust out of the oven and top it however you like.
  6. Bake for 10-15 minutes more or until cheese has melted and becomes bubbly.
3.5.3251

Whole Wheat Pizza Crust

5.0 from 1 reviews
Simple Homemade Pizza
 
Save Print
Author: Laura
Serves: 2 large pizzas
Ingredients
  • 5 cups whole wheat flour (I use freshly ground flour from hard white wheat)
  • 1 teaspoon sea salt
  • 4½ teaspoons active dry yeast (or 2 pouches)
  • 2 cups warm water (The water should feel warm, but not hot.)
Instructions
  1. Mix all ingredients together, knead for 3-4 minutes, then allow the dough to “rest” for about 10 minutes (give or take).
  2. This dough makes 2 large pizzas, or 18 mini pizzas.
  3. Shape dough into desired pizza sizes and place on baking sheets.
  4. Bake in a 375° oven for 5-7 minutes.
  5. Remove crusts from oven, allow them to cool, then freeze in freezer bags.
  6. Or, top hot pizza crusts with desired pizza toppings.
  7. When you're ready, bake the pizzas at 375° for 10 minutes or until cheese is bubbly and beginning to brown.
3.5.3251

What’s your favorite kind of pizza?

Heavenly Homemaker's Club Members: Access your homepage and all your fantastic resources here! Not a member yet? Please join us!
« Previous Page
Next Page »

Join Our Community!

 Facebook Twitter E-mail Instagram Pinterest

Popular Posts

~ Will All of the Real Moms Please Stand Up?
~ Easy! Stir-and-Pour Whole Wheat Bread
~ How to Make Gatorade
~ 31 Real Food Breakfast Ideas
~ Dear Teenage Girls...
~ When Mom Takes a Step Back
~ The Inexpensive Health Insurance We Love!
~ Let's Talk Real Food Grocery Budgets

Check out our latest posts!

  • Big Family Food and Fun: September 13-19, 2026
  • Big Family Food and Fun: September 6-12, 2026
  • Big Family Food and Fun: August 30-September 5, 2026
  • Big Family Food and Fun: August 23-29, 2026
  • Big Family Food and Fun: August 16-22, 2026
Home  ~  Simple Meals  ~  Club Membership  ~  Shop  ~  Privacy Policy  ~  Disclosure  ~ Contact

Copyright © 2026 · Beautiful Pro Theme on Genesis Framework · WordPress · Log in