Heavenly Homemakers

Encouraging women in homemaking, healthy eating and parenting

  • Home
    • About
    • FAQs
  • Recipes
    • Bread and Breakfast
    • Condiments
    • Dairy
    • Main Dishes
    • Side Dishes and Snacks
    • Desserts
    • Gluten Free
    • Instant Pot
    • Crock Pot
    • Heavenly Homemaker’s Weekly Menus
  • Homemaking
    • Real Food Sources
  • Store
  • Contact
    • Advertise
    • Disclosure
    • Privacy Policy
  • Simple Meals
  • Club Members!

Sweet and Simple Buttery Almond Cookies (4 Ingredients!)

September 30, 2018 by Laura 4 Comments

This post may contain affiliate links. For more information, please see our disclosure policy.

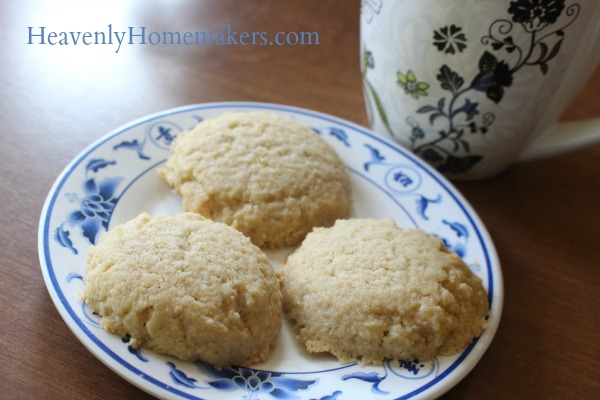
Once upon a time I decided I wanted the delicious flavor of Almond Extract in a light and buttery cookie. So I mixed up these Sweet and Simple Buttery Cookies and I subbed Almond Extract for Vanilla Extract. Just like that, we had a batch of Buttery Almond Cookies. Recipe tweaks? They can be ridiculously easy. (Just like the recipe I’m about to show you!)

Recently one of my favorite 6th grade girls was at our house visiting. She LOVES cooking (almost as much as I do), so as she tasted each item of food from our table that day, she asked about the ingredients and how I had made it. Super cute!

Later, she told her mom, “Ms. Laura’s recipes are all so simple. Most of them only have 5 or fewer ingredients!” Her mom laughed with the proclamation, because you see, her mom is the one that designed this book for me:
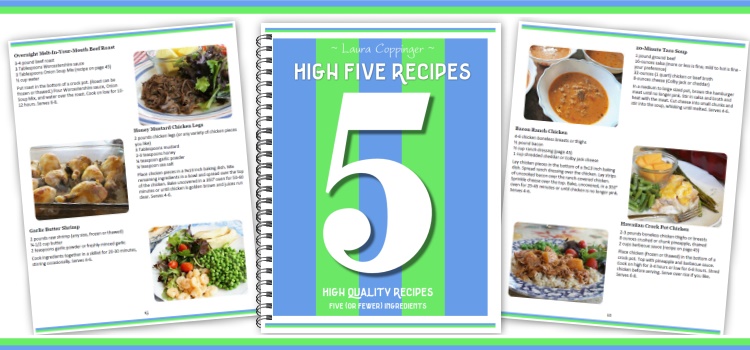
Indeed. All of Ms. Laura’s recipes are simple, and many of them do only use five or fewer ingredients. High fives all around!

You’ll find our High Five Recipes eBook here, and you’ll love it because there are 111 recipes that come together in no time. Meanwhile, we’ve got a new cookie recipe to share, and it uses only 4 little ingredients!

If you’ve tried our Sweet and Simple Butter Cookies recipe, you’ll see that this is the exact same recipe with a key flavor ingredient switched. Sub vanilla extract for almond extract and suddenly the taste of this cookie changes significantly. I can’t decide which I like better, but it doesn’t matter because they are both buttery and light, low in sugar, and delicious! How fun that one little tweak creates a brand new cookie!

Buttery Almond Cookies

Sweet and Simple Buttery Almond Cookies
 
Save Print
Author: Laura
Serves: 15-18
Ingredients
  • 1½ cups melted butter
  • ⅓-1/2 cup sugar (raw, white, brown, or sucanat)
  • 1 tablespoons almond extract
  • 3 cups whole wheat flour (I use freshly ground soft white wheat)
Instructions
  1. Cream butter and sugar together in a bowl.
  2. Stir in almond extract.
  3. Mix in flour until well combined.
  4. Scoop Tablespoon-sized balls of dough onto cookie sheets.
  5. Press the dough down with your fingers or a fork.
  6. Bake in a 350 degree oven for 8-12 minutes or until cookies are golden brown.
3.5.3229


Enjoy these cookies with a cup of tea or coffee. Enjoy them with a friend. Enjoy them during quiet time with God.

Get 111 more High Five Recipes to simplify your real food kitchen!

[wp_eStore_fancy1 id=32]

Heavenly Homemaker's Club Members: Access your homepage and all your fantastic resources here! Not a member yet? Please join us!

Simple One Dish Chicken Florentine (For Instant Pot or Crock Pot)

September 27, 2018 by Laura 11 Comments

This post may contain affiliate links. For more information, please see our disclosure policy.

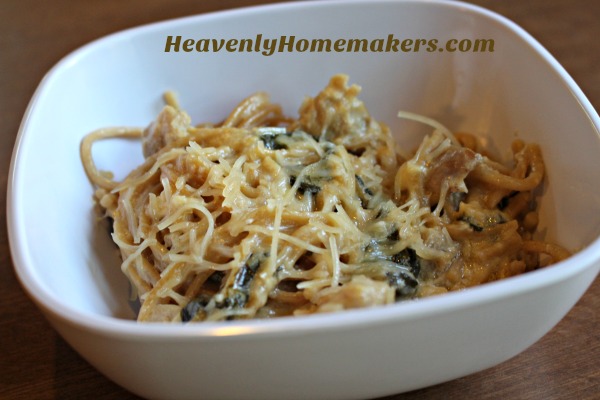
You guys. This entire, delicious meal takes me only 7 minutes of work to prepare. 7 minutes to make One-Dish Chicken Florentine. Meat, pasta, and veggie all in one dish. With 7 minutes of total prep time. Hoorah!

Now, I can’t say for sure because I don’t know the specific needs of the picky people in your life. But I dare say that even picky people might not mind the spinach in this dish. Why? Because you can’t taste it. It doesn’t really create a weird texture. It really just adds color variety (and hidden nutrients, shh!).

I personally like to serve a tossed salad on the side of this dish, because the more greens, the merrier. But in a pinch, just serve this quick-to-make dish all by itself and you’re golden!

Can we all stand and applaud the fact that we don’t have to precook our chicken or pasta when making this? That’s why it only takes 7 minutes of prep time! Raw chicken, uncooked noodles, dump it all into an Instant Pot or Crock Pot and dinner takes care of itself!

Simple One-Dish Chicken Florentine

Simple One Dish Chicken Florentine (For Instant Pot or Crock Pot)
 
Save Print
Author: Laura
Serves: 6-8
Ingredients
  • 1½ pounds boneless chicken thighs or breasts
  • 3 cloves fresh garlic, minced or 1 Tablespoon garlic powder
  • Sea salt to taste
  • 6 cups fresh spinach leaves
  • 16-ounces whole grain spaghetti (uncooked)
  • 2 cups heavy whipping cream
  • 4 cups chicken broth
  • 3 cups shredded mozzarella cheese
Instructions
  1. Cut chicken into bite-sized pieces. (I use kitchen shears for this which makes it super fast!)
  2. Place prepared chicken in the bottom of your Instant Pot or Crock Pot.
  3. Sprinkle with garlic, salt, and spinach leaves.
  4. Break spaghetti noodles in half and place on top.
  5. Pour on chicken broth and cream.
  6. Top with shredded cheese.
  7. Seal Instant Pot and cook on the "Poultry" setting for 15 minutes, doing a quick release after the time runs out.
  8. OR Cook in a Crock Pot on low for 6 hours.
  9. Stir and serve.
  10. Garnish with grated parmesan if you like!
3.5.3229

Don’t have an Instant Pot? I held back for years before jumping on the bandwagon. But now that I have one I LOVE how much time and energy it has saved me in the kitchen. This Chicken Florentine is just another recipe to prove how great my Instant Pot makes my real food kitchen life.

But a Crock Pot works too, and will still allow you to create this recipe with just 7 minutes of effort, so use whatever you have!

Want more Simple Recipes?

  • Simple Baked Salmon and Asparagus
  • Simple Crock Pot Chicken Soup with a Kick
  • Simple Skillet Taco Pasta
  • Last-Minute Lentil Chili
  • Simple Sweet and Sour Baked Chicken Legs
  • 20-Minute Taco Soup
  • Simple Cheesy Baked Chicken
  • Simple Creamy Chicken Stew in the Crock Pot
  • Simple Italian Beef and Broccoli Skillet
  • Simple Bacon Ranch Chicken
  • Simple Hawaiian Crock Pot Chicken
  • Simple Taco Rice Dinner
  • Simple Last Minute Nacho Plate
  • Simple Chicken Cheeseballs with a Kick
  • Simple Beanie Weanies
  • Simple Crock Pot BBQ Spareribs
  • Simple Pizza Chicken Bake
  • Simple Italian Chicken and Green Bean Bake
  • Last Minute Creamy Bacon Spaghetti
  • Simple Hamburger Soup
  • Simple Parmesan Broiled Fish
  • Simple Overnight Saucy Crock Pot Chicken
  • Simple 15-Minute Meal
  • Simple Overnight Melt-in-Your-Mouth Beef Roast
  • Simple 3-Cheese Crock Pot Pasta
  • Simple Oven Fried Chicken
  • Simple Honey Mustard Chicken Legs
  • The Easiest Mashed Potatoes in the World
  • Simple Garlic Butter Shrimp
  • Simple Crunchy Ranch Chicken Strips
  • Simple Crock Pot Shredded Ranch Chicken (for salad or tacos)
  • Simple Crock Pot Pizza Casserole
  • Simple Barbecue Beef Roast
  • Simple Spanish Rice Bowls
  • Simple Roasted Rotiserie Chicken
  • Simple Green Chile Chicken
  • Simple Tex-Mex Creamy Chicken
  • Simple Waffle Omelets
  • Simple Crock Pot Taco Pasta
  • Simple Grilled Chicken
  • Simple Hawaiian Beef Roast
  • Simple Crock Pot Creamy Stew Meat
  • Simple Cheese Stuffed Burgers
  • Simple Hashbrown Casserole (For Instant Pot, Crock Pot or Oven!)
  • Simple Lasagna Casserole (For Instant Pot or Crock Pot)
  • Simple Chili Mac
  • Simple Bacon Cheeseburger Casserole
  • From Burrito Bar to Casserole (a 5-Minute Meal!)
  • Simple Bacon Cheeseburger Roll
  • Simple Garlic Parmesan Chicken Legs
  • Super Simple Lasagna
  • The Simplest White Chicken Chili
  • Simple Lentil Nachos
  • Simple Tuna Patties
  • Simple Banana Pancakes
  • Simple Crock Pot Applesauce BBQ Chicken
  • Simple Hashbrown and Egg Nests
  • Simple Cornbread Waffles with Chili
  • Simple Veggie Fritters
  • Simple Lemon Garlic Chicken Legs
  • Simple Noodle Soup
  • Simple Three Cheese Spaghetti
  • Simple Crock Pot Salsa Shredded Beef
  • Cheeseburger Hashbrown Cups or Casserole
  • Easiest Beef Roast in the Instant Pot

Join Simple Meals!

728x90

We love how Simple Meals has been saving family time for so many, and helping people put great food on the table each night! Join us for just $1/week!

[wp_eStore_subscribe_fancy id=28]

Heavenly Homemaker's Club Members: Access your homepage and all your fantastic resources here! Not a member yet? Please join us!

Mini Crustless Lemon Cheesecakes (Low Sugar!)

September 25, 2018 by Laura 8 Comments

This post may contain affiliate links. For more information, please see our disclosure policy.

I’ve been wanting to try this Mini Crustless Lemon Cheesecakes recipe idea for months! (Apparently my to-do list is a little bit backed up?)

Why did it take so long to finally give these a try? Goodness, I don’t know. Life. People. Ministry. Unexpected foster care in our home. Graduation. Soccer season. Church camp. Moving not one but TWO sons into the college dorm in August.

We never quite know what God has for us each day, do we? It’s fun to look forward to learning what He has planned. So what if it takes six months to get around to trying a new recipe? Good things come to those who wait.

I met a new friend at my kids’ homeschool basketball tournament back in March. She said, “I make your Mini Crustless Cheesecakes all the time, but I always add lemon. You should try it! And top it with fruit!” Oh man, did that sound good.

Of course I couldn’t wait to try it and share the idea with you!! Except that I did wait. Six entire months.

So here we are, without further ado, and without any more delays (says the girl who actually started writing this post back in July…).

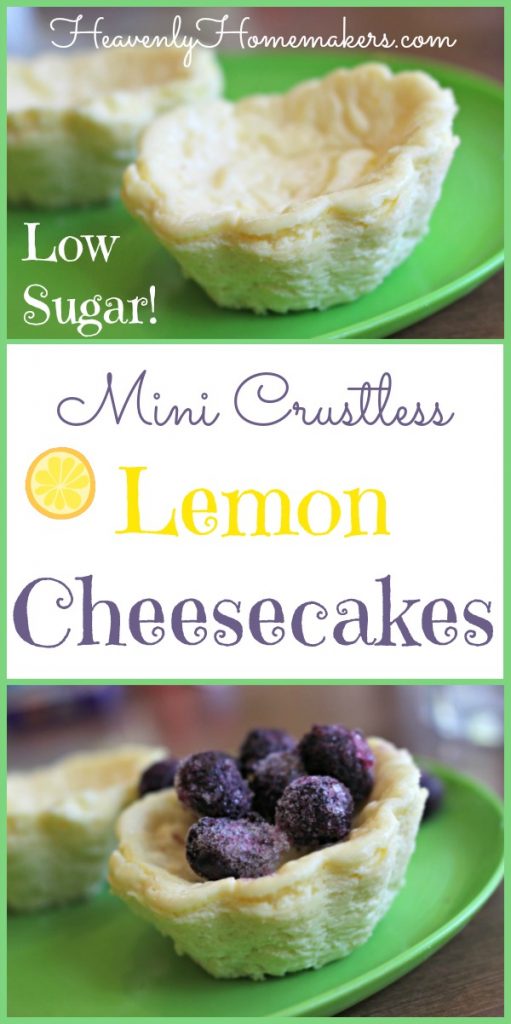
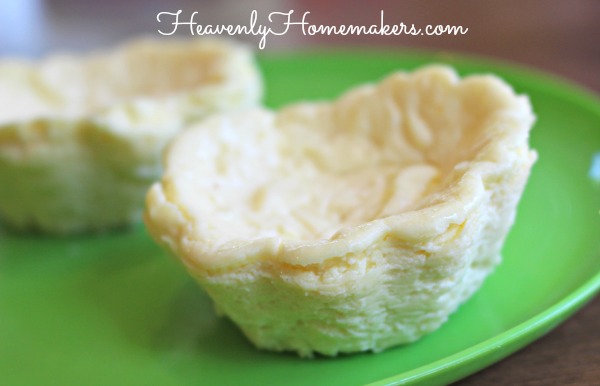
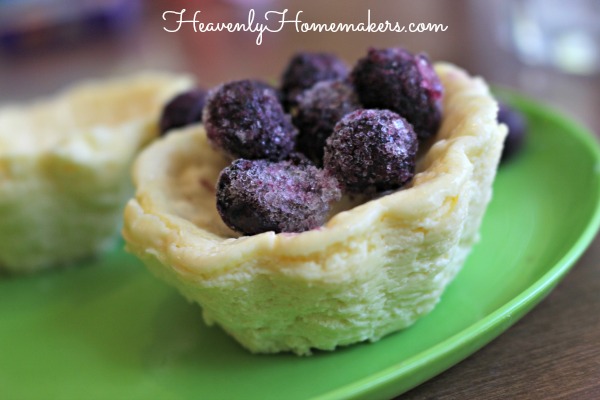
Mini Crustless Lemon Cheesecakes

Mini Crustless Lemon Cheesecakes (Low Sugar!)
 
Save Print
Author: Laura
Serves: 12
Ingredients
  • 16 ounces softened cream cheese
  • 3 Tablespoons lemon juice (or the juice of one lemon, plus zest if you like!)
  • 2 eggs
  • 2 Tablespoons maple syrup or sugar
  • 2 full droppers of liquid stevia
  • 1 teaspoon vanilla extract
Instructions
  1. Blend all ingredients together until smooth.
  2. Pour into 12 muffin cups.
  3. Bake in a 350 degree oven for 20 minutes.
  4. Turn off heat, open the oven door, and leave the cheesecakes in the oven for an additional 20 minutes. (Cheesecakes will puff up during baking but deflate while continuing to sit in the oven.)
  5. Transfer cheesecakes to the fridge and chill for at least two hours before serving.
3.5.3229

Add fresh or frozen fruit to your cheesecakes for an added burst of flavor.

P.S. I find it easiest to bake my Mini Cheesecakes in a silicone baking pan like this. Once they’ve cooled, they pop right out and the pan is super easy to wash out!

Heavenly Homemaker's Club Members: Access your homepage and all your fantastic resources here! Not a member yet? Please join us!

The BEST Chocolate Chip Cookie Cups

September 23, 2018 by Laura Leave a Comment

This post may contain affiliate links. For more information, please see our disclosure policy.

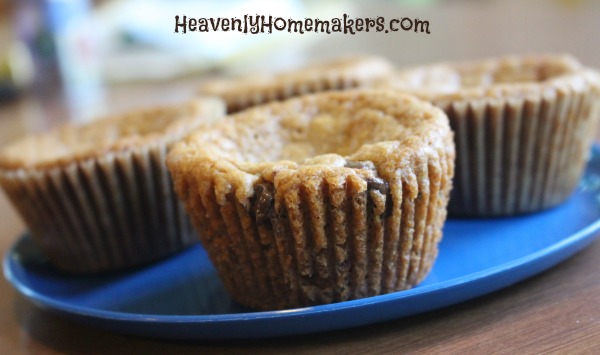
In case you are wondering, these Chocolate Chip Cookie Cups truly are the best. I didn’t just make that up. It’s a proven fact.

Who am I kidding? I rarely eat sugar so I only see and smell these gems when I make them for my family or for guests. But I remember the deliciousness and therefore, I taste them in my mind. (For the record, when I smell something wonderful I feel as though I’ve tasted it. Am I the only weird one? Who can relate?)

Ultimately, you can take any of your favorite cookie recipes and bake them in a muffin cup for a fun cookie twist. But my family has declared THIS Chocolate Chip Cookie recipe to be the best, and who am I to argue?

Scoop your cookie dough (with a large scoop like this one) into a prepared muffin cup. Bake and be happy. Eat and be happier. (Or just smell them and be happy. That works too.)

The BEST Chocolate Chip Cookie Cups

The BEST Chocolate Chip Cookie Cups
 
Save Print
Author: Laura
Serves: 24
Ingredients
  • 1 cup melted butter (2 sticks)
  • 1½ cups brown sugar
  • 2 eggs
  • ½ teaspoon baking soda
  • ½ teaspoon sea salt
  • ½ teaspoon vanilla extract
  • 2¼ cups whole grain flour, more or less as needed (I use freshly ground soft white wheat)
  • 1 cup chocolate chips
Instructions
  1. In a large mixing bowl, stir together butter and brown sugar.
  2. Add eggs, baking soda, salt, and vanilla.
  3. Stir in flour until well combined (tweaking the amount as needed depending on the flour you are using)
  4. Fold in chocolate chips.
  5. Use a large cookie scoop to add dough to 24 prepared muffin tins.
  6. Bake in a 350 degree oven for 15-20 minutes or until cookie cups are golden brown.
3.5.3229

There’s something about baking these cookies into a muffin cup that makes them extra chewy and good. These Chocolate Chip Cookie Cups are awesome for packing in a lunch box or taking on the road! Make these ahead and freeze them for easy access to a great dessert when you need one.

While this recipe is made with real butter (yay!) and whole grain (hooray!), it isn’t low in sugar, so don’t go too crazy. These Chocolate Chip Cookie Cups were meant to be shared!

Want to really have fun (while you’re sharing, that is)? Put a scoop of vanilla ice cream on top of these cookie cups when they first come out of the oven. Of course then the high sugar dessert becomes an even higher sugar dessert. But wow, so good.

Heavenly Homemaker's Club Members: Access your homepage and all your fantastic resources here! Not a member yet? Please join us!

The BEST Way to Make Mashed Potatoes in the Instant Pot

September 20, 2018 by Laura 10 Comments

This post may contain affiliate links. For more information, please see our disclosure policy.

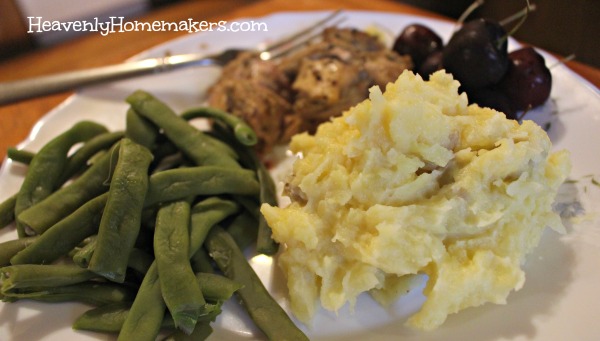
Sometimes a girl thinks she is onto something when she learns to make Mashed Potatoes in the Instant Pot. Then her friend Leesa is like, “Girl, you have to try it my way instead.” And then you try making Mashed Potatoes Leesa’s way and you fall down dead.

How is it that the best foods we all love can actually taste even better when we tweak a few ingredients and methods? Can it be that these Mashed Potatoes take so little effort to make? And is it actually possible that making Mashed Potatoes in the way I am about to describe actually adds more nutrients to this delicious dish?

Yes. So these potatoes are better tasting AND better for us, all without any extra work. Hoorah!

The BEST Mashed Potatoes in the Instant Pot

What takes these great Mashed Potatoes in the Instant Pot from good to BEST? Chicken broth. Indeed, instead of simply cooking our potatoes in water, then draining and adding milk and butter later – we are going to cook the potatoes in chicken broth and milk. No draining needed! The nutrients and flavor absorb into the potatoes, we mash them and add butter and salt, then voila. Amazing Mashed Potatoes in the Instant Pot!

NOTE: Never fear the fat! These are full of good fats, so let’s emphasize the GOOD in that sentence. Broth, real butter, and whole milk are all good, nourishing foods. Our brains need good fats for good health. So give a cheer for mashed potatoes that taste amazing and offer great nourishment too!

Don’t have an Instant Pot?

Make these in the Crock Pot instead! Cook on low for 8-10 hours or hi for 5 hours. Mash, add butter and salt, and serve!

Wait. You don’t have an Instant Pot?

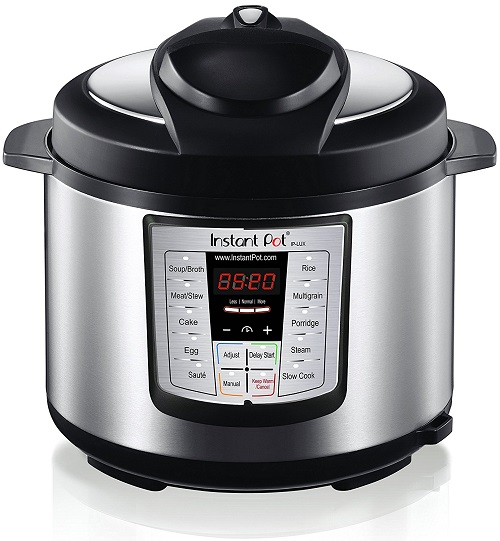
I was with you for years, putting it off forever, not wanting to jump on the Instant Pot bandwagon. Then so many worked to convince me that I finally jumped. I’ve found that investing in this lovely appliance truly has saved me time and energy in my real food kitchen.

I LOVE my 8-Quart Instant Pot (because I always make large amounts of food). Some prefer the 6-Quart Instant Pot because it comes to pressure faster.

Beyond the mashed potato, my favorite way to use my Instant Pot is to cook 5-7 pounds of frozen hamburger meat in 30 minutes. For real!

And now for my friend Leesa’s wonderful Mashed Potato recipe and instructions!

The BEST Mashed Potatoes in the Instant Pot

The BEST Way to Make Mashed Potatoes in the Instant Pot
 
Save Print
Author: Laura
Serves: 6-8
Ingredients
  • 5 pounds Yukon gold potatoes
  • 1 cup chicken or beef broth
  • 1 cup whole milk
  • Butter to taste (I use one stick)
  • Sea salt to taste
Instructions
  1. Wash and quarter potatoes.
  2. Put them onto the trivet inside your instant pot along with the chicken broth and milk.
  3. Seal and cook at high pressure for 10 minutes.
  4. Quick release the pressure.
  5. Don't drain the liquid!
  6. Add butter and salt to your liking (the more butter the better, I always say!)
  7. Mash with a potato masher and serve!
3.5.3229

These Mashed Potatoes are a must try! Let me know what you think!

Heavenly Homemaker's Club Members: Access your homepage and all your fantastic resources here! Not a member yet? Please join us!

Simple Baked Beans Recipe

September 16, 2018 by Laura 3 Comments

This post may contain affiliate links. For more information, please see our disclosure policy.

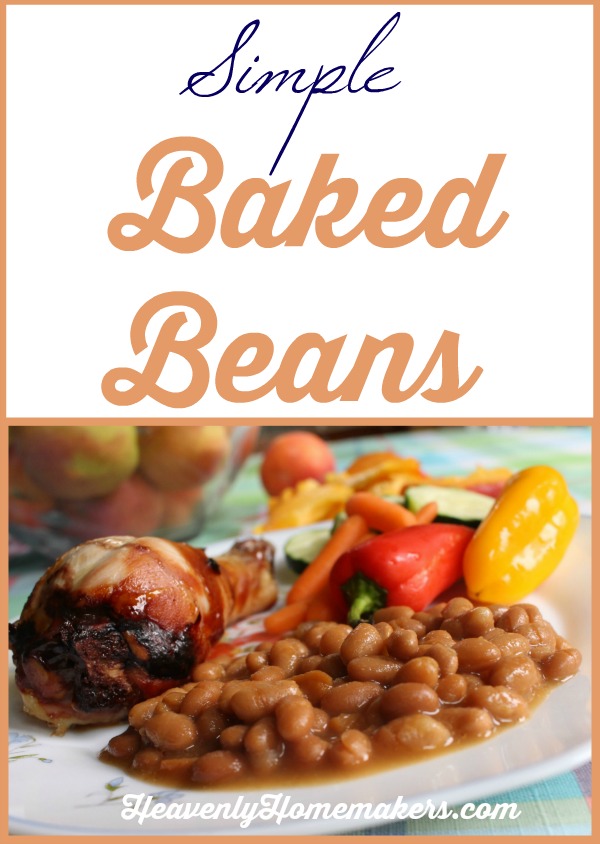
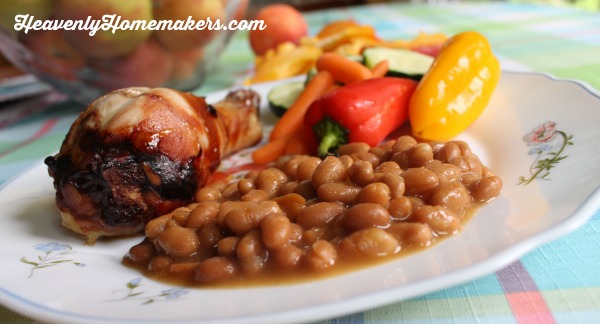
I love that Simple Baked Beans is such an easy side dish to put together and pair with so many great meats and veggies!

Truly, it is the simplest of foods that make our meals so much better! (Did you download our Simple Ingredients for Simple Meals list yet? It’s FREE! And oh so helpful!)

These Simple Baked Beans take little effort, and are just sweet enough to make us all fall in love. I love adding these as a side dish (along with other veggies and fruits) to a basic meaty main dish.

Consider these Simple Baked Beans when you decide what to serve with any of these Simple Meals recipes:

  • Simple Sweet and Sour Baked Chicken Legs
  • Simple Cheesy Baked Chicken
  • Simple Bacon Ranch Chicken
  • Simple Hawaiian Crock Pot Chicken
  • Simple Chicken Cheeseballs with a Kick
  • Simple Beanie Weanies
  • Simple Crock Pot BBQ Spareribs
  • Simple Parmesan Broiled Fish
  • Simple Overnight Saucy Crock Pot Chicken
  • Simple 15-Minute Meal
  • Simple Overnight Melt-in-Your-Mouth Beef Roast
  • Simple Oven Fried Chicken
  • Simple Honey Mustard Chicken Legs
  • Simple Garlic Butter Shrimp
  • Simple Crunchy Ranch Chicken Strips
  • Simple Barbecue Beef Roast
  • Simple Roasted Rotiserie Chicken
  • Simple Green Chile Chicken
  • Simple Grilled Chicken
  • Simple Hawaiian Beef Roast
  • Simple Cheese Stuffed Burgers
  • Simple Bacon Cheeseburger Casserole
  • Simple Bacon Cheeseburger Roll
  • Simple Garlic Parmesan Chicken Legs
  • Simple Tuna Patties
  • Simple Crock Pot Applesauce BBQ Chicken
  • Simple Veggie Fritters
  • Simple Lemon Garlic Chicken Legs

Phew, so many possibilities!!

If you haven’t joined Simple Meals yet, I encourage you to take the plunge! We do all the planning for you, then provide you each week with a beautifully laid out menu plan, grocery list, side dish ideas, bonus recipes, and so much more. Every week. For one dollar. Seriously.

Get a sample Simple Meals menu plan here.

As for these Simple Baked Beans, you’ll love having this recipe in your back pocket to add protein and goodness to your Simple Meals.

Ready for the super simple recipe? Soak and cook your own beans, or keep some canned beans on hand to throw these together at a moment’s notice.

Simple Baked Beans

Simple Baked Beans Recipe
 
Save Print
Author: Laura
Serves: 6-8
Ingredients
  • 32-ounces canned pork and beans (or soak and cook your own pintos or navy beans!)
  • ¼ cup ketchup (give or take)
  • 1 Tablespoon prepared yellow mustard
  • 3 Tablespoons dried minced onion
  • 1 Tablespoon honey or brown sugar (optional)
Instructions
  1. Stir ingredients together in a 8x8 inch baking dish.
  2. Bake uncovered in a 350 degree oven for 45 minutes or until bubbly.
  3. (In a hurry? Cook in a pot on the stove for 10-15 minutes in a pinch!)
3.5.3229

I love that if I plan ahead, I can bake these in the oven. Or if I need to throw these together in less time (story of my life), I can simply stir this recipe into a pot and heat it to bubbly on the stove. So simple and good!

P.S. Make these beans into a main dish by adding leftover cooked hamburger and/or cooked bacon!

Heavenly Homemaker's Club Members: Access your homepage and all your fantastic resources here! Not a member yet? Please join us!

Easy Peaches and Cream Muffins Recipe

September 13, 2018 by Laura 2 Comments

This post may contain affiliate links. For more information, please see our disclosure policy.

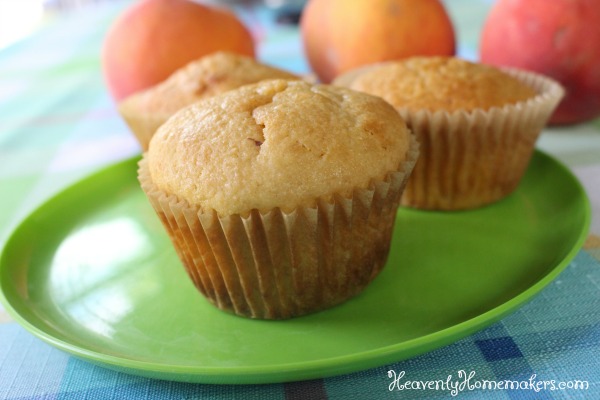
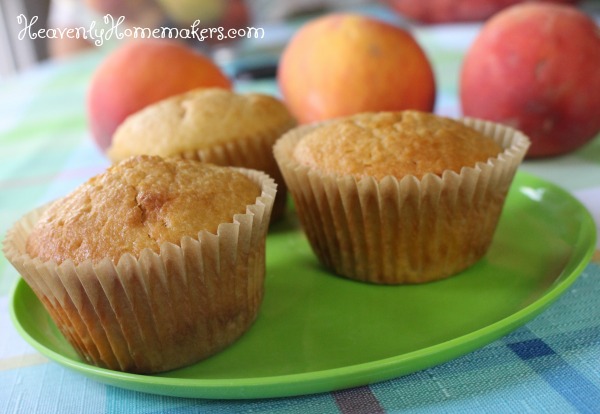
Once upon a time I had a box full of fabulous peaches. So I used a few juicy peaches to make these Peaches and Cream Muffins and the family declared them to be delicious. Good talk.

Allow me to share a few secrets to making the most deliciously moist muffins – even if you are baking with whole grain flour!

  1. Use whole grain pastry flour. I grind soft white wheat, which turns into a lovely, fine, fluffy flour. I love that it acts like white flour while actually being whole wheat! (Read more about whole wheat pastry flour here.)
  2. Stir in some sour cream. This makes the muffins moist instead of dry and crumbly. So yum!

One of my favorite, favorite tricks to making these Peaches and Cream muffins even easier to whip up is to use the Muffin Mix recipe in this Simple Mixes to Save the Day eBook. Use 4 cups of Muffin Mix in place of all the dry ingredients in the recipe, and you’ve just cut out much of the work involved in stirring together these muffins. I LOVE having all those homemade mixes on hand!

This recipe is quite versatile! Sub out peaches for berries or apples. Stir in some cinnamon. This recipe is fun to play with!

Easy Peaches and Cream Muffins

Easy Peaches and Cream Muffins Recipe
 
Save Print
Author: Laura
Serves: 18-24
Ingredients
  • 3 cups whole grain flour (I use freshly ground soft white wheat)
  • ½ cup sugar (sucanat, brown, white, or raw)
  • 1 teaspoon baking powder
  • 1 teaspoon sea salt (Or use 4 cups of Muffin Mix from Simple Mixes to Save the Day eBook instead of these dry ingredients!)
  • 1 cup sour cream
  • ¾ cup milk
  • 2 eggs
  • ½ cup melted coconut oil
  • 3 fresh peaches, pealed and diced
Instructions
  1. Stir together dry ingredients in a mixing bowl.
  2. Add sour cream, milk, eggs, and melted coconut oil and stir until just combined (do not over-stir).
  3. Fold in diced peaches.
  4. Scoop batter into 18-24 prepared muffin tins.
  5. Bake in a 400 degree oven for 18-25 minutes or until muffins are golden brown.
3.5.3229

Be sure to check out Simple Mixes that Save the Day. They truly do save my day – many days a week!

Heavenly Homemaker's Club Members: Access your homepage and all your fantastic resources here! Not a member yet? Please join us!

Stick of Butter Rice – AMAZING!

September 11, 2018 by Laura 23 Comments

This post may contain affiliate links. For more information, please see our disclosure policy.

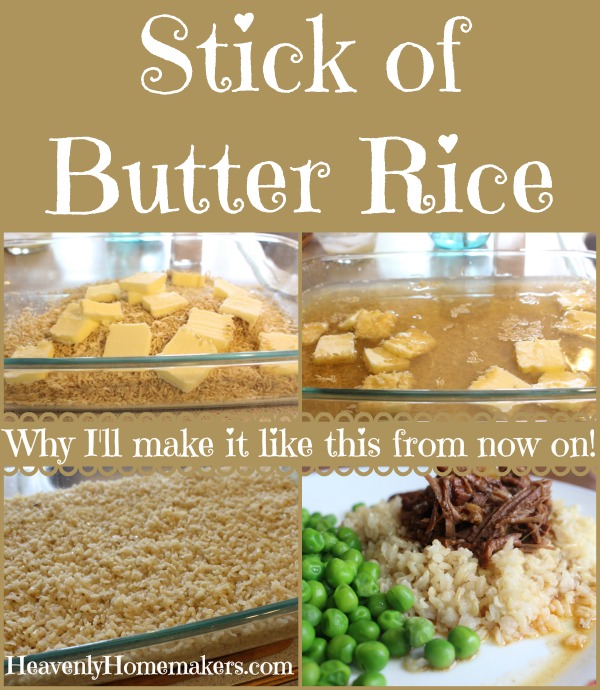
Now that I have discovered how to make this Stick of Butter Rice, I will never go back to making it “the regular way.” Wow, wow, and then some. It’s because of the butter, of course. Wait until you try this!

Some people be like, “Go easy on this rice because it’s so high in fat because of the butter!” But Laura be like, “What a great and delicious way to add good fat to a whole grain carb dish!”

I’m not a huge fan of empty carbs, which turn to sugar in our bodies, which offer little if any nourishment, and therefore can turn to fat in our bodies as they try to serve some sort of purpose for us. So if there’s any reason to go easy on this rice, it is because our bodies don’t need loads of carbohydrates or grains for nourishment (unless we are avid athletes with rigorous daily workouts).

As for me? I enjoy this wonderfully flavored, high fat rice in small quantities with a large side of veggies and a delightful portion of meat.

The flavor of this rice, though!!! Wow, you must try it. Between the broth, the onion, and the butter (the obvious MVP of this dish), I think you’ll be like me and decide to never go back to making plain rice again!

See how simple this Stick of Butter Rice is?

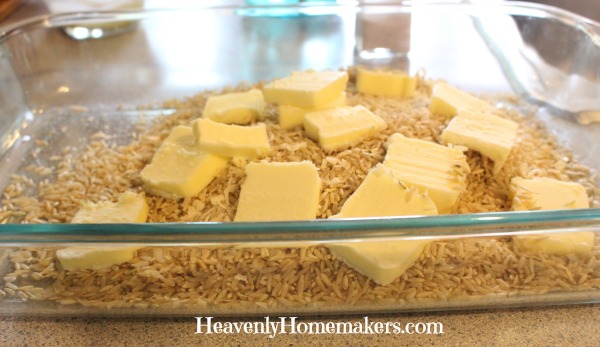
Measure uncooked rice and minced onion into a baking dish. Cut butter into pats and add to rice.

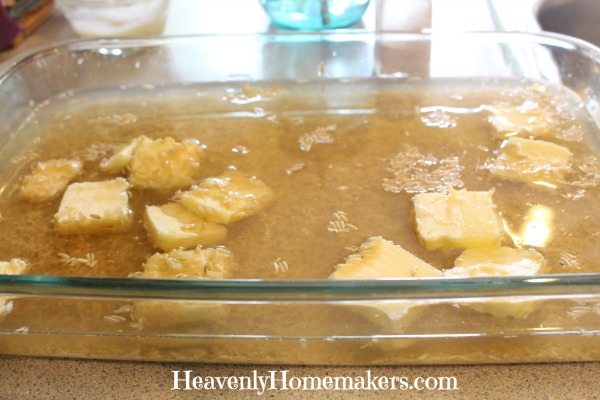
Add salt and chicken broth and stir.

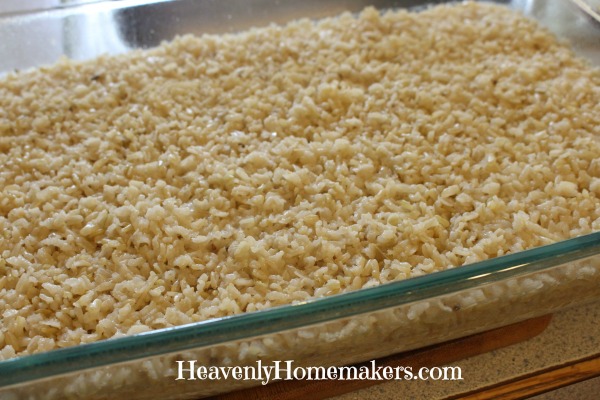
Cover and bake in a 350 degree oven for one hour. Your job here is done.

We love serving some sort of shredded meat with this rice, such as:

  • Hawaiian Crock Pot Chicken
  • Simple Overnight Saucy Crock Pot Chicken
  • Simple Overnight Melt-in-Your-Mouth Beef Roast
  • Simple Barbecue Beef Roast
  • Simple Hawaiian Beef Roast
  • Simple Crock Pot Salsa Shredded Beef

Those are our favorites, though this Stick of Butter Rice makes a great side dish with just about any meal!

Enjoy the simplicity of this wonderful dish! Once you try it you’ll never go back!

Stick of Butter Rice

5.0 from 4 reviews
Stick of Butter Rice - AMAZING!
 
Save Print
Author: Laura
Serves: 6-8
Ingredients
  • 2 cups brown rice (uncooked)
  • 4 cups beef or chicken broth
  • ¼ teaspoon sea salt
  • 2 Tablespoons dry minced onions
  • 1 stick of butter (1/2 cup)
Instructions
  1. Measure rice, broth, salt, and onions into a 9x13 inch baking dish and stir.
  2. Cut a stick of butter into 8ish "pats" and spread over the dish.
  3. Cover dish and bake in a 350 degree oven for 1 hour.
3.5.3229

Become a Simple Meals member! Every week we’ll send you a great menu plan full of Simple Recipes like this one. We’ll equip you with a grocery list. We’ll break everything down so that your meal prep is as simple as possible. We’ll give you bonus tips and recipes and freebies. And this is all for just $1 each week. You’ll love it!

[wp_eStore_subscribe_fancy id=19]

Heavenly Homemaker's Club Members: Access your homepage and all your fantastic resources here! Not a member yet? Please join us!

How to Easily Steam or Roast Vegetables

September 2, 2018 by Laura 6 Comments

This post may contain affiliate links. For more information, please see our disclosure policy.

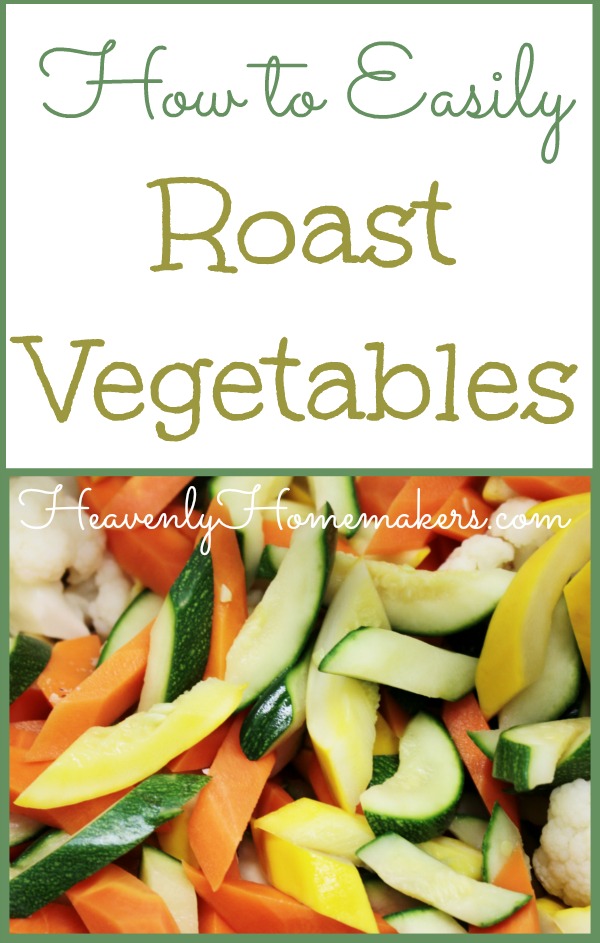
Every time I say something like, “Simply prep some veggies to go with your meal and you’re good to go!” I get email requests saying, “Yes, but how exactly do you prep your veggies?” So here I am, finally giving a little more instruction on how to easily steam or roast vegetables. How silly that it’s taken me ten years to write this post.

We’ll start with steaming then move on to roasting. And hang with me until we get to the bottom of this post so you can grab our pretty new Veggie Preparation Guide!

How to Easily Steam Vegetables

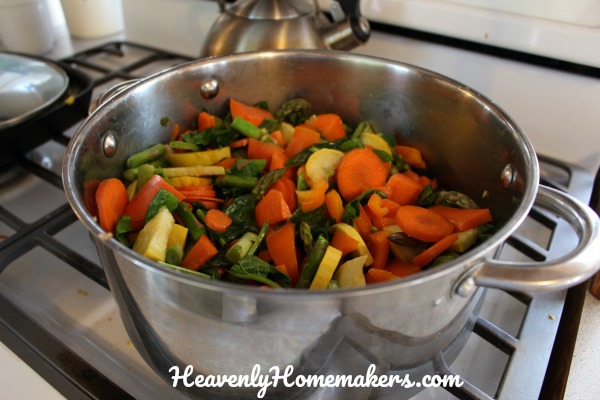
Confession: I used to go to a little more trouble when steaming vegetables, putting one of these great stainless steel steamers in the bottom of my pan before adding my veggies. But just like everything I do in my kitchen these days, I’ve pared down the work (and the dirty dishes created as a result of the work) to make food prep as simple as possible.

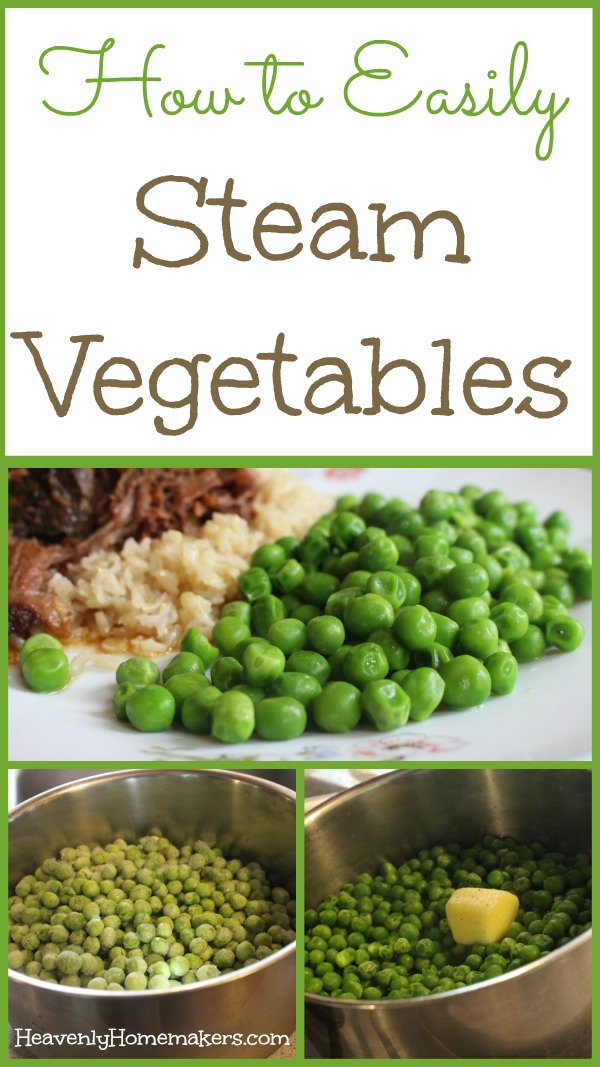
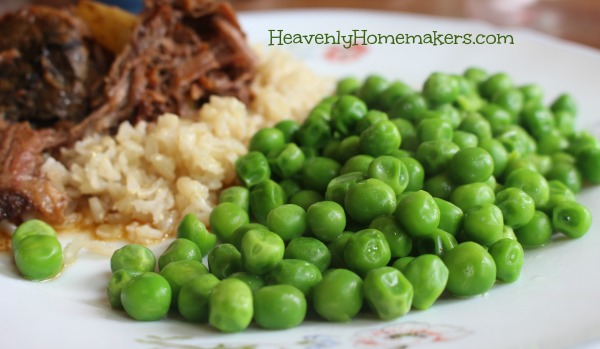
Now what do I do when steaming vegetables? I dump in the veggies, I add a shot of water, I add some fat (butter or bacon grease), and I cook them for a few minutes until they are tender. It truly is that easy!

How to steam veggies:

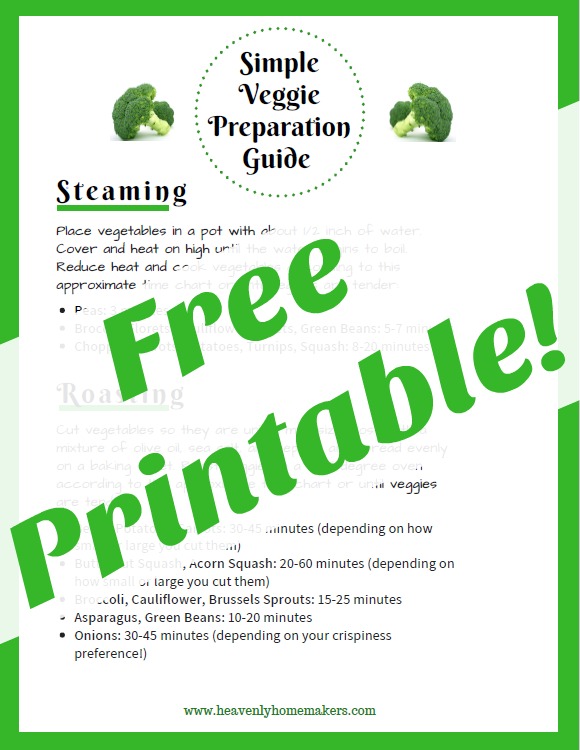
Place vegetables in a pot with about 1/2 inch of water. Cover and heat on high until the water begins to boil. Reduce heat and cook vegetables according to this approximate time chart or until veggies are tender:
Peas: 3 minutes
Broccoli Florets, Cauliflower Florets, Green Beans: 5-7 minutes
Chopped Carrots, Potatoes, Turnips, Squash: 8-20 minutes
This info will be included in our handy printable below, so you’ll always have easy access!

How to Easily Roast Vegetables

Cut vegetables so they are uniform in size. Toss with a mixture of refined coconut oil, sea salt, and pepper and spread evenly on a baking sheet. Roast veggies in a 425 degree oven according to this approximate time chart or until veggies are tender:

Beets, Potatoes, Carrots: 30-45 minutes (depending on how small or large you cut them)
Butternut Squash, Acorn Squash: 20-60 minutes (depending on how small or large you cut them)
Broccoli, Cauliflower, Brussels Sprouts: 15-25 minutes
Asparagus, Green Beans: 10-20 minutes
Onions: 30-45 minutes (depending on your crispiness preference!)
This info will be included in our handy printable below, so you’ll always have easy access!

Download a FREE Printable Veggie Prep Guide!

How about an easy-to-reference guide to print and post in your kitchen? As you prepare your veggies every day, give it a quick glance to be reminded of cooking times for each veggie!

(See what I did there? A little passive-aggressive “prepare your veggies every day” to give you a hint that it’s important to prepare and eat veggies every day.) ;)

Don’t forget Raw and Stir Fried Veggies!

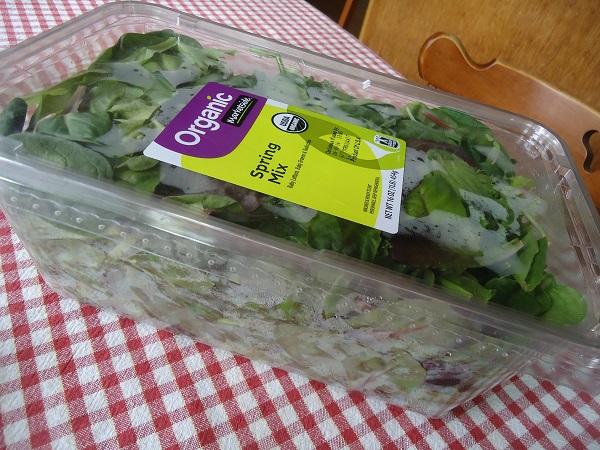
It’s the easiest thing in the world to throw out a container of mixed greens for salads each night. Or open a container of baby carrots, grab out some snap peas – raw veggies are your friend because of their nutritional content and ease for serving!

And stir-frying veggies adds fabulous flavor. Read my favorite way to stir-fry here. We make this often, with and without the noodles.

Go get your free Veggie Prep Printable!

Heavenly Homemaker's Club Members: Access your homepage and all your fantastic resources here! Not a member yet? Please join us!

Simple Strawberry Fluff (Real Food Ingredients!)

August 30, 2018 by Laura 6 Comments

This post may contain affiliate links. For more information, please see our disclosure policy.

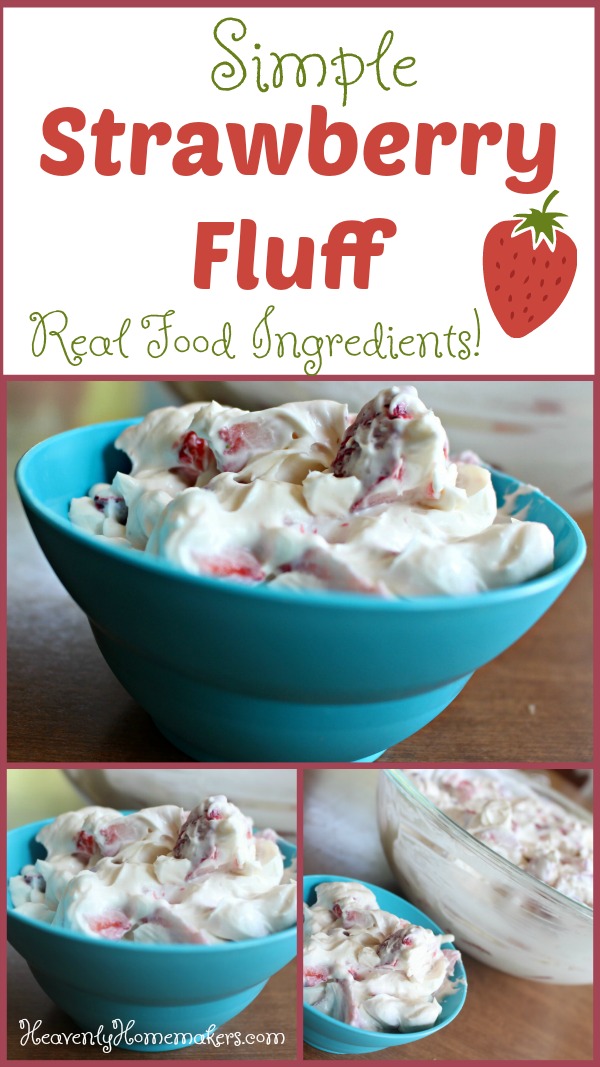
I don’t mean to be a lazy cook. Truly I don’t. In fact, I really love making wonderful food as a way to bless people. Can I help it that this Simple Strawberry Fluff is super easy to make? No. I cannot help it. There’s nothing I can do to make it difficult. It’s simply, well, simple.

I’m sure you’re dying to know how this Simple Strawberry Fluff came into being.

I had decided to make these Strawberry Cheesecake Parfaits for 20 people at our local mission. (We take turns with one other family to make a meal to serve there once each month.) I planned to make The Best Grilled Chicken, my friend was providing a salad and veggie, so the Strawberry Parfaits would round off the meal to perfection.

However, I began to get low on time, my kids weren’t home to help (how dare they go off to church camp and leave me to do all the cooking), so I began to brainstorm ways to cut down my prep time. This is no easy feat when I already do everything possible to keep my meals simple.

But…aha! It occurred to me that instead of building individual parfait cups, I could make one big bowl with strawberries and cheesecake parfait filling and stir it together into a salad. It was then that I realized I would be creating a cross between the Strawberry Cheesecake Parfaits and this Pineapple Fluff.

Would it work? There was only one way to find out. Make it and insist that my husband give it a taste test (life is hard at the Coppinger house).

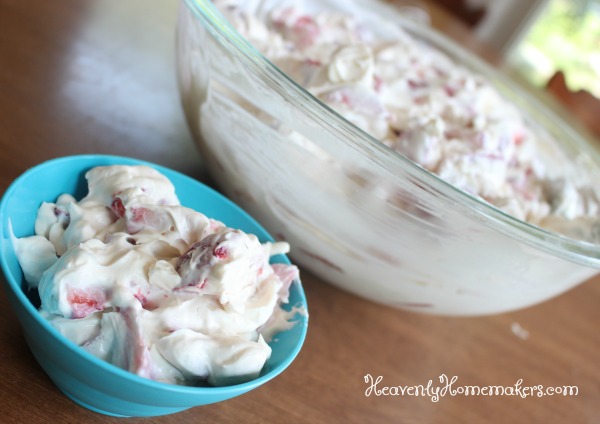
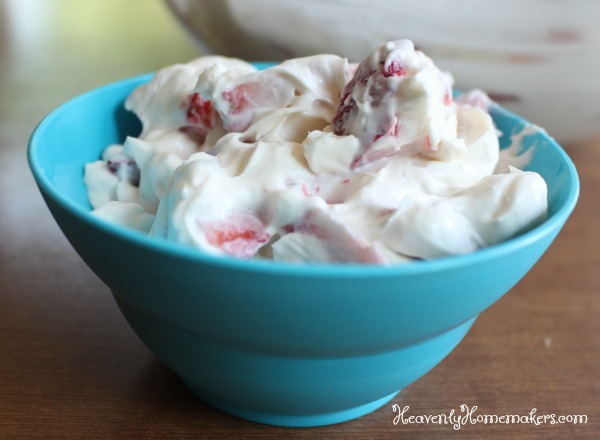
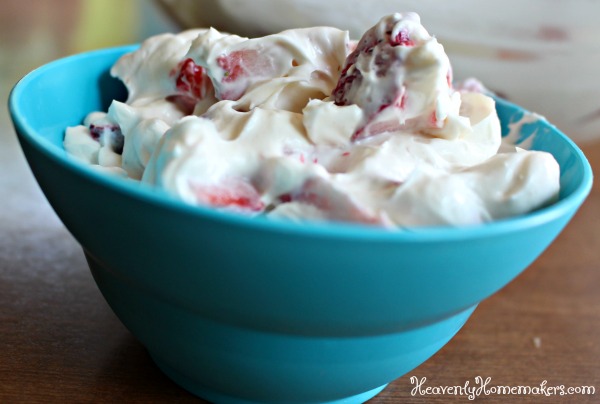
Matt had no idea where my brain had been storming. He only knew that I put a pretty blue bowl in front of him and handed him a spoon. “Oooh, that’s good!!”

Now that I’ve tried this, I may never go back to making parfaits again. Why would I when making it this way saves a precious eight seconds?

Simple Strawberry Fluff

5.0 from 2 reviews
Simple Strawberry Fluff (Real Food Ingredients!)
 
Save Print
Author: Laura
Serves: 4-6
Ingredients
  • 8 ounces softened cream cheese
  • 1 cup heavy whipping cream
  • 1 teaspoon vanilla extract
  • 2 Tablespoons lime juice
  • ¼ cup sugar or 3 Tablespoons real maple syrup or liquid stevia to taste
  • 1 pound fresh strawberries, washed and cut into bite-sized pieces
Instructions
  1. Wash and cut strawberries into a large mixing bowl.
  2. In a high-power blender mix cream cheese, whipping cream, vanilla, lime juice, and sweetener of choice until well combined and smooth.
  3. In a bowl, fold strawberries into the whipped mixture.
  4. Chill for at least one hour before serving.
3.5.3229

The folks at the mission said lovely things about this salad. (One 12-year old girl at fourths. Her love for the salad made me happy but our sweet conversation gave me even more joy.)

I will now and forevermore go back and forth between these Strawberry Cheesecake Parfaits and this Simple Strawberry Fluff. They are both incredibly delicious, and they are both super easy to make.

Pack this fun salad/dessert into a jar to take in your lunch box and you’ve got one more to-go option!

Great lunch box additions to your Simple Strawberry Fluff

  • Quick Bread in a Jar
  • Veggies With Dip in a Jar
  • Flourless Brownie Muffin
  • Mini Crustless Quiche in a Jar
  • Chips with Guacamole
  • Burrito Bowl in a Jar
  • Tuna Salad with Crackers
  • Salad in a Jar
  • Popcorn Chicken with Ranch
Heavenly Homemaker's Club Members: Access your homepage and all your fantastic resources here! Not a member yet? Please join us!
« Previous Page
Next Page »

Join Our Community!

 Facebook Twitter E-mail Instagram Pinterest

Popular Posts

~ Will All of the Real Moms Please Stand Up?
~ Easy! Stir-and-Pour Whole Wheat Bread
~ How to Make Gatorade
~ 31 Real Food Breakfast Ideas
~ Dear Teenage Girls...
~ When Mom Takes a Step Back
~ The Inexpensive Health Insurance We Love!
~ Let's Talk Real Food Grocery Budgets

Check out our latest posts!

  • Big Family Food and Fun: August 30-September 5, 2026
  • Big Family Food and Fun: August 23-29, 2026
  • Big Family Food and Fun: August 16-22, 2026
  • Big Family Food and Fun: August 9-15, 2026
  • Big Family Food and Fun: August 2-8, 2026
Home  ~  Simple Meals  ~  Club Membership  ~  Shop  ~  Privacy Policy  ~  Disclosure  ~ Contact

Copyright © 2026 · Beautiful Pro Theme on Genesis Framework · WordPress · Log in