Heavenly Homemakers

Encouraging women in homemaking, healthy eating and parenting

  • Home
    • About
    • FAQs
  • Recipes
    • Bread and Breakfast
    • Condiments
    • Dairy
    • Main Dishes
    • Side Dishes and Snacks
    • Desserts
    • Gluten Free
    • Instant Pot
    • Crock Pot
    • Heavenly Homemaker’s Weekly Menus
  • Homemaking
    • Real Food Sources
  • Store
  • Contact
    • Advertise
    • Disclosure
    • Privacy Policy
  • Simple Meals
  • Club Members!

How to Make Roast Gravy

May 3, 2018 by Laura 2 Comments

This post may contain affiliate links. For more information, please see our disclosure policy.

If you saw my recent “Easiest Way to Make Beef Roast in the Instant Pot” post, you saw that I promised to share How to Make Roast Gravy. Where there is roast, there must be gravy. There is no other way.

While I shared that I struggled with making a good roast for over 20 years before figuring it out, I perfected my gravy-making skills long ago. I guess that’s a good thing, seeing as my roasts weren’t great. At least we drown the dry meat in gravy.

Making gravy truly isn’t difficult, though in my case, it took some practice. Did I ever tell you about the first time I made gravy for Matt? He had to spread it onto his potatoes with a knife. Good times. (That was in our dating days. Praise God he saw gravy-making potential and still chose to marry me. It was probably because of how I rocked the big hair. Or the high waist pants, which are somehow now back in style. Why, girls? Why?)

How to Make Roast Gravy

How to Make Roast Gravy
 
Save Print
Author: Laura
Ingredients
  • 1-2 cups beef broth/drippings from a roast
  • ¼ cup cold water
  • 2 Tablespoons corn starch or arrowroot powder
  • Sea salt to taste
Instructions
  1. Pour the drippings from a cooked roast into a small sauce pan.
  2. Heat to boiling.
  3. Meanwhile, whisk together water and cornstarch in a small glass or jar.
  4. Slowly pour water/cornstarch mixture into the boiling beef broth, stirring/whisking constantly.
  5. Continue to cook and stir over medium heat until the mixture has thickened into gravy.
  6. Salt liberally as desired.
3.5.3229


Need to thicken your gravy? Make another mixture of water/cornstarch and whisk it in to the boiling broth little by little until you’ve reached the desired gravy consistency you want.

It is important that you mix the water and cornstarch together before stirring it into your drippings/broth! Sprinkling cornstarch directly into the hot drippings will only give you lumpy gravy. Ask me how I know.

What are you better at making: Roast or Gravy? Maybe now we can all be good at both!

Heavenly Homemaker's Club Members: Access your homepage and all your fantastic resources here! Not a member yet? Please join us!

The Easiest Way to Make Beef Roast in the Instant Pot

May 1, 2018 by Laura 9 Comments

This post may contain affiliate links. For more information, please see our disclosure policy.

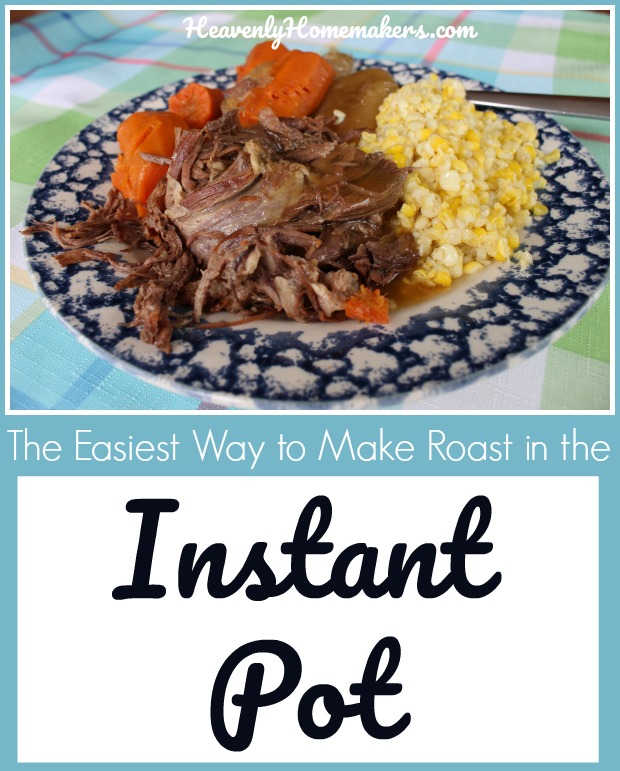
My mom used to be the queen of perfect Sunday roasts. But for some reason, it’s taken me over 20 years to figure out how to get my roast to fall apart and taste delicious. Today I’ll share what I’ve learned about making beef roast in the Instant Pot. Aha! Now we’re on to something.

After years of trial and error, I finally learned to make a Melt–in-Your-Mouth Beef Roast in the Crock Pot. This is all well and good except for the days I don’t have 12 hours to wait for my beef roast to cook to perfection. A recent Sunday morning, “What can I make for lunch before we leave for church in ten minutes?!” panic led me to investigate how to make a beef roast in my Instant Pot.

Wait. You don’t have an Instant Pot? Trust me. I understand. It took me years of hearing about them to get on the Insta-Train. Now that I’m on board, I’m declaring it to be one of my favorite appliances. Is an Instant Pot worth your investment? I give an emphatic, “Absolutely!” (I have this one.)

So anyway, back to my pot roast. I discovered that there are many Instant Pot roast-making instructions out there. But I have to admit what you already know about me: I really do not like recipes that instruct me to take several steps before walking away from my food to let it cook. After all, what good is using a Crock Pot or Instant Pot if I have to spend 30 or more minutes prepping the food?

Therefore, while most recipes I found instructed that I sear both sides of the roast and sing it a lullaby before allowing the Instant Pot to work its magic, I decided to do what I do best: Throw the food into the pot, turn it on, and walk away. After all, I don’t have time to sear meat on a Sunday morning, nor am I interested in going to church smelling like caramelized onion. And all my fellow worshipers said amen.

I figured the worst that might happen if I took a few shortcuts is that my roast would be mediocre, something my family has dealt with for most of my roast-making life. This is why God invented gravy.

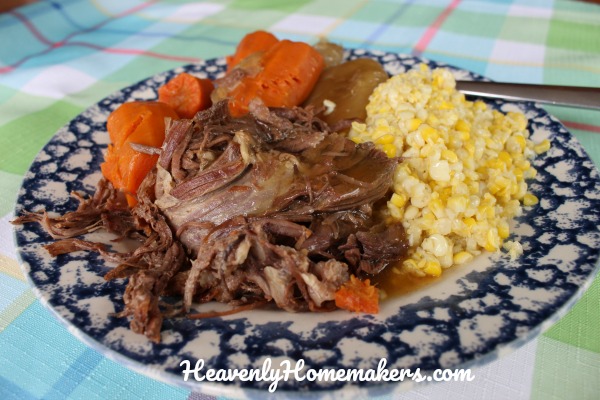
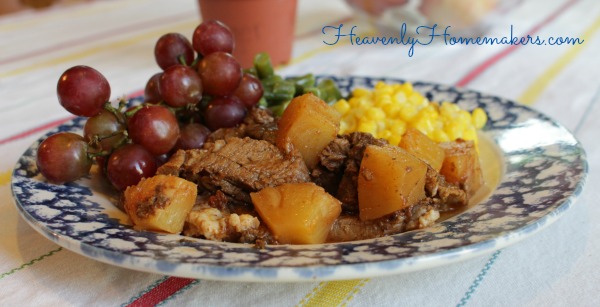
So into the Instant Pot went the roast. I dumped on some sea salt, worchestershire sauce, water, onion, and carrots. We went to church and came home to this:

The meat fell apart. The flavor was incredible. Continue to sear your roast if you must, but as for me and my house, I will continue to throw in the food and let the appliances do the work.

The Easiest Way to Make Beef Roast in the Instant Pot

The Easiest Way to Make Beef Roast in the Instant Pot
 
Save Print
Author: Laura
Serves: 6-8
Ingredients
  • 3 pound beef roast
  • 2 Tablespoons Worcestershire sauce
  • 1 medium-sized onion
  • Sea salt and pepper to taste
  • 5-8 medium-sized carrots
  • 1 cup water
Instructions
  1. Place roast on the metal trivet in your Instant Pot.
  2. Pour 1 cup water into the bottom of the pot.
  3. Cut onion into fourths and place in the pot.
  4. Peel carrots, cut them in half, then place them on the roast.
  5. Salt liberally, pepper as you like.
  6. Place the lid on the Instant Pot and seal it.
  7. Cook it at High Pressure, Manual Setting, for 70 minutes.
  8. I do natural release as I'm usually still at church during this time.
  9. Shred meat and serve!
3.5.3229


Add 3ish pounds of scrubbed and cut potatoes to the pot if you like. :)

Be on the lookout for a tutorial on making Roast Gravy.

Am I the only one who has struggled to make a good pot roast? Here’s hoping this recipe solves all your roast-making issues!

Some of the links in this post are affiliate links.

~~~~~~~~~~~~~~~~~~~~~~~~~~~~~~~~~~~~~~~~~~~~~~~~~~~~

Join Simple Meals!

728x90

We love how Simple Meals has been saving family time for so many, and helping people put great food on the table each night! Join us for just $1/week!

[wp_eStore_subscribe_fancy id=28]

Heavenly Homemaker's Club Members: Access your homepage and all your fantastic resources here! Not a member yet? Please join us!

Simple Cheeseburger Hashbrown Cups (or Casserole)

April 29, 2018 by Laura 9 Comments

This post may contain affiliate links. For more information, please see our disclosure policy.

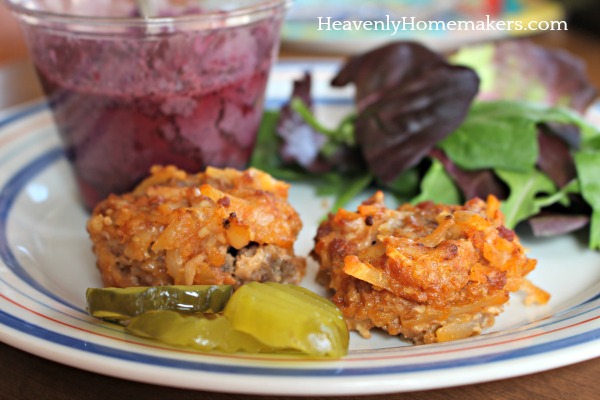
Sometimes I experiment with recipe ideas and they turn out to be big flops. You don’t know about these because they don’t get shared here, for all the obvious, not-so-tasty reasons. This Simple Cheeseburger Hashbrown Cup or Casserole recipe got rave reviews at our house, making it definitely blog worthy. How can cooking real food continue to get easier??!

Have I mentioned that I discovered Mr. Dells Frozen Hashbrowns at the grocery store and declare them to be a fabulous option? They contain one ingredient: Potatoes. Other frozen hashbrowns at the store have a slew of ingredients listed that I can’t pronounce. So either make your own frozen hashbrowns or see if you can find a brand like Mr. Dells that includes plain ol’ potatoes. I try to have big bags of these on hand at all times now as they are super convenient!

To make this recipe, simply brown meat and stir in the remaining ingredients. Spread mixture into a casserole dish (easy!!) or scoop the mixture into muffin tins (still easy but one more step). Bake and serve. Enjoy the deliciousness!

Simple Cheeseburger Hashbrown Cups or Casserole

Simple Cheeseburger Hashbrown Cups or Casserole
 
Save Print
Author: Laura
Serves: 24 cups or 6-8 servings
Ingredients
  • 1 pound ground beef, lamb, or turkey
  • 15-ounces frozen shredded hashbrowns
  • ½ - 1 cup ketchup (depending on how much your family likes ketchup)
  • 3 eggs
  • 3 Tablespoons dried minced onion
  • 2 cups shredded cheese (we like Colby jack or pepper jack best, but any variety will work!)
  • Sea salt and pepper to taste
Instructions
  1. Brown meat in a skillet until no longer pink.
  2. Mix cooked meat and remaining ingredients together in a bowl until well combined.
  3. For Cups: Scoop mixture into prepared muffin tins (I find that it works best to melt a bit of oil in each tin so that the baked nests pop right out!) Bake in a 400 degree oven for 30 minutes or until golden brown.
  4. For Casserole: Spread mixture into a 9x13 inch baking dish. Bake uncovered in a 350 degree oven for 45 minutes or until golden brown.
3.5.3229

Freezer Friendly!

Make this recipe into a casserole, cover, and freeze. When you’re ready to bake it, take it from the freezer, cover it with foil and slide it into a cold oven. Bake at 250 degrees for 2.5 hours or until bubbly.

Want more Simple Recipes?

  • Simple Baked Salmon and Asparagus
  • Simple Crock Pot Chicken Soup with a Kick
  • Simple Skillet Taco Pasta
  • Last-Minute Lentil Chili
  • Simple Sweet and Sour Baked Chicken Legs
  • 20-Minute Taco Soup
  • Simple Cheesy Baked Chicken
  • Simple Creamy Chicken Stew in the Crock Pot
  • Simple Italian Beef and Broccoli Skillet
  • Simple Bacon Ranch Chicken
  • Simple Hawaiian Crock Pot Chicken
  • Simple Taco Rice Dinner
  • Simple Last Minute Nacho Plate
  • Simple Chicken Cheeseballs with a Kick
  • Simple Beanie Weanies
  • Simple Crock Pot BBQ Spareribs
  • Simple Pizza Chicken Bake
  • Simple Italian Chicken and Green Bean Bake
  • Last Minute Creamy Bacon Spaghetti
  • Simple Hamburger Soup
  • Simple Parmesan Broiled Fish
  • Simple Overnight Saucy Crock Pot Chicken
  • Simple 15-Minute Meal
  • Simple Overnight Melt-in-Your-Mouth Beef Roast
  • Simple 3-Cheese Crock Pot Pasta
  • Simple Oven Fried Chicken
  • Simple Honey Mustard Chicken Legs
  • The Easiest Mashed Potatoes in the World
  • Simple Garlic Butter Shrimp
  • Simple Crunchy Ranch Chicken Strips
  • Simple Crock Pot Shredded Ranch Chicken (for salad or tacos)
  • Simple Crock Pot Pizza Casserole
  • Simple Barbecue Beef Roast
  • Simple Spanish Rice Bowls
  • Simple Roasted Rotiserie Chicken
  • Simple Green Chile Chicken
  • Simple Tex-Mex Creamy Chicken
  • Simple Waffle Omelets
  • Simple Crock Pot Taco Pasta
  • Simple Grilled Chicken
  • Simple Hawaiian Beef Roast
  • Simple Crock Pot Creamy Stew Meat
  • Simple Cheese Stuffed Burgers
  • Simple Hashbrown Casserole (For Instant Pot, Crock Pot or Oven!)
  • Simple Lasagna Casserole (For Instant Pot or Crock Pot)
  • Simple Chili Mac
  • Simple Bacon Cheeseburger Casserole
  • From Burrito Bar to Casserole (a 5-Minute Meal!)
  • Simple Bacon Cheeseburger Roll
  • Simple Garlic Parmesan Chicken Legs
  • Super Simple Lasagna
  • The Simplest White Chicken Chili
  • Simple Lentil Nachos
  • Simple Tuna Patties
  • Simple Banana Pancakes
  • Simple Crock Pot Applesauce BBQ Chicken
  • Simple Hashbrown and Egg Nests
  • Simple Cornbread Waffles with Chili
  • Simple Veggie Fritters
  • Simple Lemon Garlic Chicken Legs
  • Simple Noodle Soup
  • Simple Three Cheese Spaghetti
  • Simple Crock Pot Salsa Shredded Beef

Join Simple Meals!

728x90

We love how Simple Meals has been saving family time for so many, and helping people put great food on the table each night! Join us for just $1/week!

[wp_eStore_subscribe_fancy id=28]


Heavenly Homemaker's Club Members: Access your homepage and all your fantastic resources here! Not a member yet? Please join us!

Simple Crock Pot Salsa Shredded Beef (2 Ingredients!)

April 26, 2018 by Laura 1 Comment

This post may contain affiliate links. For more information, please see our disclosure policy.

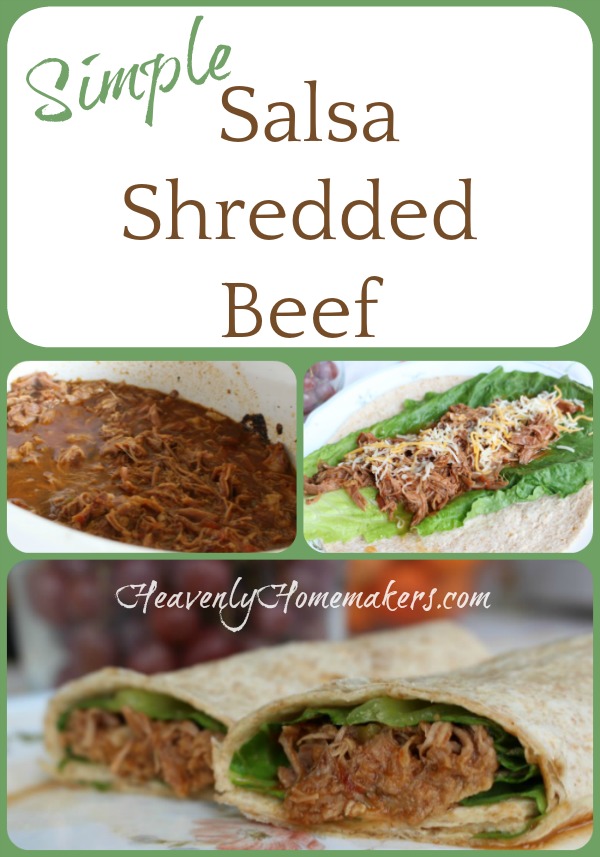
Ready to cook dinner while you’re sleeping? This Simple Crock Pot Salsa Shredded Beef idea is genius!

My Simple Overnight Melt-in-Your-Mouth Beef Roast has become a staple around here. So one night I thought, “Why can’t I try the same idea but use salsa instead of bbq sauce? Then we can have Mexi-Wraps for lunch tomorrow?

I love it when good ideas turn out amazing results! But I love it even more that this recipe is so easy your two year old can make it. My favorite is that this cooks while we’re sleeping so we can wake up and have a good meal ready to serve later in the day. Or if you prefer, start this cooking in your crock pot first thing in the morning and have an awesome meal ready at the end of the day.

Now, some have cautioned against putting frozen meat in a crock pot. I have no hesitation about this, and I think we all know I’m terrible about ever remembering to thaw meat. So if given the chance, I will put frozen meat into my crock pot because this saves brain power. Coffee can only do so much.

The work involved in making this Simple Salsa Shredded Beef includes none other than:

  1. Putting a frozen roast in a crock pot.
  2. Dumping on a jar of salsa.
  3. Letting it cook all night or all day.

Praise God, Glory Hallelujah.

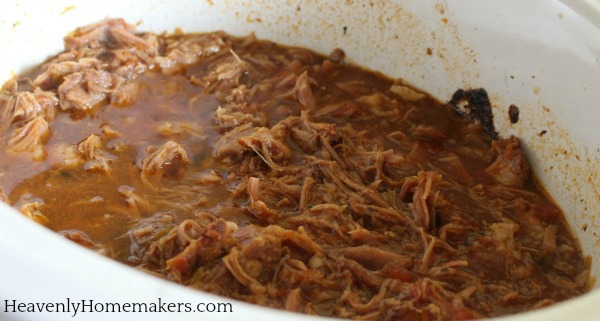
After cooking for 10-12 hours, this meat has become so flavorful and tender it practically falls apart before you even come near it with a fork. Shred it quickly, cry a joyful tear over how marvelous your meal is going to be, and serve this to your family with a smile. After all, you didn’t have to work hard to make this. So you still have energy to smile. What a gift.

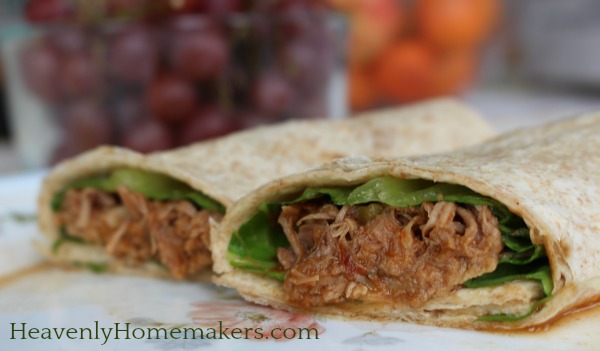
Use this Simple Salsa Shredded Beef as Mexi-Wraps in tortillas with taco/burrito fixin’s. Use it to make Simple Spanish Rice Bowls. Toss it into a Taco Salad. Eat it directly out of the crock pot. Who can help it?

Simple Crock Pot Salsa Shredded Beef

Simple Crock Pot Salsa Shredded Beef (2 Ingredients!)
 
Save Print
Author: Laura
Serves: 6-8
Ingredients
  • 3-4 pound beef or lamb roast
  • 16-ounces salsa
Instructions
  1. Place frozen or thawed roast into a crock pot.
  2. Pour salsa over the top.
  3. Cook in a crock pot on low for 10-12 hours if frozen. If thawed, cook for 8-10 hours on low.
  4. Shred meat and serve.
3.5.3229

Want even more Simple Recipes?

  • Simple Baked Salmon and Asparagus
  • Simple Crock Pot Chicken Soup with a Kick
  • Simple Skillet Taco Pasta
  • Last-Minute Lentil Chili
  • Simple Sweet and Sour Baked Chicken Legs
  • 20-Minute Taco Soup
  • Simple Cheesy Baked Chicken
  • Simple Creamy Chicken Stew in the Crock Pot
  • Simple Italian Beef and Broccoli Skillet
  • Simple Bacon Ranch Chicken
  • Simple Hawaiian Crock Pot Chicken
  • Simple Taco Rice Dinner
  • Simple Last Minute Nacho Plate
  • Simple Chicken Cheeseballs with a Kick
  • Simple Beanie Weanies
  • Simple Crock Pot BBQ Spareribs
  • Simple Pizza Chicken Bake
  • Simple Italian Chicken and Green Bean Bake
  • Last Minute Creamy Bacon Spaghetti
  • Simple Hamburger Soup
  • Simple Parmesan Broiled Fish
  • Simple Overnight Saucy Crock Pot Chicken
  • Simple 15-Minute Meal
  • Simple Overnight Melt-in-Your-Mouth Beef Roast
  • Simple 3-Cheese Crock Pot Pasta
  • Simple Oven Fried Chicken
  • Simple Honey Mustard Chicken Legs
  • The Easiest Mashed Potatoes in the World
  • Simple Garlic Butter Shrimp
  • Simple Crunchy Ranch Chicken Strips
  • Simple Crock Pot Shredded Ranch Chicken (for salad or tacos)
  • Simple Crock Pot Pizza Casserole
  • Simple Barbecue Beef Roast
  • Simple Spanish Rice Bowls
  • Simple Roasted Rotiserie Chicken
  • Simple Green Chile Chicken
  • Simple Tex-Mex Creamy Chicken
  • Simple Waffle Omelets
  • Simple Crock Pot Taco Pasta
  • Simple Grilled Chicken
  • Simple Hawaiian Beef Roast
  • Simple Crock Pot Creamy Stew Meat
  • Simple Cheese Stuffed Burgers
  • Simple Hashbrown Casserole (For Instant Pot, Crock Pot or Oven!)
  • Simple Lasagna Casserole (For Instant Pot or Crock Pot)
  • Simple Chili Mac
  • Simple Bacon Cheeseburger Casserole
  • From Burrito Bar to Casserole (a 5-Minute Meal!)
  • Simple Bacon Cheeseburger Roll
  • Simple Garlic Parmesan Chicken Legs
  • Super Simple Lasagna
  • The Simplest White Chicken Chili
  • Simple Lentil Nachos
  • Simple Tuna Patties
  • Simple Banana Pancakes
  • Simple Crock Pot Applesauce BBQ Chicken
  • Simple Hashbrown and Egg Nests
  • Simple Cornbread Waffles with Chili
  • Simple Veggie Fritters
  • Simple Lemon Garlic Chicken Legs
  • Simple Noodle Soup
  • Simple Three Cheese Spaghetti

Enjoy all these recipes without effort when you become a Simple Meals member! Every week we’ll send you a great menu plan full of Simple Recipes like this one. We’ll equip you with a grocery list. We’ll break everything down so that your meal prep is as simple as possible. We’ll give you bonus tips and recipes and freebies. And this is all for just $1 each week. You’ll love it!

[wp_eStore_subscribe_fancy id=19]

Heavenly Homemaker's Club Members: Access your homepage and all your fantastic resources here! Not a member yet? Please join us!

Super Moist Flourless Brownies

April 22, 2018 by Laura 22 Comments

This post may contain affiliate links. For more information, please see our disclosure policy.

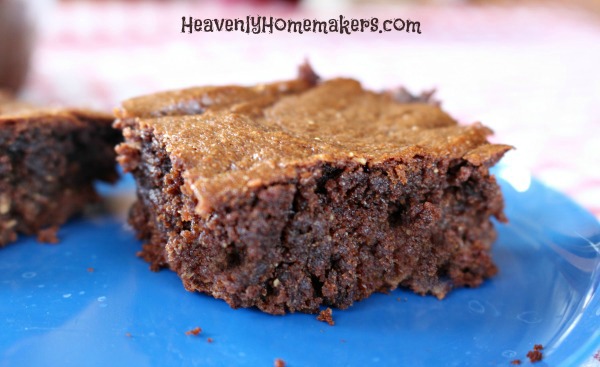
From now on, these Super Moist Flourless Brownies are the ones I will be making for my family. I’m very happy to share that there are no bananas involved in the making of this recipe. Allow me to explain how I really feel about this…

Deliver me from all recipes that are naturally sweetened with bananas. (See also: Pudding made creamy because of avocados.)

I love the idea; I think it is beautiful. What a fantastic way to sneak in fruits and veggies by adding them to our treats! But I’ve tried the banana-peanut butter-cocoa powder ice cream and I just can’t make myself like it. The same is true of the pancakes made with only bananas and eggs. Chocolate pudding made by blending avocados? I just can’t.

Am I picky? I like to think not. For goodness sake, I’m the girl who eats fresh spinach straight out of the container as a snack (basically this is me being too lazy to actually take time to get out bowl and a fork). So picky I am not. But I just can’t get into eating blended frozen bananas that are pretending to be ice cream.

Should we broach the subject of brownies made with black beans? I think this is a genius idea, but my children are less than impressed. Most of my healthy attempts at creating a low-sugar-no-flour brownie have fallen ridiculously short of, “Mom, make them this way every time!”

Until now.

The ingredients in these Super Moist Flourless Brownies won’t even shock you. There’s no secret ingredient that will cause you to cringe or question whether or not your family might actually try one.

You’ll be wonderfully amazed! These brownies actually have the taste and texture of brownies that come from a box, only of course, the real food ingredients make them even more delicious! My kids took a bite of these and couldn’t believe that these brownies were “actually healthy.” Our first pan lasted a very short time.

Look at these ingredients! How good can we feel about feeding these brownies to our kids? Good enough to serve them for breakfast? Absolutely.

Super Moist Flourless BrowniesYum

Super Moist Flourless Brownies
 
Save Print
Author: Laura
Serves: 12
Ingredients
  • 1½ cups (12-ounces) Almond Butter
  • ½ cup honey
  • ½ cup unsweetened cocoa powder
  • 2 eggs
  • ½ teaspoon baking soda
Instructions
  1. Stir all ingredients together until well combined.
  2. Spread batter into a buttered 8x8 inch baking dish.
  3. Bake in a 350 degree oven for 13-15 minutes. (Remove them from the oven when they are just slightly underdone so they come out moist!)
3.5.3251

Can you sub out peanut butter for almond butter? I don’t know why not. In fact, I think that would create a delicious chocolate-peanut butter brownie worth writing home about.

Enjoy the simplicity of this recipe! Get excited about the nourishment and energy the brownies provide. Savor eating brownies for breakfast with your morning coffee. Delight in the fact that there are no bananas involved in the making of this treat. As for me and my house, we’ll save the bananas for creating smoothies and banana bread.

~~~~~~~~~~~~~~~~~~~~~~~~~~~~~~~~~~~~~~~~~~~~~~~~~~~~~~~

Did you notice that this new Super Moist Flourless Brownie recipe includes only 5 ingredients? How does this keep happening?? (OK, I admit. I’ve been on a High Five Recipe rampage. We all win when I get on a kick like this!)

Want 111 more recipes that include 5 or fewer real food ingredients? Here’s our best collection!

[wp_eStore_fancy1 id=32]

~~~~~~~~~~~~~~~~~~~~~~~~~~~~~~~~~~~~~~~~~~~~~~~~~~~~~~~~

Also, I’ve got to be sure you all see this incredible deal that is only being offered a few more days! 6 eBooks for $6!!

[wp_eStore_fancy1 id=31]

Heavenly Homemaker's Club Members: Access your homepage and all your fantastic resources here! Not a member yet? Please join us!

How to Feed Guests Who Can’t Eat Gluten

April 19, 2018 by Laura 8 Comments

This post may contain affiliate links. For more information, please see our disclosure policy.

Gluten intolerance has become a big issue in America. I could go into all the reasons for this, but for now, let’s just thank Jesus for being our bread of life. :) Regarding this very serious gluten situation, when serving food to friends or family members who can’t eat gluten, it is very important that we know how to extend hospitality so we can prevent our guests and loved ones from becoming sick.

Sick?? Yes. While some simply experiment with eating gluten free to see if it is a diet that helps them feel better or lose weight, there are some who have a solid diagnosis of Celiac Disease or other gluten intolerance that mean that they must avoid all gluten, all the time, no matter what.

What is gluten?

Gluten is the protein found in wheat, rye, and barley. Gluten can also be found in regular oats that have been processed in a facility that processes wheat, rye, or barley. (Oats that have been clearly labeled “Gluten Free Oats” are safe.)

How to Feed Guests Who Can’t Eat Gluten

Truth: A person with Celiac Disease can’t eat even one tiny morsel of something that contains gluten without getting sick. We’re talking about sauce that has been thickened with a tiny bit of wheat flour, chicken that has been breaded with crushed wheat crackers, or even a small nibble of communion bread at church. There’s no such thing as “don’t worry – this only has a little bit of wheat in it” when it comes to feeding someone who must eat gluten free. For these people, gluten free eating isn’t an option, it is a must.

Sooooo, be aware of this and be cautious! But don’t be afraid. I’ve learned over the past decade how to easily feed my friends who can’t eat gluten. I don’t even need to buy special food to do this! I simply cook regular food, making sure to read all labels and avoid wheat, oats, barley, and rye.

Easy Meals to Feed Gluten Free Friends

You’d be amazed at how many foods are naturally gluten free! When in doubt stick with meat, fruit, and veggies. For more ideas, check out this huge list of simple meal ideas! They are gluten free without even trying!

  • Simple Baked Salmon and Asparagus
  • Simple Crock Pot Chicken Soup with a Kick
  • Last-Minute Lentil Chili
  • Simple Sweet and Sour Baked Chicken Legs
  • 20-Minute Taco Soup
  • Simple Cheesy Baked Chicken
  • Simple Creamy Chicken Stew in the Crock Pot
  • Simple Italian Beef and Broccoli Skillet
  • Simple Bacon Ranch Chicken
  • Simple Hawaiian Crock Pot Chicken
  • Simple Taco Rice Dinner
  • Simple Last Minute Nacho Plate
  • Simple Chicken Cheeseballs with a Kick
  • Simple Beanie Weanies
  • Simple Crock Pot BBQ Spareribs
  • Simple Pizza Chicken Bake
  • Simple Italian Chicken and Green Bean Bake
  • Simple Hamburger Soup
  • Simple Parmesan Broiled Fish
  • Simple Overnight Saucy Crock Pot Chicken
  • Simple 15-Minute Meal
  • Simple Overnight Melt-in-Your-Mouth Beef Roast
  • Simple Honey Mustard Chicken Legs
  • The Easiest Mashed Potatoes in the World
  • Simple Garlic Butter Shrimp
  • Simple Crock Pot Shredded Ranch Chicken (for salad or tacos)
  • Simple Barbecue Beef Roast
  • Simple Spanish Rice Bowls
  • Simple Roasted Rotiserie Chicken
  • Simple Green Chile Chicken
  • Simple Tex-Mex Creamy Chicken
  • Simple Waffle Omelets
  • Simple Grilled Chicken
  • Simple Hawaiian Beef Roast
  • Simple Crock Pot Creamy Stew Meat
  • Simple Cheese Stuffed Burgers
  • Simple Hashbrown Casserole
  • Simple Bacon Cheeseburger Casserole
  • Simple Bacon Cheeseburger Roll
  • Simple Garlic Parmesan Chicken Legs
  • The Simplest White Chicken Chili
  • Simple Lentil Nachos
  • Simple Tuna Patties
  • Simple Crock Pot Applesauce BBQ Chicken
  • Simple Hashbrown and Egg Nests
  • Simple Veggie Fritters
  • Simple Lemon Garlic Chicken Legs

Easy Snacks to Feed Gluten Free Guests

  • No Bake Cookie Cups (5 minute prep!)
  • Cream Cheese Salsa Dip (2 ingredients!)
  • Parmesan Crisps (so easy you won’t believe it!)
  • Sweet and Salty Almonds or Pecans
  • Chocolate Cheesecake Fudge
  • Creamy Italian Veggie Dip
  • No Bake Chocolate Chip Cookie Bars
  • Honey Sweetened Flourless Peanut Butter Bars (3 ingredients!)
  • Easy Cheesy Popcorn
  • Creamy Chocolate Fruit Dip

What to Avoid When Cooking For People Who Can’t Eat Gluten

Again, the ingredients to stay away from when cooking gluten free are wheat, barley, rye, and regular oats. In addition, you need to avoid:

  • Previously opened ingredients: There might be wheat bread crumbs in your jar of peanut butter or on a used stick of butter. Start fresh to be sure your food isn’t contaminated with gluten!
  • Baking stones and cast iron: These can absorb gluten, so it’s best to use stainless steel or glass pans and bowls.
  • Wooden cutting boards and wooden spoons: Again, these can absorb gluten. Use stainless steel utensils and a plastic cutting board instead.

A Few More Gluten Free Cooking Tips

  • If you want to serve bread with your meal for guests who can eat gluten, place it away from the food that is gluten free.
  • It’s a good idea to cover a baking pan with parchment paper before putting food on it in an effort to protect it from gluten contamination.
  • If you use your blender or mixer, be sure to wash it thoroughly first.
  • If you’re planning to grill meat (a wonderful choice for cooking for GF friends!) be sure to clean the grill grates before cooking meat so you can keep the meat gluten free. (This is important if you ever use your grill to heat up bread or Texas toast.)
  • Don’t be offended if the person you’re feeding asks to see packages, ingredients lists, or if they ask specifics about how something is cooked! Their health depends on it and they must be assured that the food they are eating is safe for them!

Gluten Free Friends: What are your favorite meals? Are there any other tips you’d appreciate the rest of us knowing about?

Remember, cooking gluten free food truly isn’t difficult once you realize how many thousands of food options there are that are naturally gluten free. Again, be cautious and courteous, but don’t be afraid. You’ll find that making gluten free meals really is as easy as cooking meat, steaming veggies, and slicing fruit!

Heavenly Homemaker's Club Members: Access your homepage and all your fantastic resources here! Not a member yet? Please join us!

Simple Chocolate Chip Cookie Dough Treats

April 17, 2018 by Laura 6 Comments

This post may contain affiliate links. For more information, please see our disclosure policy.

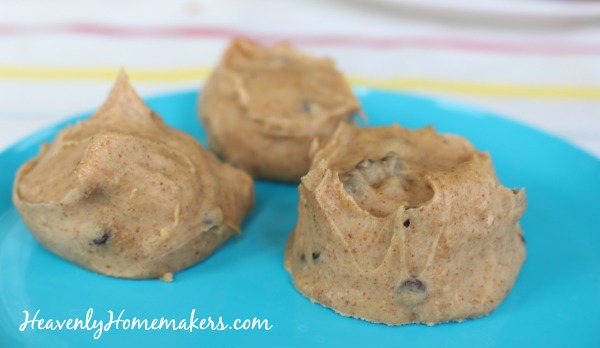
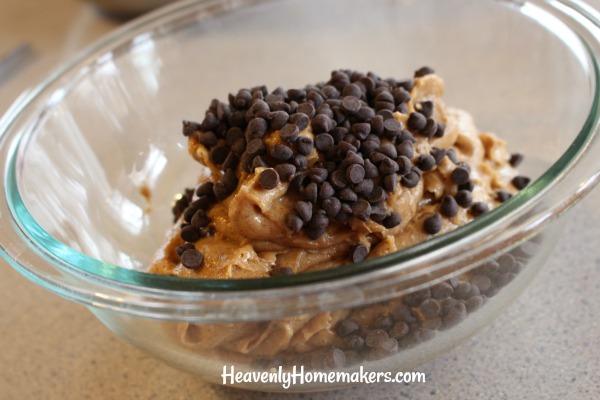
I’ll admit it. My family took one look at these Simple Chocolate Chip Cookie Dough Treats sitting in the fridge and asked, “Mom, what are those things that look like Poop Emojis?!”

What can I say? I whipped them up and plopped them down and this is what they turned out looking like. You don’t even want to make them now, do you?

I promise they taste delicious! I suppose if you took more time to make them pretty, you can avoid this conundrum at your house. But what’s the fun in that? Forever and always, these snacks will be called Poop Emojis at our house. I don’t even remember what the actual title of this recipe is. Chocolate Chip Cookie something or other?? Meh, the new name is much more fun.

I suppose I’ll find a little maturity here and tell you that these Poo Chocolate Chip Cookie Dough Treats are naturally grain/gluten free, full of protein, are low in sugar, are full of healthy fats, and are a very filling and delicious snack. There you go. See, I can be a grown up when I want to.

{Giggles and pokes an elbow into your ribs while showing you this picture}

I am so sorry. I can’t even. Apparently today, I’m a nine-year old boy. Um, so uh, just whip the ingredients, fold in the chocolate chips, and then freeze the mixture into these funny looking globs and with that, I must stop writing words and just give you the recipe.

Simple Chocolate Chip Cookie Dough Treats

Simple Chocolate Chip Cookie Dough Treats (Low Sugar, Grain Free, 5 Ingredients)
 
Save Print
Author: Laura
Serves: 12
Ingredients
  • 8 ounces softened cream cheese
  • 12 ounces almond butter (1½ cups)
  • ½ cup softened butter
  • 30 drops liquid stevia, 3 Tablespoons real maple syrup, or a combination of both
  • 2 Tablespoons mini chocolate chips
Instructions
  1. Combine cream cheese, almond butter, butter, and sweetener in a high power blender or in a bowl with a hand mixer, whipping until smooth.
  2. Fold in chocolate chips.
  3. Scoop mixture onto a parchment paper-lined or silicone lined cookie sheet.
  4. Freeze for 30 minutes.
  5. Transfer treats to an air tight container and store in the fridge.
3.5.3229

What do I have to say for myself?

If you can’t beat ’em, join ’em?

I’ll go read my Bible now.

~~~~~~~~~~~~~~~~~~~~~~~~~~~~~~~~~~~~~~~~~~~~~~~~~~

Want more awesome recipes that only include 5 or fewer ingredients? We’re pretty excited about this gem!

[wp_eStore_fancy1 id=32]

Heavenly Homemaker's Club Members: Access your homepage and all your fantastic resources here! Not a member yet? Please join us!

How to Have a Successful Baking Day

April 15, 2018 by Laura 5 Comments

This post may contain affiliate links. For more information, please see our disclosure policy.

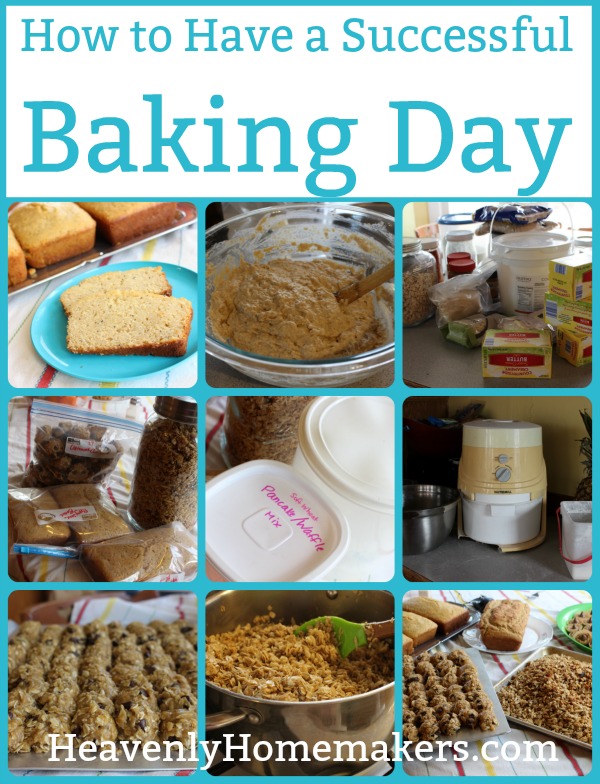
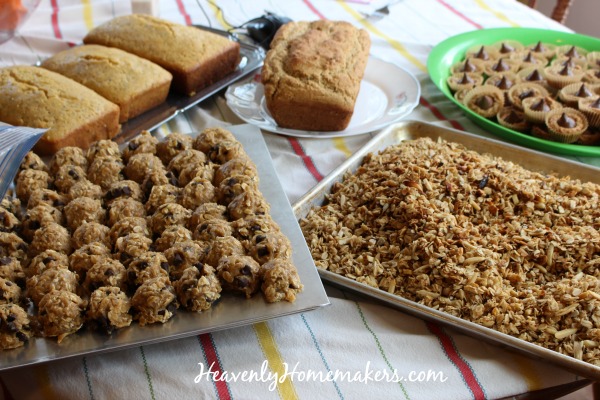
Just like my grandma used to do, sometimes I like to have a big baking day in an effort to crank out food for busy days ahead. My most recent baking day happened right after our basketball season ended and just before our soccer season started. I was feeling the crunch to get ahead before life turned crazy again. Allow me to share pictures of this adventure and my best tips for having a successful baking day!

How to Have a Successful Baking Day

  1. Block out several hours to focus on being in the kitchen.
  2. Make a plan. Write a list of items you want to bake.
  3. Don’t bite off more than you can chew. (Literally, because of the baking. I’m so funny.)
  4. Gather ingredients so you can be efficient. (Many baking ingredients overlap in recipes, so it’s nice to get out what you need and leave them out to use in a variety of recipes.)
  5.  Plan simple meals for the day or plan to serve leftovers for lunch and/or dinner. I’ve found that it’s too difficult to cook regular meals and bake extra food all in one day!

Ready to see how my recent baking day played out?

First, I made a list of baked goods I wanted and needed to make.

  • Stove-Top Granola (x2)
  • Orange Glazed Poppyseed Bread (x2)
  • Oatmeal Chocolate Chip Cookie Dough Balls (x2)
  • Flourless Peanut Butter Cookies (x4)
  • Pancake Mix and Muffin Mix

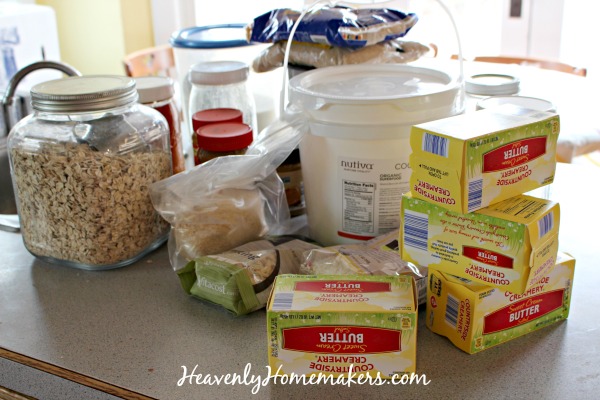
I gathered all my ingredients.

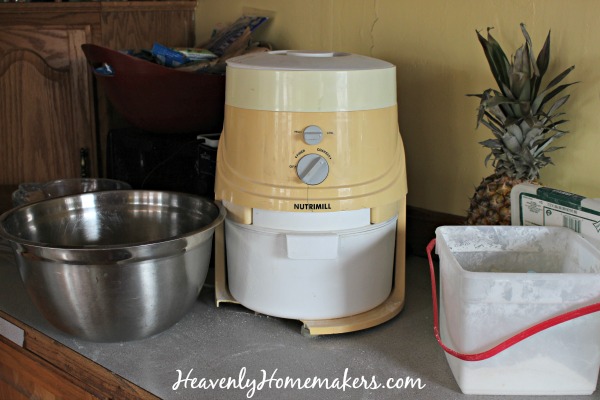
I ground two rounds of flour, both Soft White Wheat (pastry flour). My poor Nutrimill has seen better days, but it still gets the job done!

Once flour was ground and all other ingredients were gathered, I mixed up a double batch of Orange Glazed Poppyseed Bread. I put it into the oven and realized I’d buttered one-too-many bread pans. What’s a girl to do?

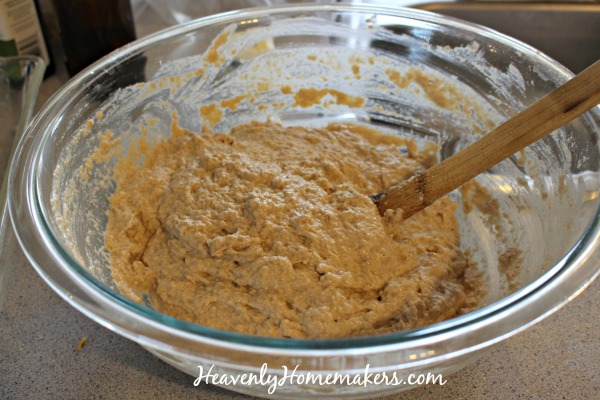
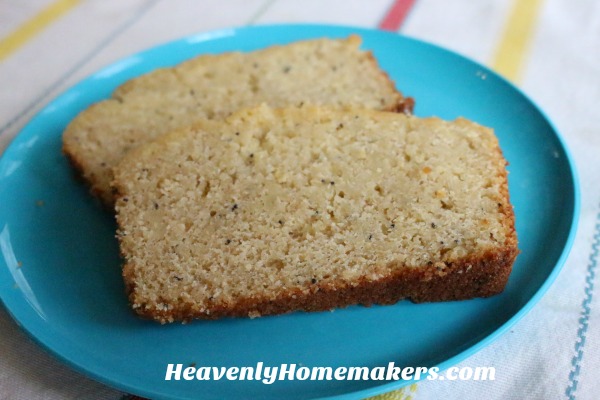
I decided to stir up a batch of Stir-and-Pour Bread to fill my extra bread pan. It’s wayyyyyy too easy! (It’s a yeast bread recipe so I needed to use hard white wheat for this one. I had some on hand in the freezer already, so this made mixing up this bread very simple!)

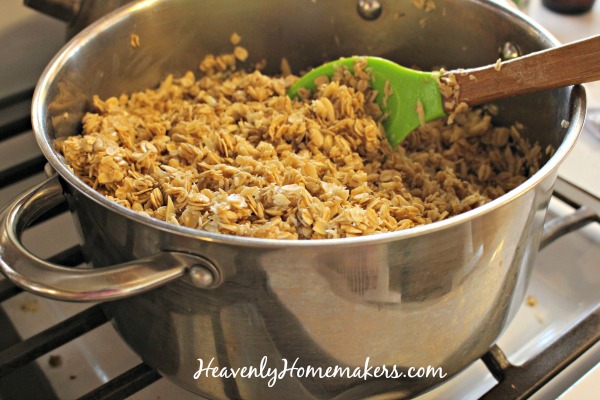
With the Poppyseed Bread in the oven and the Stir and Pour Bread mixed up and rising, I started a double batch of Stove-Top Granola.

Once done, I moved the Granola off the stove and poured it onto a cookie sheet to dry a bit before transferring it to a jar. The Stir and Pour Bread went into the oven and I paused my baking to do a Biology lesson with my kids. But wait!! Why not get two jobs done at one time?? While I was reading Biology, I put my kids to work unwrapping Hershey kisses for my Flourless Peanut Butter Cookies. (I’d picked up a few packages of kisses the day after Valentine’s Day – what a score!)

Biology finished and boys onto their other school work, I headed back and mixed up a double batch of Oatmeal Chocolate Chip Cookies. I frozen them all in cookie dough balls to have on hand for an upcoming weekend when we were hosting teens.

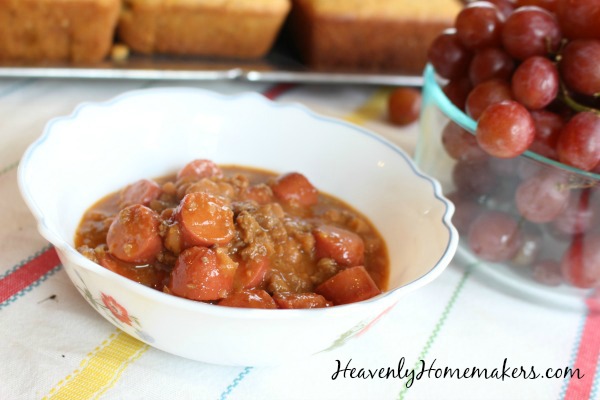
Suddenly I realized I was starving, so I prepped a very easy lunch of Beanie Weanies. #noshame

Next, I cleaned my kitchen. Why? Because after all that baking, it was a mess. Also, next on my baking agenda was Flourless Peanut Butter Cookies. I wanted to keep these gluten free to serve at a high school gathering. Three of our high school youth group need to eat gluten free, and these cookies are perfect! But not with all the wheat flour flying around my kitchen. So I cleaned up so I wouldn’t cross-contaminate with wheat before baking a quadruple batch of these easy cookies!

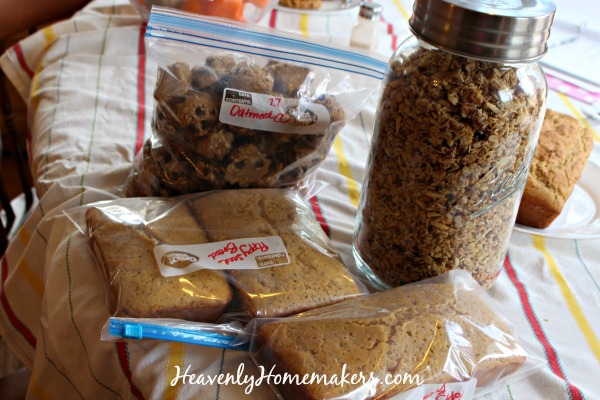
Breads done, granola done, cookies done…I packaged everything up for the fridge, counter, or freezer.

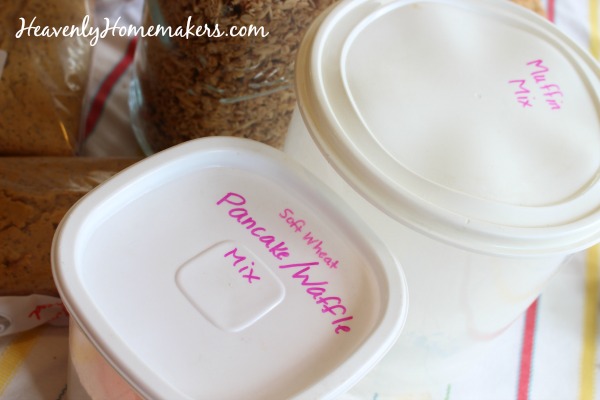
Finally, I ground one more batch of flour so I could fill my Muffin Mix and Pancake Mix containers. Having these on hand saves me tons of time and effort, and these are our favorite mixes of the collection.

You can bet I needed to do some extra kitchen cleaning after all these hours baking! I had my kids mix up Tuna Salad for dinner, which we ate on my freshly baked Stir and Pour Bread. Then we headed out for our boys’ Choir Concert. Never a dull moment.

Why Have a Baking Day?

  1. Because if you’re going to make a mess, you might as well make a big one.
  2. Because many baking ingredients overlap between recipes. It’s nice to get out ingredients like baking powder, oats, butter, and flour and use them for several different recipes before putting them away.
  3. Because taking a few hours to bake in one day provides baked goods to last you for many days.
  4. Because it’s nice to have baked goods in your freezer to pull out for your family’s needs on busy days or to share with others who have needs you become aware of.
  5. Because everyone likes cookies.

What are your favorite foods to bake?

Heavenly Homemaker's Club Members: Access your homepage and all your fantastic resources here! Not a member yet? Please join us!

The Best Oatmeal Chocolate Chip Cookies

April 12, 2018 by Laura 9 Comments

This post may contain affiliate links. For more information, please see our disclosure policy.

If we had to pick a favorite cookie at our house, these Oatmeal Chocolate Chip Cookies would be the winners.

Hoping for low sugar recipe? Welllllll, this one isn’t so much low in sugar. This is the recipe I make when I have a house full of teenagers or college students. This is the recipe I make in bulk to keep in the freezer for all our cookie hospitality needs. This is the recipe that is my go-to because I can make it in my sleep. You can be sure I have definitely made these in my sleep before. What can I say?

My favorite things to do when making this recipe is 1) double it and 2) freeze cookie dough balls so I can bake them fresh as needed.

Once I’ve frozen the cookie dough balls, I transfer the balls to a gallon-sized freezer bag. When we want/need fresh cookies, we pull out a few and bake them. This saves a lot of time and dirty dishes! It also means I’m prepared for last minute guests. Need a quick dessert? All I have to do is pull out cookie dough balls and bake them. Perfect!

The Best Oatmeal Chocolate Chip Cookies

The Best Oatmeal Chocolate Chip Cookies
 
Save Print
Author: Laura
Serves: 24
Ingredients
  • 1 cup melted butter
  • 1½ cups brown sugar or sucanat
  • 2 eggs
  • 1 teaspoon baking soda
  • ½ teaspoon sea salt
  • ½ teaspoon vanilla extract
  • 2 cups rolled oats
  • 2 - 2½ cups whole grain flour (I use freshly ground hard white wheat)
  • 2 cups chocolate chips
Instructions
  1. In a large mixing bowl, stir butter and sugar together.
  2. Add eggs, baking soda, salt, and vanilla and stir well.
  3. Mix in oats and flour (starting with 2 cups of flour and adding more until correct cookie dough consistency is reached)
  4. Fold in chocolate chips.
  5. Scoop dough onto a cookie sheet leaving 2 inches between each scoop.
  6. Bake in a 350 degree oven for 10-12 minutes or until cookies are golden brown.
3.5.3229

Bonus: This recipe calls for whole grain flour! This doesn’t really make the cookies healthy, but at least all the ingredients are real food. That counts for something!

What’s your favorite cookie recipe at your house?

Heavenly Homemaker's Club Members: Access your homepage and all your fantastic resources here! Not a member yet? Please join us!

The Best Orange Glazed Poppyseed Quick Bread

April 10, 2018 by Laura 3 Comments

This post may contain affiliate links. For more information, please see our disclosure policy.

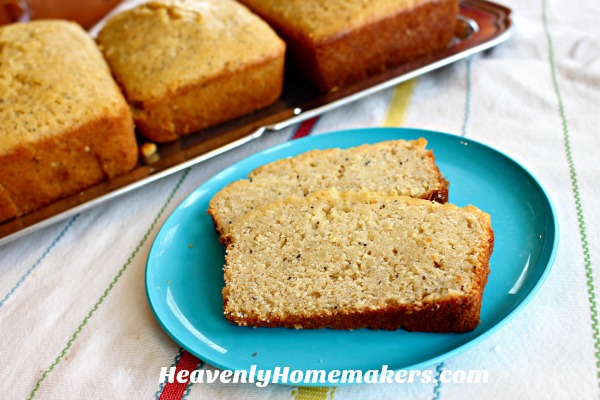
This Orange Glazed Poppyseed Quick Bread will shock you, especially when you see that it is made with whole wheat flour. How can something made with whole wheat be so moist? Ahh, let me tell you athe secrets.

First, I believe a huge factor in making this bread delicious while baking with whole grain is that I use freshly ground soft white wheat. There is a big difference in wheat flour ground from hard red berries (which makes heavy, dark whole wheat flour), wheat flour ground from hard white berries (which makes lighter whole wheat flour), and wheat flour ground from soft white berries (which becomes a light pastry flour – still whole wheat!).

Read more details about these varieties of wheat here. I use hard and soft white wheat berries, depending on what I’m baking. (Hard wheat must be used in recipes that call for yeast.) For recipes like this Orange Glazed Poppyseed Quick Bread, I use soft wheat berries. The pastry flour this makes is so light it seems like I’m using all-purpose white flour. But it’s whole grain – and full of nutrients!

Beyond the kind of flour used in this recipe, I believe the Orange Glaze is what gives this bread an extra measure of moistness! Mix a little orange juice with honey, add almond and vanilla extract, and this glaze is incredible!

And speaking of almond extract, I’m going to make this ingredient the MVP of this Poppyseed Bread recipe. Wow, does the almond extra take this bread from a one-star to a five! This, from a girl who loves vanilla extract. Sorry, vanilla. It’s almond that wins the prize this time. :)

Orange Glazed Poppyseed Quick Bread

The Best Orange Glazed Poppyseed Quick Bread
 
Save Print
Author: Laura
Serves: 2 loaves
Ingredients
  • 3 cups whole wheat pastry flour
  • ¾ cup sucanat, brown sugar, or raw sugar
  • 1 ½ teaspoons baking powder
  • 1 ½ teaspoons sea salt
  • 1 ½ cups milk
  • 1 ½ teaspoons vanilla extract
  • 1 ½ teaspoons almond extract
  • 3 eggs
  • 1 cup melted butter or coconut oil
  • 1 ½ Tablespoons poppy seeds
  • ORANGE GLAZE:
  • ¼ cup orange juice
  • ¼ cup honey
  • ½ teaspoon vanilla extract
  • 1 teaspoon almond extract
Instructions
  1. Mix flour, sucanat or sugar, baking powder, and salt.
  2. Add eggs, milk, extracts, oil, and poppy seeds.
  3. Mix well.
  4. Pour batter into 2 well-buttered loaf pans (or six small loaf pans).
  5. Bake 45-60 minutes at 350°.
  6. FOR GLAZE:
  7. Whisk ingredients together until smooth.
  8. Pour mixture over loaves of poppyseed bread about 3 minutes after they have been removed from the oven, but before removing the loaves from the baking pans.
3.5.3229

I guess it’s clear that while this is a Poppyseed Quick Bread recipe, poppy seeds aren’t the ingredient that gets my attention. Those are important too, but whole wheat pastry flour, orange glaze, and almond extract are the key to making this recipe absolutely amazing!!

  • Read more about grinding flour in a grain mill here.
  • Not able to grind your own flour right now? You can buy Whole Wheat Pastry Flour like this.
  • Want to make your own Vanilla Extract? Here’s how.
  • Need Almond Extract for this recipe? Here’s my favorite brand.
  • Not sure where to buy poppy seeds? I either buy them in bulk from Azure Standard, or I find them at Amazon.

By the way, I love doubling this recipe and freezing extra loaves to pull out and serve another time. This bread doesn’t get dry in the freezer and thaws to be a perfect convenience food!

Some of these links are my affiliate links.

Heavenly Homemaker's Club Members: Access your homepage and all your fantastic resources here! Not a member yet? Please join us!
« Previous Page
Next Page »

Join Our Community!

 Facebook Twitter E-mail Instagram Pinterest

Popular Posts

~ Will All of the Real Moms Please Stand Up?
~ Easy! Stir-and-Pour Whole Wheat Bread
~ How to Make Gatorade
~ 31 Real Food Breakfast Ideas
~ Dear Teenage Girls...
~ When Mom Takes a Step Back
~ The Inexpensive Health Insurance We Love!
~ Let's Talk Real Food Grocery Budgets

Check out our latest posts!

  • Big Family Food and Fun: August 30-September 5, 2026
  • Big Family Food and Fun: August 23-29, 2026
  • Big Family Food and Fun: August 16-22, 2026
  • Big Family Food and Fun: August 9-15, 2026
  • Big Family Food and Fun: August 2-8, 2026
Home  ~  Simple Meals  ~  Club Membership  ~  Shop  ~  Privacy Policy  ~  Disclosure  ~ Contact

Copyright © 2026 · Beautiful Pro Theme on Genesis Framework · WordPress · Log in