Heavenly Homemakers

Encouraging women in homemaking, healthy eating and parenting

  • Home
    • About
    • FAQs
  • Recipes
    • Bread and Breakfast
    • Condiments
    • Dairy
    • Main Dishes
    • Side Dishes and Snacks
    • Desserts
    • Gluten Free
    • Instant Pot
    • Crock Pot
    • Heavenly Homemaker’s Weekly Menus
  • Homemaking
    • Real Food Sources
  • Store
  • Contact
    • Advertise
    • Disclosure
    • Privacy Policy
  • Simple Meals
  • Club Members!

Spiced Holiday Tea

December 19, 2021 by Tasha Hackett 2 Comments

This post may contain affiliate links. For more information, please see our disclosure policy.

Tasha made this Spiced Holiday Tea for us one day and we fell in love with it!

holiday spiced tea

Spiced Holiday Tea

by Tasha Hackett

Or as I like to call it the drinkable potpourri. I’ve been simmering water with lemon rinds and a cinnamon stick for the past month just to enjoy the smell, but why only use it for the smell when you can drink it, too?

This spiced tea was introduced to me the first time I went home for the Thanksgiving holiday with my then boyfriend. He’s now my husband, and I won’t claim this drink has brought us together because for some odd reason, he doesn’t like it. Which is completely fine with me and his mother, because that means more for us. My mother-in-law always has a pot of this drink simmering on the stove over the holidays.

Sweeten your spiced tea to taste!

 

I have stayed true to my mother-in-law’s recipe in all except the sugar content. The original recipe that she used calls for a full cup. But I’ve decreased it to 1/2 cup in year’s past and nobody noticed. This year I will add even less, but please don’t tell them!

To get started, first boil a full gallon of water in a large pot on the stove. Then turn the burner down and add the tea bags. Please never boil the tea! Follow the directions on the package of your tea to brew a full gallon—I use decaf so we can enjoy anytime of day and share with the kids without any caffeine messing up our sleep.

Once you’ve removed the tea bags, add in 5 cinnamon sticks, 10 whole cloves, and one of each limeade and orange juice concentrate. (Not straight lime juice, but the sweetened limeade in the freezer section with other fruit juices.) Basically you just used tea instead of water to mix the juice. You do not need to add extra water with the juice concentrates. Add in the sugar to taste, approximately 1/2 cup more or less. Wait to taste for sweetness until the juice concentrates are mixed in.

Let the holiday spiced tea simmer—but not boil—for at least an hour.

This tea is better tomorrow.Yum

After we’ve all enjoyed a cup, we store the rest in the fridge overnight, keeping the cloves and cinnamon sticks in the pitcher and the tea gets a stronger spiced flavor throughout the holiday weekend. We enjoy it cold or reheated. I can’t really tell you which is my favorite because I like it both ways!

What’s your favorite holiday drink?


Tasha HackettTasha Hackett is a friend of Laura and has officially been writing since she asked for a journal for her 10th birthday. Her first novel, a historical Christian romance, Bluebird on the Prairie was released just this year, 2021, and she looks forward to sharing many more of her stories with the world. For now, you can read more about her and her fiction from her website: www.TashaHackett.com. 

Holiday Spiced Tea
 
Save Print
Prep time
15 mins
Cook time
1 hour
Total time
1 hour 15 mins
 
Author: Tasha
Ingredients
  • One gallon of tea brewed to instructions on tea package (regular or decaf)
  • Limeade concentrate
  • Orange juice concentrate
  • 5 cinnamon sticks
  • 10 cloves
  • ½ cup sugar (more or less to taste)
Instructions
  1. Brew the tea in a large pot on the stove.
  2. Once the tea bags are removed, add the rest of the ingredients.
  3. Simmer for a minimum of one hour, being careful not to boil.
  4. Enjoy warm or cold.
  5. Store leftovers in the fridge.
3.5.3251

Heavenly Homemaker's Club Members: Access your homepage and all your fantastic resources here! Not a member yet? Please join us!

80+ Christmas Side Dish Recipes

December 8, 2021 by Bethany Lotulelei Leave a Comment

This post may contain affiliate links. For more information, please see our disclosure policy.

Not sure which side dish to take to your family Christmas dinner this year? We can help! Here’s a list of 80+ of our favorites that Bethany put together!

80+ Easy Side Dishes for Christmas

Can I let you in on a little secret?

My favorite Christmas treat is always found on the side dish table.

Yes, I love the turkey and the ham and the desserts (you know I love the dessert!) but there’s something extra special about being able to eat a plate full of mashed potatoes, salads, stuffings, and dips. I think it is because I don’t usually prepare a lot of side dishes for our every day life (I tend to pull out easy side dishes, like Laura suggests in this post). Adding fresh fruits and veggies is the easiest way to help my family eat healthier, and add variety to our meals!  So when Thanksgiving and Christmas roll around, I love being able to enjoy the potluck of side dishes. There’s just so much goodness there!!

If you are hosting this year or even if you are simply looking for a dish or two to contribute to your family’s holiday celebration, we’ve got you covered! Here’s a master list of my favorite side dishes for Christmas. 

Delicious Veggie Side DishesYum

  • Whipped Sweet Potatoes
  • Sweet Potato Fries
  • Mashed Potatoes
  • Crispy Cheese Crackers
  • Honey Glazed Carrots
  • Instant Pot Mashed Potatoes
  • Cheesy Mashed Potatoes
  • Green Bean Casserole
  • Bean Casserole
  • Cheesy Vegetable Casserole
  • Baked Potatoes in the Crock Pot
  • Cheesy Cauliflower Cakes
  • Cheesy Vegetable Casserole
  • Creamy Mac and Cheese
  • Creamy Scalloped Potatoes
  • Ranch Potato Wedges

Delightful Dips

  • White Queso – My Current Favorite!
  • Simple Bean and Cheese Salsa Dip
  • Creamy Chocolate Fruit Dip
  • Creamy Italian Veggie Dip
  • Cream Cheese Salsa Dip
  • Bacon Ranch Chip Dip
  • French Onion Dip
  • Bacon Tomato Dip
  • Black Bean Salsa
  • Easy Veggie Dip
  • Healthier Cheese Dip 
  • Hot Spinach and Artichoke Dip
  • Nacho Cheese Pretzel Dip
  • Easy Guacomole
  • Easy Cheesy Bean Dip
  • Hamburber Sauerkraut Dip
  • Cream Cheese Fruit Dip
  • Tomato Dip with Baked Tortilla Chips

Fun Fruit Side Dishes

  • Cranberry Sauce
  • Pineapple Fluff Salad
  • Cream Cheese Fruit Dip
  • Hawaiian Fruit Salad
  • Blue Raspberry Salad
  • Fruit + Creamy Chocolate Fruit Dip

Yummy Bread Side Dishes

  • Stuffing Muffins
  • Homemade Rolls
  • Stir-and-Pour Rolls
  • Sour Cream Pumpkin Bread
  • Chocolate Swirl Bread
  • Honey Oat Bread
  • One Hour No Knead Yeast Rolls
  • Soft Pretzel Bites
  • Easy Chocolate Cheesecake Muffins
  • Easy Chocolate Chip Cheesecake Muffins
  • Easy Banana Cheesecake Muffins
  • Easy Pumpkin Cheesecake Muffins
  • Eggnog Muffins
  • Whole Wheat Butterhorns
  • Whole Wheat Cinnamon Rolls
  • Whole Wheat Sourdough Biscuits
  • Sweet Potato Streusel Muffins
  • Pumpkin Chocolate Chip Bread
  • Pumpkin Chocolate Chip Muffins
  • No Knead Whole Wheat Bread
  • Oatmeal Breakfast Bars
  • One Hour Whole Wheat Yeast Rolls
  • Bacon Cheese Muffins
  • Bacon Cheese Muffins

Easy Salads

  • Bacon, Egg, and Avocado Salad
  • Black Bean Taco Salad
  • BLT Chopped Salad
  • Easy Taco Salad
  • Chicken Chef Salad
  • Tuna Salad
  • Perfect Pasta Salad
  • Simple Bacon Broccoli Salad
  • Easy Blue Raspberry Salad
  • Strawberry Spinach Salad with Vinaigrette
  • Easy Salsa Chicken Salad
  • Strawberry Christmas Salad
  • Pineapple Fluff Salad
  • Build-a-Fruit-Salad Bar
  • Hawaiian Fruit Salad
  • Simple Strawberry Fluff Salad
  • Angeled Eggs

What’s your favorite Christmas side dish? Share below!

Heavenly Homemaker's Club Members: Access your homepage and all your fantastic resources here! Not a member yet? Please join us!

Simple DIY Coconut Milk

November 24, 2021 by Tasha Hackett 1 Comment

This post may contain affiliate links. For more information, please see our disclosure policy.

Simple DIY Coconut Milk

by Tasha Hackett

diy coconut milk

Dairy-free milk is good to have on hand these days. This simple DIY coconut milk is going to wow you, I’m sure of it. Even if you’re not on a special diet, the chances are high you know someone who is! Of all the nut milk options, coconut milk is the one I’ve landed upon for all my dairy-free baking and cooking. After almost a year of eating paleo to combat migraines, I’m embarrassed at how long it took me to try to this simple method. (Hi! Tasha, here.) If I wanted a yogurt or cream substitute, I used canned coconut milk or coconut cream. If I wanted simple coconut milk for smoothies and baking, I bought the jugs and ignored any added ingredients.

I finally tried making my own coconut milk.Yum

Don’t get too excited. I’m not out there foraging coconuts and shredding the meat into milk. #aintnobodygottimeforthat. But I am side-stepping buying water in a jug. I had convinced myself that making my own was going to be too complicated. Silly Tasha. Once I mustered the proper sense of adventure and ingenuity, there’s really been no turning back.

Not only is this simple DIY coconut milk unadulterated with added ingredients, it is significantly cheaper, and saves the landfill and the factories from dealing with those obnoxious plastic/cardboard jugs. And because I Subscribe and Save my canned coconut milk from Amazon, I don’t even have to think about buying it. It just magically appears on my porch. Poof!

Simple Coconut Milk Recipe

I’m really stepping out on a limb here to call this a recipe. But if Laura can tell you to pour salsa on the chicken in the crock pot and call it a recipe, than we’re calling this a recipe.

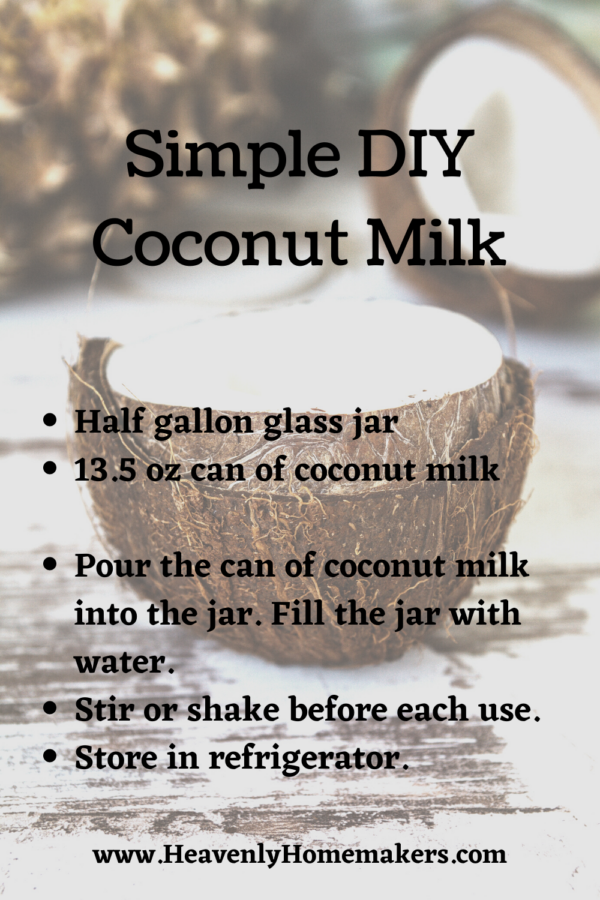
You will need a half gallon glass jar and a can of coconut milk. I currently use this brand. I’ll go over all the steps very slowly for you, just be sure you can keep up: Open the canned coconut milk. Pour it into the jar. Fill the jar the rest of the way with water and leave an inch or so at the top. Put the lid on the jar. In case you missed it, that last step is very important. A lidless jar is hazardess. Shake your lidded jar before using the coconut milk in smoothies, pancakes, muffins, and any recipe that calls for milk! As it happens, I pour a splash of it into my coffee each morning.

DIY Coconut Milk Recipe in Pictures

Because this recipe is very complicated, I decided to go the extra mile and show you the process step-by-step. I hope this clears things up for you.

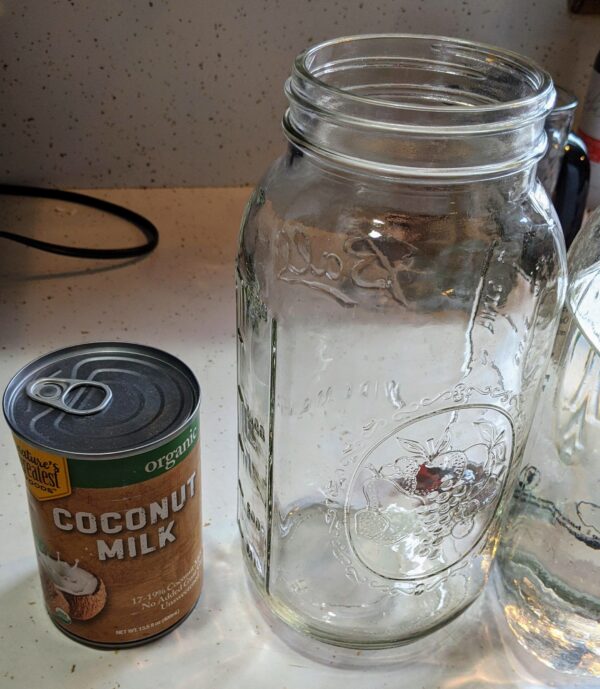
Set out your supplies.

canned coconut milk

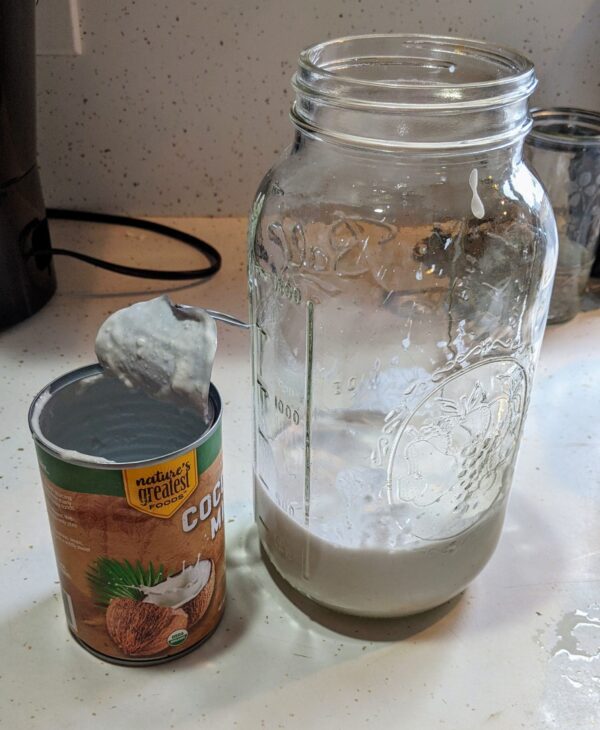
Open the canned milk and pour it into the half gallon glass jar.


diy coconut milk

Fill the remainder of the jar with water.

homemade coconut milk

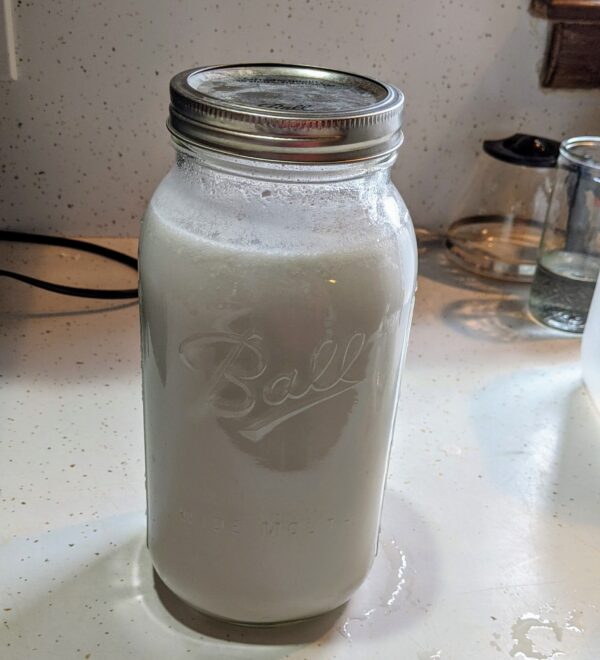
I hope you don’t mind, but I combined a step in this picture. See how the lid is on the jar?

Store in the refrigerator and give it a shake before using. That’s all, kids! I hope you enjoyed learning a new skill that will impress all of your friends the next time you’re at a party in need a parlor trick.

homemade coconut milk


Tasha HackettTasha Hackett is a friend of Laura and loves to eat homemade chocolate bars, potato chips, and yes, even salsa on chicken. A homeschooling mom of four, author, and recovering DIY addict, she loves to take a walk on the prairie as time allows. Her debut novel, a historical romance set in 1879 Nebraska released Summer 2021: Bluebird on the Prairie. (Print and Kindle options available.) Though Tasha likes to do All The Things, most of her time is spent with four chatty children and an incredibly supportive husband. They give her the kind of love people write books about.

To learn more about Tasha and her works of fiction, find her at www. TashaHackett.com.

Heavenly Homemaker's Club Members: Access your homepage and all your fantastic resources here! Not a member yet? Please join us!

The BEST Pumpkin Bars

November 17, 2021 by Laura 4 Comments

This post may contain affiliate links. For more information, please see our disclosure policy.

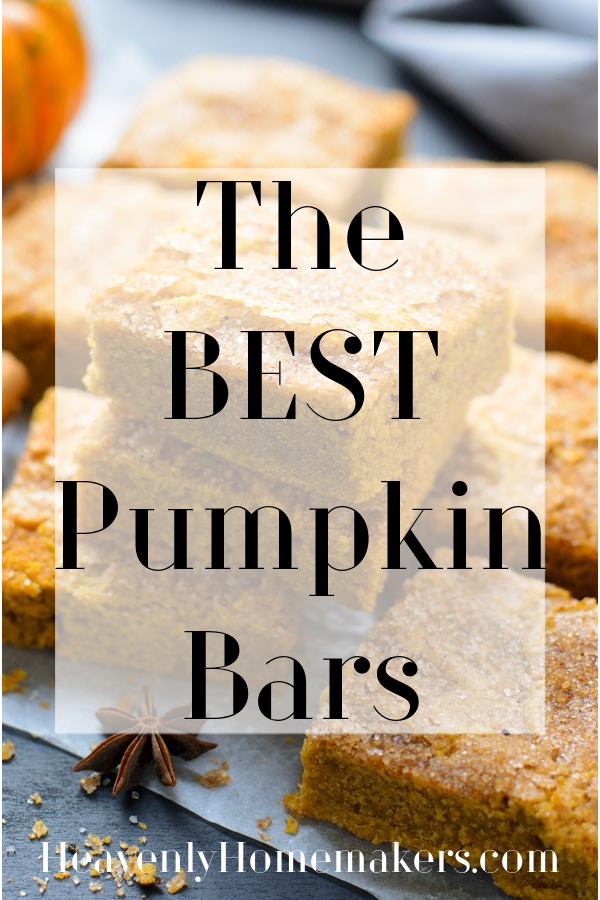
Are these really the BEST Pumpkin Bars? I guess you’ll have to try them to see!

I love how moist these are! And how cool is it that they are made with whole grains and no one can tell?! (I use freshly ground soft white wheat, which is a whole wheat pastry flour, to make these.) I love that they are lightly sweetened instead of loaded with sugar. And this:

I LOVE THE CLOVES.

There’s something about the flavor that the cloves gives this recipe that makes is so very good. Cinnamon? I’m always all in with the cinnamon! Sometimes I skip other spices just so I can enjoy the cinnamon in a recipe.

But don’t leave out the cloves in this one. Oh, it makes the Pumpkin Bars – well – it makes them the BEST Pumpkin Bars.

The BEST Pumpkin BarsYum

The BEST Pumpkin Bars
 
Save Print
Author: Laura
Serves: 15
Ingredients
  • 2 cups whole grain flour
  • ¾ cup brown sugar or sucanat
  • 1 teaspoon baking powder
  • ¼ teaspoon sea salt
  • 2 teaspoons ground cinnamon
  • 1 teaspoon ground cloves
  • 4 eggs
  • 16-ounce can pureed pumpkin
  • 1 cup melted coconut oil
Instructions
  1. Mix together flour, sugar, baking powder, salt, cinnamon, and cloves.
  2. Add eggs, pumpkin, and oil, stirring until batter is smooth.
  3. Pour batter into a 9x13 inch baking dish.
  4. Bake in a 350 degree oven for 30-40 minutes or until a toothpick inserted in the center comes out clean.
3.5.3251

Here are more Pumpkin Recipes you’ll love. Twenty more to be exact!

  1. Pumpkin Spice
  2. Make-Ahead Pumpkin Donuts
  3. Pumpkin Breakfast Cake
  4. Easy Low Sugar Pumpkin Whip
  5. Pumpkin Cheesecake
  6. Easy Flourless Pumpkin Muffins
  7. Pumpkin Chocolate Chip Bread
  8. Whole Wheat Pumpkin Chocolate Chip Muffins
  9. Pumpkin Pie
  10. Cream Cheese Pumpkin Muffins
  11. Pumpkin Bars
  12. Low-Sugar Pumpkin Roll-Out Cookies
  13. Simple Pumpkin Pancakes
  14. Simple Pumpkin Waffles
  15. Chocolate Pumpkin Cake
  16. Whole Grain Pumpkin Bundt Cake
  17. Warm Pumpkin Custard
  18. Pumpkin Chocolate Chip Cake
  19. Pumpkin Pecan Pie Squares
  20. Cheater Cheater Pumpkin Eaters
Heavenly Homemaker's Club Members: Access your homepage and all your fantastic resources here! Not a member yet? Please join us!

The Best Chocolate Pumpkin Cake

October 27, 2021 by Laura 2 Comments

This post may contain affiliate links. For more information, please see our disclosure policy.

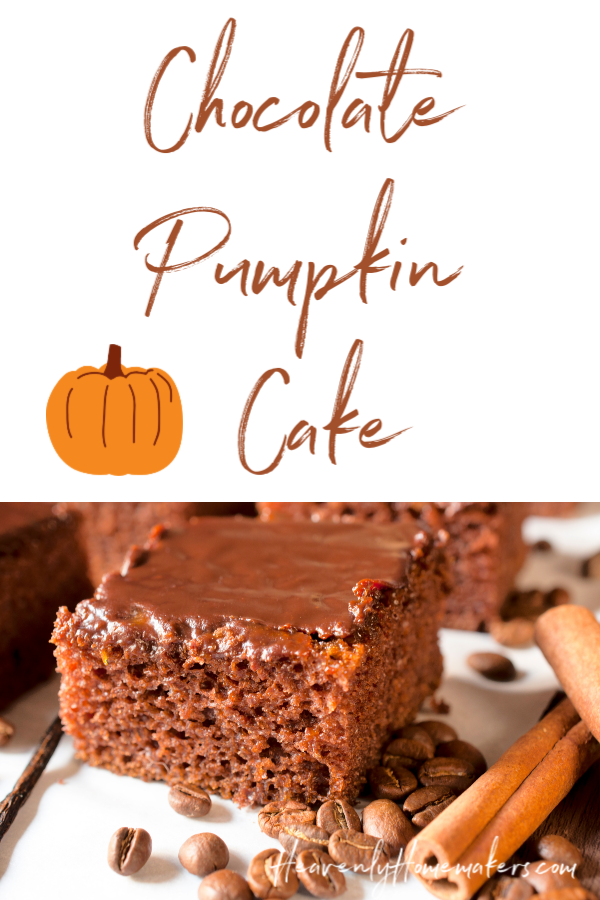
This Chocolate Pumpkin Cake is so good, I decided to repost it so you would be sure to see it and try it this fall!

I love any treat that includes ingredients healthy enough for us to serve for breakfast.

What? Cake for breakfast? Oh yes. All year long. And since this one includes pumpkin, it’s a step above. #veggiecake

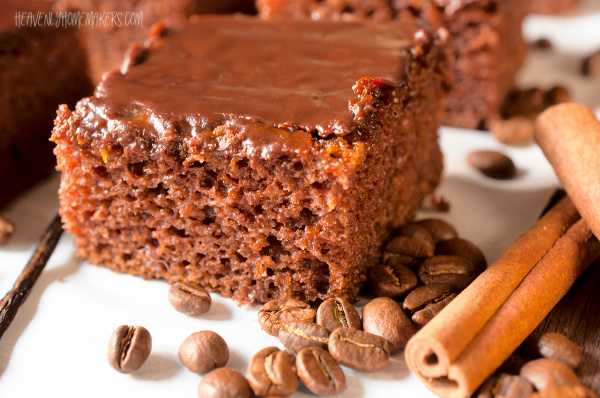
Of course, the pumpkin in this recipe makes it super moist. And the chocolate in this recipe? Well, that makes it chocolate. Need I say more?

You’ll love that this cake is topped with a thin layer of Honey-Sweetened Chocolate Frosting. Sigh…while I sure do love summer best, NOTHING can beat fall baking!!

Chocolate Pumpkin CakeYum

The Best Chocolate Pumpkin Cake
 
Save Print
Author: Laura
Ingredients
  • 1 cup melted coconut oil
  • 1 cup water
  • 4 Tablespoons unsweetened cocoa powder
  • 2 cups whole wheat pastry flour
  • ½ cup sucanat
  • dash of sea salt
  • 1 teaspoon ground cinnamon
  • 1 teaspoon baking soda
  • 1 cup pumpkin puree
  • 2 eggs
Instructions
  1. In a large mixing bowl, stir together flour, sucanat, cinnamon, salt, and baking soda.
  2. Set aside. In a saucepan, bring oil, water, and cocoa to a boil.
  3. Pour liquid mixture into the bowl with the dry ingredient mixture.
  4. Stir well.
  5. Add pumpkin puree and eggs, mixing well.
  6. Pour batter into a 9x13 inch baking pan.
  7. Bake in a 350° oven for 20-25 minutes or until a toothpick inserted in the middle comes out clean. Allow cake to cool completely before frosting.
3.5.3251


Low Sugar Chocolate Frosting

 
Save Print
Author: Laura
Ingredients
  • ½ cup butter
  • 4 Tablespoons cocoa powder
  • 2 Tablespoons milk
  • 2-4 Tablespoons honey (sweeten this to your taste)
  • 1 teaspoon vanilla extract
Instructions
  1. In a small saucepan combine butter, cocoa, milk, and honey.
  2. Cook and stir over low heat until ingredients are well combined and mixture begins to thicken slightly.
  3. Removed from heat.
  4. Stir in vanilla.
  5. Spread over cooled cake.
3.5.3251


Do you love fall baking like I do? Will you be eating this cake for breakfast? :)

Heavenly Homemaker's Club Members: Access your homepage and all your fantastic resources here! Not a member yet? Please join us!

Easy Lemon Chicken Zucchini for Breakfast

October 24, 2021 by Tasha Hackett Leave a Comment

This post may contain affiliate links. For more information, please see our disclosure policy.

As promised, in the What To Do with All the Zucchini post, here’s the actual recipe to one of my new favorite breakfasts. Since I have to give the thing a name, I settled on Easy Lemon Chicken Zucchini. But really we call it the “lemon zucchini thing.” Is it easy? Or is it simple? Is it simply easy? Or easily simple? No matter which way you want to look at it, it’s real food that fuels my body and gets me ready for another awesome day. Bonus: It’s paleo! Gluten free, dairy free, soy free, sugar free… but not boring or complicated.

Chicken and zucchini for breakfast?

Do you have to eat it for breakfast? Duh, no. But for some reason I do. That’s about all I have to say on that. Eat it for any old meal you like, but I needed more grain-free breakfast food ideas. The paleo diet is not at all restricting once you get the hang of it, but the western culture has this idea that breakfasts are for all the sugar and carbs, or either all the protein and fats… and as it turns out, there is no authority that says you can’t have chicken and zucchini for breakfast, therefore I do.

Easy Lemon Chicken ZucchiniYum


lemon chicken squash

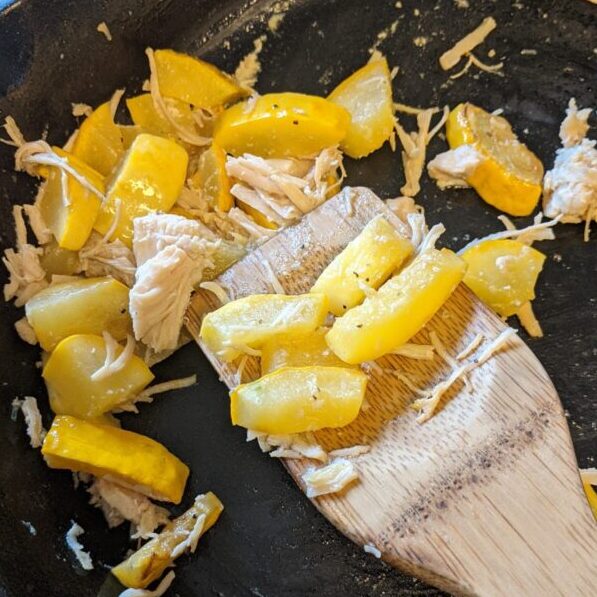
We used a yellow summer squash for this one!

If you’re using a cast iron skillet, remember to slowly pre-heat it so it’s ready to go. (Check out this post for tips on how to use a cast iron skillet.)Pre-heat for a few minutes and then melt 3-4 tablespoons of butter. While the skillet is heating and the butter melting, chop a summer squash—a yellow summer squash or a zucchini both work interchangeably in this recipe. OR A CUCUMBER. It sounds nuts to me, but my dear, sweet husband accidentally chopped a cucumber for this recipe instead of a zucchini and I could smell that it was a cucumber and I could see that it was a cucumber and by-golly I could taste that it was a cucumber, but it was surprisingly delicious. (He did not believe me that it was a cucumber until he tasted the final product for himself.) So we laughed and then ate our breakfast, but now we know… a cucumber fried in a bit of butter in place of squash is still yummy.

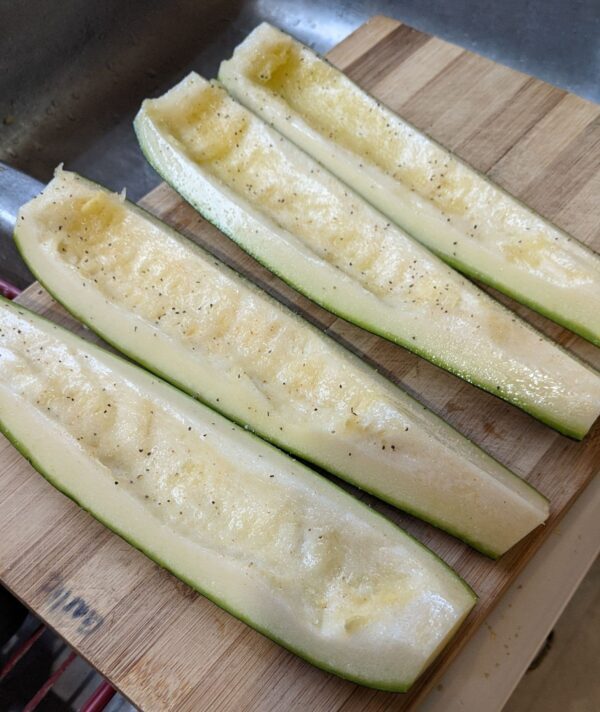
Okay, the skillet is pre-heated and the butter is melted, now toss in the squash. (I like to scrape out the middle if it’s a larger zucchini because I think it gets soggy and I don’t like it. ) Let it cook for two minutes and then flip and stir it about. When it’s right on the edge of being done add in a can of chicken. Season with salt and pepper and pour 1-2 tablespoons of lemon juice over the top. It will sizzle and smell amazing.

Lemonize at your own risk.

Ben made this recipe the first two times. (Once with the cucumber in disguise and once with a zucchini.) When I made it, he wasn’t around to ask how much lemon juice to use. Thankfully I’m a pretty smart gal and I used two tablespoons. I even measured it out on purpose to make sure I could tell you exactly how much I used. Two tablespoons was the perfect amount for me. As long as you stir it up well. If you’re scared, just start with one and see how it goes.

What are your thoughts on squash for breakfast?


Tasha HackettTasha Hackett is Laura’s friend and author of the Christian romance Bluebird on the Prairie set in 1879, Nebraska. Though she used to be a closet Cheeto eater, she’s been on a strict paleo died for months to help fight migraines (with great success). She often pretends to be a ballerina while unloading the dishwasher and has a hard time going more than a few days without any homemade chocolate bars. Her favorite thing is writing with hope and humor to encourage and entertain women. She spends most of her time with four chatty children and an incredibly supportive husband; they give her the kind of love people write books about.

To find out more about Tasha and her fiction writing, connect with her at www.TashaHackett.com.

Heavenly Homemaker's Club Members: Access your homepage and all your fantastic resources here! Not a member yet? Please join us!

Easy Cinnamon Crumb Cake

September 29, 2021 by Laura 2 Comments

This post may contain affiliate links. For more information, please see our disclosure policy.

This Easy Cinnamon Crumb Cake is a lovely treat with coffee or tea.

You may notice that this cake recipe is very similar to my Strawberry Shortcake recipe. One of my favorite things is to take a tried-and-true recipe, then tweak it to turn it into something new and delicious.

That’s how this Easy Cinnamon Crumb Cake came to be. Take a simple cake recipe, add cinnamon, then top it with cinnamon and brown sugar. SO GOOD.

Easy Cinnamon Crumb CakeYum

Easy Cinnamon Crumb Cake
 
Save Print
Author: Laura
Serves: 9
Ingredients
  • 1⅓ cups whole wheat flour (I use freshly ground whole wheat)
  • 1 teaspoon baking powder
  • 1 teaspoon ground cinnamon
  • 2 eggs
  • ½ cup honey
  • ⅓ cup oil (I use coconut oil)
  • 1 teaspoon vanilla extract
  • ½ cup milk
  • 1 Tablespoon ground cinnamon plus 1 Tablespoon brown sugar
Instructions
  1. Mix together flour, baking powder, and cinnamon.
  2. Add in eggs, honey, oil, vanilla, and milk.
  3. Mix well.
  4. Pour into a well buttered 8×8 inch baking pan or a round cake pan.
  5. Sprinkle cinnamon/sugar mixture over the top.
  6. Bake at 350° for 20-25 minutes.
3.5.3251

Here are some more tasty fall treats you may enjoy:

  1. No-Knead Cinnamon Rolls with Honey’d Orange Glaze
  2. Cinnamon Smoothie
  3. Cinnamon Nectarine Muffins
  4. Quick Mix Honey Cinnamon Muffins
  5. Cinnamon Apple Toast
  6. Snickerdoodles
  7. Cinnamon Swirl Bread
  8. Baked Apple Pancake
  9. Snickerdoodle Muffins
  10. Vanilla Muffins with Cinnamon Crumb Topping
  11. Apple Pie Filling
  12. No-Bake Snickerdoodle Bites
  13. Low-Sugar Carrot Cake
  14. Zucchini Carrot Bread
  15. Applesauce
  16. Baked Apple Pancake
  17. Apple Pie Filling
  18. Salted Caramel Apple Crisp
  19. Cream Cheese Fruit Dip (to go with your apples)
  20. Applesauce Bread
  21. Apple Fruit Leather
  22. Build a Fruit Salad Bar
  23. Apple Crisp
  24. Apple Butter
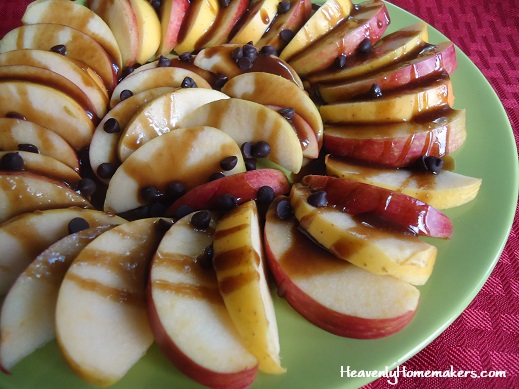
  25. Apple Nachos
  26. Pumpkin Chocolate Chip Bread
  27. Pumpkin Chocolate Chip Muffins
  28. Pumpkin Donuts
  29. Warm Pumpkin Custard
  30. Multi-Grain Pumpkin Waffles and Pancakes
  31. Pumpkin Chocolate Chip Cake
  32. Pumpkin Pecan Pie Squares
  33. Pumpkin Pie
  34. Pumpkin Breakfast Cake
  35. Pumpkin Cheesecake
  36. Pumpkin Pie Bars
  37. Pumpkin Cream Cheese Muffins
  38. Pumpkin Spice French Toast Casserole
  39. Pumpkin Spice Roll-Out Cookies
  40. Pumpkin Chocolate Chip Cheesecake Muffins


Heavenly Homemaker's Club Members: Access your homepage and all your fantastic resources here! Not a member yet? Please join us!

What to do with All the Zucchini

August 27, 2021 by Tasha Hackett Leave a Comment

This post may contain affiliate links. For more information, please see our disclosure policy.

Trying to figure out what to do with all the zucchini?

what to do with all the zucchini

Yum

It’s zucchini season! I didn’t grow any this year. Sad. But other people did and around this time each year people are giving them away because when a zucchini plant does well, it does well. And when it doesn’t, we all curse the vine-borer grubs in unison and praise God for grocery stores and our friends who somehow fought off the nefarious and disgusting grubs. Ah-hem. Back to the yummy part.

What to do with all the zucchini?

Zucchini might be one of our favorite versatile vegetables. Here’s what I do with it:

  1. Chop it up and pan fry with salt and pepper and other stuff to make a quick skillet dinner: a.) garlic, onions, mushrooms, shrimp. b) garlic, onions, beef, cabbage. c.) garlic, onions, tomatoes, parmesan cheese. You get the idea: cook it and eat it for dinner with some meat and garlic and onions.
  2. Shred (or use the food processor to chop) and bake it into muffins, brownies, pancakes, waffles, breads, etc. Some people freeze the shredded zucchini to use for later. I have done this and I NEVER have good luck with it later. It gets all weepy and soggy and then I get weepy and never use it. Best of luck to you if you decide to freeze it. I’d rather bake the bread and freeze that instead.
  3. Cut in half, scrape out the middle and make pizza boats. (Broil, then melt on your pizza toppings. Dip in pizza sauce.)
  4. Slice in half, or chop, and roast, broil, or grill with oil, salt, and pepper and just eat it!
  5. Use a zoodle thingy and make noodles. Easy Alfredo and shrimp used to be my favorite with this.
  6. Have I ever been tired of zucchini? No, I have not.
  7. This is my announcement: I will take your extra zucchini.

Don’t let all the zucchini go to waste, let’s start baking!

Of course, Laura already put together many of her favorite zucchini recipes, but that was ages ago and you may have forgotten about it. Click through some of those recipes or search “zucchini” on this site for more great ideas.

Are you a zucchini lover like me? I used to only be a zucchini bread (which is usually cake, let’s not kid ourselves) kind of girl. But then I grew up and realized that as a vegetable it can take on the flavor of butter and garlic and I do so love butter and garlic. Here are some great recipes for you to try as the zucchini crop comes in.

Simple Oven-Baked Pizza Nachos

Finely chopped and baked over the nachos is a great way to sneak more veggies into this meal.

Last Minute Stir-Fry

Frozen chopped zucchini will be a little soggier than fresh, but it holds up better than shredded, OR just add a few fresh ones to your frozen veggie bags.

Zucchini Waffles

This is a pumpkin recipe. I know. You can sub one squash for the other. It will be fine. Really. Many popular baked zucchini recipes have so much sugar in them they may as well be cake… try a less-sugar option and top with just a few drops of maple syrup, honey, or nut butter.

Have zucchini for breakfast!

Why have we decided that most vegetables are for lunch and dinner? Here’s a quick breakfast that I’ve made many times already this summer: In a hot skillet I melt butter, fry up a chopped summer squash (yellow or green), add in a can of chicken (because it’s breakfast and people are hungry for the food), salt and pepper and (here’s the secret ingredient), a tablespoon or so of lemon juice. You must not forget the lemon juice. Once the chicken is warmed and the lemon juice has sizzled for a few seconds, we eat and dance and go about our day warm and well-fed.

In hindsight, I will need to make that one into an actual recipe post for you. You will need to be reminded of it again because it is so delicious.

Do tell, what is your favorite way to eat this amazing and versatile vegetable?


book cover of bluebird on the prairie Tasha Hackett is a friend of Laura and author of Bluebird on the Prairie, a historical romance set in an 1879 Nebraska town. Zeke has his sights set for California, but Eloise prefers the quiet safety of her home. Is it possible they’re both searching for the same things? Find this heart-warming romance wherever books are sold.

To find out more about Tasha and her world of historical fiction, connect with her at www.TashaHackett.com.

Heavenly Homemaker's Club Members: Access your homepage and all your fantastic resources here! Not a member yet? Please join us!

Instant Pot Whole Chicken

August 22, 2021 by Bethany Lotulelei Leave a Comment

This post may contain affiliate links. For more information, please see our disclosure policy.

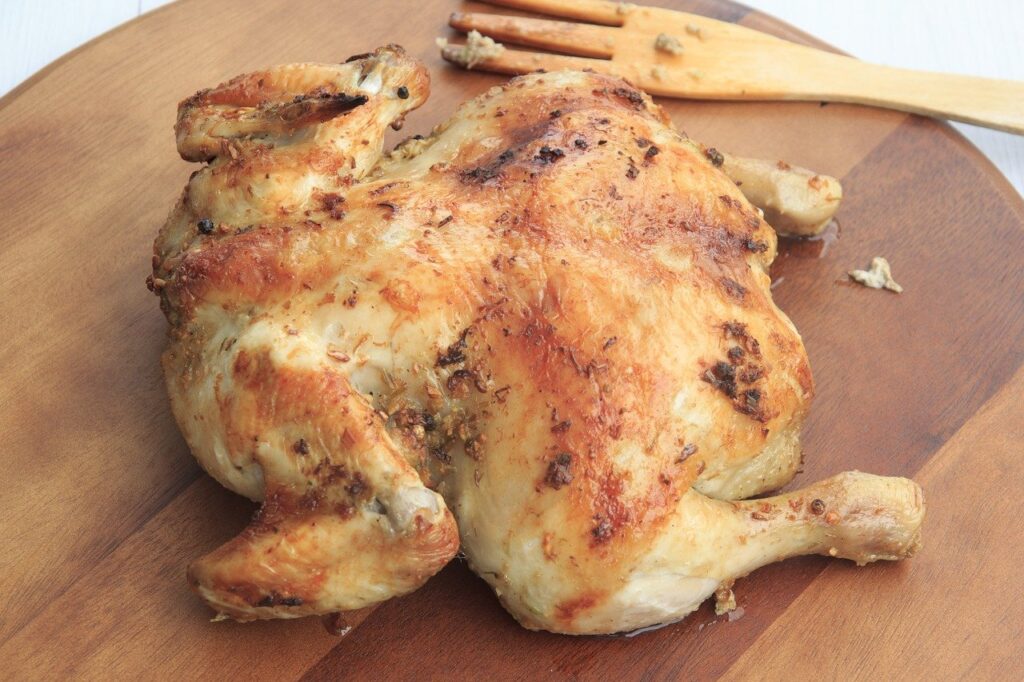
Did you know you can cook a whole chicken in your Instant Pot? This is one of my favorite time savers!

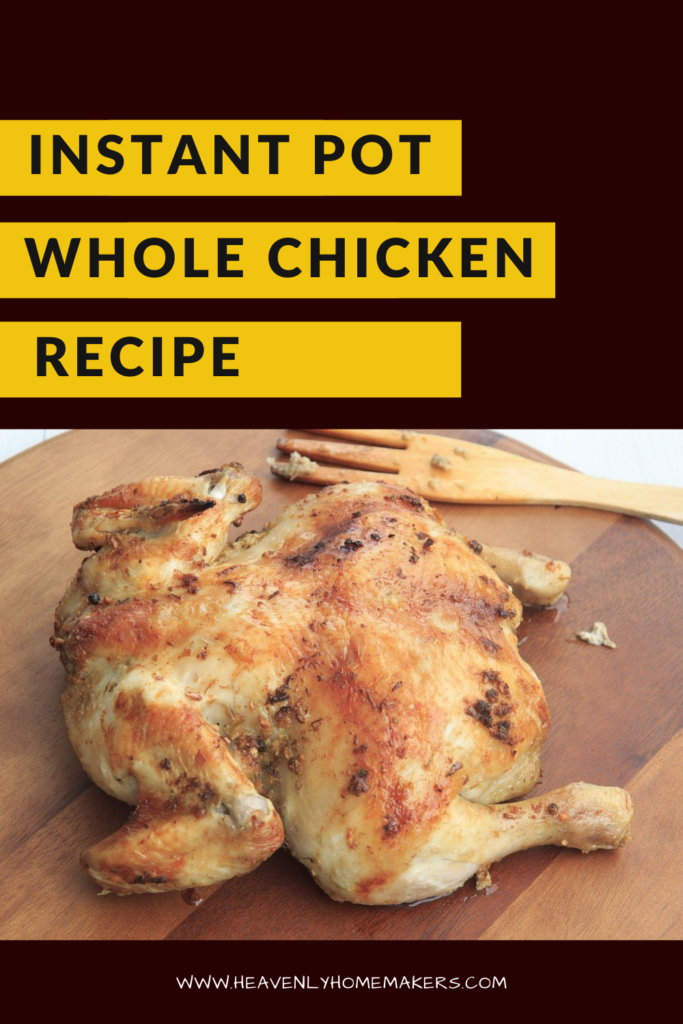
Instant pot Whole Chicken Recipe

Instant Pot Whole Chicken

by Bethany Lotulelei

Once upon a time, I was afraid of the whole chickens at the store. I wasn’t sure how to cook them properly, so I avoided buying them. Then one day, I got my courage up, and I purchased one. I stuck it in the oven, following a recipe I’d found online, and cooked it until I was sure it was done. The result? A sad, dry chicken that would have greatly benefited from some gravy.

I didn’t buy another whole chicken for quite some time, until I read a recipe that promised a moist, delicious rotisserie-style chicken with crispy skin. All from cooking it in the Instant Pot.

Could it be true? Would the Instant Pot deliver me a beautiful roast chicken in less than an hour? My curiosity was piqued, and I gave it a go.

This recipe has changed my life.

We routinely eat roast chicken, thanks to the ease of making it in the Instant Pot! It is seasoned, delicious, and (thanks to a secret which I will share with you in this post) the skin is nice and crispy! Win-win-win!

If you, too, are avoiding whole chickens, because of less-than stellar experiences in the past, might I encourage you to give this recipe a go?

A few tips:

  • Only buy a chicken that will fit in your Instant Pot. If you have a smaller Instant Pot then you’ll need to purchase a smaller bird as well! I was gifted some beautiful, free-range chickens that were double the size of the grocery store version, and none of them fit in my Instant Pot! Sob! I use Laura’s method to cook them, rotisserie-style, in the oven instead!
  • Stuff your chicken with something delicious–lemon slices, sprigs of herbs, onions, garlic, all of the above!
  • Season your chicken liberally. Add your favorite herbs + salt, and don’t sprinkle it lightly! You want a well-seasoned bird!
  • Save the chicken broth in the bottom of the Instant Pot, and mix it into your Instant Pot Mashed Potatoes or make a delicious gravy out of it!

How to Give it Crispy SkinYum

Are you ready to hear the secret of how you are going to ensure your chicken has beautiful, delicious, crispy skin? Step in closer. I’m about to reveal all…

I LOVED cooking the whole chicken in the Instant Pot: it was easy, it was fast, it was incredibly moist. But what I didn’t love? The skin. I missed the crispy skin the oven would give a whole chicken.

Then I discovered this tip: after you have finished cooking your chicken in the Instant Pot, pull it out, set it on a cookie sheet in the oven, and broil it.

Broiling it after it has already baked will give you an amazing, delicious, crispy skin paired with the moist, flavorful meat from the Instant Pot.

So good, and so easy!

Instant Pot Whole Chicken
 
Save Print
Prep time
10 mins
Total time
10 mins
 
Delicious, moist whole chicken cooked in the Instant Pot!
Author: Laura
Recipe type: Main Dish
Serves: 6-8
Ingredients
  • 1 whole chicken with the innards removed
  • 2-3 T of melted butter
  • 1 lemon cut in half
  • 4 cloves of garlic
  • 1 onion, quartered
  • Seasoning of choice
Instructions
  1. Place trivet in the Instant Pot
  2. Pour 1 cup water into the bottom of the Instant Pot
  3. Rub melted butter over chicken.
  4. Stuff chicken with lemon, garlic, and onion.
  5. Season the outside of the chicken liberally with your seasoning of choice.
  6. Place chicken in the Instant Pot, and close the lid.
  7. Set on high pressure for 7 minutes per lb.
  8. Once cooking time is finished, allow pressure to release naturally for 15-20 minutes.
  9. Remove chicken from the Instant Pot, place it on a cookie sheet, and broil it for a few minutes until brown.
  10. Enjoy!
3.5.3251


Seasoning Ideas:

  • Italian Seasoning
  • Onion Soup Mix Seasoning
  • Ranch Dressing Seasoning
  • Rotisserie Chicken Seasoning

What’s your favorite Instant Pot recipe? Share below!

Heavenly Homemaker's Club Members: Access your homepage and all your fantastic resources here! Not a member yet? Please join us!

How to Eat Paleo on a Road Trip

August 8, 2021 by Tasha Hackett 1 Comment

This post may contain affiliate links. For more information, please see our disclosure policy.

How to Eat Paleo on a Road Trip

by Tasha Hackett

Hi everyone! Before you skip this because you’re not a fan of paleo diets. WAIT!! STOP!! This is still for you. Just pretend you like to eat fresh, wholesome foods. Foods that give you fuel and energy and build you up instead of tear you down. Paleo, or any special diet, or budget, or lifestyle that includes not eating fast food junk can be overwhelming at home. But eating paleo on a road trip? Is it even possible? Yep. It is. I’ll show how!

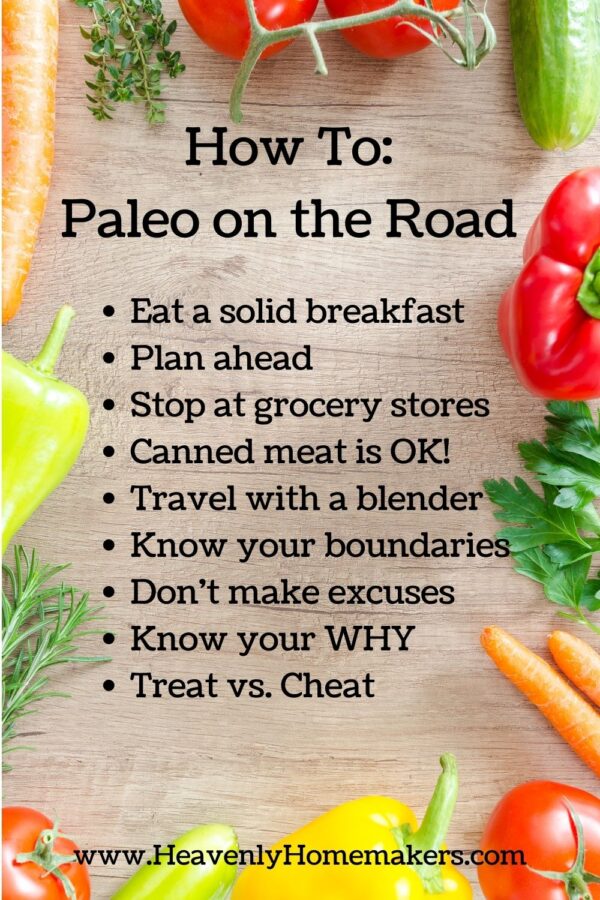
Here’s how I survive road trips eating paleo:

paleo road

Eat a solid breakfast and plan ahead.Yum

If you’re anything like me, you might be used to making sure all the kids have breakfast and snacks available, but you forget to feed yourself? Okay! If you’re on a special food plan, that’s not going to work anymore. I fry up a great skillet of eggs and fresh onions, toss in a few cups of spinach at the end to wilt, mix in an avocado and salsa… yes, it takes at least 15 minutes. But so totally worth it.

No chance of stopping for donuts on the way out of town because I have great food for fuel in me and I feel great! I plan ahead when possible. Am I going to still be on the road for the next meal? Where can I get food? The answers to those questions will guide what I bring with me and where I plan my longer stops.

fruit

Stop at grocery stores and canned meat is OK!

If I’m going to be on the road during the next meal and I haven’t already packed food, then I stop at a grocery store! Ben and I started doing this for budget reasons when we were first married and we loved it. We could spend $25 on “luxury” food items, and it would last us a meal and snacks or more. We’d grab fresh deli meat and cheese, fruits, veggies, and other fun snacks. But now that I’m driven by my health and not by the budget, grocery stores are still the place for me to go to find food. (Pre-made salads, guac, Nut-Thins, meat, fruit and veggies, Larabars.) And here’s a neat tip… canned meat. Though it’s not amazing, it’s protein and calories and energy. Ever tried opening a can of chicken and digging in? I dare ya. It’s a meat source that you can bring along that doesn’t need refrigeration.

Travel with the blender.

Likely, you’ll be traveling to a place to stay for a few days and you’re going to get hungry while you’re there. If possible, I bring my Blentec with me. Working in the kitchen at a camp earlier this summer was a blast. Baking with everything I needed was purchased for me and staff to wash dishes and someone else to hold my babies? Yes, please! But I knew I’d be surrounded by traditional camp food, and I didn’t want to be grumpy and hungry. Obviously, I needed my chocolate. Therefore, I brought the Blentec and whipped up my go-to chocolate shake for the meals I needed to avoid. (Pizza, lasagna, pancakes, pot pie, etc.)

Know your boundaries and don’t make excuses.

If you’re eating paleo because you want to lose weight… well, you get to decide how strict you want to be. If you’re celiac and you will break out in a terrible rash or be sick the rest of the day if you eat pizza, that requires more careful planning. Road trips can be difficult for elimination diets. I eat paleo for a lot of reasons, but the easiest to explain is the migraines. When I switched to a paleo diet, I very quickly stopped being in pain. They went from 17 days a month to 3-4 days a month. I tolerate oats and other gluten-free grains in moderation. I don’t react to corn chips or small amounts of cheese. But ice-cream? No way. Because the headaches are so severe I don’t even crave tasting the “banned” foods anymore. Clearly, I’m human—I have my moments when I’m sad about not being able to enjoy a cinnamon roll, but then I remember the amount of pain I used to be in and I go make myself a batch of homemade chocolate and all is right with Tasha’s world again.

paleo

Know your WHY.

If you’ve been following Laura for a while you’ve seen the progression from homemade foods, low-sugar foods, organic or non-organic, simple meals, we love people more than food… and it’s all wonderful! And Laura knows her why. If I was on a diet for the fun of it… I would have a hard time following through. But knowing that I’m on a “diet” for very specific health reasons makes a huge difference. Otherwise, why would I bother with paleo on a road trip? Whatever the reason you’ve made it this far into this article: Do you know why you eat the way you eat? Why do we stop at a fast food restaurant? Do we think it’s going to be cheaper? Faster? Tastier? I challenge you to think about why you eat what you eat and what you might want to change. Depending on your why, you might be able to splurge and have a treat on a road trip! Have a treat and enjoy every bite of it.

Traveling soon? Whatcha gonna eat?!


book cover of bluebird on the prairieTasha Hackett is friend of Laura and author of Bluebird on the Prairie. Tasha spends most of her time with four chatty children that she homeschools and a fun-loving, supportive husband. They give her the kind of love people write books about. Find out more about her and her historical Christian romance at www.TashaHackett.com. Her novel is available wherever books are sold and she loves to speak about the novel at libraries and other bookish events.

Heavenly Homemaker's Club Members: Access your homepage and all your fantastic resources here! Not a member yet? Please join us!
« Previous Page
Next Page »

Join Our Community!

 Facebook Twitter E-mail Instagram Pinterest

Popular Posts

~ Will All of the Real Moms Please Stand Up?
~ Easy! Stir-and-Pour Whole Wheat Bread
~ How to Make Gatorade
~ 31 Real Food Breakfast Ideas
~ Dear Teenage Girls...
~ When Mom Takes a Step Back
~ The Inexpensive Health Insurance We Love!
~ Let's Talk Real Food Grocery Budgets

Check out our latest posts!

  • Big Family Food and Fun: August 30-September 5, 2026
  • Big Family Food and Fun: August 23-29, 2026
  • Big Family Food and Fun: August 16-22, 2026
  • Big Family Food and Fun: August 9-15, 2026
  • Big Family Food and Fun: August 2-8, 2026
Home  ~  Simple Meals  ~  Club Membership  ~  Shop  ~  Privacy Policy  ~  Disclosure  ~ Contact

Copyright © 2026 · Beautiful Pro Theme on Genesis Framework · WordPress · Log in