Heavenly Homemakers

Encouraging women in homemaking, healthy eating and parenting

  • Home
    • About
    • FAQs
  • Recipes
    • Bread and Breakfast
    • Condiments
    • Dairy
    • Main Dishes
    • Side Dishes and Snacks
    • Desserts
    • Gluten Free
    • Instant Pot
    • Crock Pot
    • Heavenly Homemaker’s Weekly Menus
  • Homemaking
    • Real Food Sources
  • Store
  • Contact
    • Advertise
    • Disclosure
    • Privacy Policy
  • Simple Meals
  • Club Members!

Are Vanilla Bean Prices Going Down?

March 4, 2021 by Laura 2 Comments

This post may contain affiliate links. For more information, please see our disclosure policy.

Is it true? Are vanilla bean prices going down? After several years, I can finally tell you yes!

What happened to the vanilla bean prices?

Back in 2017, there was a major vanilla bean crop failure which caused a shortage of beans and a huge price spike. It was a big bummer for those of us who love to use vanilla extract for cooking and baking, but even more so for those of us who love to make our own vanilla.

Finally, about a year ago, I checked prices again and found that there was a little bit of a rebound. Prices were lower. Not low, mind you. But lower than they had been. So I did the math and began to again recommend that making vanilla would save you money. (Because the price of commercial vanilla had also gone way up! Making it at home saved money even though vanilla bean prices were still on the high side.)

{Bonus! Olive Nation gives us an extra 20% discount when we use the code home, so that helps even more!}

Then, just a few weeks ago, a reader emailed to clarify what kind of vanilla beans I usually buy. See, in this post I had said that you can buy 25 beans for $91 after our special 20% discount. But she saw the regular price for 25 beans listed at $62. Was she looking at the correct beans?

I didn’t read her email correctly at first, so I thought, “Oh no! Did the price go up again?” Haha, Laura. Read the email again. :) :) Not up, but down! The price went down!!!

You guys! This is all so exciting! We’ve waited a long time for this and we can all get vanilla beans at a much lower price and make vanilla extract again for huge money savings! Not to mention – homemade vanilla is amazing!! 

Where I get my vanilla beans

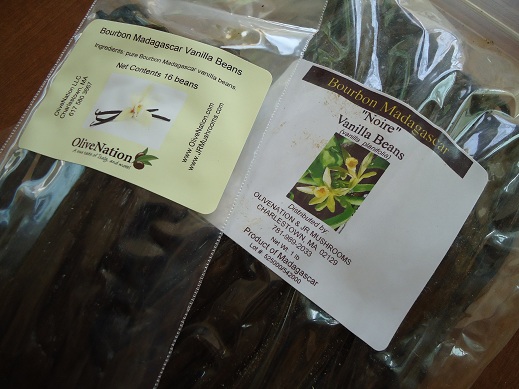
I always buy from Olive Nation. I’ve worked with them for years and am always so happy with all they offer. Their prices are the best. Their quality is the best.

Side note: Once, a long time ago, I bought from another source and the beans were dry and shriveled. Never again. Olive Nation always now for me!

Because Olive Nation has worked with us here for so long, they really appreciate Heavenly Homemakers readers. They give us a forever discount because they want us to be extra happy with our purchase. They know we all love to save money as we care for our families well. So they’ve set up the code home and it gives us all a 20% discount on our vanilla bean orders! (Orders over $50 also receive free shipping so there’s that perk too!)

What kind of vanilla beans do I buy?

I currently purchase Olive Nations Papua New Guinean Beans. Why? Because they are the lowest in cost right now.

When the vanilla bean shortage made prices go up, Olive Nation started bringing in a supply of beans from several different countries. The prices from each range from $62-$172 for 25 beans from different areas around the globe. I’ve definitely found that the quality of the less expensive beans is still wonderful! So I go with the $62 bean package and have been very happy with what I get!

Another side note: I rarely only buy 25 beans at once. Usually, I buy two-four times that many. But I’m using that as an example because I’m guessing some of you don’t make homemade vanilla in such bulk quantities!

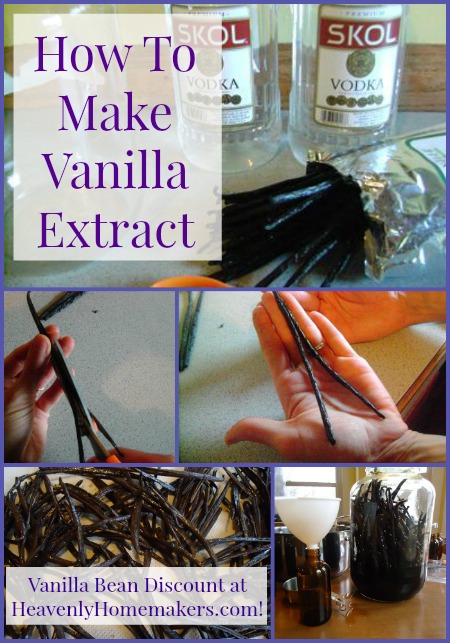
Is it hard to make Vanilla Extract?

Not even a little bit. It’s incredibly easy. Get all the details and see a full tutorial here. Or follow these simple instructions:

Are Vanilla Bean Prices Going Down?
 
Save Print
Author: Laura
Serves: ½ gallon
Ingredients
  • 1.75 liters of inexpensive vodka
  • 25 Vanilla Beans enter code HOME for a 20% discount on Vanilla Beans through Olive Nation!!
Instructions
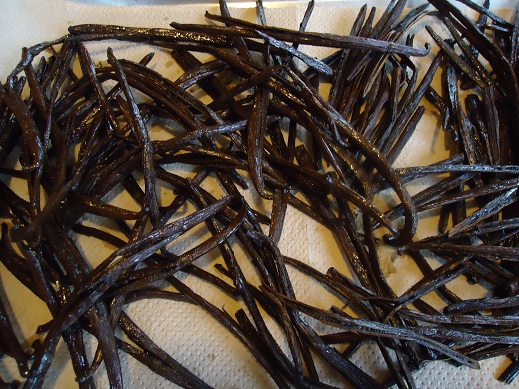
  1. Slice through each bean lengthwise, leaving about one inch at the top of each bean uncut so that it stays together.
  2. Place all of your cut Vanilla Beans into a half-gallon jar.
  3. Fill the jar with vodka.
  4. Secure the lid and put the jar in a dark place (like in the back of a cabinet).
  5. Allow it to sit and "extract" for 4-6 months.
  6. Every few weeks during extracting time, shake the jar to mix it up a bit.
3.5.3251

Bonus Resources:

  • Read this post to learn how to finish and strain your vanilla after 4-6 months.
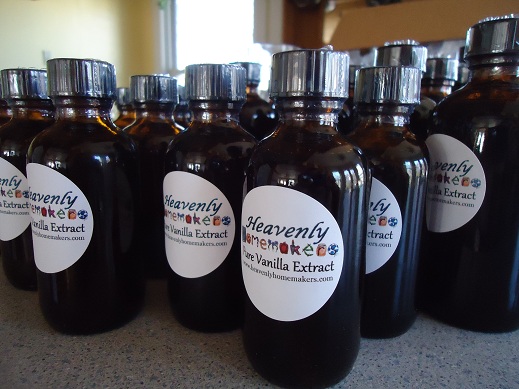
  • You can purchase dark amber bottles here.
  • Order personalized vanilla stickers for bottles and gifts here.
  • Get your beans here, and use the code HOME to get 20% off!

Time to make vanilla again!

Enjoy this fun price dip and the discount we receive to go with it. Make some vanilla to enjoy in your kitchen – how fun!!
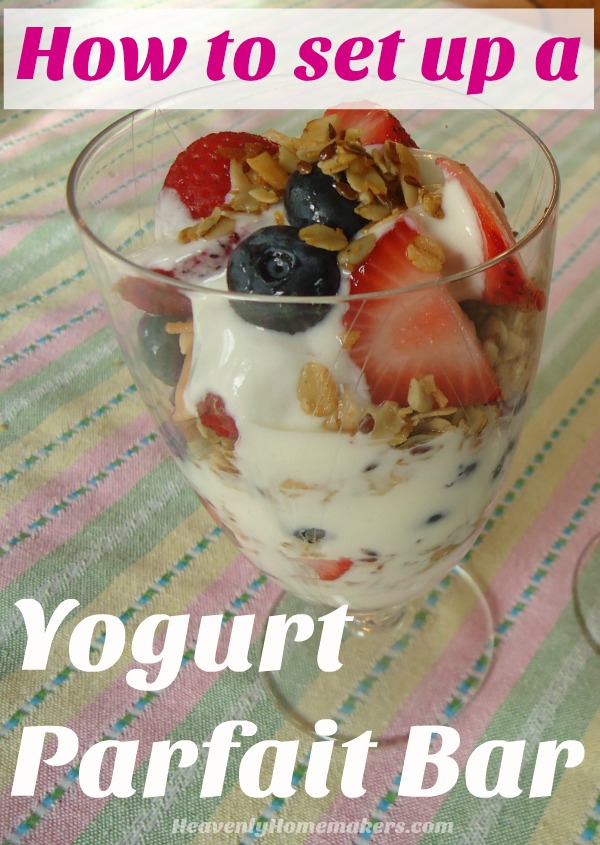
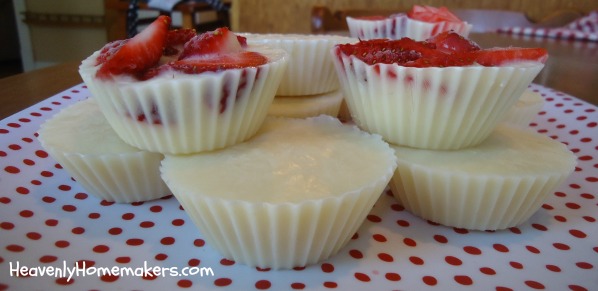
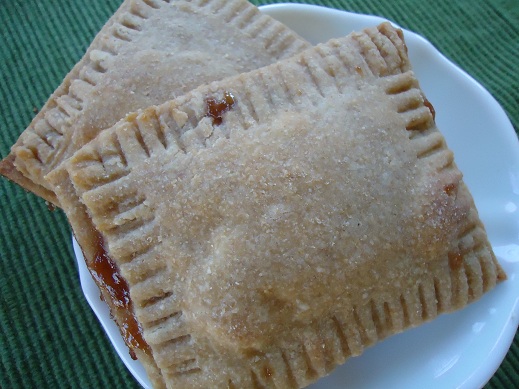
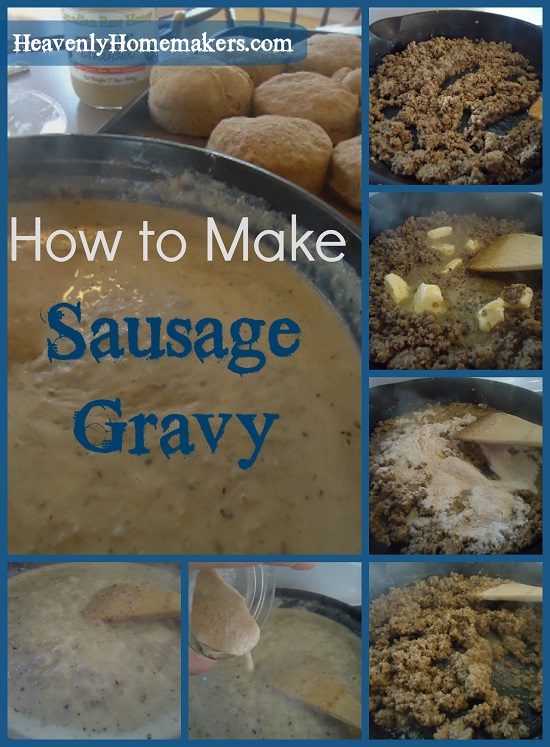
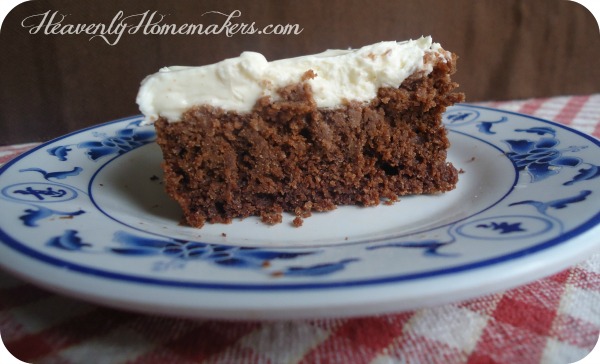
Heavenly Homemaker's Club Members: Access your homepage and all your fantastic resources here! Not a member yet? Please join us!

10 Easy Food Items You Didn’t Know You Could Make at Home (Save $$!)

February 24, 2021 by Laura 3 Comments

This post may contain affiliate links. For more information, please see our disclosure policy.

I bet you didn’t know you could make these food items at home! (Actually, if you’ve been reading here long, you probably do know about most of these, but act surprised anyway.) ;)

The old me used to make EVERYTHING from scratch. Some of you probably remember that girl. I made homemade ketchup, homemade tortillas, homemade grape nuts cereal, homemade hashbrowns, homemade tator tots… Wait. Homemade Tator Tots?? Yes. It was a reader request and I figured out how to do it! I was what one might call “an overachiever.” (Or “that really crazy heavenly homemaker lady.”)

Now I’m in a different season in life with a big houseful of littles and have decided that there are some food items that aren’t worth my time to make at home. Loving my people is more important than making Homemade Peanut Butter Captain Crunch. Oh my goodness yes. I even tried that too.

But today I want to share 10 food items that are easy to make at home, will save a lot of money, and are worth your time!

10 Easy Food Items You Didn’t Know You Could Make at Home

1. Vanilla Extract

We’ll start with my favorite! This saves a lot of money and is amazing to make in your very own kitchen!

2. Peanut Butter (super creamy – spreadable, like Skippy or Jif)

This tastes so much better than any store brand and is so much fun to make. Watch peanuts turn into peanut butter! So cool.

3. Gatorade

This costs pennies and is so much better for us!

4. Chicken Wings

I always thought this was restaurant food. Turns out, it’s super cheap Friday night dinner at home.

5. Whipped Cream

No, it isn’t cool whip. It’s 1,000 times better.

6. Ranch Salad Dressing

Hidden Valley who?

7. Poptarts

These taste so incredibly good and are easy to make in bulk amounts to freeze and pull out for easy breakfasts!

8. Graham Crackers

The kind from a box will never taste as good as these gems. You can even make them chocolate!

9. Instant Oatmeal Packets

Make a bunch of packets or make a big batch in a jar for easy, inexpensive breakfasts!

10. Frappe

Because why pay $5 at a coffee shop when you can make it for much less at home?

Stevia Sweetened Chocolate Frappe

Which of these have you tried? Ready to try something new?!

~~~~~~~~~~~~~~~~~~~~~~~~~~~~~~~~~~~~~~~~~~~~~~~~~~~~~~~~~~

We’d love to connect with you :)
Join our fun community here!

Heavenly Homemaker's Club Members: Access your homepage and all your fantastic resources here! Not a member yet? Please join us!

My Favorite Hot and Cold Drinks

February 14, 2021 by Bethany Lotulelei Leave a Comment

This post may contain affiliate links. For more information, please see our disclosure policy.

One of my favorite parts of winter is all the warm, cozy drinks we can enjoy! I love making a few special, warm mugs full of hot chocolate, or cider, or tea in the evenings. So today I am sharing my absolute favorite hot drinks to serve my family! With that in mind, here’s a list of my favorite hot and cold drinks to serve your family!

Are you a fan of chocolate or vanilla drinks? Sweet or savory? Either way, you are sure to find a drink you will love included on this list!

Choose a couple to try this week, grab the ingredients, and then enjoy the comfort of a warm mug of yum after a long day along with your spouse and kiddos. It’s simply the best.

Favorite Hot Drinks to Serve Your Family

1. Chocolate Mint Soother

This drink is filling, comforting, and so delicious. A perfect way to warm up on a chilly day!

2. Warm Pumpkin Custard

This is a great after dinner dessert – or because it’s so full of rich, hearty, nutritious ingredients – I think it would be great for breakfast even!

3. Warm Vanilla Soother

This drink is so incredible. It’s warm, filling and nourishing. As I drink this, I always feel like someone just handed me a delicious mug of comfort. Mmmmm Warm Vanilla Soother.

4. Peppermint Cream Cocoa (or Coffee)

I put this together one afternoon, plopped a generous serving onto a cup of freshly brewed coffee, and immediately decided that I needed to sit down, close my eyes, and relish the moment. It was hot beverage deliciousness in a mug. The rest of the family enjoyed this special whipped cream on their hot cocoa, and we all declared it to be ah-mazing.

5. Hot Vanilla Milk

This Hot Vanilla Milk is a fun option to offer when you need a little variety in your hot drink repertoire.

6. Simple White Hot Chocolate

If you’re a white chocolate fan, this one is for you. And no doubt, if you are a fan of easy recipes (who isn’t?), you will definitely love this delicious holiday drink!

7. Coffee with Chocolate Caramel Creamer

Ingredients: One cup of hot coffee that smells really good, one teaspoon hot fudge sauce, one teaspoon hot caramel sauce, and a few teaspoons of cream. So, so good.

8. Crockpot Cranberry Apple Cider


This spiced apple cider not only tastes delicious, but also makes your house smell amazing when it simmers away in the crockpot! Win-win!

9. Chocolate Whipped Cream on your Coffee

You have GOT to try this Chocolate Whipped Cream on your coffee. Oh my. So incredible!

In the mood for a chilled drink, instead? Check these out!

  • Homemade Gatorade
  • Chocolate Frappe
  • Iced Mango Sweet (or Unsweet) Tea
  • Cinnamon Smoothie
  • Creamy Orange Cooler
  • Peach Sweet (or Unsweet Tea)
  • Pineapple Mango Smoothie
  • Coffee Milkshake
  • Iced Coffee
  • Raspberry Sweet (or Unsweet) Tea

Now only one question remains: which one will you try first?

Heavenly Homemaker's Club Members: Access your homepage and all your fantastic resources here! Not a member yet? Please join us!

How to Use a Cast Iron Skillet like a Pro

January 27, 2021 by Tasha Hackett 1 Comment

This post may contain affiliate links. For more information, please see our disclosure policy.

I’ve loved and recommended using a cast iron skillet for years. Today, Tasha will tell you how to use one like a pro!

How to use a cast iron skillet like a pro

by Tasha Hackett

I didn’t know how to properly cook with a cast iron skillet until very recently. 

Even though I have prepared food almost exclusively on my cast iron skillet, I continually burned food or the food stuck so badly I spent far too long scraping it off the bottom and reseasoning again. 

I burned the pancakes on my cast iron again and I was sad. As I served my family I said, “I know it’s burned. Sorry. It is what it is. This is the last of the flour, I’m not making anything else. Sorry. Just eat it. I know it’s burned. Sorry. Don’t ask me why it keeps burning.” 

I burned the zucchini patties and I was sad. “I don’t know why they’re burning! The bottom is burned before I can even flip them without it falling apart! I turned it down and they’re still burning.” 

The scrambled eggs stuck to the bottom of the pan so badly I felt like I sacrificed two whole eggs to the cast iron gods. 

Please tell me I’m not the only one who struggles with the cast iron skillet? 

Figuring out how to use a cast iron skillet shouldn’t have taken me this long.


With all my struggles, you may be asking, “Why do you even use it if it causes so much trouble?” A few reasons. 

Now that I know how to use a cast iron skillet, I love it even more.

Foremost, I like the simplicity of it. I use this one pan multiple times a day. I clean it after each meal and it lives on my stovetop. The nostalgia that this is the same type of pan the pioneers used hundreds of years ago speaks to my author soul. I don’t wear 1800’s dresses, or travel by horse or train or write letters with an inkwell, but by golly I can cook with the same pan! (In theory, except I was disproportionately burning everything.) Another main reason I like to use it is that I don’t trust modern technology when it comes to our health. Teflon is bad for you–correction, teflon is bad for you when heated. HA! 

I know there are other non-stick pans out there today that claim to be non-toxic, but I haven’t had the time to look into them yet. (I’ve been far too busy wondering why I keep burning the Simple Tuna Patties.)

cast iron eggs

Here are my how-to tips for using your cast iron skillet:

  1. Start with a well-seasoned cast iron skillet. Which I have. Many times. Keeping it well-seasoned was my problem. Seasoning a skillet is simple: Clean. Dry. Rub a teaspoon of vegetable oil or lard all over. Top, bottom, outside, underneath, and the handle. Bake upside down in a 350* oven for an hour. Let it cool in the oven before putting it away.
  2. Be patient. Let the pan preheat at a low temperature for up to five minutes before cooking on it. A drop of water should immediately sizzle and then you may add the oil. If the butter, oil, lard, etc., is smoking, that means your skillet is too hot. Heating a cast iron skillet/pot/pan on high heat right away, especially on an electric stove, causes the iron to expand and heat unevenly and can cause warping. This is one of the only things that will ruin your skillet.
  3. Preheat the oil. Do this after the pan is preheated. Again, if the oil smokes or burns, this is a bad sign. If the butter is burning, the pancakes will soon be burning. (You’d think I could have figured that out sooner.) On my gas stove, I do most of my cooking just above Low or directly between Low and Medium. On my stove, the butter burns at Medium. Once the pan is heated, if you turn the temperature down it will not immediately make a difference. One of the pan’s strengths is the ability to hold heat. Therefore, adjusting the temperature up and down while you’re cooking isn’t going to work well for your food or your taste buds. Or your family’s trust in your cooking abilities. Have patience while preheating, and you will quickly learn where to set the temperature and can leave it there.
  4. Do the sizzle dance.

  5. The food should sizzle as soon as it touches the pan. Food that doesn’t sizzle means your pan wasn’t preheated enough and now your food is going to stick and then probably burn. (Preheat the skillet even if you are baking cornbread in the oven. The sizzle as you pour in the cornbread batter will create a delicious crust and keep the wet cornbread from sticking to the pan.)
  6. A properly seasoned cast iron skillet is easily cleaned with a wipe-down of a paper towel or hot water and plastic scraper. Boiling water in the pan, using soap, or not properly drying will cause your pan to rust and this is bad. If the pan rusts, you get to scrub it off with a steel brush and do the reseasoning thing again.
  7. Whenever dry spots appear on the pan, it’s time to reseason. If you use enough oil while cooking on the pan, you shouldn’t have to do the reseasoning thing more than a few times a year. If that. But… if you were anything like me and frequently burned the food and then had to scour it off with hot water, reseason it as often as necessary until you’ve perfected the patience that is required for preheating your pan. 

And that’s how to use your cast iron!

cast iron onions

This pan was not preheated. There was no sizzle when the onions were added. The butter wasn’t melted and then it will later burn.

I’m curious, how many of you have skillets passed down from your grandma? Years of history and thousands of meals prepared in a pan that is still in great use today? Amazing!

I love to invest in things that will last. Cast iron is just one of those things. Now that I know how to really use mine, I foresee some delicious pancakes in my family’s future. 


Tasha HackettTasha Hackett, friend of Laura, is fueled by sunshine or chocolate, whichever is more readily available. Recently embarking on a paleo journey to combat some chronic inflammation, she is still finding ways to eat chocolate. Though she proudly sings every word of the Wee Sing Silly Songs albums and often pretends to be a ballerina while unloading the dishwasher, her favorite thing is writing with hope and humor to entertain and encourage women—specifically young moms. Most of her time is spent with four chatty children and an incredibly supportive husband. They give her the kind of love people write books about. Her debut novel, Bluebird on the Prairie, a heartwarming Historical Romance will release spring, 2021. You can connect with her at www.tashahackett.com or on Instagram @HackettAcademy. 

Heavenly Homemaker's Club Members: Access your homepage and all your fantastic resources here! Not a member yet? Please join us!

How to Drink Your Salad (and love it!)

January 13, 2021 by Laura 7 Comments

This post may contain affiliate links. For more information, please see our disclosure policy.

Today I will teach you how to drink your salad. I’m quite sure you will love this idea as much as I do!

See, here’s the thing:

Matt and I like to eat a big salad every day. Scratch that. Matt and I know we need to eat a big salad every day. It’s amazing for our overall health as leafy greens are so incredibly nourishing! But shucks if eating a big salad isn’t actually as much fun as we all wish that it was.


As our family has grown and my hands have become more full of little ones again, I’ve been known to frequently grab greens out of a container in the fridge and eat them on the fly – no dressing, no extras – simply because I rarely have time to build a salad in a bowl and then sit down to chomp it down. Does it takes good, these greens straight out of the fridge? Well, it doesn’t taste bad. But it’s not as fun as eating other food. Again, I just do it because I know my body needs it. Every single day.

Most of us have heard about throwing leafy greens in smoothies. I’ve done it off and on for years, but I never really bought into it as a great daily habit until last summer.

Our three littlest boys and I would go on super long walks every day (before our girls moved in). We’d come home and enjoy chilled smoothies to refresh us. I loaded them with frozen fruit and greens. The boys drank them without hesitation. Matt and I loved them. And finally it hit us: Why should we ever eat salad again?

Well, we did wonder: Would smoothies made with frozen fruit and greens be as wonderful during the cold winter months? Would we get burned out on green smoothies? Was this only a temporary wonderful idea?

Many months and hundreds of smoothies later, I’m happy to report that we are still so very happy with the fact that we can drink our salad every day! It goes down easy. It tastes like fruit. We can drink it on the fly, which is incredibly important during this very busy season in our lives full of both big kids and many little kids.

How to Drink your Salad (and love it!)

  1. Stuff as many leafy greens into your blender as you dare. I put in way more greens than we would typically eat in a regular bowl of salad and our bodies are very happy about this. I also have and highly recommend a Blendtec blender as this will blend your greens into complete smoothness and oblivion.
  2. Add your choice of frozen fruit. I buy big bags of mixed fruit for a fun variety. It includes berries, peaches, and pineapple. Super delicious!
  3. Pour in milk to fill the blender half-full or whatever liquid amount is recommended for your blender so that your smoothie doesn’t explode to the ceiling of your kitchen. Whole milk yogurt is also an awesome “liquid” to include.
  4. Add sweetener or protein powder if you like. Matt and I have found that the fruit alone makes the smoothie sweet enough, so I don’t add any maple syrup or stevia anymore. During the summer we added protein powder to make the smoothie more like a meal. But this winter we’ve left it out.
  5. Put the lid on and blend until smooth. Drink your salad and love it.

And just like that, you have one or two days worth of salad to drink. Perhaps you’ve been doing this all along. Perhaps this is a new idea for you. Perhaps you knew about it but needed the reminder about what a great idea it is!

Here’s what my blender looks like before I get all the goodies mixed up. :)

Give this a try and let me know how you like it!

Heavenly Homemaker's Club Members: Access your homepage and all your fantastic resources here! Not a member yet? Please join us!

How to Make Perfect Hot Chocolate

December 27, 2020 by Laura 2 Comments

This post may contain affiliate links. For more information, please see our disclosure policy.

Want to learn how to make Perfect Hot Chocolate? You’ll want to learn these “tricks” so you can enjoy a mug of this during holiday break with your family!

I am so thrilled to have a huge houseful right now! We’ve got five littles, four bigs, plus two amazing girlfriends. Our holiday time food shared together has been simple but fun. And since I’ve got more big people around to help with all the littles, I find my hands are a little freer to make special treats.

That’s where the Perfect Hot Chocolate comes in. Sure, Christmas is over. But the fun treats and the special drinks will keep on coming until school and work starts again!

Now, to make Perfect Hot Chocolate, I believe it takes three perfect recipes:

Not to worry, these are all easy and fast. (Do you even know me at all?)

  1. Hot Cocoa
  2. Whipped Cream
  3. Homemade Hot Fudge

The Hot Cocoa whisks together quickly on the stove. I whip cream in my Blendtec, which takes 25 beautiful seconds of effortless “work.” I often have Homemade Hot Fudge already in the fridge that we can warm up and drizzle into our hot cocoa. If not, I can make that quickly too.

The ingredients in all these recipes overlap with one another. Plus they are ingredients I always have on hand. Simple but special – that’s what I love about treating our family and guests to this Perfect Hot Chocolate!

Once you’ve got your three recipes made: 1) Fill a mug with hot cocoa. 2) Add a generous amount of whipped cream. 3) Drizzle hot fudge over the cream.

If it all oozes out over the sides of the mug, well, this can’t be helped and it is one of the best problems you’ll have because you’ll have to lick the sides of your mug to “clean it up.”

And there you have it! The Perfect Hot Chocolate. Let me know how you like it!

Heavenly Homemaker's Club Members: Access your homepage and all your fantastic resources here! Not a member yet? Please join us!

Simple Green Beans in the Air Fryer

December 20, 2020 by Laura 2 Comments

This post may contain affiliate links. For more information, please see our disclosure policy.

I love how simple and tasty it is to make green beans in the air fryer!

Do you have an Air Fryer? If no, you might consider putting it on your Christmas wish-list. Here’s how I’ve found it to save a lot of money. Not to mention it turns out some super fun foods, making us feel like we’re eating a treat meal from a restaurant!

So green beans in the Air Fryer? Well, these are super healthy and our kids gobble them up because they’re so delicious. They take about two minutes to prepare, so you can’t go wrong there.

Simple Green Beans in the Air FryerYum

Simple Green Beans in the Air Fryer
 
Save Print
Author: Laura
Serves: 4-6
Ingredients
  • 12-ounces frozen fine green beans
  • 1 teaspoon olive oil
  • ¼ teaspoon sea salt
  • ¼ teaspoon garlic powder (optional)
Instructions
  1. Pour green beans into a bowl (or cheat by cutting open the bag of green beans to use it as a disposable bowl!)
  2. Add olive oil, salt, and garlic powder.
  3. Toss with a spoon or tongs to coat the green beans.
  4. Cook in your Air Fryer at 400 degrees for 7-10 minutes, tossing them half-way through cook time to make sure they are cooking evenly.
3.5.3251

These have an awesome crunch. And did you see that simple hack I shared in the recipe? I simply open a bag of frozen green beans and use the bag as a bowl! Drizzle in the olive oil, sprinkle in the seasonings, shake the bag, and pour the coated green beans into the air fryer. No dishes!! NO DISHES!!!! That is my favorite part, besides of course, the fact that we can make this awesome vegetable in the air fryer. Nourishing and fun all in one!

P.S. I have this Air Fryer and we’ve been very happy with it!

Heavenly Homemaker's Club Members: Access your homepage and all your fantastic resources here! Not a member yet? Please join us!

Christmas Make-Ahead Breakfast Ideas

December 16, 2020 by Bethany Lotulelei Leave a Comment

This post may contain affiliate links. For more information, please see our disclosure policy.

I love baking, but who wants to spend all day in the kitchen when there’s hot chocolate to sip, family memories to make, and stockings to open? I am all about doing the work days earlier so you have a stress-free, peaceful holiday with your family. That’s why I put together this list of Christmas make-ahead breakfast ideas, to encourage you to get that baking done ahead of time so you have more time with your family.

Just in case you, too, are looking for ways to spend less time in the kitchen this holiday season, here are a few of our favorite tried and true Christmas make-ahead breakfast ideas!

Christmas Make-Ahead Breakfast Ideas

Mix and Match Christmas Make-Ahead Breakfast Ideas

1.Make-Ahead Pumpkin Donuts

We can mix up the pumpkin donuts, roll out the dough, cut the shapes, then freeze the uncooked dough on parchment paper or silicone mat-lined cookie sheets. We transfer the frozen dough into freezer bags, then any time we want fresh donuts (and when would we notwant fresh donuts?), we can grab some out of the freezer and fry them up fresh to eat while sipping a cup of coffee, tea, or hot chocolate!

2. Yogurt Parfait Bar

Simply purchase the ingredients beforehand, make the granola or other add-ins a few days beforehand, chop up the fruit the day before, and you are set!

Here are some of my favorite toppings:

  • Containers of your family’s favorite yogurt
  • Stevia, maple syrup, or honey if you haven’t already sweetened the yogurt
  • A variety of fresh berries or peaches (make the process faster in the morning by cutting the fruit ahead of time)
  • Dried fruit options
  • Coconut Flakes
  • Cinnamon Sugar Pecans or other nuts or seeds your family enjoys
  • Dark Chocolate Almond Granola, Regular Granola, or Grape Nuts Cereal

3. Make-Ahead Muffins

I have to know:  Is this “freezing muffin batter” a brand new idea to you, or have you tried it before?  Once I tried this and learned how well it worked, I went on a muffin freezing frenzy (as confessed above). I now have Chocolate Chocolate Chip Muffin batter, Blueberry Muffin batter, Chocolate Chip Muffin batter (recipe in Kids in the Kitchen eBook), and Peanut Butter Chocolate Chip Muffin batter in my freezers. What a time saver!

Looking for a few new recipes to try for Christmas morning? Check out this list of 23 Muffin recipes!

4. Frozen Yogurt Cups

This recipe is easy enough for your kiddos to make! Invite them into the kitchen, and whip these up together!

5. Homemade Poptarts


I love to make these poptarts and freeze them before I bake them. On a day I declare to be a Poptart Morning, I pull a few out and bake enough for each person to have a couple with our eggs and fruit. So good!

6. Giant Breakfast Cookies

Make the dough ahead of time, scoop the cookies out unto cookie sheets, freeze the cookie dough balls, and you’re set! Hot breakfast cookies on Christmas morning! Serve with fruit, and bacon (of course).

7. Biscuits with Sausage Gravy

Biscuits and gravy is one of my favorite special breakfasts. Make your biscuits ahead of time, and pop them in the freezer then make your gravy the day before, and heat it up in the morning. Easy peasy!

8. Cinnamon Rolls

I couldn’t make a list of Christmas breakfasts without including Cinnamon Rolls! These are deliciously easy, and mostly low in sugar! They kind of resemble those frozen orange rolls you can buy in the freezer section – except that these have a little bit of nutritional value and not nearly as much sugar, so we can all rejoice.

What is your favorite breakfast to make for Christmas morning?

Heavenly Homemaker's Club Members: Access your homepage and all your fantastic resources here! Not a member yet? Please join us!

The Surprising (Money-Saving) Ways I Use an Air Fryer

November 18, 2020 by Laura 1 Comment

This post may contain affiliate links. For more information, please see our disclosure policy.

You might be surprised about the ways I use an Air Fryer, but hey, it’s tasty and saves money. Let me fill you in on all my secrets…

Matt and the boys surprised me with an Air Fryer last Christmas. But the truth is, I’m pretty sure they all wanted it for themselves and well, it was for sure a win-win Christmas gift!

I’ve made delicious Garlic Butter Shrimp in it and will never turn back. I love roasting green beans in it and will share those simple instructions soon. But can I confess how we mostly use the Air Fryer at our house?

French. Fries.

From a bag. At the store. The good kind. As in, the name brand fries because our store brand doesn’t taste nearly as good.

Wait, but Laura, don’t you make homemade fries?

Yes, I did. Past tense, at least for now. I barely have time to scrub a potato, so I do not have time (or arms) to cut potatoes into fries.

Ore Ida fries in the Air Fryer – the crinkle kind because THOSE ARE THE BEST – are so delicious and fun. We have them every Friday night and have obviously dubbed it “French Fry Friday.” We eat chicken strips and fries and watch a movie to celebrate the week. And about those chicken strips?

Those come out of a bag too. I don’t even feel guilty about this. We throw those into the air fryer with our fries. On Fridays. Before our movie night.

If I have a few extra minutes and two or even one arm to work with, I’ll steam a veggie to go with our meal. Otherwise we all grab some fruit and call it a night.

This saves money, how?

Well, how much money do you spend when you’re too tired to cook and you go through the drive-through for chicken strips and fries for your crew?

We almost never eat out, but a few weeks ago we went through a fast-food drive-through because they were giving a percentage of sales to our local school for a fundraiser. We headed that way to show our support and to give me a night off, but shucks if we didn’t sink $30 into that meal – and the receipt was only that low because only half of us were home that night.

What I throw into my air fryer – which tastes just as good and is slightly healthier than fast-food restaurants – costs around $10 for six of us to eat our fill.

What if your Air Fryer took the place of eating out?

Sure, my Ore Ida fries and Dino Nuggets or Bagged Chicken Strips are not the healthiest things I put on our table. But it’s still a step healthier than regular-fried food at fast-food restaurants.

And the money-saving aspect is huge!

Beyond that, the fun food we cook in our Air Fryer gives us that “we just had a treat” feeling that we can get when we go out to eat.

So now you know. I keep some frozen treats like fries and nuggets on hand to throw in my Air Fryer to help me survive this busy season in life. It saves big bucks compared to eating out and it’s a lot of fun too!

Thought you’d like to know, just in case you want to put an Air Fryer on your Christmas wish-list this year. :)

P.S. I have this Air Fryer and we’ve been very happy with it!

Heavenly Homemaker's Club Members: Access your homepage and all your fantastic resources here! Not a member yet? Please join us!

What Should I Bake?

November 1, 2020 by Laura Leave a Comment

This post may contain affiliate links. For more information, please see our disclosure policy.

As much as I love summer the best of all the seasons, I sure love fall so I can get to baking again! In case you’re in the baking mood too, I thought it would be fun to give you some ideas if you’re asking yourself: What should I bake?

What should I bake?

I organized 111 of our favorite baking recipes into Yeast Bread Recipes, Muffin Recipes, Quick Bread Recipes, Cookie Recipes, Bar Recipes, and Cake Recipes. You’ll love how simple, yet how delicious these recipes are!

Get ready to bake up a storm and share with your neighbors. Wondering “what should I bake?” Wonder no more!

And by the way, if you don’t have a Bosch Mixer, I do highly recommend one. That has made my baking endeavors so much easier!!! (Read about why I invested here.)

Yeast Bread RecipesYum

  1. Chocolate Swirl Bread
  2. Cinnamon Swirl Bread
  3. Honey Whole Wheat Bagels
  4. Honey Whole Wheat Bread
  5. Monkey Bread
  6. No Knead Whole Wheat Bread
  7. One Hour Whole Wheat Yeast Rolls
  8. Pita Bread
  9. Stir-n-Pour Bread – So Easy!
  10. Soft Pretzels
  11. Soft Pretzel Bites
  12. Whole Wheat Hamburger Buns
  13. Whole Wheat Hot Dog Buns
  14. Whole Wheat Butterhorns
  15. Whole Wheat Cinnamon Rolls

Muffin Recipes

  1. Almond Flour Muffins
  2. Bacon Cheese Muffins
  3. Banana Muffins
  4. Blueberry Streusel Muffins
  5. Breakfast Cake Muffins
  6. Chocolate Chocolate Chip Muffins
  7. Chocolate Swirl Muffins
  8. Chocolate Zucchini Muffins
  9. Cinnamon Nectarine Muffins
  10. Coconut Flour Muffins
  11. Coconut Flour Banana Muffins
  12. Cornbread and Cornbread Muffins
  13. Cream Cheese Pumpkin Muffins
  14. Easy Chocolate Cheesecake Muffins
  15. Easy Chocolate Chip Cheesecake Muffins
  16. Easy Banana Cheesecake Muffins
  17. Easy Pumpkin Cheesecake Muffins
  18. Eggnog Muffins
  19. Honey Cinnamon Muffins
  20. Orange Muffins
  21. Pancake Muffins
  22. Pancake and Sausage Muffins
  23. Peanut Butter Chocolate Chip Muffins
  24. Peanut Butter Muffins (gluten free!)
  25. Pumpkin Chocolate Chip Muffins
  26. Snickerdoodle Muffins
  27. Strawberry Cream Muffins
  28. Sweet Potato Streusel Muffins
  29. Whole Wheat and Honey Zucchini Muffins
  30. Whole Wheat Chocolate Zucchini Muffins

Quick Bread Recipes

  1. Applesauce Bread
  2. Banana Bread
  3. Chocolate Chocolate Chip Bread
  4. Lemon Bread
  5. Pumpkin Chocolate Chip Bread
  6. Whole Wheat and Honey Zucchini Bread
  7. Zucchini Carrot Bread
  8. Strawberry Bread

Cookie Recipes

  1. Cranberry White Chocolate Chip Breakfast Cookies
  2. Giant Breakfast Cookies
  3. Chocolate Chip Cookies
  4. Chocolate Chip Zucchini Cookies
  5. Chocolate Crinkle Cookies
  6. Christmas Spice Cookies
  7. Coconut Macaroons
  8. Flourless Fudge Cookies
  9. Flourless Peanut Butter Chocolate Chip Cookies
  10. Flourless Peanut Butter Cookies
  11. Oatmeal Butterscotch Chip Cookies
  12. Orange Cream Cheese Cutouts
  13. Snickerdoodles
  14. The Best Chocolate Chip Cookies
  15. Super Soft Chocolate Cookies
  16. Sweet and Simple Butter Cookies
  17. Sweet and Simple Cranberry Cookies
  18. Low Sugar Cream Cheese Cut-Out Cookies
  19. Buttery Almond Cookies
  20. Simple Oatmeal Cookies
  21. Honey Sweetened No-Bake Cookies
  22. Easy {Low} Sugar Cookies
  23. Low Sugar Lemon Melt-Away Cookies
  24. Low Sugar Almond Melt-Away Cookies
  25. Low Sugar Orange Melt-Away Cookies
  26. Low Sugar Lime Melt-Away Cookies
  27. Low Sugar Chocolate Fudge Cookies
  28. Low Sugar Flourless Peanut Butter Cookies
  29. Low Sugar Flourless Chocolate Peanut Butter Cookies
  30. Pumpkin Spice Cut-Out Cookies

Bar Recipes

  1. Apricot Breakfast Bars
  2. Oatmeal Breakfast Bars
  3. Butterscotch Bars
  4. Cheesecake Brownies
  5. Chocolate Chip Brownies
  6. Coconut Flour Brownies
  7. Honey Peanut Bars
  8. Monster Chocolate Chip Cookie Bars
  9. Peanut Butter Apple Cookie Bars
  10. Peanut Butter Honey Bars
  11. Pumpkin Pecan Pie Squares
  12. Zucchini Brownies
  13. Low Sugar Chocolate Brownies
  14. Low Sugar Chocolate Chip Cookie Bars

Cake Recipes

  1. Banana Cake
  2. Blueberry Coffee Cake
  3. Breakfast Cake
  4. Peanut Butter Breakfast Cake
  5. Pumpkin Breakfast Cake
  6. Carrot Cake
  7. Chocolate Cake
  8. Lemon Pound Cake
  9. Peanut Butter Cake
  10. Peanut Butter Chocolate Chip Cake
  11. Pumpkin Chocolate Chip Cake
  12. Red(less) Velvet Cake
  13. Strawberry Shortcake
  14. Zucchini Cake
Heavenly Homemaker's Club Members: Access your homepage and all your fantastic resources here! Not a member yet? Please join us!
« Previous Page
Next Page »

Join Our Community!

 Facebook Twitter E-mail Instagram Pinterest

Popular Posts

~ Will All of the Real Moms Please Stand Up?
~ Easy! Stir-and-Pour Whole Wheat Bread
~ How to Make Gatorade
~ 31 Real Food Breakfast Ideas
~ Dear Teenage Girls...
~ When Mom Takes a Step Back
~ The Inexpensive Health Insurance We Love!
~ Let's Talk Real Food Grocery Budgets

Check out our latest posts!

  • Big Family Food and Fun: May 3-9, 2026
  • Help Your Kids Become Independent in the Kitchen!
  • Big Family Food and Fun: April 26-May 2, 2026
  • Big Family Food and Fun: April 19-25, 2026
  • Big Family Food and Fun: April 12-18, 2026
Home  ~  Simple Meals  ~  Club Membership  ~  Shop  ~  Privacy Policy  ~  Disclosure  ~ Contact

Copyright © 2026 · Beautiful Pro Theme on Genesis Framework · WordPress · Log in