Heavenly Homemakers

Encouraging women in homemaking, healthy eating and parenting

  • Home
    • About
    • FAQs
  • Recipes
    • Bread and Breakfast
    • Condiments
    • Dairy
    • Main Dishes
    • Side Dishes and Snacks
    • Desserts
    • Gluten Free
    • Instant Pot
    • Crock Pot
    • Heavenly Homemaker’s Weekly Menus
  • Homemaking
    • Real Food Sources
  • Store
  • Contact
    • Advertise
    • Disclosure
    • Privacy Policy
  • Simple Meals
  • Club Members!

Real Food Money Saving Tips

September 5, 2019 by Laura 2 Comments

This post may contain affiliate links. For more information, please see our disclosure policy.

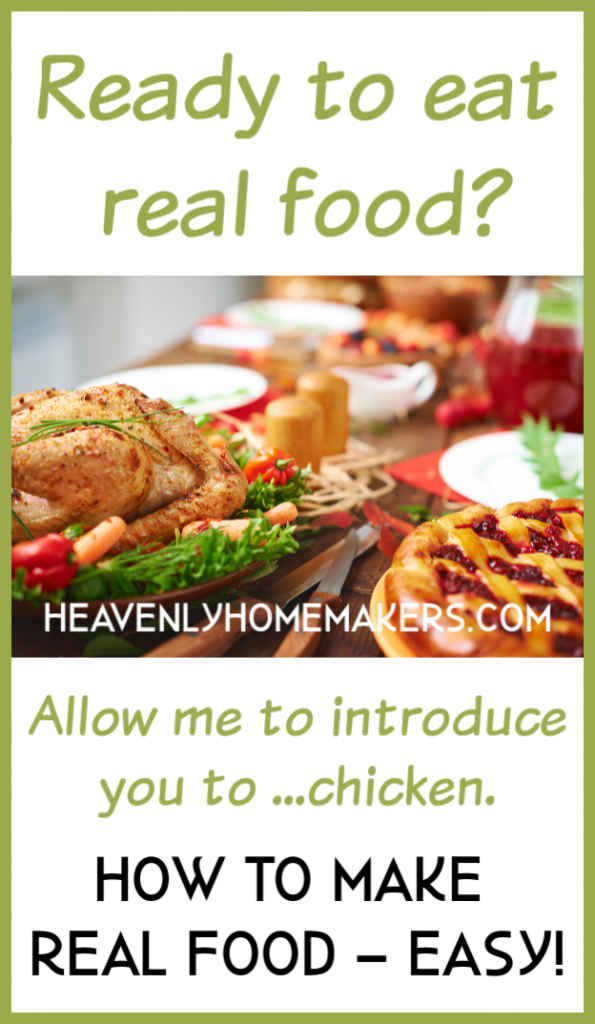
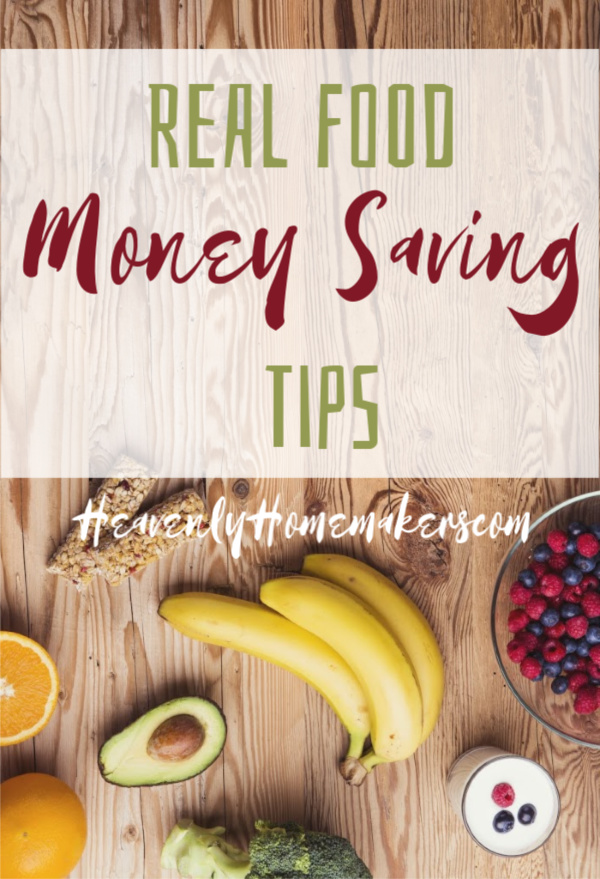
Want some simple real food money-saving tips? Is it possible to eat healthy food and still stay on a budget? It’s like the best of both worlds! And it really is doable for everyone.

First, I should let you know that I found myself having this discussion with myself (tell me you do that too?). My self discussion sounded something like this:

  • Laura, why do you always feel the need to put the word “Simple” in front of everything?? “Simple Meals” “Simple Recipes” Simple Money Saving Ideas…”
  • Because it is…it’s all simple.
  • Well, I guess that’s simple enough.

And then one of my kids interrupted my self discussion and I moved on. This is probably a good thing.

But truly, I don’t do anything unless it’s simple. Life is hard enough. Why make food difficult?

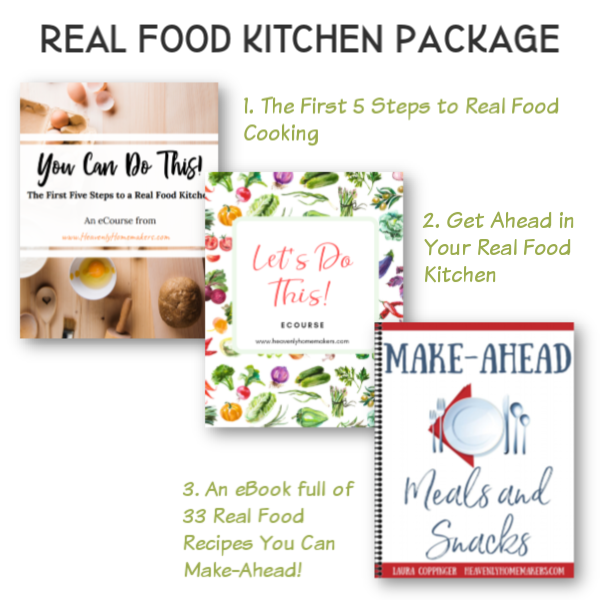
With this in mind, we put gathered all of our best and simplest real food money-saving tips, and we put them into a new and fun little eBook. Obviously, we had to use the word “Simple” in the title. It’s all about switching to real food and it’s all about saving money – but all of the tips are SIMPLE.

You wouldn’t want it if it was difficult, am I right?!

  • “Buy complicated ingredients!”
  • “Shop at weird stores!”
  • “Stand on your head whilst straining the strange liquid thing into the never-before-heard-of dry thing.”

No. Not here. Not now. Not ever. {Sobs just a little bit thinking about it.}

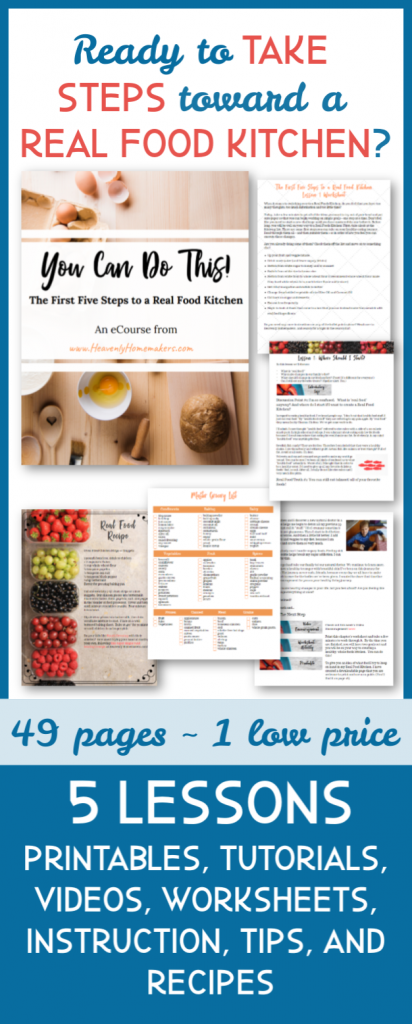
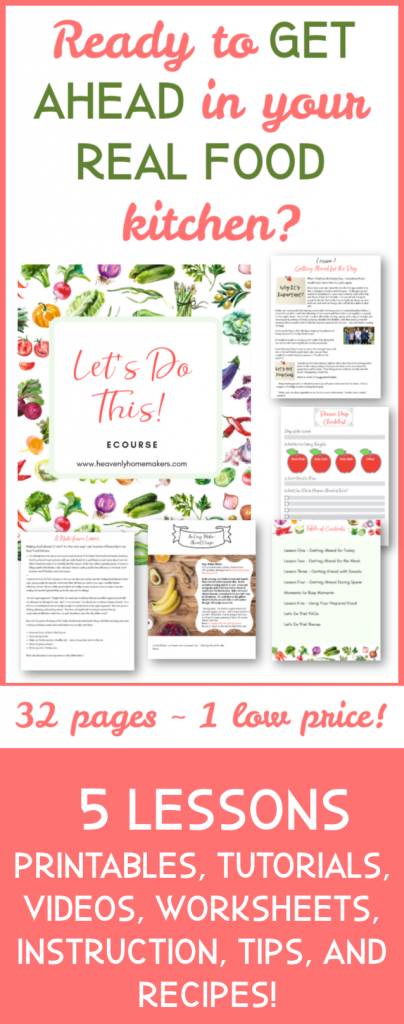
Here’s the book we just completed, and would you look at that? The word “Simple” is right there in the title.

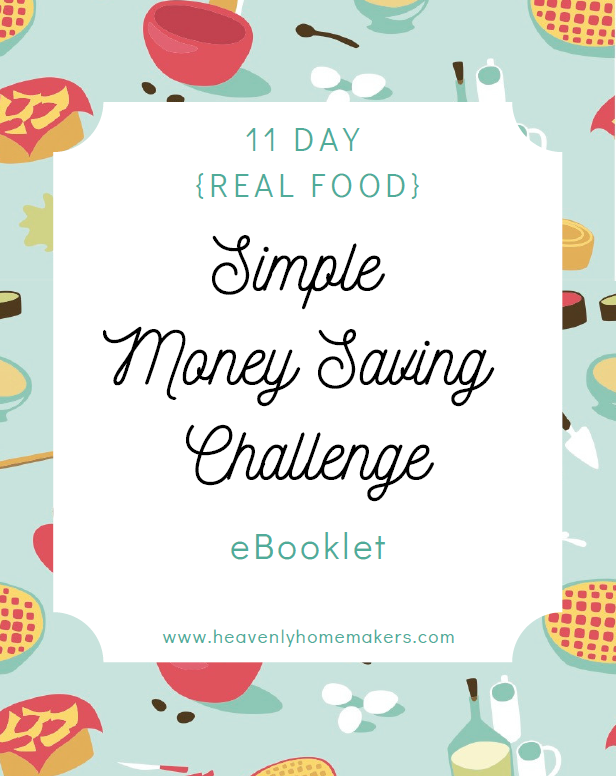
Notice that the word “Challenge” is also in the title. But don’t let that scare you. The challenges are our way of giving you simple (of course) goals to strive for throughout the book so that you are actually motivated to make some changes! Easy peasy.

We’re not ready to put this new book into our Shop yet, but we are ready to give it to you today for free!

See, here’s what we’re thinking: We kind of think everyone should invest in the Healthy Living Bundle because it’s cheaper than a doctor visit and gives you way more help and information than one doctor visit ever could give. (Not that this replaces your doctor, and blah, blah, all the other disclaimers, please go to the doctor as needed, you heard it here.)

We just really like the information we have learned and continue to learn from the bundle (read the specifics here if you don’t believe me) and want you to have all the information too. As a “thank you” for purchasing the Healthy Living Bundle through our links, we’ll give you this pretty new eBooklet for free!

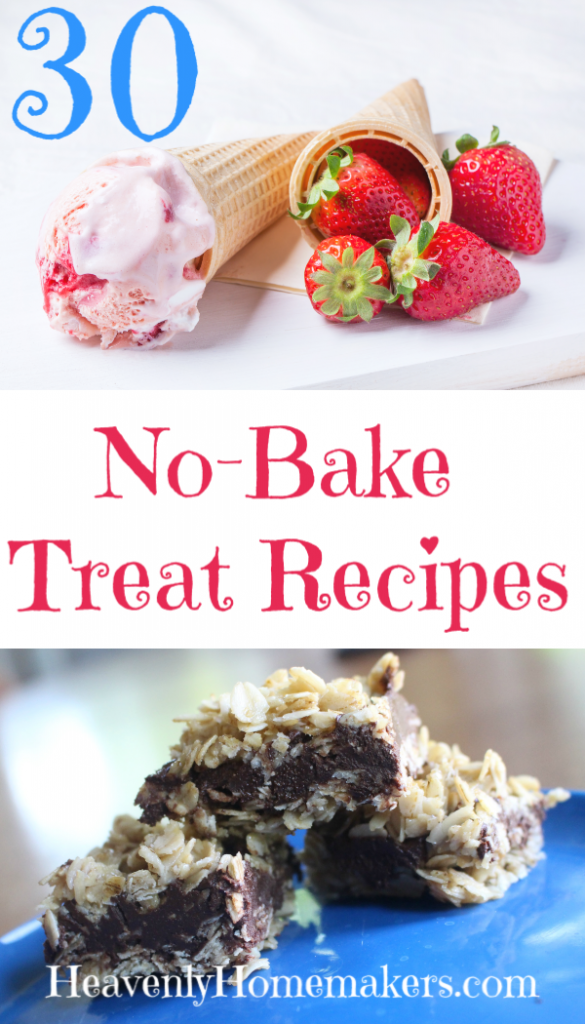
Simple Real Food Money Saving Tips

What’s inside this book that’s worth reading? Well, I hate to give it away, but it probably talks about:

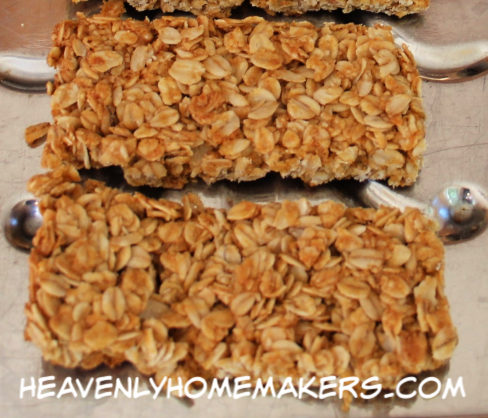
  • Why switching from fake margarine to real butter will actually save you money, even though butter costs more than margarine. Crazy, but true.
  • How adding spinach to many different recipes won’t even shock your family, but will add a lot of nourishment.
  • Leftovers. And how you should use them instead of waste them (thus wasting money). And how you can use them creatively even if your family doesn’t like leftovers.
  • The fun of actually cleaning out the pantry and freezer, making meals with food you already have before they go bad.
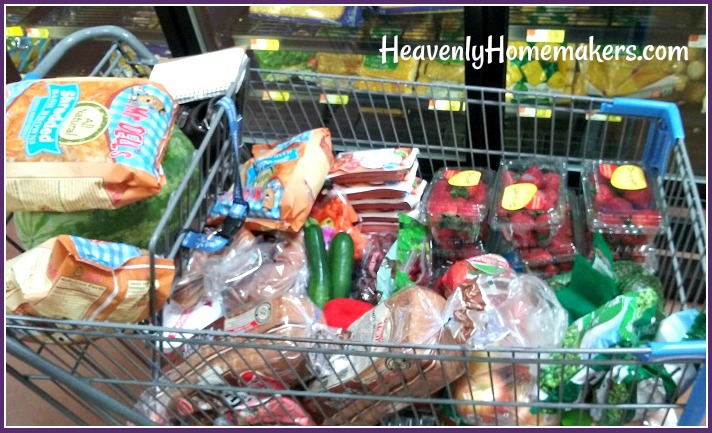
  • Packing food for road trips and outings so that you eat healthier and save money

Did I mention there are all kinds of wonderful links to inexpensive real food recipes throughout the book? We’ve got you covered.

How to get the Simple Real Food Money Saving Challenge eBook for free:

Purchase the Healthy Living Bundle through our links. Email me a copy of your receipt and I’ll thank you by emailing you this book. Easy and fun!

Or shall I say…simple. Yes, probably.

Be sure to email me after your purchase so I can send you this free book! Bundle sales close on Monday, September 9. This free book offer ends that day too!

Heavenly Homemaker's Club Members: Access your homepage and all your fantastic resources here! Not a member yet? Please join us!

Simple Cheeseburger Mac in the Instant Pot

August 27, 2019 by Laura 6 Comments

This post may contain affiliate links. For more information, please see our disclosure policy.

Once upon a time, I had a genius idea to add seasoned hamburger meat to our Simple 10-Minute Instant Pot Mac and Cheese. This magically and beautifully turned into Simple Cheeseburger Mac in the Instant Pot. And once again, dinner is saved!

Mind you, this recipe is made even easier if I have “worked” ahead and have hamburger meat already pre-cooked and in the fridge ready to pull out as needed. And by “worked” I mean that I open several packs of hamburger meat (usually frozen) and plop it into my Instant Pot where it cooks all by itself for a few minutes, providing our family with several meals worth of pre-cooked meat to use easily in recipes as needed.

If you get an Instant Pot for no other reason, get it so that it will cook your hamburger meat for you. I usually cook 7-pounds at once, and it is such a time and energy saver!

Simple Cheeseburger Mac in the Instant PotYum

5.0 from 1 reviews
Simple Cheeseburger Mac in the Instant Pot
 
Save Print
Author: Laura
Serves: 4-6
Ingredients
  • 1 pound cooked hamburger meat
  • ½ teaspoon garlic powder
  • ½ teaspoon chili powder
  • 16-ounces whole grain pasta (any shape)
  • 4 cups water
  • 4 Tablespoons butter
  • 2 teaspoons sea salt
  • 1 cup heavy whipping cream
  • 3 cups shredded cheese (we love Colby jack)
Instructions
  1. Cook hamburger meat and season with garlic powder and chili powder.
  2. Stir meat, uncooked pasta, water, butter, and salt in your instant pot.
  3. Seal and cook on manual, high pressure for 4 minutes.
  4. Quick release the pressure.
  5. Open the pot and stir in the cream and cheese until melted and creamy.
3.5.3229

This recipe is incredibly easy to make, and it is a huge hit with the family! Any time I can make pasta without actually boiling pasta is a win in my book. Fewer dirty dishes, less time in the kitchen, and a delicious meal too!

Want More Simple Recipes?

We’ve got a huge list, and it keeps growing!

  • Simple Baked Salmon and Asparagus
  • Simple Crock Pot Chicken Soup with a Kick
  • Simple Skillet Taco Pasta
  • Last-Minute Lentil Chili
  • Simple Sweet and Sour Baked Chicken Legs
  • 20-Minute Taco Soup
  • Simple Cheesy Baked Chicken
  • Simple Creamy Chicken Stew in the Crock Pot
  • Simple Italian Beef and Broccoli Skillet
  • Simple Bacon Ranch Chicken
  • Simple Hawaiian Crock Pot Chicken
  • Simple Taco Rice Dinner
  • Simple Last Minute Nacho Plate
  • Simple Chicken Cheeseballs with a Kick
  • Simple Beanie Weanies
  • Simple Crock Pot BBQ Spareribs
  • Simple Pizza Chicken Bake
  • Simple Italian Chicken and Green Bean Bake
  • Last Minute Creamy Bacon Spaghetti
  • Simple Hamburger Soup
  • Simple Parmesan Broiled Fish
  • Simple Overnight Saucy Crock Pot Chicken
  • Simple 15-Minute Meal
  • Simple Overnight Melt-in-Your-Mouth Beef Roast
  • Simple 3-Cheese Crock Pot Pasta
  • Simple Oven Fried Chicken
  • Simple Honey Mustard Chicken Legs
  • The Easiest Mashed Potatoes in the World
  • Simple Garlic Butter Shrimp
  • Simple Crunchy Ranch Chicken Strips
  • Simple Crock Pot Shredded Ranch Chicken (for salad or tacos)
  • Simple Crock Pot Pizza Casserole
  • Simple Barbecue Beef Roast
  • Simple Spanish Rice Bowls
  • Simple Roasted Rotiserie Chicken
  • Simple Green Chile Chicken
  • Simple Tex-Mex Creamy Chicken
  • Simple Waffle Omelets
  • Simple Crock Pot Taco Pasta
  • Simple Grilled Chicken
  • Simple Hawaiian Beef Roast
  • Simple Crock Pot Creamy Stew Meat
  • Simple Cheese Stuffed Burgers
  • Simple Hashbrown Casserole (For Instant Pot, Crock Pot or Oven!)
  • Simple Lasagna Casserole (For Instant Pot or Crock Pot)
  • Simple Chili Mac
  • Simple Bacon Cheeseburger Casserole
  • From Burrito Bar to Casserole (a 5-Minute Meal!)
  • Simple Bacon Cheeseburger Roll
  • Simple Garlic Parmesan Chicken Legs
  • Super Simple Lasagna
  • The Simplest White Chicken Chili
  • Simple Lentil Nachos
  • Simple Tuna Patties
  • Simple Banana Pancakes
  • Simple Crock Pot Applesauce BBQ Chicken
  • Simple Hashbrown and Egg Nests
  • Simple Cornbread Waffles with Chili
  • Simple Veggie Fritters
  • Simple Lemon Garlic Chicken Legs
  • Simple Noodle Soup
  • Simple Three Cheese Spaghetti
  • Simple Crock Pot Salsa Shredded Beef
  • Cheeseburger Hashbrown Cups or Casserole
  • Easiest Beef Roast in the Instant Pot
  • Simple One-Dish Chicken Florentine
  • Simple Creamy Layered Enchiladas
  • Simple Ham and Hashbrown Casserole
  • 5-Minute Cheesy Hamburger and Potatoes
  • Simple 10-Minute Instant Pot Mac and Cheese
  • Simple Creamy Chicken Soup
  • Simple Broccoli Bacon Chicken
  • Simple Cheesy Salsa Chicken
  • Simple (Mostly Real Food) Tator Tot Casserole
  • Simple Cheeseburger Noodle Crock Pot Dinner
  • Simple 5-Minute Shredded Chicken
  • Simple Popcorn Chicken
  • Simple Popcorn Chicken Tacos
  • Simple Make-Ahead Parmesan Meatballs
  • Simple Saucy Parmesan Meatballs
  • Simple Make-Ahead Parmesan Burgers
  • Simple Creamy Pasta in the Instant Pot

Join Simple Meals!

728x90

We love how Simple Meals has been saving family time for so many, and helping people put great food on the table each night! Join us for just $1/week! (It’s half price right now!!!!)

[wp_eStore_subscribe_fancy id=28]

Heavenly Homemaker's Club Members: Access your homepage and all your fantastic resources here! Not a member yet? Please join us!

Take Ten Minutes To Prep For Tonight’s Meal!! (Take the Challenge!)

August 11, 2019 by Laura 12 Comments

This post may contain affiliate links. For more information, please see our disclosure policy.

Who’s ready to make dinner time easier and less stressful? Who’s interested in saving money and eating healthier? Join us for our fun and easy Take Ten Challenge!

Take ten minutes each morning to make dinner prep in the evening much easier! Ready to learn how?

What’s great about this “challenge” is that it’s really not so challenging at all. In fact, all the tips, suggestions, and challenges we’re going to offer should really make your life much, much easier. If you ask me, the actual dinner challenge really comes in not being prepared, in giving in to spending extra money on take-out, in feeling sluggish after eating a less-than-wholesome meal, and in becoming discouraged because we just don’t like cooking or just don’t know how to “get it together” in the kitchen.

The Take Ten Challenge is here to help.

Here’s how it works:

The Take Ten Challenge

Cost: $17.

What: You’ll receive step-by-step instructions and recipes to help you put meals on the table with an easy 10-minute morning prep! You’ll receive a complete grocery list to get you started. Then each evening of your 10-day challenge, you’ll receive an email containing tomorrow’s Take Ten Challenge information.

When: As soon as you sign up, you’ll receive an email with full grocery list for the Take Ten Challenge. Plus you’ll receive all the other information you’ll need. Two days later, your Take Ten Challenges will begin to arrive in your inbox. You’re going to love how easy this is!

How it works: After you sign up, we’ll immediately send you a complete grocery list and all the information you’ll need to know as we launch the challenge.

What you need to do: Read the simple information, grab the (inexpensive, basic, real food) groceries, and be ready to dive in two days after you sign up. (Hint: For the first meal and challenge, you only need 2 simple ingredients. Hooray!)

Then what: Watch for the first Take Ten Challenge email to arrive at 7:00 pm CST two days after you sign up. It’ll look something like this:

When each email arrives, plan to spend about 10 minutes (or less?!) the following morning doing whatever the Take Ten challenge suggests that you do. That evening, complete the final preparations, then enjoy an easy meal around the table with your family!

Not a morning person?

If you prefer, complete some of the meal prep tasks at night before heading to bed!

Watch for your Take Ten eBook!

After you complete the 10-day challenge, you’ll receive our complete Take Ten eBook, full of all of the challenges you completed plus much more great information!

Ready to join the Take Ten Challenge?

Our Heavenly Homemaker’s Club Members have access to this amazing resource plus ALL of our eBooks, eCurriculum, printables, and so much more – for one very low price! Join us here!

Or purchase separately below:

Once you’ve purchased, watch for an email letting you know how to access your Take Ten Challenge information. Then you’ll receive our Take Ten grocery list and other important challenge information. Looking forward to saving time and money with you while we put great meals on the table!!

Maximum quantity exceeded
Minimum purchase amount of 0 is required
Maximum purchase amount of 0 is allowed
17.000
Heavenly Homemaker's Club Members: Access your homepage and all your fantastic resources here! Not a member yet? Please join us!

Homemade Crunchy Granola Bars

July 30, 2019 by Laura 8 Comments

This post may contain affiliate links. For more information, please see our disclosure policy.

I’m sure you’re wondering: Why did Laura decide to make Homemade Crunchy Granola Bars?

Oh, you weren’t wondering? You’re just so used to me sharing recipes that you never question what inspired the recipe? And really, you probably don’t even care too much as you really just want to take a peek at the recipe to see if it looks easy and good enough to try.

It get you. I’m a “scroll to the bottom of the post and just read the recipe” kind of a gal too. But still, I wanted to tell you the question I asked myself before I looked up ideas for how to create Homemade Crunchy Granola Bars. The question was this:

What is a better use of my time – going to the store or making these at home?

It wasn’t really about money, even though making these homemade is going to save a buck or two. It wasn’t about the ingredients, even though making these homemade is going to ensure we only eat the best of the best. What was it about then?

See, now that we have little ones in the house again (currently a 5-year-old and an 8-month-old), along with our teens and college guys home for the summer, I am questioning my best use of my time for EVERYTHING. Not one minute can be wasted, you know?

We’ve been on a bit of a Nature Valley Granola Bar kick, because God is bigger than store-bought granola bars when you have a lot of people to love on. But then we ran out of the bars, and quite a few other staple snacks too. I mean, I did add them to the grocery list, but on that particular day and week, I was trying to avoid going to the store for as many days as possible.

We had fresh produce from our garden and milk from the farm. So all other meals and snacks could be made from what we had so that I wouldn’t have to mess with lugging babies to the store. Can anyone else relate to this?

So while Boy Babe was napping, Bonus Boy and I mixed these up after looking up a few ideas online. He had fun, I had fun, and you can bet that this recipe is super simple because if I’m too lazy to go to the store, I’m certainly not willing to make a difficult recipe, right?

We are very pleased with how these turned out! They include only simple, real food ingredients. They are great for breakfast or for a snack. And they pack well in the diaper bag to, you know, take to the store with us should we ever decide to go again. :)

Homemade Crunchy Granola BarsYum

5.0 from 1 reviews
Homemade Crunchy Granola Bars
 
Save Print
Author: Laura
Serves: 15
Ingredients
  • 3¼ cups rolled oats
  • ⅔ cups flour (I use freshly ground soft white wheat)
  • 3 tablespoons brown sugar or sucanat
  • ½ teaspoon baking soda
  • ½ teaspoon salt
  • ⅔ cup honey
  • ⅓ cup melted coconut oil
  • 1 teaspoon vanilla extract
Instructions
  1. In a large bowl, mix oats, flour, brown sugar, baking soda, and salt.
  2. Add honey, coconut oil, and vanilla, stirring until well combined.
  3. Press mixture down into a parchment paper-lined 9x13 pan.
  4. Bake in a 350 degree oven for 20-25 minutes or until golden brown.
  5. Remove pan from oven, and press the bars down with another piece of parchment paper so that they stay nice and tight while cooling.
  6. After 15 minutes, remove the bars from the pan to cool for a few more minutes.
  7. Cut them into 12 bars or break into snack-sized bites.
  8. Allow approximately 2 hours for the bars to become crunchy.
3.5.3229

In your current season of life, what is your preference? Buy most food store-bought or make do with what you have at home so you don’t have to mess with a grocery store run?

Heavenly Homemaker's Club Members: Access your homepage and all your fantastic resources here! Not a member yet? Please join us!

Why I Decided to Have an Amazon Prime Pantry Membership

July 16, 2019 by Laura 3 Comments

This post may contain affiliate links. For more information, please see our disclosure policy.

Until recently, I had never really looked into Amazon’s Prime Pantry. It came with a monthly fee, after all. But here’s what made me decide to take on an Amazon Prime Pantry membership.

There are several reasons really. But the first and most important reason is:

1. Groceries placed right on my porch.

I absolutely love groceries being delivered right to my doorstep. What a blessing!!

For years I’ve taken advantage of Amazon Prime and Subscribe and Save. I order many food and household items by the case, saving at least 15% and maybe more if there are coupons. Since I don’t have a Sams or Costco closeby, this has been a fantastic option for us!

But I kept ignoring all the Prime Pantry offers, mostly because I didn’t want to take the time to figure out how it worked (silly). Also, since I usually buy by the case, I wasn’t sure it would be beneficial. Then on Prime Day, there was a sweet Prime Pantry offer which made me decide to give it a try. Aha, I realized! Having a Prime Pantry membership would greatly help me with the fact that…

2. I don’t have any room in my grocery cart anymore!

With a squishy baby in the front and a stocky 5-year old in the big part of the cart, there’s not much room left in my grocery cart for actual groceries. We go through lots of food, so typically I need to fill an entire cart to the max.

This has become very challenging, phew!

When I realized that Prime Pantry would save me a trip to the store for all the odds and ends I typically get (applesauce squeezies, granola, chips, condiments, nuts, etc.), it made me very excited. If most of what I needed at an actual store was fresh fruits and veggies, chicken, and frozen food – well THAT I could probably fit into the cart along with cute little boys. :)

3. But what about the $4.99 monthly fee?

Worth it, worth it, worth it.

I like avoiding fees just as much or more as the next guy. But goodness, there’s a lot to be said for keeping life calm and simple when so much going on in life is far from calm and simple.

With Prime Pantry, I’ll now be able to order whenever I need to and have it delivered for free (on orders over $10, which is basically the amount of food we eat in five minutes). That $4.99 fee saves me all kinds of time, energy, and effort so I feel it is money well spent. Plus it will probably save me money in the long run.

Nope, no room for little boys in that cart!

4. Also, my sanity.

God bless little boys who talk non-stop and ask all the questions up and down every aisle. I absolutely love how inquisitive, fun, and aware our 5-year old is, and taking him to the store is so good for life skills training.

But I find it very difficult to compare prices and think about specific ingredients we need or make an actual good decision about my purchases while answering, “Mom, why is that box blue? Why isn’t that box blue? Are your eyes blue? Do you like blue? Blue is my favorite color. But green is my favorite. And every color of the rainbow is my favorite. Remember that rainbow we saw? I want to see another rainbow. Why can’t we see another rainbow today?”

Oh precious one. Be five forever. But sweet as it all is, that doesn’t help me think and shop at the same time.

So Prime Pantry will help me out with this and give us fewer aisles to travel during shopping trips. I guess I’ll have to come up with other excuses now for losing my sanity.

So Amazon Prime Pantry for the win.

If at any time I find that I’m not getting my $4.99/month worth out of this membership, I’ll let it go, no problem. But for now, I’m finding this to be quite wonderful and helpful!

Want to try it for free?

This is pretty exciting! If you click on the banner below, you can sign up for a free trial for one month to see if it benefits you and your family!

Are you a Prime Pantry member? What do you like about it?


Heavenly Homemaker's Club Members: Access your homepage and all your fantastic resources here! Not a member yet? Please join us!

30 No-Bake Treat Recipes

June 27, 2019 by Laura Leave a Comment

This post may contain affiliate links. For more information, please see our disclosure policy.

Avoiding the oven this summer? Me too! To help us out, here are some awesome No-Bake Treat Recipes for us to make!

Allow me to highlight some of my favorites for you. As you can imagine, I had a hard time narrowing it down. Ah, the difficulty of choosing ones favorite treats…

As far as “cookie bars” go, this Easy No-Bake Chocolate Peanut Butter Oatmeal Bars recipe is my current favorite. Can you blame me?

As for drinks, you already know that this Chocolate Frappe is my very favorite in the summer.

When strawberries are in season, I feast on these Strawberry Cheesecake Parfaits. It’s like heaven in a bowl.

Or I mix things up a bit and make Chocolate Whipped Cream to put on my strawberries.

I super love that I have figured out how to make No-Churn Ice Cream varieties! These recipes only take 5 minutes to prepare, and they are so good! See #26-#29 below for all the recipes, but here’s the Low Sugar Chocolate Ice Cream recipe to get you started!

These Peanut Butter Honey Rice Krispie Treats are so very simple, and I love the sweetness with the crunch!

Last but not least (because I have an entire list of No-Bake Treat Recipes below!), I must highlight my two favorite “jello salad” knock-offs. Spoiler: There is no jello involved in the making of these recipes. Simple real food ingredients, plus delicious fresh fruit make these awesome salad treats!

Here’s my Pineapple Fluff Salad…

And my Strawberry Fluff Salad…

Ready for the entire huge list? Here you go!

30 No-Bake Treat RecipesYum

  1. Easy No-Bake Chocolate Peanut Butter Oatmeal Bars
  2. Simple No-Bake Granola Bar Bites
  3. Honey Sweetened No-Bake Cookies
  4. Chewy Granola Bars
  5. Chocolate Frappe
  6. Coconut Fudge Bars
  7. Stevia Sweetened Fat Bombs or Honey Sweetened Fat Bombs
  8. Frozen Yogurt Cups
  9. Honey Peanut Bars
  10. Mudballs
  11. Nectarine Cream Cups
  12. No-Bake Chocolate Fudge Bites
  13. No-Bake Peanut Butter Cookie Bites
  14. No-Bake Snickerdoodle Bites
  15. Pineapple Fluff Salad
  16. Raspberry Lemon Cream Cups
  17. Strawberry Cheesecake Parfait
  18. Chocolate Strawberry Cheesecake Parfait
  19. Americana Cheesecake Parfait
  20. Chocolate Whipped Cream for Coffee or Fruit
  21. Strawberry Milkshake
  22. Strawberry Peach Slushie
  23. Pineapple Mango Smoothies
  24. No-Bake Chocolate Peanut Butter Cheesecake
  25. Peanut Butter Honey Rice Krispie Treats
  26. Low Sugar Vanilla Ice Cream
  27. Low Sugar Chocolate Ice Cream
  28. Low Sugar Strawberry Ice Cream
  29. Low Sugar Peanut Butter Ice Cream
  30. Strawberry Fluff Salad

Have fun making these great No-Bake Treat!

Heavenly Homemaker's Club Members: Access your homepage and all your fantastic resources here! Not a member yet? Please join us!

How to Make Real Food Easy

June 5, 2019 by Laura Leave a Comment

This post may contain affiliate links. For more information, please see our disclosure policy.

Are you ready to eat real food, but you’re overwhelmed by all the work that seems to be involved? Allow me to introduce you to my friend…the Chicken. And to my other friends: Apples, Butter, and Cream. Don’t forget the infamous Green Bean. Gather ’round. I want to show you how to make real food EASY!

Sure, there’s no such thing as a free {real food} lunch. What I mean is, real food doesn’t just appear on the table by magic – so I certainly can’t claim that making real food for your family doesn’t take any work at all.

But I can tell you how to make the work much, much easier!!

And if you’re afraid of switching over from processed, boxed, pre-made foods or take-out because you don’t even know where to start – I would be so very happy to guide you along in this transition! I PROMISE it is much easier than you think!!! And it tastes delicious and normal. Who knew?

How to Make Real Food Easy!

I want to walk you through taking some very simple, inexpensive first steps toward transitioning your kitchen away from processed foods and settling into enjoying more real food.

The good news with this? You can start with whatever step you’re ready for! Struggling to give up soda? Don’t despair. Just start with something else. Can’t stand veggies? How about learning some new ways to eat them, or just start with fruit instead. If nothing else, start your journey to a real food kitchen by switching from margarine to real butter. There are so many places to start – and you can begin with whatever is right for you!

You Can Do This!

You may remember this eCourse from many years ago. I’m happy to share that we’ve spent the past few months re-working it so that it is brand new and improved!

It includes 49 pages, 5 lessons, printables, worksheets, videos, tutorials, instruction, tips, and recipes. You can use this to baby step or giant step your way toward a real food kitchen – go at your own pace!

You can read all the specifics of this awesome eCourse here.

Let’s Do This!

Oh look! We updated our Let’s Do This eCourse too! It includes 32 pages, 5 lessons, printables, worksheets, videos, tutorials, instruction, tips, and recipes. This eCourse walks you through managing your real food kitchen so that you can simplify and actually get ahead! Fill the freezer, make tonight’s dinner in the morning, get some healthy snacks stashed away for the week.

It actually is possible to get ahead and simplify your life, and this eCourse shows you how!

You can read the specifics about this eCourse here.

Afraid to take an eCourse?

Don’t worry. The teacher is very nice. ;) Upon completion, everyone gets an A. The only homework involved is yours and yours alone, to be done on your own time and for your family’s benefit. Once you purchase, you can keep the course information forever and reference them as needed. Read them on your computer or print the pages you need in your hands. What else?

Oh, these eCourses only cost $10 each. (“Where else can you take an entire class at such a low cost?!” exclaims the mother of many college students.)

It’s kind of too good to be true, except that we love all that these offer and we want to make them accessible to everyone! So it’s good AND it’s true. And there’s something else:

We put them together into a Real Food Kitchen Package!

We packaged up both of the new-and-improved eCourses, and we threw in our Make-Ahead Meals and Snacks recipe eBook because you really need those incredible recipes along with these eCourses!

Total cost for all three of these would normally be $25. But for one week, you can get this entire package of 3 resources for just $12! Total!

Ready to start working your way toward a healthy, real food, easy kitchen life? This time couldn’t be more perfect!

[wp_eStore_fancy1 id=44]

Heavenly Homemaker's Club Members: Access your homepage and all your fantastic resources here! Not a member yet? Please join us!

Easy Peanut Butter Fluff Fruit Dip

May 21, 2019 by Laura 1 Comment

This post may contain affiliate links. For more information, please see our disclosure policy.

You need just three simple ingredients, plus some bananas, apples, grapes, or berries – and you can enjoy this wonderfully refreshing treat: Easy Peanut Butter Fluff Fruit Dip!

This is one of those delightful recipes that you can hand off to your kids to make! Not only will it give them experience with cooking and reading recipes, but it will also invite them to eat fruit.

I like to make homemade peanut butter – which is easier than you think! Here are the recipe links that explain how to make peanut butter. But of course, if you prefer to buy it at the store, just be sure the ingredients are wholesome!

  • Peanut Butter (just peanuts!)
  • Peanut Butter (super creamy – like Skippy or Jif)

Along with peanut butter, all you need is yogurt and honey. Easy peasy! See? Your kids can make this!

Want to get your kids involved in the kitchen with you?

We have a list of great resources for you here. Plus, we encourage you to take recipes like this Easy Peanut Butter Fluff Fruit Dip and use it to help your kids get excited about helping you in the kitchen!

Easy Peanut Butter Fluff Fruit DipYum

5.0 from 1 reviews
Easy Peanut Butter Fluff Fruit Dip
 
Save Print
Author: Laura
Serves: 2 cups
Ingredients
  • 1 cup plain whole milk yogurt
  • 1 cup natural creamy peanut butter
  • 3 Tablespoons honey
Instructions
  1. Blend ingredients together in a blender or with a hand mixer.
  2. Serve with your favorite fruit!
3.5.3229

Love recipes like this Easy Peanut Butter Fluff Dip that have five or fewer healthy ingredients?

We do to! This book is filled with 111 recipes just like this one!

[wp_eStore_fancy1 id=32]

Want more great dip recipes?

We love making entire meals out of fruits, veggies, and chips with dips! Here are 16 more of our favorite dip recipes:

  1. Simple Bean and Cheese Salsa Dip
  2. Creamy Chocolate Fruit Dip
  3. Creamy Italian Veggie Dip
  4. Cream Cheese Salsa Dip
  5. Bacon Ranch Chip Dip
  6. French Onion Dip
  7. Bacon Tomato Dip
  8. Black Bean Salsa
  9. Easy Veggie Dip
  10. Healthier Cheese Dip 
  11. Hot Spinach and Artichoke Dip
  12. Nacho Cheese Pretzel Dip
  13. Easy Guacomole
  14. Easy Cheesy Bean Dip
  15. Hamburber Sauerkraut Dip
  16. Cream Cheese Fruit Dip


Heavenly Homemaker's Club Members: Access your homepage and all your fantastic resources here! Not a member yet? Please join us!

How $10 Worth of Meat Fed My LARGE Family 5 Meals!

April 4, 2019 by Laura 8 Comments

This post may contain affiliate links. For more information, please see our disclosure policy.

No doubt, sometimes my family eats $10 worth of meat in 5-minutes {gulp}. But then there is the beautiful occasion that I see high quality, spiral cut hams marked down to just $0.99/pound for quick sale. Quick sale indeed. I don’t even give it a second thought before putting the ham quickly into my cart. Sold!

Ok, fine. Let’s be real. I quickly put three hams into my cart. How could I resist? They were each $10 or less, and I have learned the beauty of how delicious spiral cut ham is, how easy it is to prepare, and how far I can stretch this large piece of meat. $10 for 5 meals’ worth of meat? Yeah, baby. There are teenage boys and college men and all of their friends to feed, plus a 5-year old ham-loving Bonus Boy and a hungry hard-working husband. Somewhere in there, this mom likes to eat too.

Is Laura excited about her $10 hams? Why yes, I guess this fact cannot be denied.

How to Cook a Spiral Cut Ham

First, let’s discuss how easy a spiral cut ham is to bake. Make it difficult if you prefer, but as for me and my house, we will:

  1. Open the package.
  2. Throw away the glaze packet that comes with it, because why?
  3. Plop the ham into a roasting pan.
  4. Put the lid on the pan.
  5. Slide the pan into the oven and bake it in a 325-degree oven for 20-minutes per pound.

Truly, doing the math to figure out the baking time takes longer than actually preparing the ham for baking. (10 pounds of ham x 20 minutes of baking time = 200 minutes divided by 60 minutes in one hour = cook my 10-pound ham for approximately 3 1/2 hours.)

Once time is up, I set the cooked ham, roasting pan and all, onto my buffet to serve it. I use a large bread knife to cut it off the bone, which takes no effort because it falls off the bone anyway, and it has already been spiral cut.

How Delicious is a Spiral Cut Ham?

Oh my dears. There is not much better. And I don’t even add any fancy topping or glaze. Mmm, it is fantastic.

How a Spiral Cut Ham Feeds My LARGE Family 5 Meals

What’s beautiful about how easy it is to stretch one ham into at least 5 meals is that it’s not even a stretch. One 10-pound ham provides a LOT of meat. Amen and amen. Here is a typical way I can use one ham to provide my family (of 7) with 5 great meals!

  1. Bake it as directed above, and serve it as a Sunday meal after church with Cheesy Hashbrown Casserole, salad, and veggies on the side.
  2. Use small leftover pieces of ham the next morning to make Ham and Cheesy Eggs in a skillet. (This actually gets them out of bed in the morning because it smells so good!)
  3. Stir pieces of leftover ham into a big batch of Creamy Mac and Cheese. I can’t tell you how delicious.
  4. Stir pieces of leftover ham into a pan of Simple Ham and Hashbrown Casserole.
  5. Use larger slices of ham to make BLTs, or rather HLTs since we are using ham instead of bacon. Or better yet, make HLT Wraps. How can anything taste any better?

We’re talking about 5 meals filled with healthy portions of meat that tastes delicious. Happy, happy, happy.

Other meals to create with your leftover ham include adding ham to:

  • Regular cold ham sandwiches
  • Simple Hashbrown and Egg Nests
  • Simple Three Cheese Spaghetti
  • Simple Waffle Omelets
  • Last Minute Creamy Bacon Spaghetti (except use ham instead of bacon)
  • Use the ham bone to make broth – which takes your purchase even farther!

By the way, finding a $10 ham isn’t a regular occurrence for me, just an incredibly exciting one! But often at Christmas or Easter time I find them for $20ish. While a $10 ham gives us 5 meals for just $2 each (!!!), a $20 ham still provides us with 5 meals at only $4 each. It’s fun to think this through when considering a purchase like this. How far with this meat stretch? How many meals can I get out of my $20 (or $10!)? The same is often true of a holiday turkey. I love it when stretching meat is easy!

How do you like to use leftover ham?


Heavenly Homemaker's Club Members: Access your homepage and all your fantastic resources here! Not a member yet? Please join us!

40+ Real Food Muffin Recipes

March 31, 2019 by Bethany Lotulelei 6 Comments

This post may contain affiliate links. For more information, please see our disclosure policy.

Muffin lovers, unite! And bring your chocolate chips when you come. Some of the 40+ real food muffin recipes we’re about to share are going to need them.

40 + Real Food Muffin Recipes

For eleven years now, I’ve been posting muffin recipes here to share with you. We decided it would be nice to list them all in one place for you to access! But first, two of my favorite muffin-making tips…

  1. Make Muffin Batter ahead of time!

    Follow this tutorial to easily freeze muffin batter for later. I love this time-saving trick.

  2. Make Muffin Mix!

    Make a big batch of Muffin Mix so you can easily whip up a pan of muffins without getting out all the ingredients!

And now it’s time to share our favorite muffin recipes. These are all either whole grain or grain free!

40+ Real Food Muffin RecipesYum

  • Almond Flour Muffins (gluten free/dairy free)
  • Bacon Cheese Muffins
  • Banana Muffins
  • Banana Cheesecake Muffins
  • Blueberry Cheesecake Muffins
  • Blueberry Streusel Muffins
  • Bran Muffins
  • Breakfast Cake Muffins
  • Chocolate Banana Muffins
  • Chocolate Cheesecake Muffins
  • Chocolate Chip Cheesecake Muffins
  • Chocolate Chocolate Chip Muffins
  • Chocolate Swirl Muffins
  • Chocolate Zucchini Muffins
  • Coconut Flour Muffins (gluten free/dairy free)
  • Coconut Flour Banana Muffins (gluten free/dairy free)
  • Cornbread and Cornbread Muffins
  • Cream Cheese Pumpkin Muffins
  • Eggnog Muffins
  • Flourless Brownie Muffins
  • Flourless Pumpkin Muffins
  • Honey Cinnamon Muffins
  • Lemon Muffins
  • Muffin Waffles
  • Orange Muffins
  • Pancake and Sausage Muffins
  • Peaches and Cream Muffins
  • Peanut Butter Muffins (grain/gluten/dairy free)
  • Peanut Butter Chocolate Chip Muffins
  • Peanut Butter Chocolate Chip Cheesecake Muffins
  • Pumpkin Cheesecake Muffins
  • Pumpkin Chocolate Chip Muffins
  • Snickerdoodle Muffins
  • Strawberry Cream Muffins
  • Stuffing Muffins
  • Sweet Potato Streusel Muffins
  • Vanilla Muffins with Cinnamon Crumb Topping
  • Whole Grain Chocolate Chip Muffins
  • Whole Grain Lemon Muffins
  • Whole Grain Orange Poppyseed Muffins
  • Whole Wheat Chocolate Zucchini Muffins
  • Whole Wheat and Honey Zucchini Muffins
  • Whole Wheat Oatmeal Chocolate Chip Muffins

My boys’ favorite muffins are the Chocolate Chocolate Chip Muffins. Matt’s favorite is the Peanut Butter Chocolate Chip Muffin. My favorites are any that are topped with cheesecake!

What’s your favorite kind of muffin?

Heavenly Homemaker's Club Members: Access your homepage and all your fantastic resources here! Not a member yet? Please join us!
« Previous Page
Next Page »

Join Our Community!

 Facebook Twitter E-mail Instagram Pinterest

Popular Posts

~ Will All of the Real Moms Please Stand Up?
~ Easy! Stir-and-Pour Whole Wheat Bread
~ How to Make Gatorade
~ 31 Real Food Breakfast Ideas
~ Dear Teenage Girls...
~ When Mom Takes a Step Back
~ The Inexpensive Health Insurance We Love!
~ Let's Talk Real Food Grocery Budgets

Check out our latest posts!

  • Big Family Food and Fun: May 24-30, 2026
  • Free 7-Day Summer Menu Plan
  • Big Family Food and Fun: May 17-23, 2026
  • Easy Side Dishes for Summer
  • Big Family Food and Fun: May 10-16, 2026
Home  ~  Simple Meals  ~  Club Membership  ~  Shop  ~  Privacy Policy  ~  Disclosure  ~ Contact

Copyright © 2026 · Beautiful Pro Theme on Genesis Framework · WordPress · Log in