Heavenly Homemakers

Encouraging women in homemaking, healthy eating and parenting

  • Home
    • About
    • FAQs
  • Recipes
    • Bread and Breakfast
    • Condiments
    • Dairy
    • Main Dishes
    • Side Dishes and Snacks
    • Desserts
    • Gluten Free
    • Instant Pot
    • Crock Pot
    • Heavenly Homemaker’s Weekly Menus
  • Homemaking
    • Real Food Sources
  • Store
  • Contact
    • Advertise
    • Disclosure
    • Privacy Policy
  • Simple Meals
  • Club Members!

Busy Day Baked Chicken

March 1, 2020 by Laura 2 Comments

This post may contain affiliate links which won’t change your price but will share some commission.

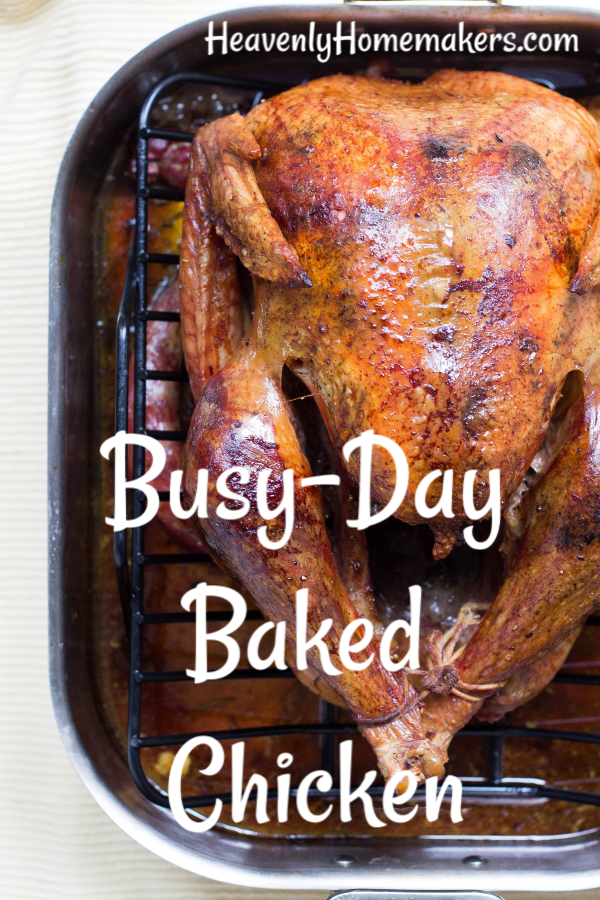
Bring on the Busy Day Baked Chicken!

Every day is a busy day! (Though it’s important that we are intentional about taking time to slow down and find restful days too!)

But for those extra-busy days – I am loving this idea for Busy-Day Baked Chicken!

This idea came from Anne, a cherished HeavenlyHomemakers.com reader. She says:

Laura, I have a favorite recipe idea to share! It was a lifesaver for me when I was a working mother (now retired). We call it “Wishbone Chicken.”

Wash and trim the fat on a whole chicken and place it in a pan. Sprinkle it with Lawry’s Seasoned Salt and slather it with Wishbone Italian Dressing. That’s it. Bake about an  hour at 350 degrees. Smells divine! Easy peasy!

As a working mom, I’d buy 3 or 4 whole chickens when on sale. I’d lay each cleaned chicken in foil and cover with the salt and dressing. Then I’d wrap each tightly in the foil and put in the freezer. On a work day, I’d take one out before I left for work, unwrap it, place in a pan, and put it in the oven (frozen). I’d set the oven to come on at 2:00 pm at 325 degrees. The chicken would be partly thawed when the oven came on. The kids and I came home from school around 3:30. We’d walk into a luscious smelling house and a delicious homemade dinner was all ready for us! – Anne

I’ve taken Anne’s great idea and we love it so much! I especially love the idea of buying the chickens on sale and making several ahead of time to freeze, then pull out and bake as needed!

This chicken is delicious and ridiculously easy!!

Busy-Day Baked ChickenYum

5.0 from 1 reviews
Busy Day Baked Chicken
 
Save Print
Author: Laura
Serves: 4-6 servings
Ingredients
  • Whole chicken
  • Seasoning Salt
  • 1½ cups Italian Dressing
Instructions
  1. Place a whole chicken on a rack, placed on a baking sheet.
  2. Sprinkle liberally with seasoning salt.
  3. Drizzle Italian Dressing over the chicken.
  4. Cover and bake for 1 hour at 350 degrees.
3.5.3229

This is my favorite Seasoning Salt. And here’s our great and easy recipe for Homemade Italian Dressing if you’d like!

Do yourself a favor and make this chicken! Serve it with a salad and steamed veggie and you have the easiest meal in the world that is extremely delicious and nourishing.

Thank you, Anne!

Psssst! Everyone be sure to grab our Simple Real Food Recipes cookbook full of amazingly tasty and simple real food recipes like this one!

Heavenly Homemaker's Club Members: Access your homepage and all your fantastic resources here! Not a member yet? Please join us!

Simple Make-Ahead Parmesan Burgers

March 26, 2019 by Laura 1 Comment

This post may contain affiliate links which won’t change your price but will share some commission.

I’m not sure if you’re keeping track or not, but this is the third variation I’ve shared in two weeks using the exact same recipe. Woohoo for easy versatility! Today we’re taking our Simple Make-Ahead Parmesan Meatball recipe and basically smashing the mixture into Simple Make-Ahead Parmesan Burgers. Are we smart or are we smart?

The idea came to me as I was working ahead to make a bunch of Parmesan Meatballs for the freezer. Either I got tired of scooping out meatballs, or I got a brilliant idea. It might have been both. After scooping out about 2 1/2 pounds of meatballs, I decided to abort my meatball endeavor. I took my remaining mixture and formed it into burger patties. I froze them, then we pulled them out to fry another day.

Fantabulous!

Might I recommend that you make these Simple Make-Ahead Parmesan Burgers with a side of Sweet Potato Fries or Simple Seasoned Potato Wedges?

Simple Make-Ahead Parmesan Burgers

Simple Make-Ahead Parmesan Burgers
 
Save Print
Author: Laura
Serves: 8
Ingredients
  • 2 pounds ground beef or turkey
  • 2 eggs
  • 3 Tablespoons dried minced onion
  • ½ cup shredded (or grated) parmesan cheese
  • 1 teaspoon sea salt
  • ¼ teaspoon ground pepper
  • ½ teaspoon garlic powder
Instructions
  1. Mix all ingredients together until well combined.
  2. Press together burger-sized patties.
  3. Fry in a skillet or on a grill for 8-12 minutes or until the meat is no longer pink.
  4. Serve right away, or refrigerate or freeze cooked burgers to easily reheat for a meal later.
  5. OR, freeze the prepared raw burgers, thaw as needed, and fry as directed.
3.5.3229

Want Parmesan Meatballs instead? Or would you prefer Saucy Parmesan Meatballs? Nothing like getting 3-meal-varieties from one recipe!

Want More Simple Recipes?

We’ve got a huge list, and it keeps growing!

  • Simple Baked Salmon and Asparagus
  • Simple Crock Pot Chicken Soup with a Kick
  • Simple Skillet Taco Pasta
  • Last-Minute Lentil Chili
  • Simple Sweet and Sour Baked Chicken Legs
  • 20-Minute Taco Soup
  • Simple Cheesy Baked Chicken
  • Simple Creamy Chicken Stew in the Crock Pot
  • Simple Italian Beef and Broccoli Skillet
  • Simple Bacon Ranch Chicken
  • Simple Hawaiian Crock Pot Chicken
  • Simple Taco Rice Dinner
  • Simple Last Minute Nacho Plate
  • Simple Chicken Cheeseballs with a Kick
  • Simple Beanie Weanies
  • Simple Crock Pot BBQ Spareribs
  • Simple Pizza Chicken Bake
  • Simple Italian Chicken and Green Bean Bake
  • Last Minute Creamy Bacon Spaghetti
  • Simple Hamburger Soup
  • Simple Parmesan Broiled Fish
  • Simple Overnight Saucy Crock Pot Chicken
  • Simple 15-Minute Meal
  • Simple Overnight Melt-in-Your-Mouth Beef Roast
  • Simple 3-Cheese Crock Pot Pasta
  • Simple Oven Fried Chicken
  • Simple Honey Mustard Chicken Legs
  • The Easiest Mashed Potatoes in the World
  • Simple Garlic Butter Shrimp
  • Simple Crunchy Ranch Chicken Strips
  • Simple Crock Pot Shredded Ranch Chicken (for salad or tacos)
  • Simple Crock Pot Pizza Casserole
  • Simple Barbecue Beef Roast
  • Simple Spanish Rice Bowls
  • Simple Roasted Rotiserie Chicken
  • Simple Green Chile Chicken
  • Simple Tex-Mex Creamy Chicken
  • Simple Waffle Omelets
  • Simple Crock Pot Taco Pasta
  • Simple Grilled Chicken
  • Simple Hawaiian Beef Roast
  • Simple Crock Pot Creamy Stew Meat
  • Simple Cheese Stuffed Burgers
  • Simple Hashbrown Casserole (For Instant Pot, Crock Pot or Oven!)
  • Simple Lasagna Casserole (For Instant Pot or Crock Pot)
  • Simple Chili Mac
  • Simple Bacon Cheeseburger Casserole
  • From Burrito Bar to Casserole (a 5-Minute Meal!)
  • Simple Bacon Cheeseburger Roll
  • Simple Garlic Parmesan Chicken Legs
  • Super Simple Lasagna
  • The Simplest White Chicken Chili
  • Simple Lentil Nachos
  • Simple Tuna Patties
  • Simple Banana Pancakes
  • Simple Crock Pot Applesauce BBQ Chicken
  • Simple Hashbrown and Egg Nests
  • Simple Cornbread Waffles with Chili
  • Simple Veggie Fritters
  • Simple Lemon Garlic Chicken Legs
  • Simple Noodle Soup
  • Simple Three Cheese Spaghetti
  • Simple Crock Pot Salsa Shredded Beef
  • Cheeseburger Hashbrown Cups or Casserole
  • Easiest Beef Roast in the Instant Pot
  • Simple One-Dish Chicken Florentine
  • Simple Creamy Layered Enchiladas
  • Simple Ham and Hashbrown Casserole
  • 5-Minute Cheesy Hamburger and Potatoes
  • Simple 10-Minute Instant Pot Mac and Cheese
  • Simple Creamy Chicken Soup
  • Simple Broccoli Bacon Chicken
  • Simple Cheesy Salsa Chicken
  • Simple (Mostly Real Food) Tator Tot Casserole
  • Simple Cheeseburger Noodle Crock Pot Dinner
  • Simple 5-Minute Shredded Chicken
  • Simple Popcorn Chicken
  • Simple Popcorn Chicken Tacos
  • Simple Make-Ahead Parmesan Meatballs
  • Simple Saucy Parmesan Meatballs

Join Simple Meals!

728x90

We love how Simple Meals has been saving family time for so many, and helping people put great food on the table each night! Join us for just $1/week!

[wp_eStore_subscribe_fancy id=28]

Heavenly Homemaker's Club Members: Access your homepage and all your fantastic resources here! Not a member yet? Please join us!

How to Make Healthier Corndogs for the Freezer

September 18, 2016 by Laura 6 Comments

This post may contain affiliate links which won’t change your price but will share some commission.

Of all the recipes I share, this one is not the healthiest. Just whatever though, because corndogs taste amazing. (With a salad. And fruit. And digestive enzymes.) I’m providing a homemade option so that at least we’ll know these are better than store-bought.

Homemade Corndogs

Yum

First – try to find hotdogs that are nitrite free. Also, beef. Always beef hotdogs. Fine, turkey is okay too. Just try to avoid the hotdogs that are only pretending to be meat. I can’t even believe I’m still trying to convince myself that any form of a hotdog is healthy. But for real, at least try to find some that aren’t terrible. Why I like hotdogs is beyond me.

Now that we’ve covered the sacred topic of the hotdogs, allow me to share another compromise I make. This. We bought this fun corndog maker for one of our sons a few years ago as a gift because he is the ultimate corndog lover. (I have no idea where he gets this.) I think having dozens of appliances that only do one task each is fairly ridiculous. But shucks if having a corndog maker isn’t a lot of fun, so there. We’ve used it for more than just corndogs (like muffins and cookies – who knew?!) so hallelujah for an appliance that is actually multi-functional.

I will tell you that this machine makes the effort of creating homemade corndogs so easy and mess free that a few days ago, I made 48 corndogs in less than an hour – while I was making tomato sauce, French toast, and frozen yogurt. The corndog maker allows me to multitask while making food for my freezer. And here you thought that appliance was pointless.

Anyway….

The long and short of making homemade corndogs is that you simply use your favorite cornbread recipe, add a bit of extra milk so the batter will coat the dogs, then you either fry them in oil or bake them in the above mentioned corndog maker.

What about sticks?

Life is too short to poke sticks into hotdogs. Do the stick poking if you must, but as for me and my house, we will skip the sticks and just eat the dogs.

How to Make Healthier Corndogs (in Bulk) for the Freezer

How to Make Healthier Corndogs for the Freezer
 
Save Print
Author: Laura
Serves: 24-48
Ingredients
  • 2⅔ cup Homemade Jiffy Cornbread Mix*
  • 2 eggs
  • 1½ cups milk
  • 4 Tablespoons melted butter
  • 24 hot dogs
Instructions
  1. In a mixing bowl, whisk together cornbread mix, eggs, milk, and butter.
  2. If using a corndog maker, cut hotdogs in half.
  3. Dip hotdogs in batter to coat thoroughly.
  4. Fry until golden brown, or cook in a Corndog Maker**
  5. Serve right away, or cool and freeze in freezer bags.
  6. Rewarm corndogs by placing them on a baking sheet in a 350 degree oven for 10-15 minutes or until heated through.
3.4.3177

*Homemade Jiffy Cornbread Mix recipe

I put these homemade cornbread mixes together and have them on hand for convenience. I highly recommend this!

** I cut my hotdogs in half, then cook my corndogs in this fun Corndog Maker. It saves a lot of time and mess!

Homemade Corndogs for the Freezer

If you make these to freeze, all you have to do at mealtime is pull them out and warm them up while you’re getting out all the actual nutritious parts of the meal (fruits, veggies, and more veggies with a side of another vegetable).

‘Fess up. Do ya like hotdogs?

Heavenly Homemaker's Club Members: Access your homepage and all your fantastic resources here! Not a member yet? Please join us!

Easy Make-Ahead Stuffing Muffins

November 2, 2015 by Laura 53 Comments

This post may contain affiliate links which won’t change your price but will share some commission.

Of all the dishes that must be included in a holiday meal, stuffing is the one I always try to avoid making if possible. If I’m hosting the meal, when people ask what they can bring, I almost always ask them to bring the stuffing so I don’t have to make it. (Nice, huh?)

Why had stuffing always been such a hard one for me? I just hadn’t found a stuffing recipe I love. I look at stuffing recipes and get completely overwhelmed. After all, there are usually no fewer than 28 steps to take to go from bread to stuffing.

Until now.

stuffing2

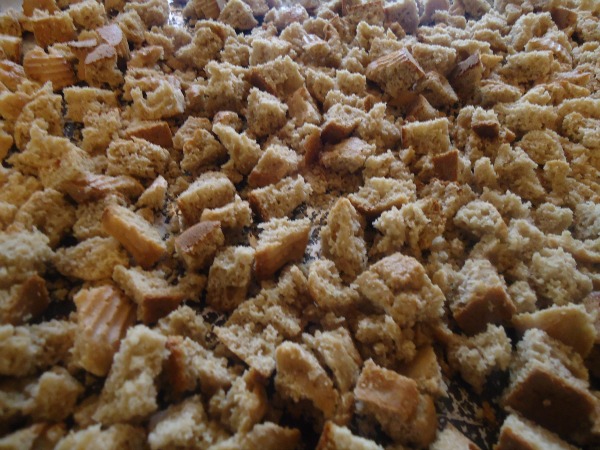
Oh look. We made toasted bread.
It wasn’t even hard.

Homemade Stuffing Made Easy

Once I finally wrapped my brain around all the instructions in all the recipes I looked at, I realized that I didn’t need to perform 28 steps. I could simplify everything and cut it down to four:

1. Cube and toast bread.
2. Brown sausage with onion and sage.
3. Stir everything together with a few other ingredients.
4. Bake.

What? That’s it? Yes.

Some may prefer their stuffing with additional spices. Many like celery. But this turned out plenty flavorful for us with very few ingredients. Plus, not one of the six of us likes celery. So I skipped it.

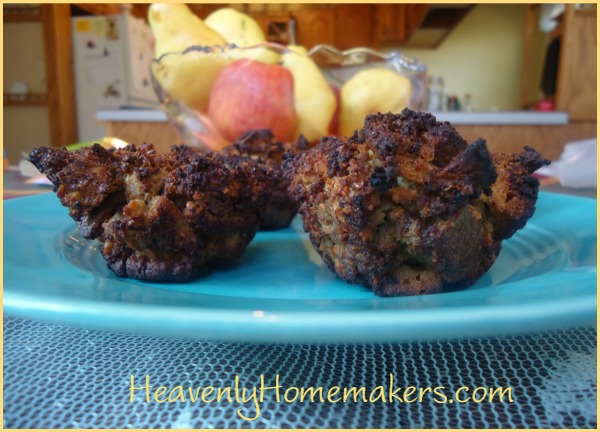
This recipe can be made ahead of time. You can make this stuffing spread into a dish or as scooped into muffin tins. I may actually make this more than twice a year for holiday meals. After all, when I was was testing driving this recipe to make it as easy as possible, my family dug in and kept going back for more. Even if I did burn the first batch.

stuffing muffins4

Indeed, my pictures feature over-baked Stuffing Muffins. It’s because I was baking them while having unfortunate cat drama. It was day 2 of baby kitties and Wiggams wasn’t sure she was cut out for the mama business. (WHAT?!) I told her she didn’t have a choice, that sometimes we all have hard days, and that she needed to get over it at go try to keep her last baby alive (yes, we’re down to only one). She ignored me. So I was trying to keep the last kitten alive by holding it to warm it up and by giving it milk from a dropper. This is when my muffins burned. I am not cut out to be the mother of a kitten.

Other bloggers would have started over in an effort to take better pictures. Me? I just took pictures of my burned muffins. There just are not enough hours in the day, okay? I get overwhelmed easily. It was either burned pictures or no pictures. At least we saved the kitten.

Easy Stuffing Muffins

Yum

5.0 from 1 reviews
Easy Make-Ahead Stuffing Muffins
 
Save Print
Author: Laura
Serves: 18 muffins
Ingredients
  • 6-8 slices of whole wheat bread
  • 1 pound ground sausage
  • 2 Tablespoons butter or oil
  • ½ cup yellow onion, chopped or 3 Tablespoons dried minced onion
  • 1 teaspoon ground sage
  • ¾ cup chicken broth
  • ½ teaspoon sea salt
  • ½ cup Parmesan cheese (optional)
  • 2 eggs
Instructions
  1. Cut bread into ½ inch cubes.
  2. Lay cubes on a cookie sheet and bake in a 300° oven for 10 minutes to toast.
  3. In the meantime, brown sausage with onion and sage.
  4. In a large bowl, stir toasted bread cubes, cooked sausage mixture, and the remaining ingredients together.
  5. Scoop mixture into 18 muffin tins or spread it into a 9x13 inch baking dish.
  6. Bake in a 400° oven for 25-40 minutes or until golden brown.
3.4.3177

Recipe links you might find helpful:

  • Homemade Turkey Sausage
  • Homemade Chicken Broth

To Freeze Stuffing Muffins

Allow muffins to cool completely. Place them in a freezer bag and seal, air tight. Freeze for up to one month.

To reheat: Thaw and warm muffins in a 250° oven in a covered dish for 10-15 minutes.

Easy Stuffing Muffins

You should know that saying Stuffing Muffins most often comes out of my mouth as Muffing Stuffers or Stuffern Muffings. It can’t be helped.

And now for some adorable cat pictures. I mean, if I’m going to show you burned muffins, I should at least show you the reasons they burned:

With assistance from our neighbor, some much needed help from a friend, and now some persistent work with Wiggams, I think we’ll be able to keep one little kitten alive. Wiggams seems to be getting the mama thing figured out, finally. If this isn’t the sweetest…

lionel2

Look at this little one’s face. See why we named it Lionel? (I mean, besides the fact that we named it after Lionel Messi. He just looks like a Lionel.) Look at his little lion cub face. We are in love.

lionel1And that is why my muffins burned. 

Holiday Make-Ahead Tip:

Getting Ahead for the Holidays

If you are in charge of stuffing for this year’s holiday festivities, I suggest you make these Stuffing Muffins at least two weeks in advance. Freeze them until the night before your meal. Thaw in the fridge. Rewarm just before serving. These are great drenched in turkey gravy (recipe coming up during this series).

Here are the quick links to all the recipes we covered in this series:

  • Make-Ahead Turkey
  • Stuffing Muffins
  • Cheesy Mashed Potatoes
  • Oh Good Gravy
  • Green Bean Casserole
  • How to Make Frozen Pies
  • Simple Whipped Sweet Potatoes
  • How to make Whipped Cream
  • Whole Wheat Stir-and-Pour Dinner Rolls

~~~~~~~~~~~~~~~~~~~~~~~~~~~~~~~~~~~~~~~~~~~~~

Simple Meals is here! It’s saving my brain (and many of yours too!). If you haven’t joined yet, now’s the time. Get all the details here!

728x90

Heavenly Homemaker's Club Members: Access your homepage and all your fantastic resources here! Not a member yet? Please join us!

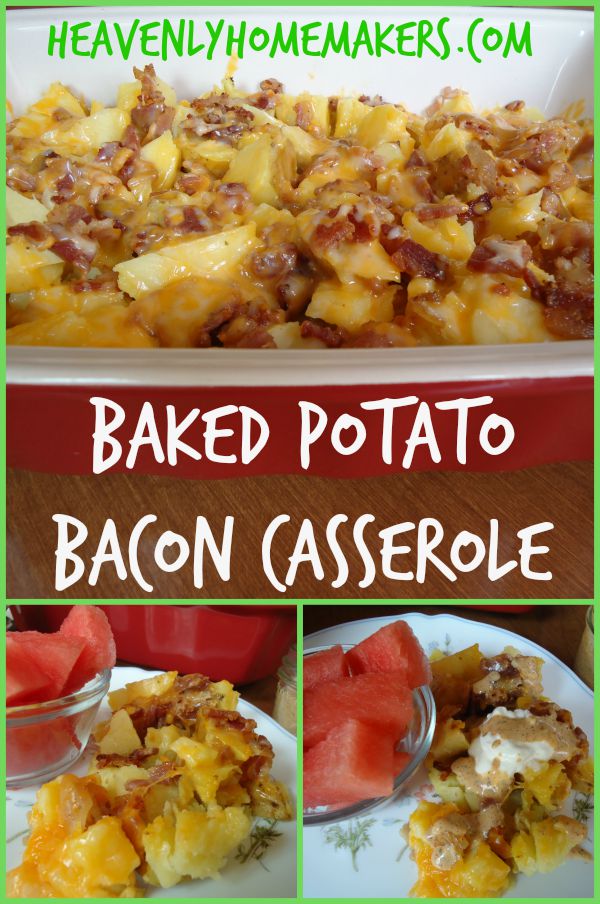
Easy (Make-Ahead) Baked Potato and Bacon Casserole

September 9, 2015 by Laura 15 Comments

This post may contain affiliate links which won’t change your price but will share some commission.

It’s a Potato and Bacon Casserole. Life is good.

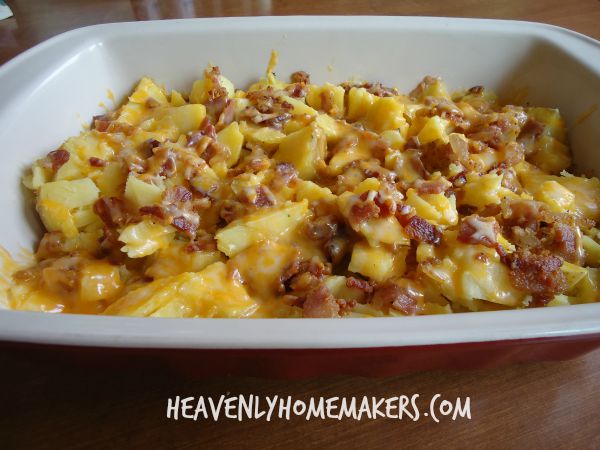
Bacon Baked Potato Casserole

This is so easy we can hardly call it a recipe. I’m pretty sure my family will be having this every other week for the rest of our lives for the following reasons:

  1. Bacon. Of course. And also, cheese.
  2. We can slather it with Spicy Ranch Dressing, which tastes so good I believe I shall become addicted to it.
  3. I can make several of these casseroles at once and freeze them for later, making this easy meal even easier.

This “casserole” is basically baked potatoes cut up in a dish with bacon and cheese all over it. I’m sorry that I can’t make it more complicated for all of you who would rather spend many more minutes sauteing, braising, and broiling. This time, you’ll have to get your steeping and zesting fix elsewhere.

Everyone else: I lovingly suggest that you go scrub some potatoes. You’re having this for dinner tonight.

Baked Potato and Bacon CasseroleYum

Easy (Make-Ahead) Baked Potato and Bacon Casserole
 
Save Print
8 medium-sized potatoes (any variety) 1 pound bacon 2 cups shredded cheddar or colby jack cheese Sour cream, chives, and/or Spicy Ranch Dressing for topping
Author: Laura
Ingredients
  • 8 medium-sized potatoes (any variety)
  • 1 pound bacon
  • 2 cups shredded cheddar or colby jack cheese
  • Sour cream, chives, and/or Spicy Ranch Dressing for topping
Instructions
  1. Scrub and bake potatoes by putting them into a covered dish in a 350° oven for 1½ hours.
  2. In the meantime, cut bacon into bite-sized pieces and cook thoroughly on the stove-top.
  3. Cut baked potatoes into chunks, spreading them out into a 9x13" baking dish.
  4. Sprinkle cooked bacon over the potatoes.
  5. Top with shredded cheese.
  6. Bake in a 350° oven for about 10 minutes or until the cheese has melted.
3.4.3177

Offer sour cream, chives, and/or Spicy Ranch Dressing to complete this main course. Serve with a salad and another fruit or veggie. It is too easy. Makes 6-8 servings.

Baked Potato Bacon Casserole

To Freeze This Dish: 

Make it as directed above. Allow it to cool completely. Cover and label. Put it in the freezer.

To Reheat and Serve This Dish:

This is my favorite trick. Get the casserole out of the freezer. Cover the frozen dish with foil (somebody needs to invent a 9×13 glass cover for my pyrex dishes). Put the frozen casserole into a COLD oven. Turn the oven on to 250° allowing it to heat up along with the casserole. After one hour, turn the oven up to 350° and bake for one more hour or until the casserole is thawed, heated through, and looks like wonderful cheesy deliciousness.

Let us all add this recipe to our “Reasons to Make Extra Baked Potatoes When We’re Making Baked Potatoes Anyway” list.

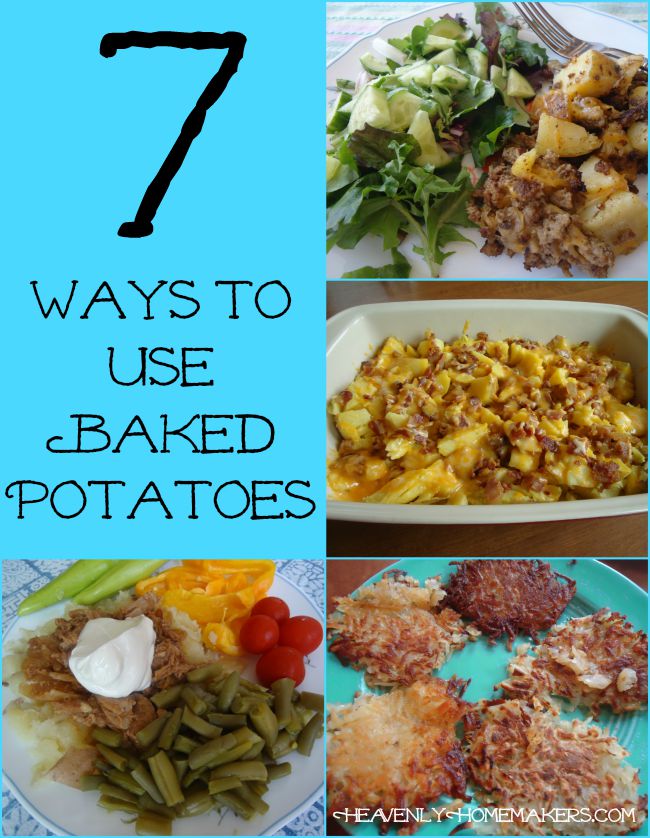
7 Ways to Use Baked Potatoes

Switch out the bacon in this casserole for other cooked meats. Switch out the regular potatoes for sweet potatoes. Just whatever you do, try it with the Spicy Ranch Dressing. Ah-mazing.

Heavenly Homemaker's Club Members: Access your homepage and all your fantastic resources here! Not a member yet? Please join us!

Easy Pancake Muffins – Great for the Freezer!

September 1, 2015 by Laura 24 Comments

This post may contain affiliate links which won’t change your price but will share some commission.

Pancake Muffins? Seriously?! Why did I not think of this before?

Easy Pancake Muffins

I think I heard this idea from one of you brilliant minds a few dozen weeks or possibly even years ago. If it was you, thank you. My apologies for taking so long to try it. It’s just that...change is hard, you know? I’m so used to pouring pancake batter on a griddle, so scooping it into a muffin cup was just such a hard, hard adjustment for me.

Not really. I just never got around to trying it. Sheesh.

The thing about the traditional pancake is how long one has to stand at the griddle flipping the cakes. Yum, and all that. But it is time consuming if you must move make mountains of pancakes to fill up your people. With the muffin idea, you can scoop the very same pancake batter into muffin cups, slide them into the oven, and be on your way. And {please hold your applause} you can make extras of these and put them into your freezer, then pull them out and rewarm them without even having to think or stir or dirty up a bowl.

I may never stand at a griddle again. {standing ovation}

I no longer know how to cook in small quantities, as is evidenced by the following large-sized ingredient list. Forgive me, cut the recipe in half, or simply put your leftovers in a freezer bag and then into the freezer for a no-brainer breakfast of the future.

Pancake Muffins Yum

Easy Pancake Muffins - Great for the Freezer!
 
Save Print
Author: Laura
Serves: 24
Ingredients
  • 3 cups whole wheat flour (I use freshly ground white wheat - hard or soft)
  • 1 teaspoon baking powder
  • ½ teaspoon sea salt
  • ½ cup melted butter
  • 3 eggs
  • 2½ cups milk
Instructions
  1. Whisk all ingredients together until smooth-ish.
  2. Scoop into prepared muffin cups (buttered, paper-lined, whatever you choose).
  3. Drop in berries or chocolate chips if you wish.
  4. Bake in a 350° oven for 15-20 minutes or until muffins are golden brown.
3.4.3177

Easy Pancake Muffins - Great for the Freezer

You’d think I would have done this earlier since I’ve been making Sausage Pancake Muffins for so long.

If you want to make these a “to-go” muffin, simply add about 1/4 cup of real maple syrup to the batter before scooping and baking. Then you can skip the necessary “dip them in syrup while holding your chin over the table” step.

Ever tried this idea? Were you the one who told me about it? Love you.

Heavenly Homemaker's Club Members: Access your homepage and all your fantastic resources here! Not a member yet? Please join us!

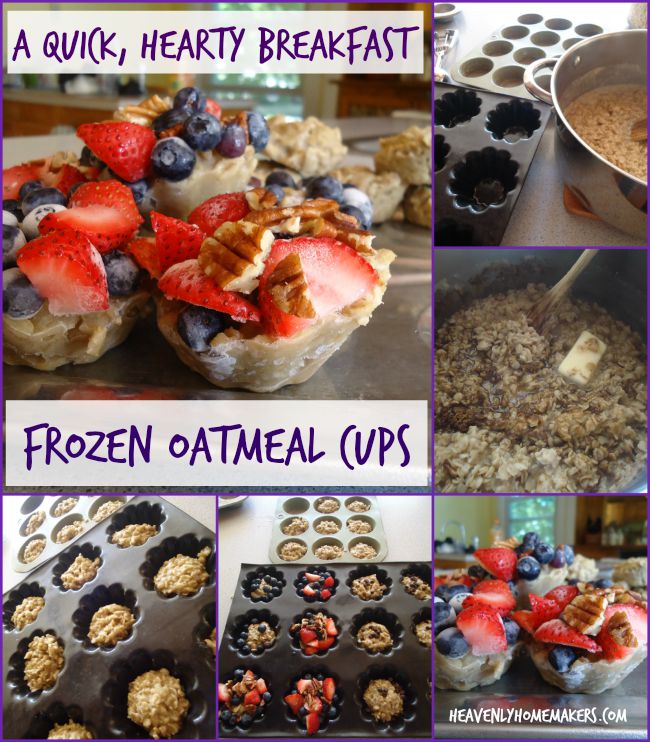
Frozen Oatmeal Cups – for a Quick, Hearty Breakfast

August 2, 2015 by Laura 17 Comments

This post may contain affiliate links which won’t change your price but will share some commission.

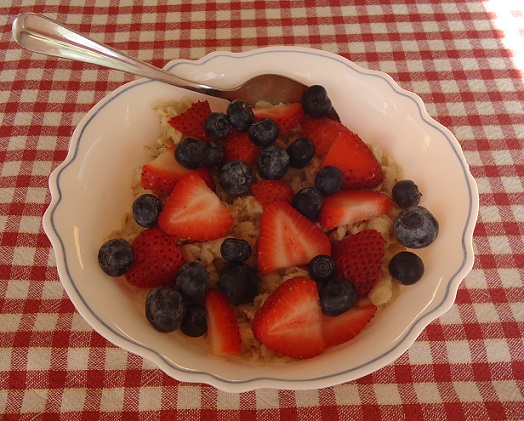
Seriously, Frozen Oatmeal Cups. Check this out.

frozen oatmeal8

Yum

Making oatmeal has got to be the most difficult thing to do ever. It’s definitely the most tedious breakfast food there is – requiring time, energy, thought, and absolute sweat-dripping labor over a stove for five entire minutes (because oatmeal won’t cook properly unless someone is staring at it in expectation). Life is hard. We should probably settle for pop-tarts. It’s the only way.

Don’t worry, friends. I’ve found a way to avoid performing this grueling task (and eating pop-tarts) in the mornings – and I’m here to share. I think we can all agree that the more we can avoid the challenge of putting water in a pot to boil, the better. Gather ’round, everyone. This tip will shave at least 1.4 minutes off your morning meal prep, so listen closely. Every 1.4 minutes counts.

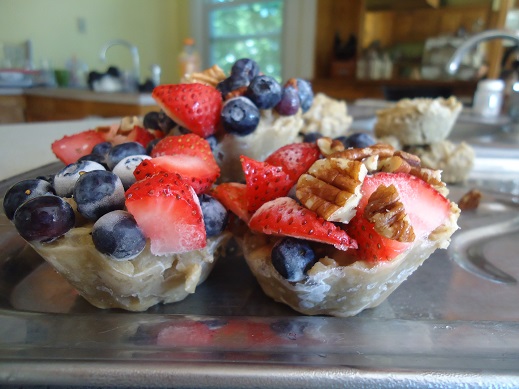
Here’s what you need to do: You need to cook up a double or triple batch of oatmeal (you can do it, we’re all in this together, persevere, I believe in you). Once the oatmeal is done, go ahead and feed some to your family. Here’s where it gets good: After your meal, freeze the leftovers in muffin cups, topped with whatever delicious toppings your family likes. Like this:

frozen oatmeal3

The result is easy-to-store cups of frozen oatmeal which are ready to pull out and re-heat at any given time – preferably on those mornings. You know the ones I’m talking about.

But seriously, in all seriousness, because I am always serious – this really is a lovely way to help your children help themselves on a busy morning, and it really does save a tiny bit of time because the cooking of the oatmeal has already been done.

Now, if you get a little bit burned out on oatmeal and you’re still struggling with the urge to buy a pre-made breakfast in a box that promises to save you time – I suggest you consider the possibility of frying an egg. If I can do it, you can do it. There are also apples – a brand new innovative idea for breakfast that I’ve heard are great to grab-and-go. Who knew?

Frozen Oatmeal Cups - a quick, hearty breakfast

The Specifics of Making Approximately 24 Frozen Oatmeal Cups

  1. Boil 6 cups of water.
  2. Stir in 3 cups of whole oats.
  3. Turn the heat down to simmer the oats/water for about 5 minutes, stirring occasionally.
  4. Remove from heat once the water has been absorbed and the oats are soft.
  5. Stir in 1-3 Tablespoons of butter and 1-4 Tablespoons of sweetener like honey or sucanat as desired.
  6. Scoop prepared oatmeal into muffin tins (no need to grease the tins).
  7. Top oatmeal cups with any variety of fruit, nuts, chocolate chips, etc.
  8. Place filled muffin pans in the freezer for 2-3 hours or until oatmeal is frozen solid.
  9. Pull frozen oatmeal out of the freezer and allow it to sit on the counter-top for about 10 minutes.
  10. Use a fork or spoon to gently pop the frozen oatmeal cups out of the tins.
  11. Place the frozen cups into a labeled freezer bag. Store in the freezer for up to three months.
  12. Re-heat by placing frozen oatmeal cup(s) in a small saucepan on medium heat until thawed and warm.

I love this idea (for so many reasons, as explained earlier) – but also because this allows for a variety of sizes of appetites. Little ones may just need one cup to fill them, whereas my sons would likely each pull out 2-4 to rewarm.

So now, go therefore and make yourself some frozen oatmeal cups. Your breakfast – and really, your entire life – is obviously going to be changed for the better because of this tip. Enjoy your extra 1.4 minutes of morning time. You are very, very welcome.

What do you think of this idea? I like the brainlessness of it. I like that the cooking is done so all that needs to be done is rewarm and serve. I love that my kids can do this themselves. Not every freezer meal is about saving time – sometimes it’s just about the comfort of having prepped food on hand for ease!

P.S. We also really love making Homemade Instant Oatmeal to have on hand.

Kudos to Cupcakes and Kale Chips where I first saw this fun idea!

Heavenly Homemaker's Club Members: Access your homepage and all your fantastic resources here! Not a member yet? Please join us!

Crock Pot Barbecue Chicken ~ Freezer Cooking Week Two

April 9, 2014 by Laura 1 Comment

This post may contain affiliate links which won’t change your price but will share some commission.

Hopefully, you’ve knocked out cooking your whole chicken and making chicken broth, plus made a double batch of Black Bean Chicken Nachos for the freezer. If you’re just joining us for the Freezer Cooking Challenge, that’s great! You can get started here.

Today is going to be just as easy as yesterday when it comes to prepping a meal for tonight’s dinner along with putting a meal (or two) into the freezer for another time. All you need to do is throw chicken into the crock pot, cover with bbq sauce, and let the crock pot do your work for you. Once your chicken is done, use a portion as part of tonight’s dinner. Allow the rest to cool, then put into a jar or freezer bag. Place it in the freezer (clearly labeled) for a day you don’t have time to cook.

Here’s the recipe you’ll need for today:  Crock Pot Barbecue Chicken Breasts

bbq chicken dinner

As you can see, I chose to serve our Bbq Chicken on buns with cheese melted on top. We had a busy evening with soccer practices, so setting these out on the table with fresh pineapple, carrots, and cucumbers made a quick meal for us to grab on the fly. The rest of the chicken is now in the freezer, waiting for another day when I can pull it out to use.

I hope you’re beginning to see how easy freezer cooking can be! Coming up next:  Bacon Wrapped Cream Cheese Chicken (recipe in {Healthy} Make-Ahead Meals and Snacks eBook)

How are you doing with the challenge so far this week?

Heavenly Homemaker's Club Members: Access your homepage and all your fantastic resources here! Not a member yet? Please join us!

Join Our Community!

 Facebook Twitter RSS E-mail Instagram Pinterest

Popular Posts

~ Will All of the Real Moms Please Stand Up?
~ Easy! Stir-and-Pour Whole Wheat Bread
~ How to Make Gatorade
~ 31 Real Food Breakfast Ideas
~ Dear Teenage Girls...
~ When Mom Takes a Step Back
~ The Inexpensive Health Insurance We Love!
~ Let's Talk Real Food Grocery Budgets

Check out our latest posts!

  • Easy Meatballs with Sweet Sauce (Freezer Friendly)
  • How to Make Uncrustables
  • The Easiest No-Bake Cheescake
  • Do I Still Buy Organic Food?
  • How I Shop and Budget for Our Large Family
Home  ~  Simple Meals  ~  Club Membership  ~  Shop  ~  Privacy Policy  ~  Disclosure  ~ Contact

Copyright © 2023 · Beautiful Pro Theme on Genesis Framework · WordPress · Log in